
Nel precedente articolo, è stato illustrato come utilizzare VBR (Veeam Backup & Replication) come framework per proteggere le istanze (VM) presenti nella Piattaforma Google Cloud (GCP).
Il componente integrato di VBR che automatizza i processi di backup e restore, è il VBGP (Veeam Backup for Google Platform), giunto ad oggi (gennaio 2022) alla sua seconda versione.
Il VBGP permette di salvare a livello di immagine le istanze Google, ma ad oggi non è in grado di ripristanre in modalità granulare le applicazioni.
Nota 1: Il VBGP permette di realizzare backup “Application Consistency” delle istanze attraverso:
- le VSS (Windows Volume Snapshot Copy Services) per i sistemi operativi Microsoft-Windows.
- Script personalizzabili per i sistemi operativi Linux.
Nei casi in cui sia richiesto il backup dei transaction log o il ripristino granulare di oggetti applicativi, è necessario utilizzare il Veeam Agent (VA).
Nota 2: Nel sito www.gable.it troverete molti articoli che dettagliano come implementare i Veeam Agent.
Nota 3: Il Backup Server VBR può essere installato sia in cloud (ad esempio come istanza in GCP) che on-premises. In tutti gli scenari è necessario garantire la corretta connettività tra i componenti.
Nota 4: La versione 12 di VBR (in uscita nel 2022) aggiungerà una serie di miglioramenti in ambito Cloud. Ad esempio la possibilità di gestire il deploy e i componenti Veeam Agent, senza dover creare a priori una VPN tra il VBR on-premises e le istanze da proteggere.
Vediamo ora le due fasi principali per realizzare il Backup dell’istanza:
La prima fase ha lo scopo di realizzare discovery e il deploy dell’Agent sull’istanza (vedi immagine 1) (menù Inventory, Create a Protection Group).
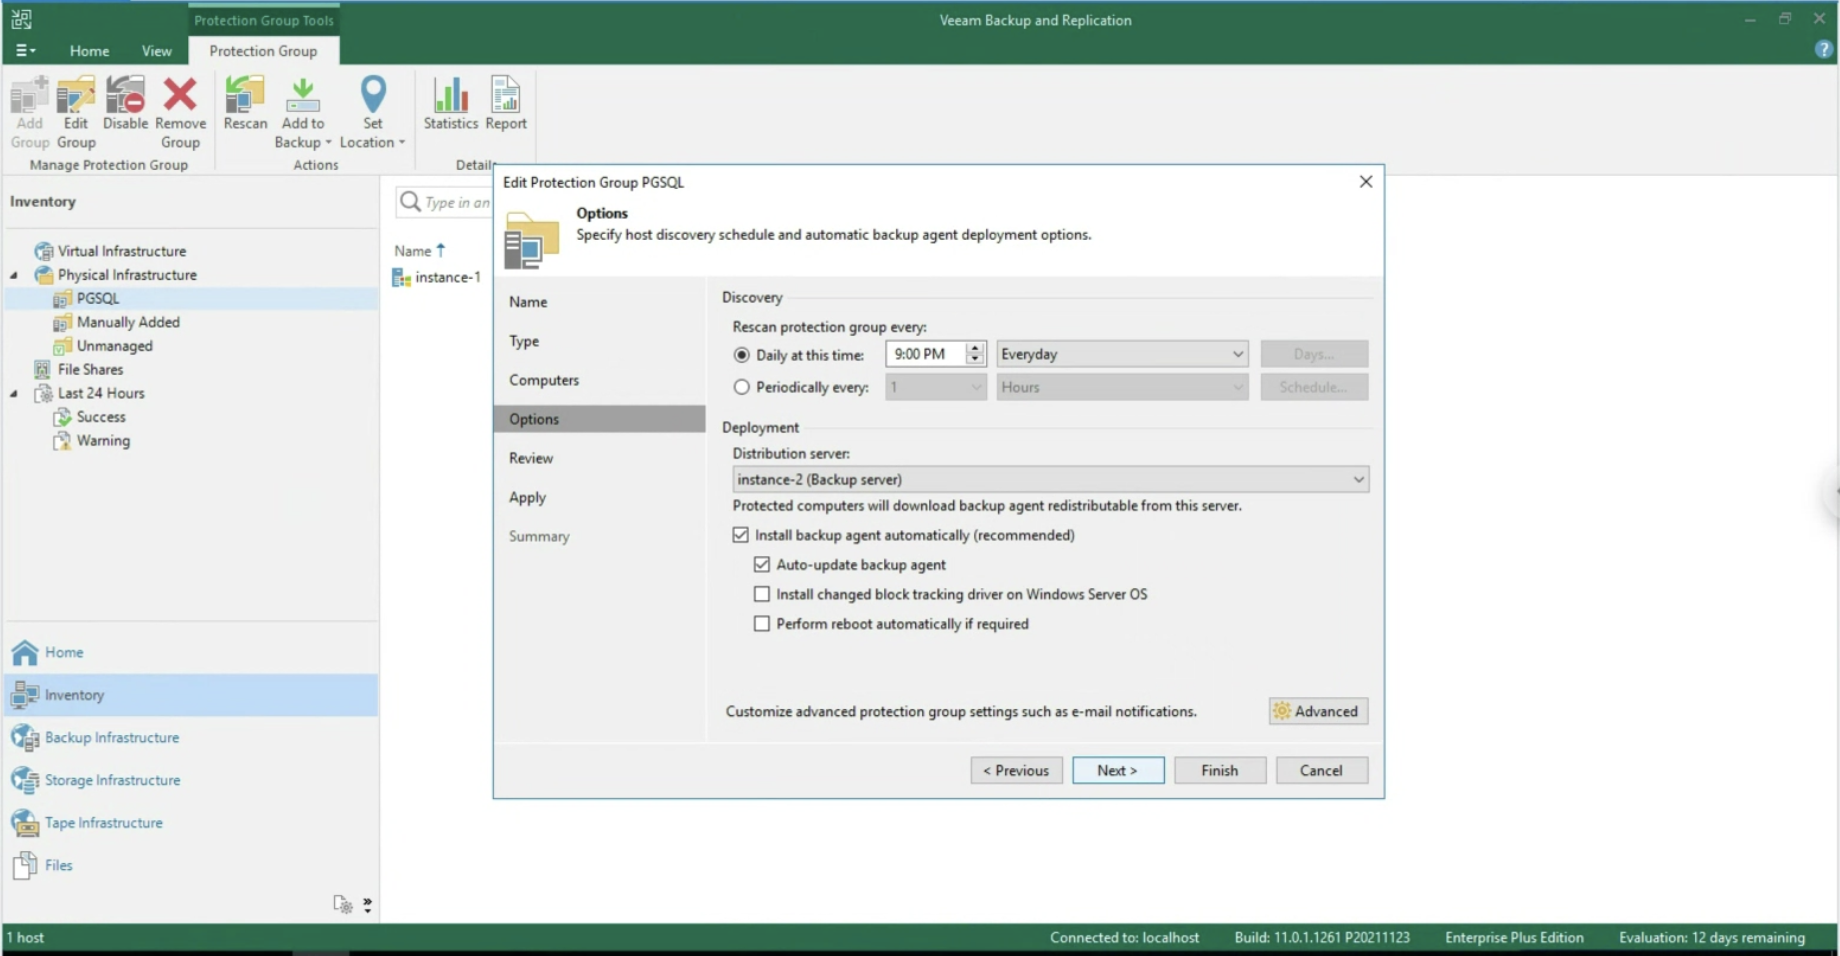 Immagine 1
Nella seconda fase, la creazione del job di Backup selezionando la voce Veeam Agent for Windows (Immagine 2)
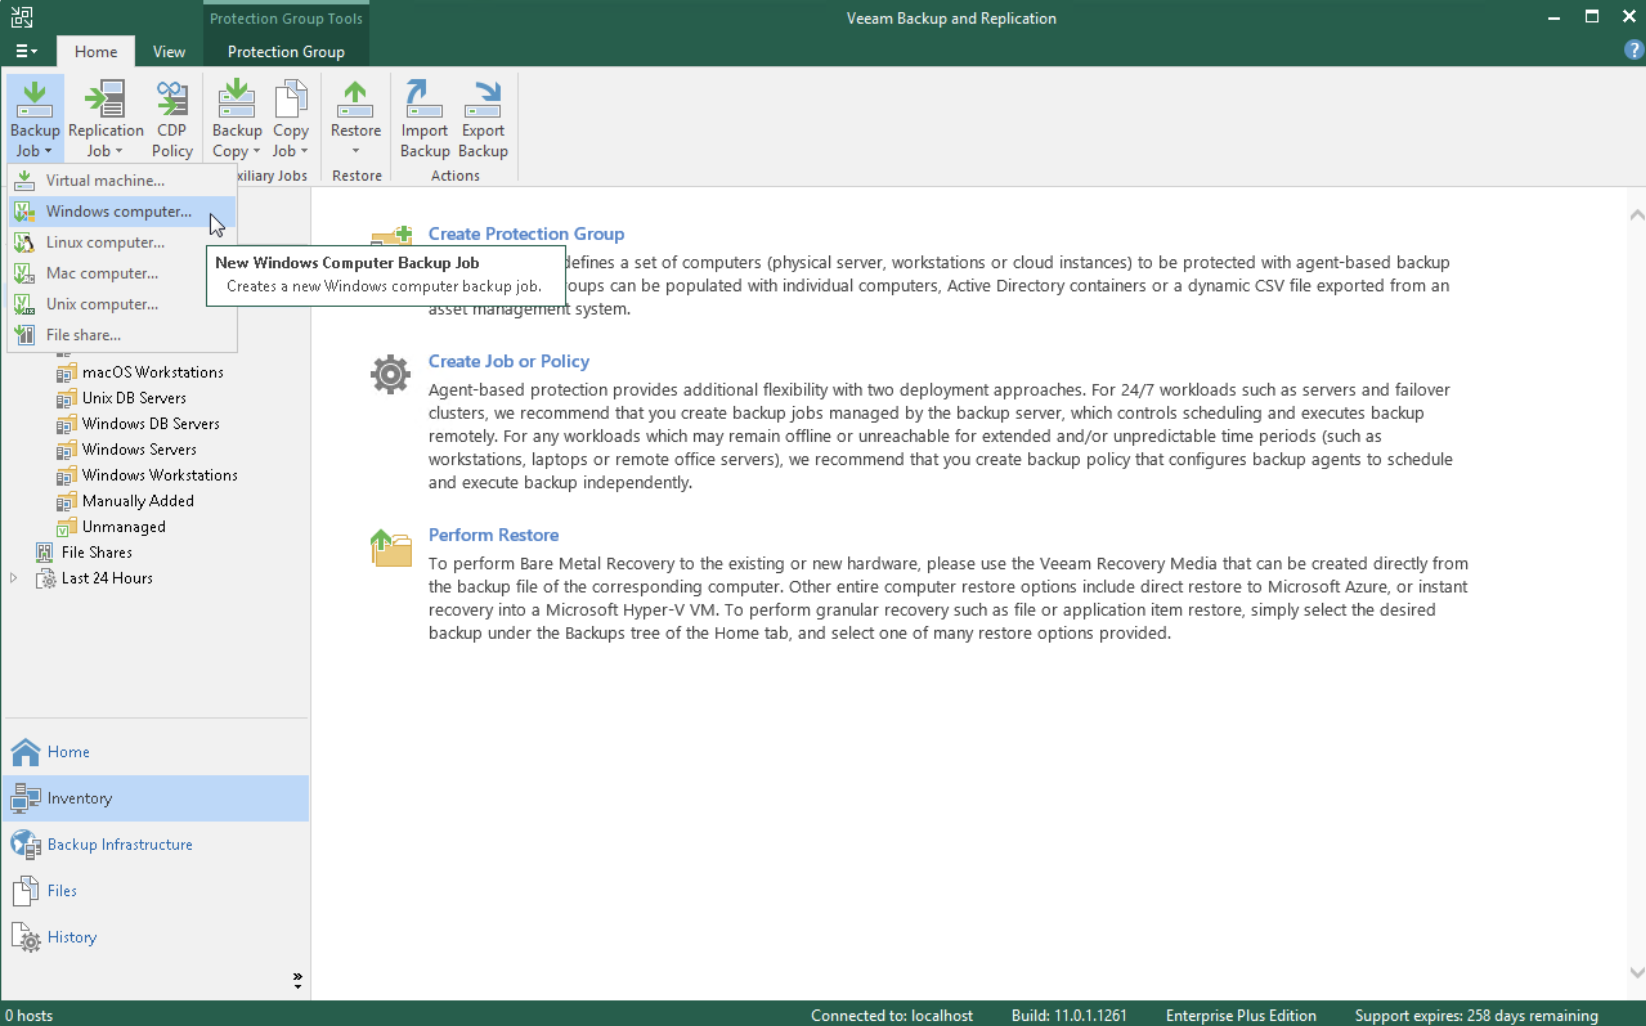 Immagine 2
Durante il Wizard selezioniamo alla voce Backup Mode, Entire Computer (immagine 3) e alla voce Storage il Repostitory di Backup (immagine 4).
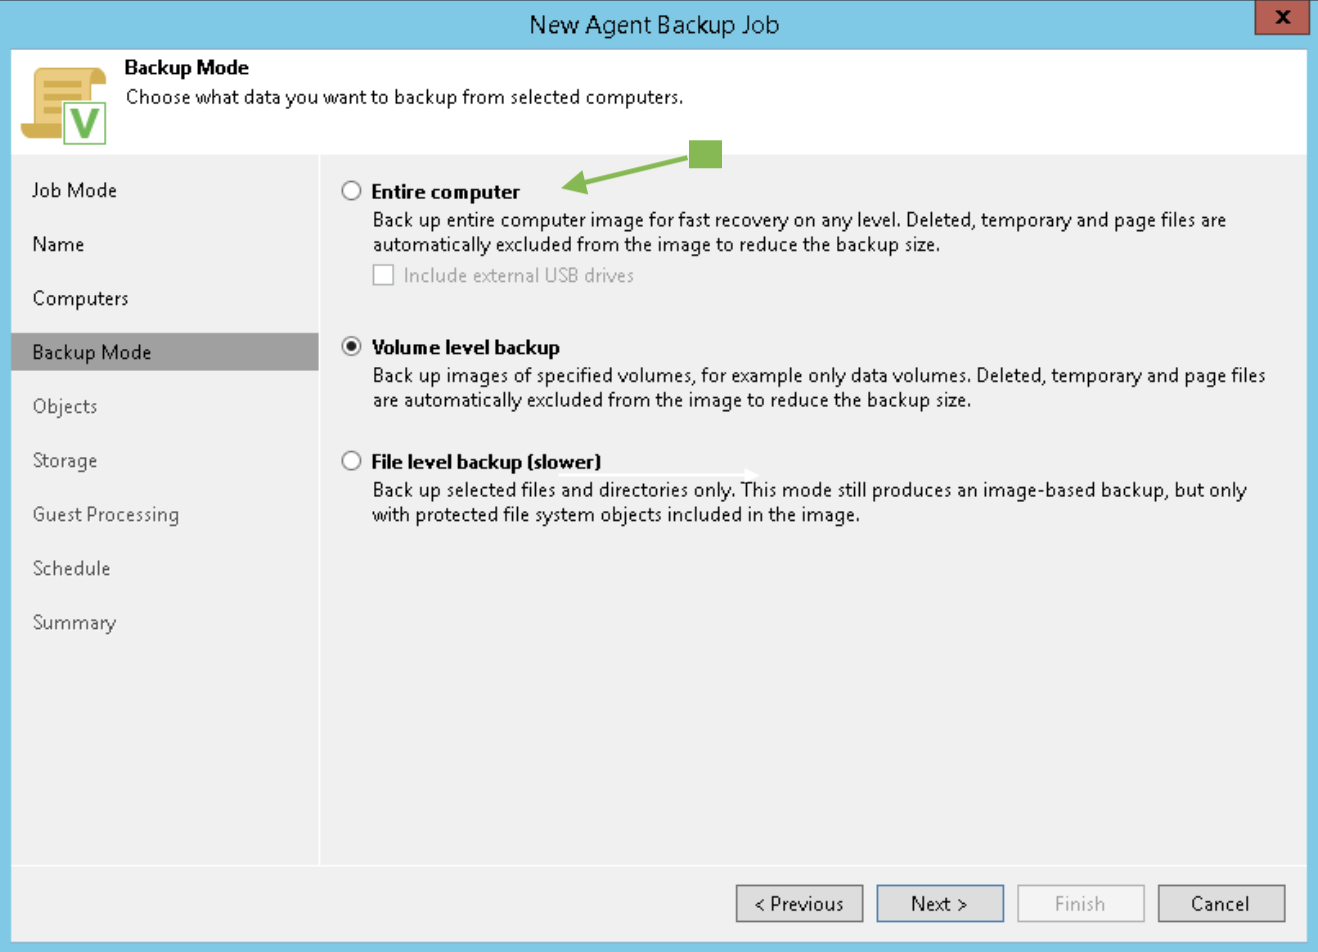 Immagine 3
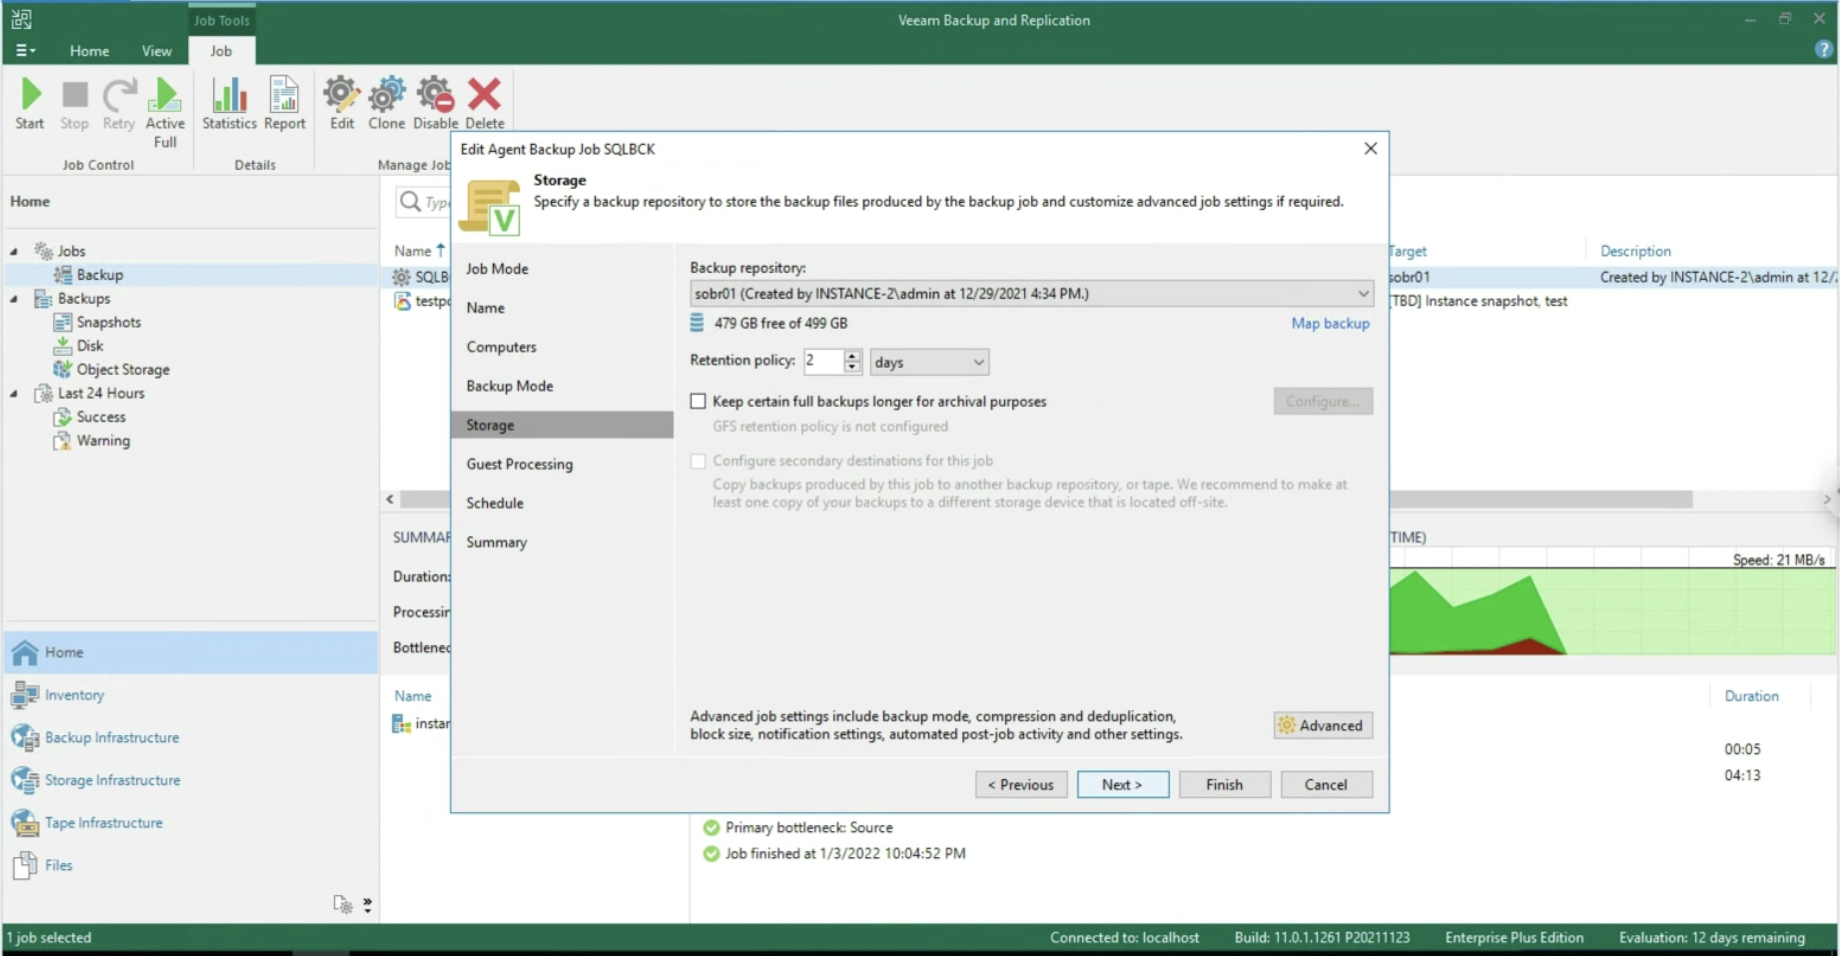 Immagine 4
Il punto focale del presente articolo è la gestione della protezione delle applicazioni (in questo scenario MS-SQL).
Dopo aver abilitato l’application aware processing (immagine 5), è possibile operare a livello di Transaction Log, selezionando se cancellarli dopo ogni operazione di Backup (Trunking) oppure ancora se effettuare il backup dei soli T-Log. (immagini 6-8).
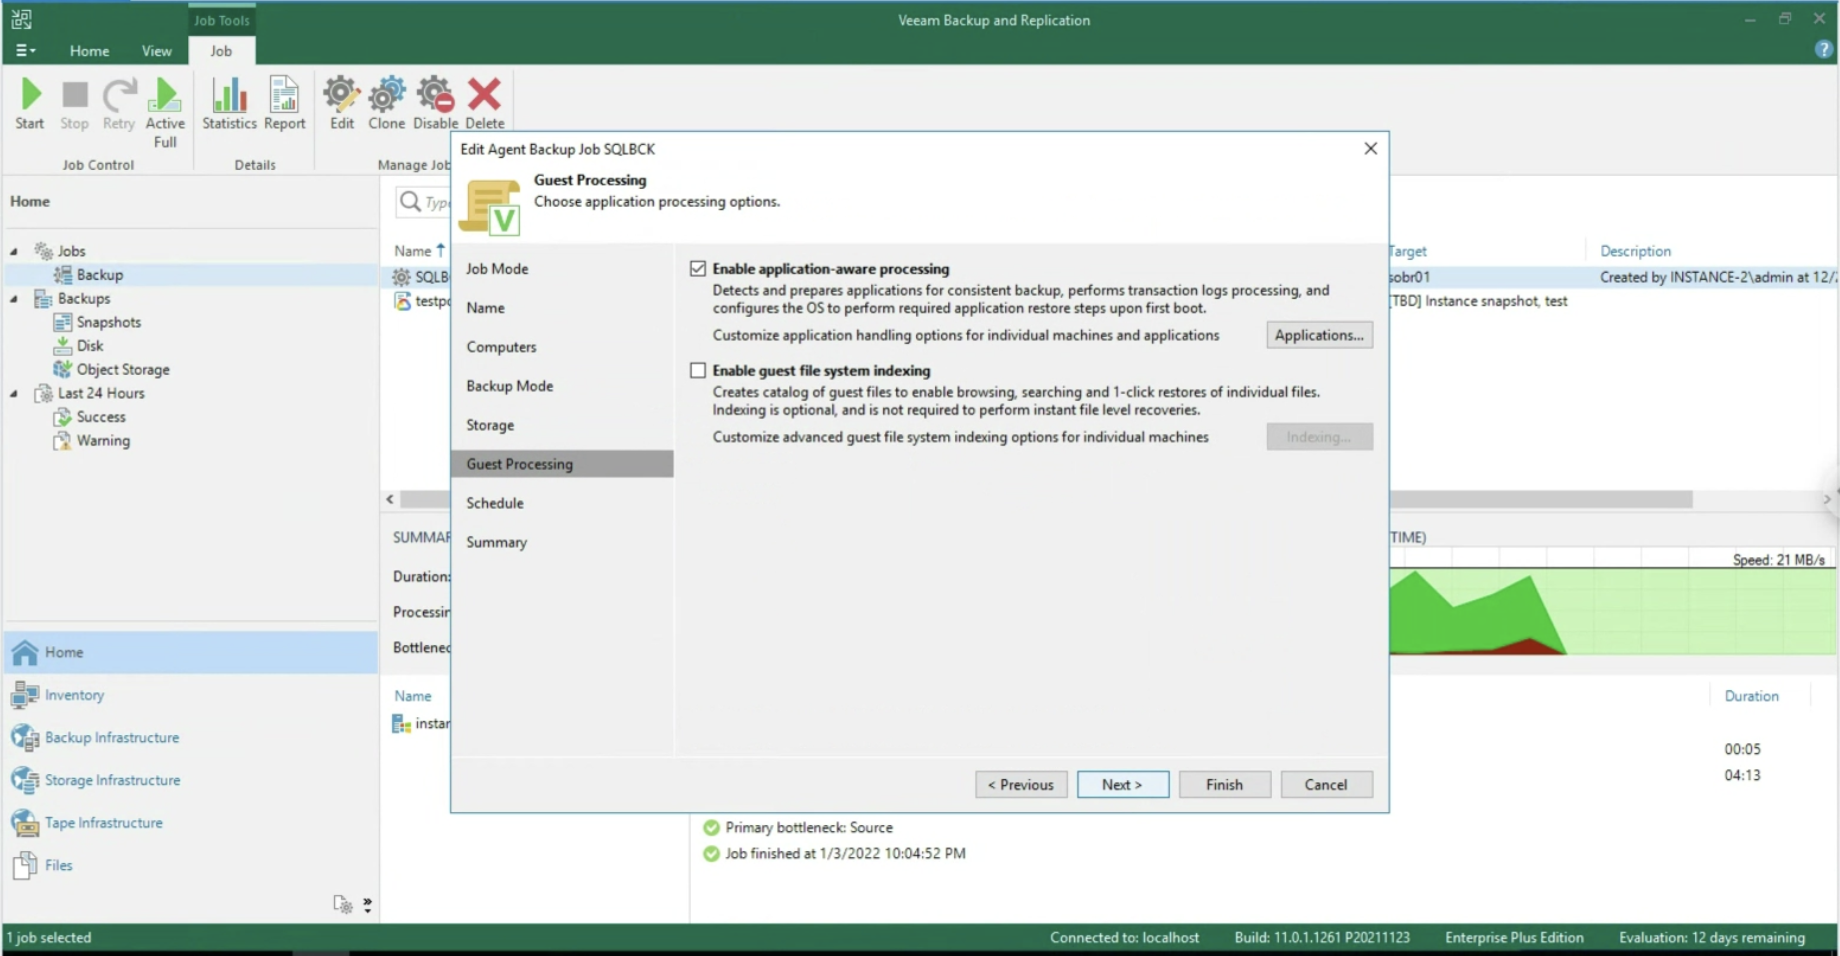 Immagine 5
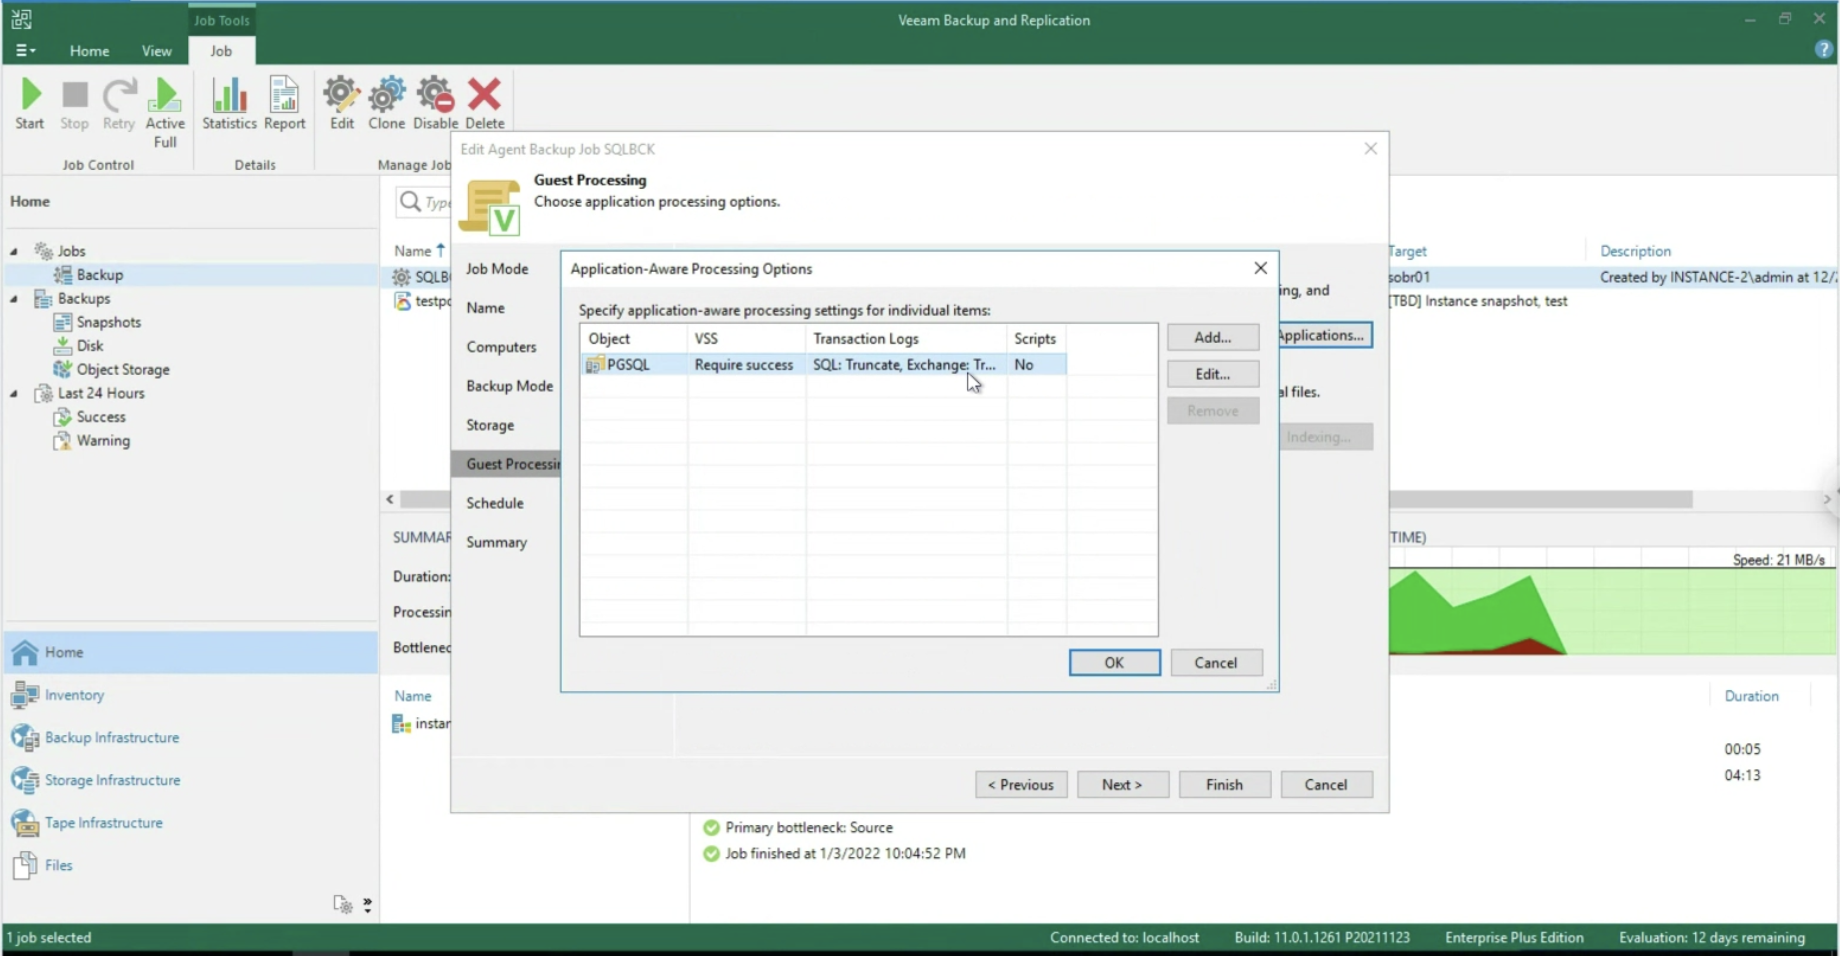 Immagine 6
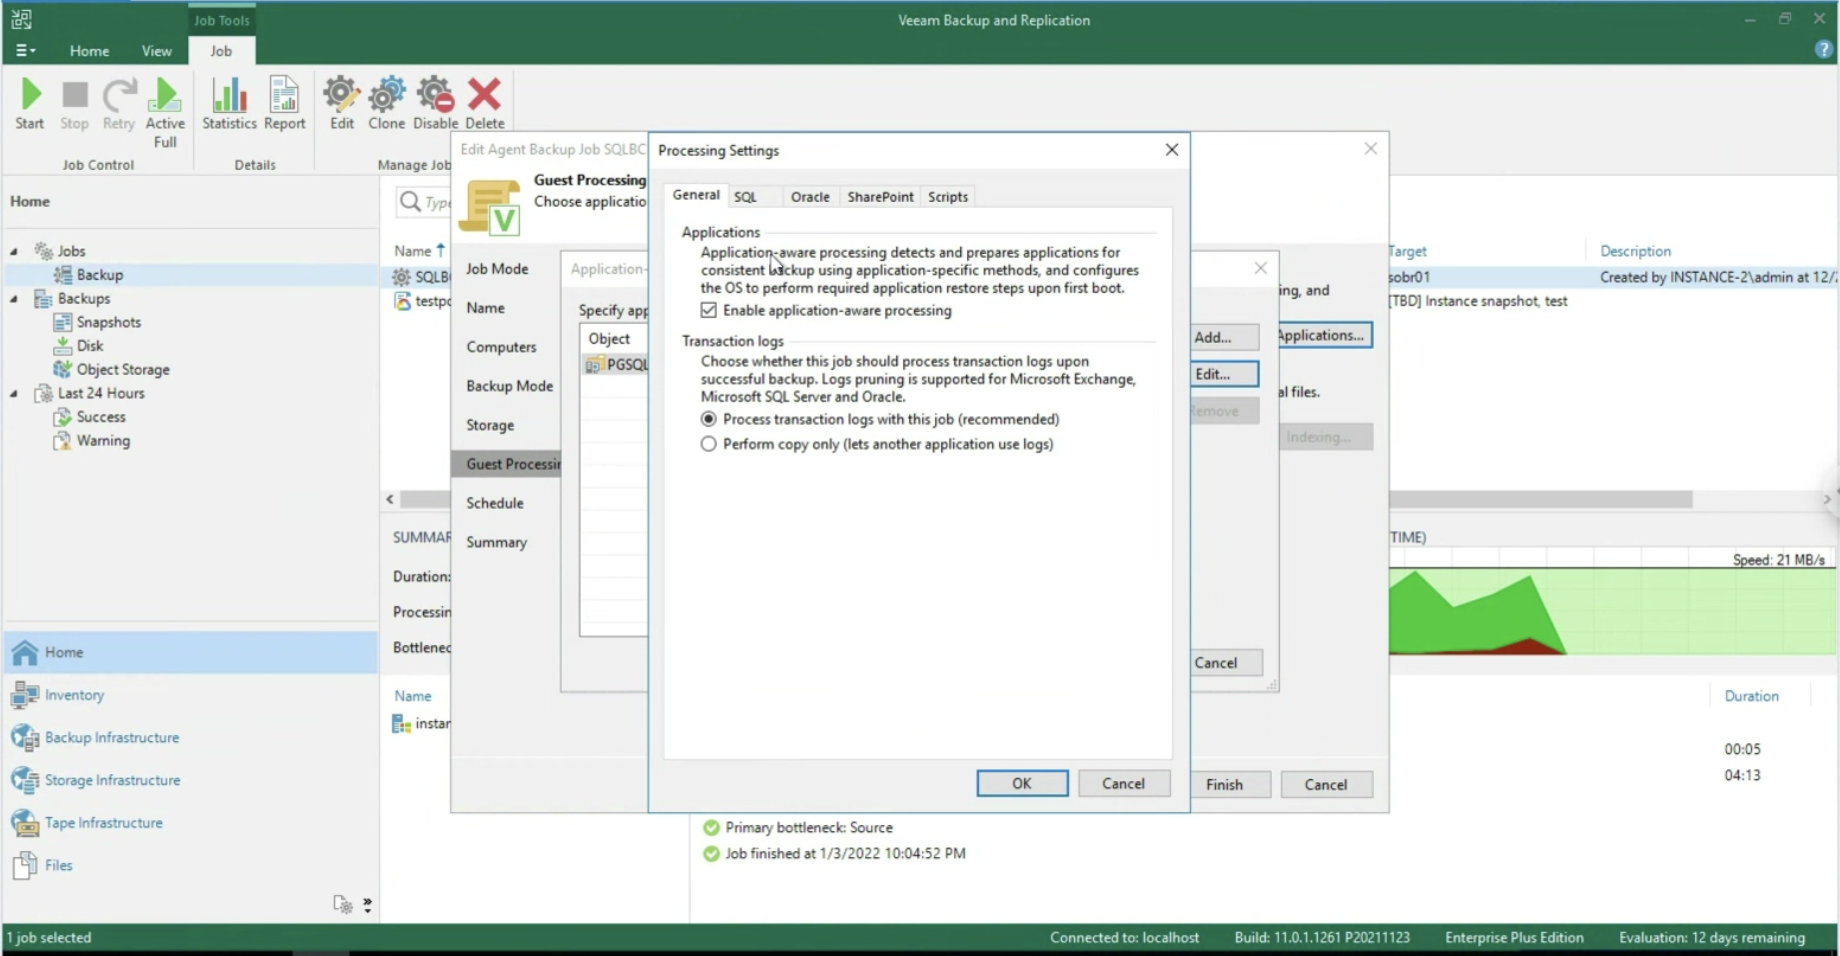 Immagine 7
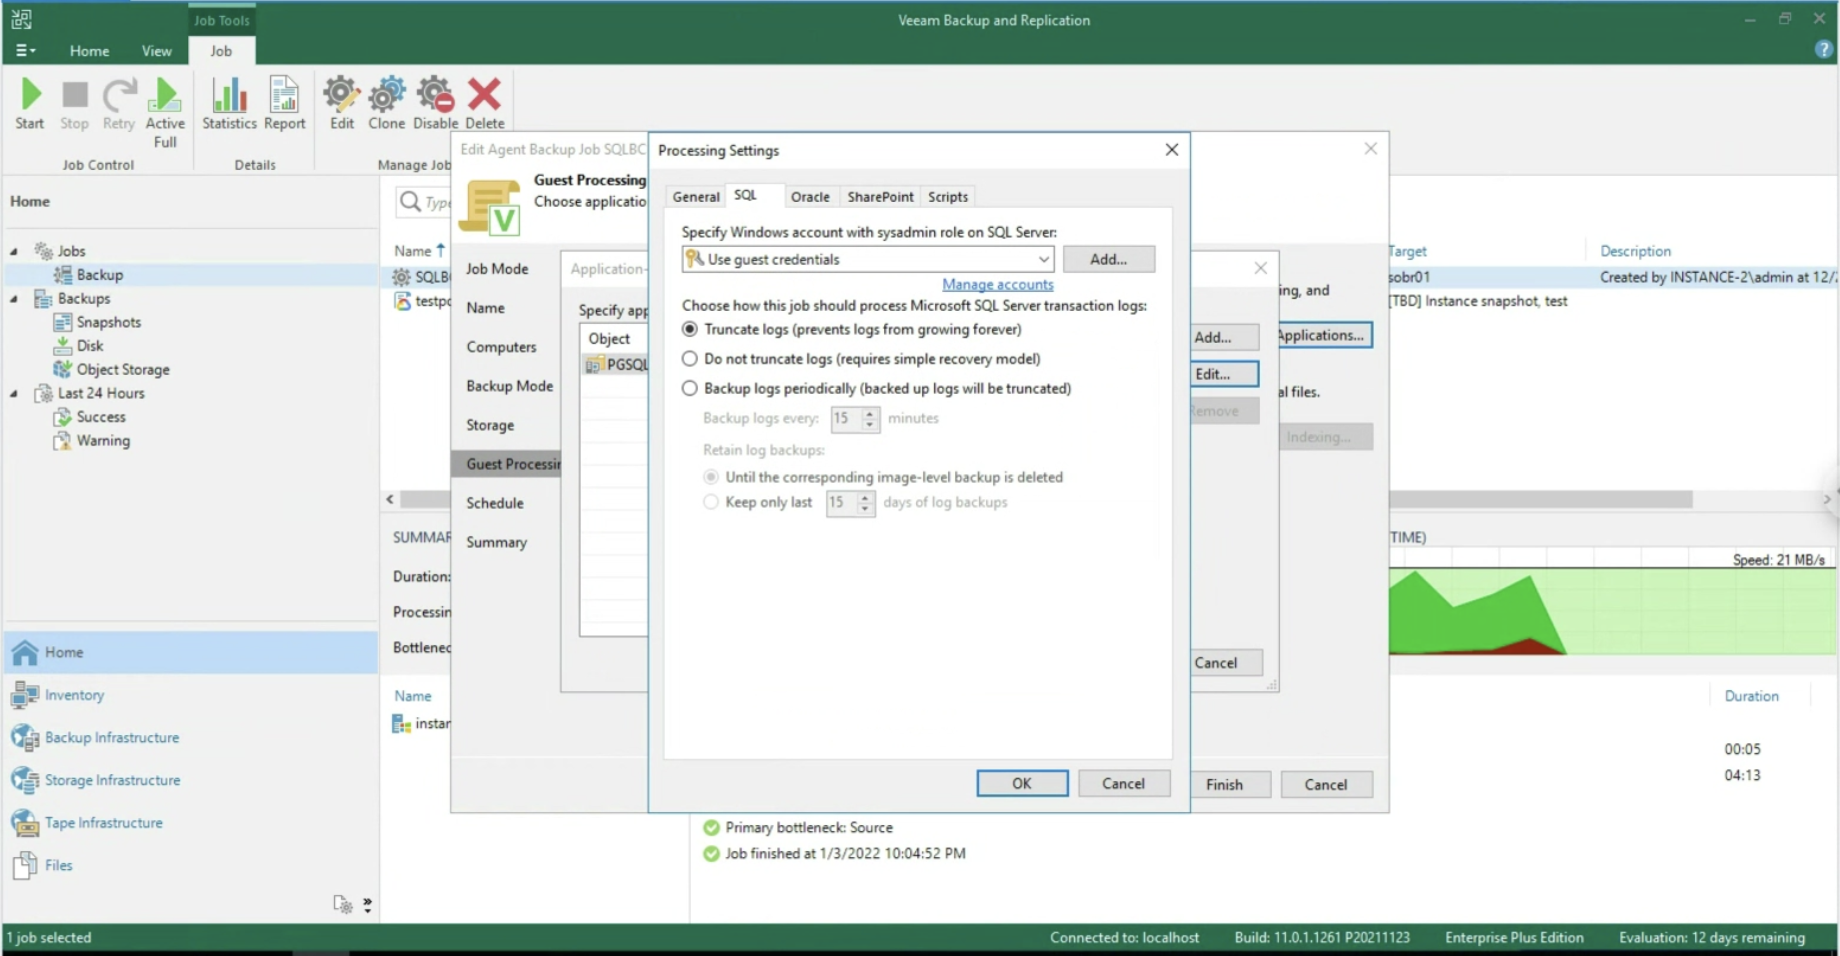 Immagine 8
Dopo aver avviato il job, controlliamo che alla voce Disk sia presente almeno un punto di ripristino (vedi immagine 9).
 Immagine 9
Concludiamo il presente articolo illustrando le opzioni di ripristino del Veeam Agent for Windows: (immagine 10)
- Verso architetture virtuali VMware & Hyper-V
- Instant Recovery
- Ripristino di Volumi
- Esportazione dei Dischi (VMDK, VHD, VHDX)
- Verso architetture Public Cloud
- AWS
- Azure
- GCP
- La creazione di un Recovery Media per realizzare un Bare Metal Restore
- Il ripristino di File e Cartelle (immagine 10, disponibile anche con il VBGP)
- Il ripristino di oggetti applicativi (immagine 11 & 12, disponibile unicamente via VA)
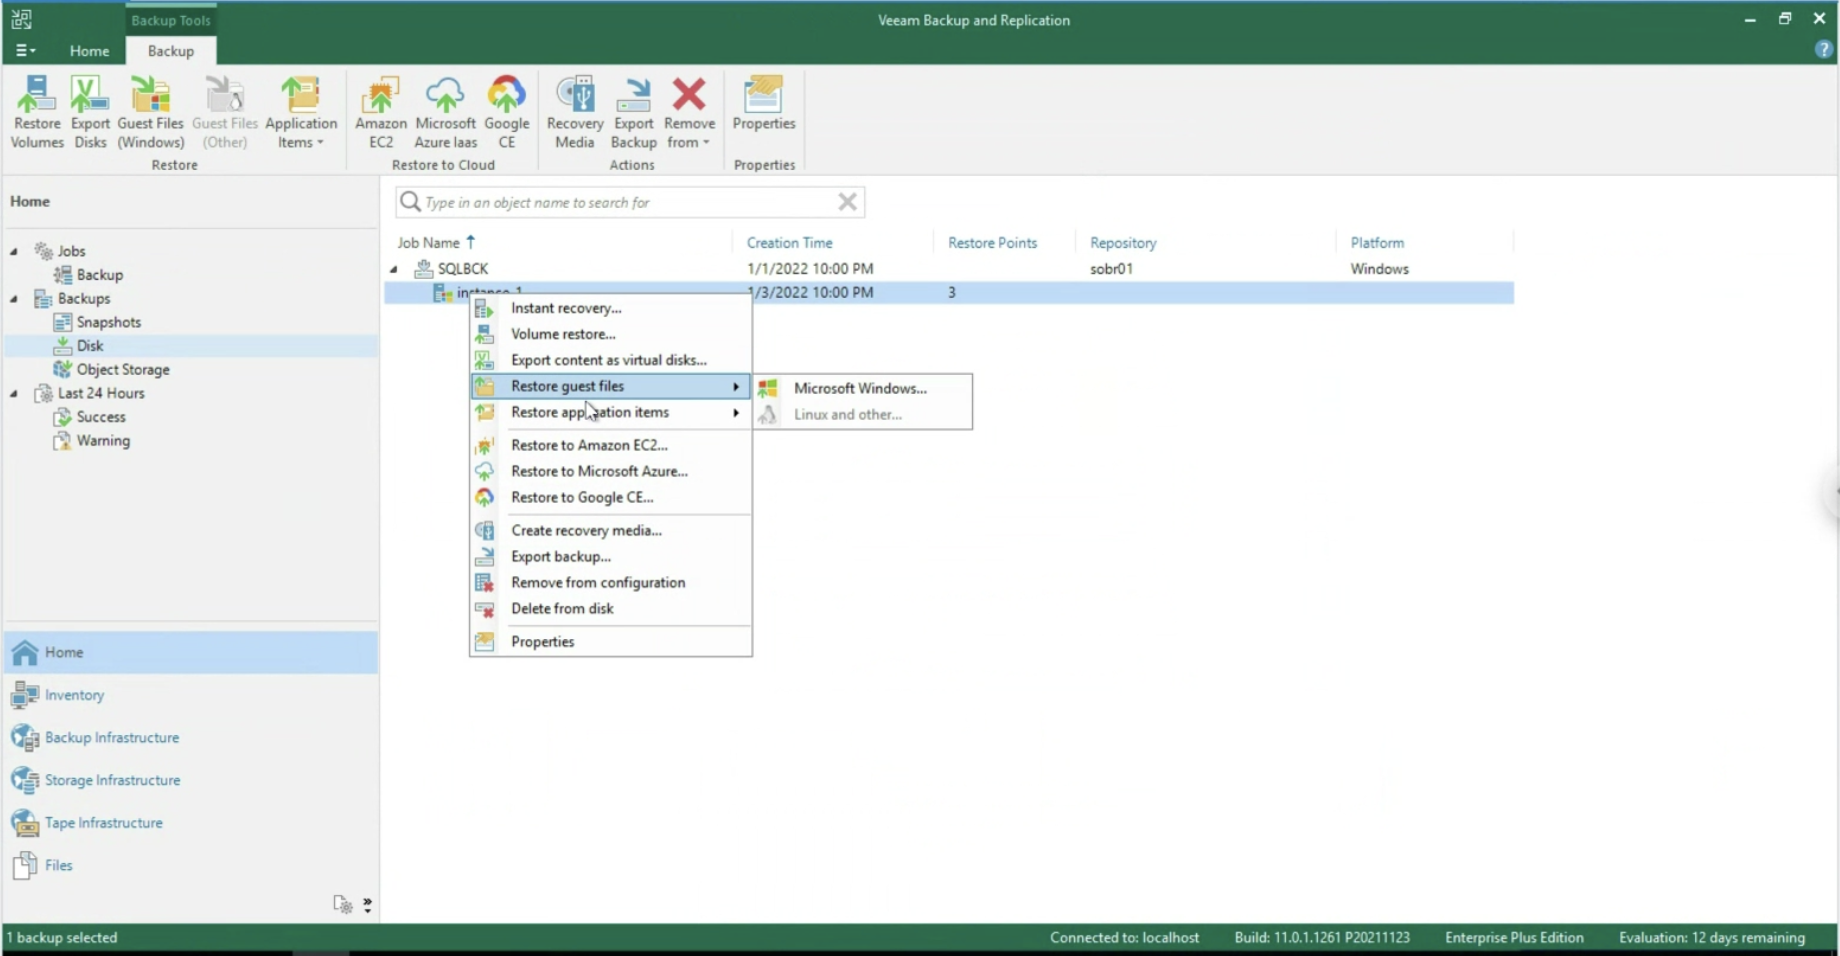 Immagine 10
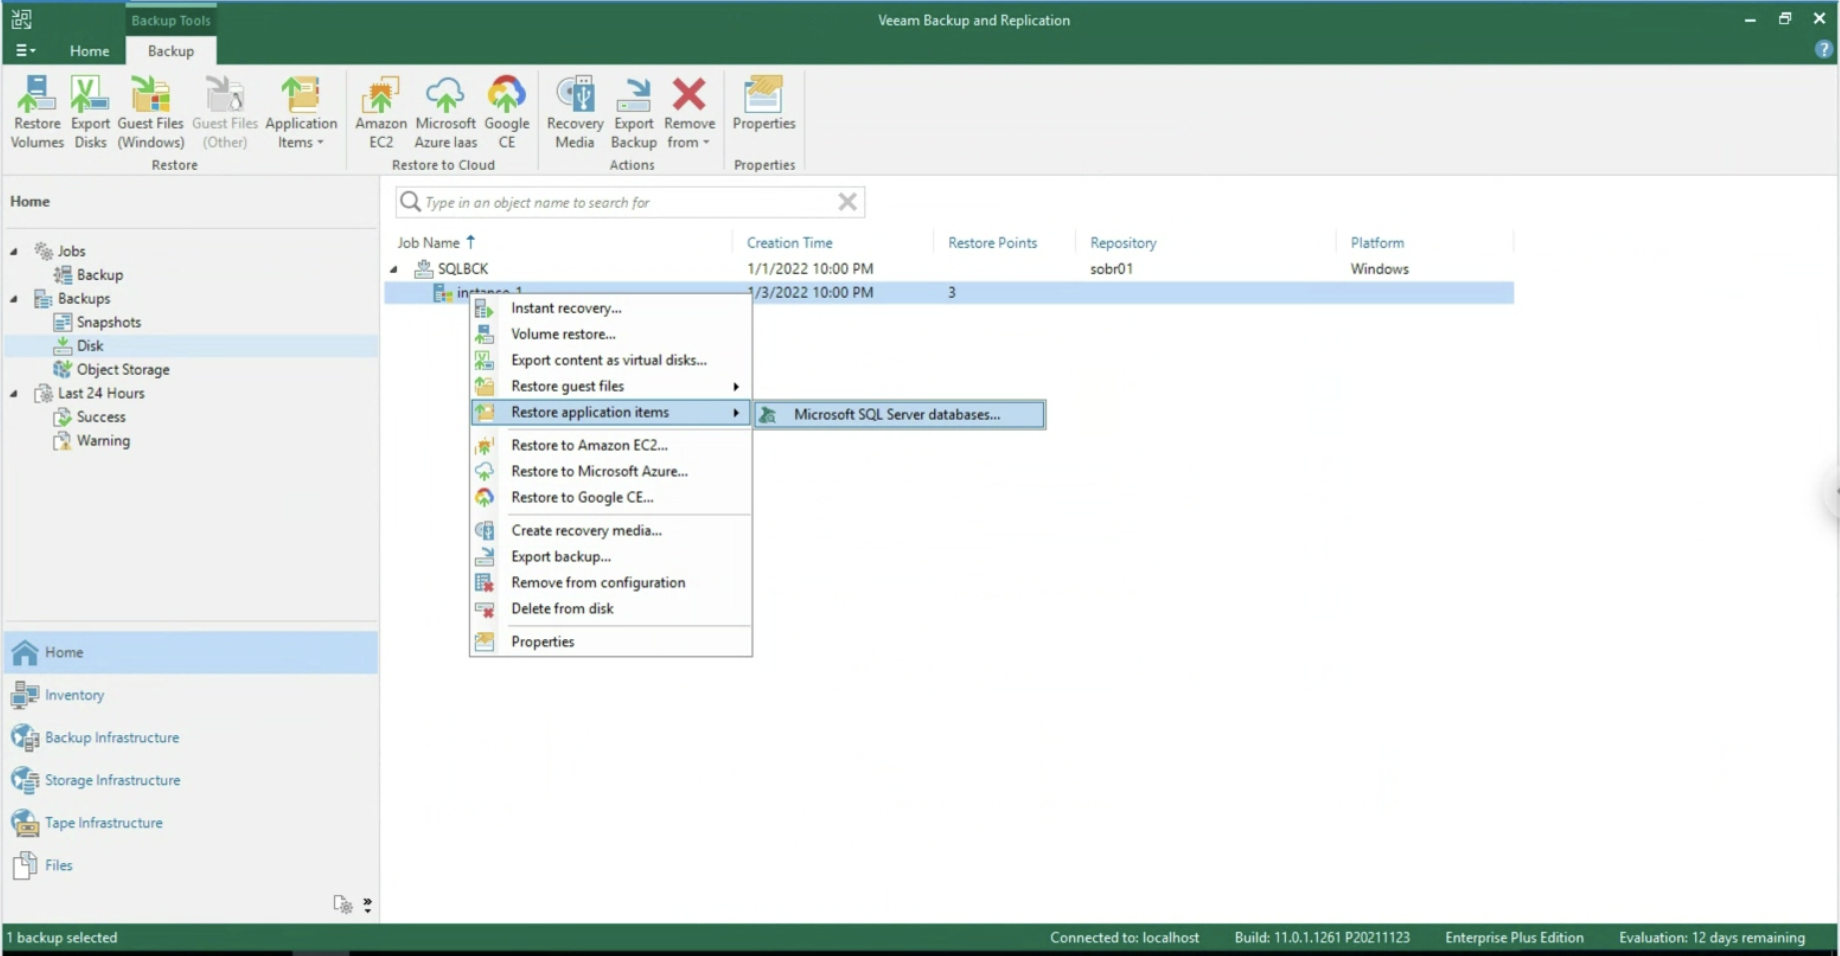
Immagine 11
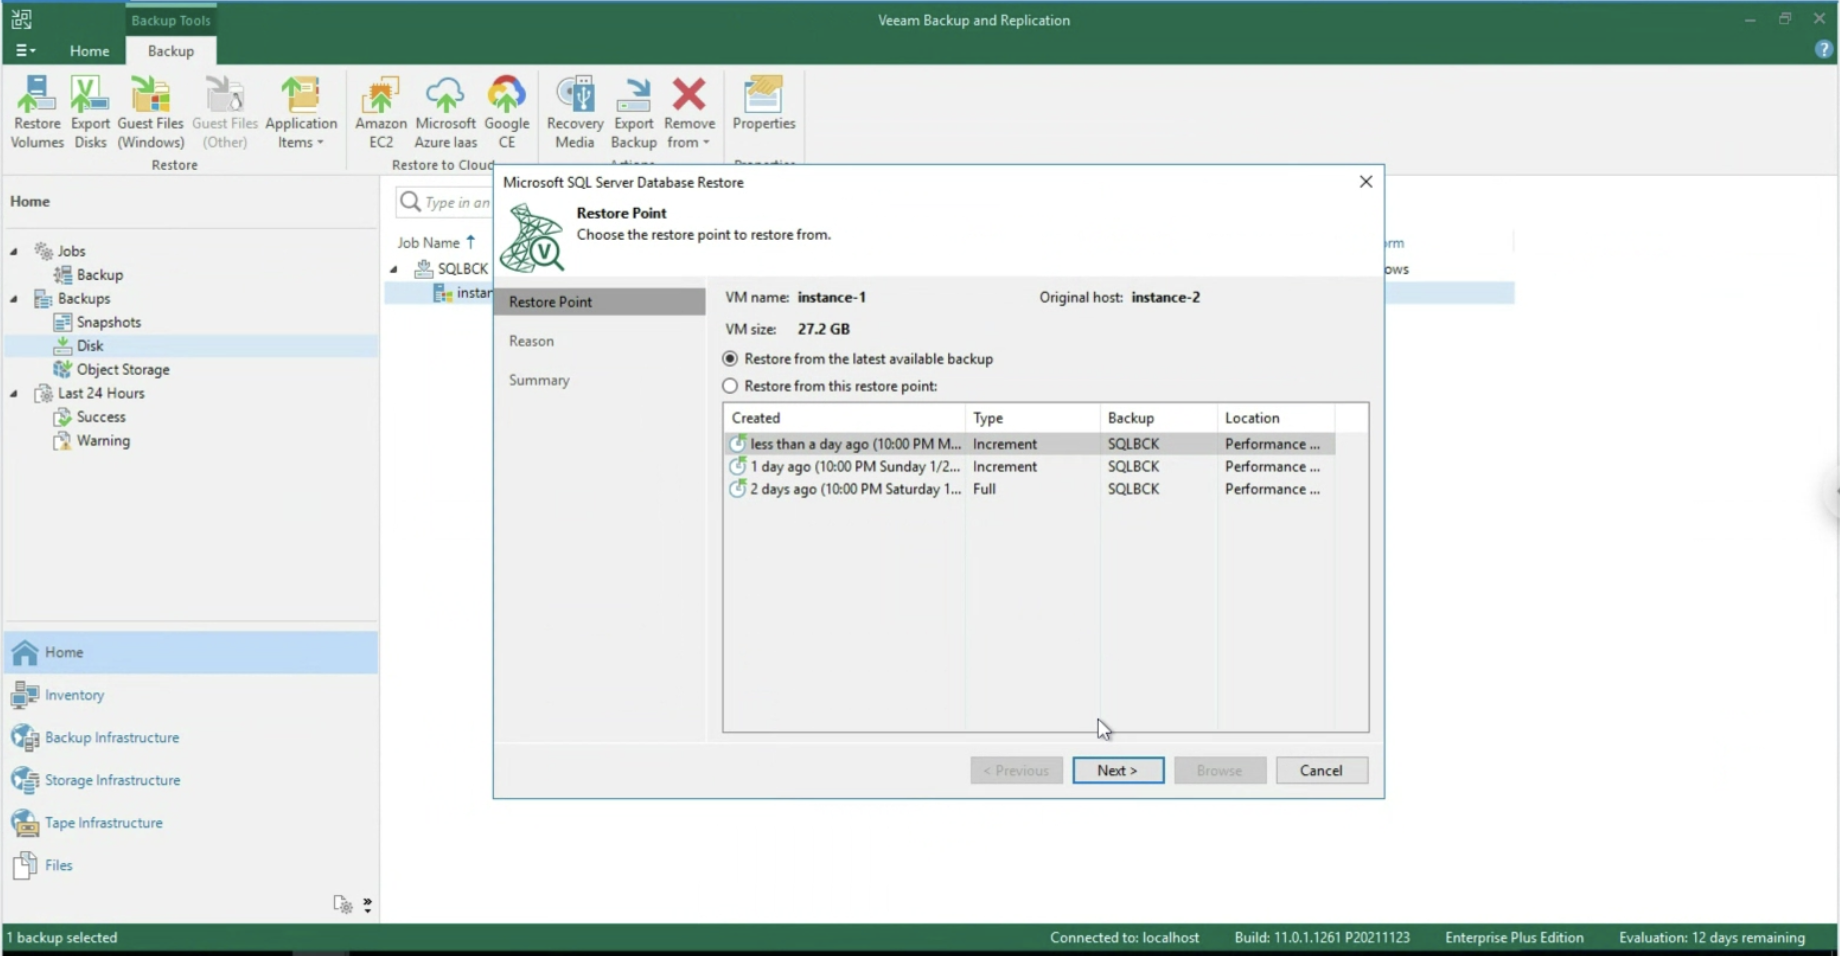 Immagine 12
Tutte le opzioni di ripristino utilizzando il Veeam Explorer per SQL sono disponibili al seguente sito.
Nota 5: Nell’ esempio è stato scelto uno Scale Out Backup Repository che ha il vantaggio di copiare i dati verso l’Object Storage di Google (vedi immagine 13). La versione 12 di VBR permetterà la scrittura diretta verso l’Object Storage
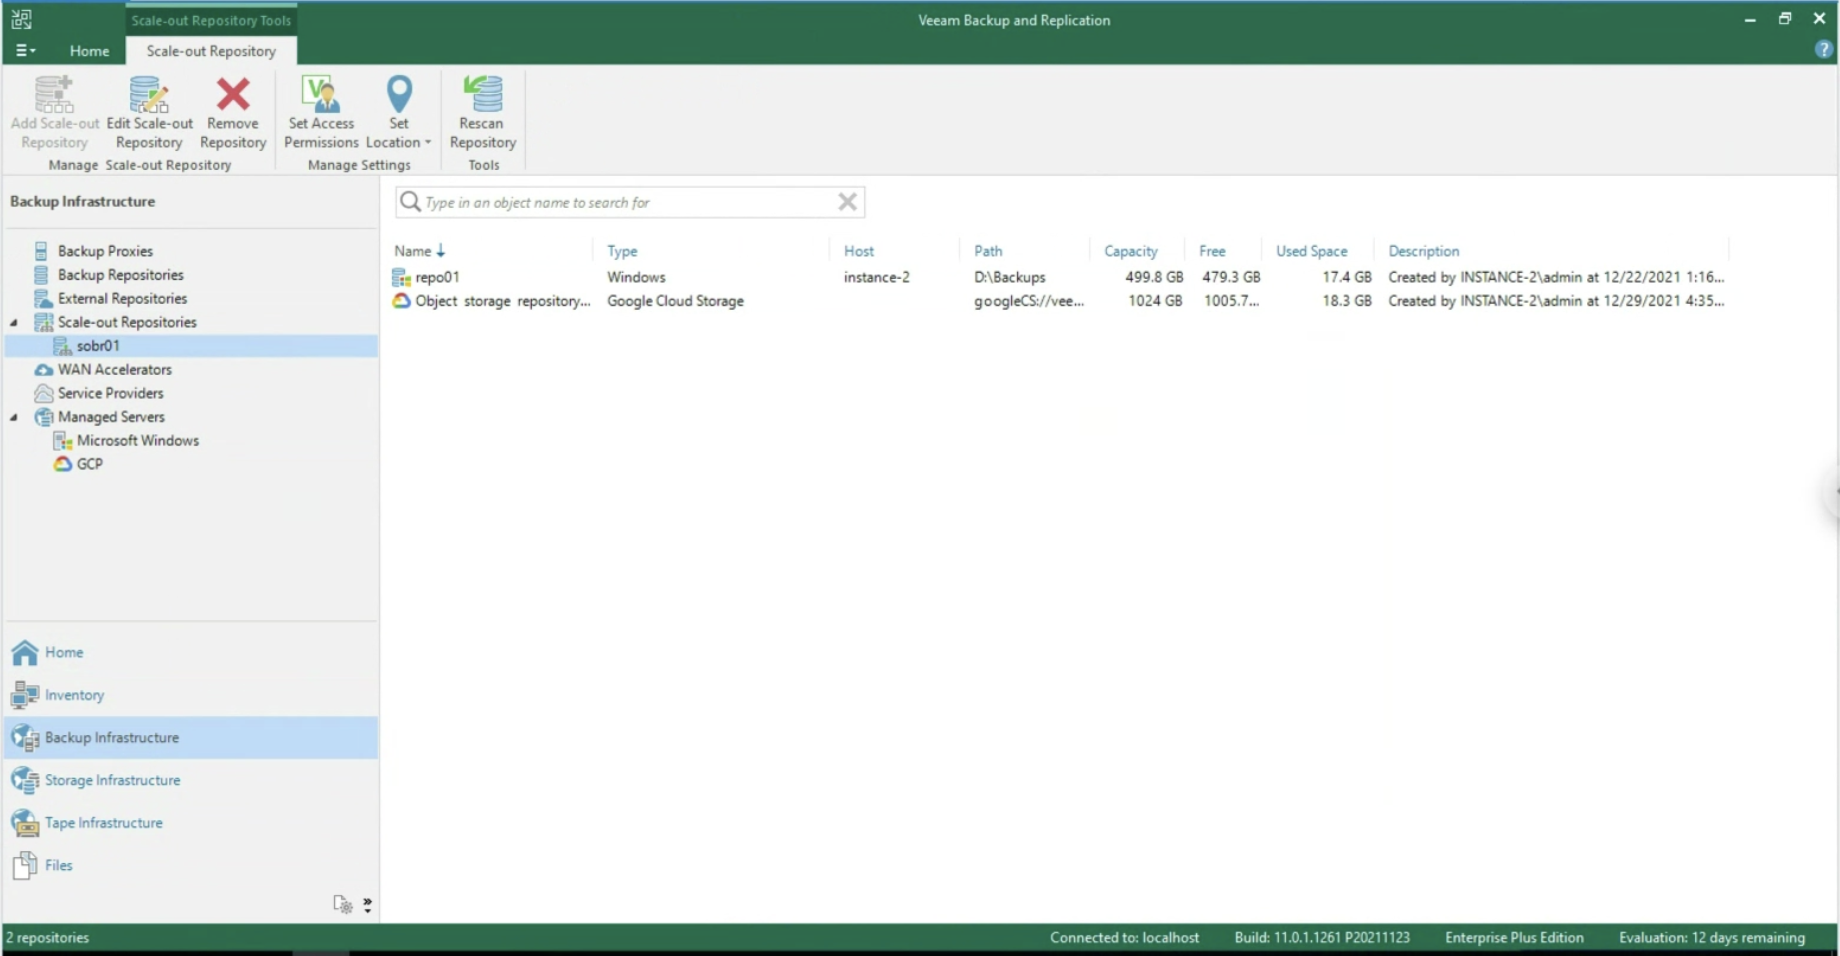 Immagine 13
A presto
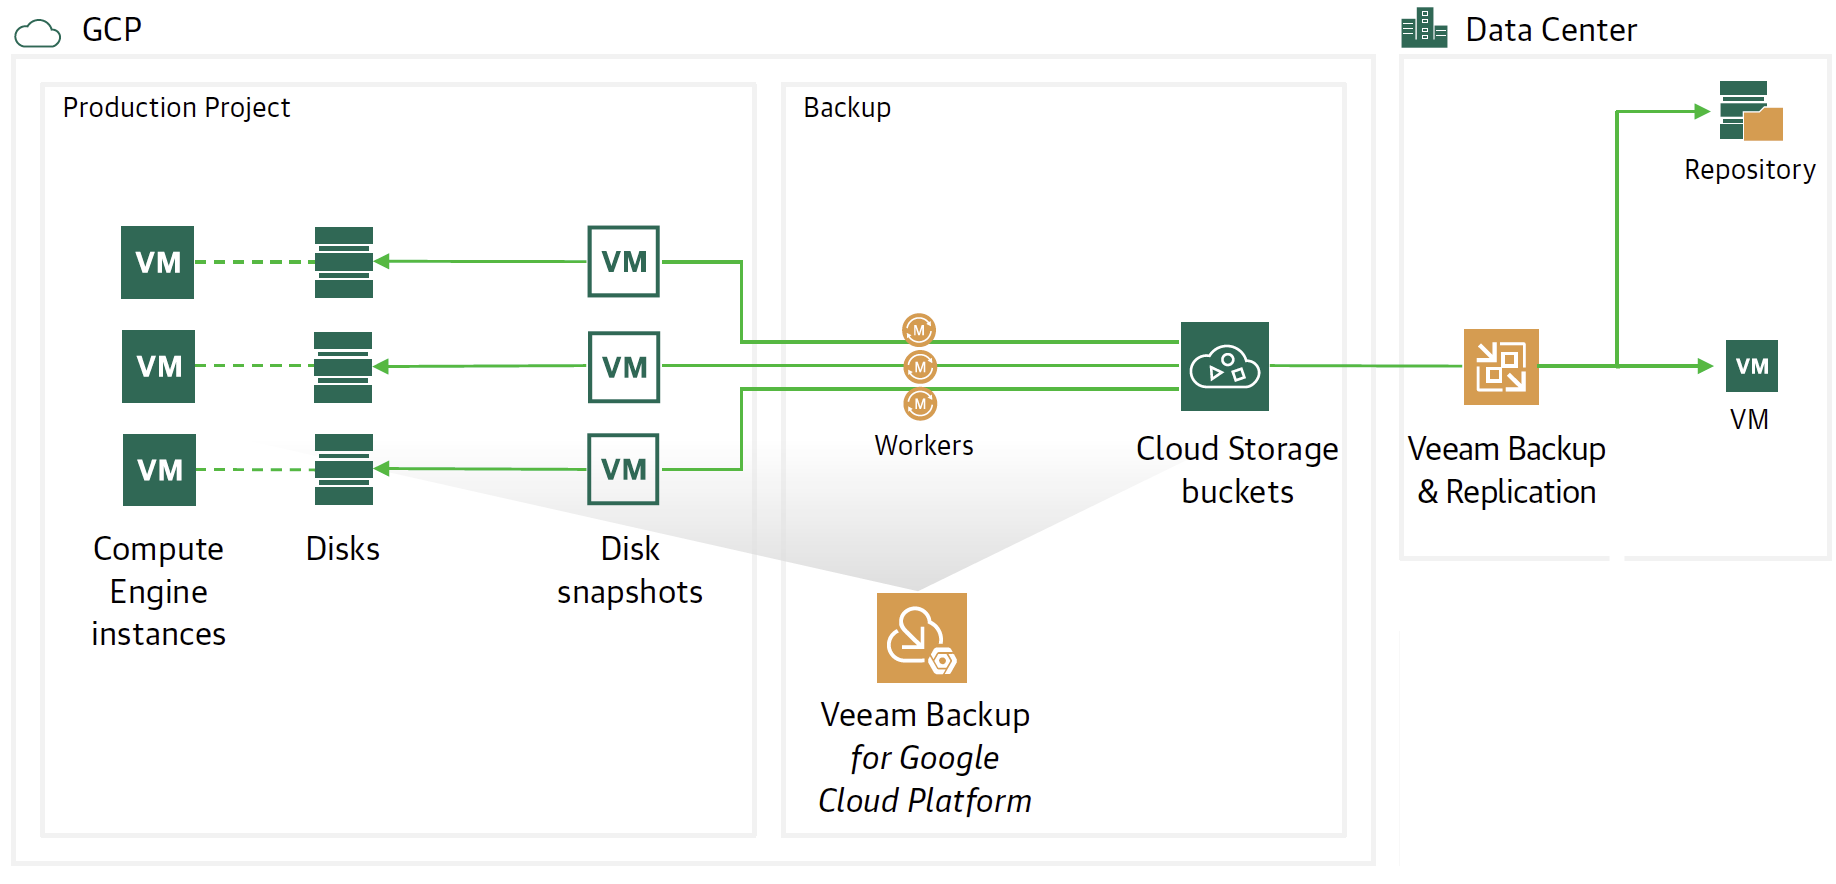 Immagine 1
 Immagine 2
 Immagine 3
 Immagine 4
 Immagine 5
 Immagine 6
 Immagine 7
 Immagine 8
 Immagine 9
 Immagine 11
 Immagine 12
 Immagine 13
 Immagine 14
 Immagine 15
 Immagine 16
 Immagine 17
 Immagine 18
 Immagine 19
 Immagine 20
 Immagine 21
 Immagine 22
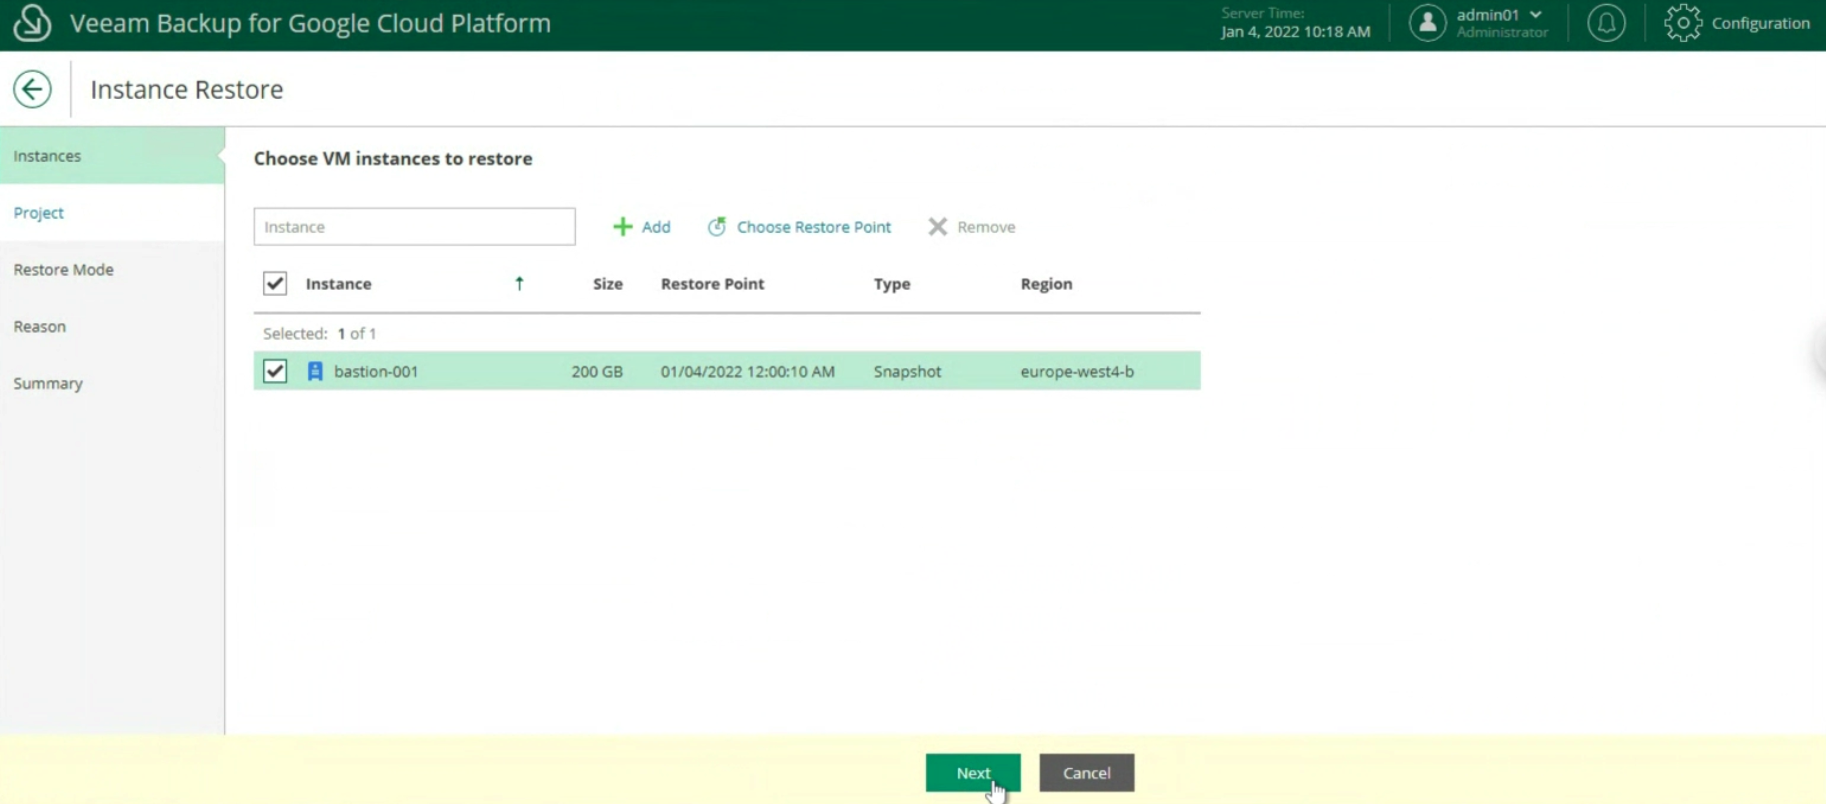 Immagine 23
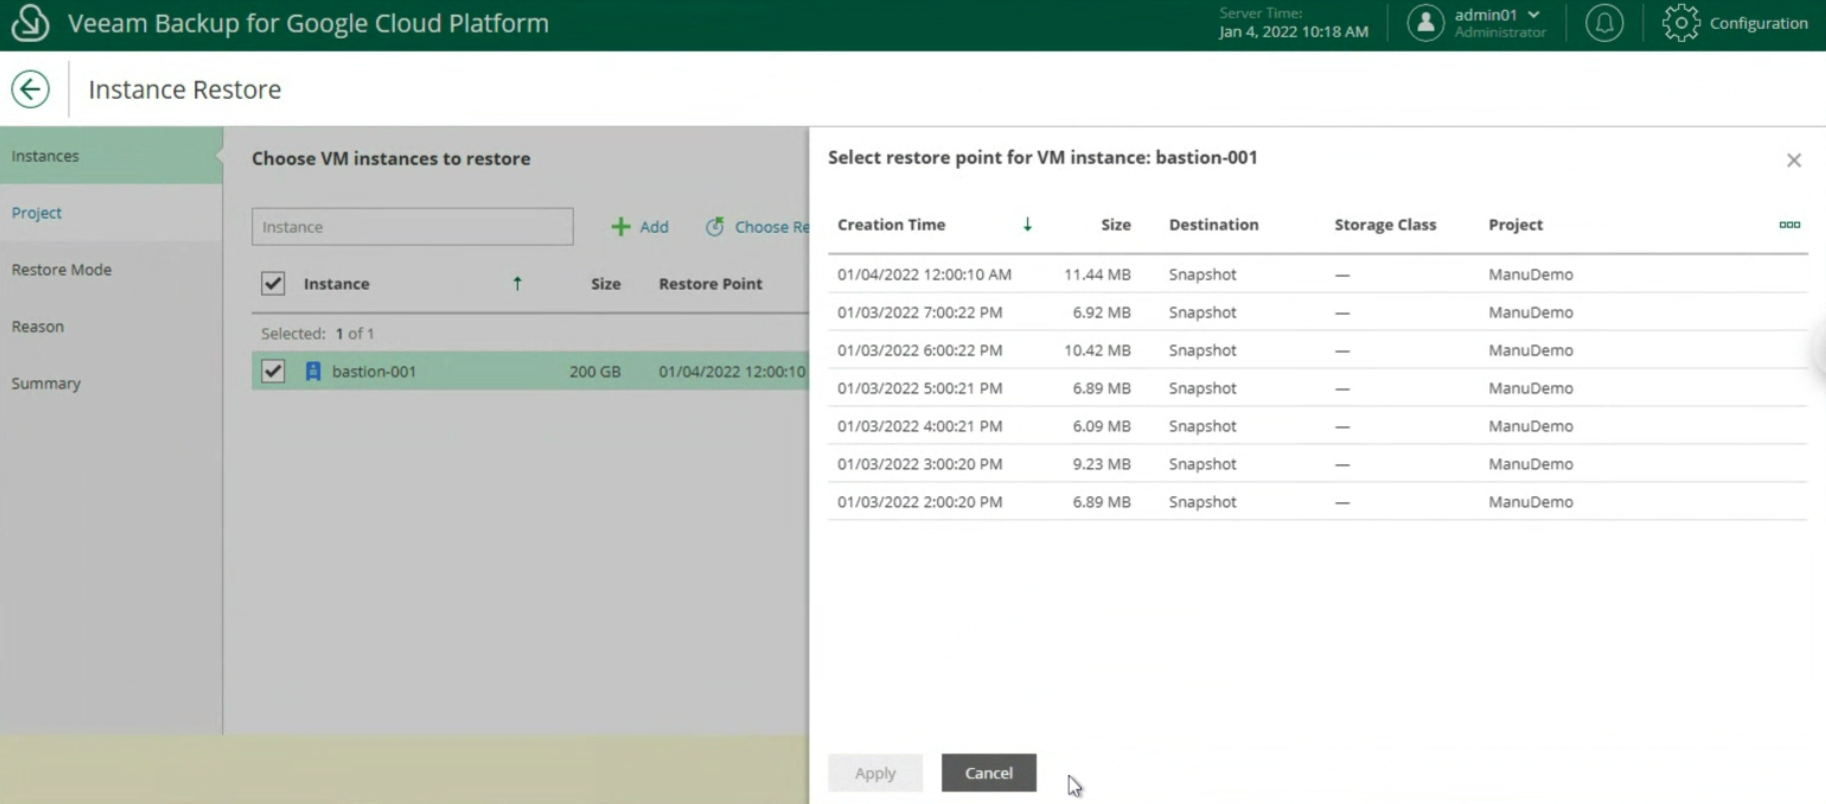 Immagine 24
 Immagine 25
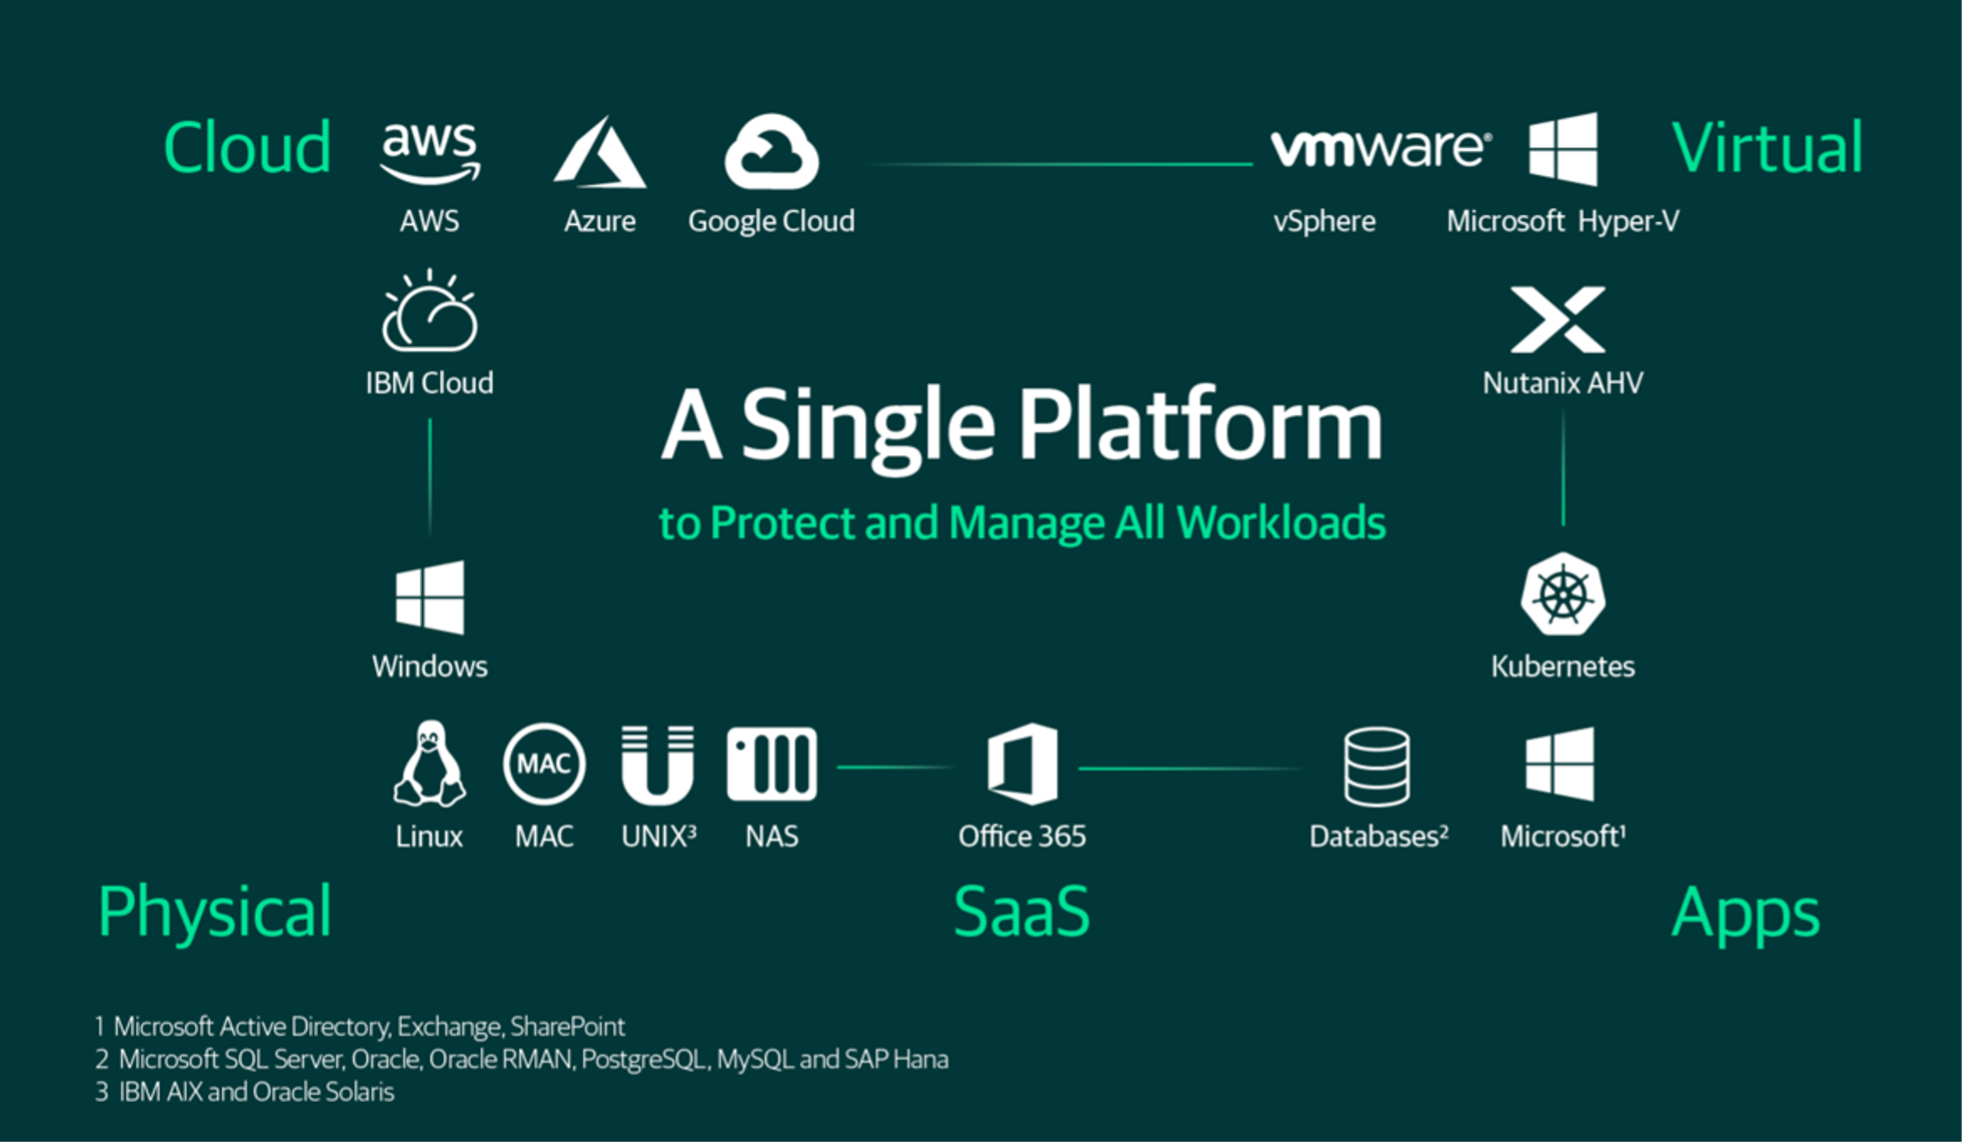
 Picture 1
 Picture 2
 Picture 3
 Picture 4
 Picture 5
 Picture 1
 Picture 2
 Picture 3
 Picture 4
 Picture 5
 Picture 6
 Picture 7
 Picture 8