
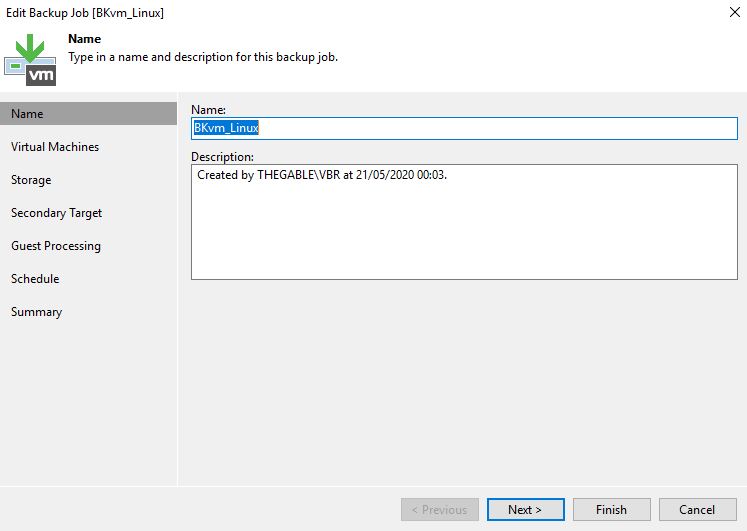
In these last days, I had enough time to analyze my personal lab performances.
For testing purposes, I launched the backup of the whole architecture at the same time; the VM that suffered more was the backup server (VBR) and in particular the SQL Service.
This article will explain the steps I followed to move the VBR Database SQL Express from Backup & Replication to a SQL Server standard using SQL-Management Studio as a migration tool.
Before continuing reading the article, please watch at the following Veeam KBs and contact the Veeam Support
To make the description easier I’ll use the following acronyms :
- VBR = Backup Server
- SQLServer = Target Server where SQL Standard is installed
- SQLExpress = Source DB
- DB = VeeamBackup
- DBFile = VeeamBackup.mdf & VeeamBackup.ldf
The main steps to get the goal are:
- Stopping the Veeam service on VBR server
- Detaching DB from SQLExpress
- Copying DBFile from VBR to SQLServer
- Attaching DB to SQL Server
- Using the Veeam Migration tool
- Changing the service account name on VBR Service (optional)
- Checking up the register key
- Launching Backup and Restore tests
Let’s go!
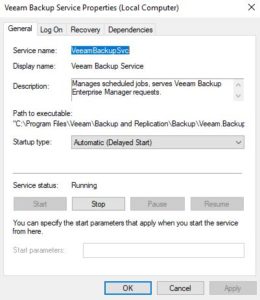
- The first step is quite easy. Just connect to VBR, click on service and stop the SQL instance (Picture 1).
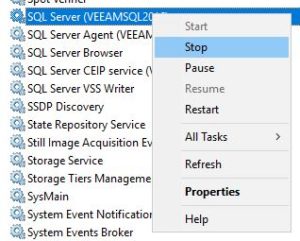 Picture 1
2. The second step is detaching the DB from SQL Express using SQL Management Studio (Picture 2).
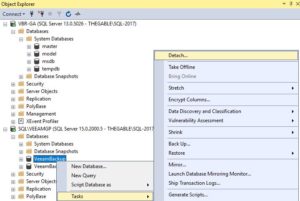 Picture 2
If you need a good and short video guide to install SQL Management Studio please refer to the following link:
Another interesting video guide to understand how to enable the remote connection with SQL server is available here
Remember: for enabling SQL Server to talk via Network (1433 is default port) you also have to set-up the firewall correctly.
3. Now it’s time to copy DBFiles from VBR to SQLServer
Pay attention to the default path where the files have to be copied and pasted.
Generally, it is in C:\Program Files\Microsoft SQLServer\ MSSQL.xx.INSTANCENAME\MSSQL\DATA (Picture 3).
 Picture 3
4. Next step is attaching the DB to the new SQL server following the easy SQL Management studio menu ((Picture 4).
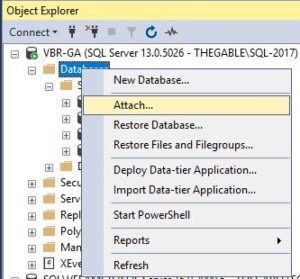 Picture 4
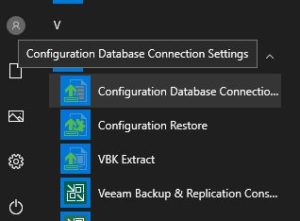
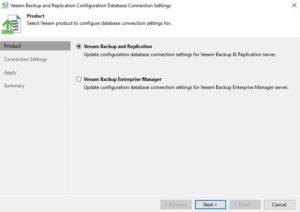
5. Now from the programs menu of VBR server, just select the voice Veeam and then “Configuration DataBase Connection Settings“.
Now choose which DBs you want to move to the new architecture. It can be Backup & Replication or the Enterprise Manager or both (Picture 5)
(Picture 5)
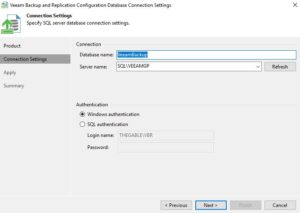
Now fill in the Database Name and Server/Instance and proceeding with the final step migration (Picture 6).
 Picture 6
If everything is correctly configurated you have finally migrated your DBs.
Troubleshooting:
TS-1
If you see that the process runs out of time (600 seconds), it means that the VBR service account can’t access the database
How to solve it?
Please contact your DB experts before doing any tasks!!!
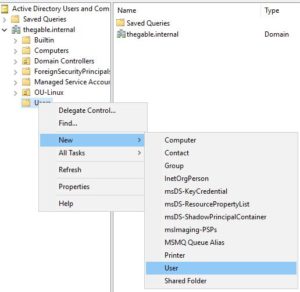
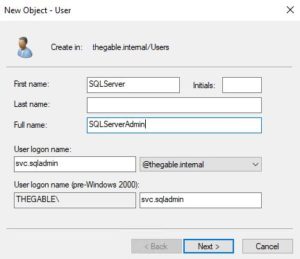
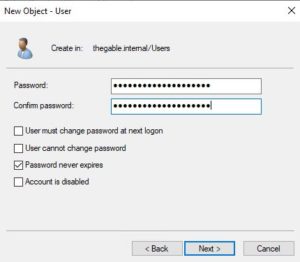
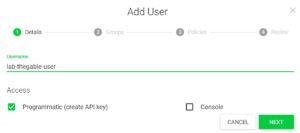
6. The first thing is creating a user able to manage the SQL services.
The procedure is quite easy using a Domain Controller (Picture 7-9)
 Picture 7
 Picture 8
 Picture 9
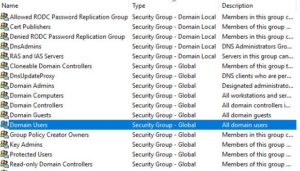
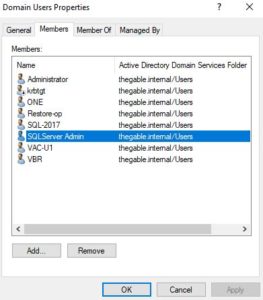
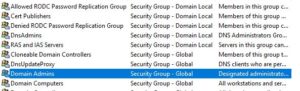
Now you have to add the new user to Domain Users and Domain Admin groups (Picture 10-12).
 Picture 10
 Picture 11
 Picture 12
From the Veeam Services window, select the Logon Service tab and set up the right user (and for all services that need it) (Picture 13 & 14)
 Picture 13
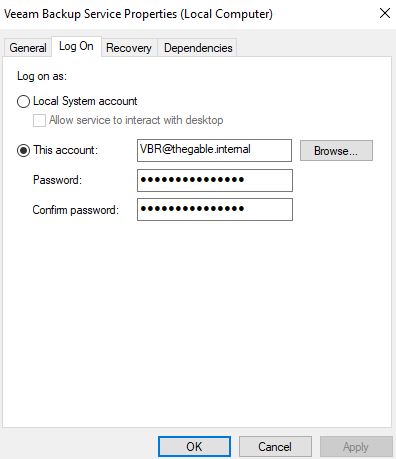 Picture 14
Re-apply the procedure shown at point 5.
In my case, I’ve had another issue.
TS-2
The issue I unlucky met during my setup was the following:
When I tried to connect to remote DB with the “Configuration DataBase Connection Settings” command appeared the following error (Picture 15).
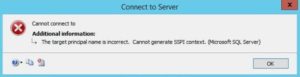 Picture 15
This issue happens when the SQL Server driver on a client computer that uses integrated security and the Windows security token, can’t connect to the SQL Server
If you want to have all details please refer to the following Microsoft article:
Please contact your DB experts before doing any tasks!!!
After some google research and test, I found a solution that addressed my issue always working with Domain Controller.
The AD console needs to be switched to advanced (Picture 16).
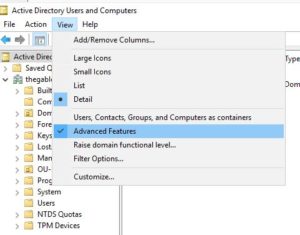 Picture 16
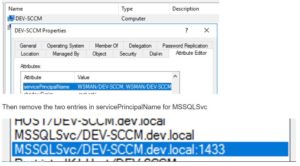
Now left-click on the SQL server and select “attribute editor”
From this menu, you have to delete all the entries with the writing MSSQL.svc (Picture 17)
It also needs a server reboot.
Please contact your DB experts before doing any tasks!!!
 Picture 17
For the last two points (7 and 8), check-up, if the procedure followed, has solved the request.
TS-3
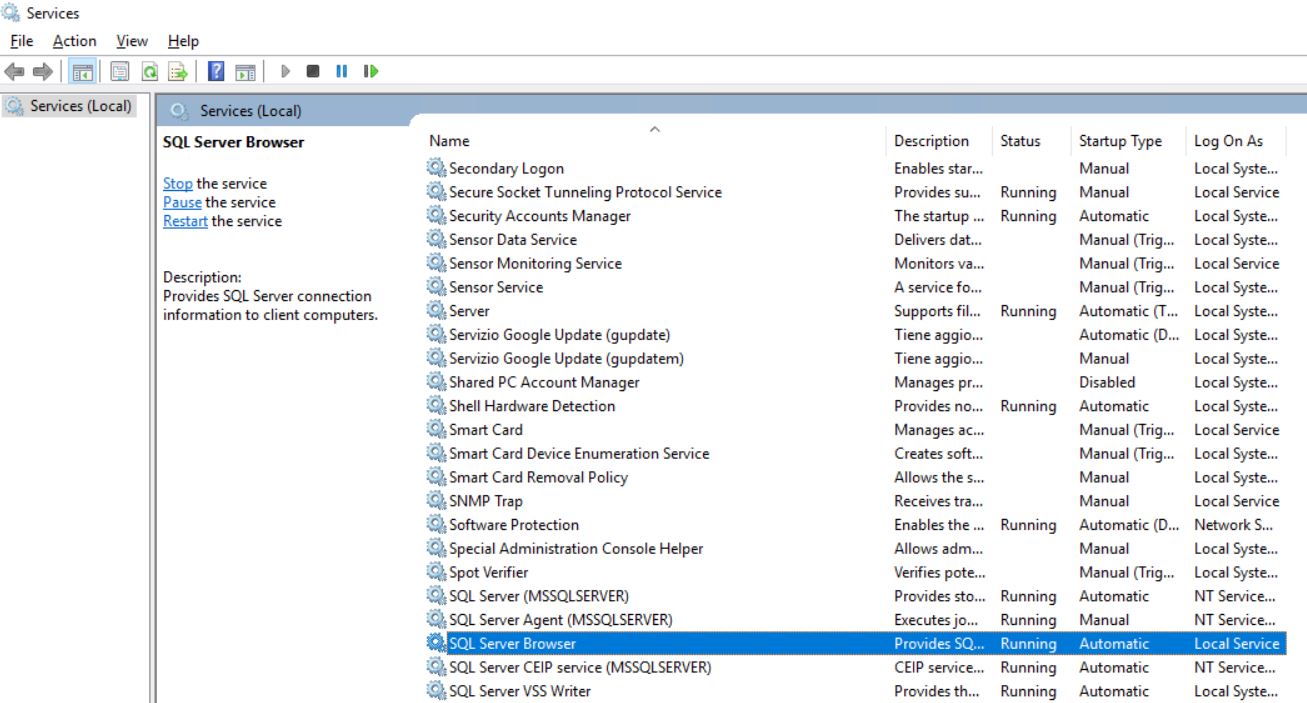
If you are not able to discover the SQL server, please check on the target Server if the SQL Server browser is up and running
 Picture 18
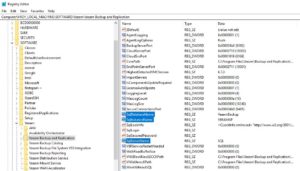
From VBR Server open the register key (HKEY_LOCAL_MACHINE\ Software\Veeam\Veeam Backup and Replication) and check up if the items SqlDatabaseName, SQLinstanceName e SqlServerName are correctly filled in (Picture 19).
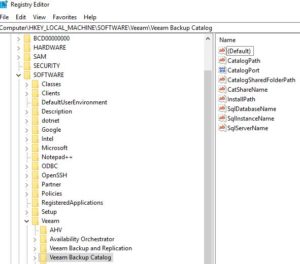
Do the same check-up for HKEY_LOCAL_MACHINE\Software\Veeam\Veeam Backup Catalog) (Picture 20).
 Picture 19
 Picture 20
Now start backup Jobs and do some restore tasks to be sure that your Backup architecture is up and running.
In my case, the Backup Server can manage more tasks without any issue.
One more recommendation before ending the article:
Before doing any activities please read the official documentation and ask Veeam support
 Picture 2
 Picture3
 Picture 4
 Picture 5
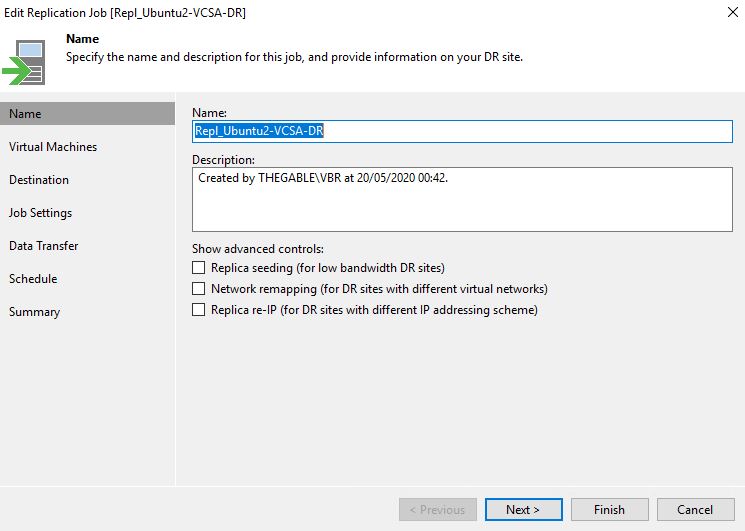 Picture 6
 Picture 7
 Picture 9
 Picture 10
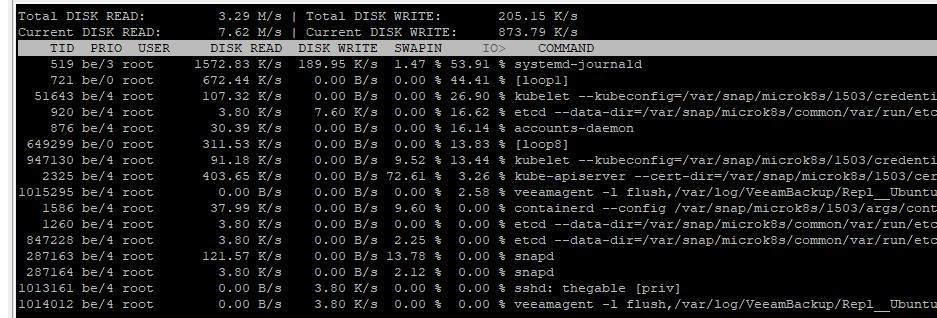 Picture 11
 Picture 1
 Picture 2
 Picture 3
 Picture 4
 Picture 5
 Picture 6
 Picture 7
 Picture 8
 Picture 9
 Figure 1
 Figure 2
 Figure 3
 Figure 4
 Figure 5
 Figure 6
 Figure 7
 Figure 8
 Figure 9
 Picture 1
 Picture 2
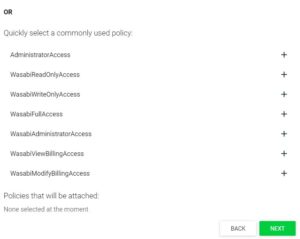 Picture 3
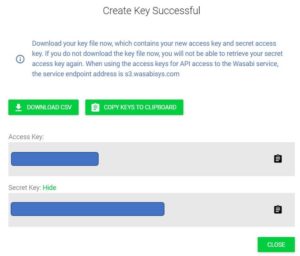 Picture 4
 Picture 5
 Picture 1
 Picture 2
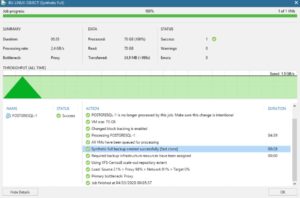 Picture 3