
As written in the last article a container can manage more images.
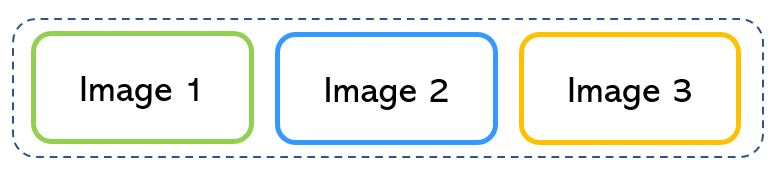
Picture 1 shows an example of three different workloads running in a single container.
 Picture 1
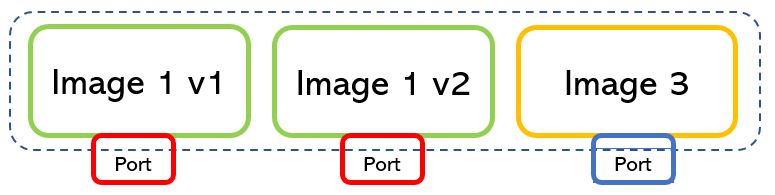
It’s possible to work with different versions of the same image also.
For example, MySQL has several images that can be installed and run to the same container.
Note 1: Nowadays MySQL available images are:
- 8.0.25, 8.0, 8, latest
- 5.7.34, 5.7, 5
- 5.6.51, 5.6
Picture 2 shows a container where three different images run with two kinds of version applications.

Picture 2
Let’s digress slightly talking about how a service is built.
Most of the time it is made by grouping applications that means grouping several types of images.
The question is: How do images talk to each other?
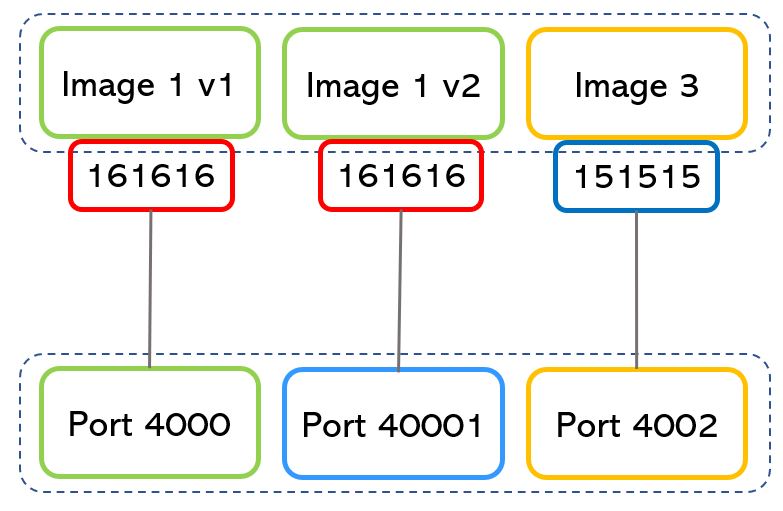
The answer is quite easy. They talk through the networks, where IP addresses and ports are in charge of the communication to and from the applications (picture 3).
Picture 3
There is just a simple rule to remember when a container network architecture is deployed.
As shown in picture 4, if the ports used by a running image can be the same for different applications (in example 161616), the port assigned to the back-end server must be always different (4000,40001,4002).
Note 2: The port numbers are just an example also because the port with the higher number is 216 = 65535.
Picture 4
Wrap-up: The binding network architecture is completely allowed but the host back-end port can’t expose the same port number to more than one service.
Let’s go deeper into networking in the Container environment:
The network’s topology is defined by the used drivers.
They can be:
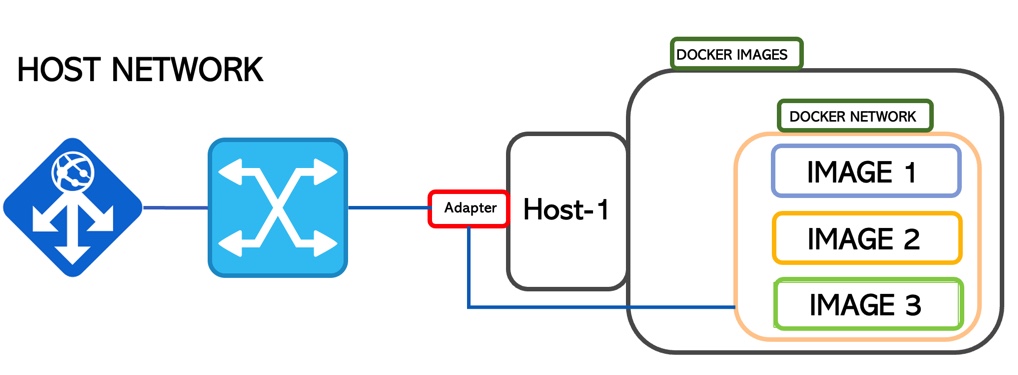
1. Host
When the container comes up it attaches its ports to the host network directly.
In this way, it shares the TCP/IP stack and the Host NameSpace.
The segregation is guaranteed by Docker technology (Picture 5)
Picture 5
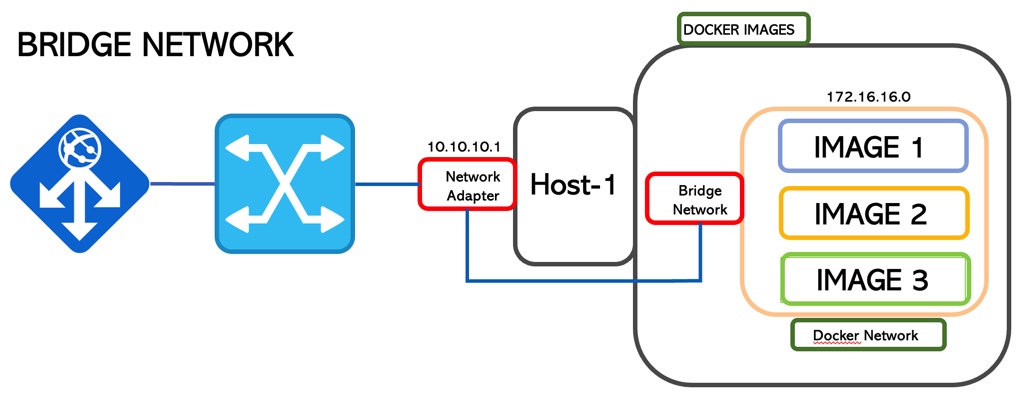
2. Bridge
This is the default network mode.
It creates an isolated bridge network where the containers run inside a range of IP addresses.
In the previous scenario, the containers can talk to each other but no connection is allowed from outside.
To allow communication with external service in Docker, it’s necessary to start docker with the -p option.
docker run -pserverport:containerport nameservice (ie: docker run -p2400:2451 mysql)
port 2400 is now working with 2451
From a security point of view, it is amazing. You can monitor and select which ports are going to be used for a service (Picture 6)
 Picture 6
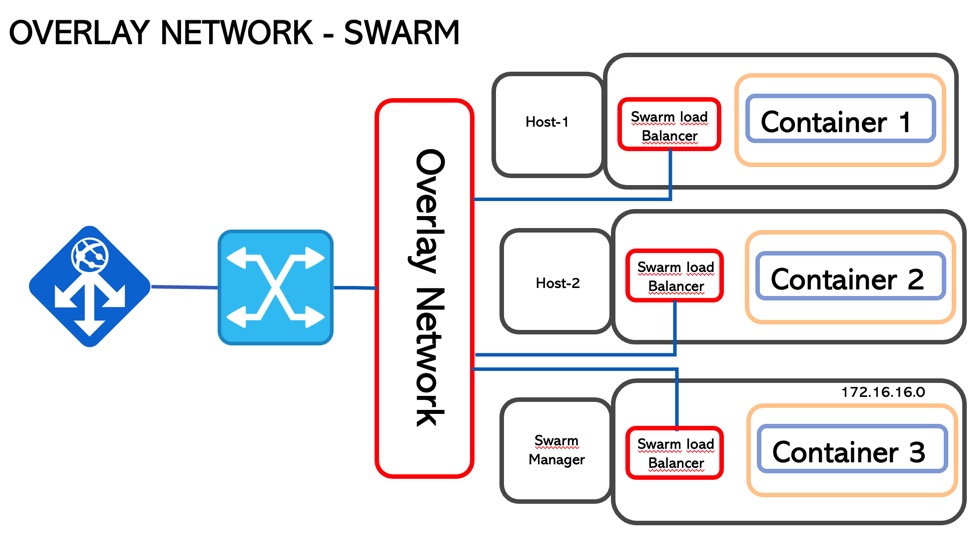
3. Overlay
If the previous technologies are single-host networking topology, the Overlay allows communication among the container hosted in different hosts.
This scenario requires cluster intelligence to manage the traffic and guarantee segregation. It could be Swarm or Kubernetes (picture 7)
The technology core that allows it is vxlan that creates a tunnel on top of the underlay network and it is part of the operating system
The traffic is encrypted (AES) with a rotating password.
When a service is exposed (-p option wrote before), all traffic is automatically routed, nevermind where the service is running
More interesting details: each container has two IP addresses: the first one insists on the overlay network and is used by the containers to talk to each other (internal). The second address is for vxlan and allows the traffic to outside.
Picture 7
4. Null (Black box)
No network connection
5. MacVLan
It’s possible to implement a MacVLan through a driver. The scope is giving to the network container the behaviour of a traditional network. It’s necessary that the network accepts the promiscuous mode.
That’s all for now. Take care and see you soon.

 Picture 1
 Picture 2
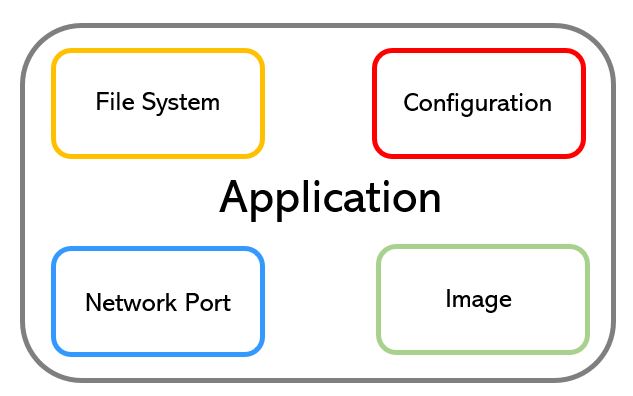 Picture 3
 Picture 1
 Picture 2
 Picture 3
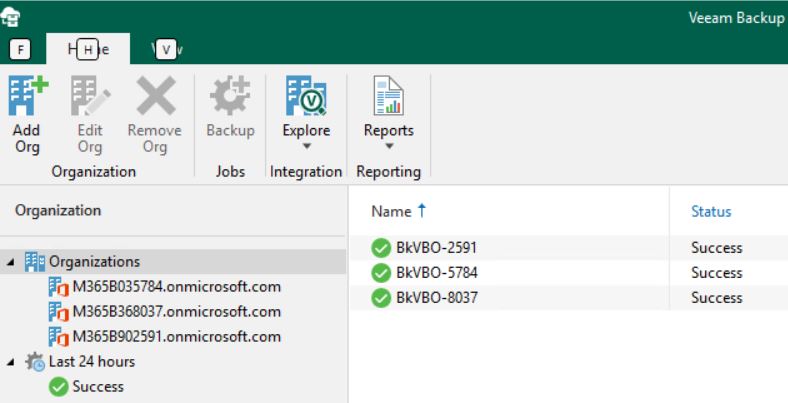 Picture 4
 Picture 5
 Picture 6
 Picture 1
 Picture 2
 Picture 3
 Picture 4
 Picture 5
 Picture 6
 Picture 7
 Picture 8
 Picture 9
 Picture 10
 Picture 11
 Picture 12