
Last device I added to my lab is the Ubiquity Unify Security Gateway (from now on USG)
I need it because I have to work with a great number of vLAN in my demo lab.
Let’s see what I learned in the last test weeks and how I set it up to address my needs.
The hardware installation is quite easy. After unpacking the box you just need to plug-in the power supply and two ethernet cables, the first one on LAN Port and the second to WAN port.
The USG setup is composed of 5 configuration phases
- LAN / WAN
- Unifi-Controller
- VPN
- VLAN
- Routing
In this first article, we are going to cover the three first phases.
I – LAN /WAN Configuration
- On your PC set up the Ethernet IP Address as 192.168.1.x/24 and plug the LAN cable. Now ping the 192.168.1.1 address to be sure you can reach the USG. Open a Browser and you’ll be able to configure LAN and WAN interfaces from 192.168.1.1 address.
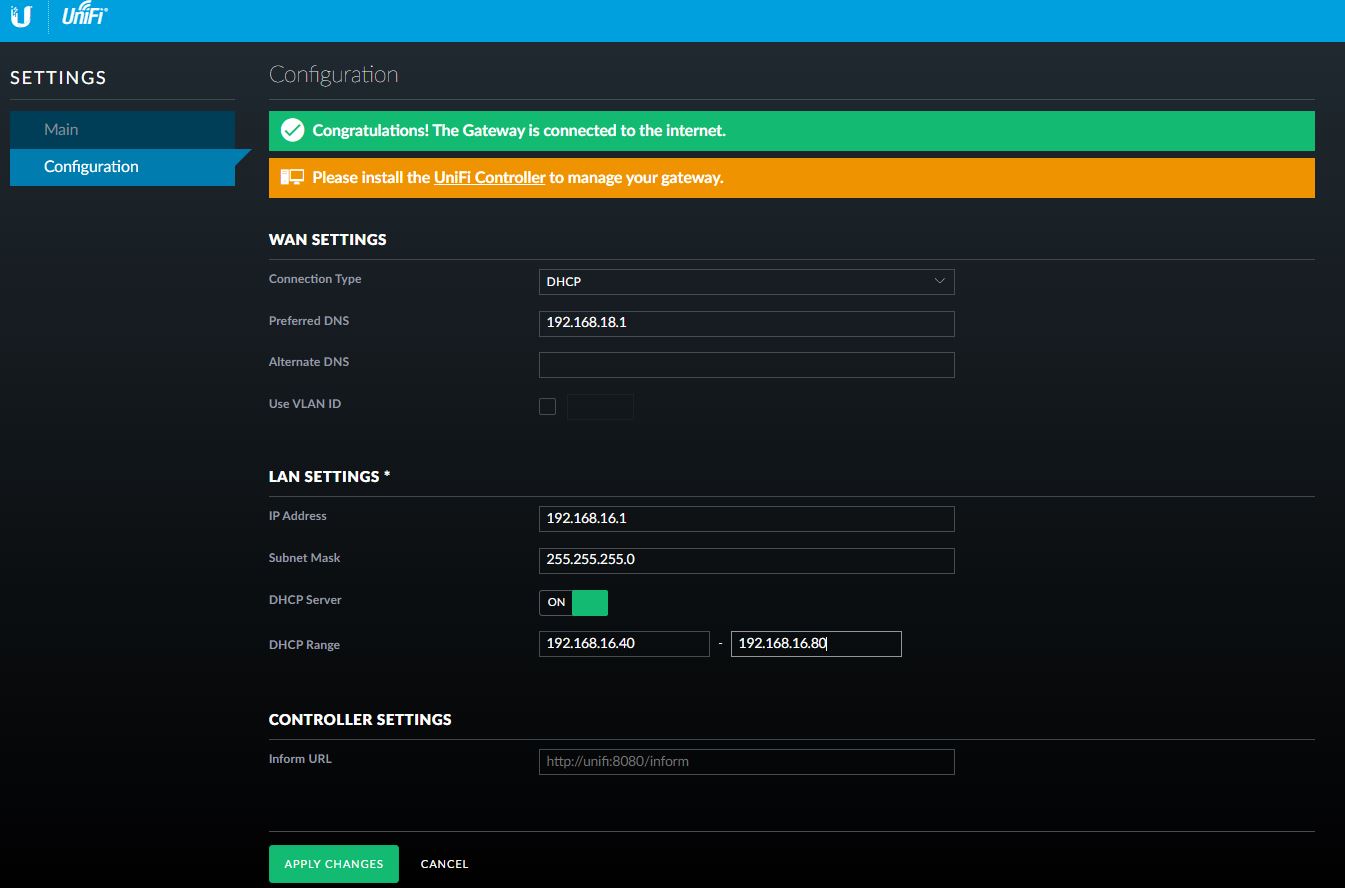
Figure 1
My personal router works on 192.168.18.x while I choose to set up the LAN on 192.168.16.x address
After “applying the changes”, you have to re-change the IP address of your PC to a LAN address (192.168.16.99 for example) and test the USG answer to ping.
II Unify Controller
After creating an account on the Ubiquity site (https://account.ui.com/register), download and install the Unifi Controller (https://www.ui.com/download/unifi-switching-routing) on your local PC.
Let’s see the most important steps on the wizard:
Click on “Launch a Browser to manage the network” button (Figure 2)
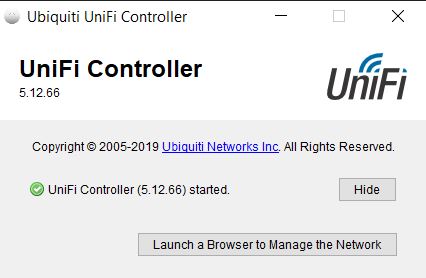
Figure 2
Log-in to Ubiquiti account

Figure 3
Checking if the USG device is properly discovered
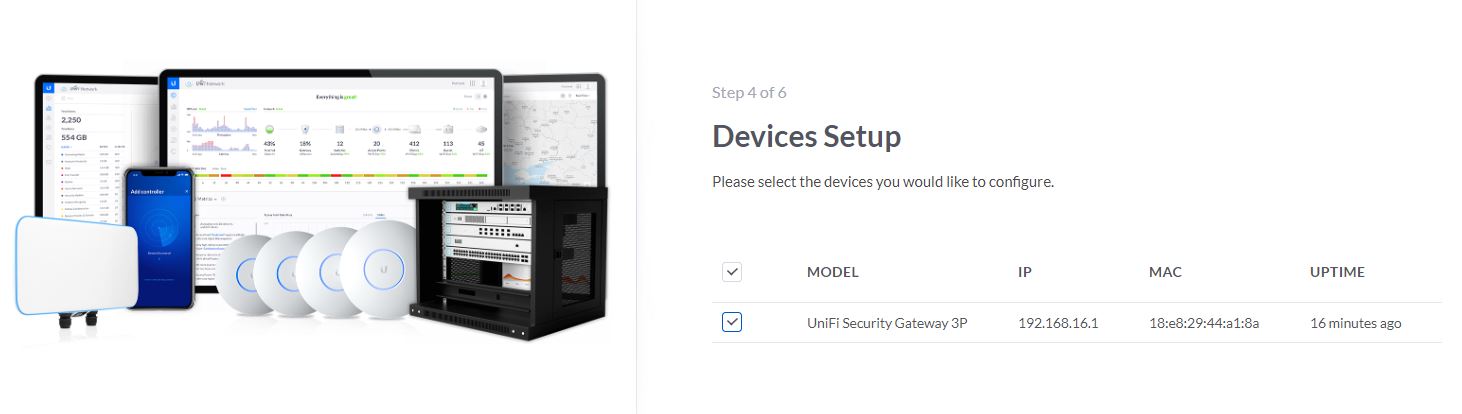
Figure 4
After the wizard has been completed you can start to play with the friendly user interface. Figure 5 and 6 show the USG Device status (the fourth icons on the left panel (device))

Figure 5
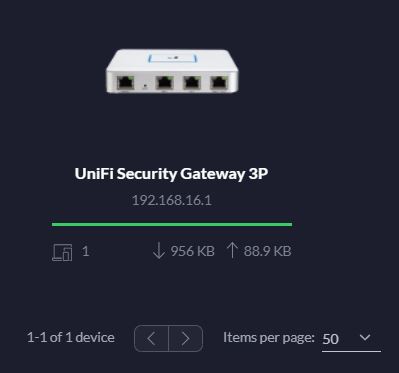
Figure 6
III VPN Creation
The Wizard consists in:
- Creating a new Network (Figure 6) selecting the options “Remote user VPN” and L2PT server. On Radius menu you must add a new profile as shown in (Figure 7)
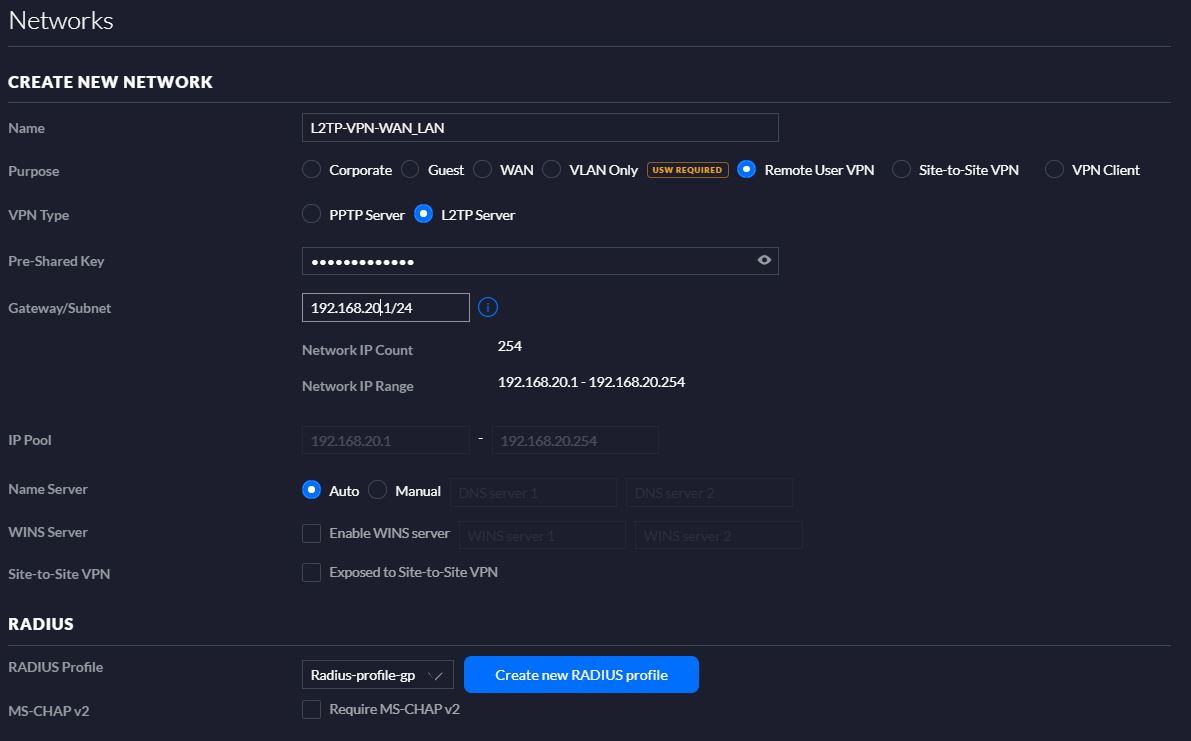
Figure 6
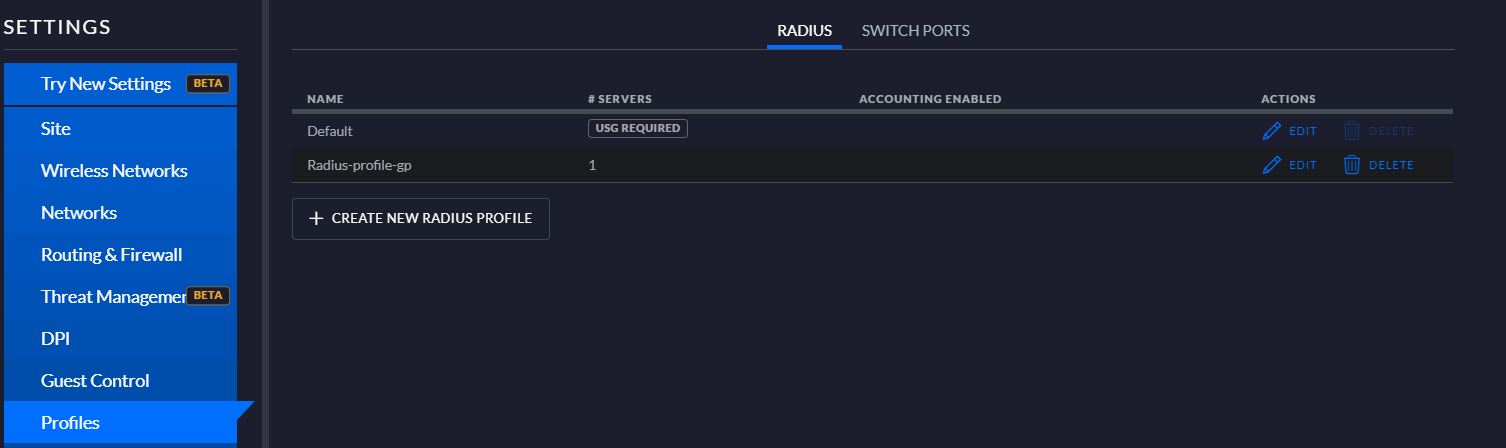
Figure 7
2) Enable Radius Server as shown in figure 8
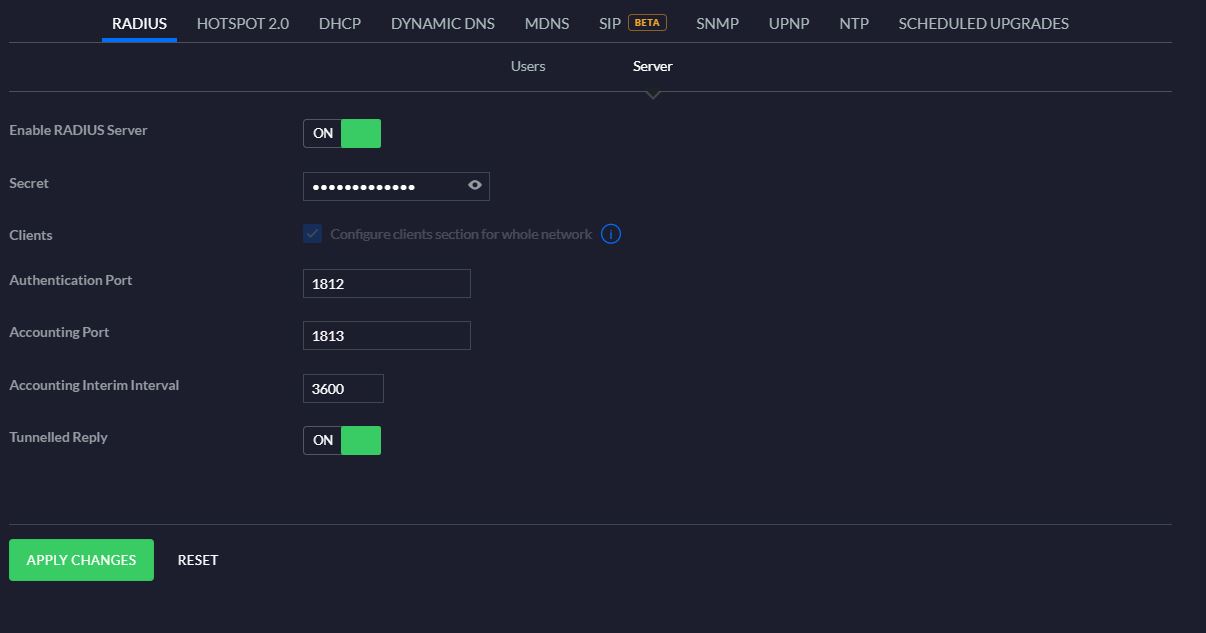
Figure 8
Now you can set on your windows/linux/mac/android device the VPN connection and test it
Before ending the article two more notes.
- If you see the provisioning entry on the web interface, it means USG is loading and saving the new configuration.
- You can have all detail about USG products at the following internet address: https://www.ui.com/unifi-routing/usg/
 Figure 1
 Figure 2
 Figure 3
 Figure 4
 Figure 5
 Figure 6
 Figure 7
 Figure 8
 Figure 9

 Picture 1
 Picture 2
 Picture 3
 Picture 4
 Picture 5
 Picture 1
 Picture 2
 Picture 3
 Picture 1
 Picture 2
 Picture 3
 Picture 4
 Picture 5
 Picture 6