![]()
On January 24th I completed the VMCE 2021 training course.
In this article, I will describe the methodology I used in order to pass the final exam.
The six cornerstones of the preparation were:
1- Pay maximum attention to Veeam Backup & Replication components (Backup Server, Proxy, Wan Acceleration, Gateway) understanding their purpose, operation, and limitations. For example, for proxies to know the usage scenarios of the different transport modes (SAN, Virtual Appliance, Direct NFS, Network).
2- Understand the RPO (Recovery Point Object) and RTO (Recovery Time Object) theme by analyzing:
-
- Type and topology of protection (Backup, Replica, and Backup Copy Job)
- Type of repositories involved (Stand-alone, XFS / ReFS, Immutable, SOBR, capacity Tier and Archive Tier)
- Backup chain (Forever Forward Incremental, Reversed Incremental and Forward Incremental)
Note 1 : to verify the preparation the advice is to respond to imaginary requests for protection; for example, thegable.it customer requested a daily primary backup of their VMs with an RPO of 31 days, with a GFS retention of 8 Weeks and 12 Months. In addition, the backup data will have to be copied to a second site …
3- Reinforce the knowledge on the available recovery options (VBR manual), through the Veeam Explorer, also in this case paying particular attention to the usage scenarios and limitations.
4- Massively use the laboratory to establish not only theoretical aspects but also real implementation scenarios.
5- Know the Veeam ONE features (Infrastructure, Data Protection, Business View).
Note 2: Laboratories simplify learning by often turning theory into a wonderful game of trial and error.
Preparation time was 42 days roughly divided into 2 hours/day on average during the week and 4 hours/day on average on weekends.
6- To check your progress and for the final review, the following are available:
- The videos were created by Rasmus Haslund on the youtube platform.
- Rhys Hammond‘s online quizzes.
Concluding note:
Pearson-Vue test platform certifies VMCE-2021 competency.
You can take the exam either at a Pearson-Vue center or from your home and office.
While recognizing that online is a very convenient approach that eliminates all logistical problems, in my case a small problem presented itself.
My method of recalling stored information and its processing to answer questions often requires the use of a pen and inkwell *.
Well, the exam with the “home and office” option does not allow the use of any pencil and sheet of paper while in Pearson-Vue authorized centers it is often possible to use a small white board of the re-writable type.
In addition, by applying to a licensed center, you will also help Pearson-Vue centers pay back their investment.
*: To take and digitize notes, I have been using Remarkable 2 with utmost satisfaction for 6 months, which I highly recommend to all readers.
 Immagine 1
 Immagine 2
 Immagine 3
 Immagine 4
 Immagine 5
 Immagine 6
 Immagine 7
 Immagine 8
 Immagine 9
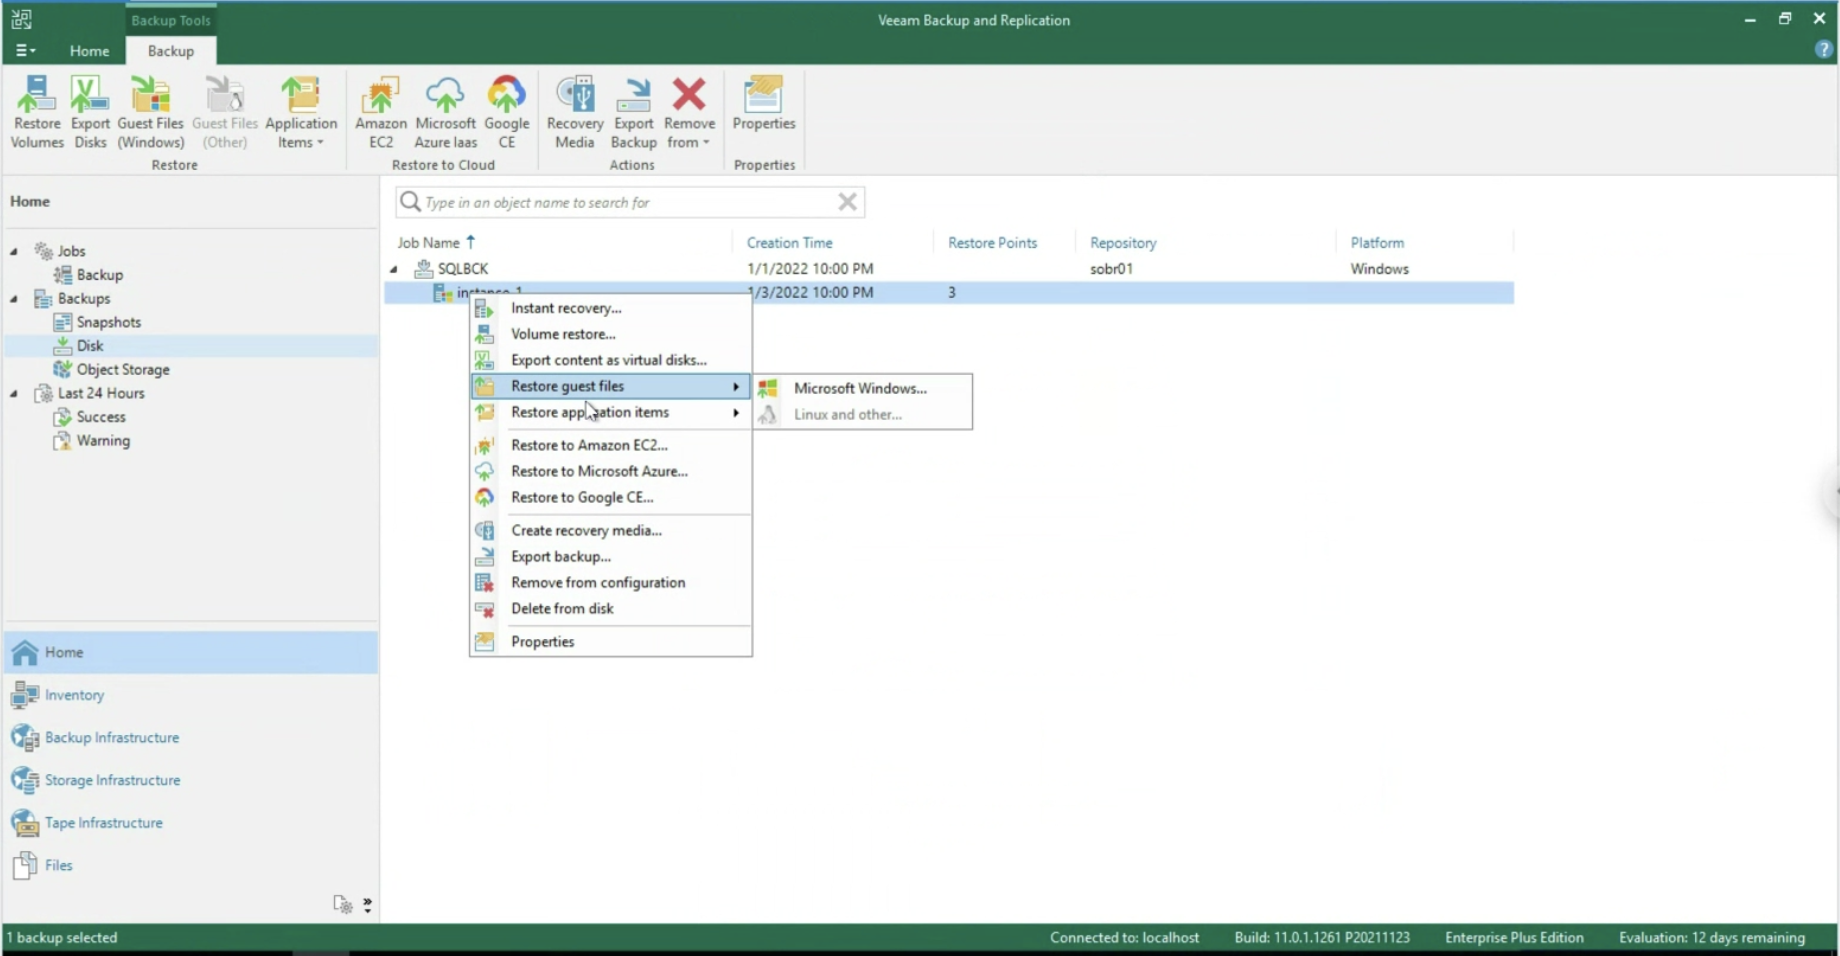 Immagine 10
 Immagine 12
 Immagine 13
 Picture 1
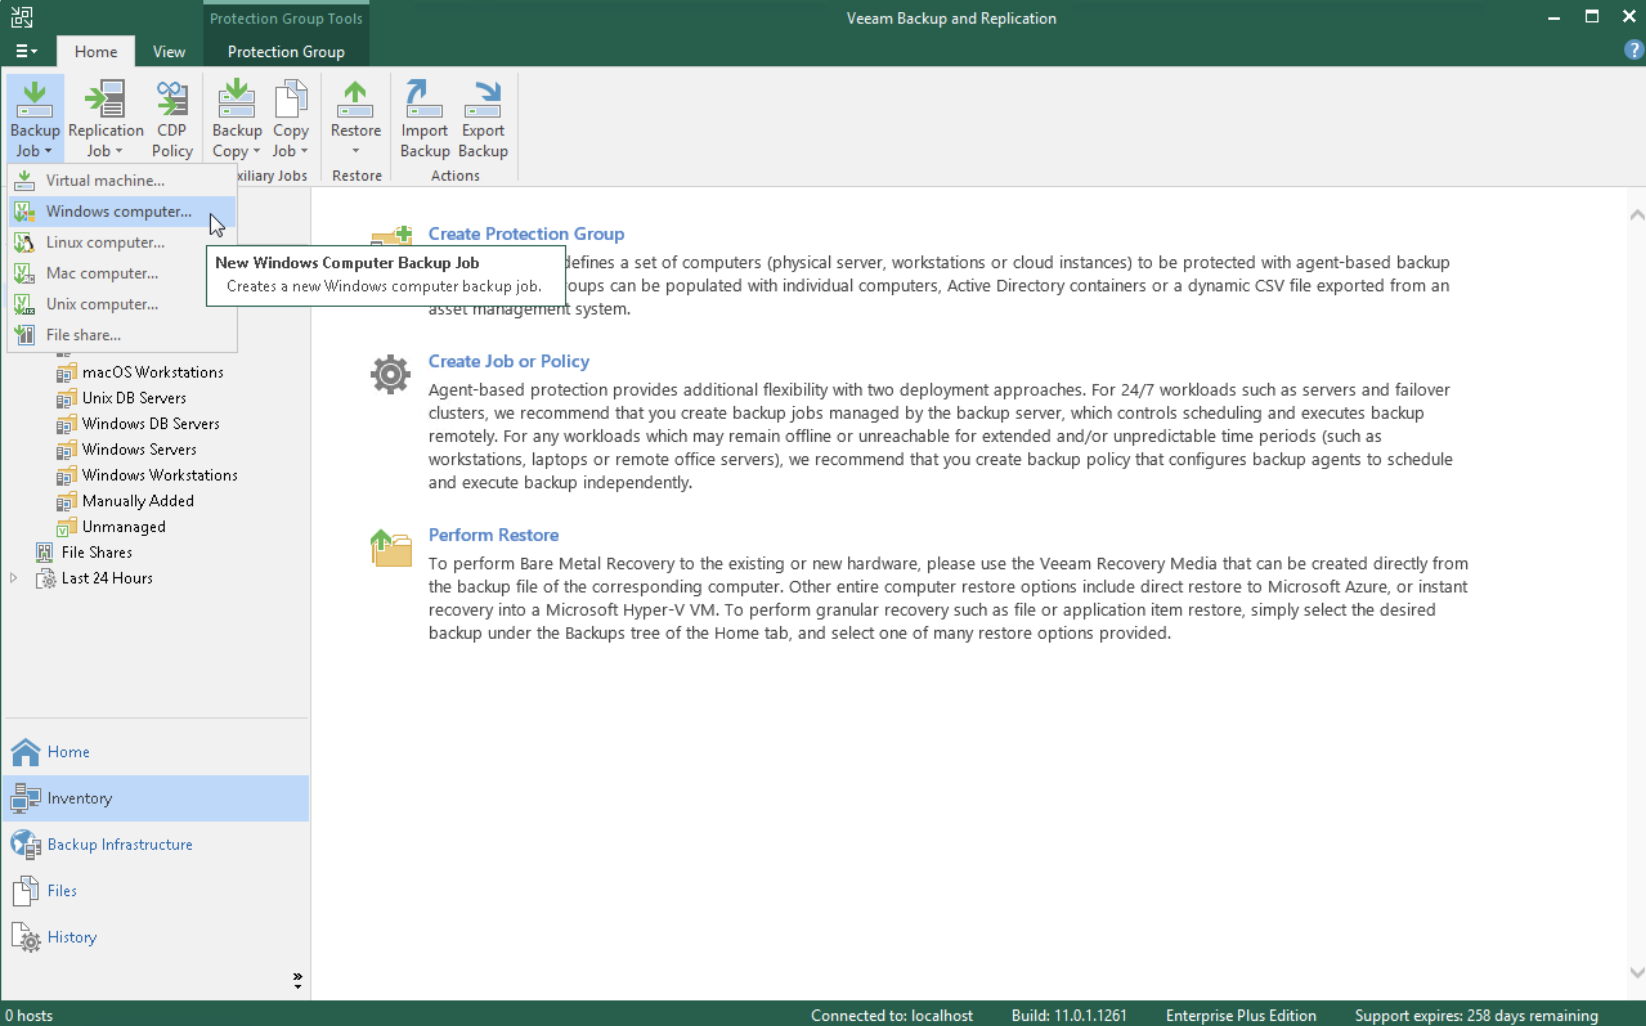 picture 2
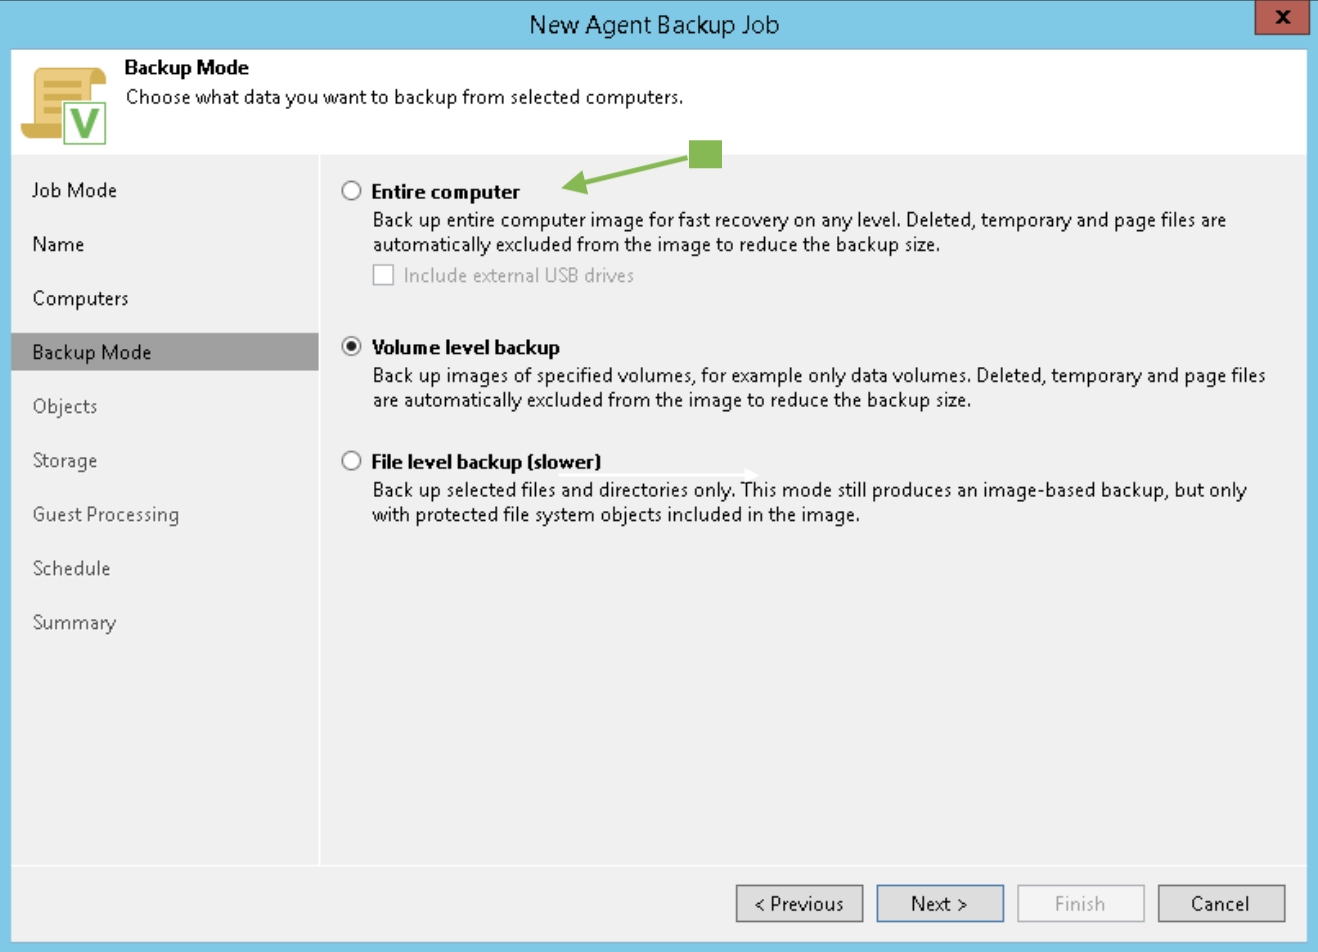 Picture 3
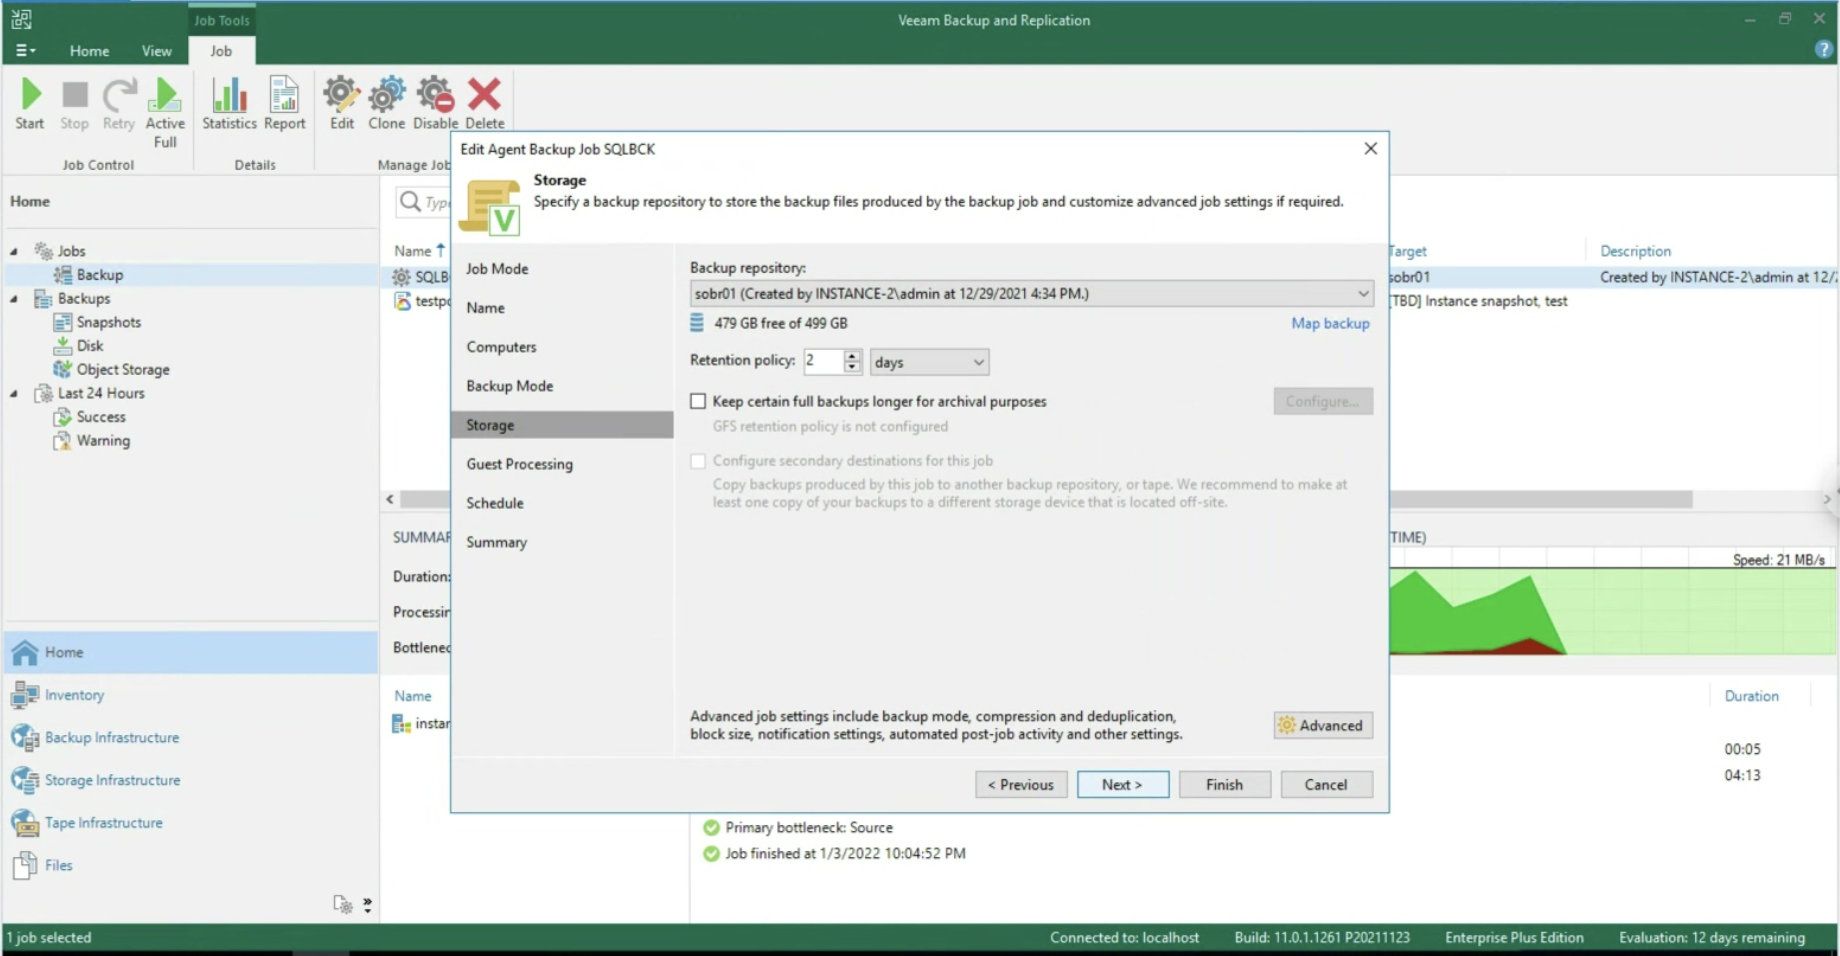 Picture 4
 Picture 5
 Picture 6
 Picture 7
 Image 8
 Image 9
 Image 10
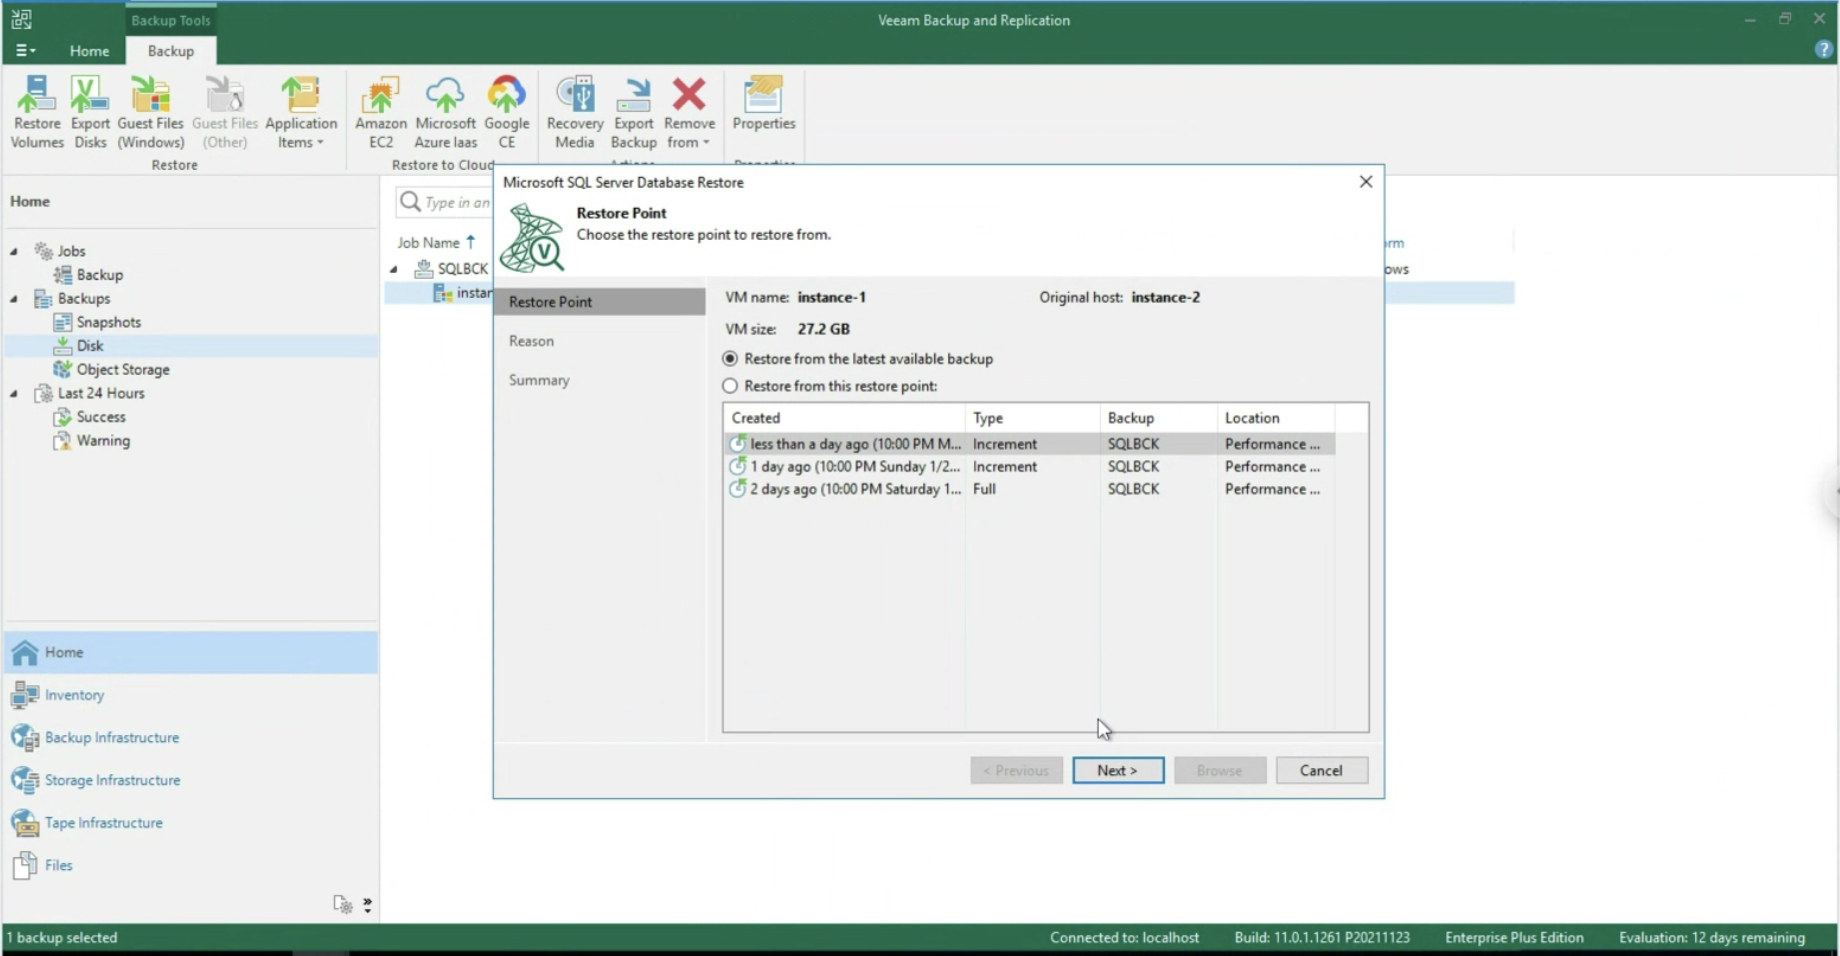 Image 12
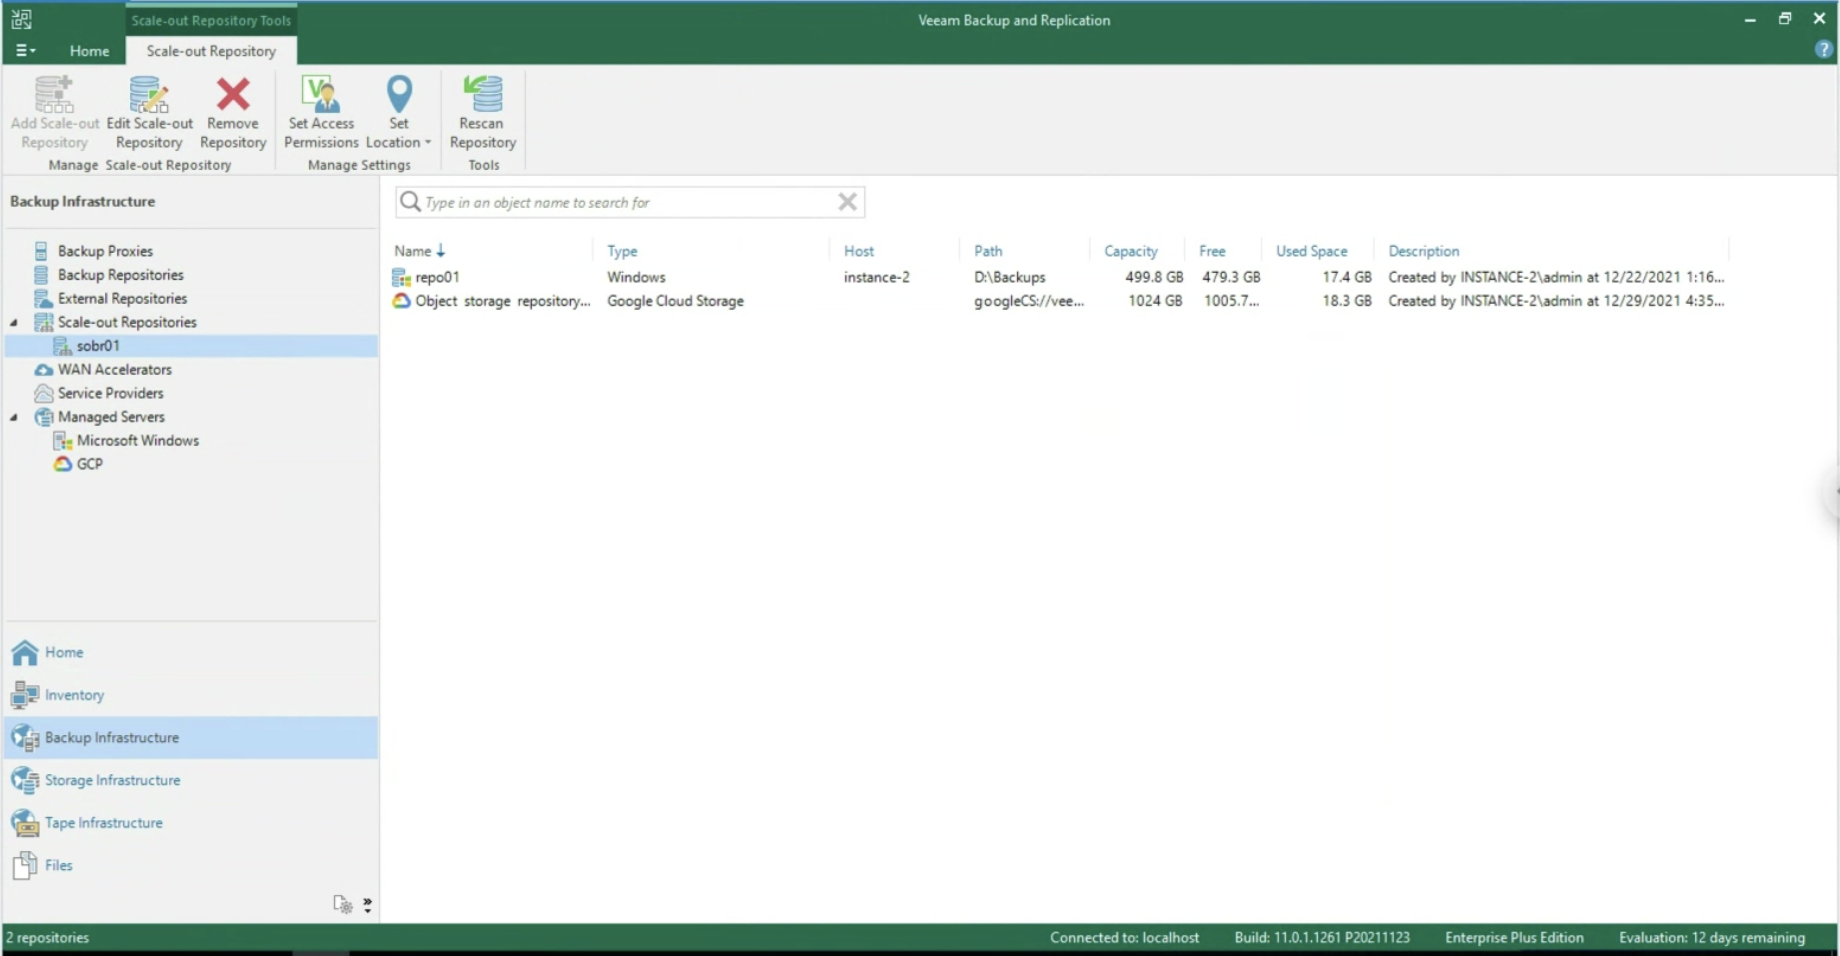 Image 13
 Immagine 1
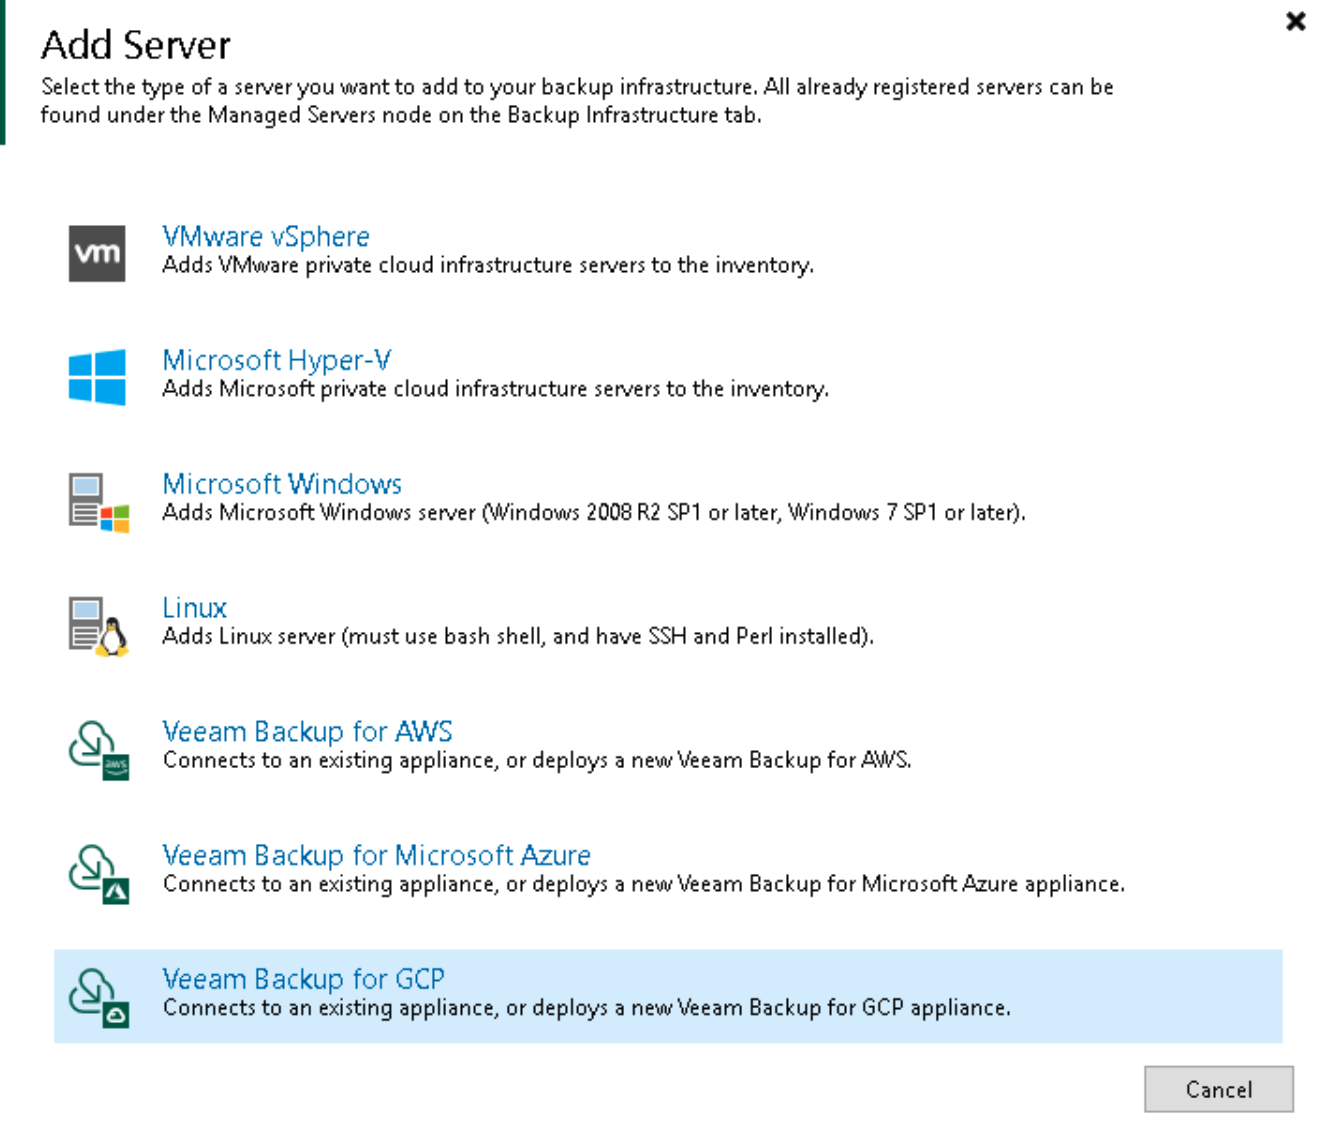 Immagine 2
 Immagine 3
 Immagine 4
 Immagine 5
 Immagine 6
 Immagine 7
 Immagine 8
 Immagine 9
 Immagine 11
 Immagine 12
 Immagine 13
 Immagine 14
 Immagine 15
 Immagine 16
 Immagine 17
 Immagine 18
 Immagine 19
 Immagine 20
 Immagine 21
 Immagine 22
 Immagine 23
 Immagine 24
 Immagine 25