
Many customers and partners ask whether it is possible to implement a GFS (Grandfather – Father – Son) type of protection policy when the data to be protected pertains to a NAS (Network network-attached storage) and the destination is a tape library.
Such automation with the current version of Veeam Backup & Replication(VBR) 12.1 is not yet available, something that is already possible when the data source is a backup of VMs and Physical Servers.
In this first article, I will help you achieve that goal by taking advantage of VBR ‘s great flexibility in creating backup jobs.
Note1: In the next one I will illustrate how to make GFS copies by exploiting a little-known feature of
VBR
, the Tape Copy.
Flexibility of Backup Jobs:
a. VBR manages tapes using an architecture that is based on:
- Media Pool(MP) are the logical containers of the tapes and can pertain to one or more Backup jobs (in our scenario we will create one MP per Job).
- Media Set(MS) identifies the restore points present on the tape (in our scenario we will create one MS per Backup job per single tape).
b. The proposed solution is to create weekly, monthly, and annual backup jobs in full mode. These backups should be created on a specific date and the backups should reside on tape pools created for the purpose.
Let’s see step by step how to proceed:
c. Creation of weekly and monthly Media Pools(MP).
 Picture 1
From image 2 it is important to note that a new tape will be used for each backup session.
 picture 2
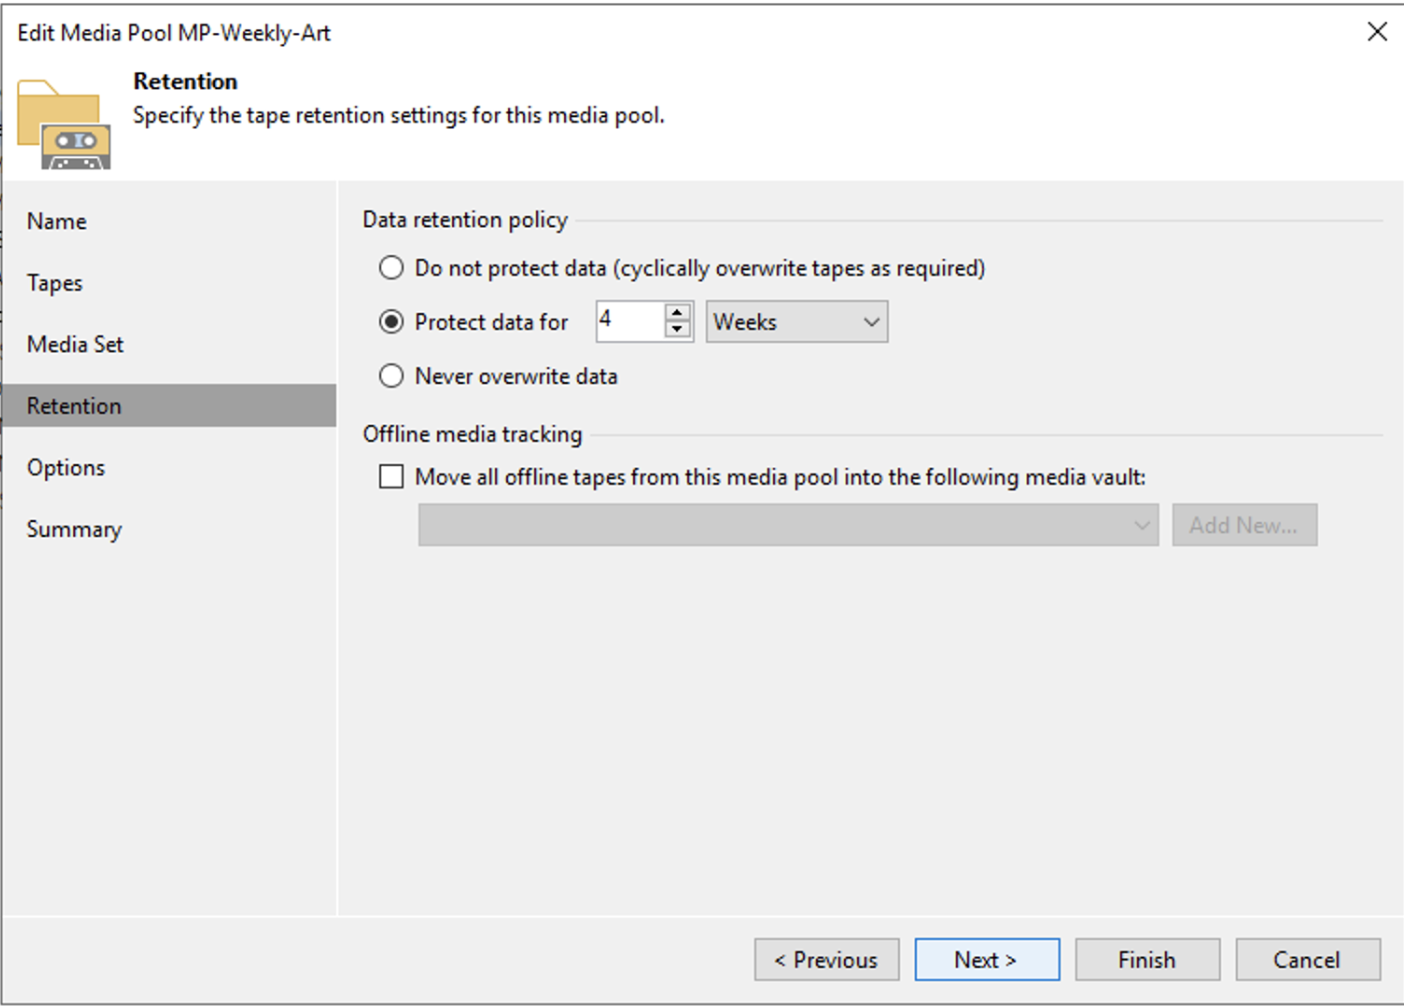
Image 3 shows how to set the retention, which in this scenario is 4 weeks.
 Picture 3
For the Monthly MP, the same procedure is used, changing the retention to 12 months (see images 4,5,6).
 Picture 4
 Picture 5
Image 6 shows that the retention for Full Months is 12 months.
 Picture 6
d. Creating Backup Jobs
 Picture 7
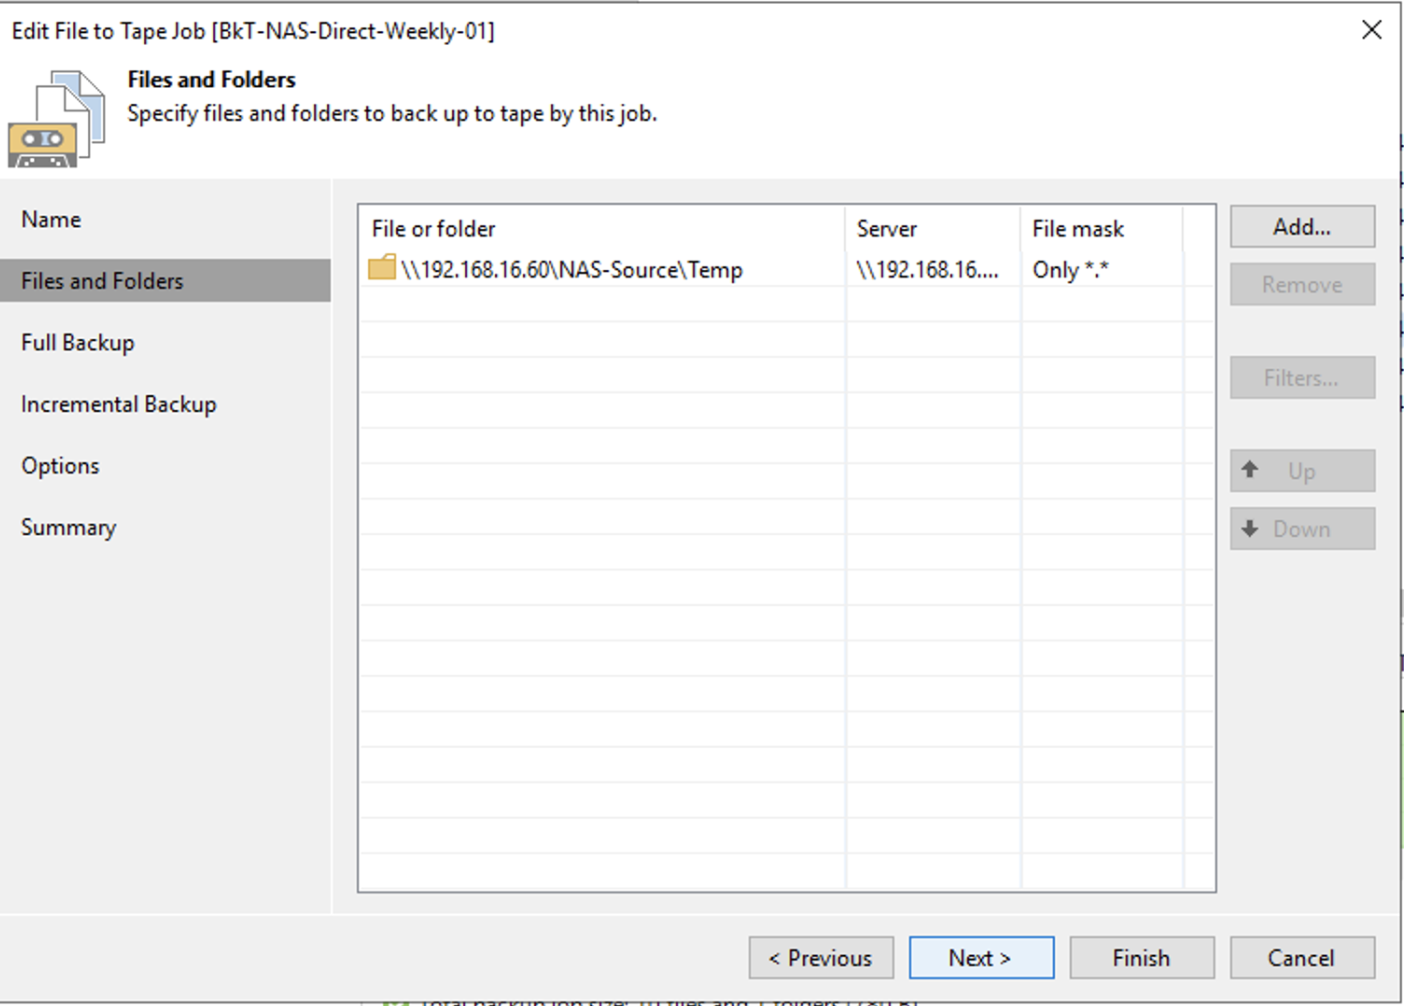 image 8
Image 9 highlights the scheduling of the Backup job.
The assumption is to make n full backup jobs for each GFS policy.
Our example scenario shows the first week’s job (blue arrow) with weekly retention (green arrow). For the second, third, and subsequent week, we will proceed in a completely similar way, replacing the value first with second, third, etc. under “Run the full backup automatically.”
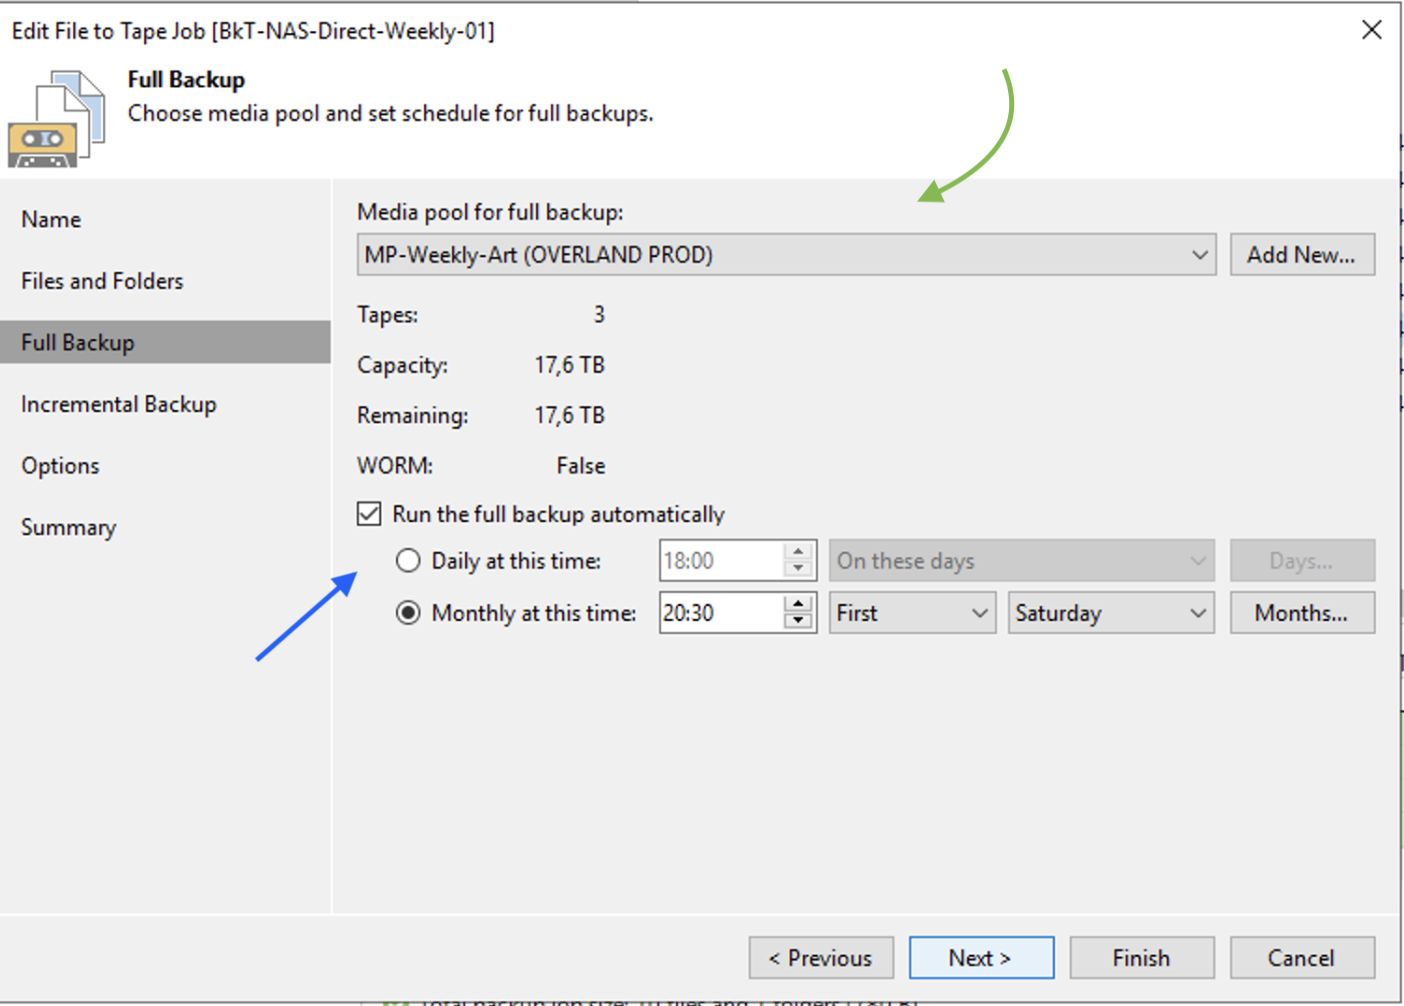 Image 9
Image 10 highlights (orange arrow) that no incremental backups will be initiated.
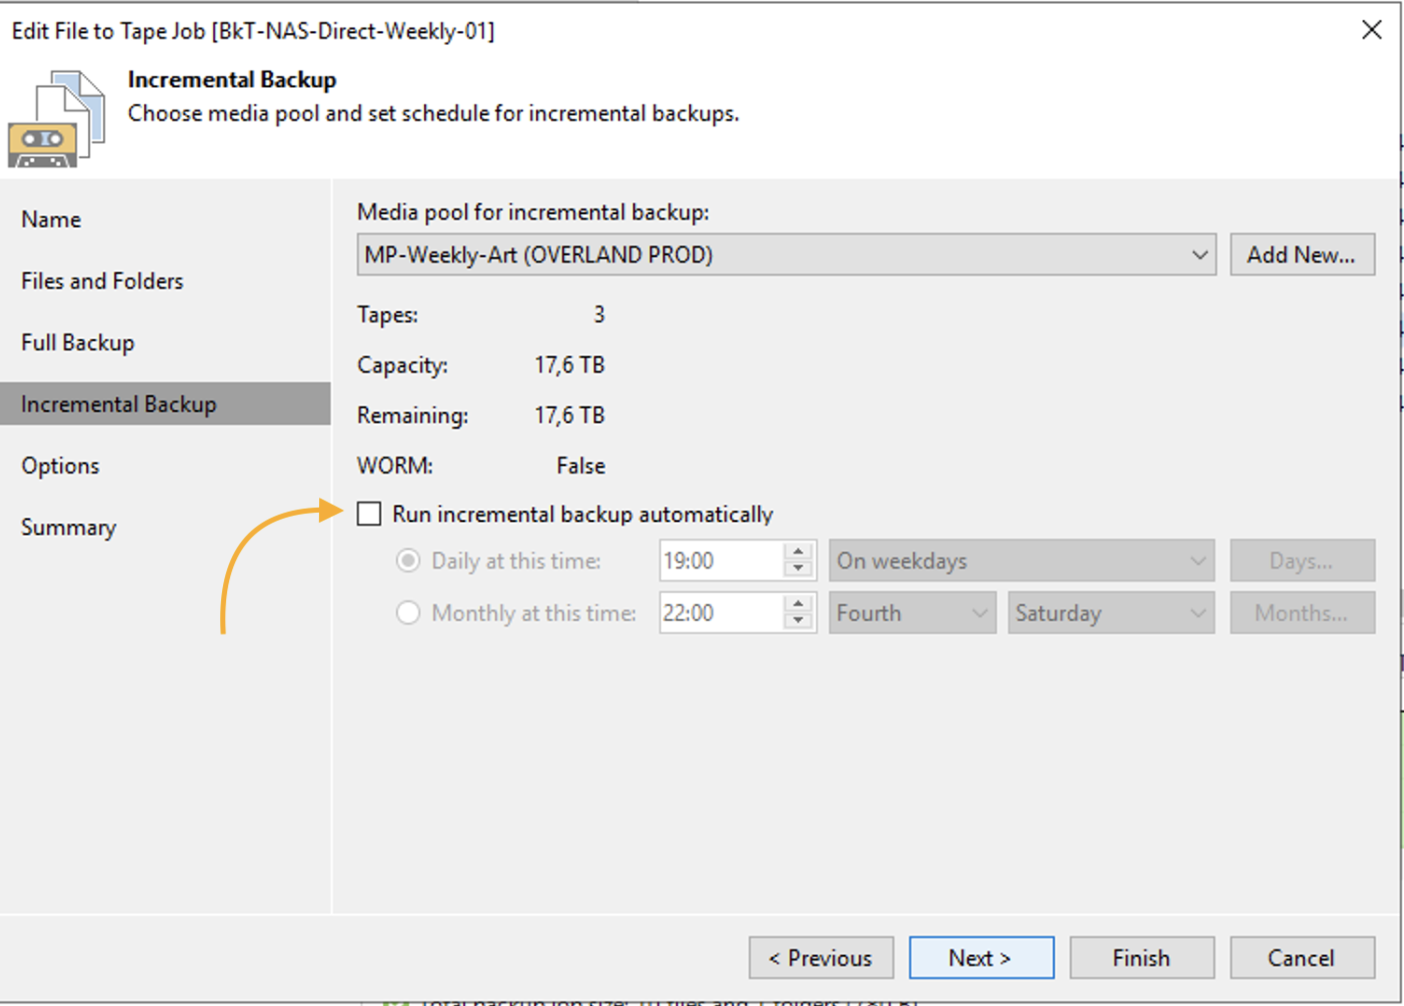 image 10
The same steps must be implemented to create monthly type GFS backups, in the example I set the backup job start on the 4th Saturday of the month (image 12 – blue arrow).
 Image 11
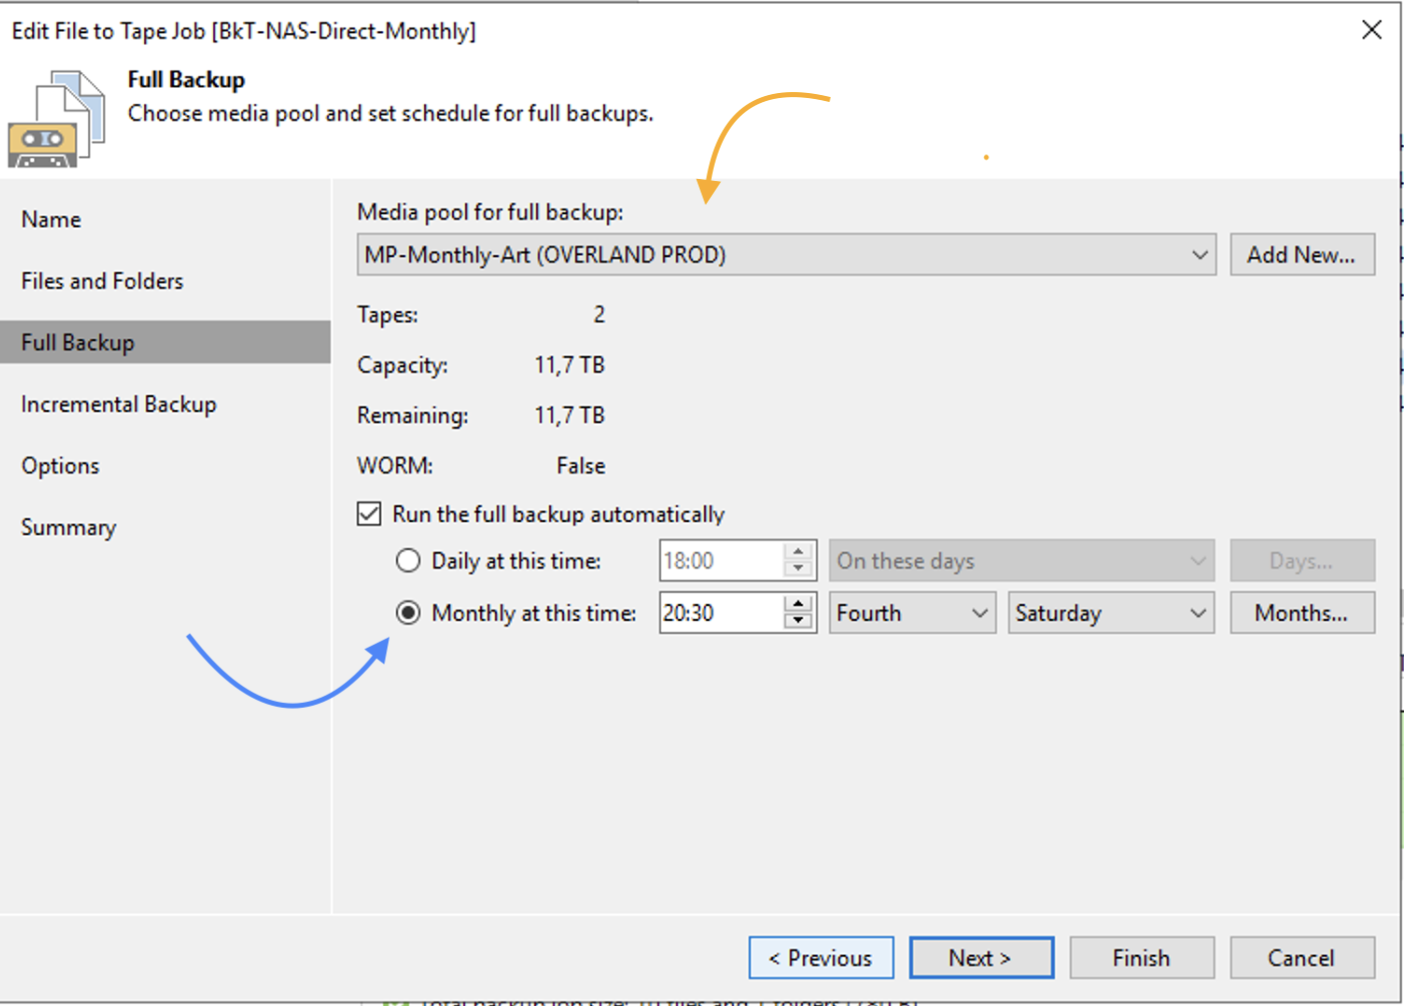 Image 12
 Image 13
Note 2:
- Licensing counts licenses per individual Backup job (verision 12.1).
- Conduct tests to make sure the scenario matches your needs. Get help from Veeam support.
In the next article, we will see how to use the Tape Copy feature.


 Picture 1
 picture 2
 Picture 3
 Picture 4
 Picture 5
 Picture 6
 Picture 7
 Image 8
 Image 9
 Image 10
 Image 11
 Image 10