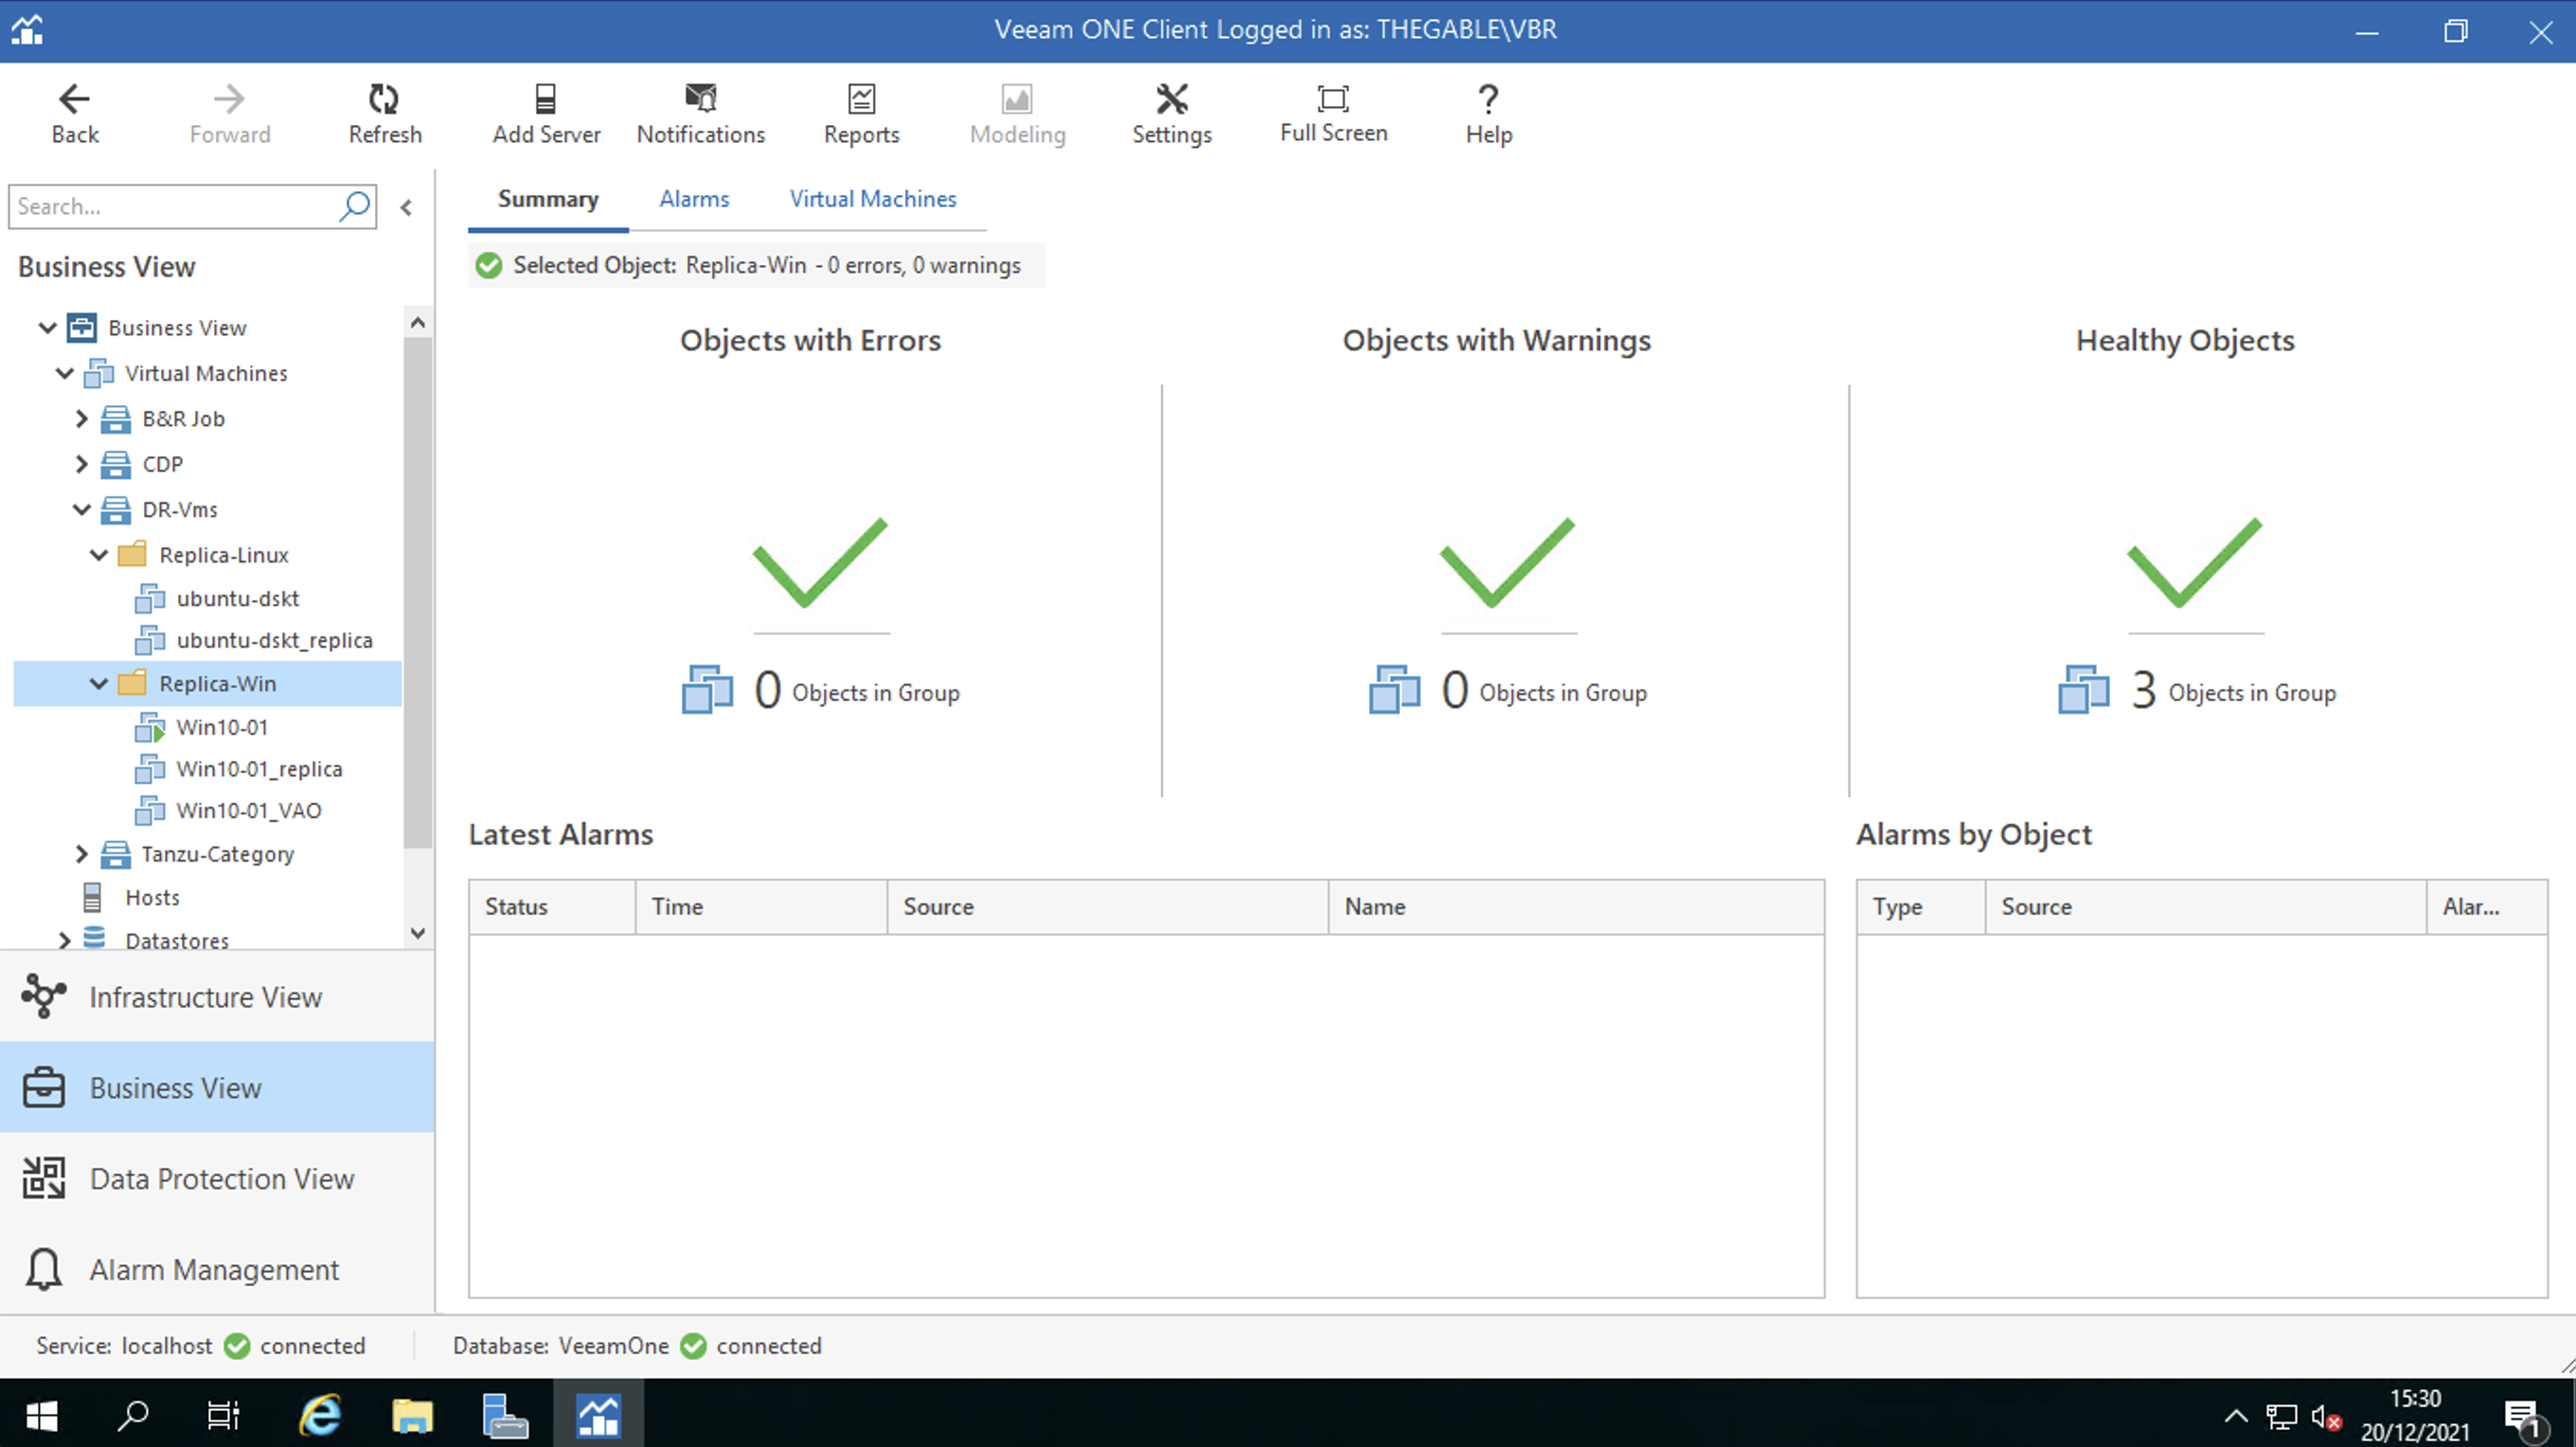
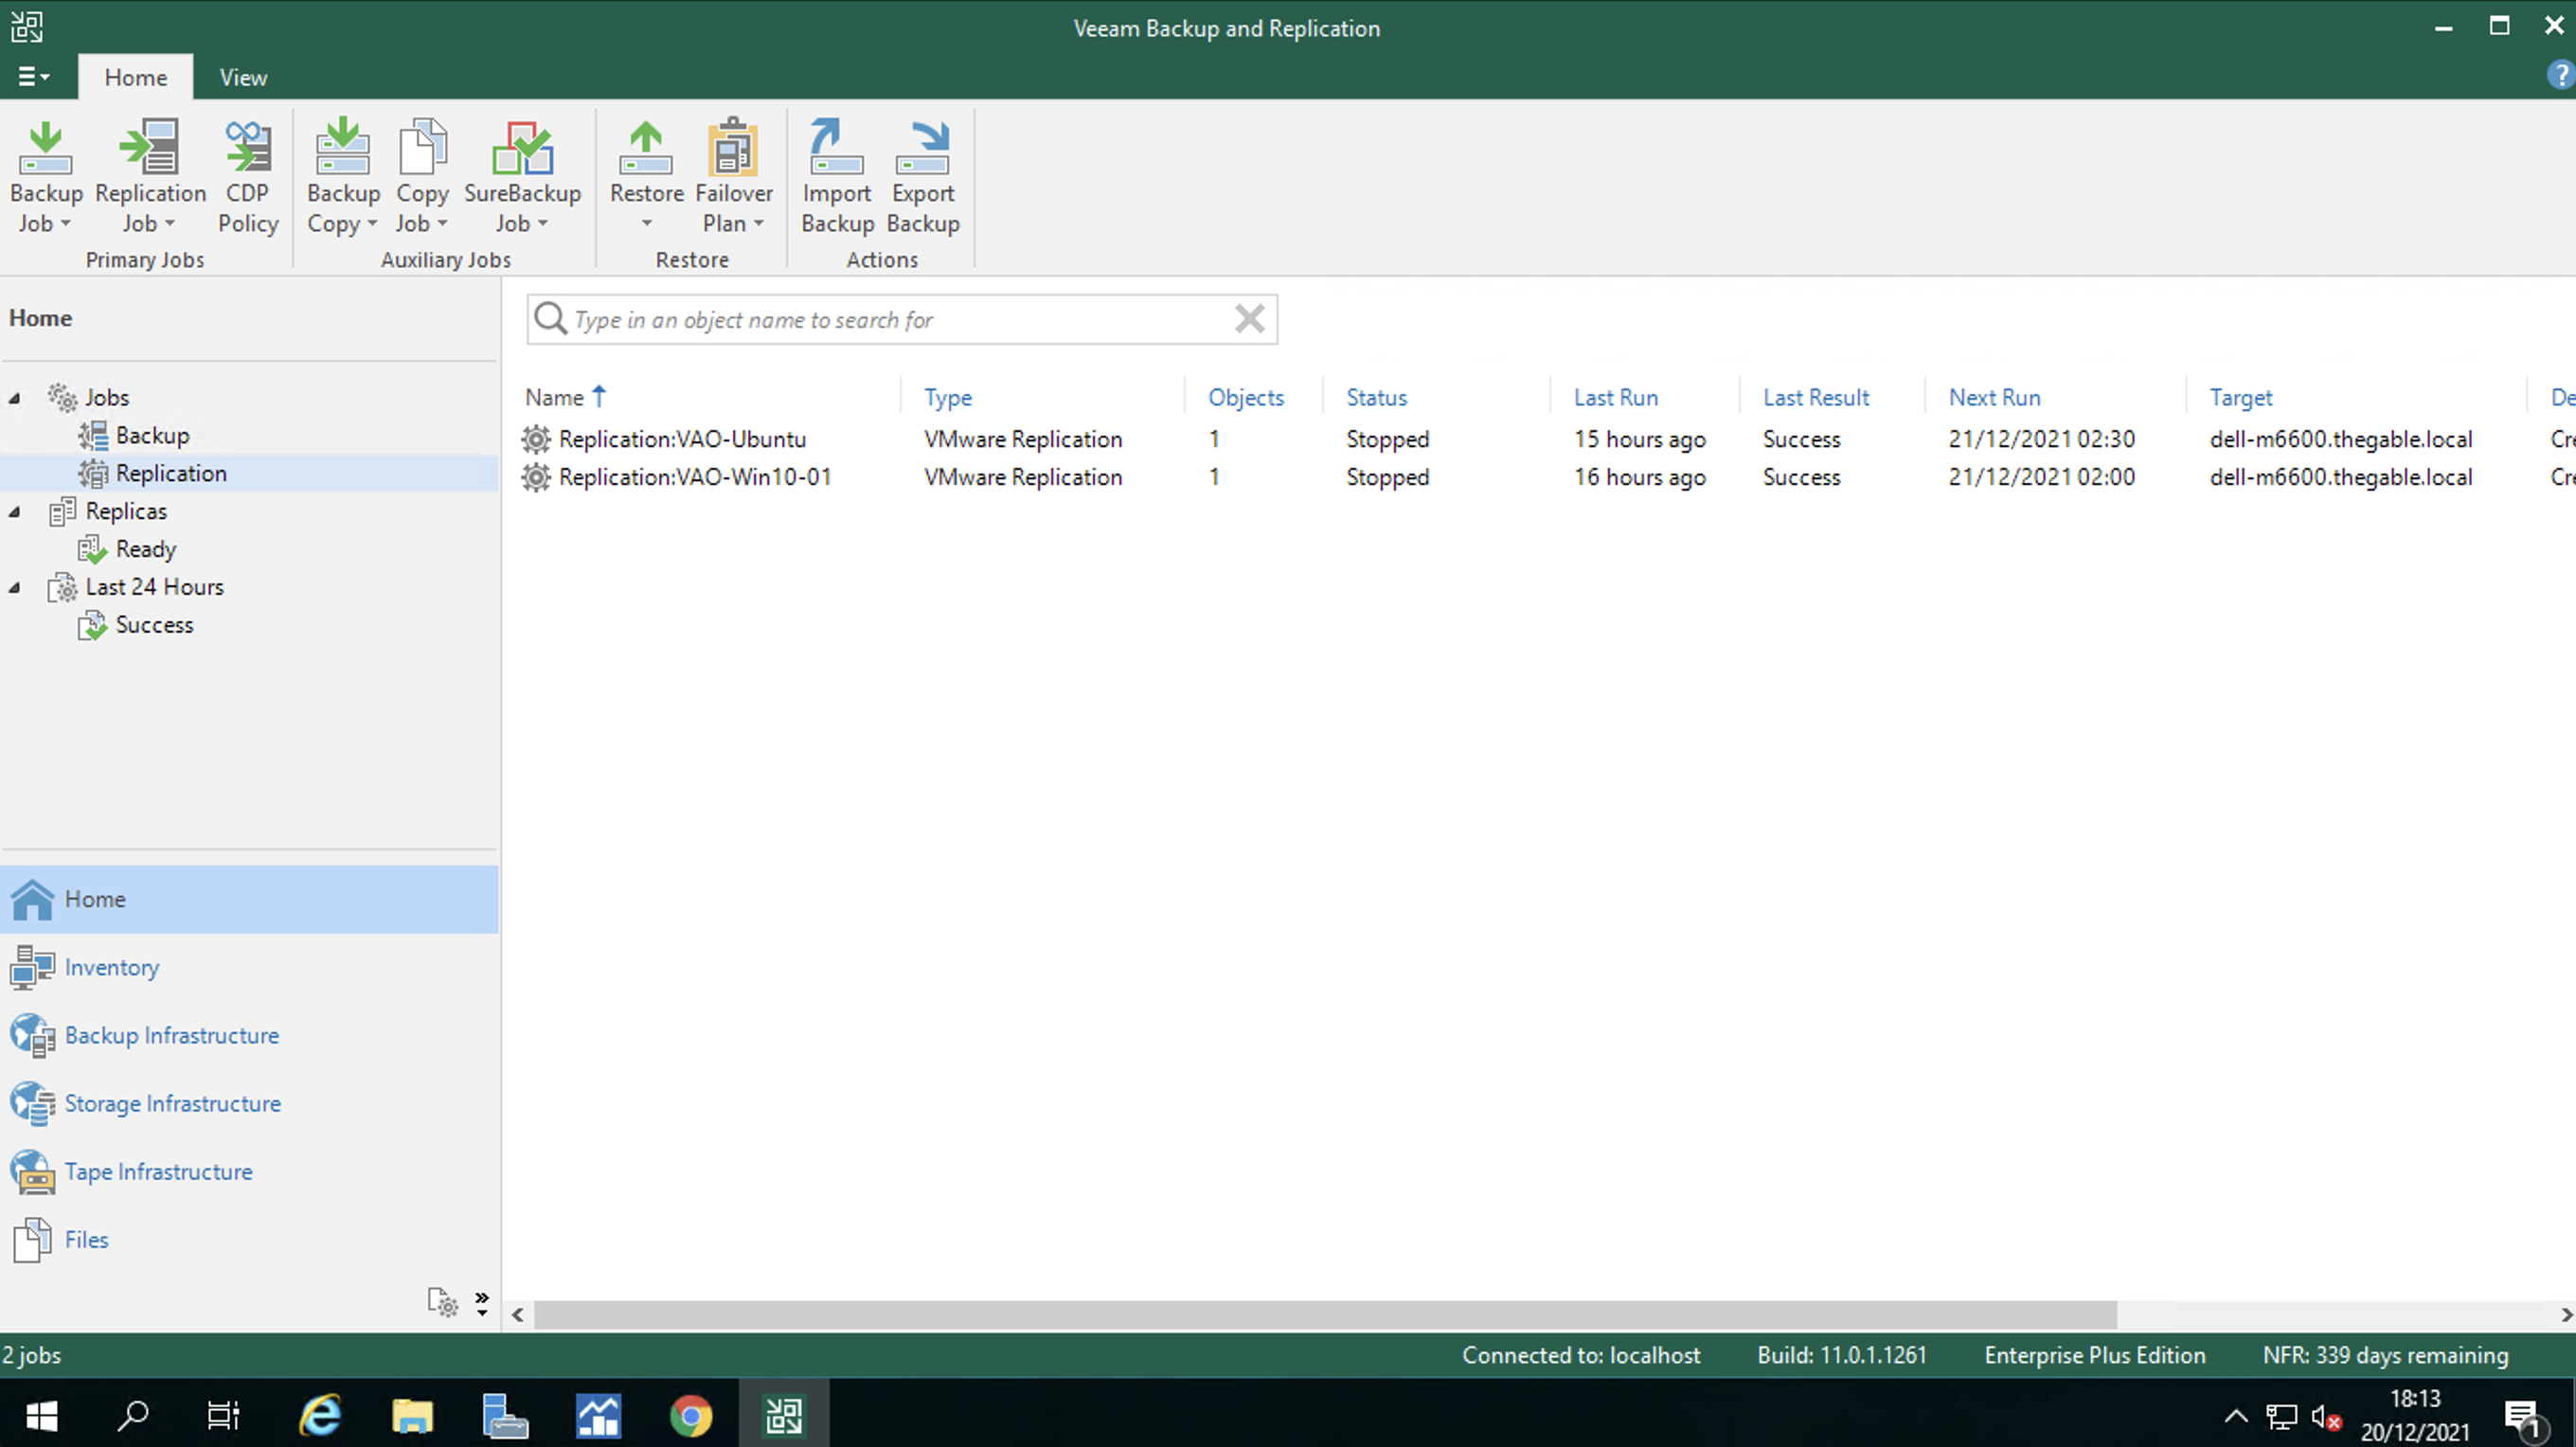
Veeam Disaster Recovery Orchestrator – Creating the plan

We have arrived at the latest article on Veeam Disaster Recovery Orchestrator version 5.

In this last part, we will concentrate on the efforts made previously and available on this site, to implement the Disaster Recovery Orchestration plan.

After logging in, the dashboard illustrates the status of the completed plans (image 1).
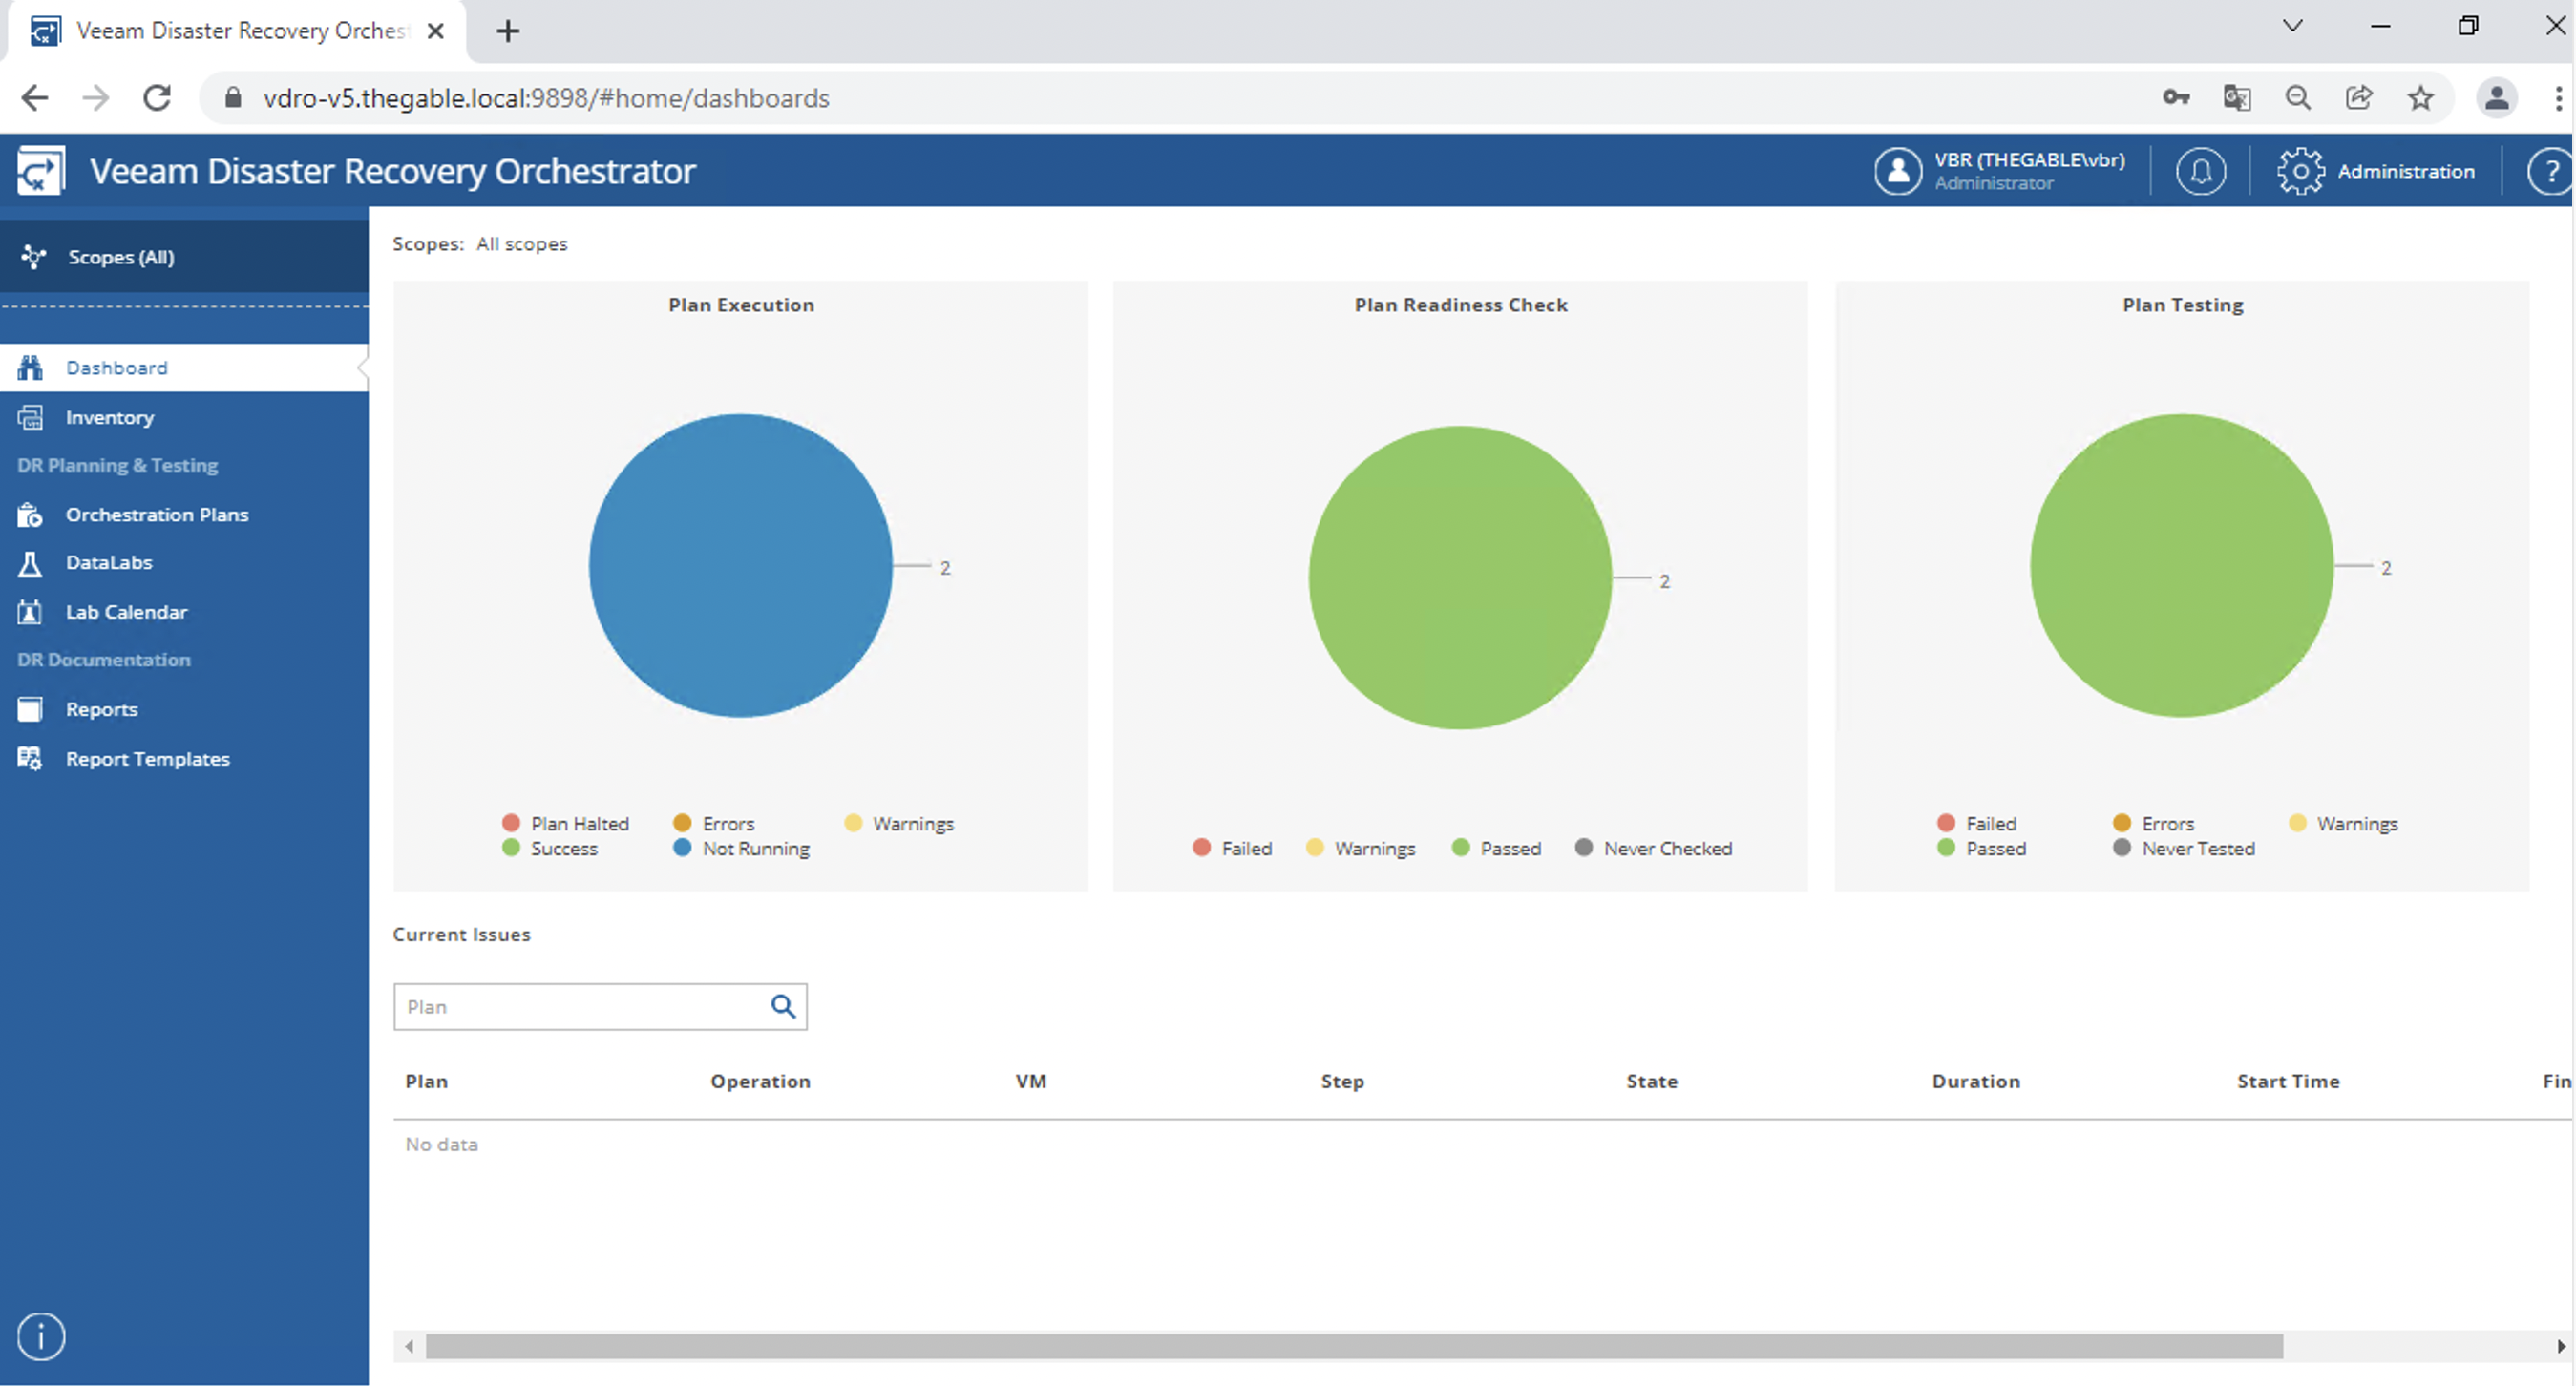
Picture 1

Note that, unlike the previous VDrO version, it is possible to filter planes based on “scopes” (image 2).
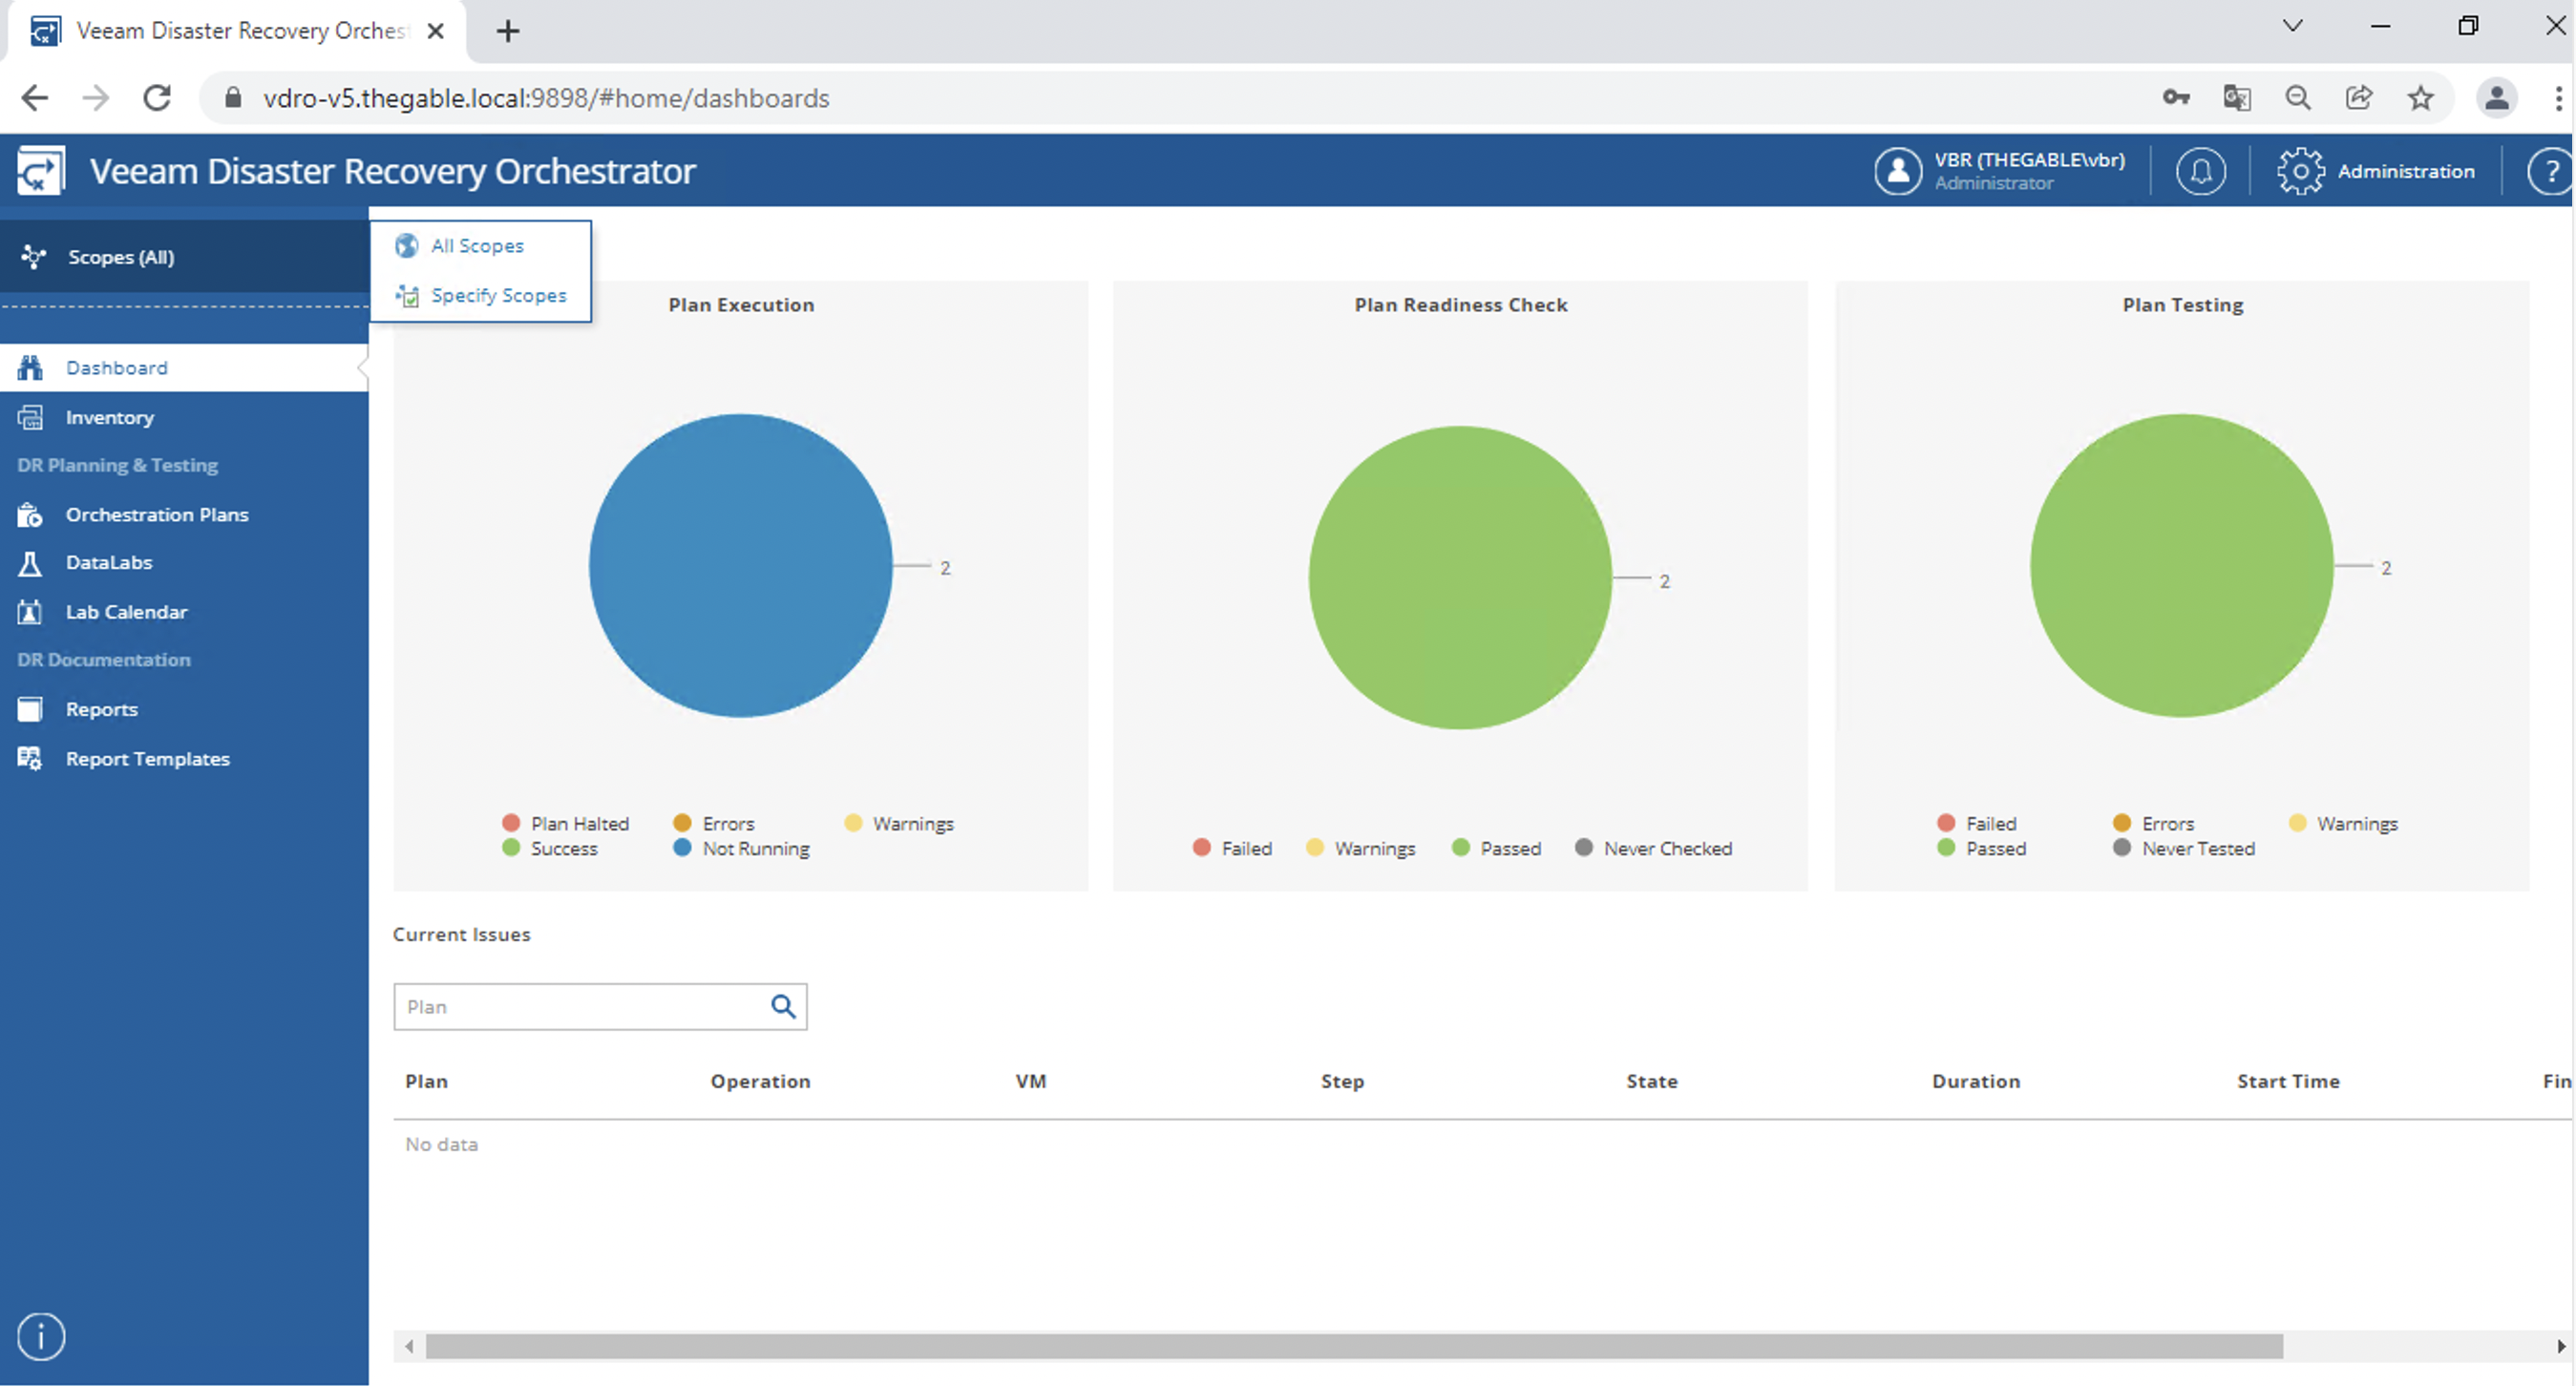
picture 2

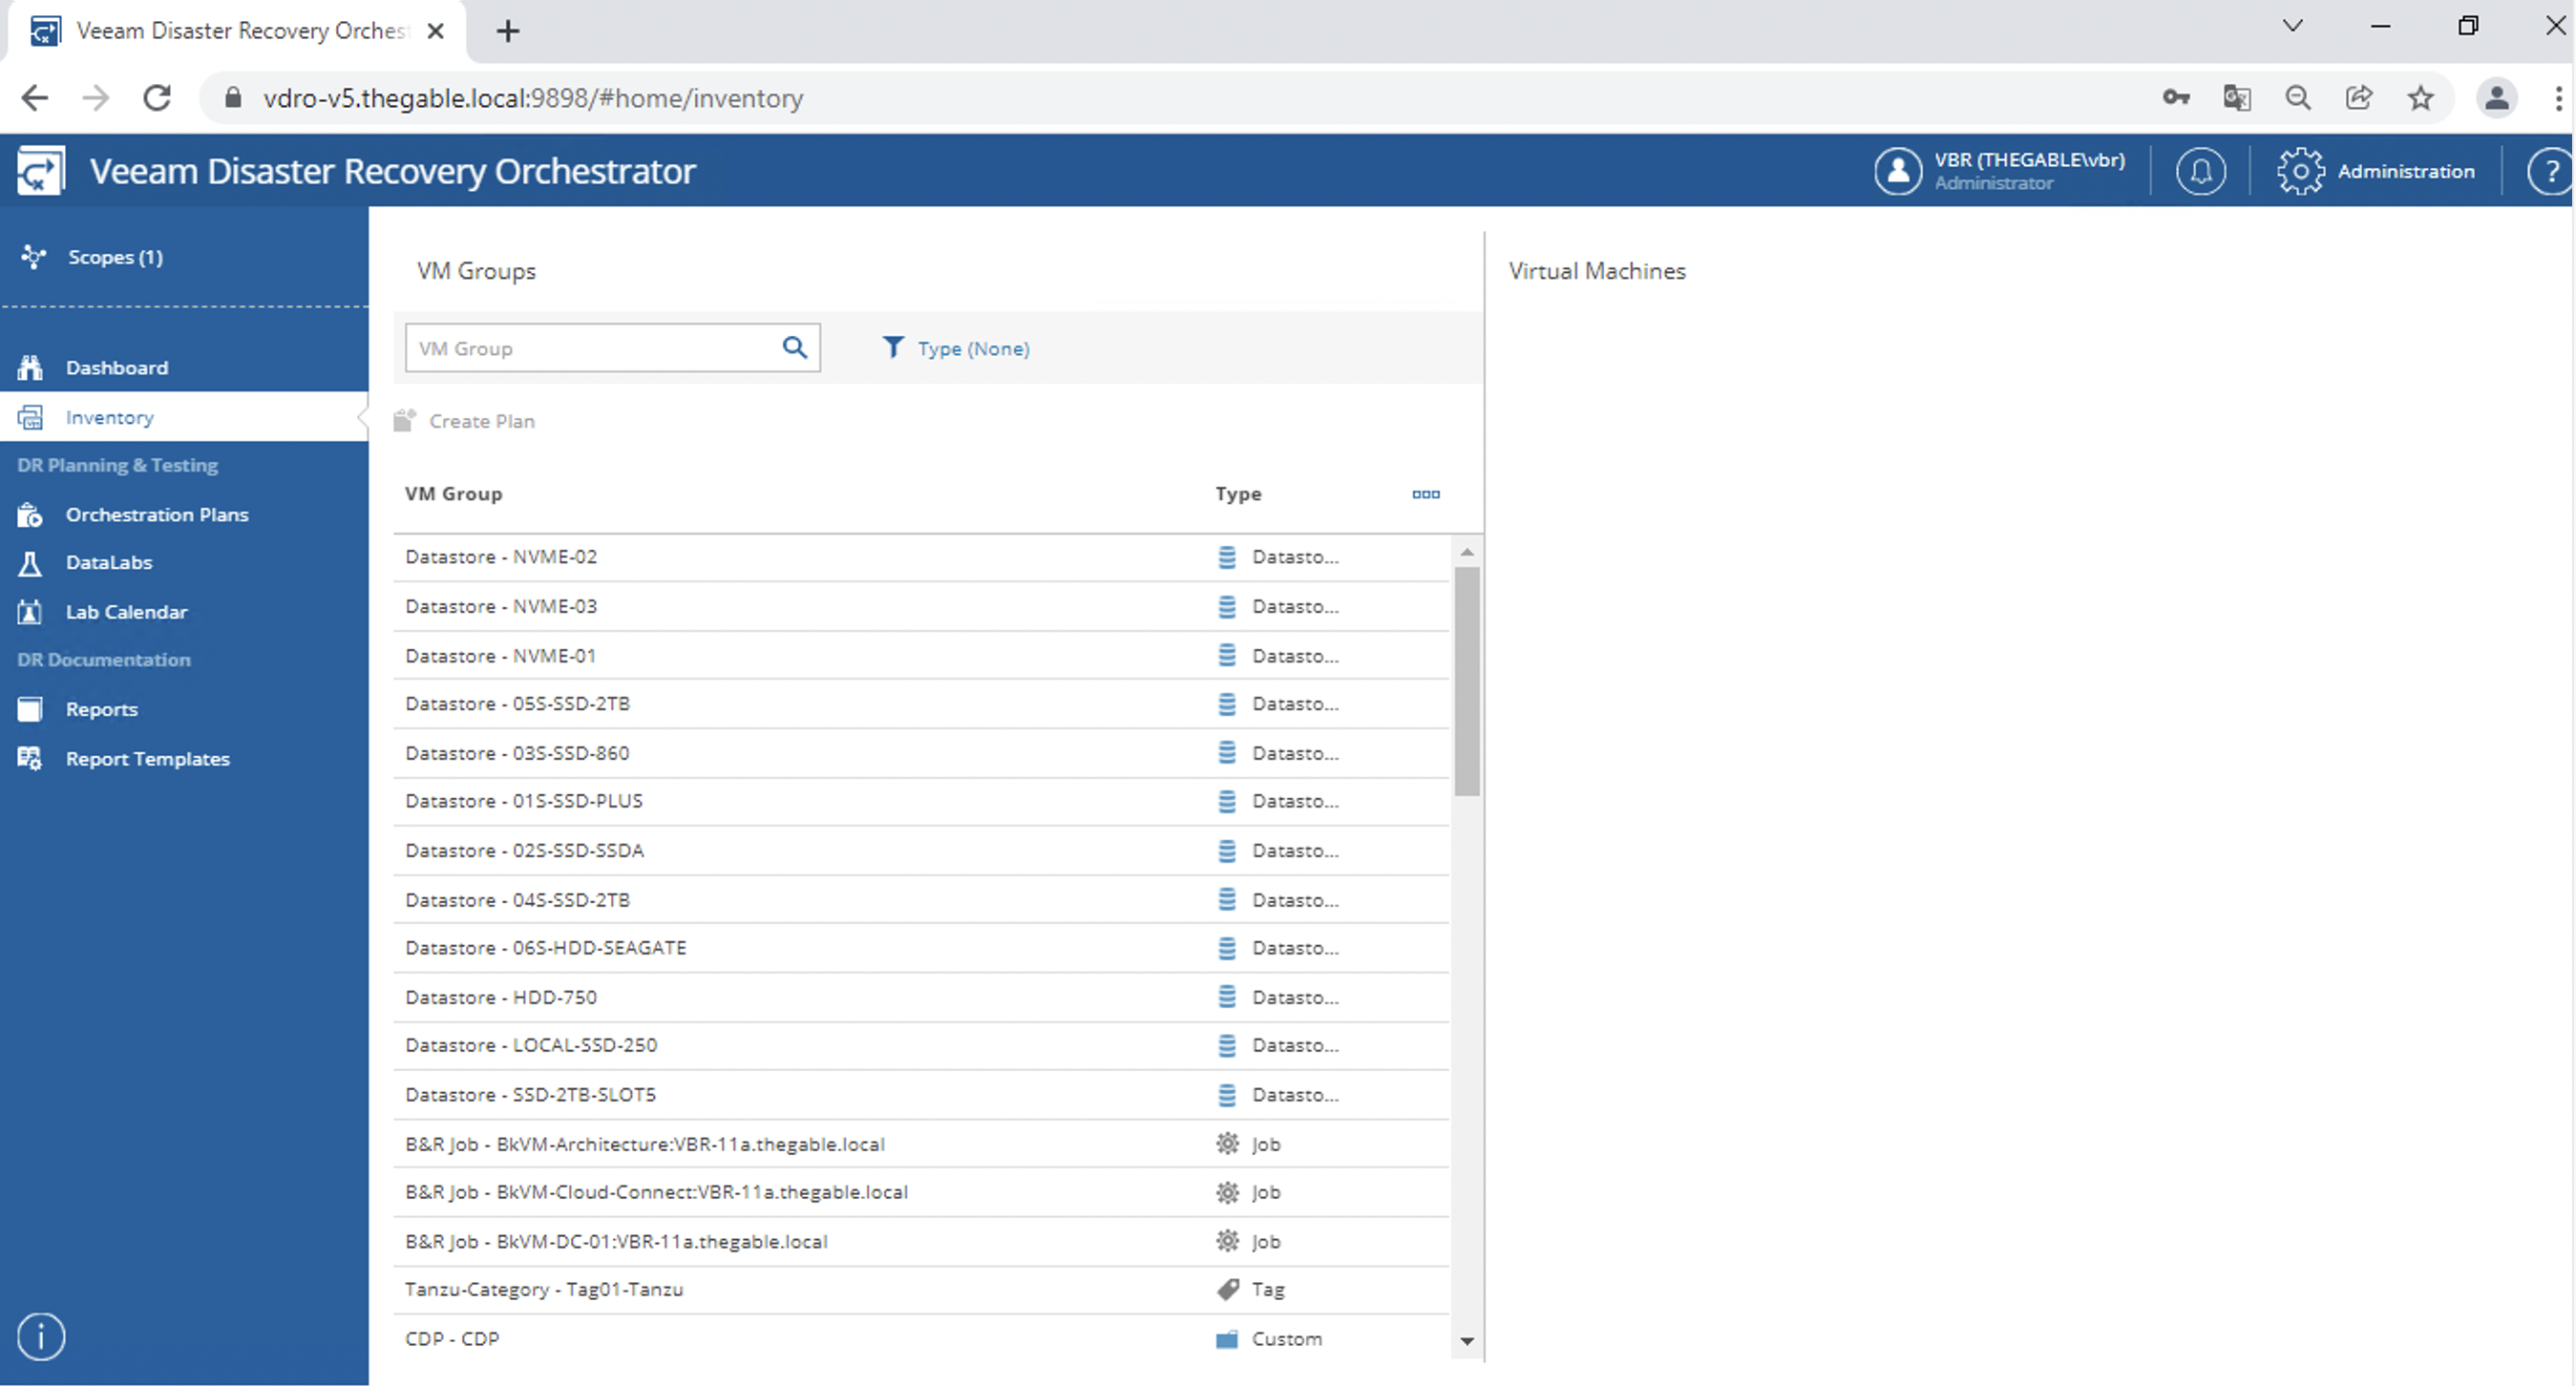
A second and very useful novelty of version 5 is the presence of the inventory items (image 3), where the VM Groups are reported.

This option immediately verifies that in the chosen “scope” there is the group of VMs that will implement the DR plan.
Picture 3

Image 4 shows the details of the Orchestration plans already created.

Picture 4

Let’s see now how to create a plan:

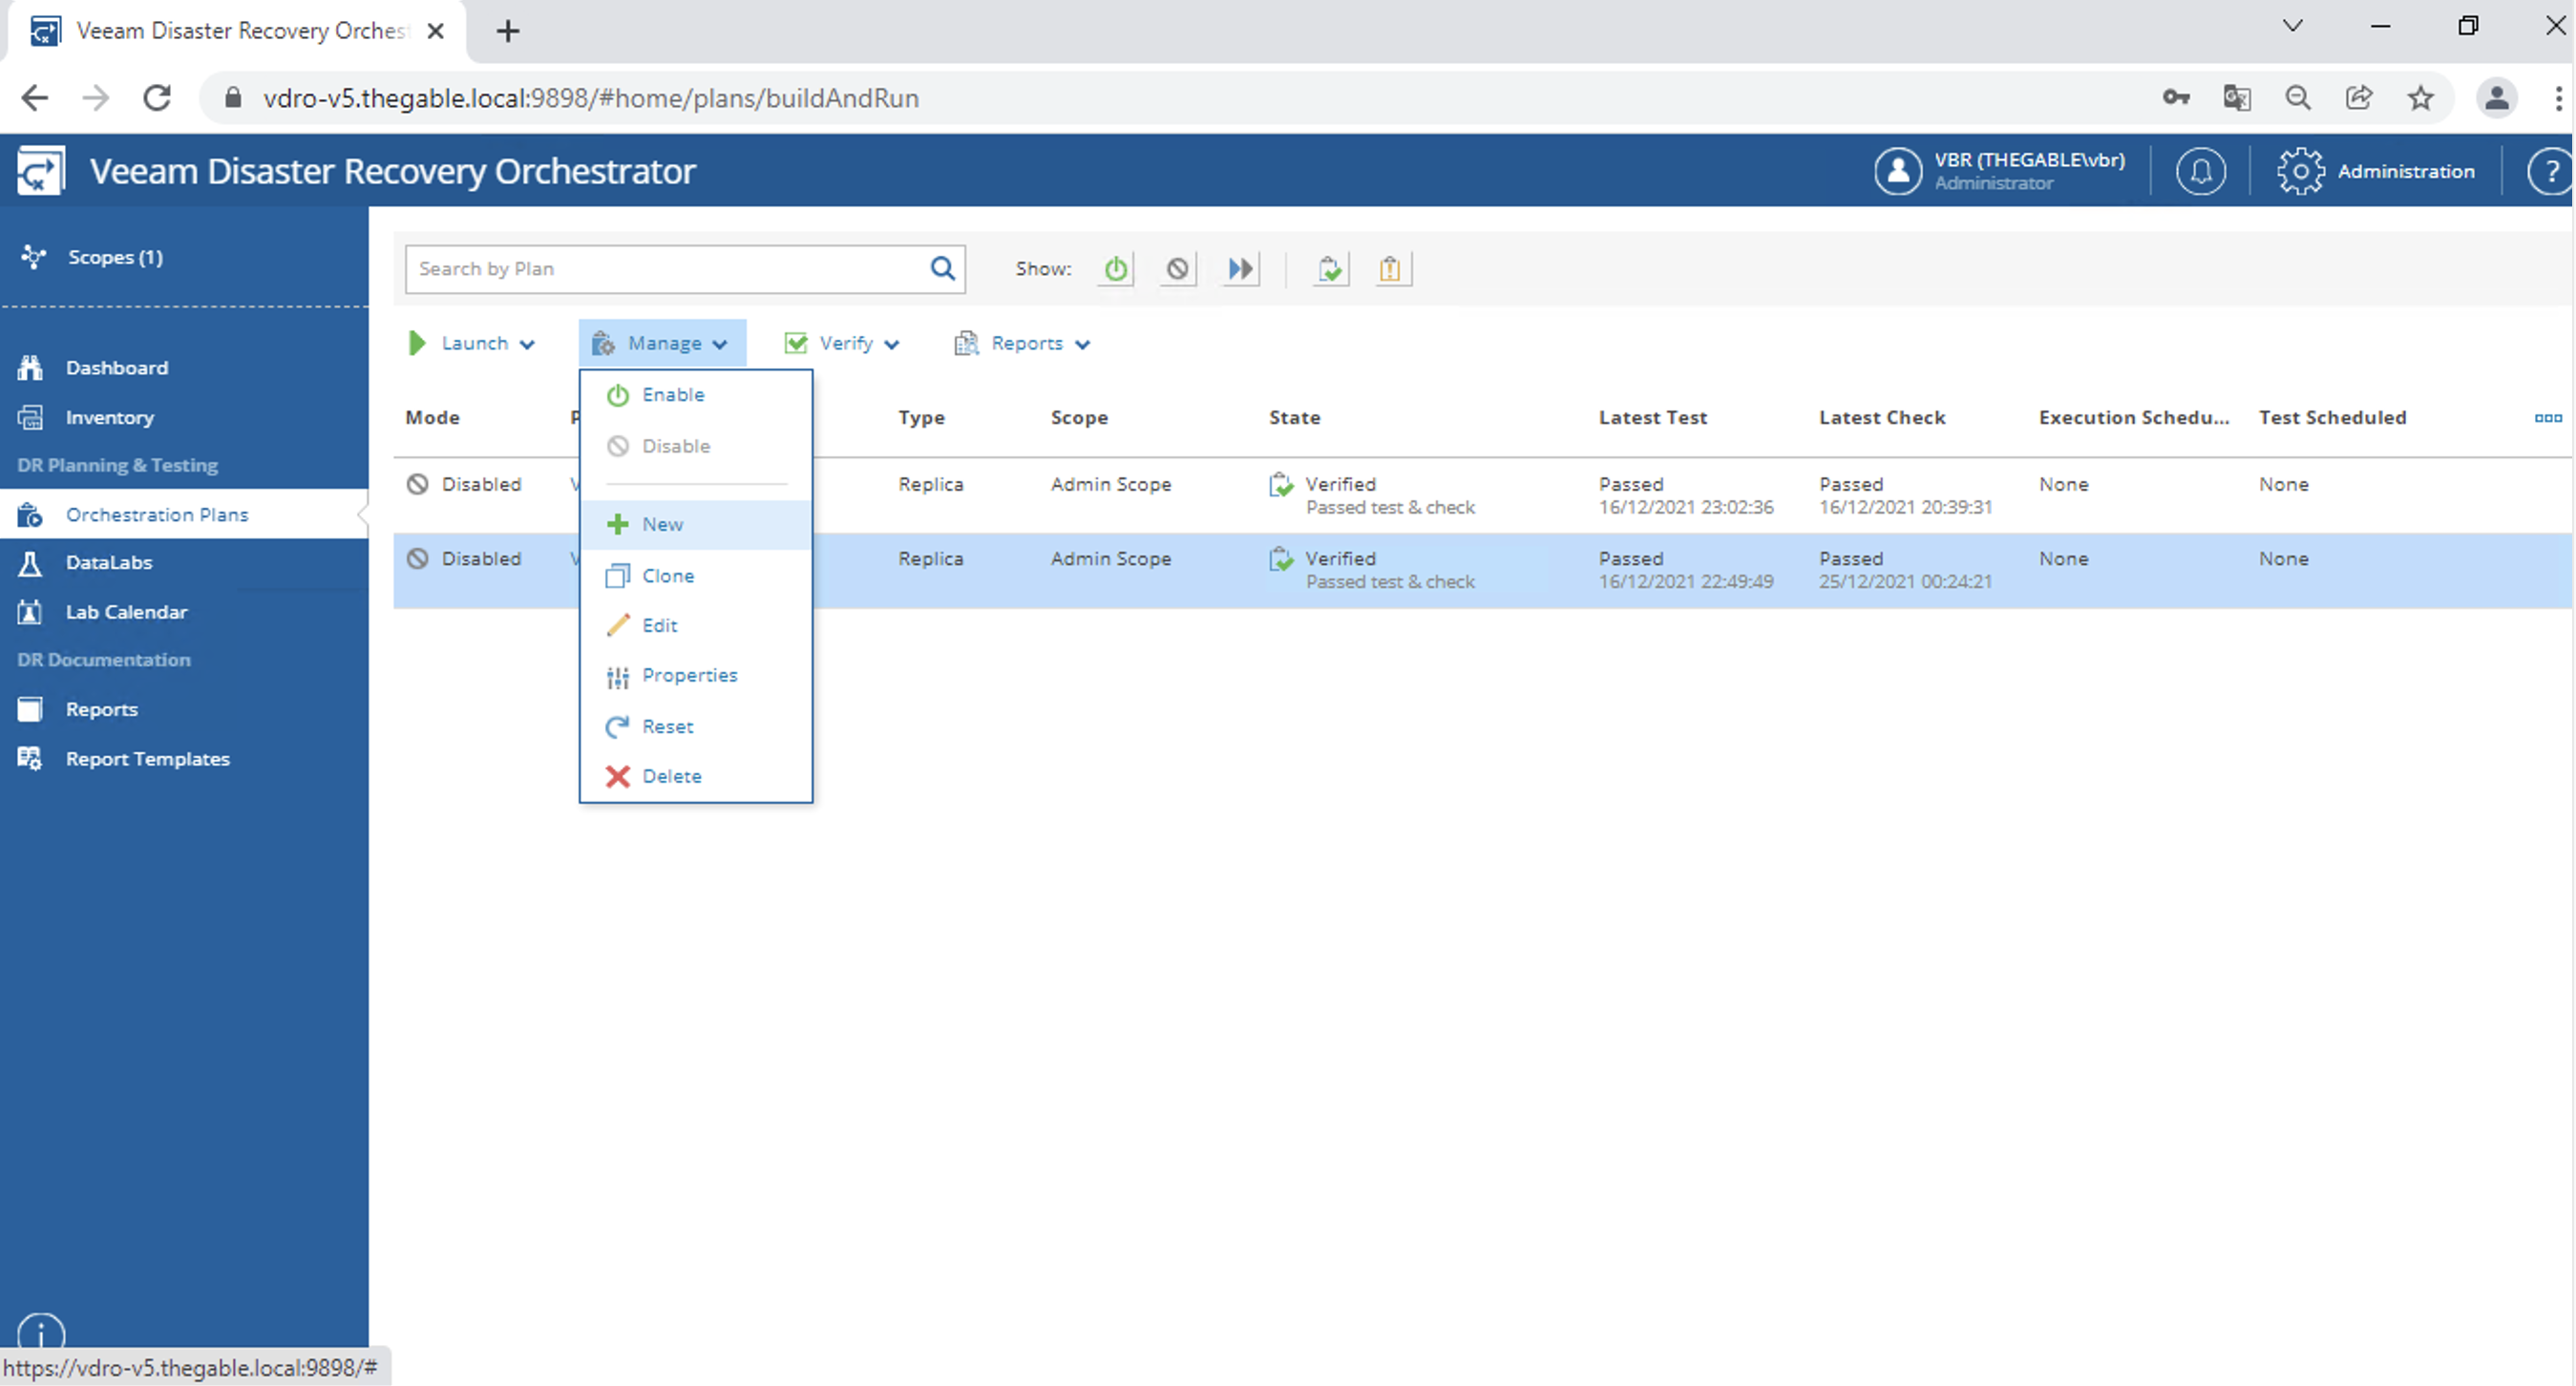
From the manage, menu selects the New item (image 5).
Picture 5

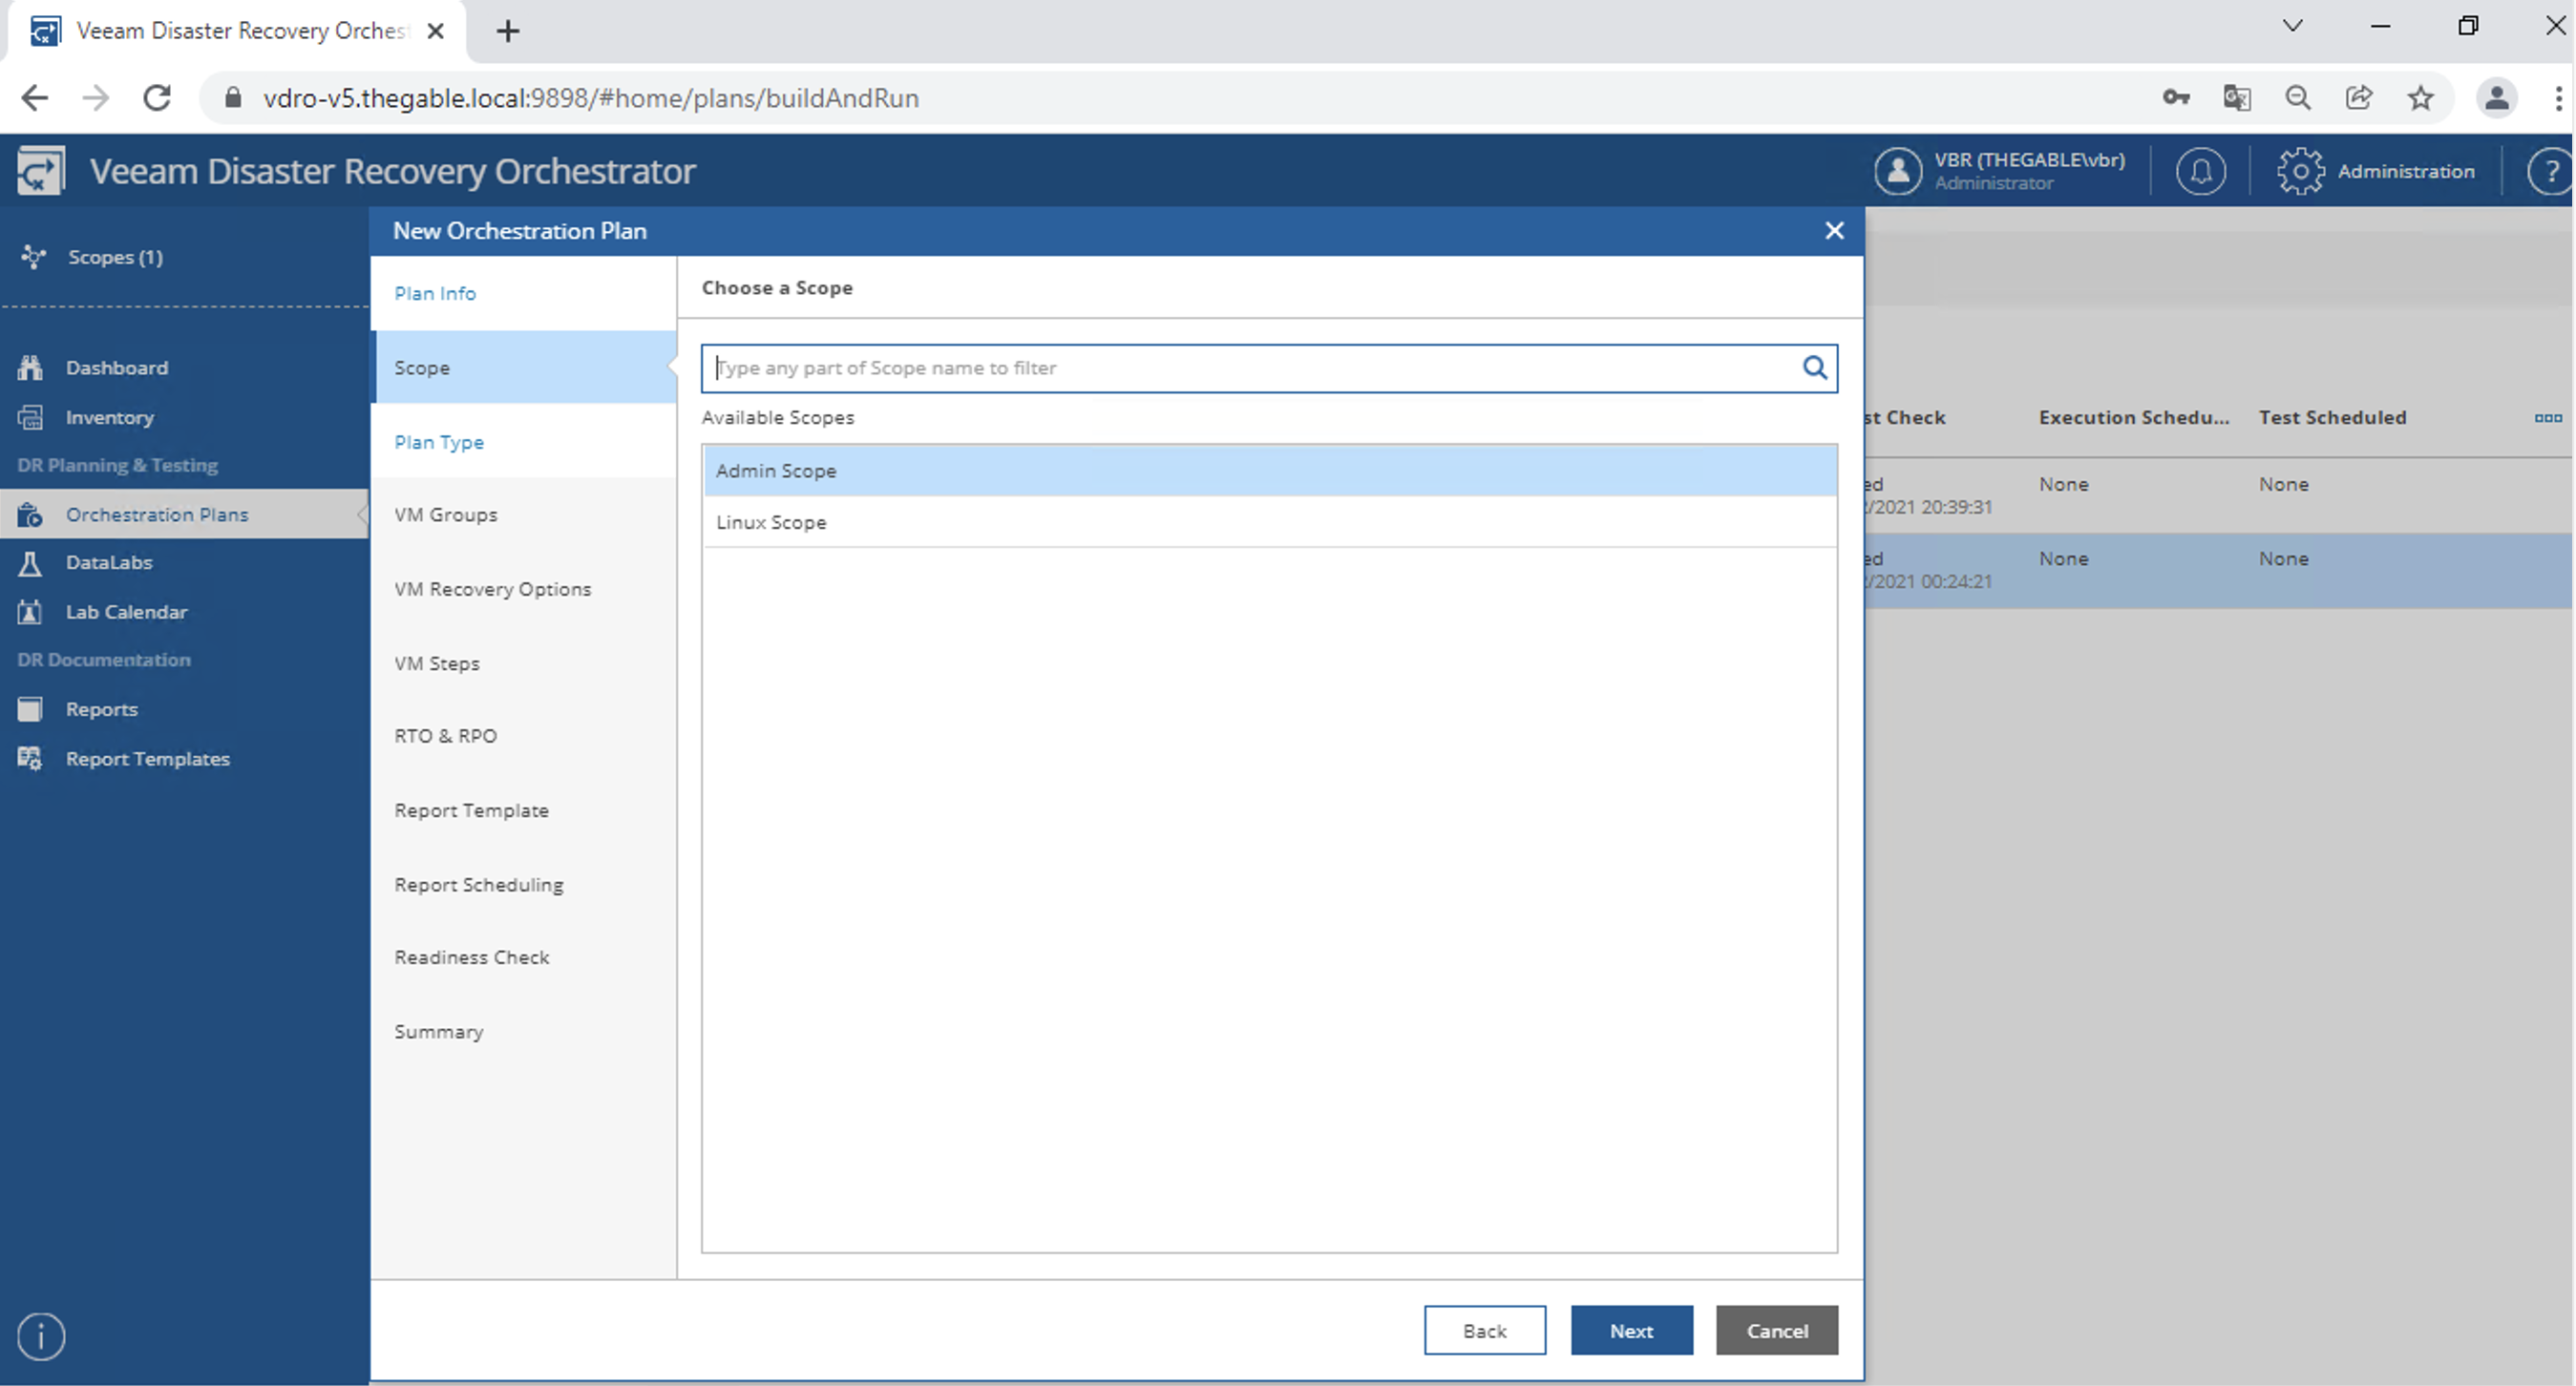
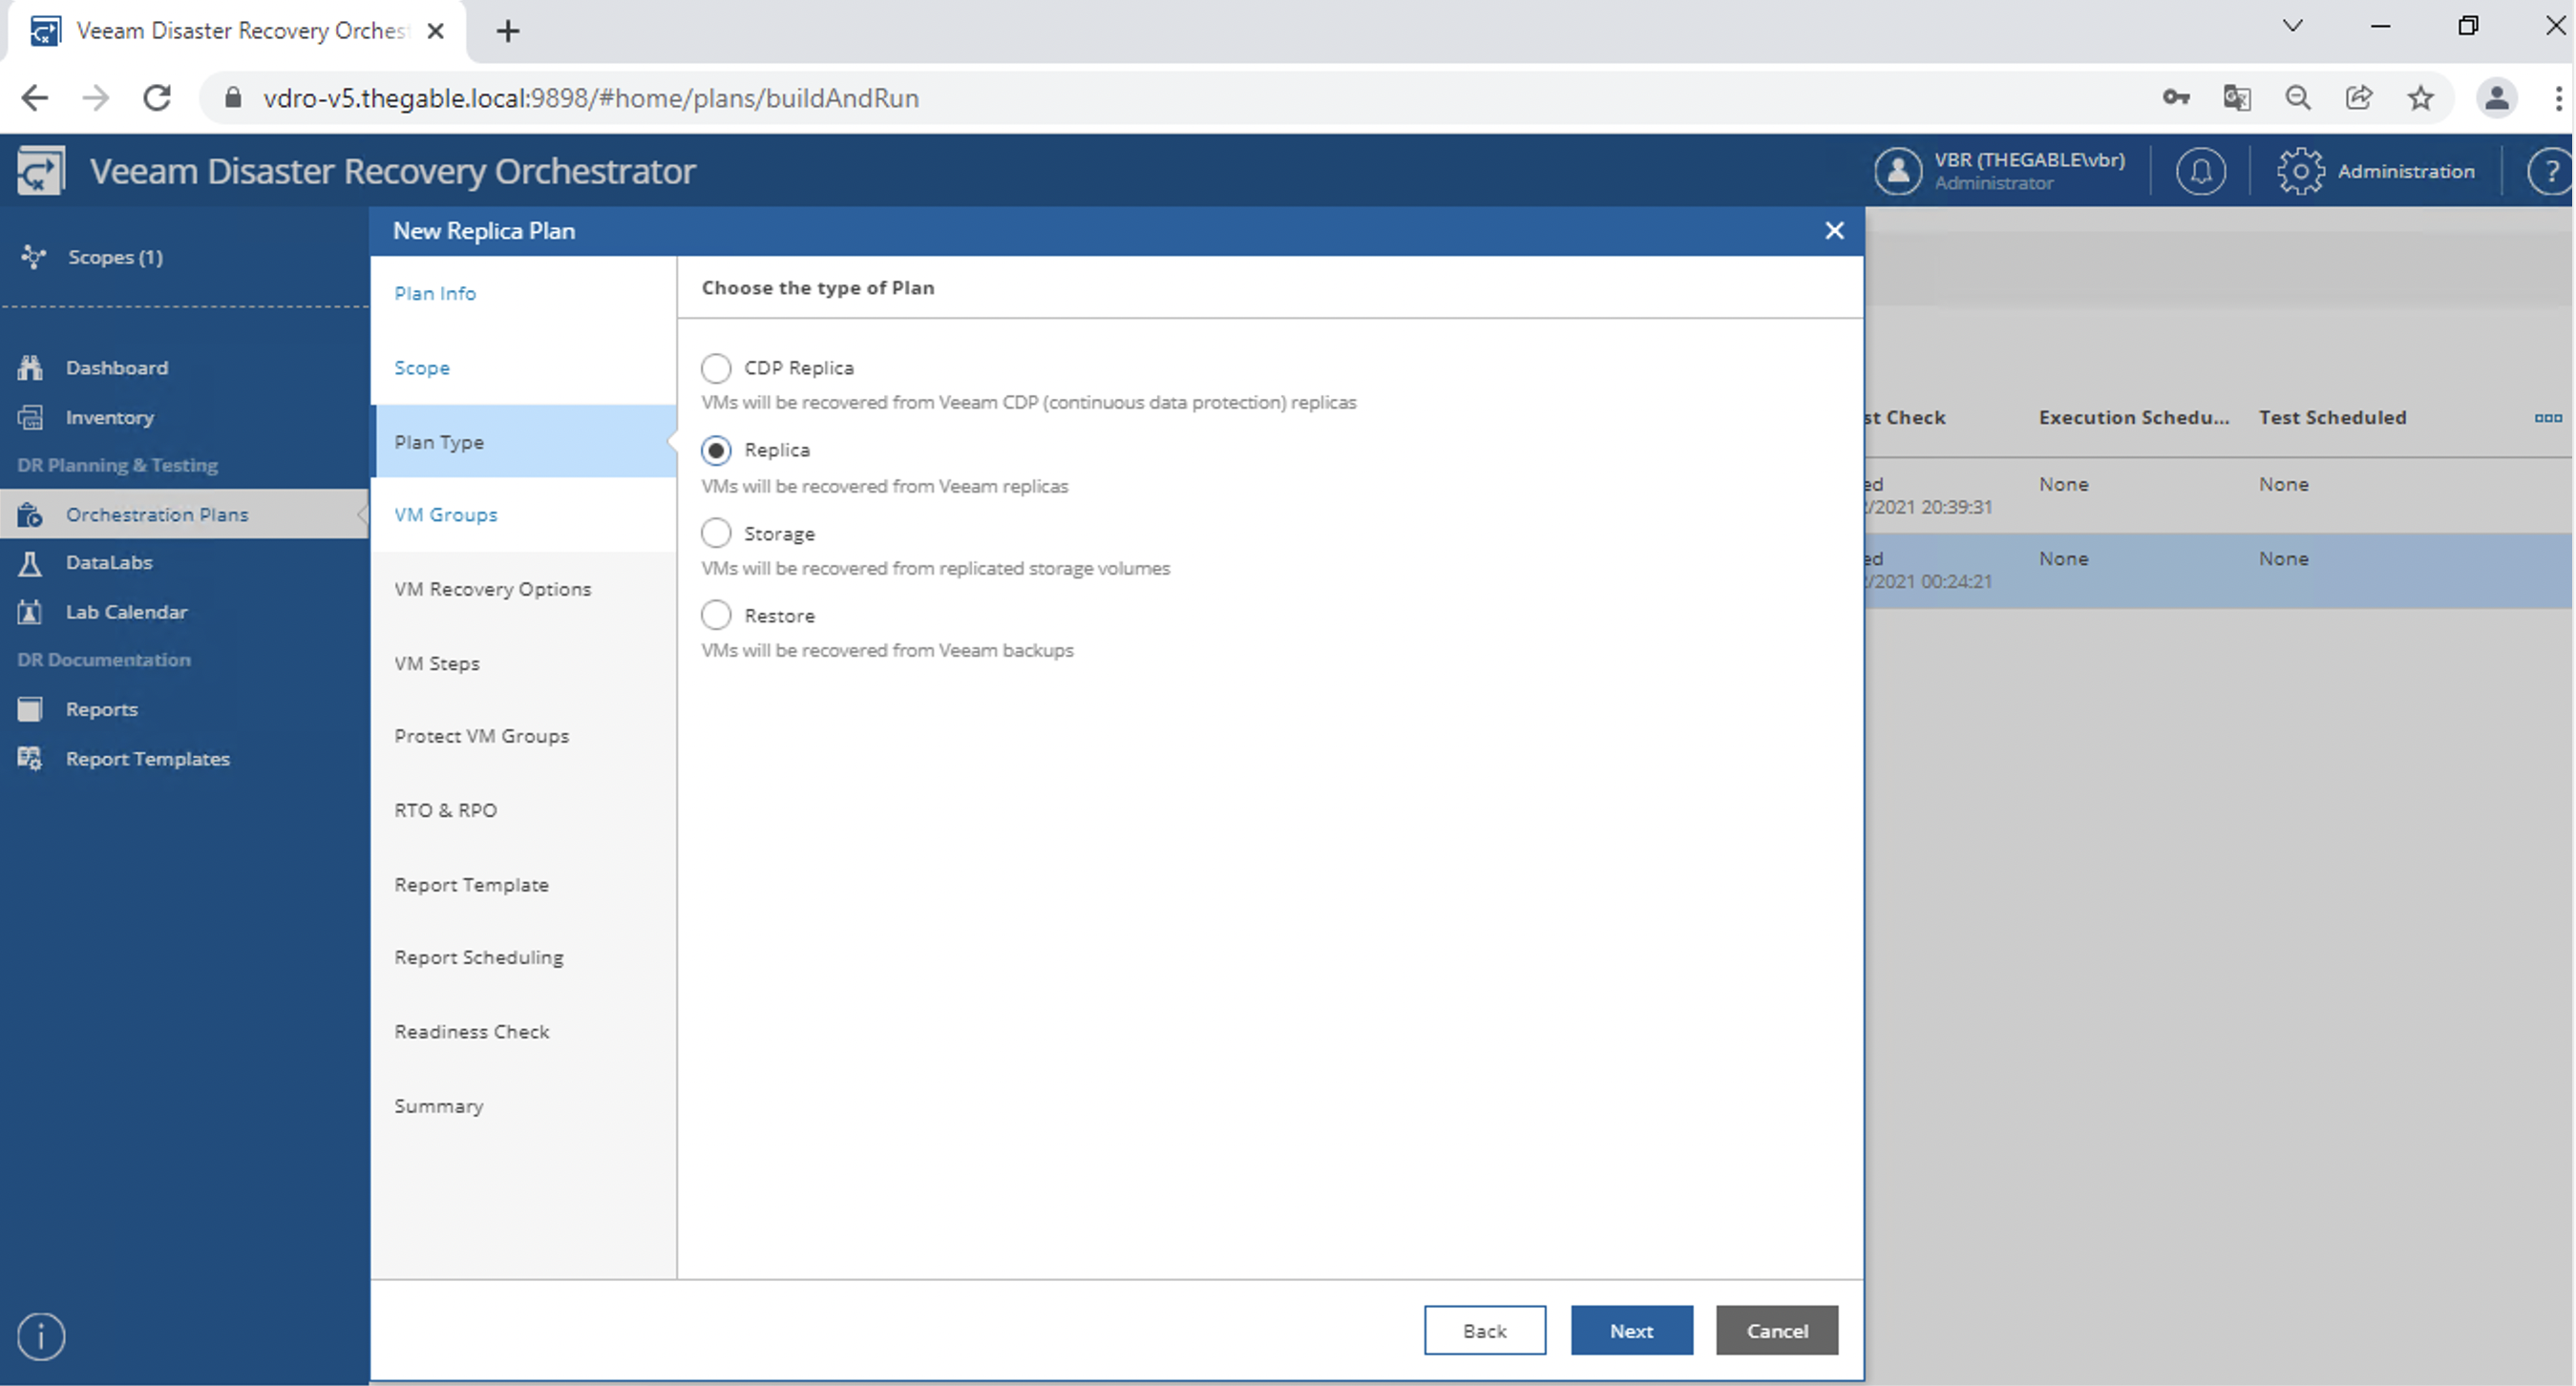
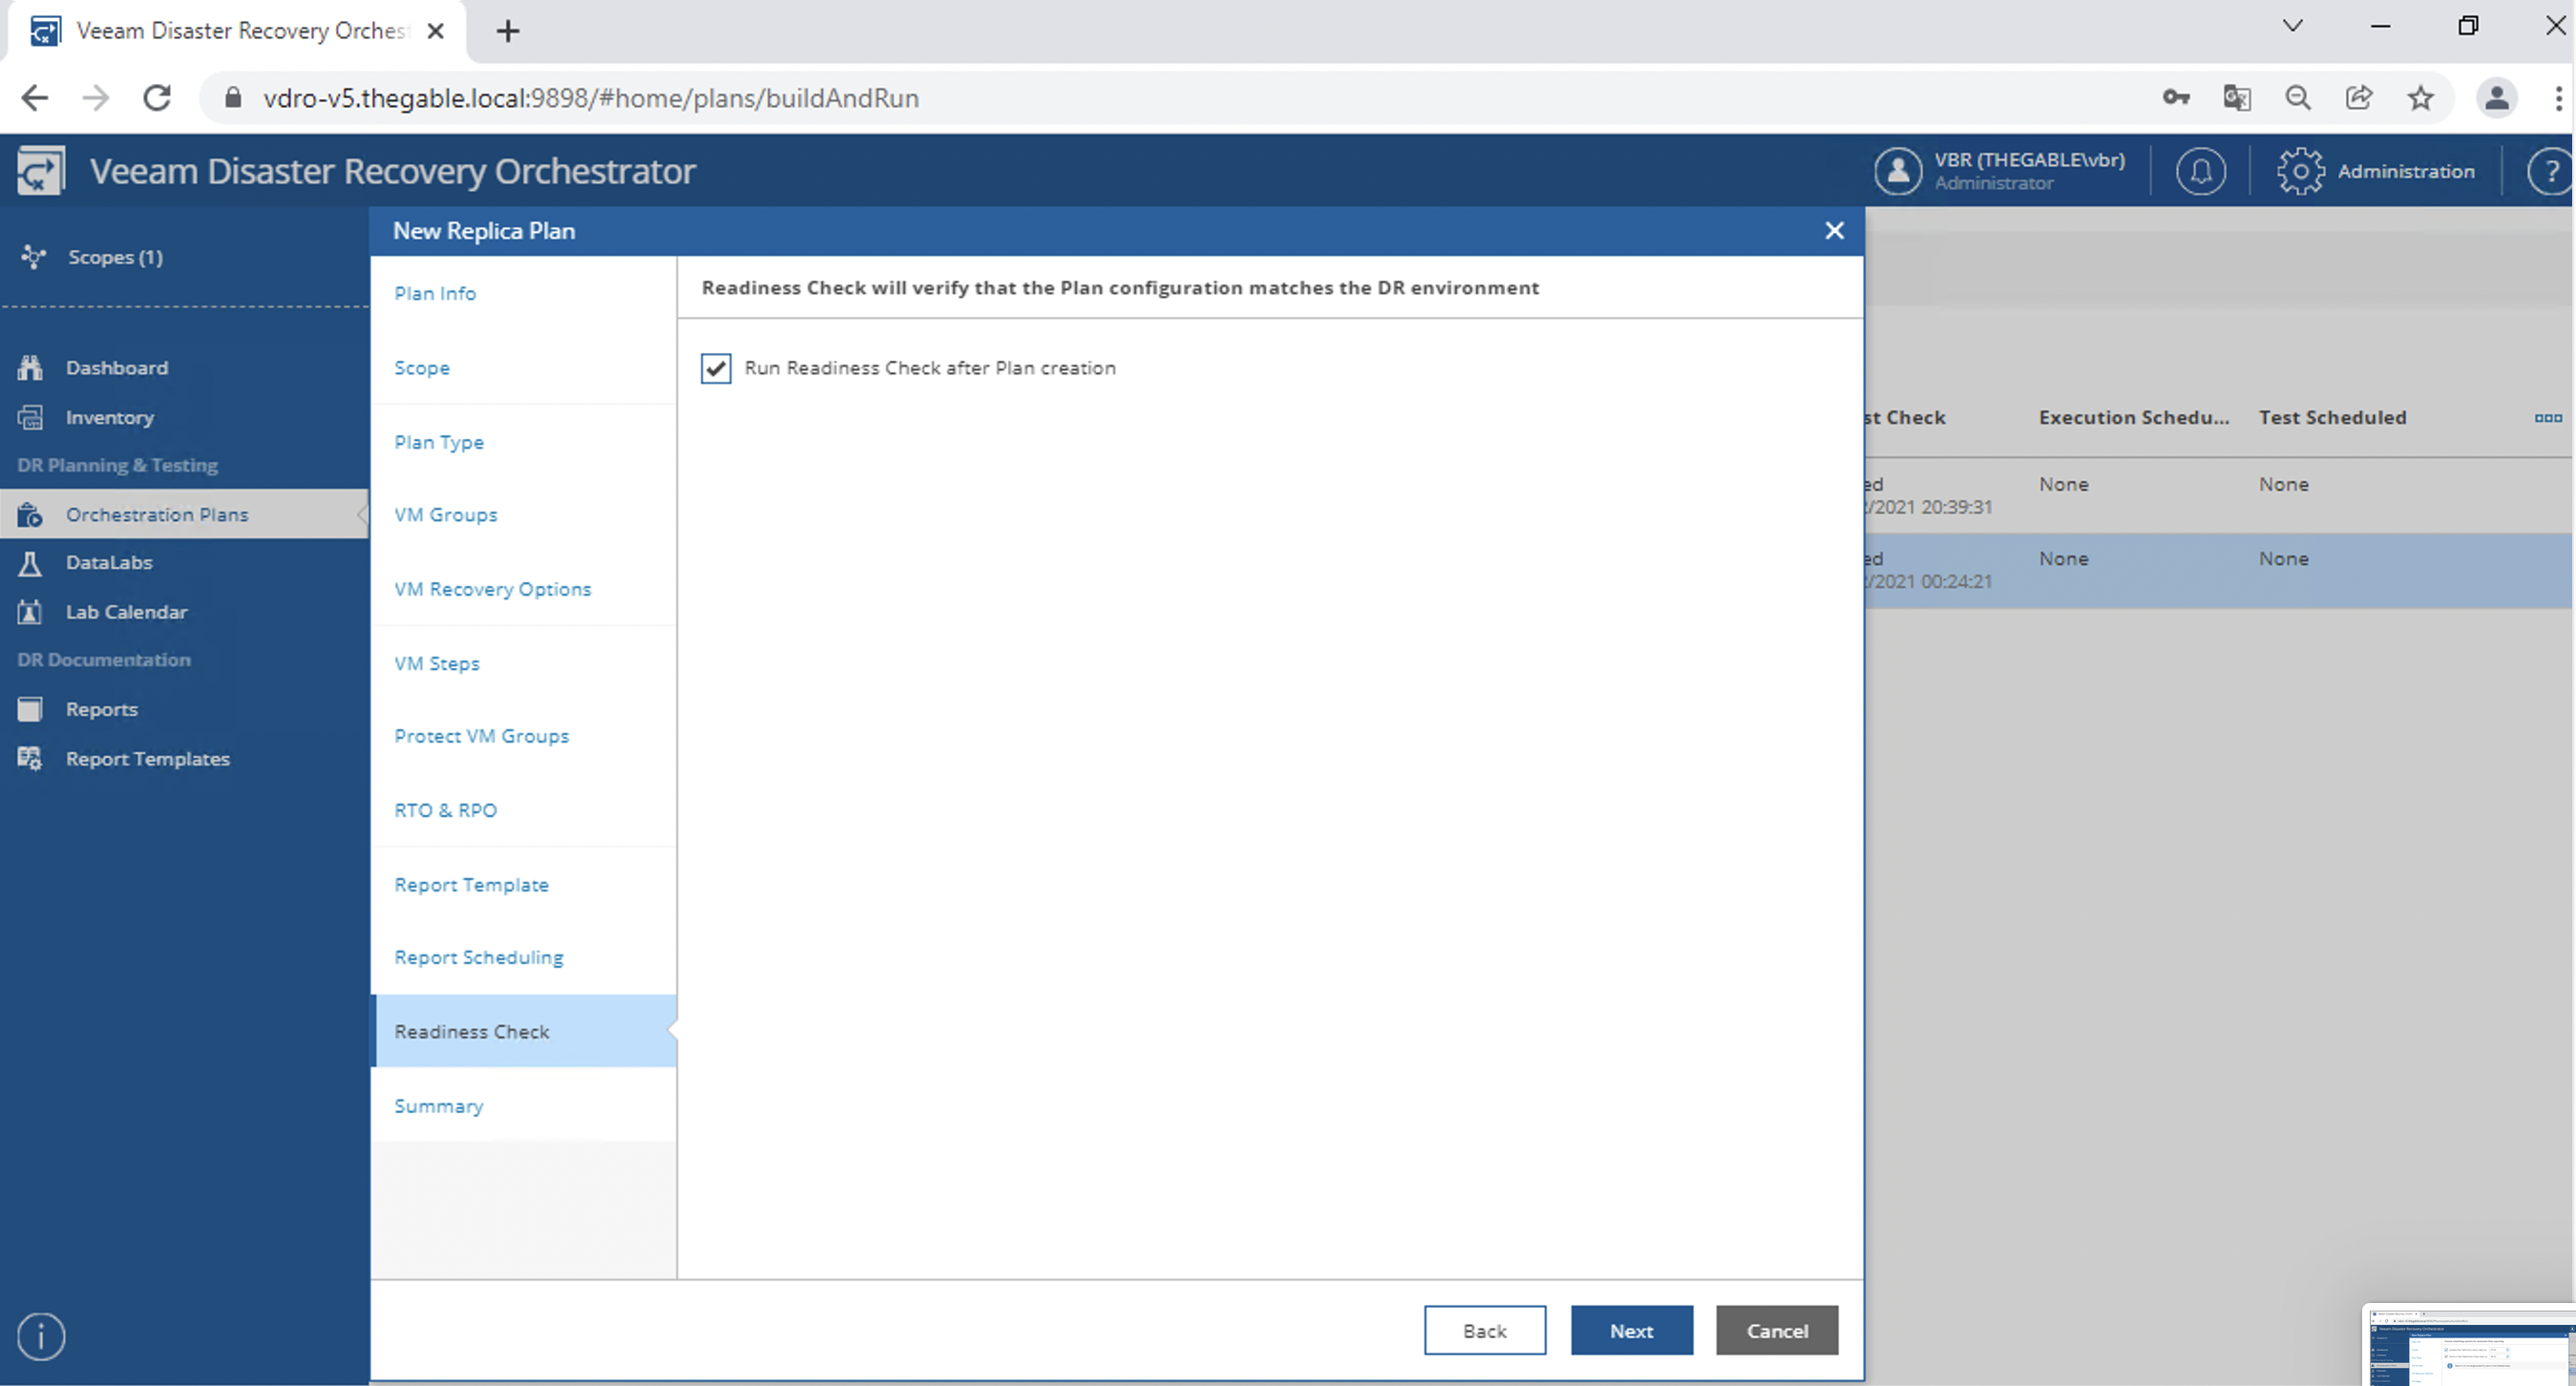
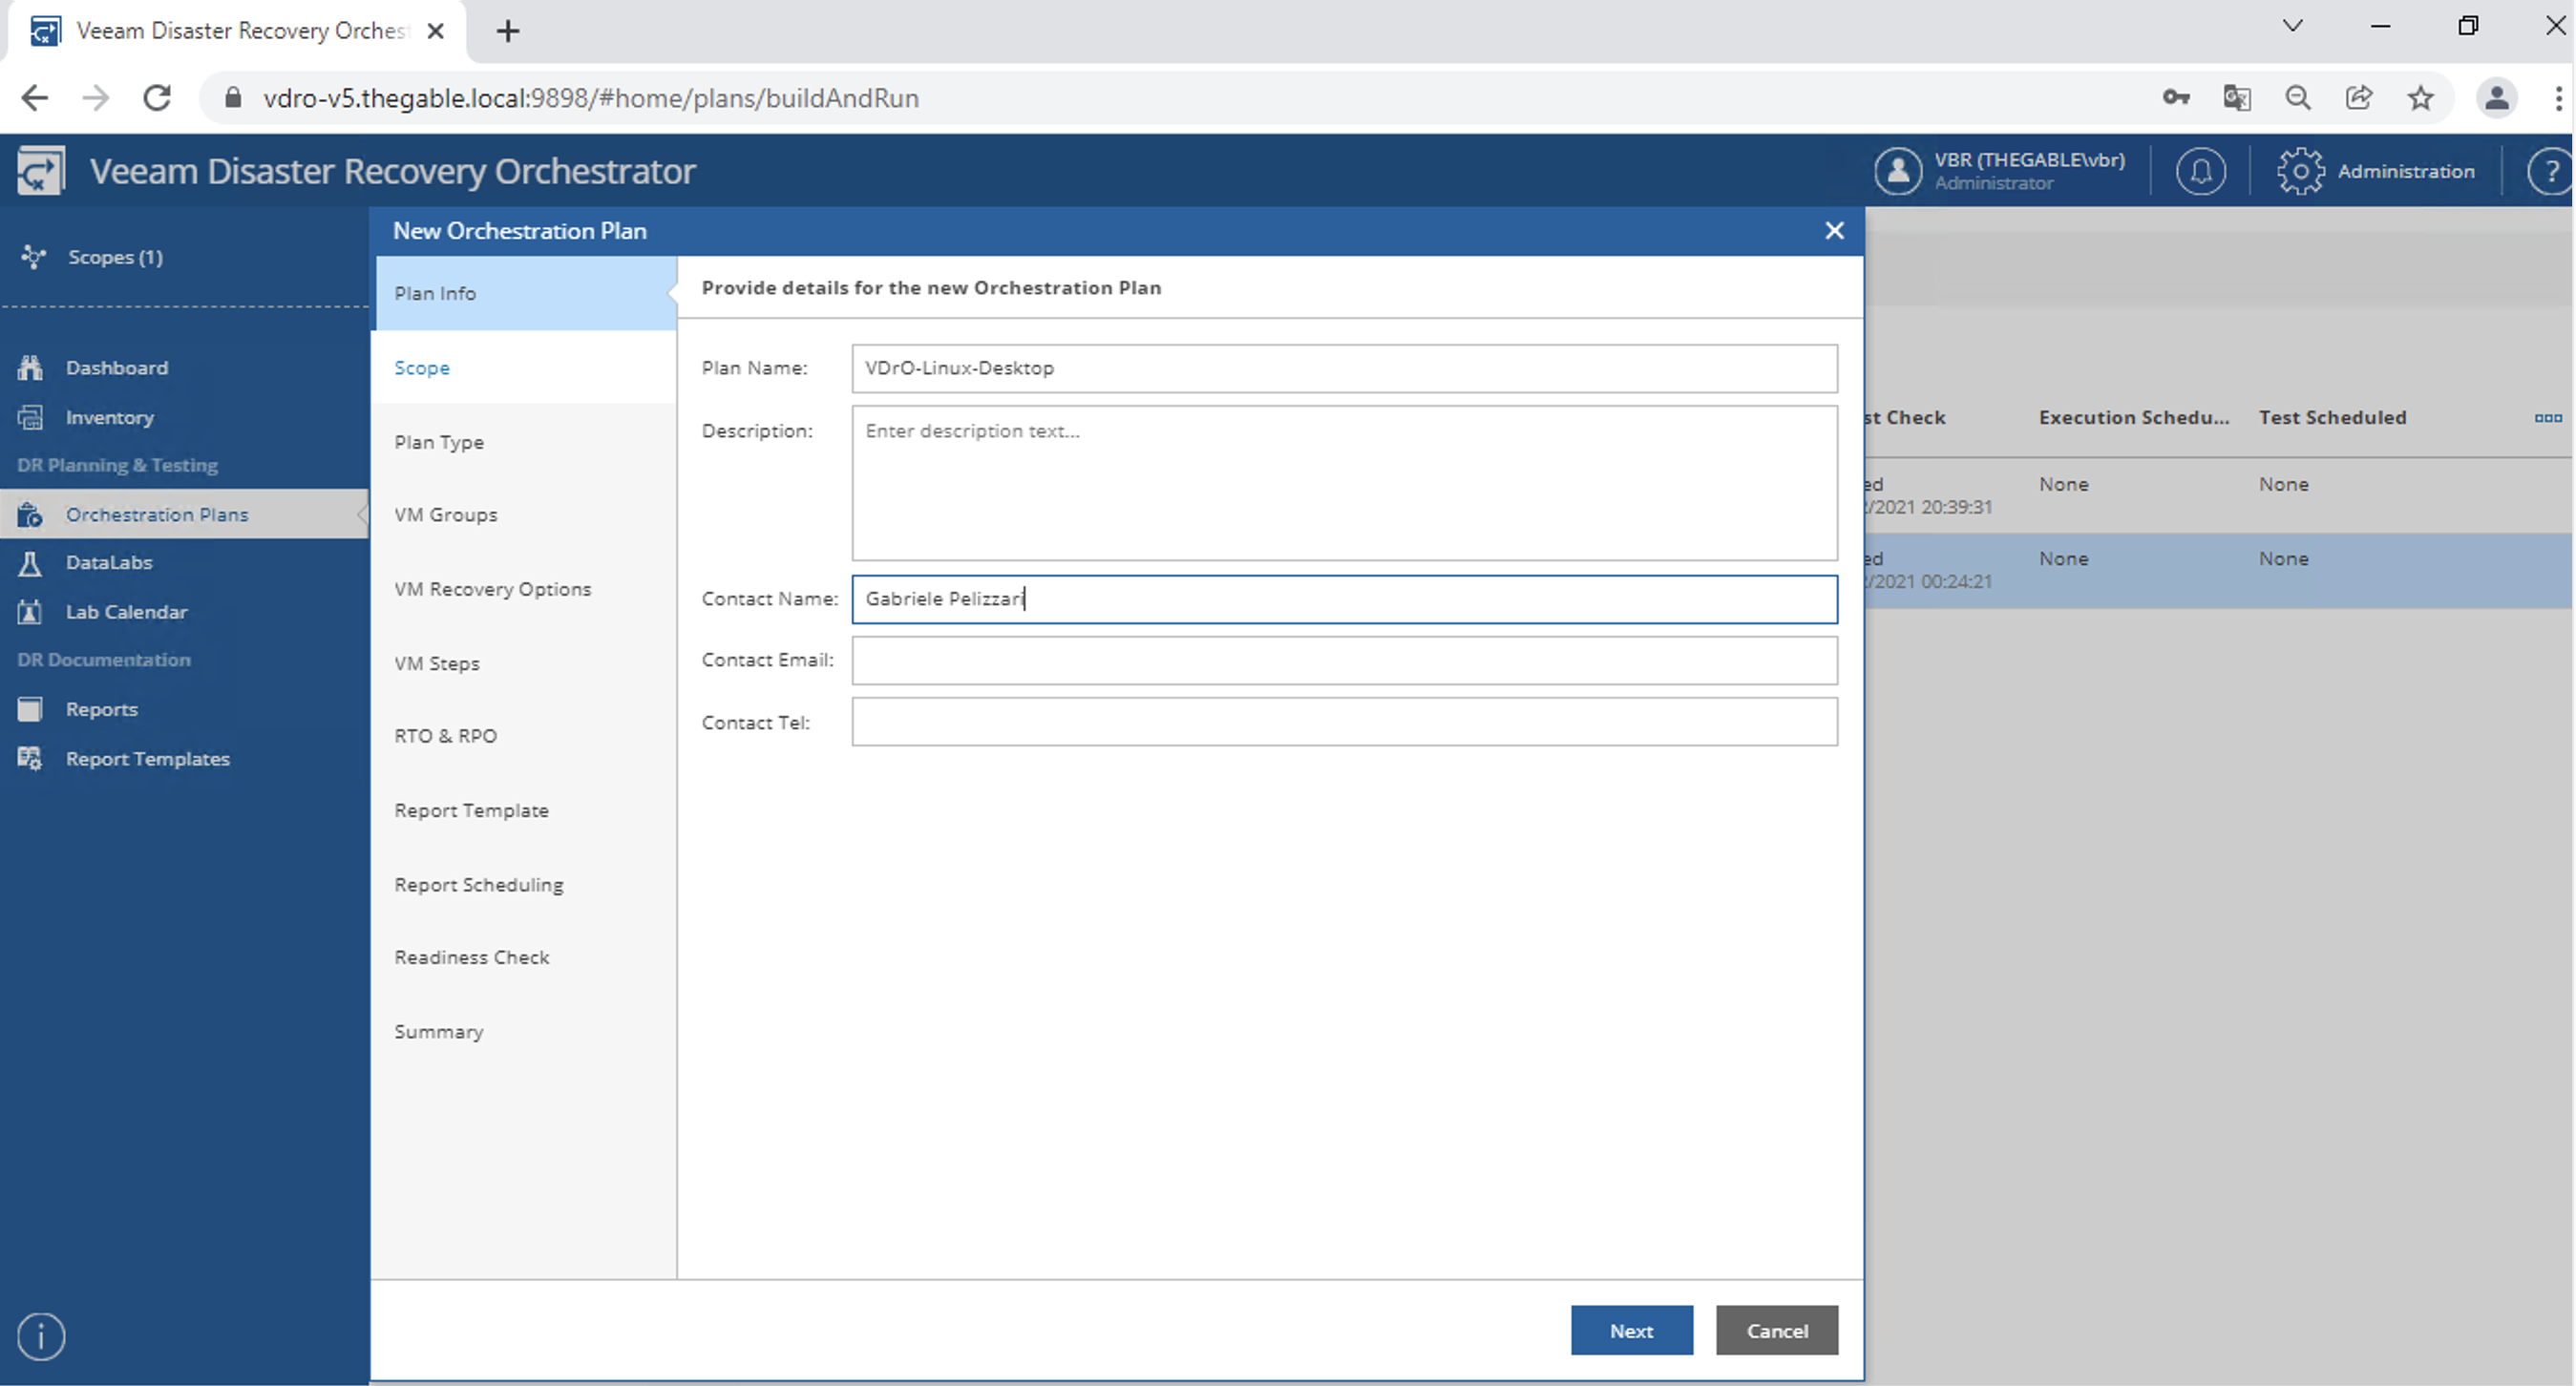
And continuing with the wizard, we enter a name (image 6), the scope (image 7), and the type of floor (image 8).
Picture 6

Picture 7

Image 8

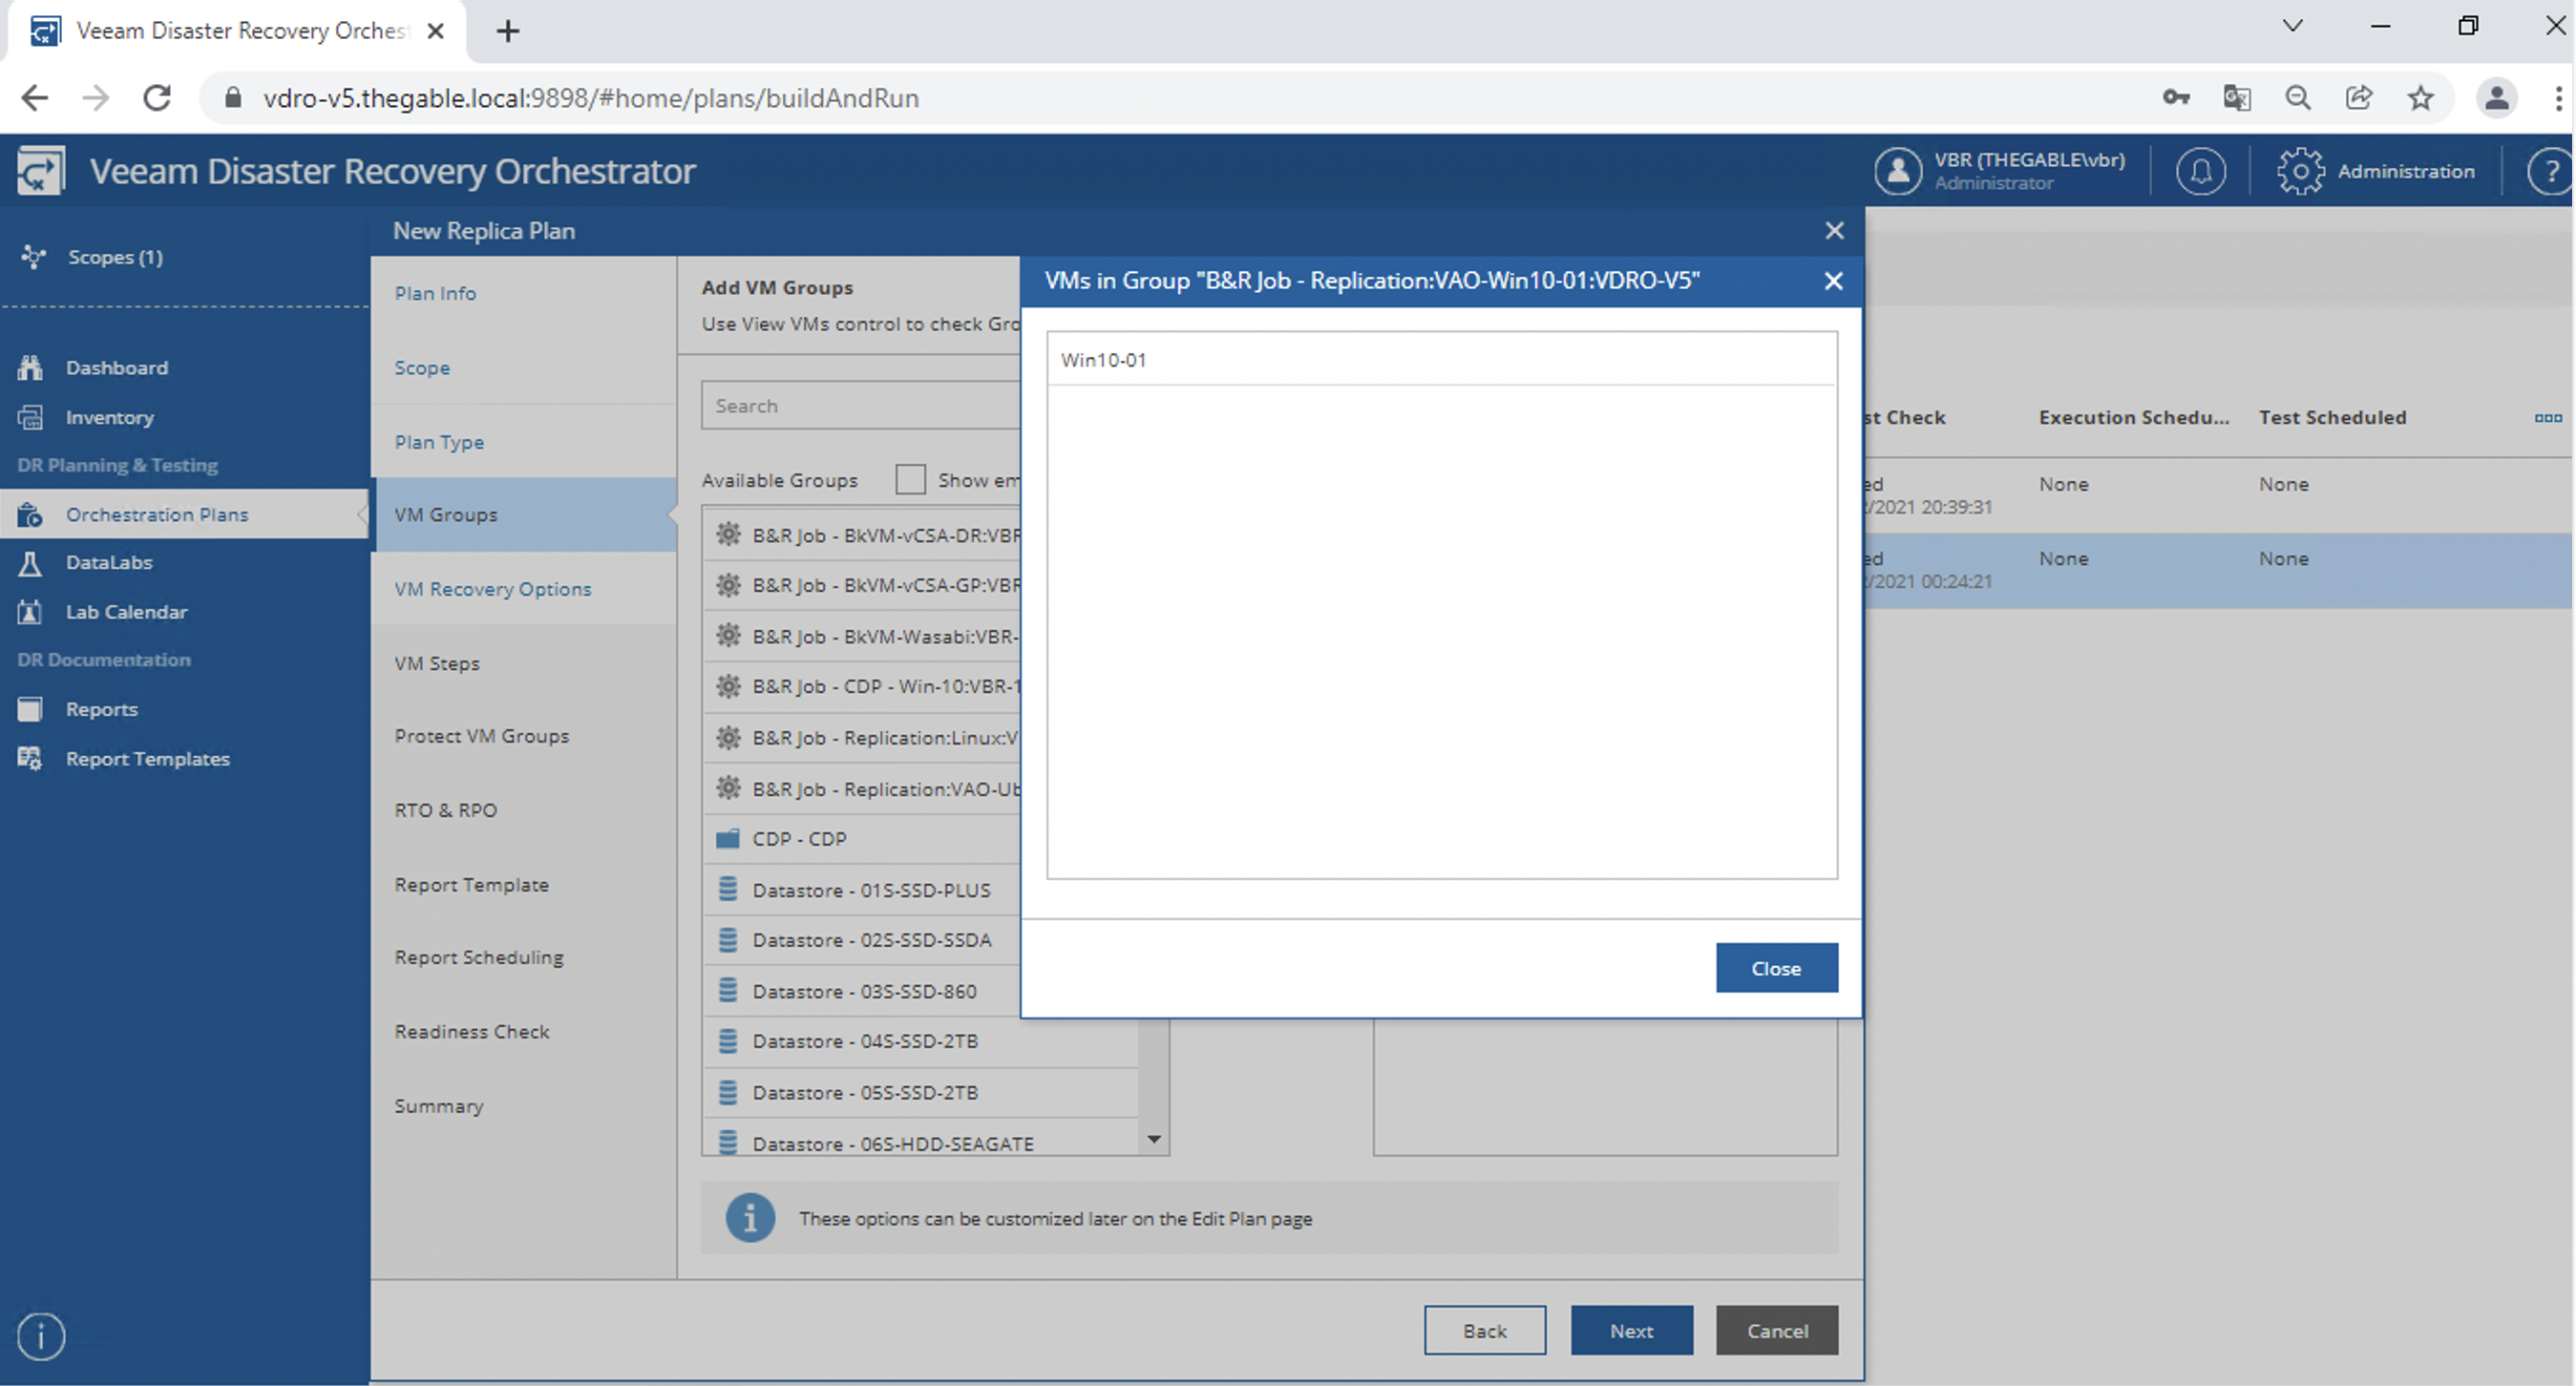
After adding the VM group to be orchestrated (image 9, 10 and 11)
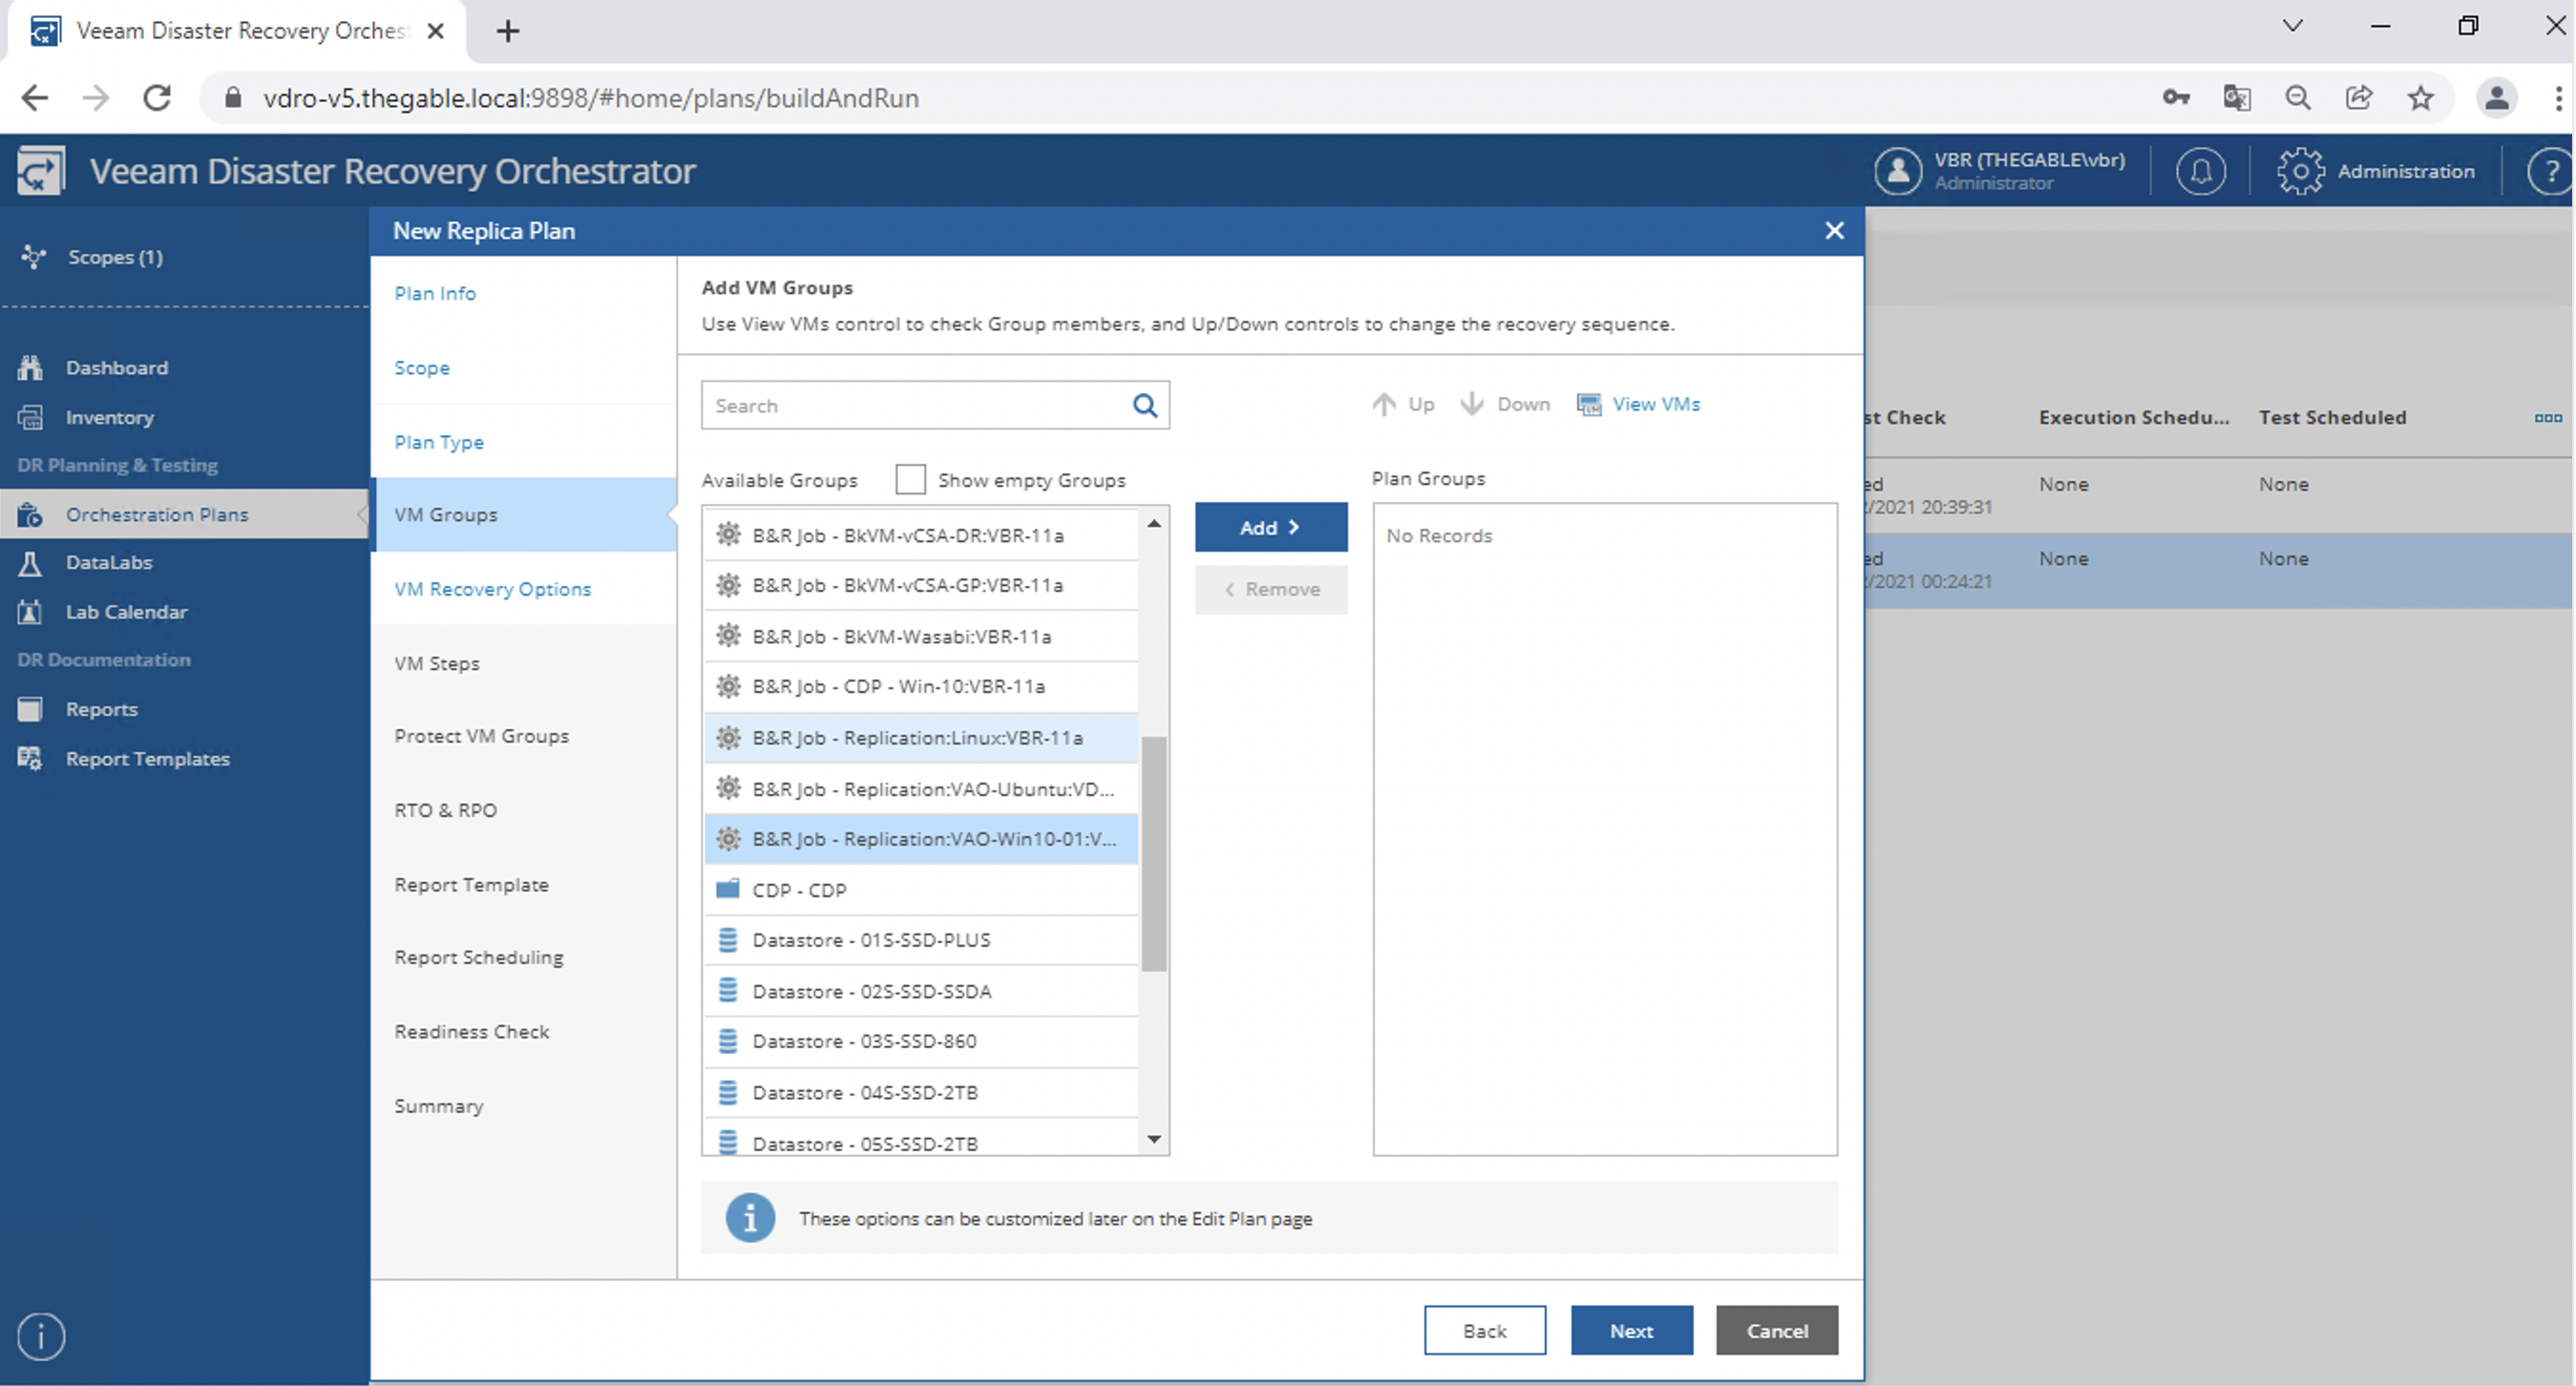
Image 9
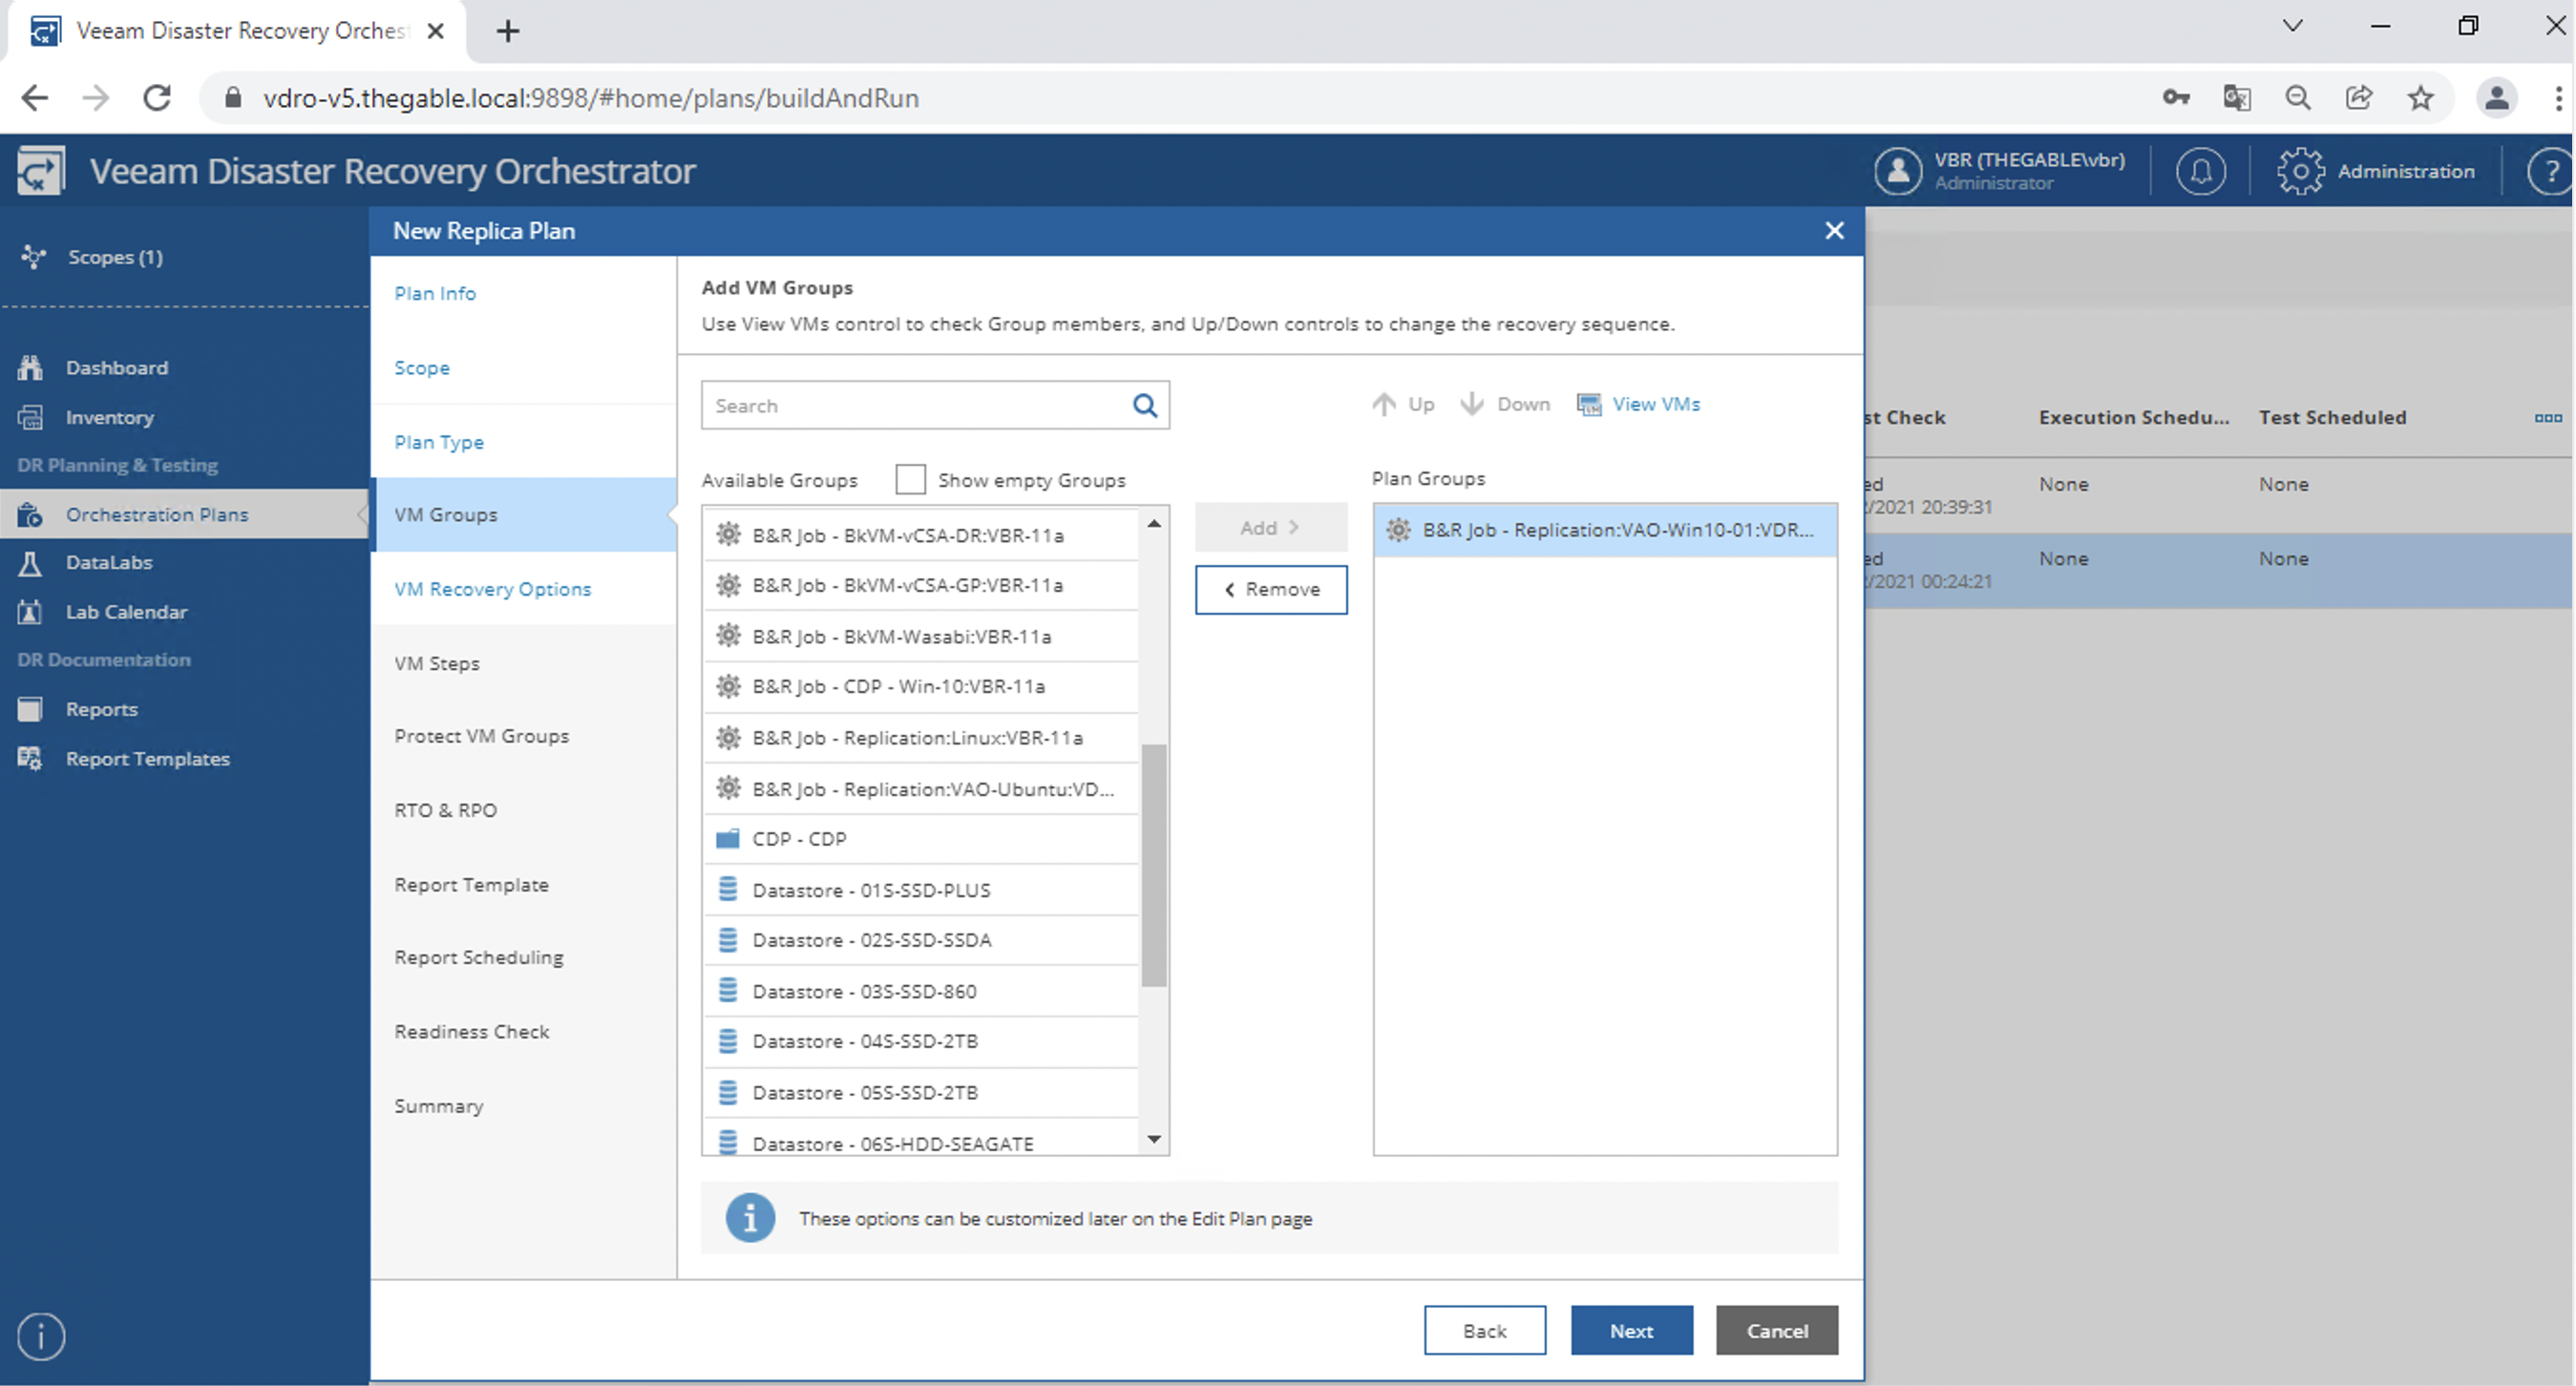
Image 10

Image 11

It is possible to customize the Recovery options, (for example whether to process the VMs in parallel or sequential mode) (image 12).
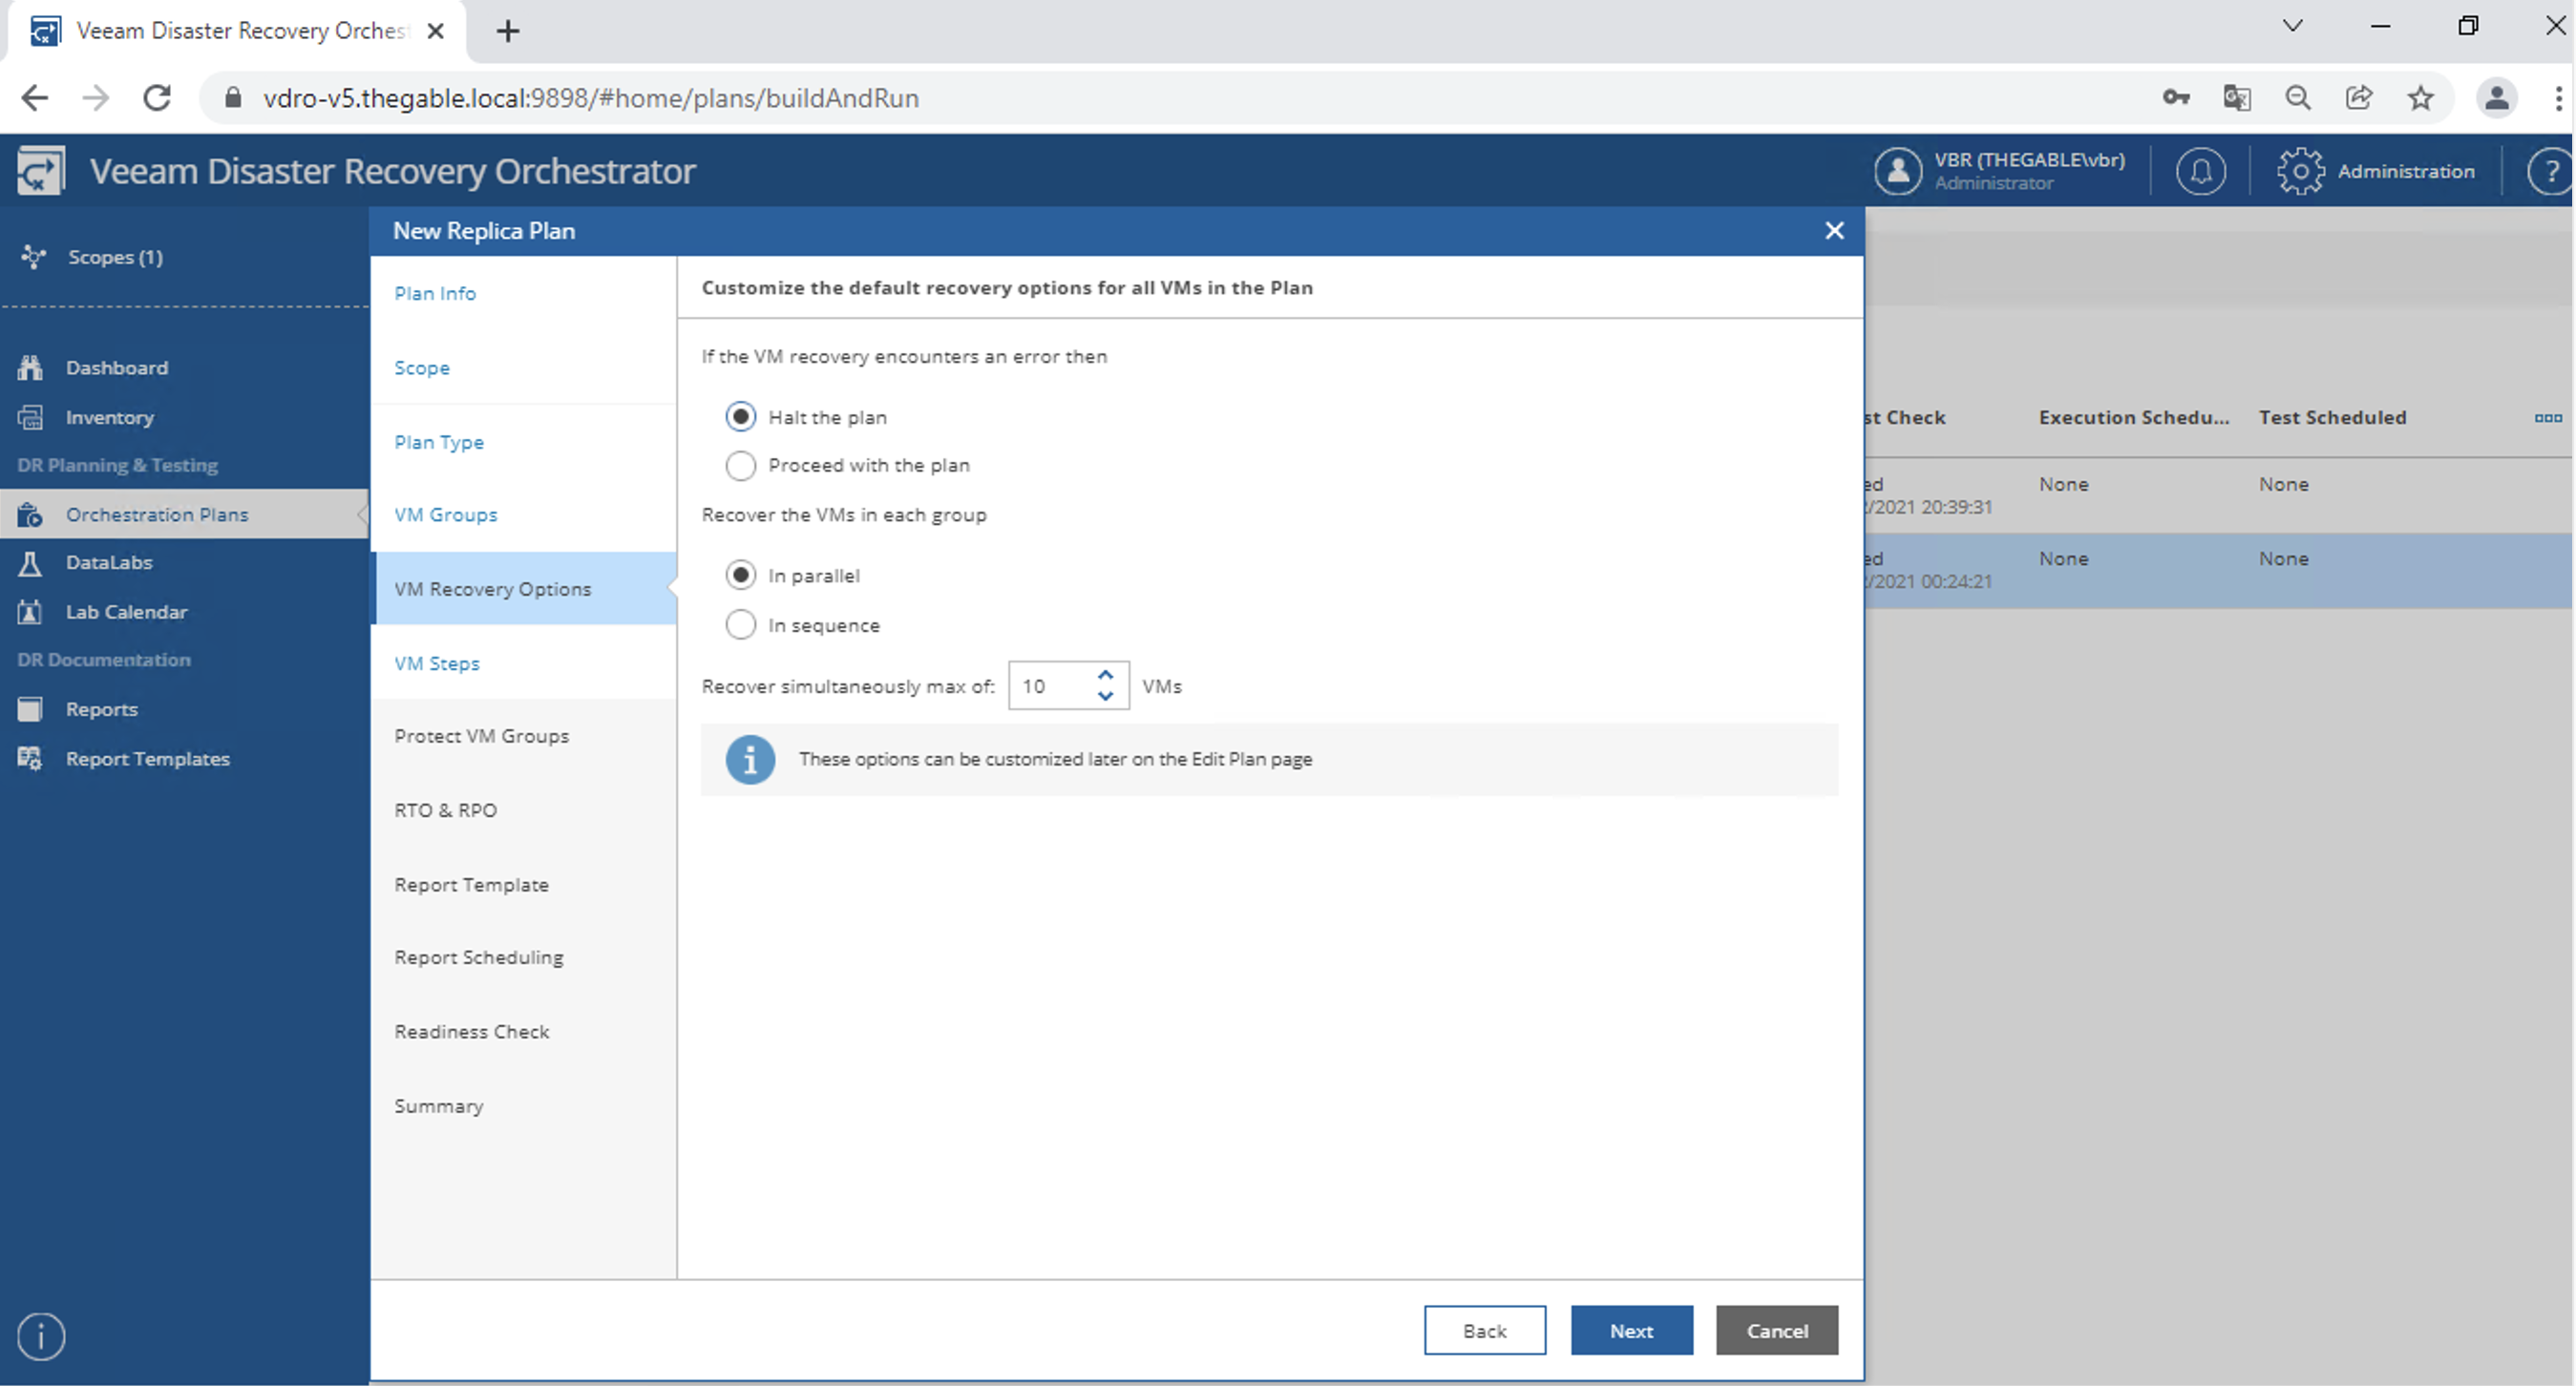
Image 12

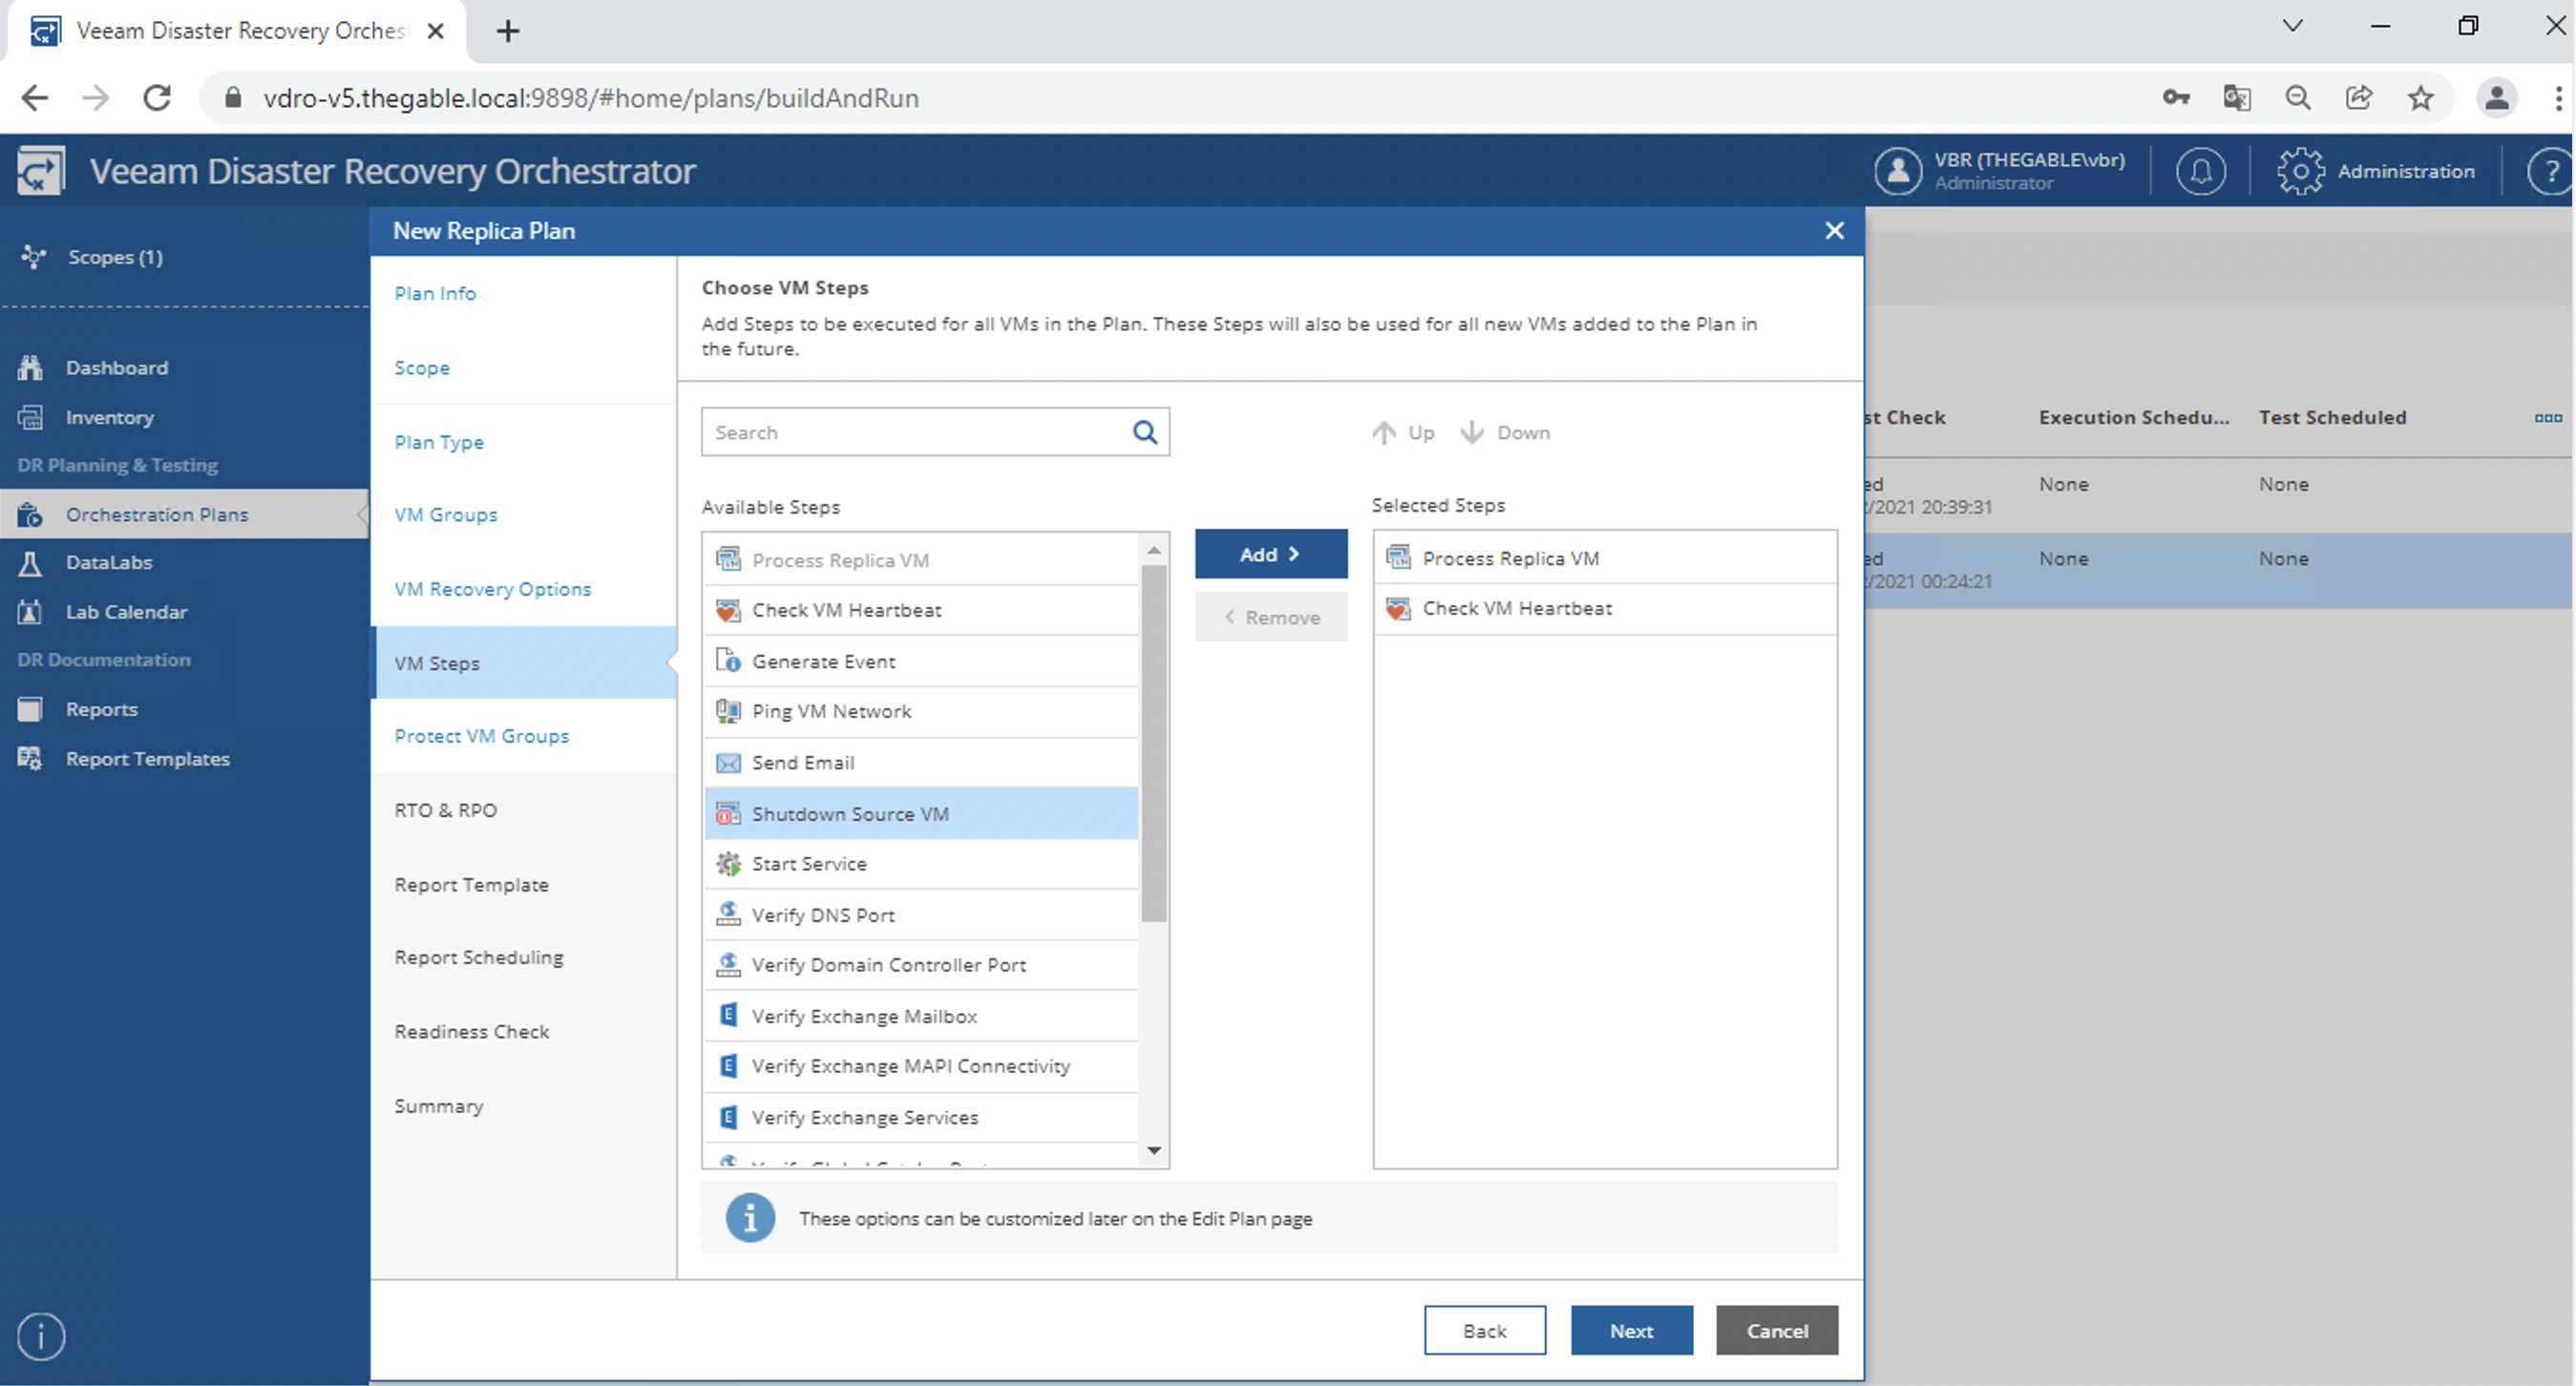
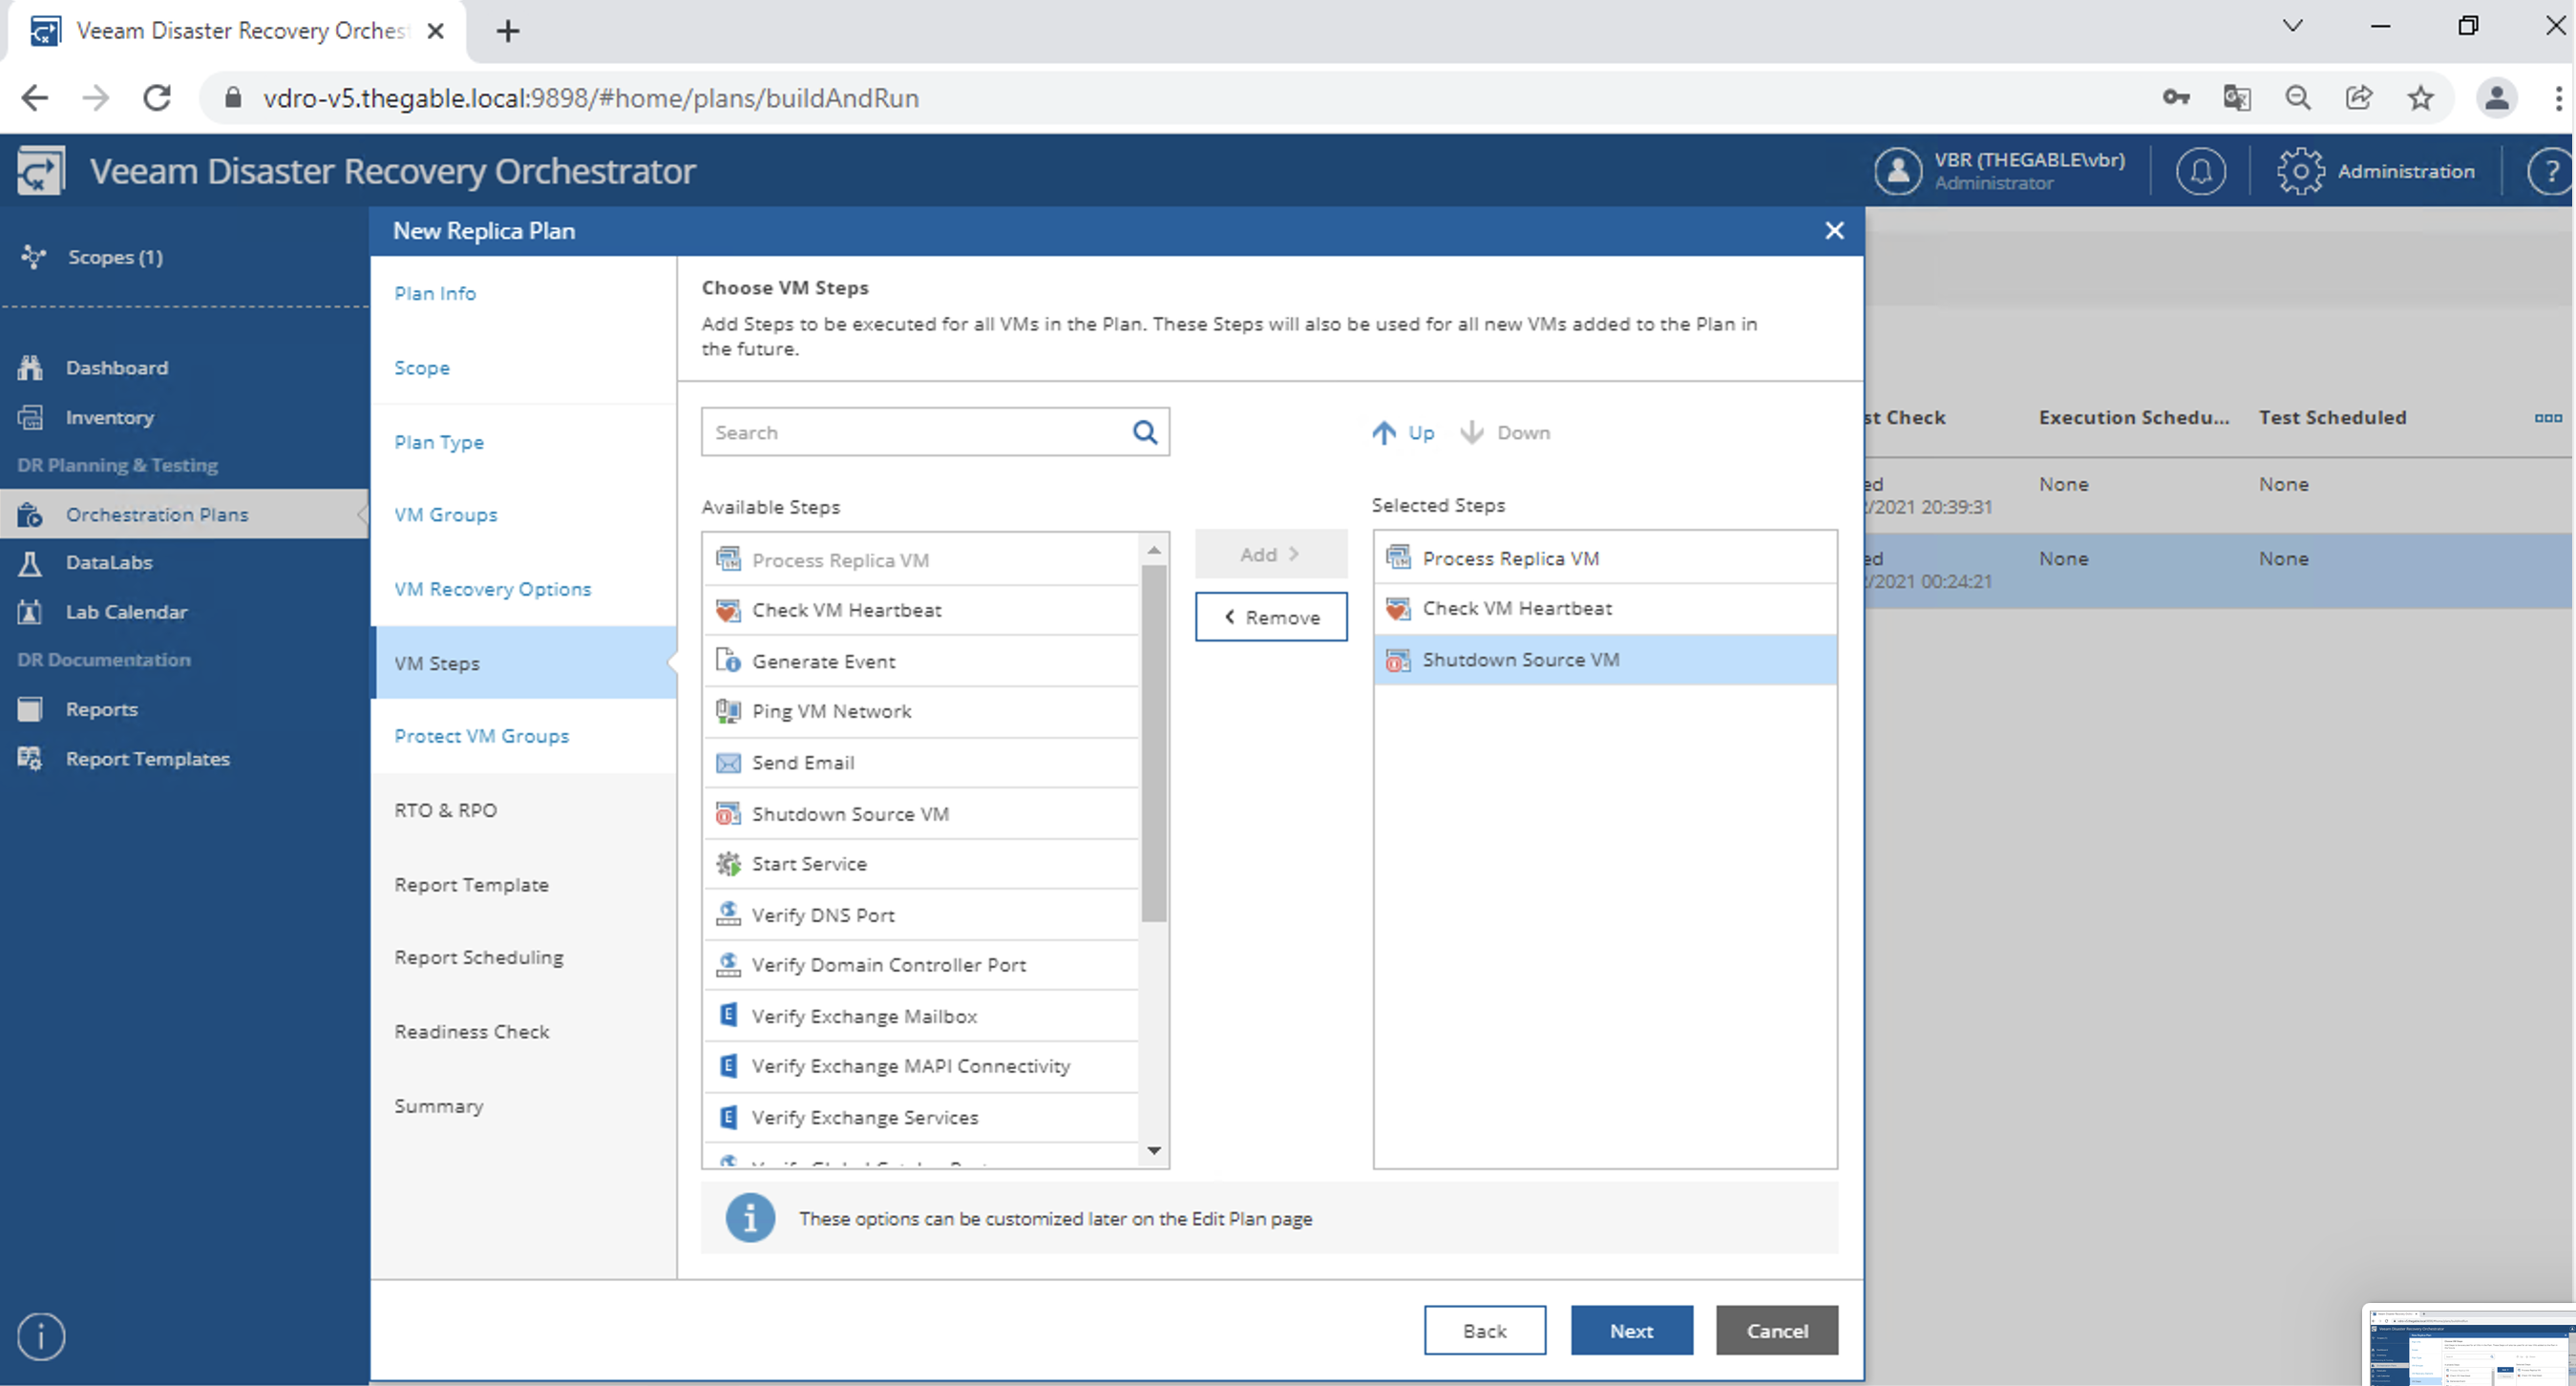
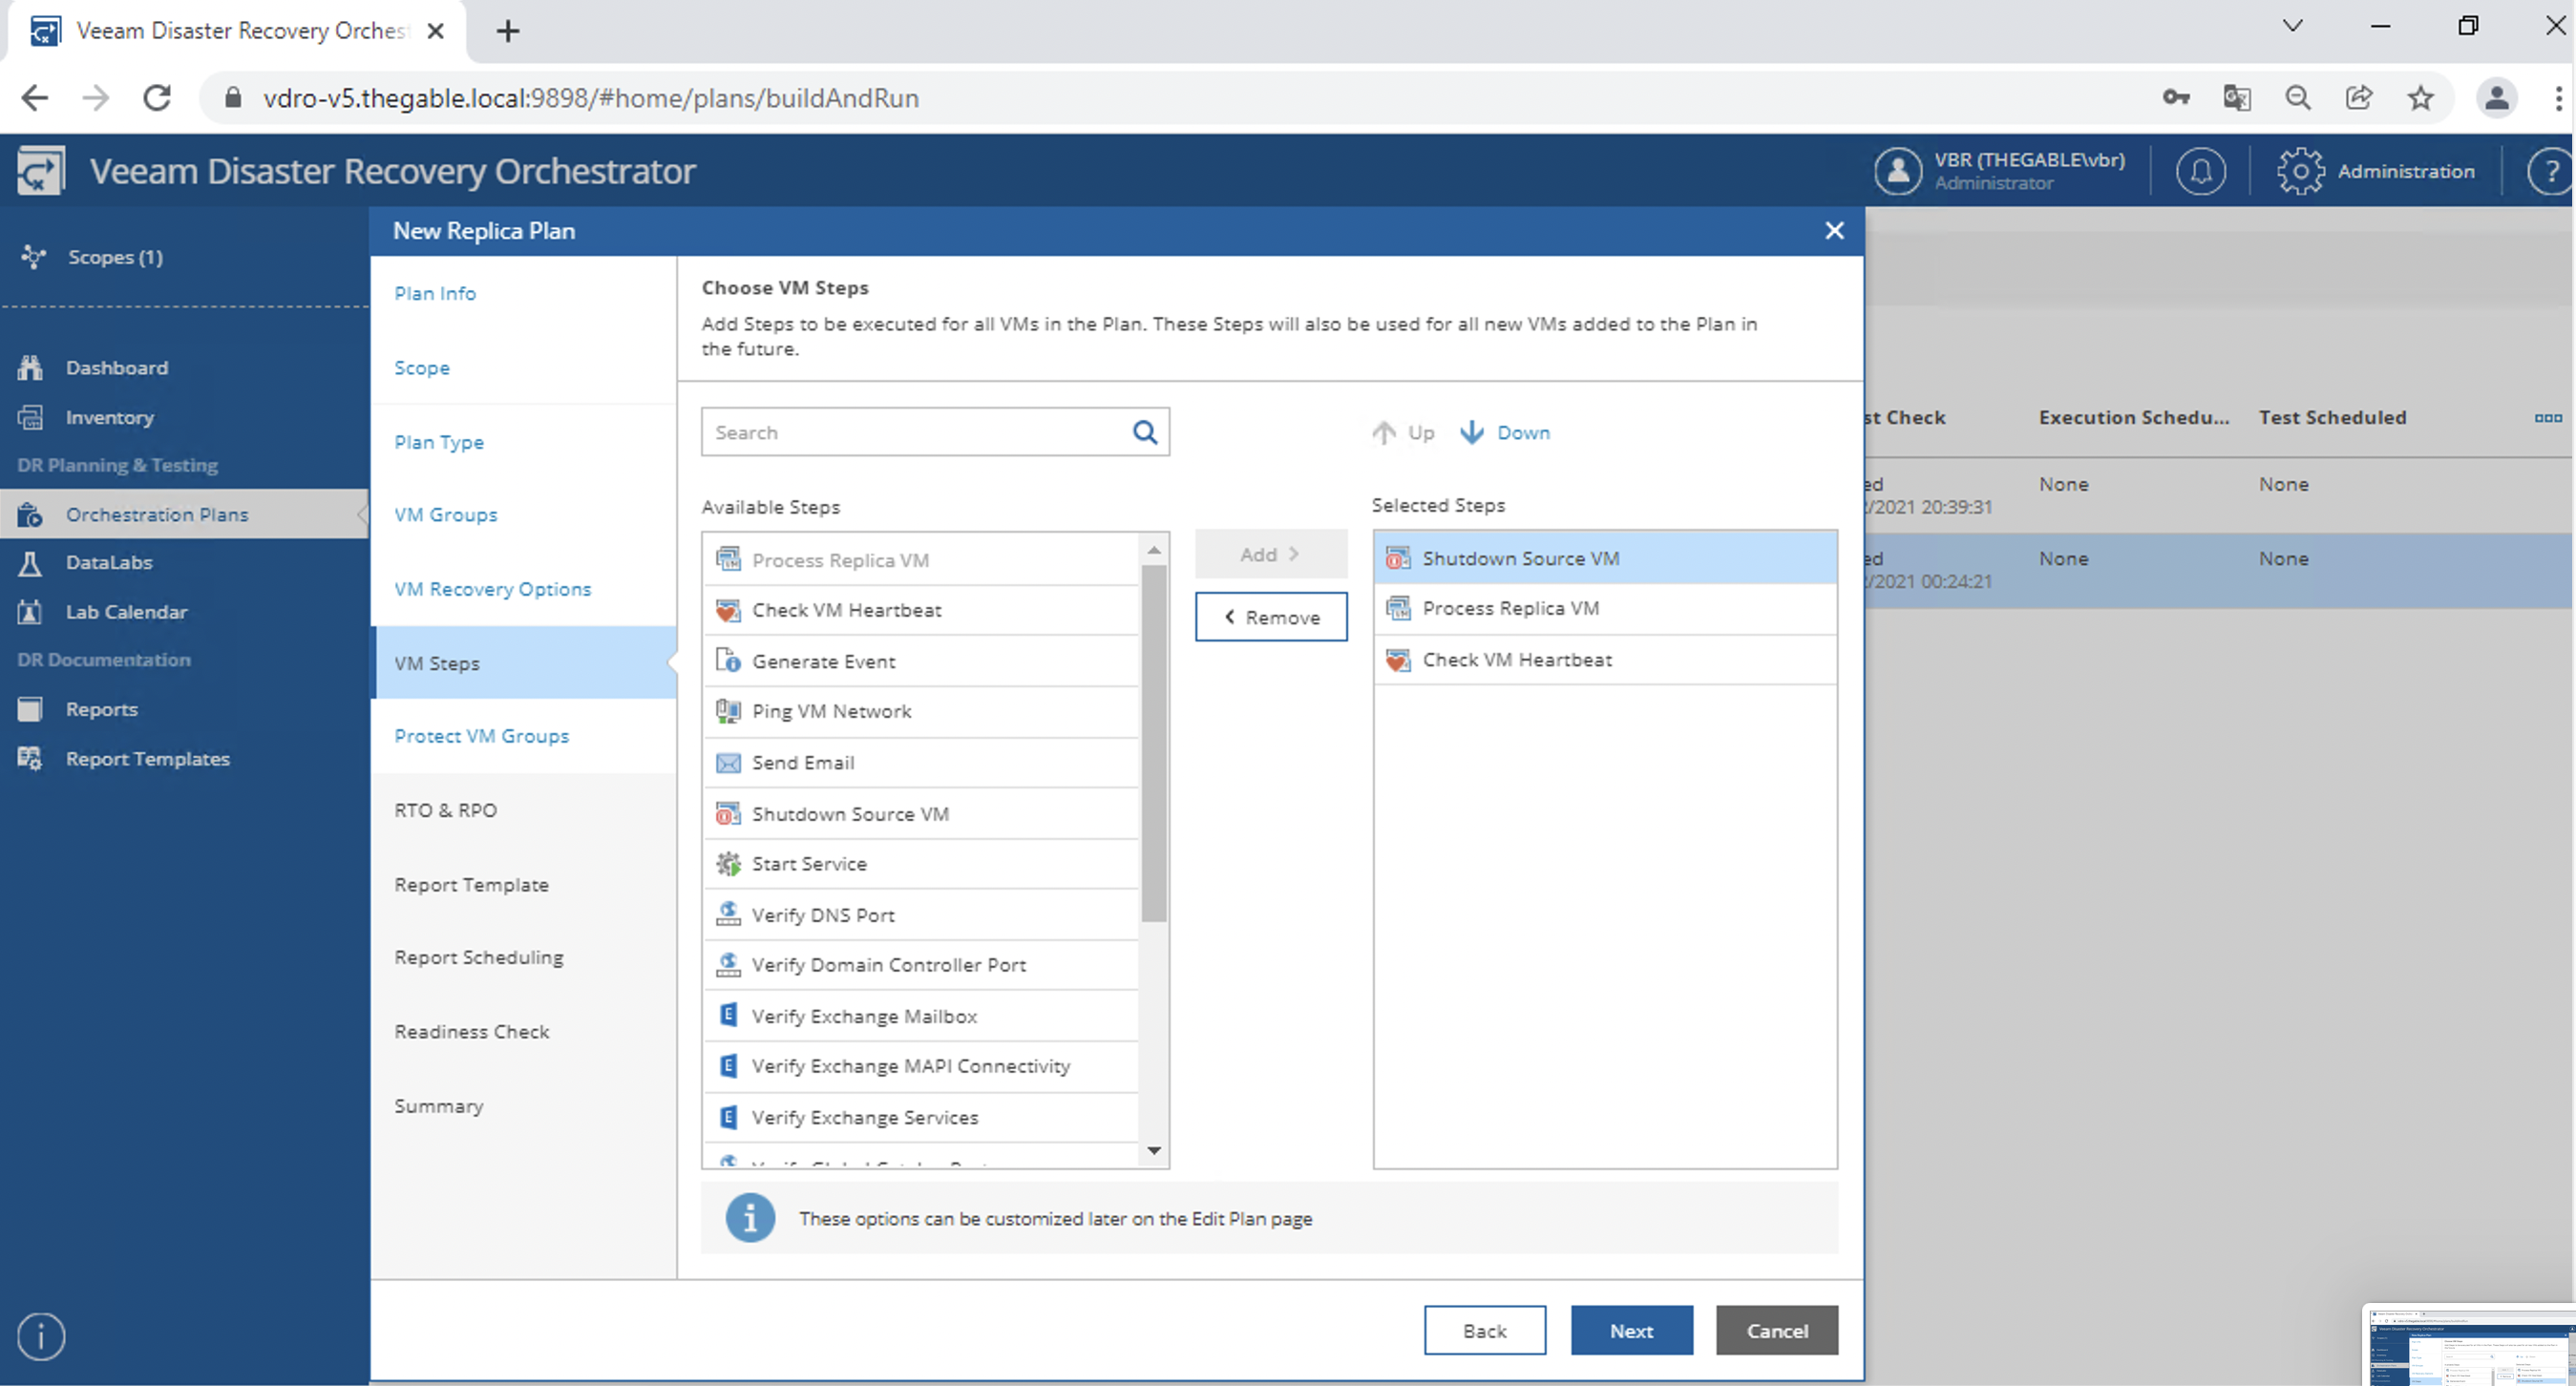
Now I add the steps necessary for the realization of the plan (in the example the shutdown of the production VM was added as the first activity of the plan) (see images 13, 14, 15, and 16).
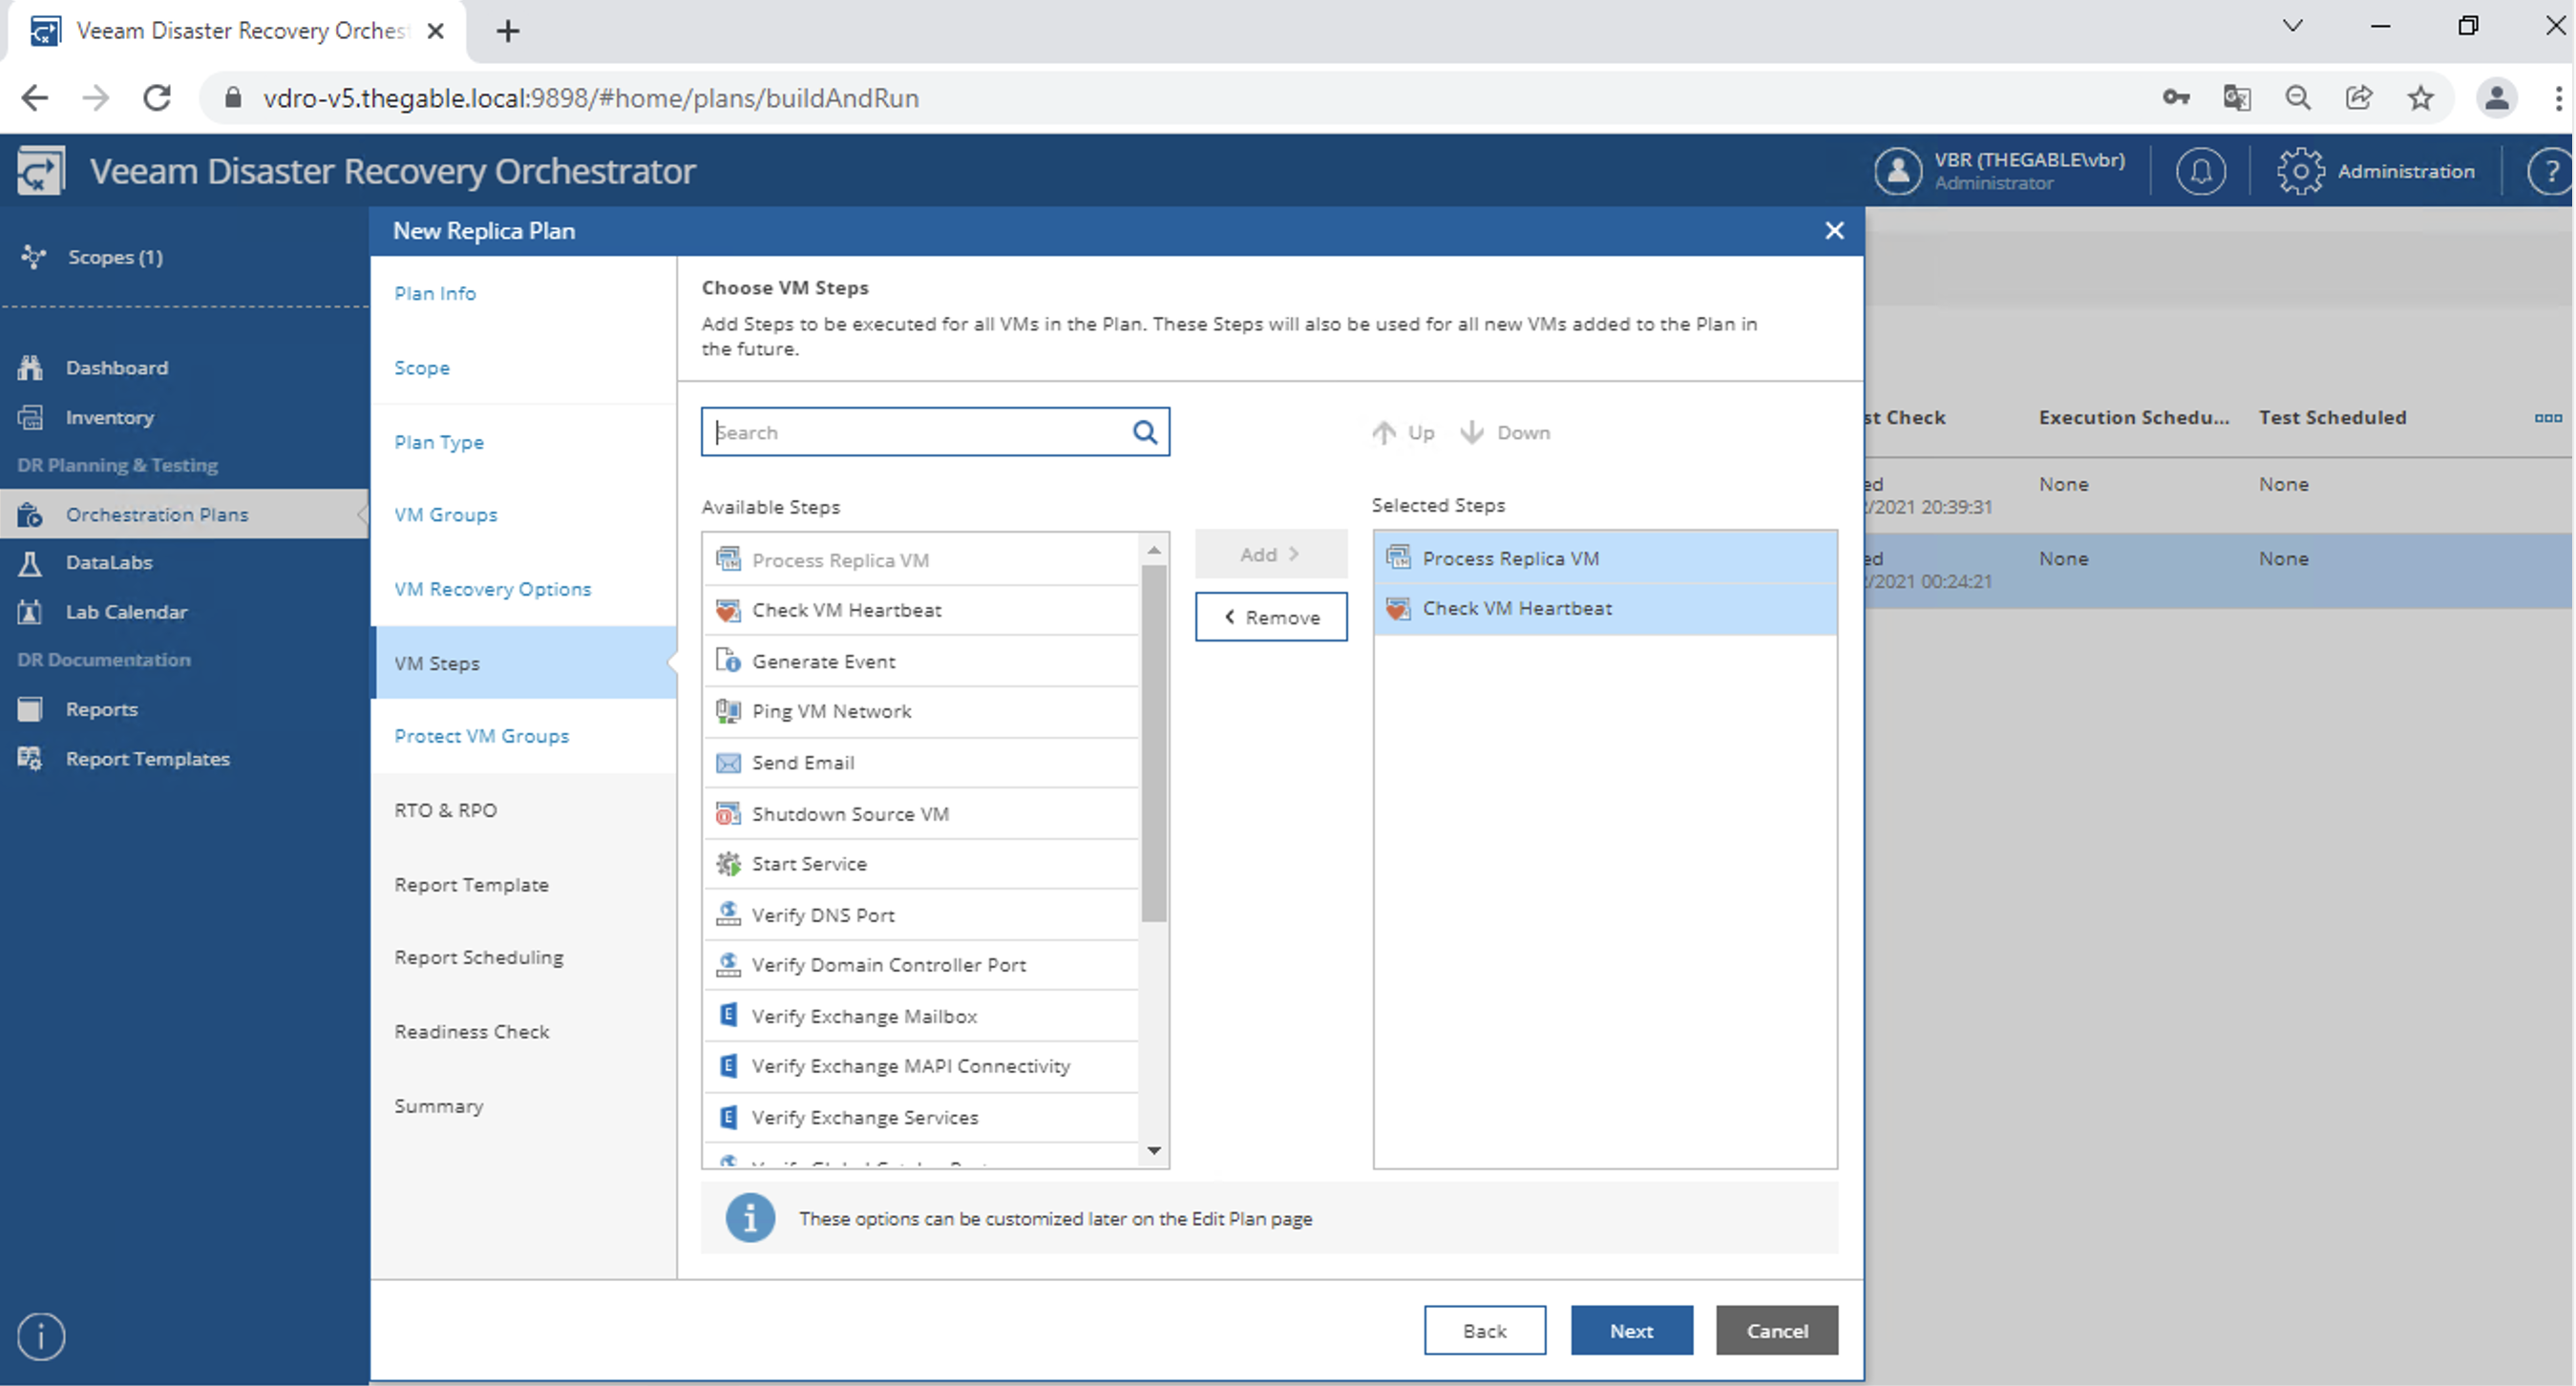
Image 13

Image 14

Image 15

Image 16

The wizard ends with:

  • The option to backup the VMs that were started during the DR plan (image 17)
  • The RTPO values that must be respected for the plan to be executed (image 18)
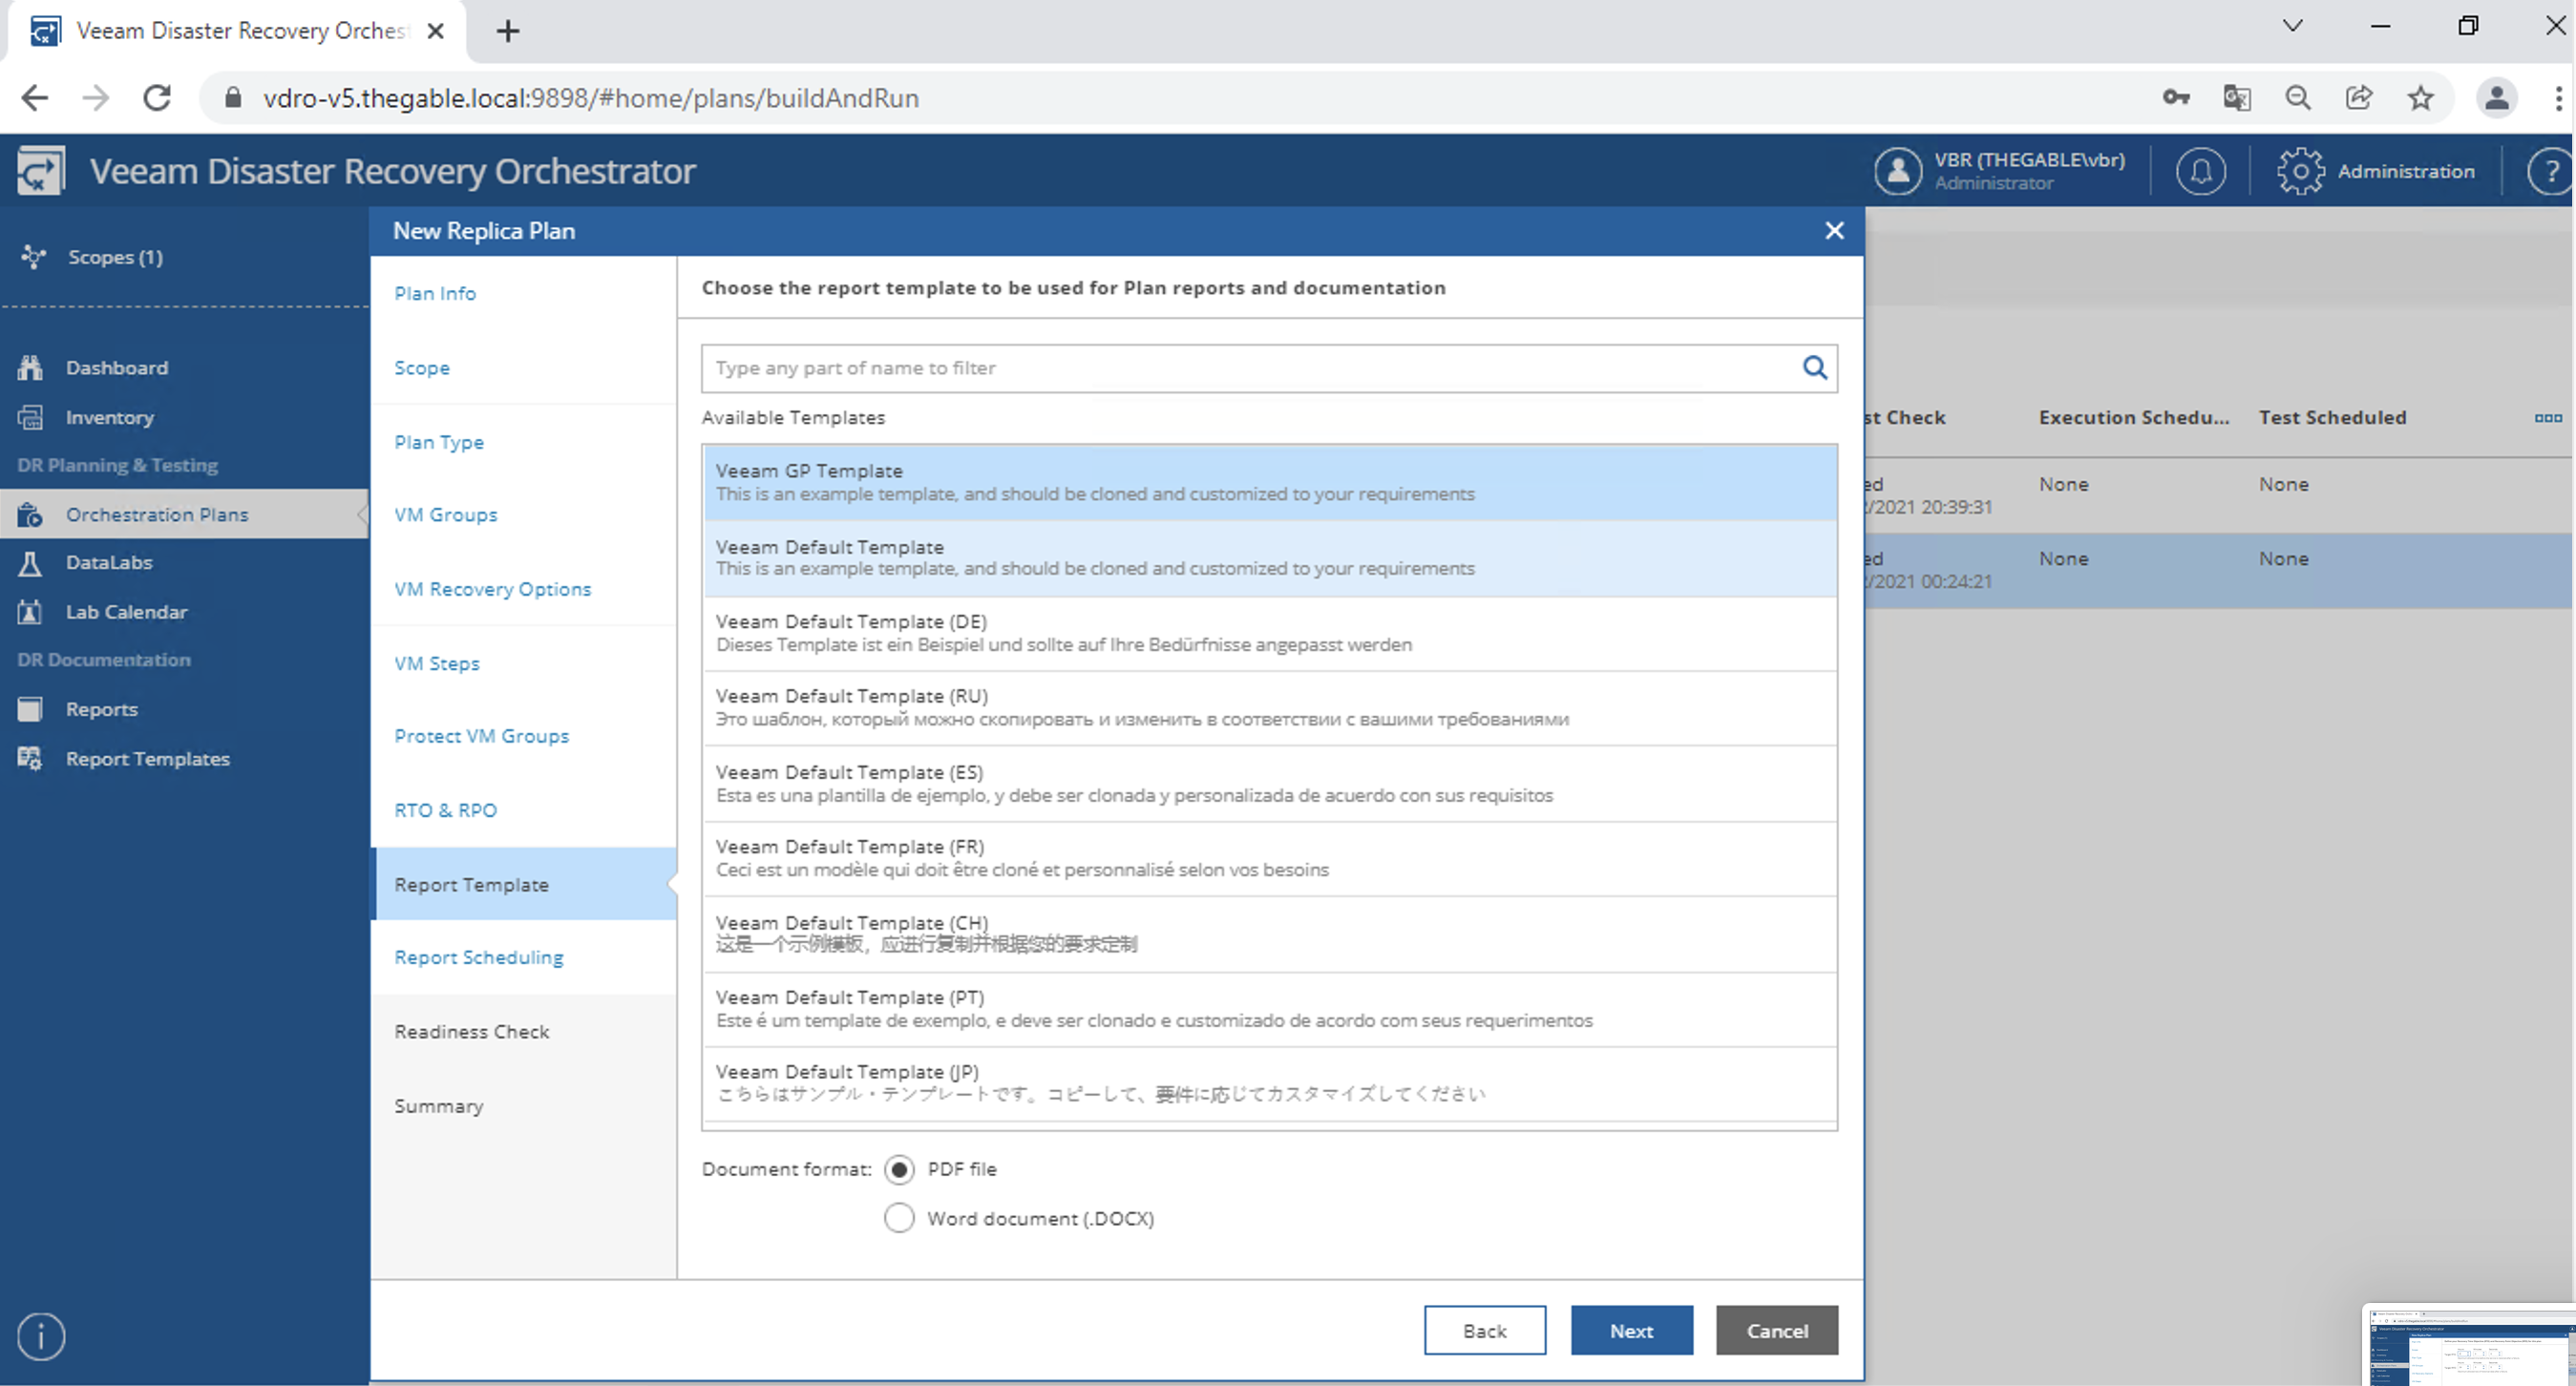
  • The choice of the language of the template to be used (image 19)
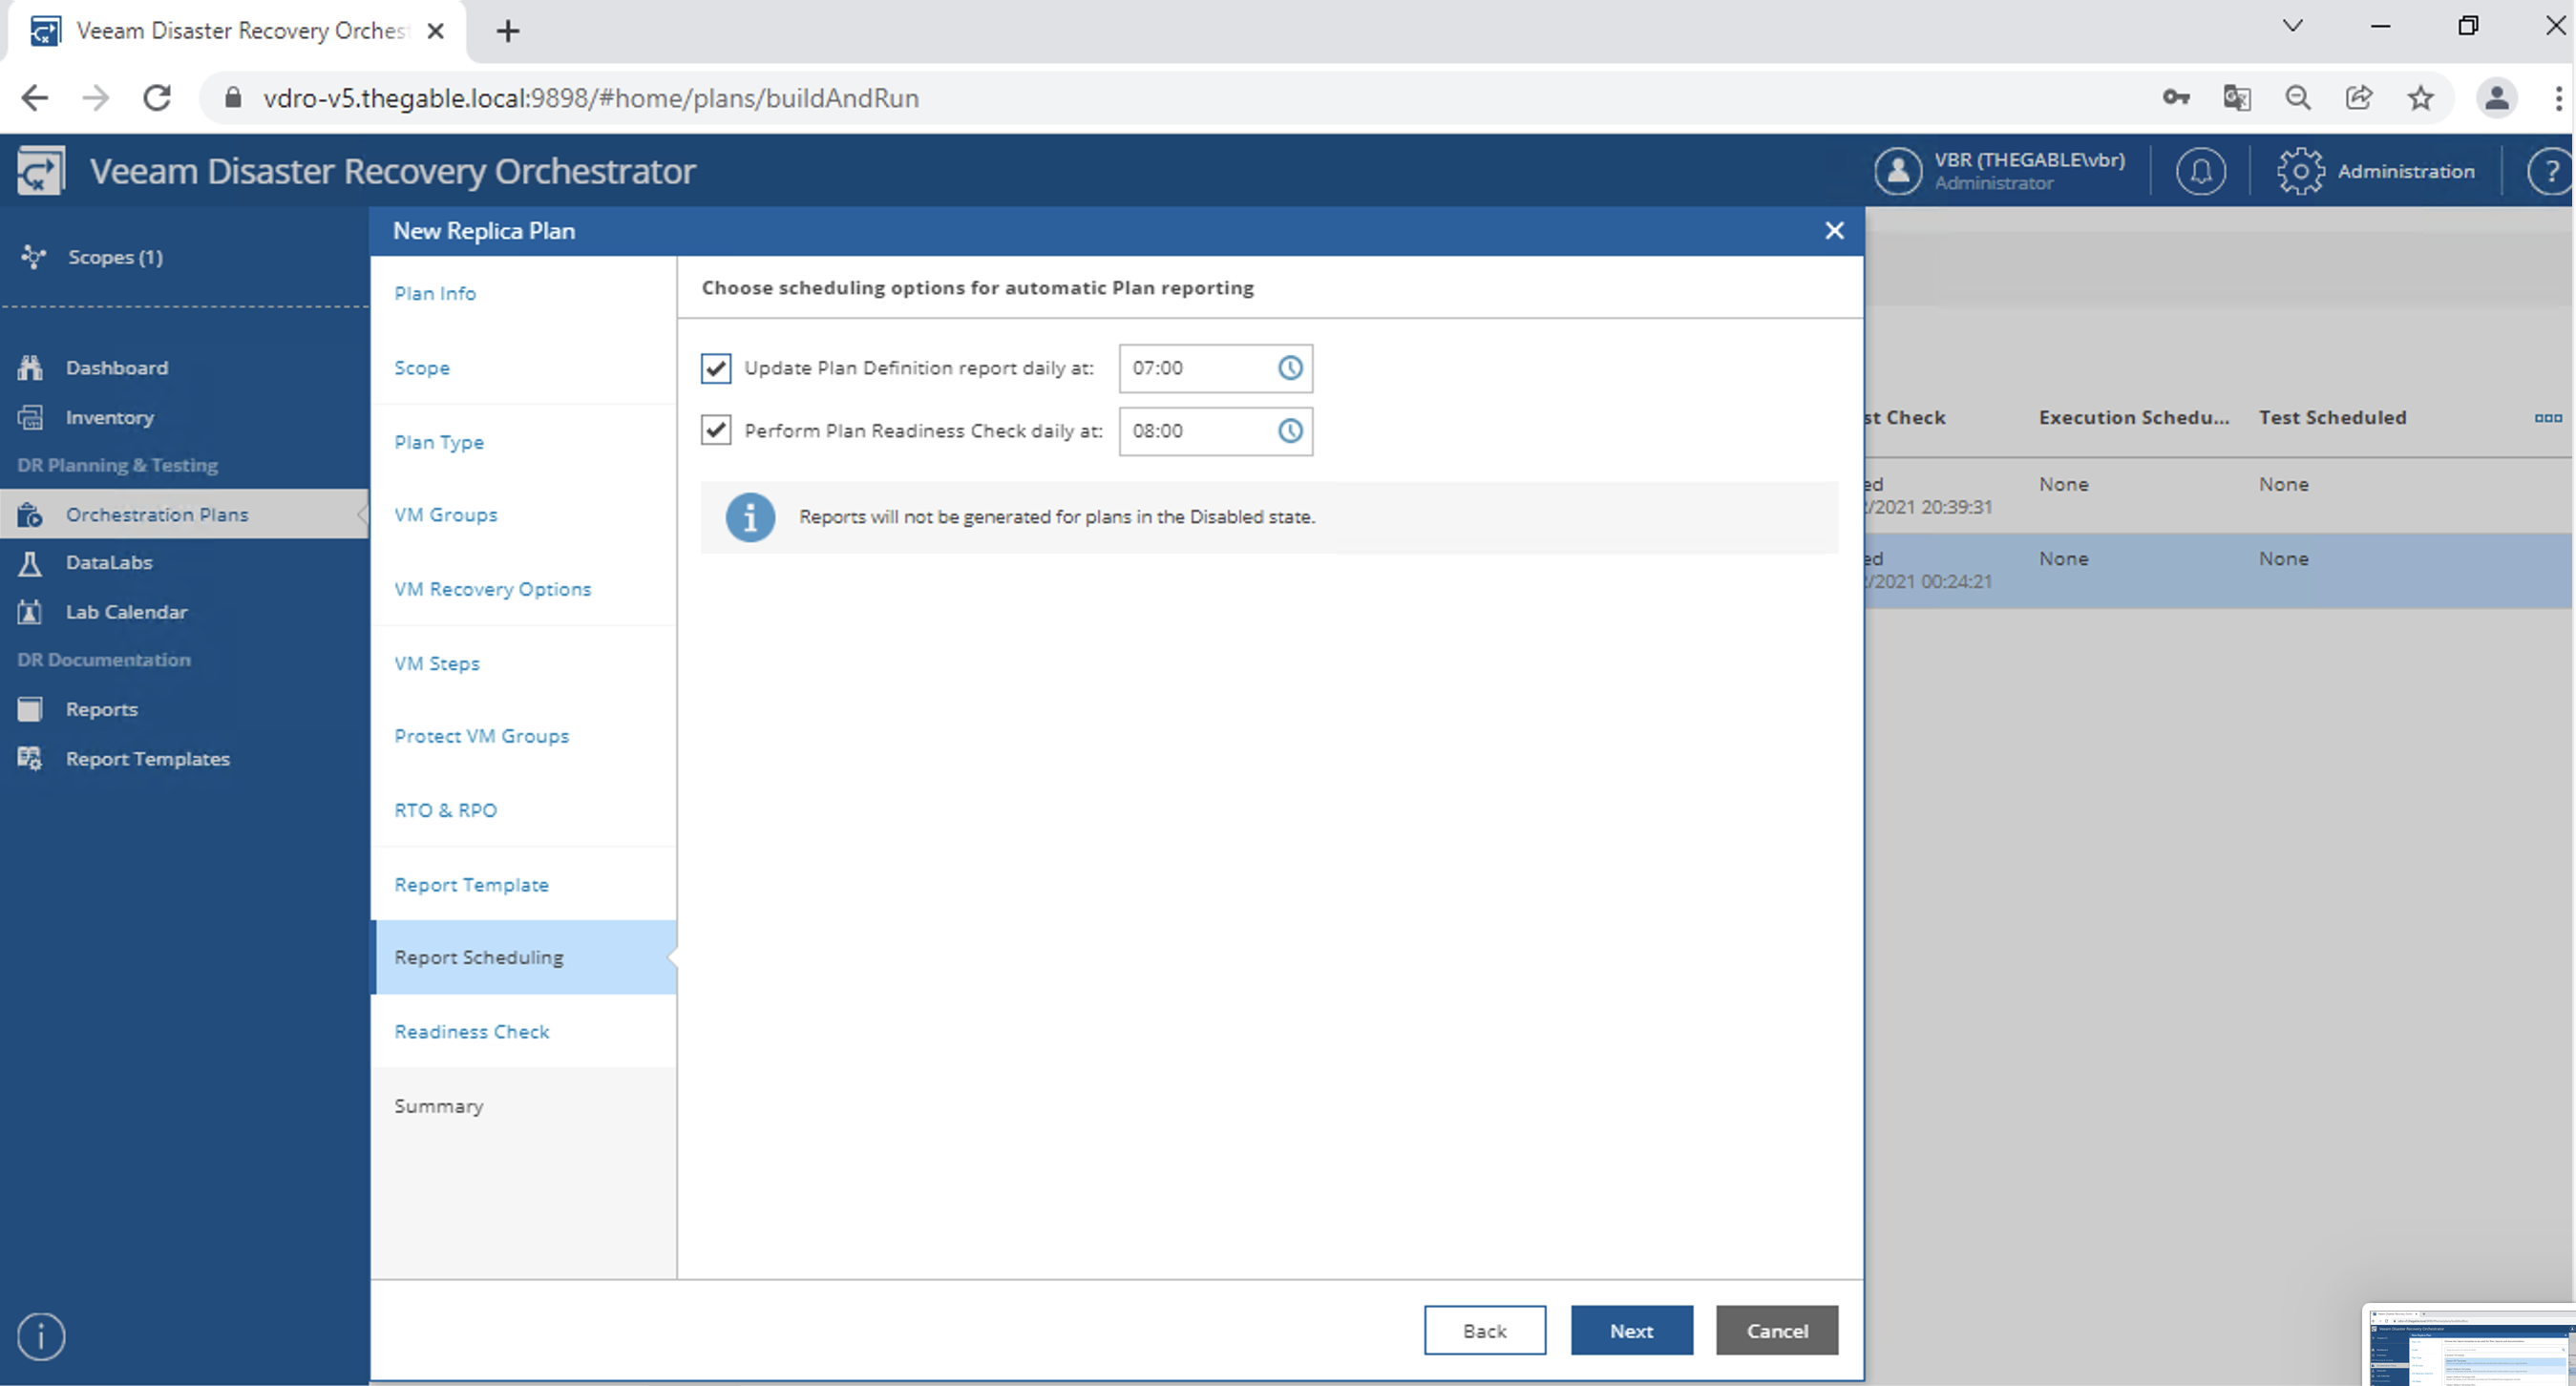
  • The time at which the reports will be automatically generated (image 20)
  • Whether to immediately create the readiness report (which verifies all components of the plan) (image 21)
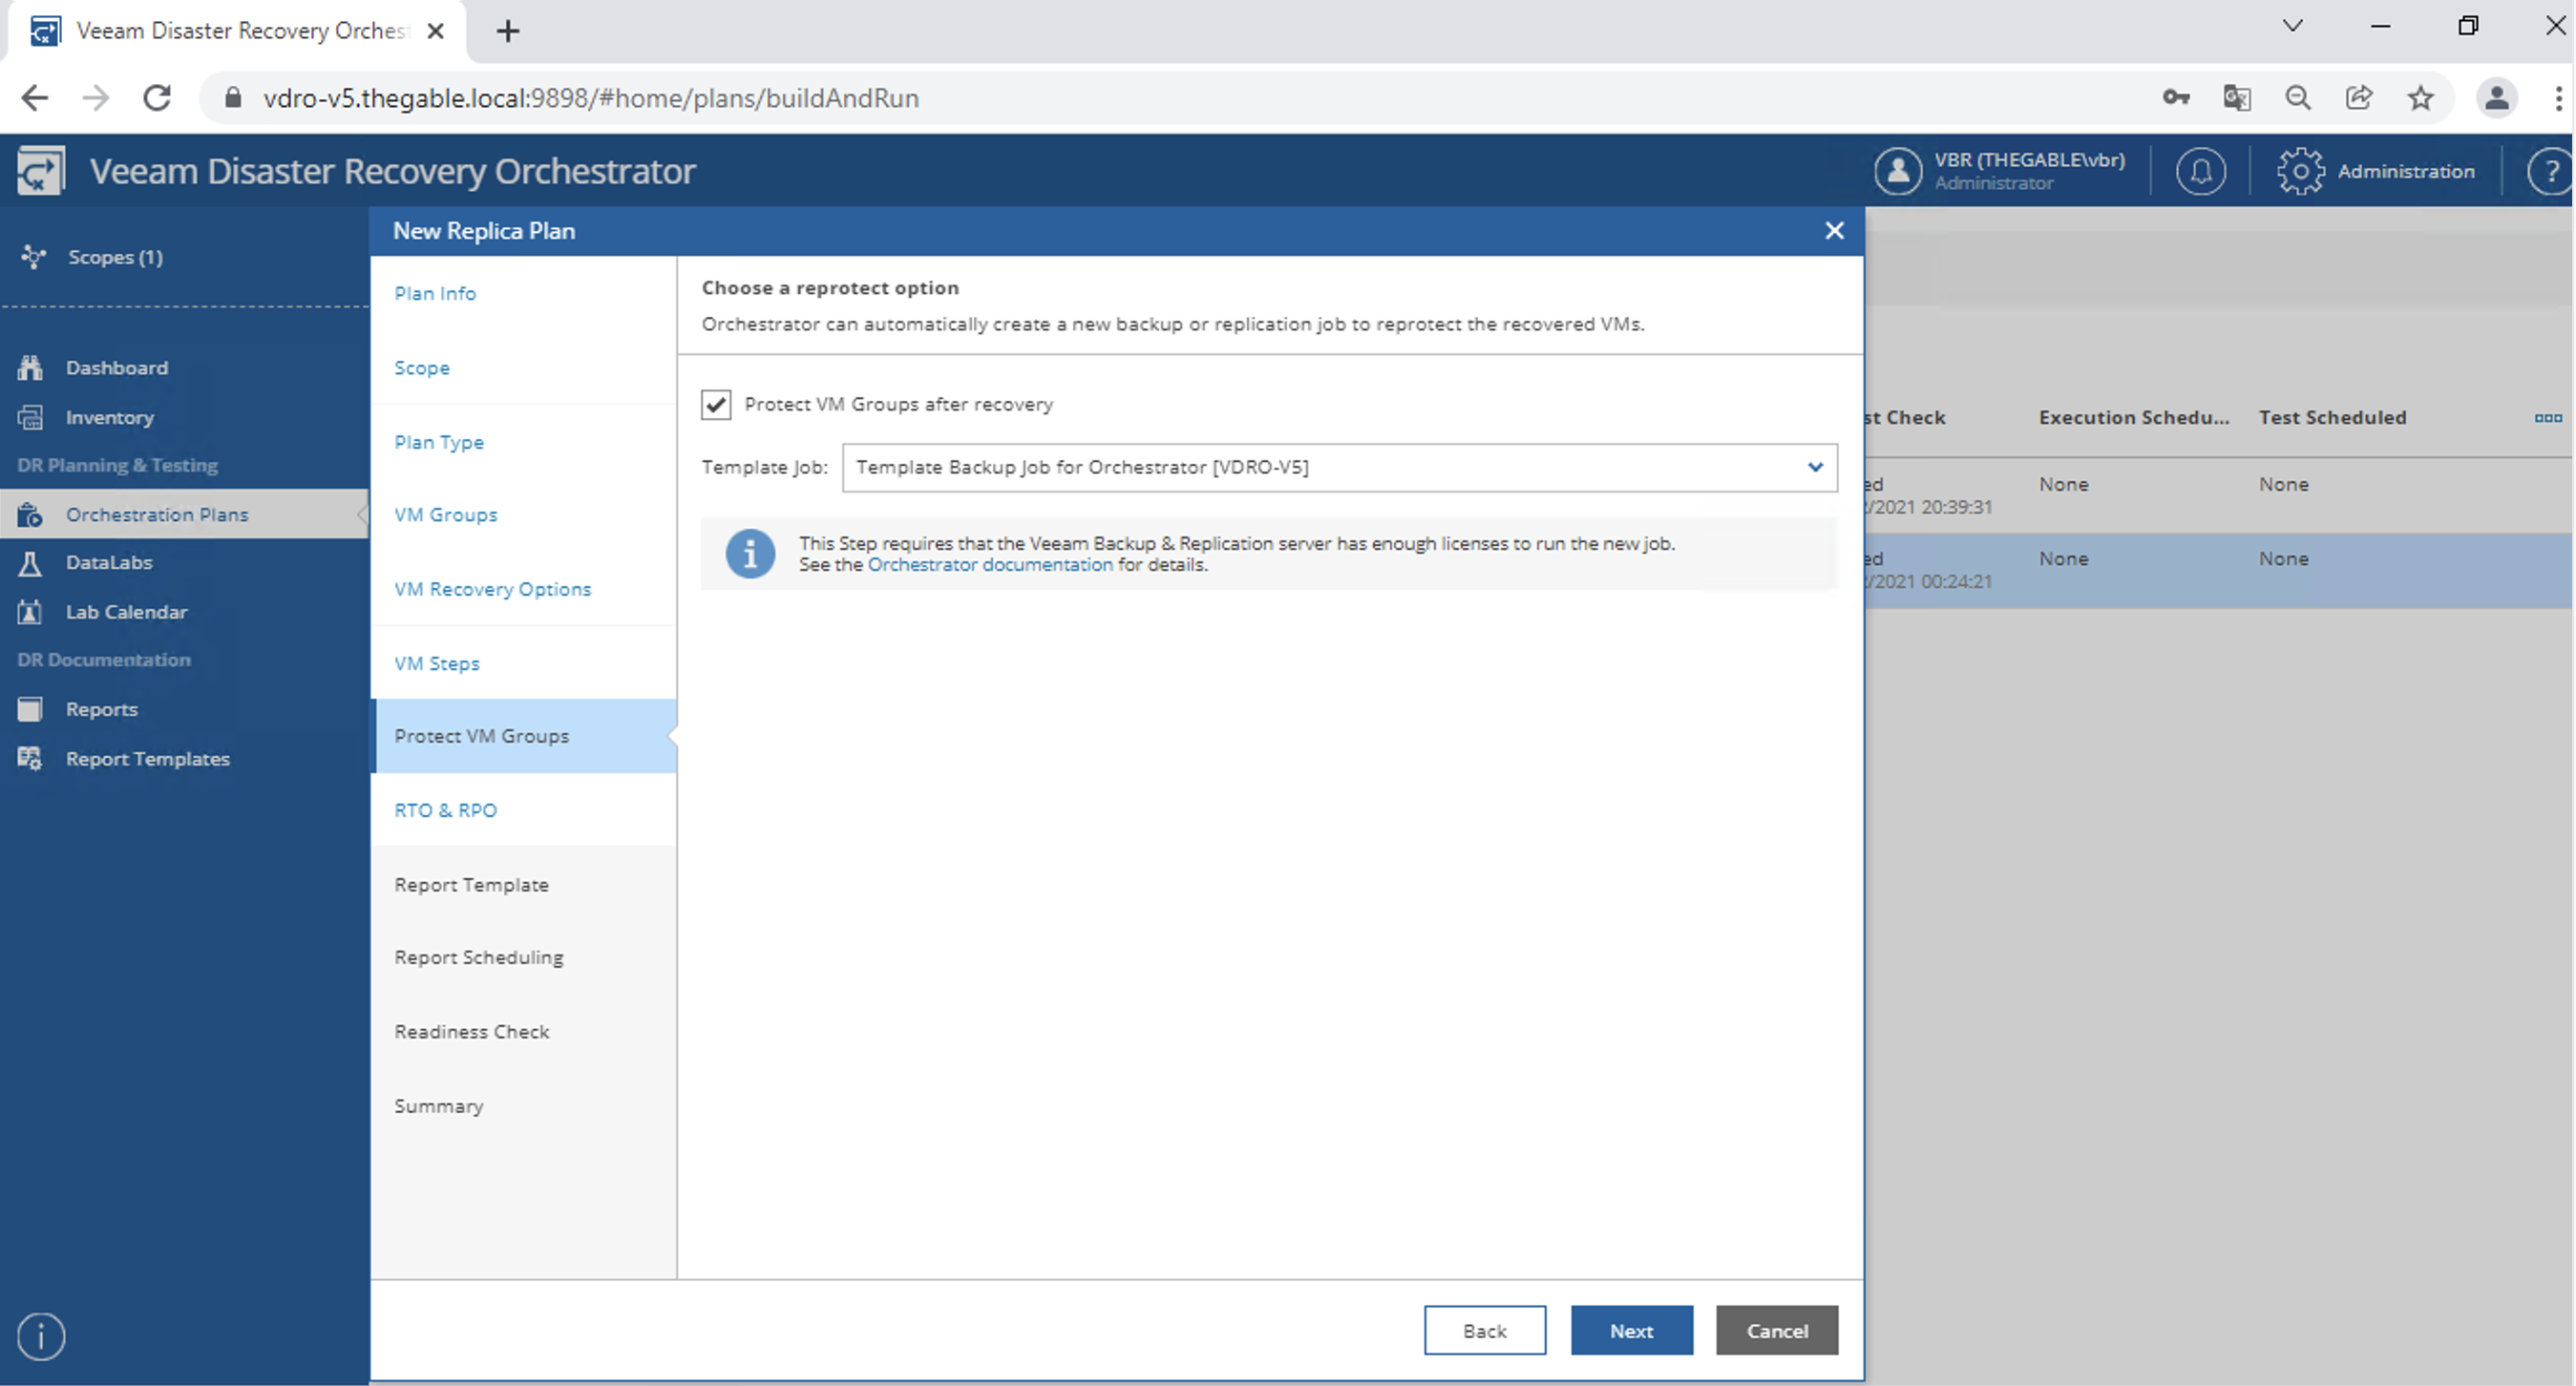
image 17

image 18

image 19

image 20

image 21

Now you can test and start your orchestration plans later

Veeam Disaster Recovery Orchestrator v.5: Components verification

This article explains how to configure the Veeam Disaster Recovery Orchestrator (VDrO) administration menu.

Before proceeding to the administration phase, it is essential to have already labeled the resources that will have to be part of the Disaster Recovery plans.

The classification was illustrated in the previous article, available by clicking on the following link: VDrO – VOne – Tagging .

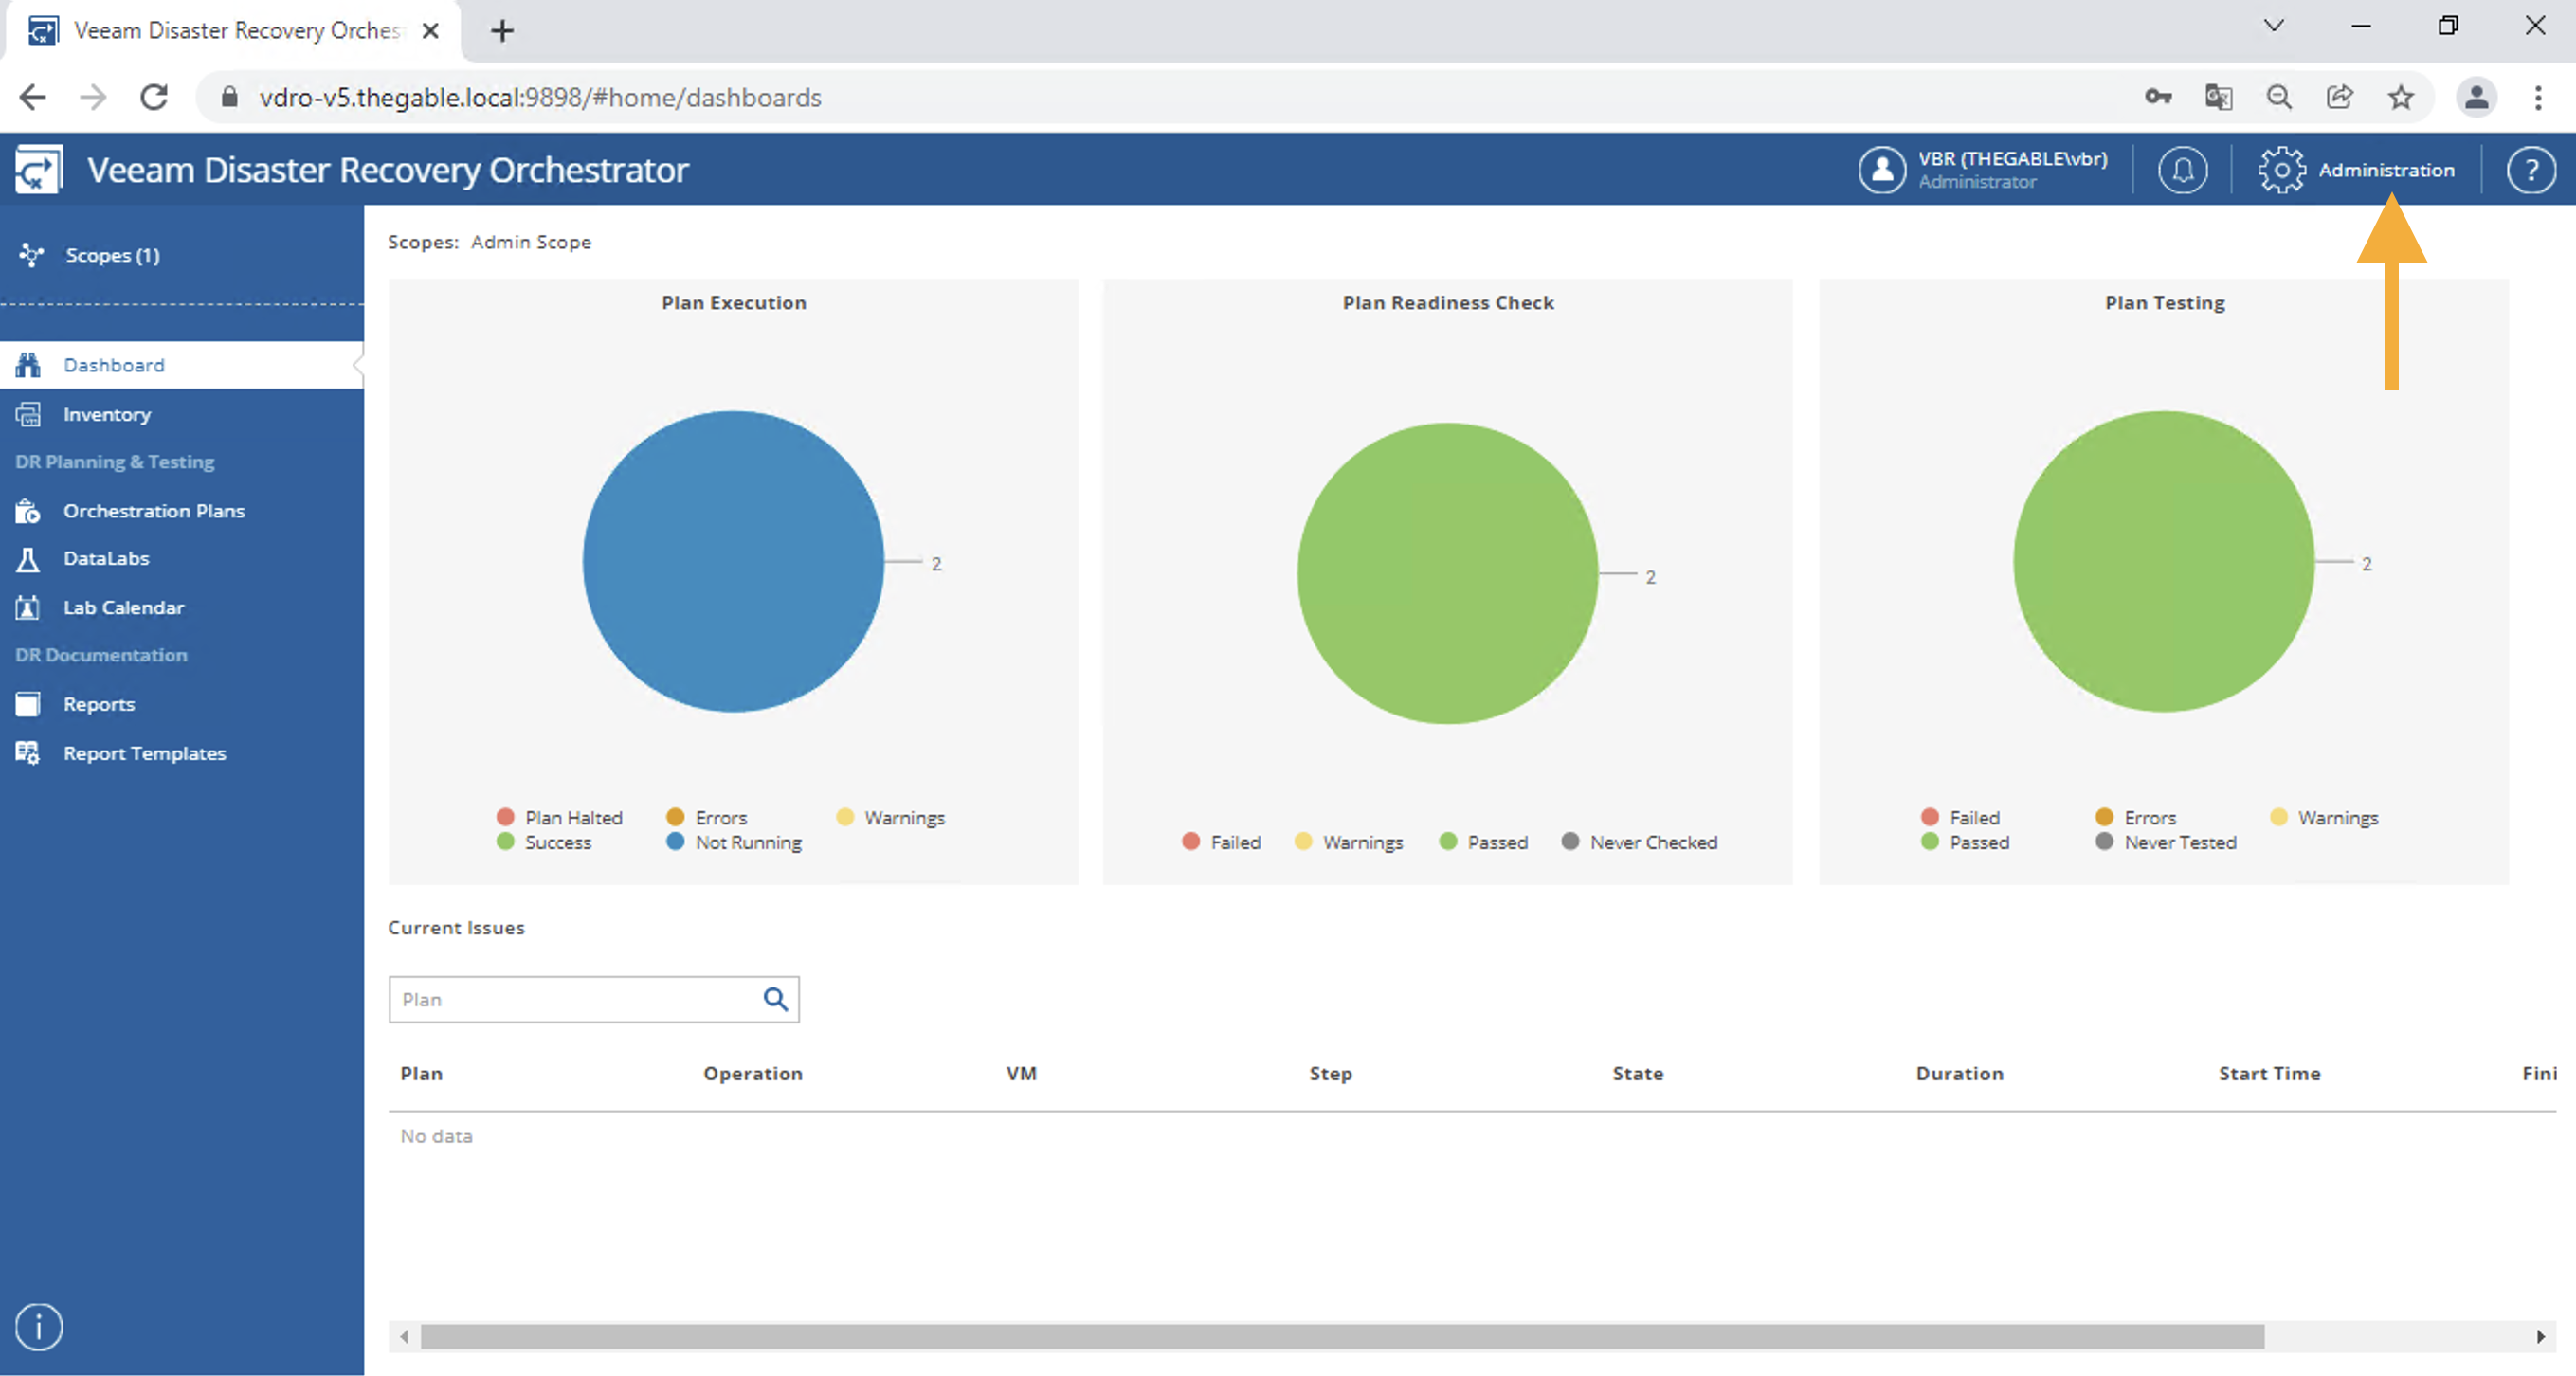
Note 1 : To access the administration menu, select the item called “Administration” (see image 1)

Picture 1

The configuration of the administration menu is divided into three main areas:

In the first, the following are set:

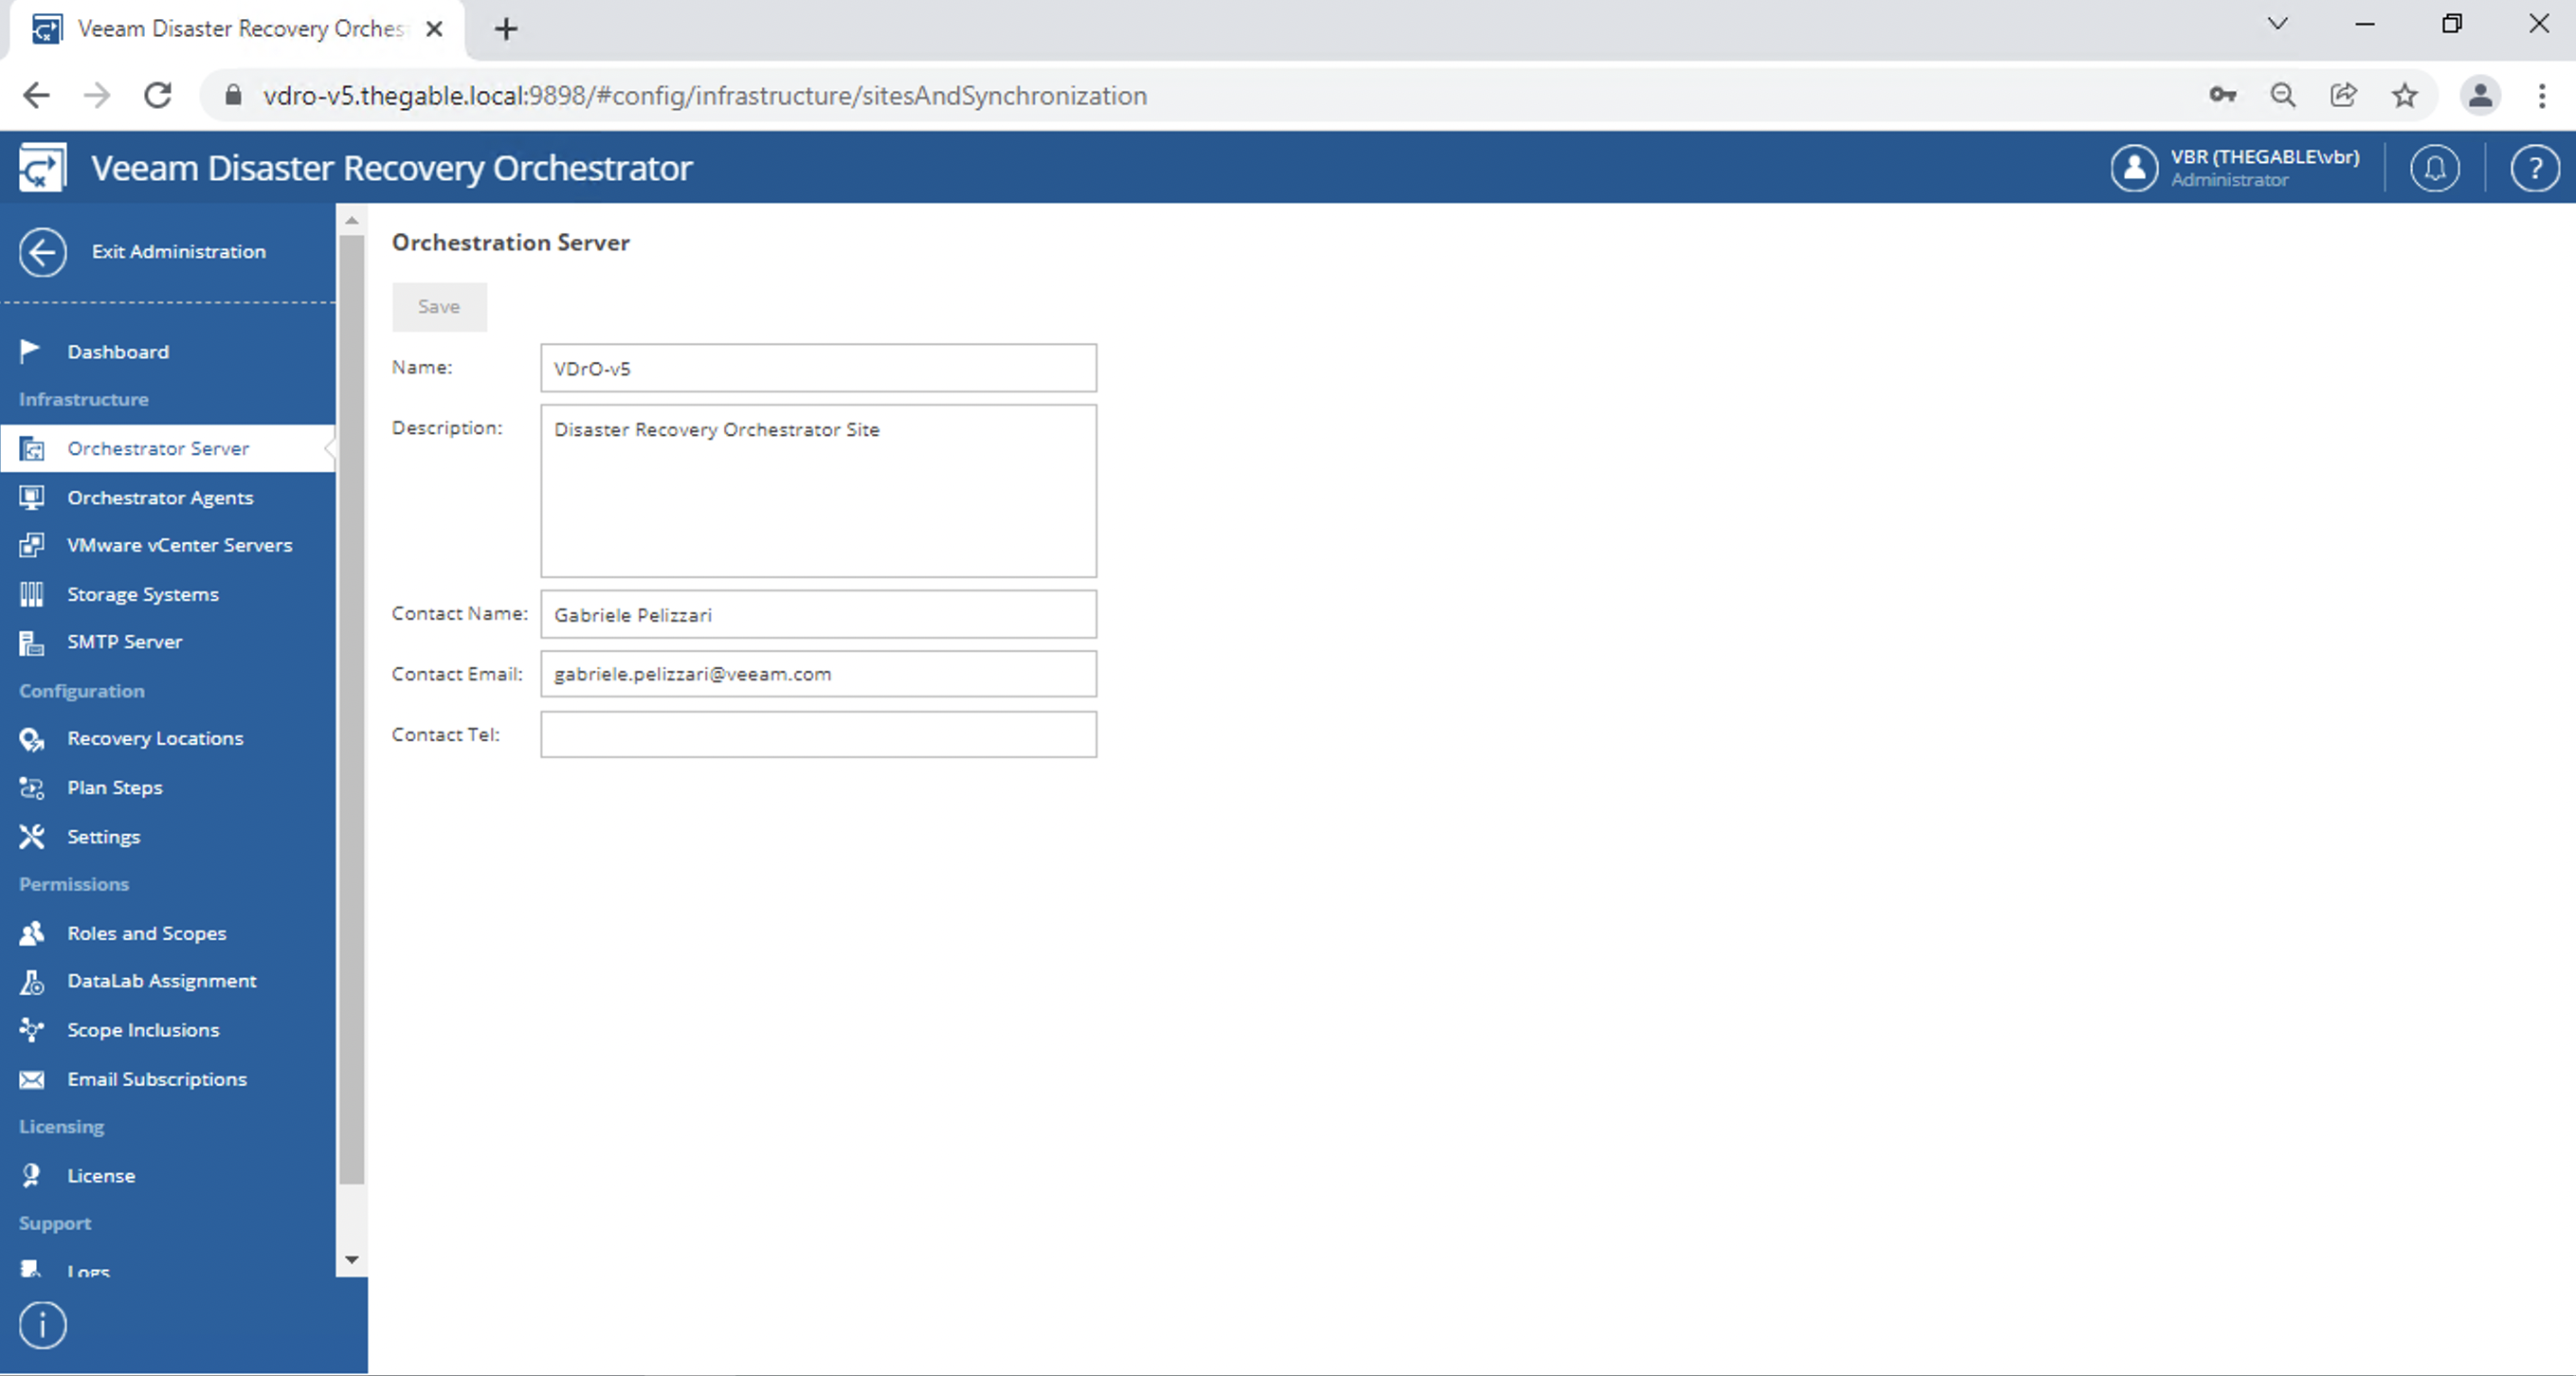
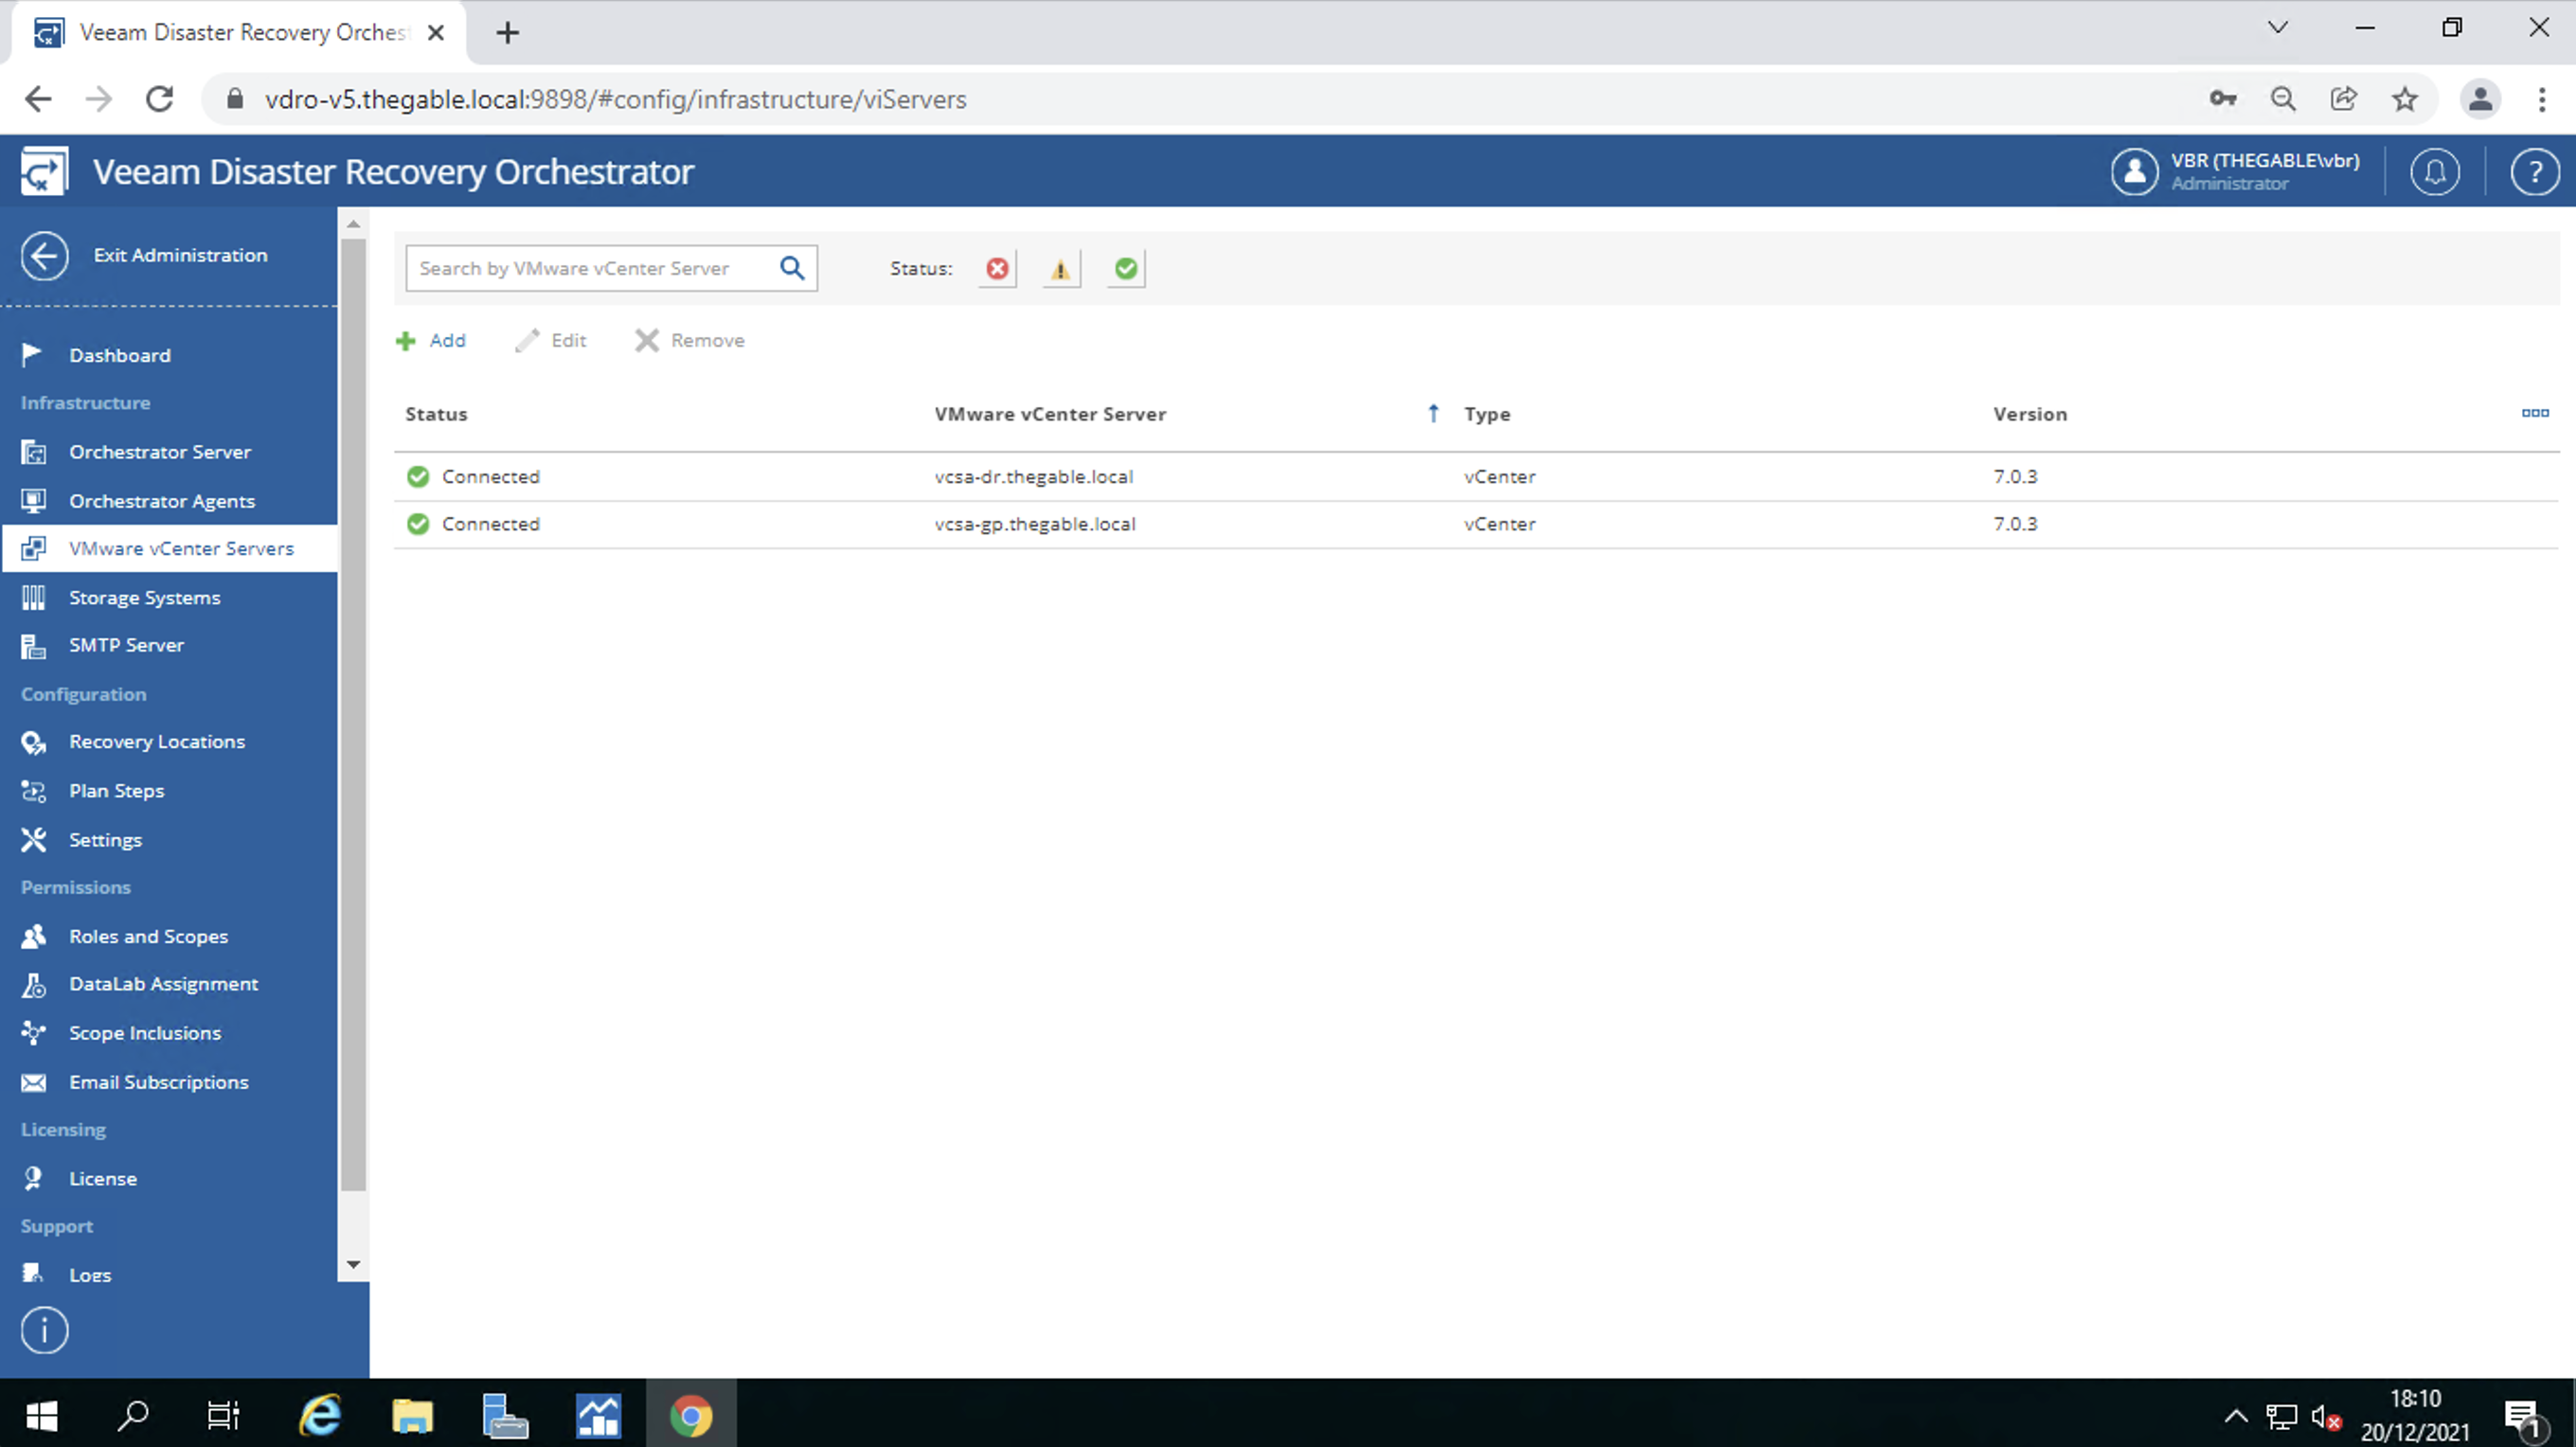
  • The name of the VDrO Server and the contact name (image 2).
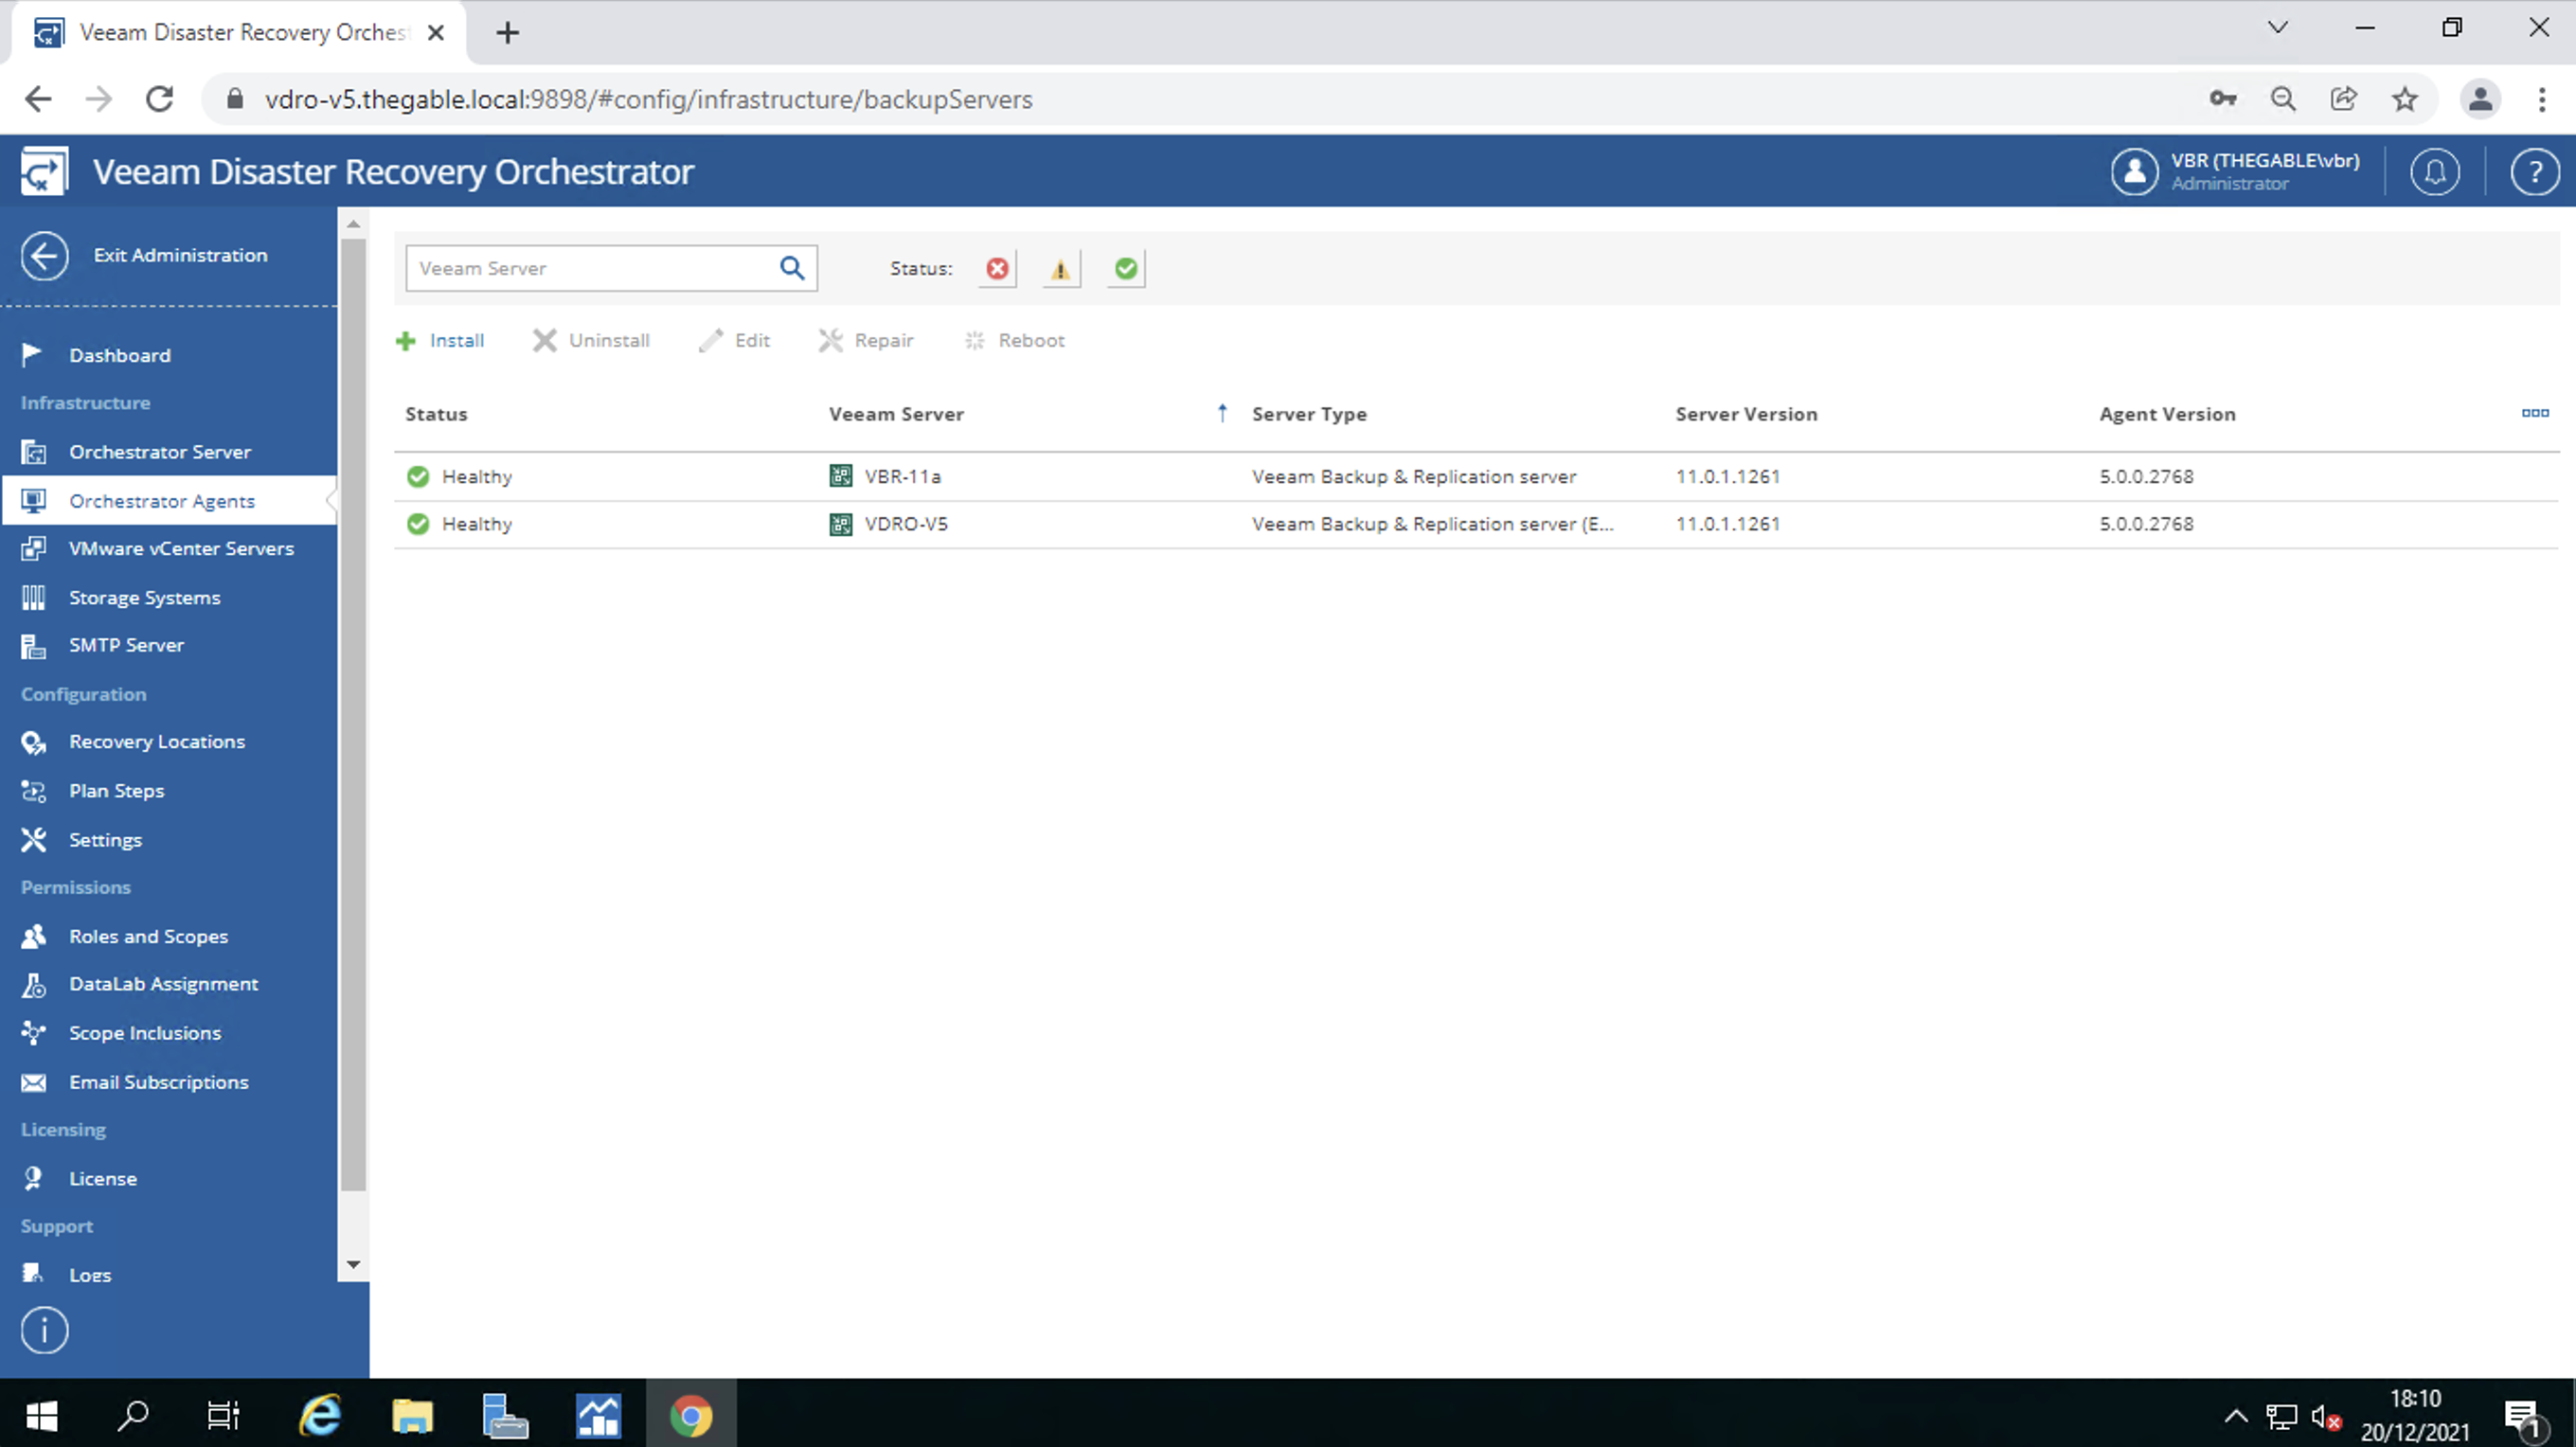
  • connections to Veeam Backup & Replication Servers (VBR) (image 3)
  • connections to vCenters (image 4)
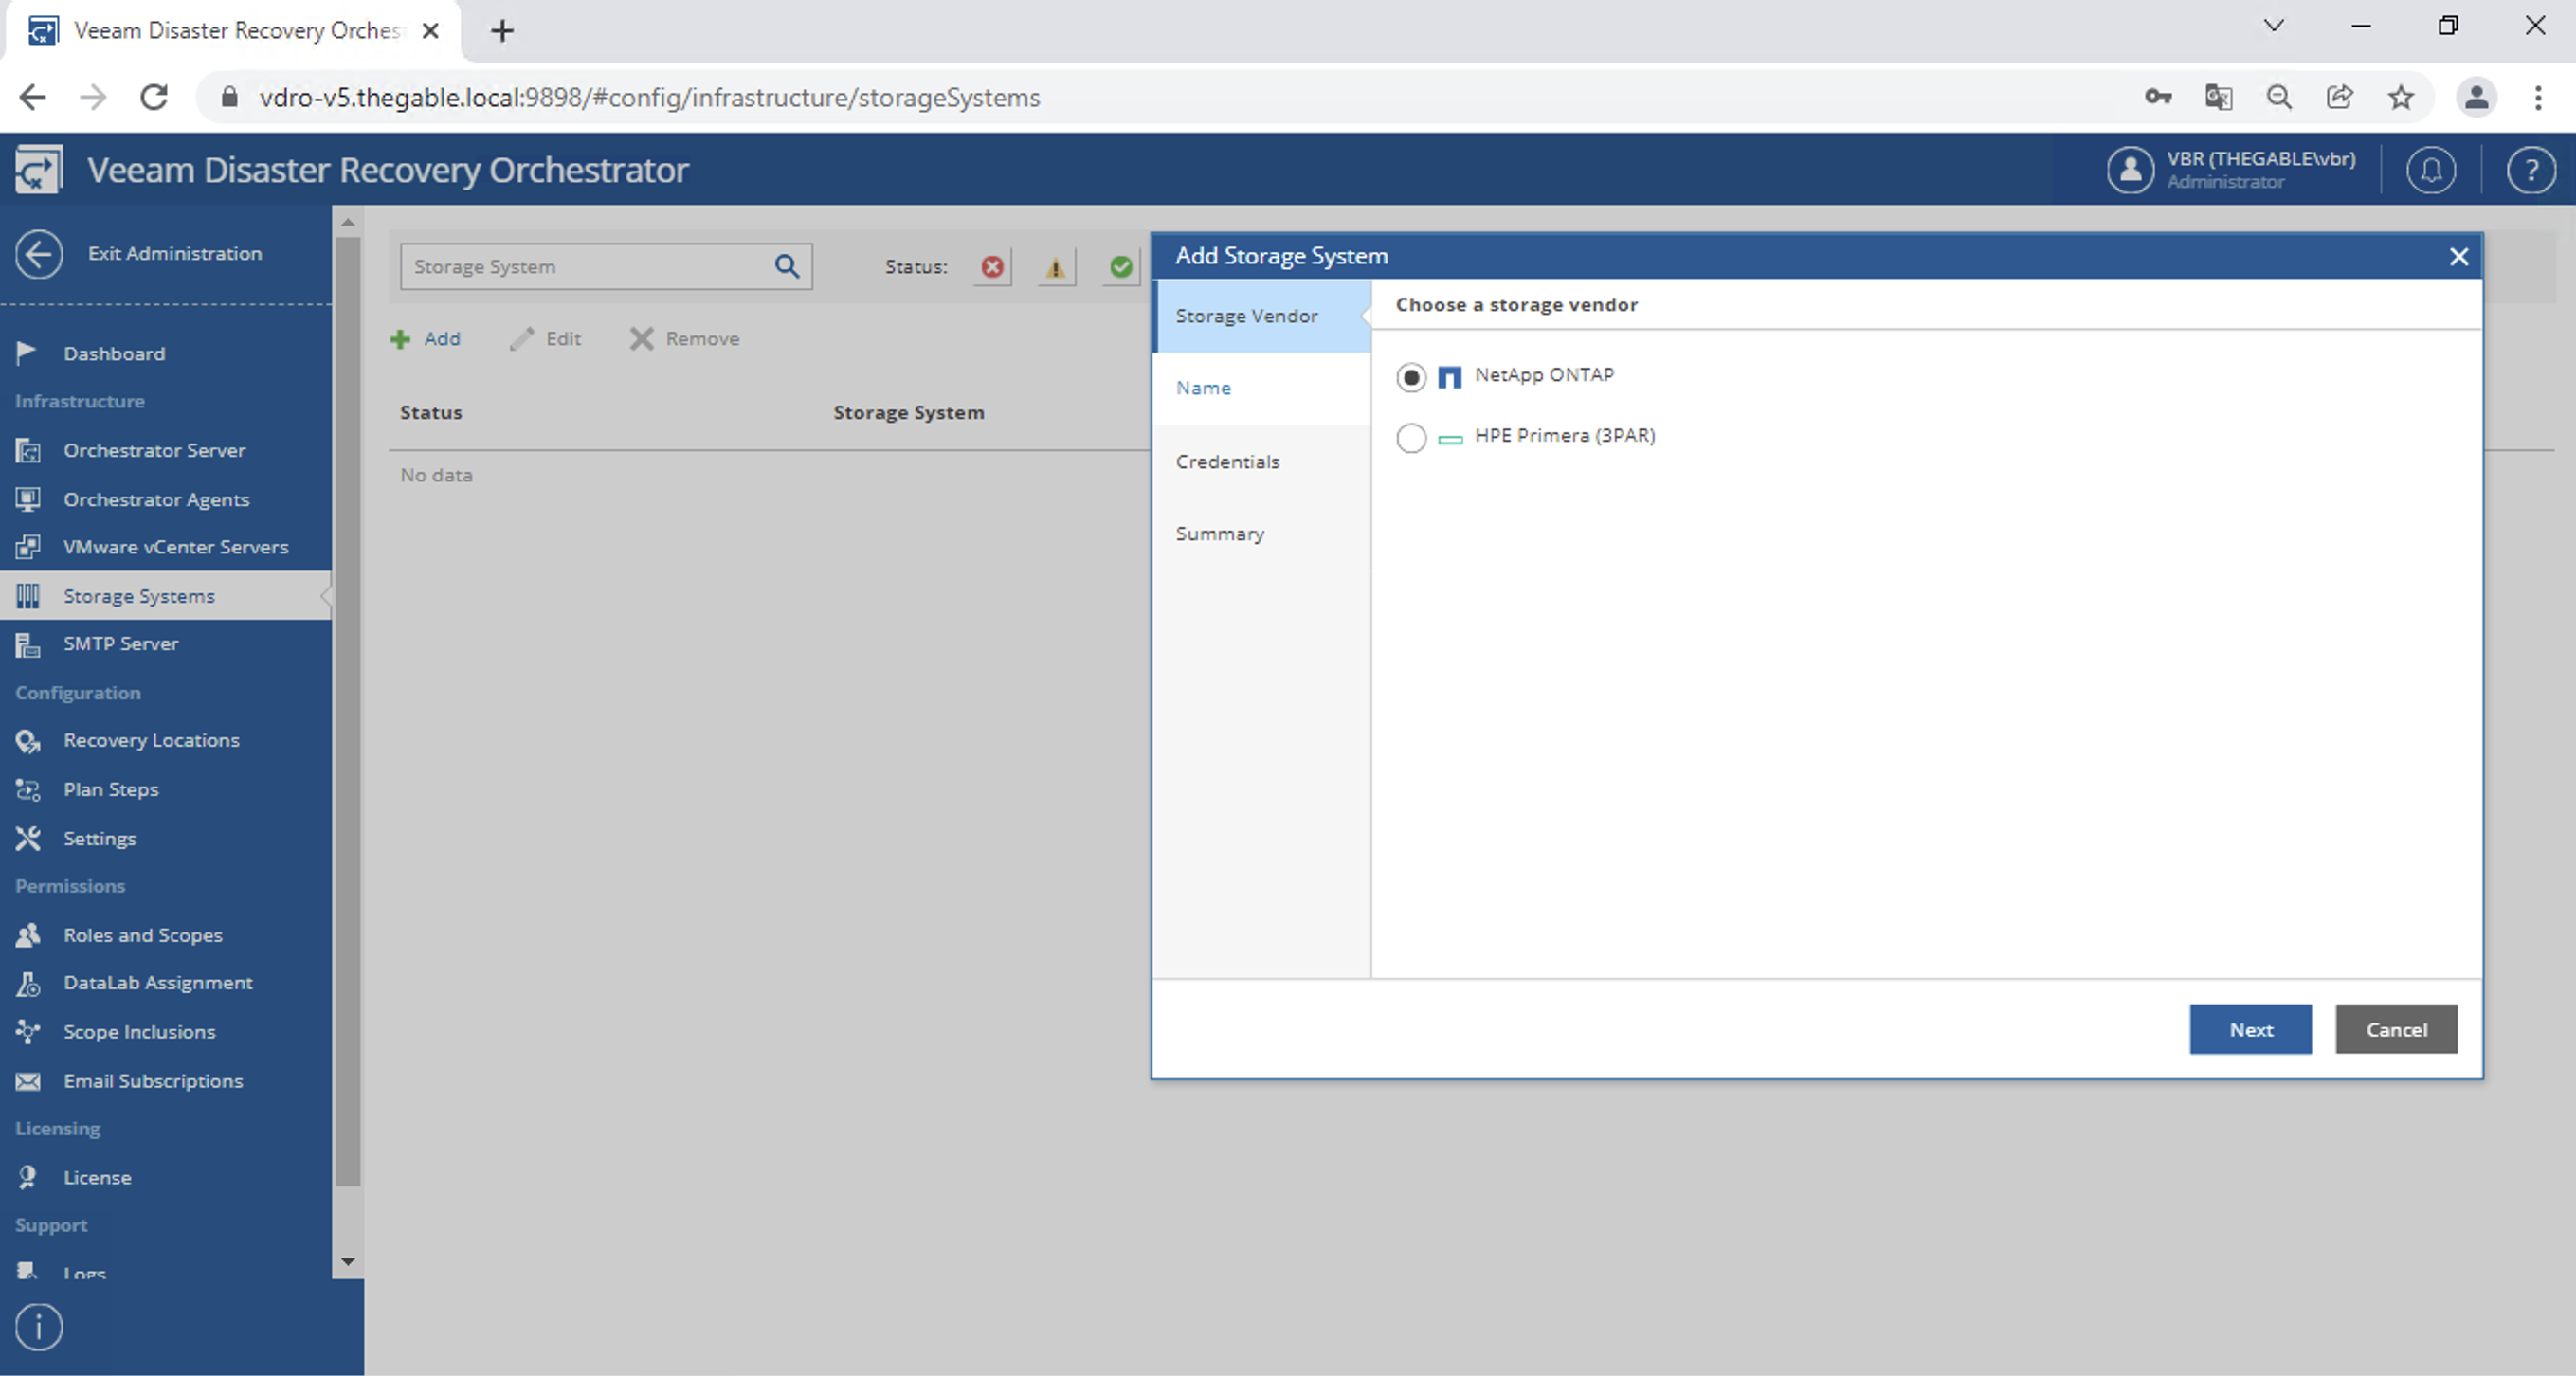
  • the optional connection to the storage (image 5) (refer to this article to find out the details)

picture 2

Picture 3

Picture 4

Picture 5

The second area identifies the resources to be added to the DR plans through tagging:

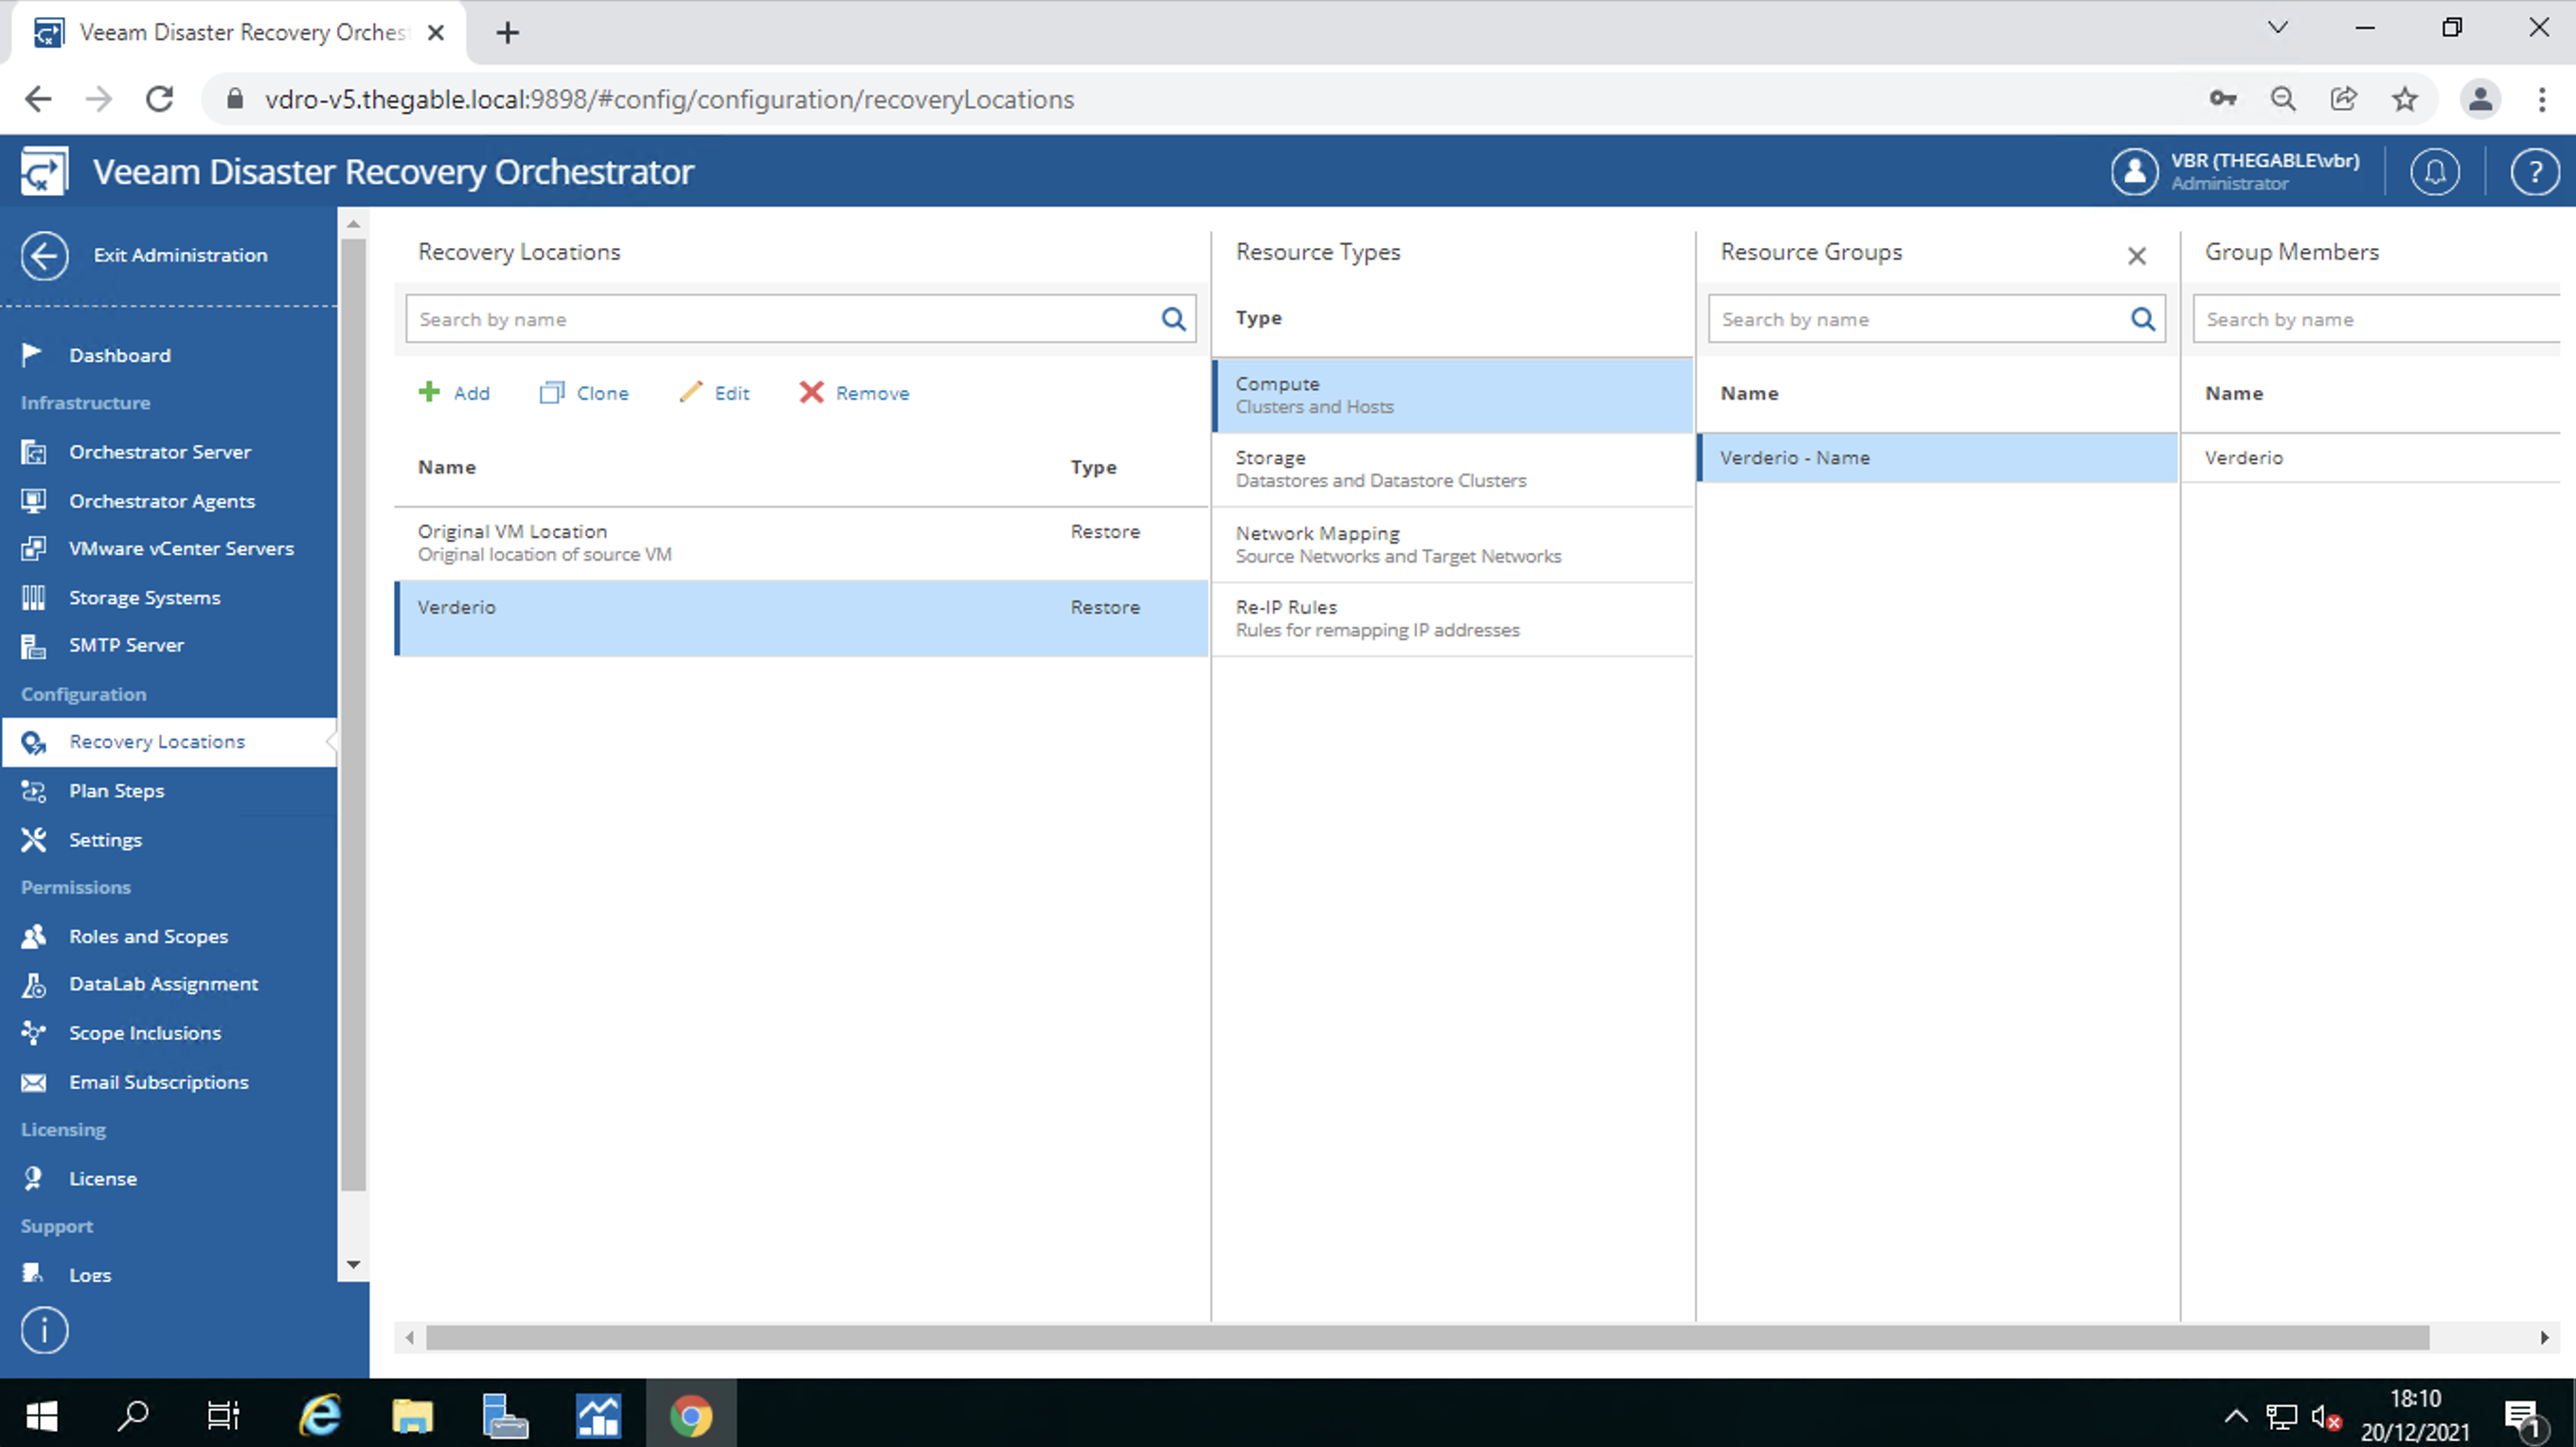
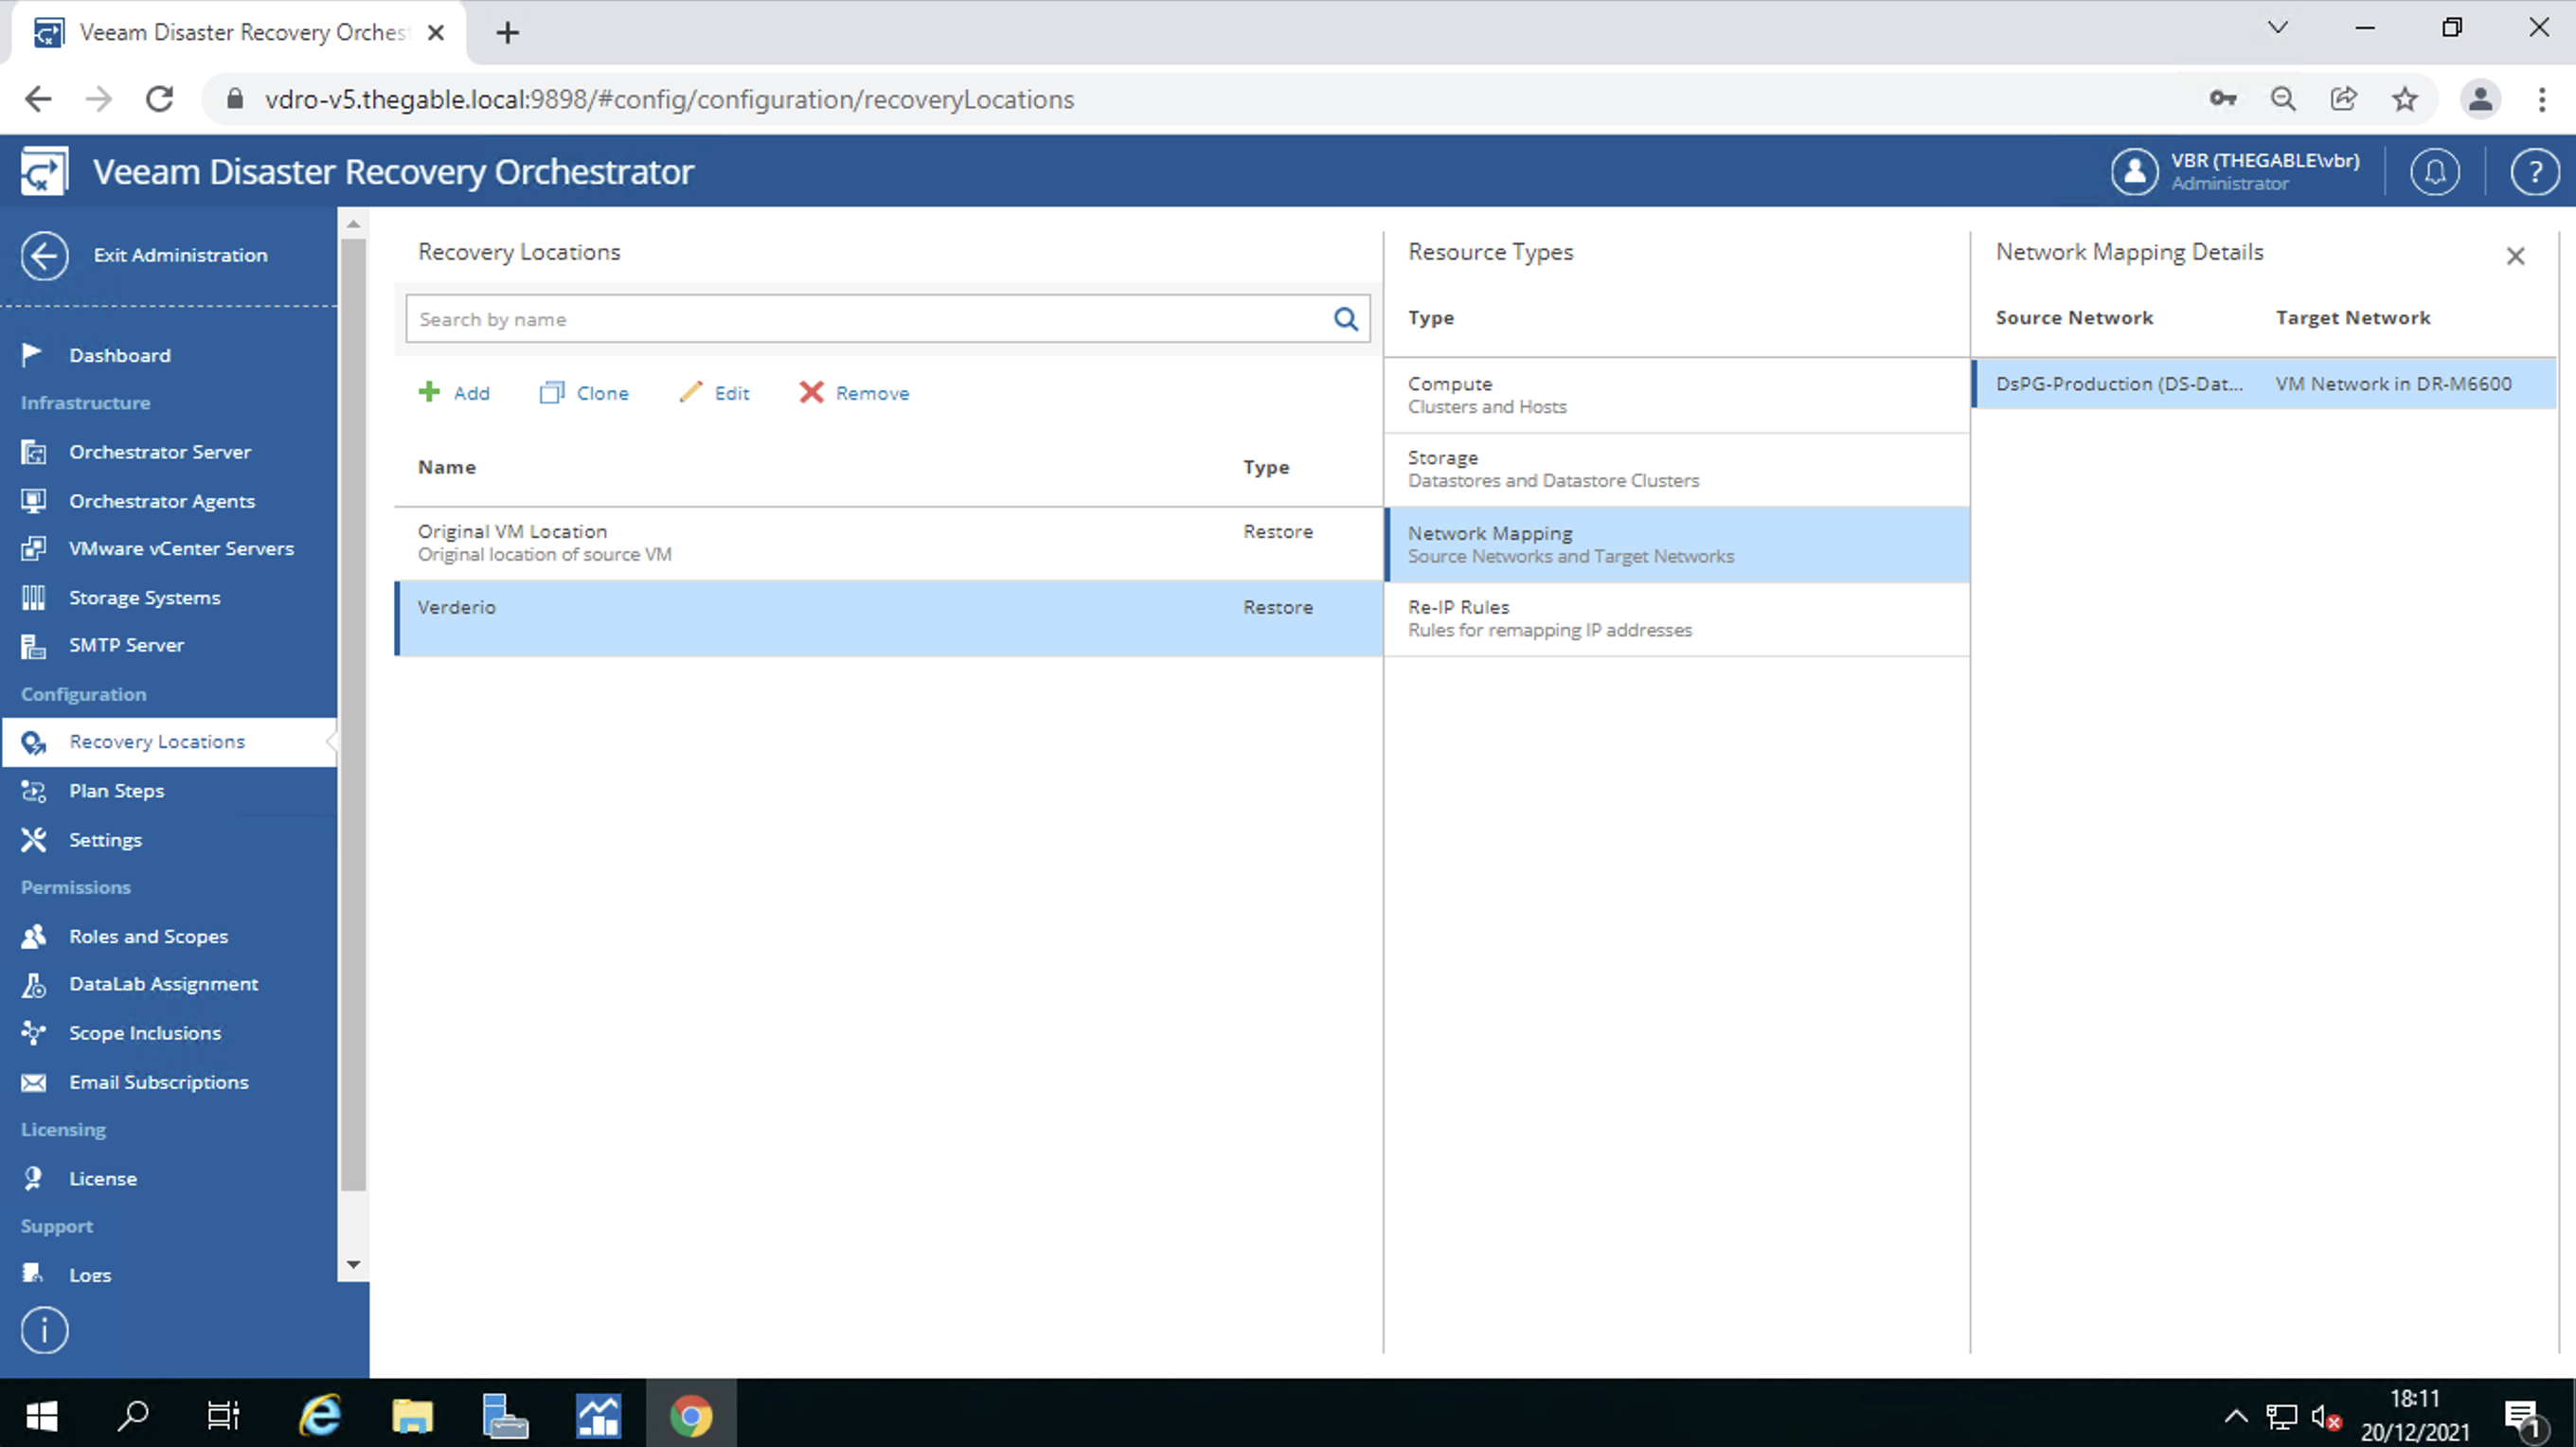
  • The recovery location (image 6)
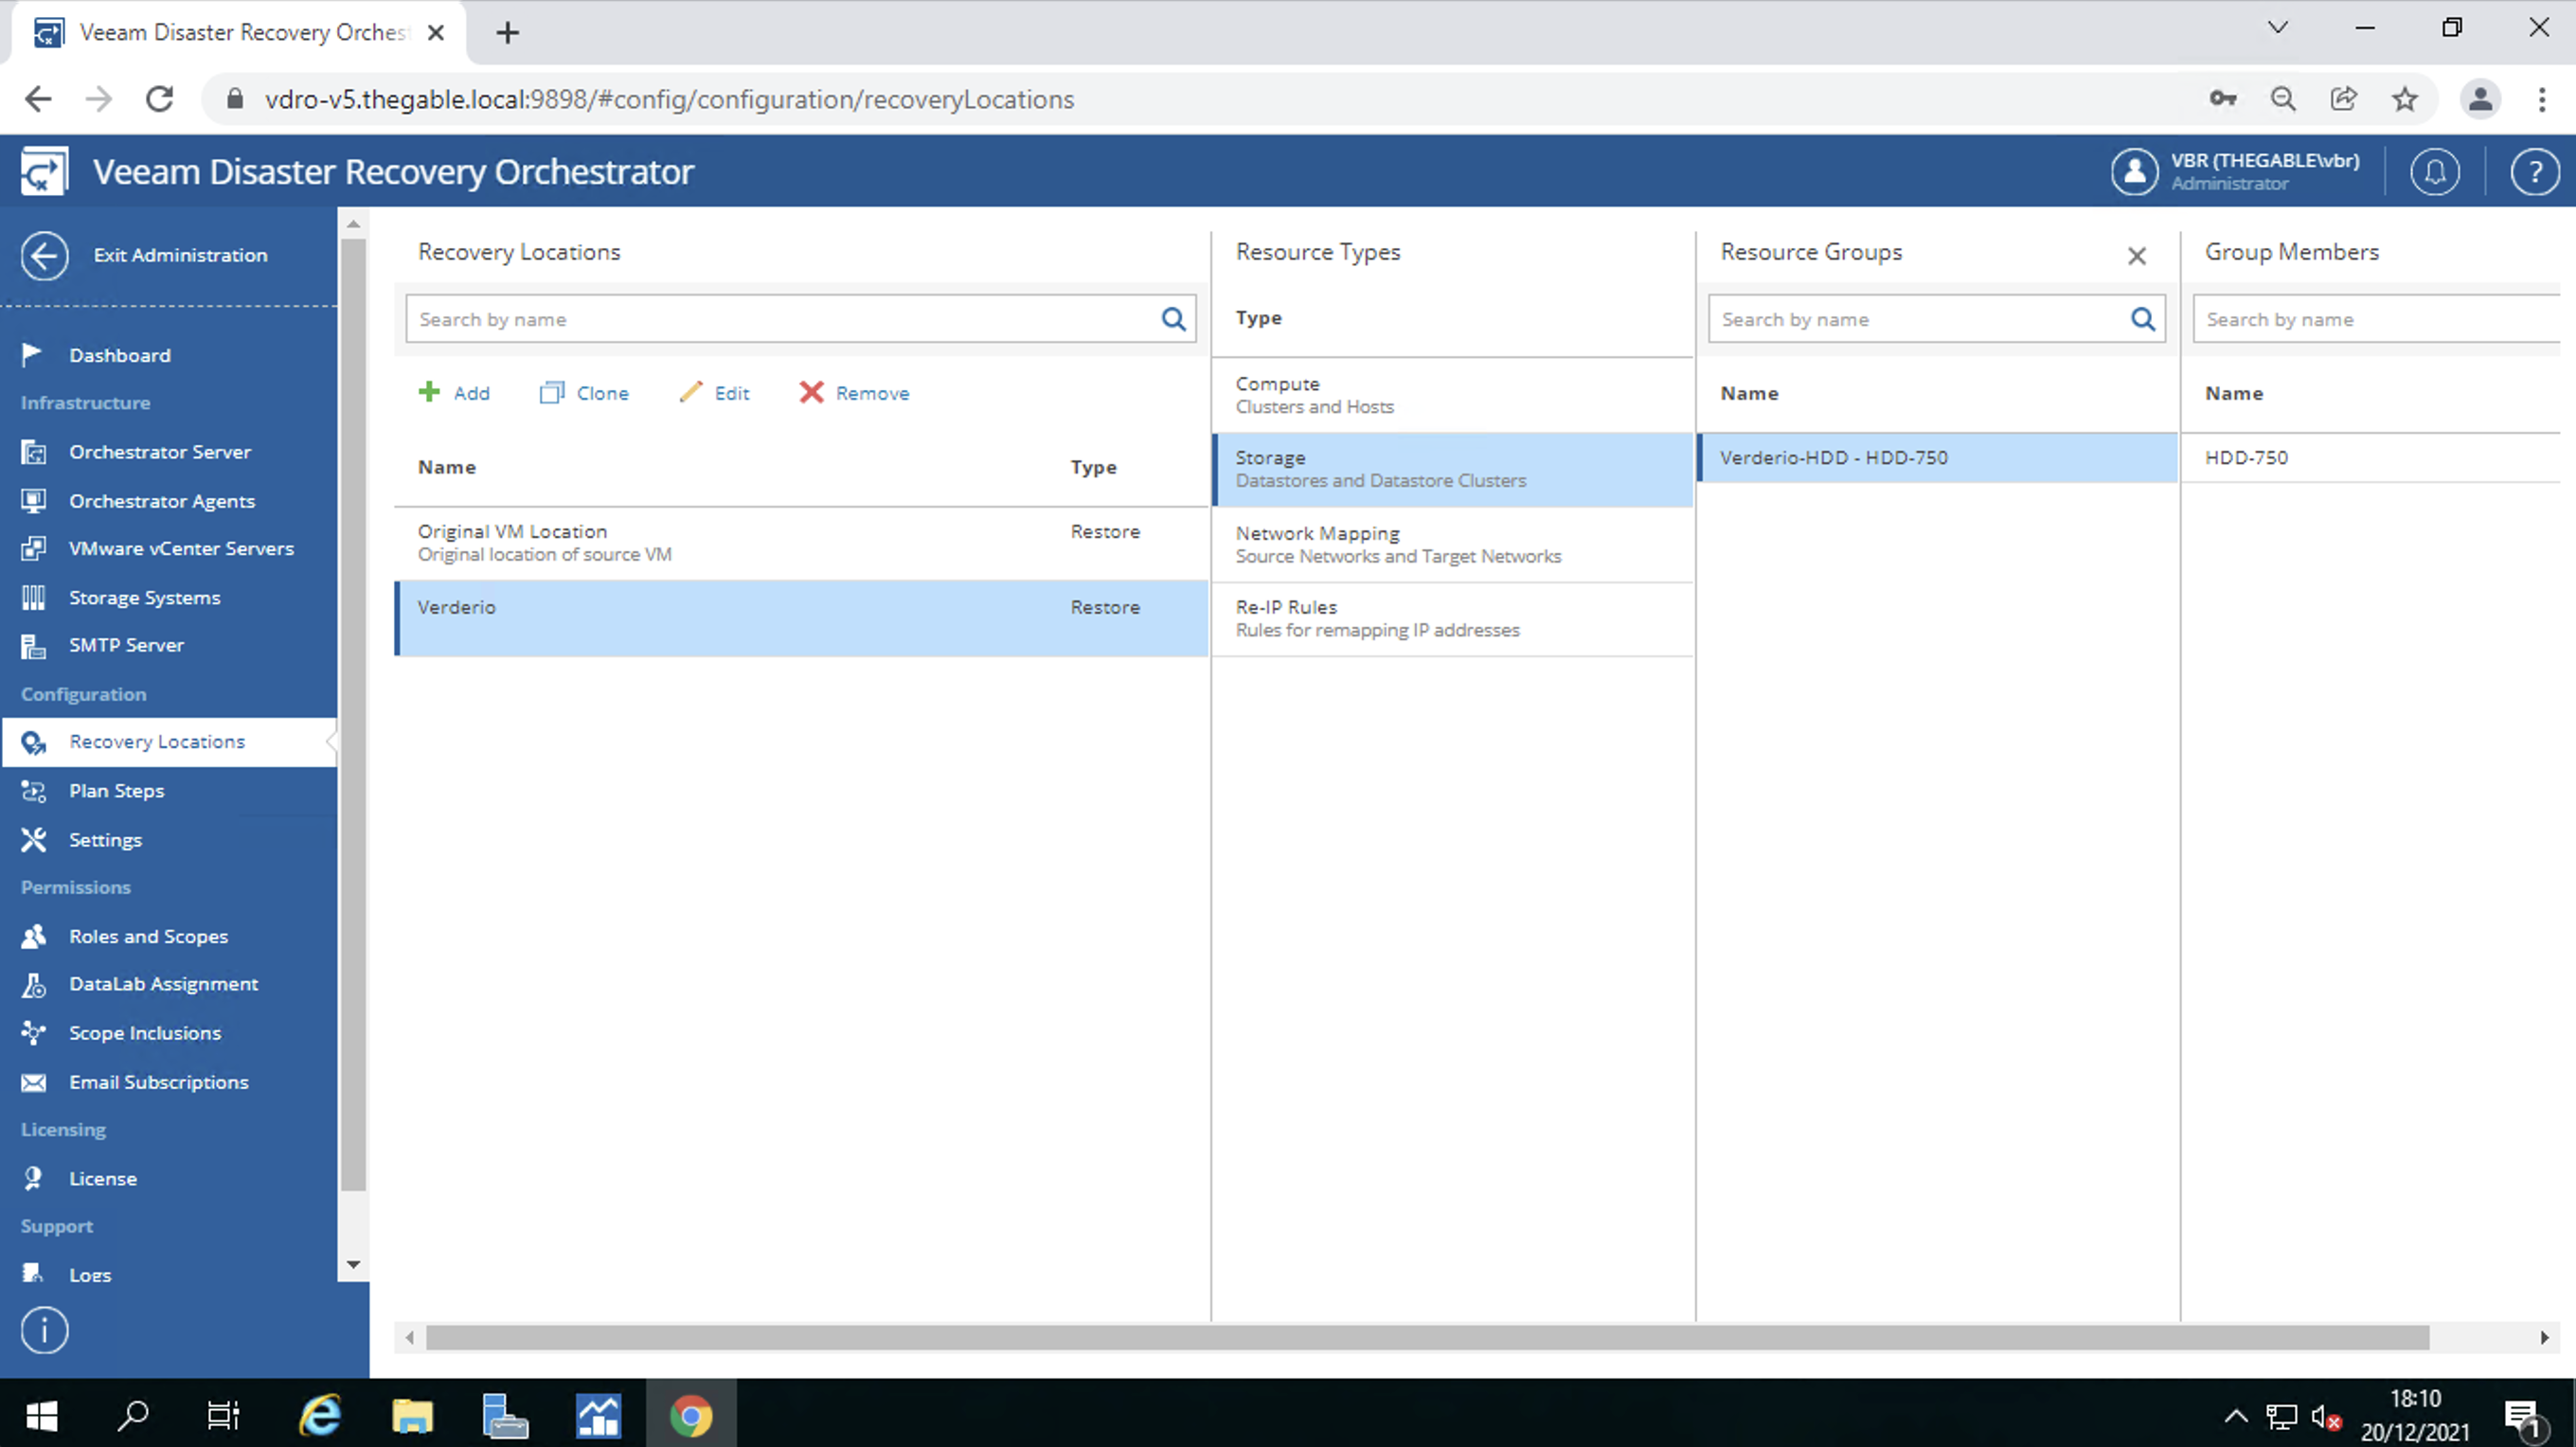
  • In the recovery location the datastores where the VM filesystems will reside (image 7)
  • Network mapping (image 8)
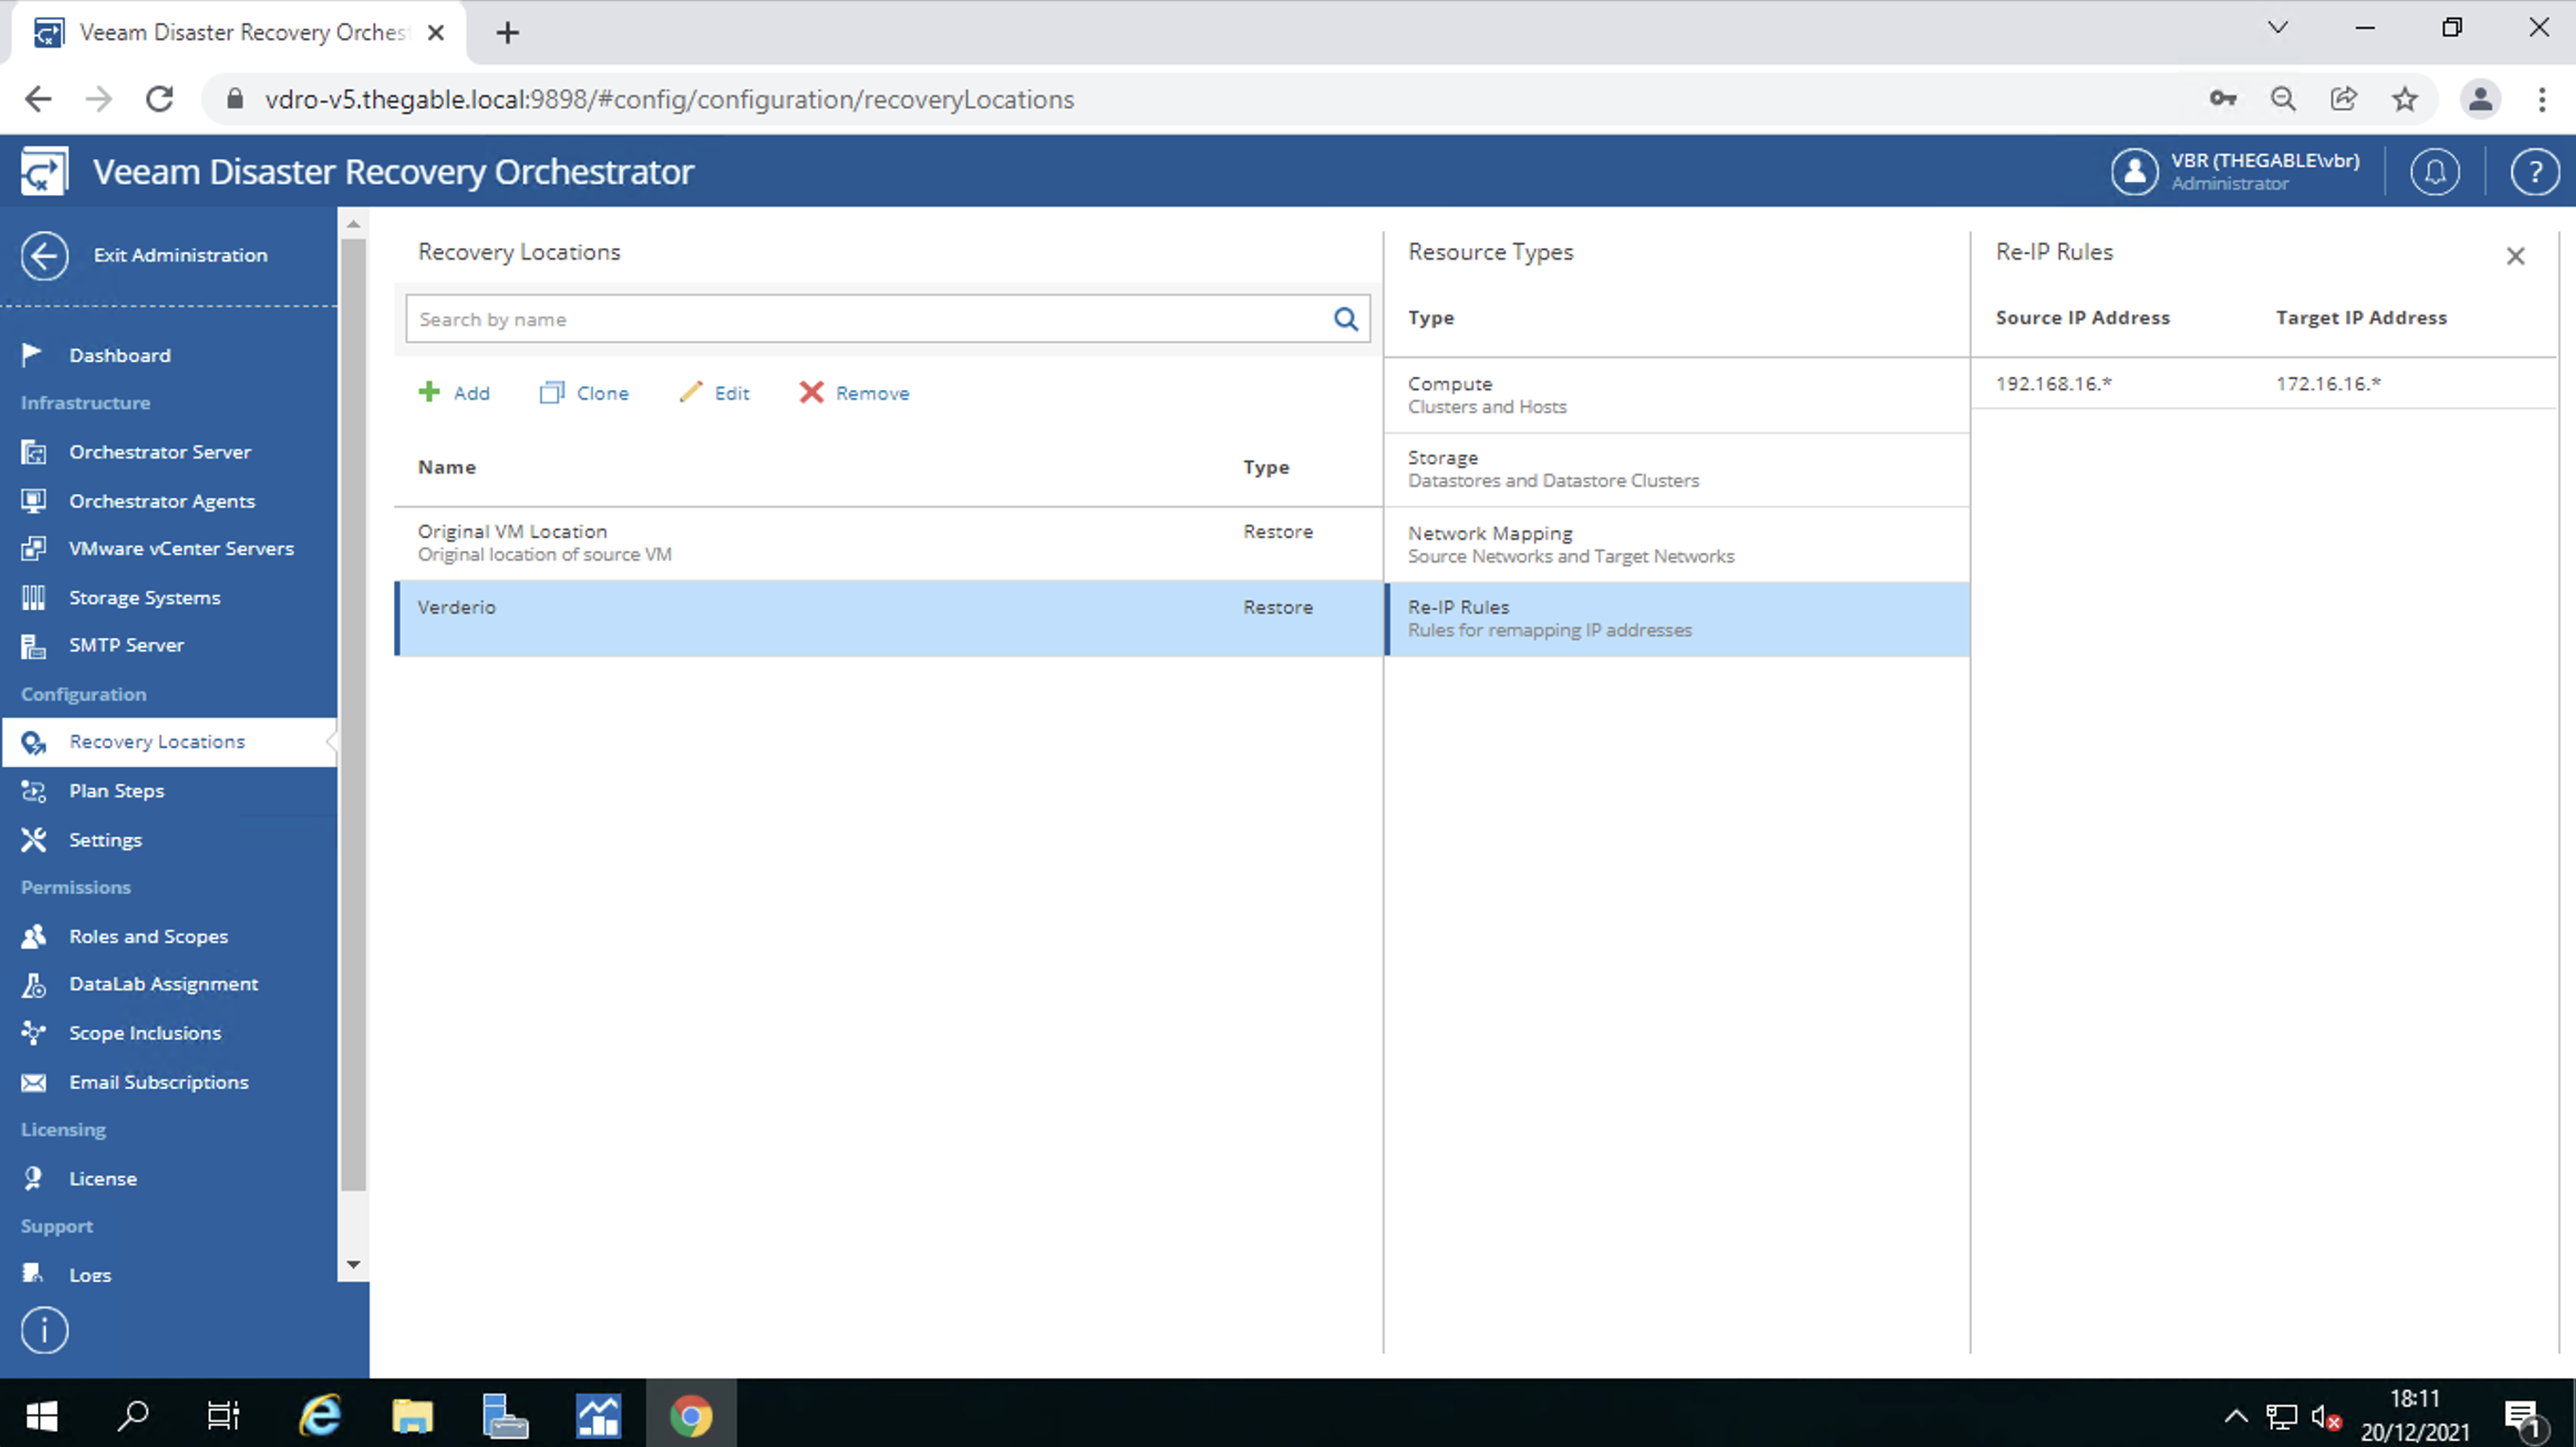
  • IP address remapping (image 9)

Note 2: The operations described above are possible if and only if all necessary resources have been tagged.

Note 3: Automatic remapping of IP addresses when starting a DR plan is only available for Windows VMs.

Picture 6

Picture 7

Image 8

Image 9

In the third area are identified:

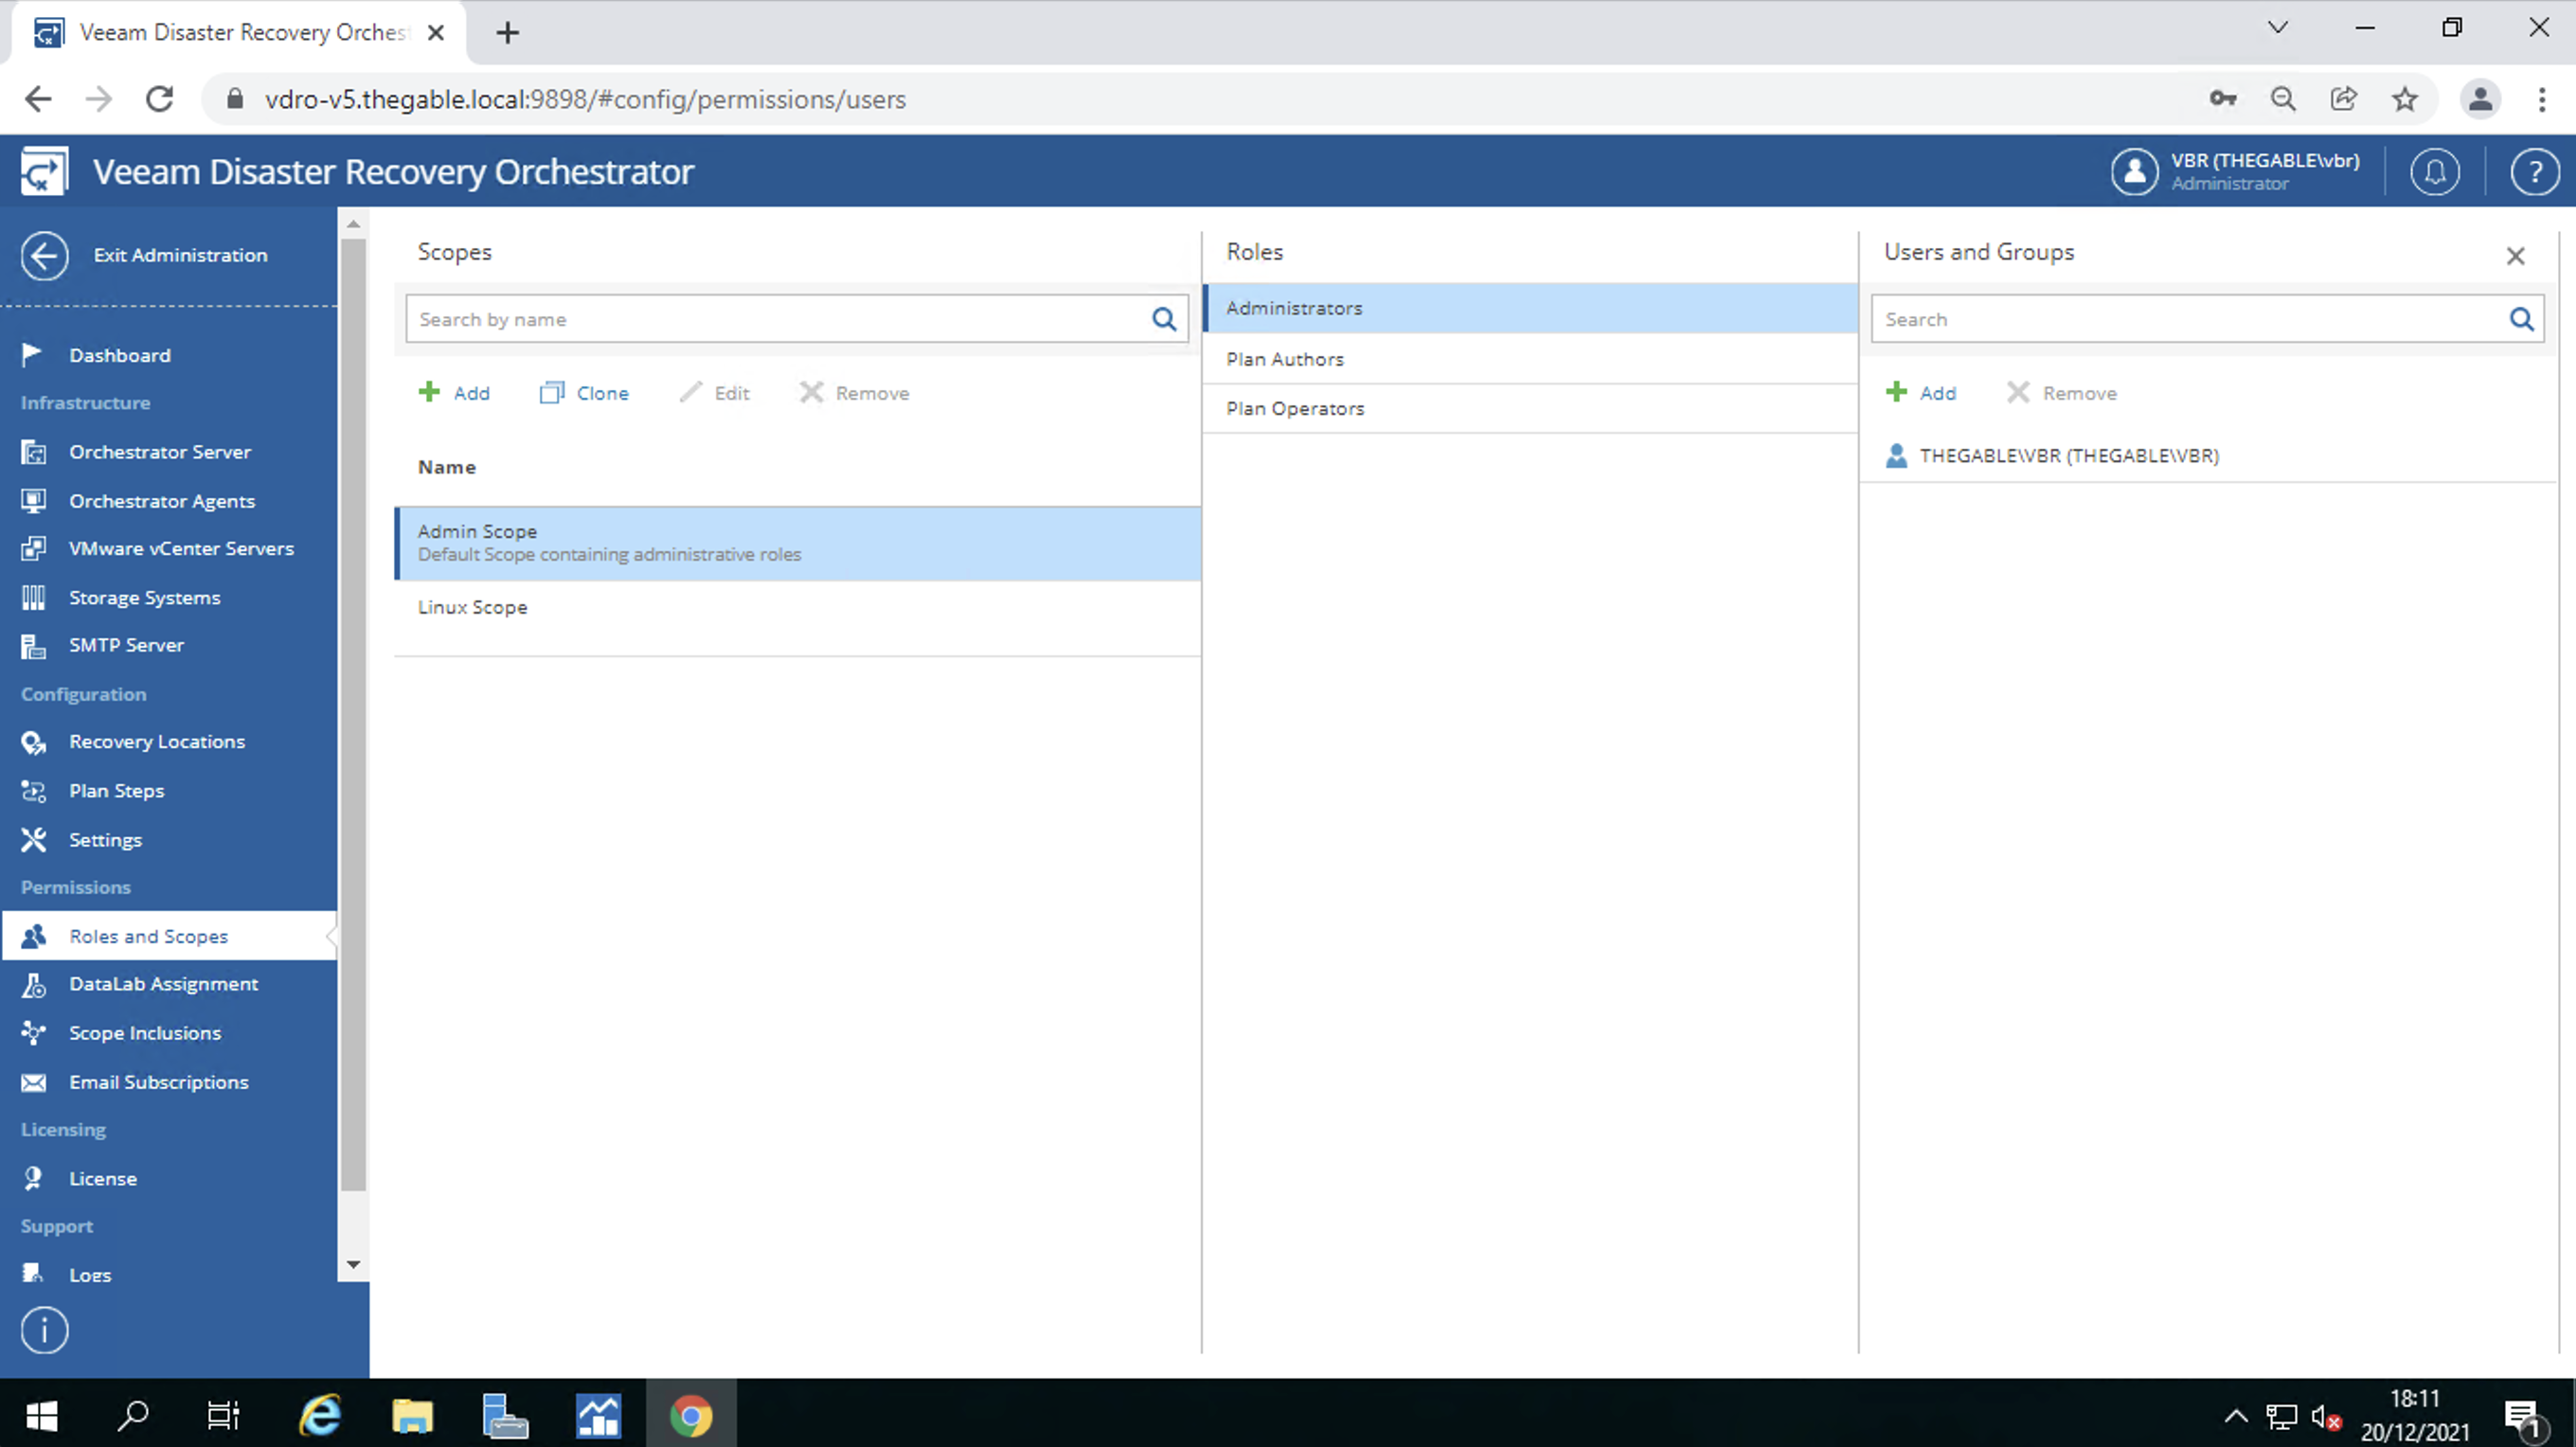
  • User profiling. In simple terms, the VDrO allows you to create users capable of administering only specific workloads which are called “scopes” (image 10).
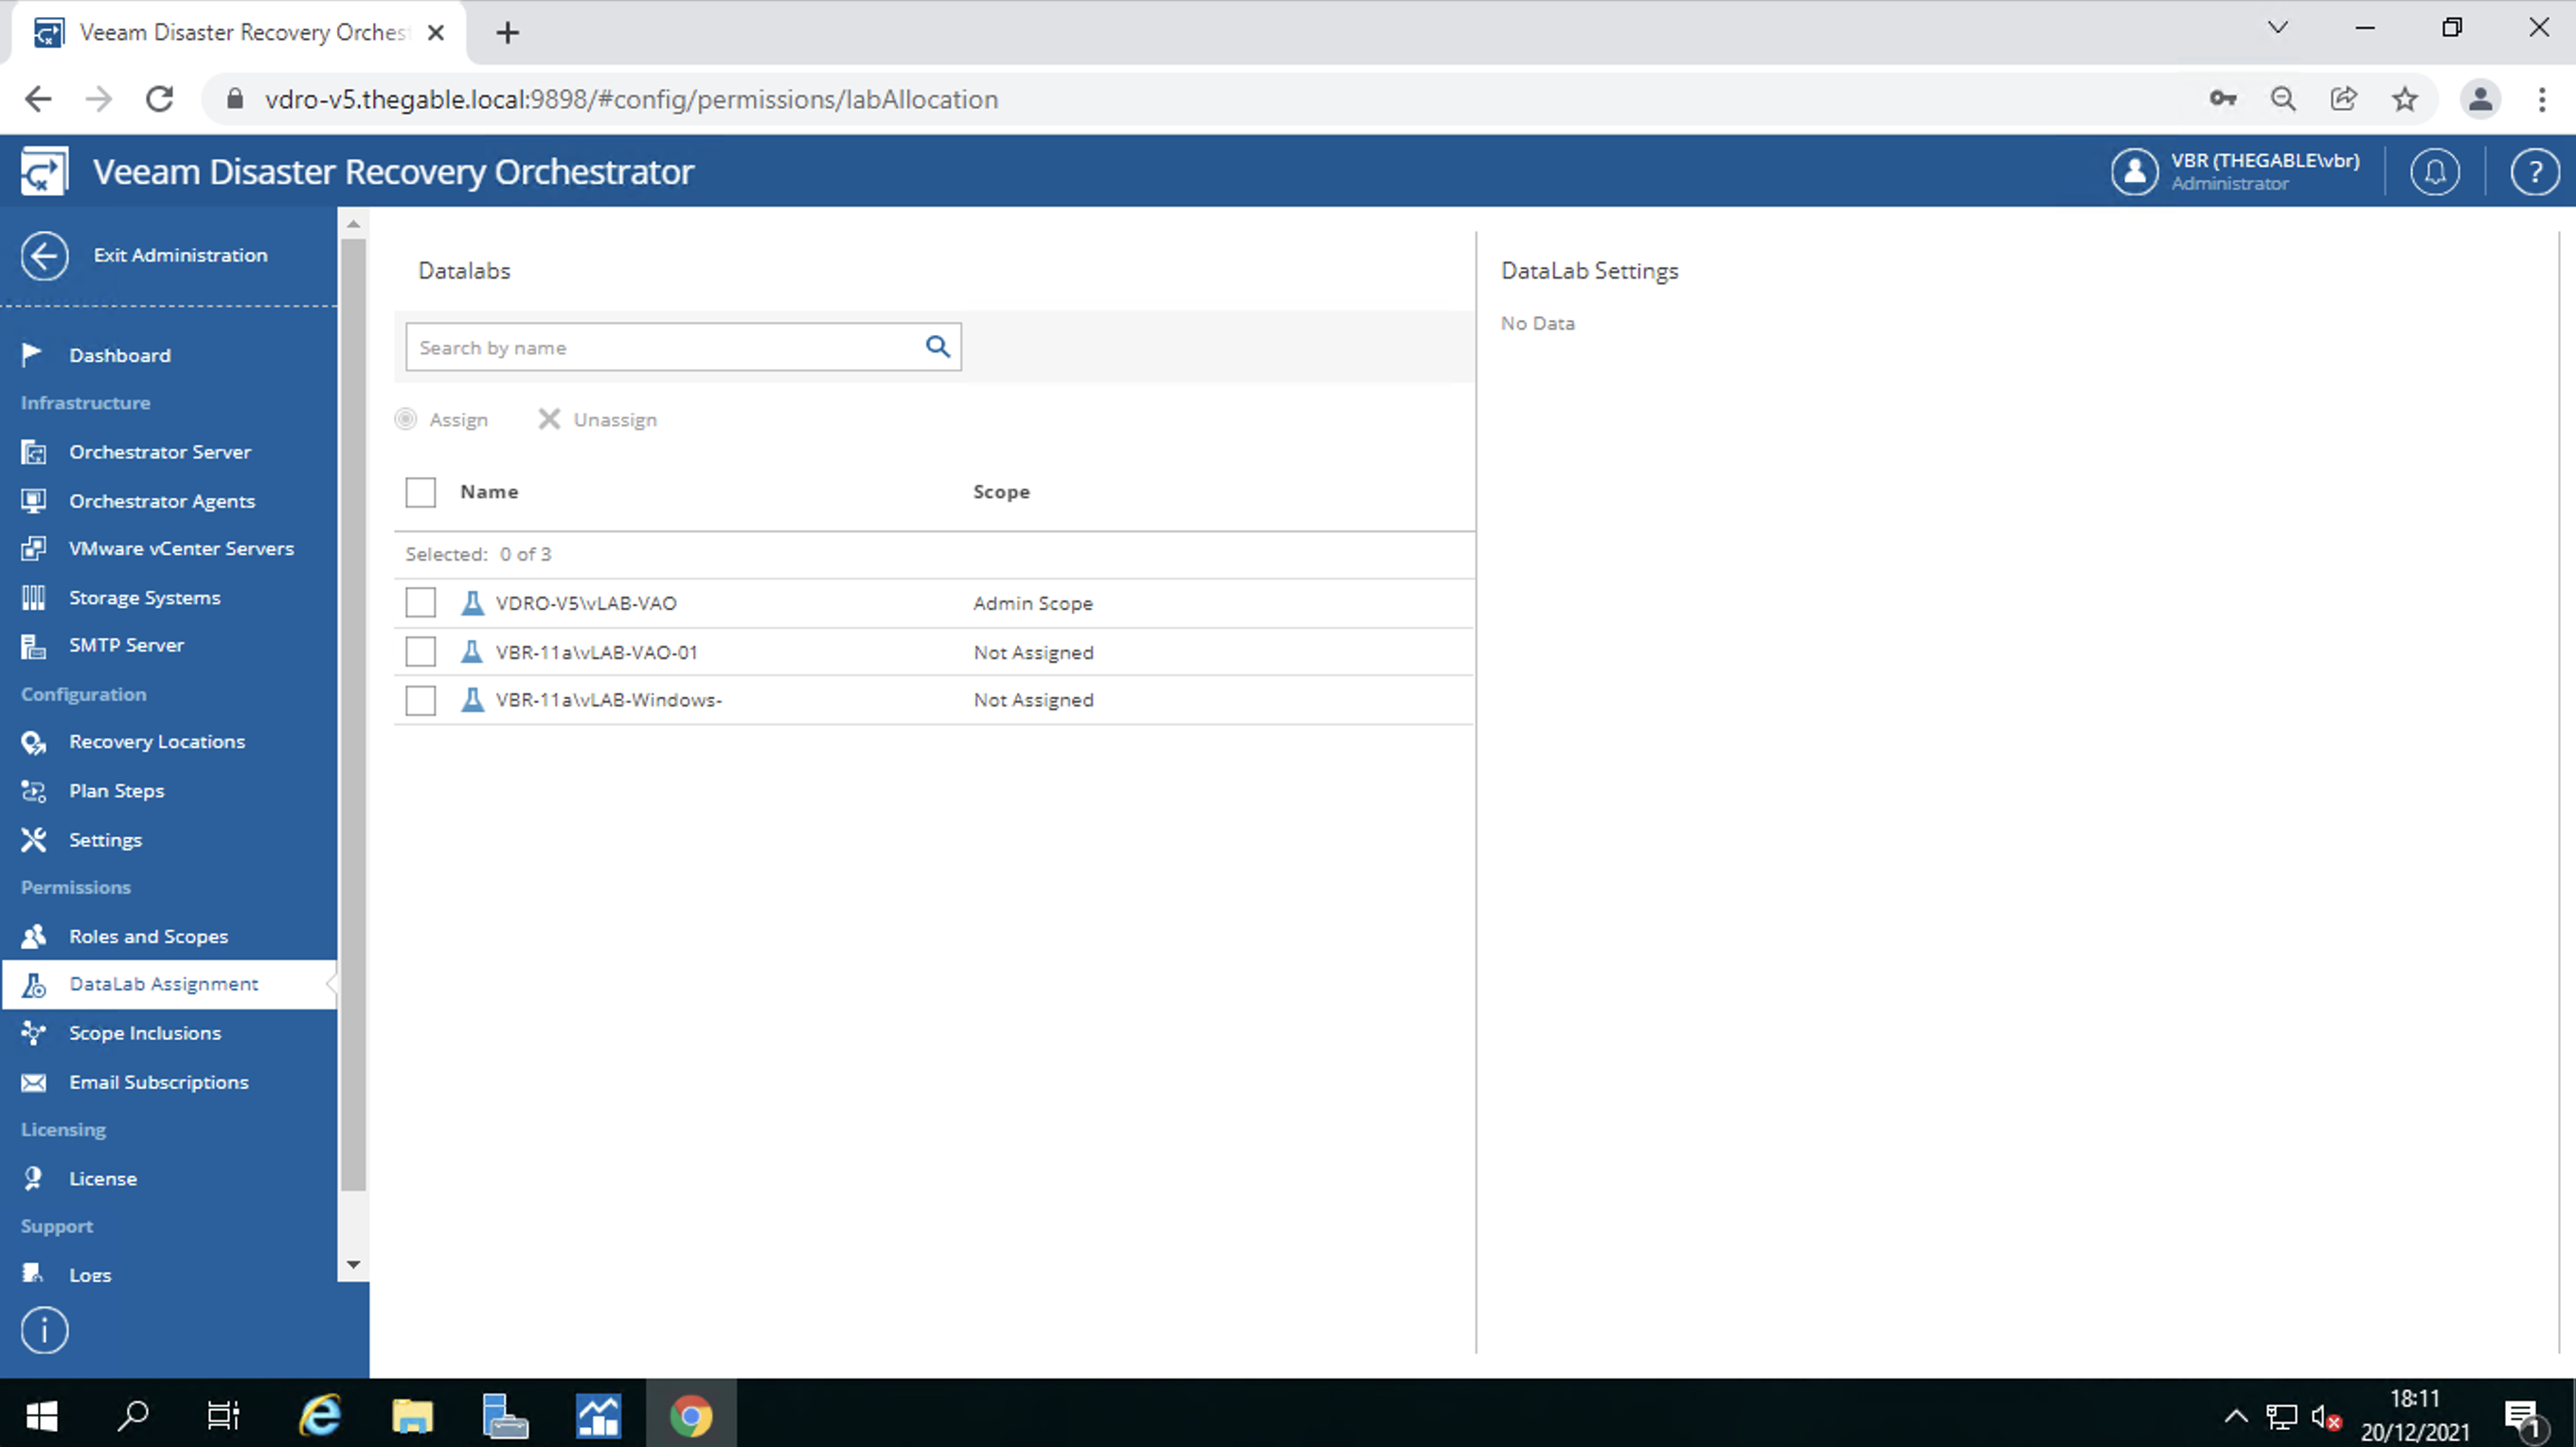
  • The assignment of the DataLabs to the “scopes”. Remember that the DataLabs allow you to verify that the DR plan is usable (image 11).

Image 10

Image 11

The last configuration allows you to link the group of VMs replicated or saved via backup (called VM Groups) to the users’ scopes.

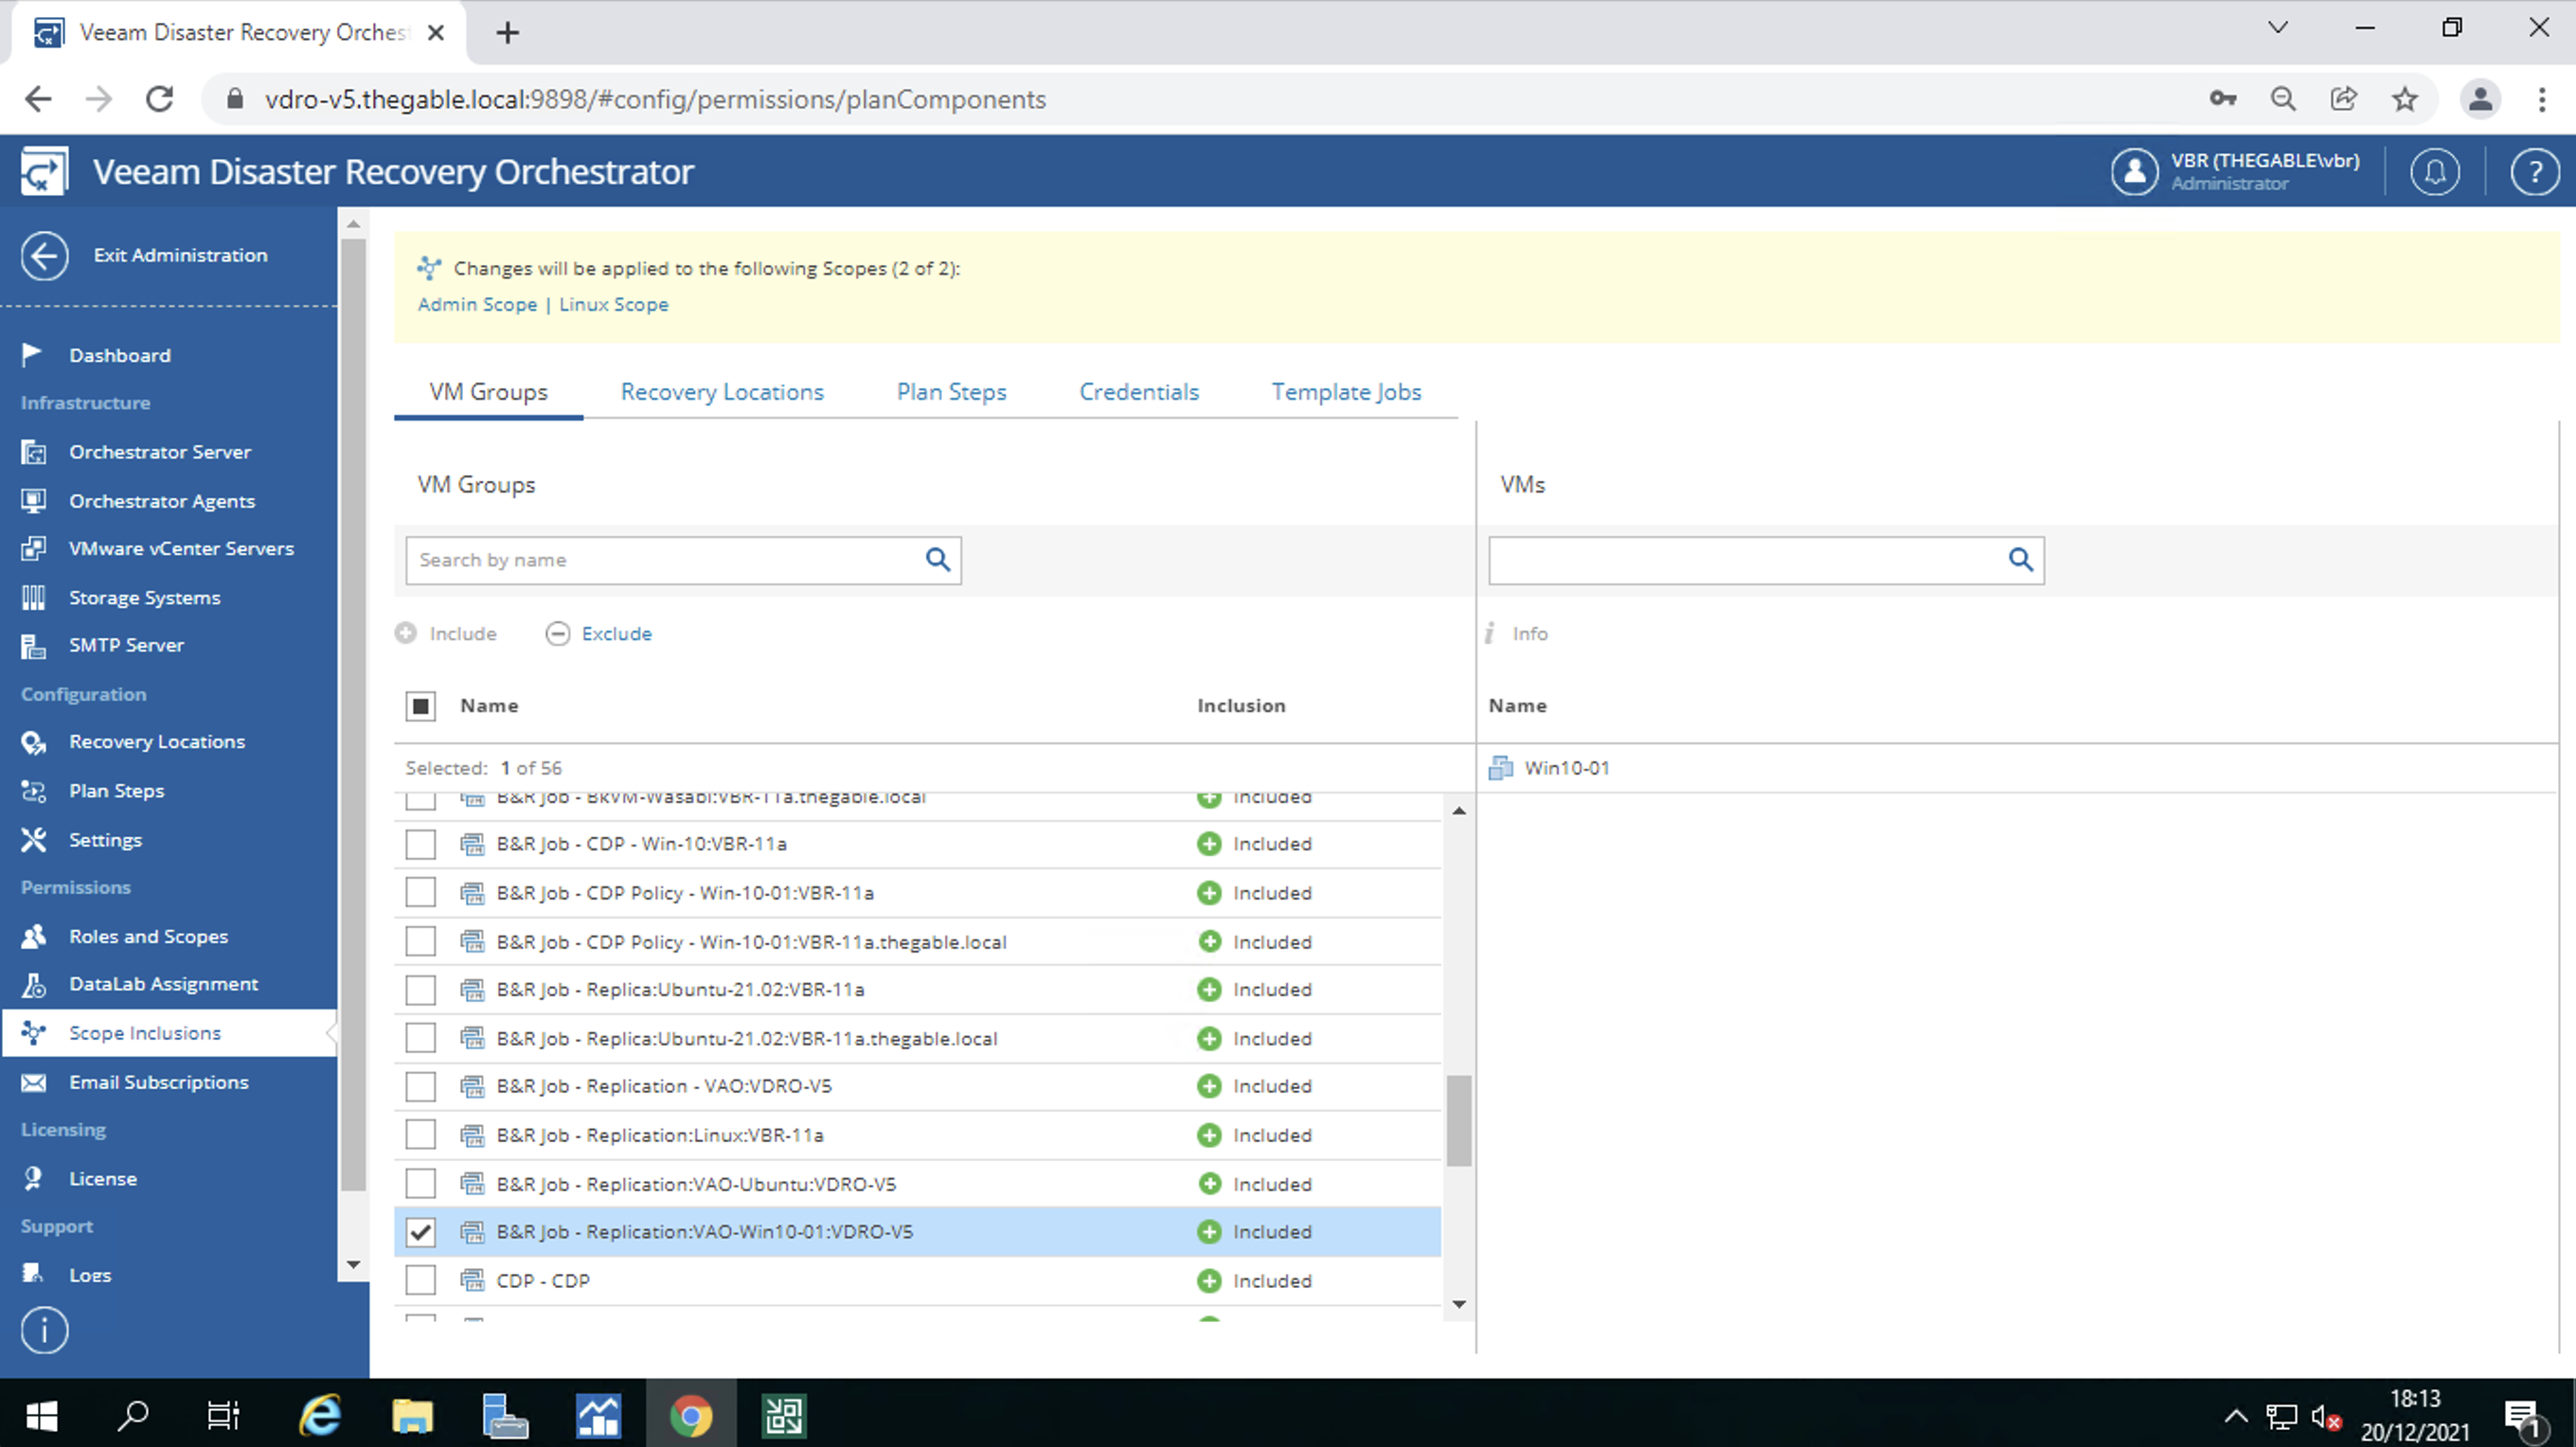
For example, image 12 shows that the VM Group “B&R Job – Replication VAO Win 10” is assigned (included) to both the Admin and Linux scopes.

Image 10

In the next and last article, we will find out how to create and verify a DR plan.

See you soon

Veeam Dr Orchestrator v.5: VONE – Tagging

Today we will show how to tell Veeam Disaster Recovery Orchestrator which resources to use to start a Disaster Recovery plan.

Before reading this article, we suggest you read the previous article ( by clicking here ) which allows you to check the status of the VDrO Server.

The main tool of asset labeling is Veeam One, which is installed by default with the Veeam Disaster Recovery Orchestrator v.5.

The procedure is very simple:

After connecting via RDP to the VDrO Server select Veeam One Client on the desktop (see Figure 1)

Figure 1

After selecting the Business View item (bottom left), the resources to be labeled are:

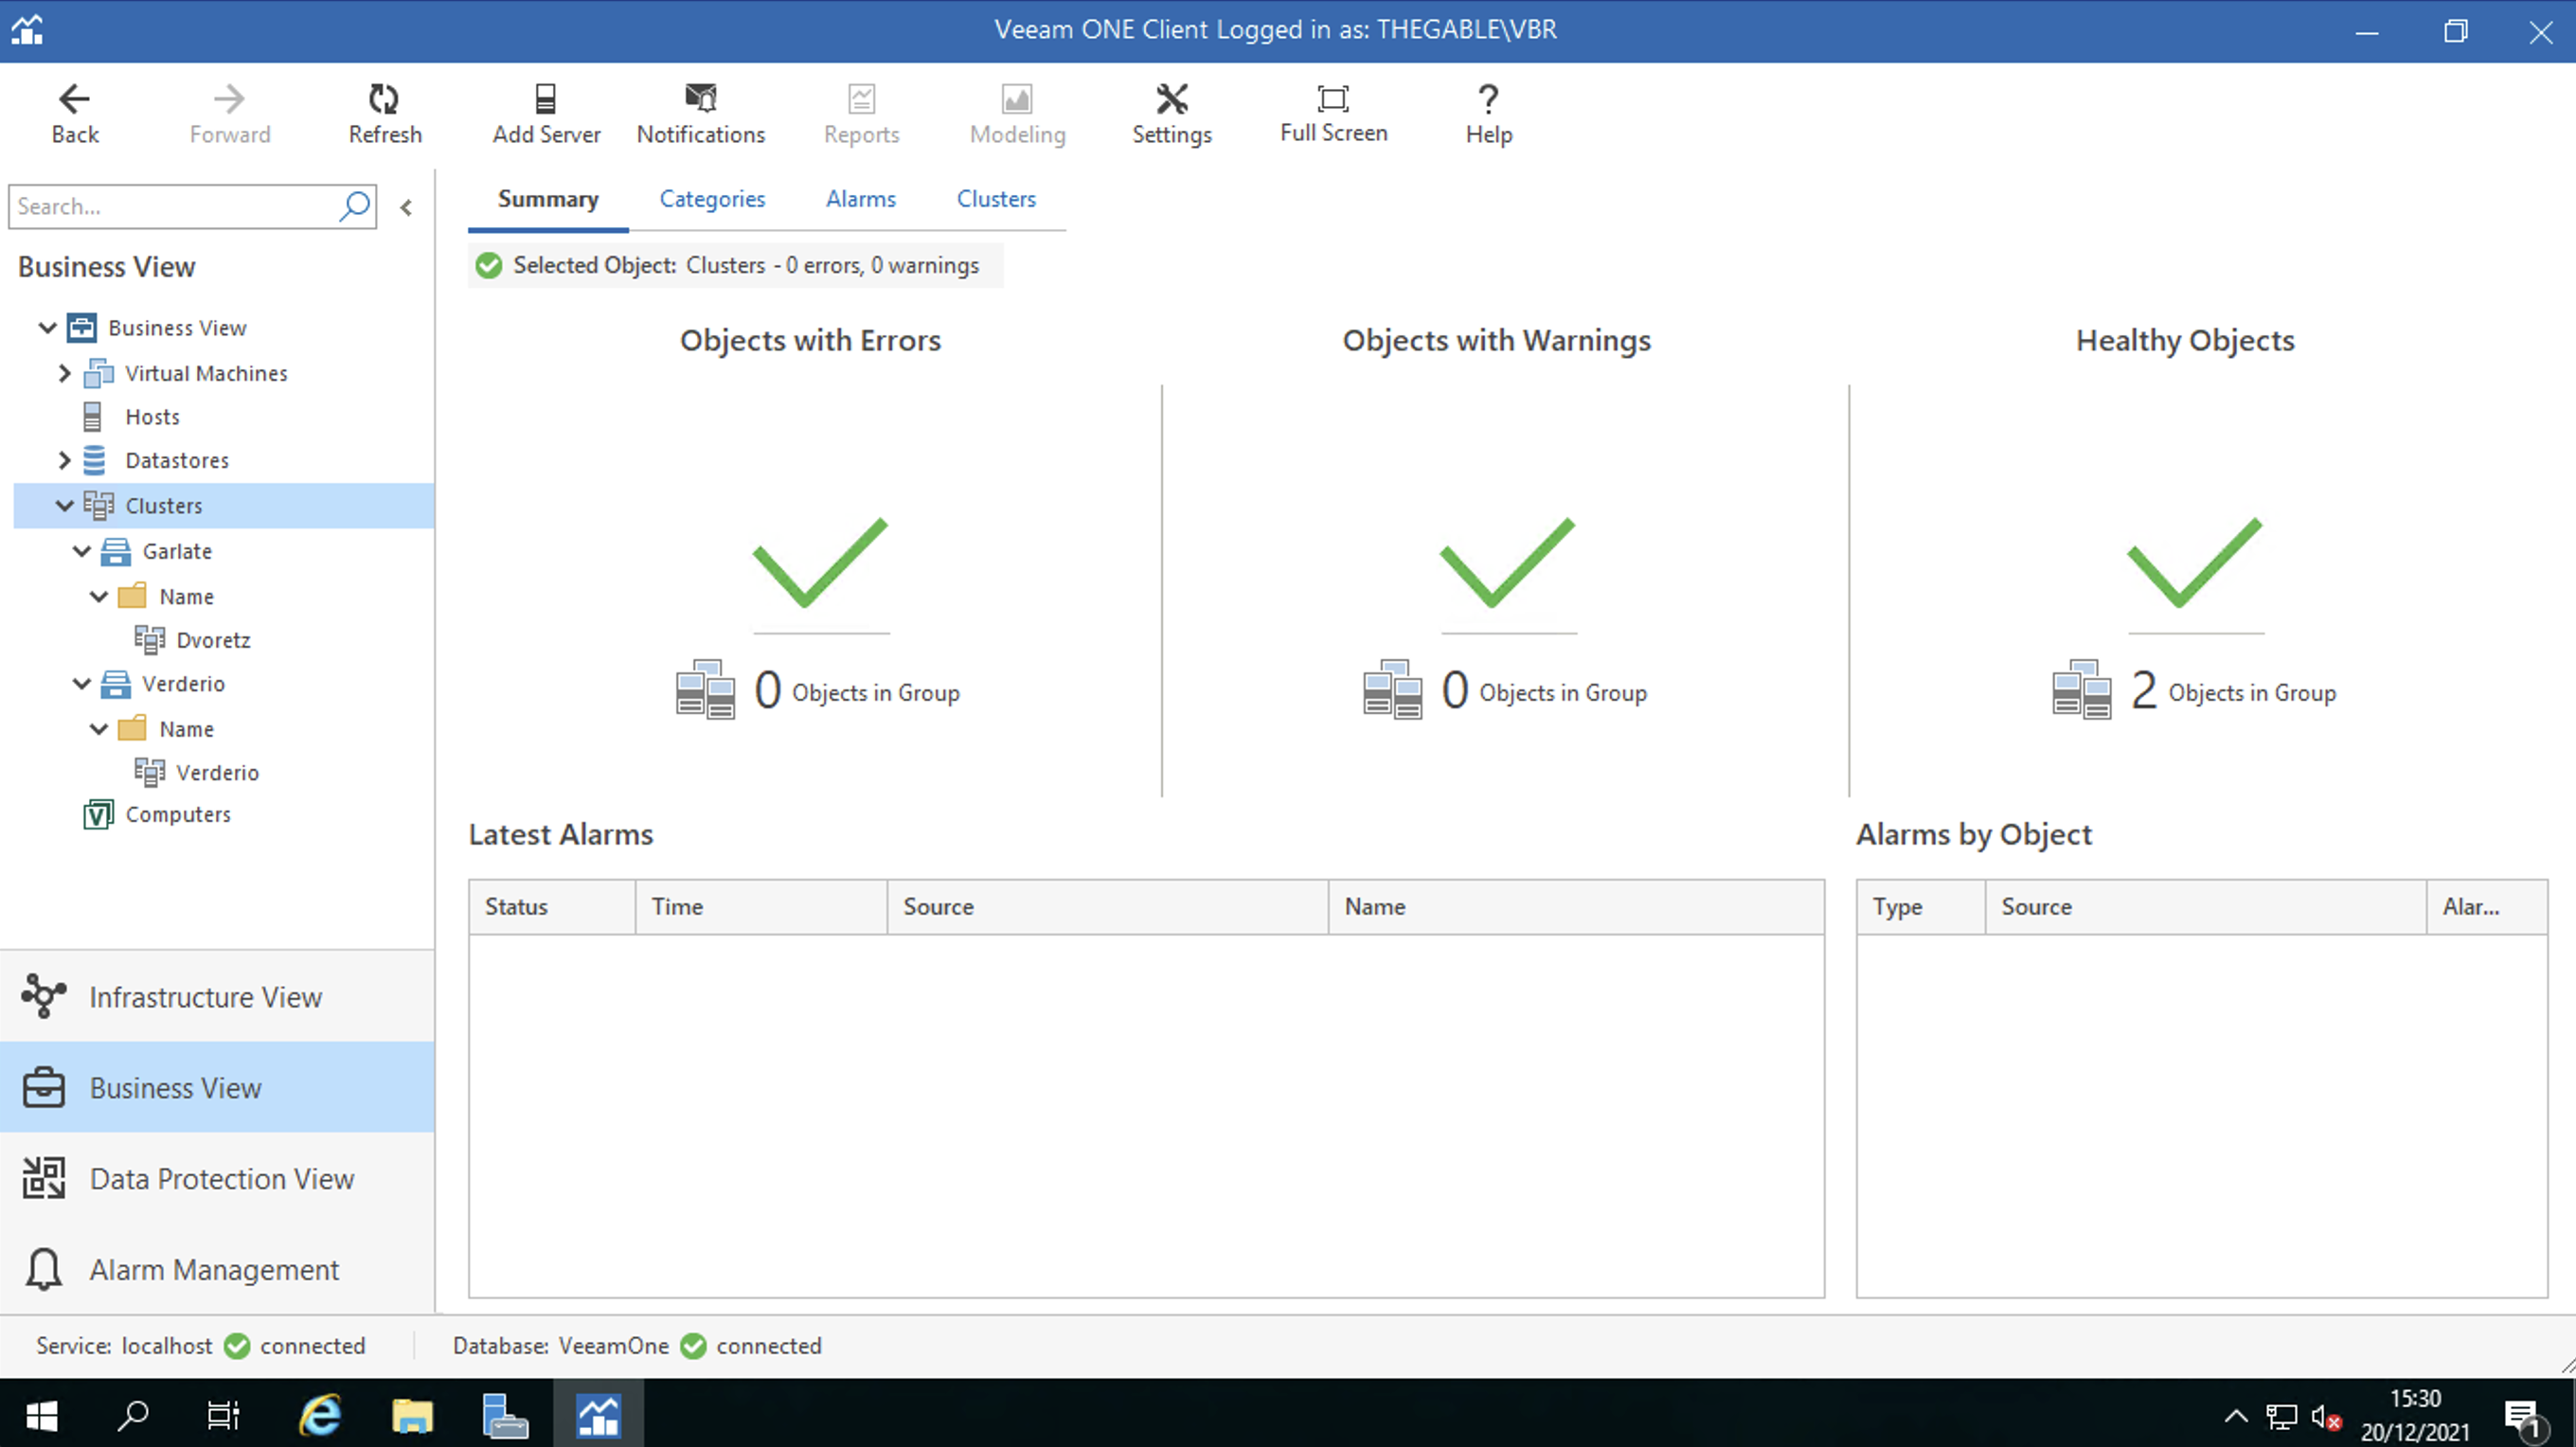
  1. Clusters: this item identifies the Disaster Recovery and production vCenter resources (Figure 2)
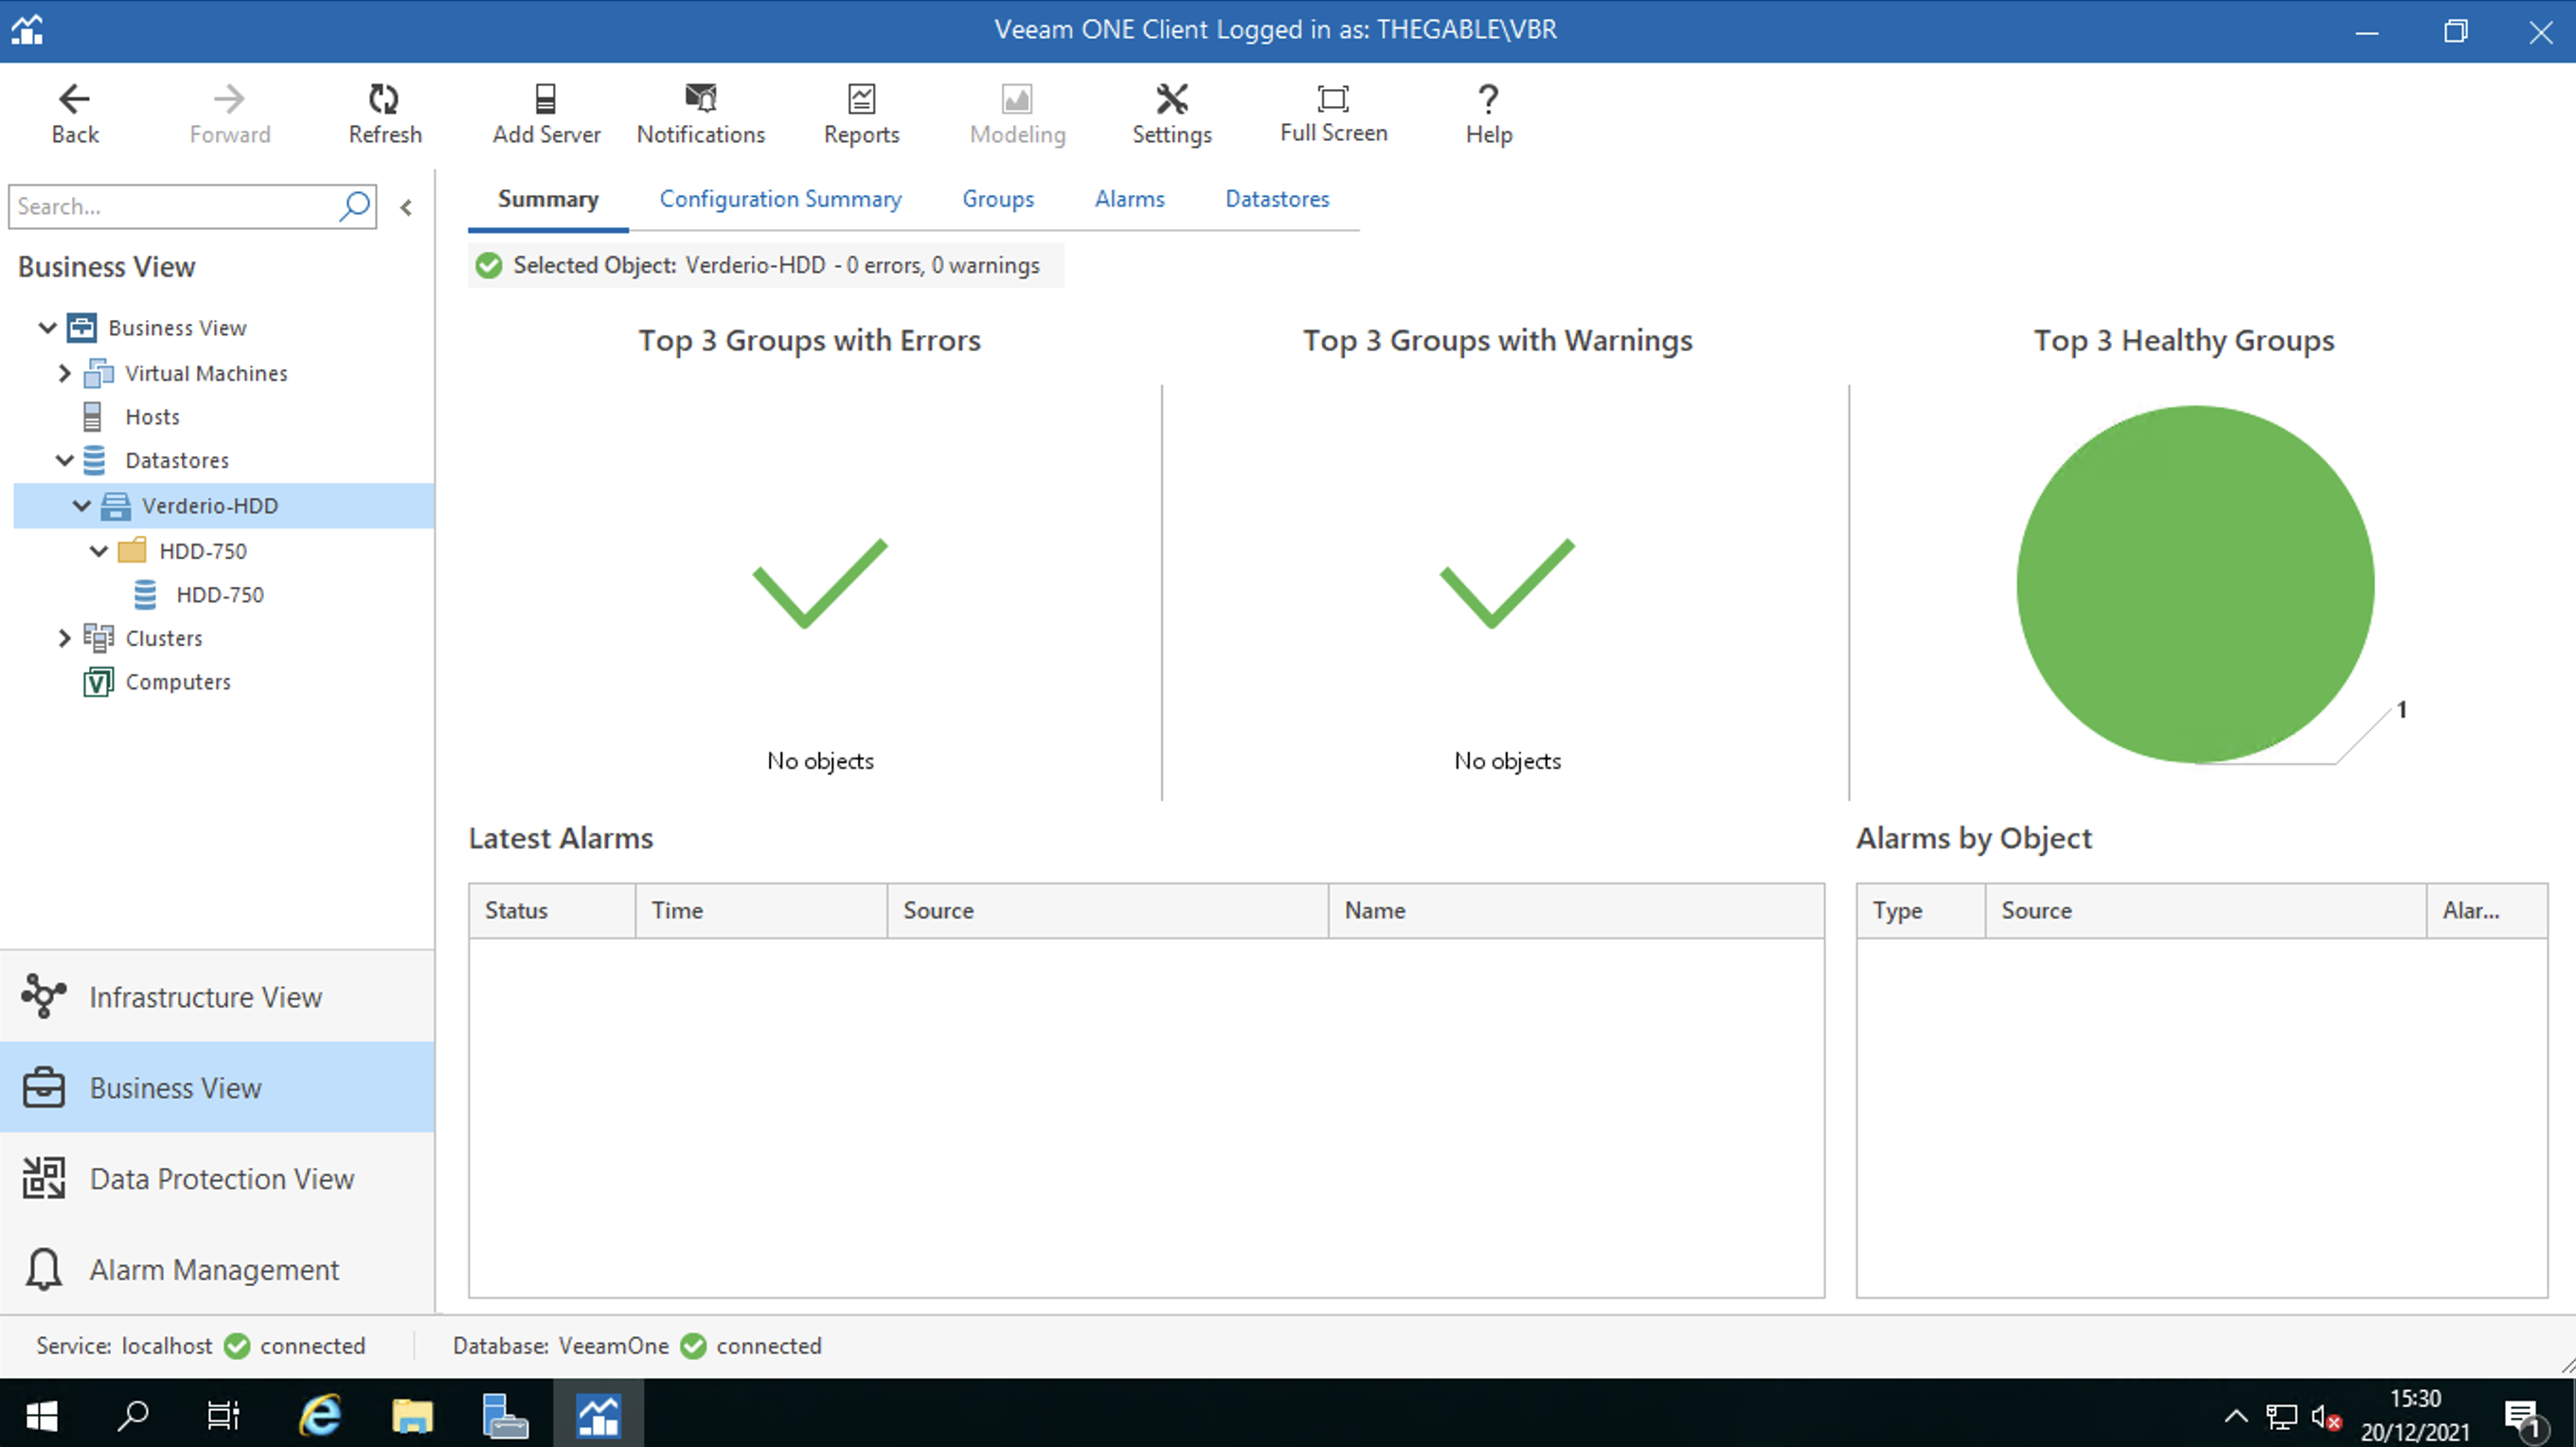
  2. The DataStores: this item identifies the disk areas where the VMs will reside once turned on (Figure 3)
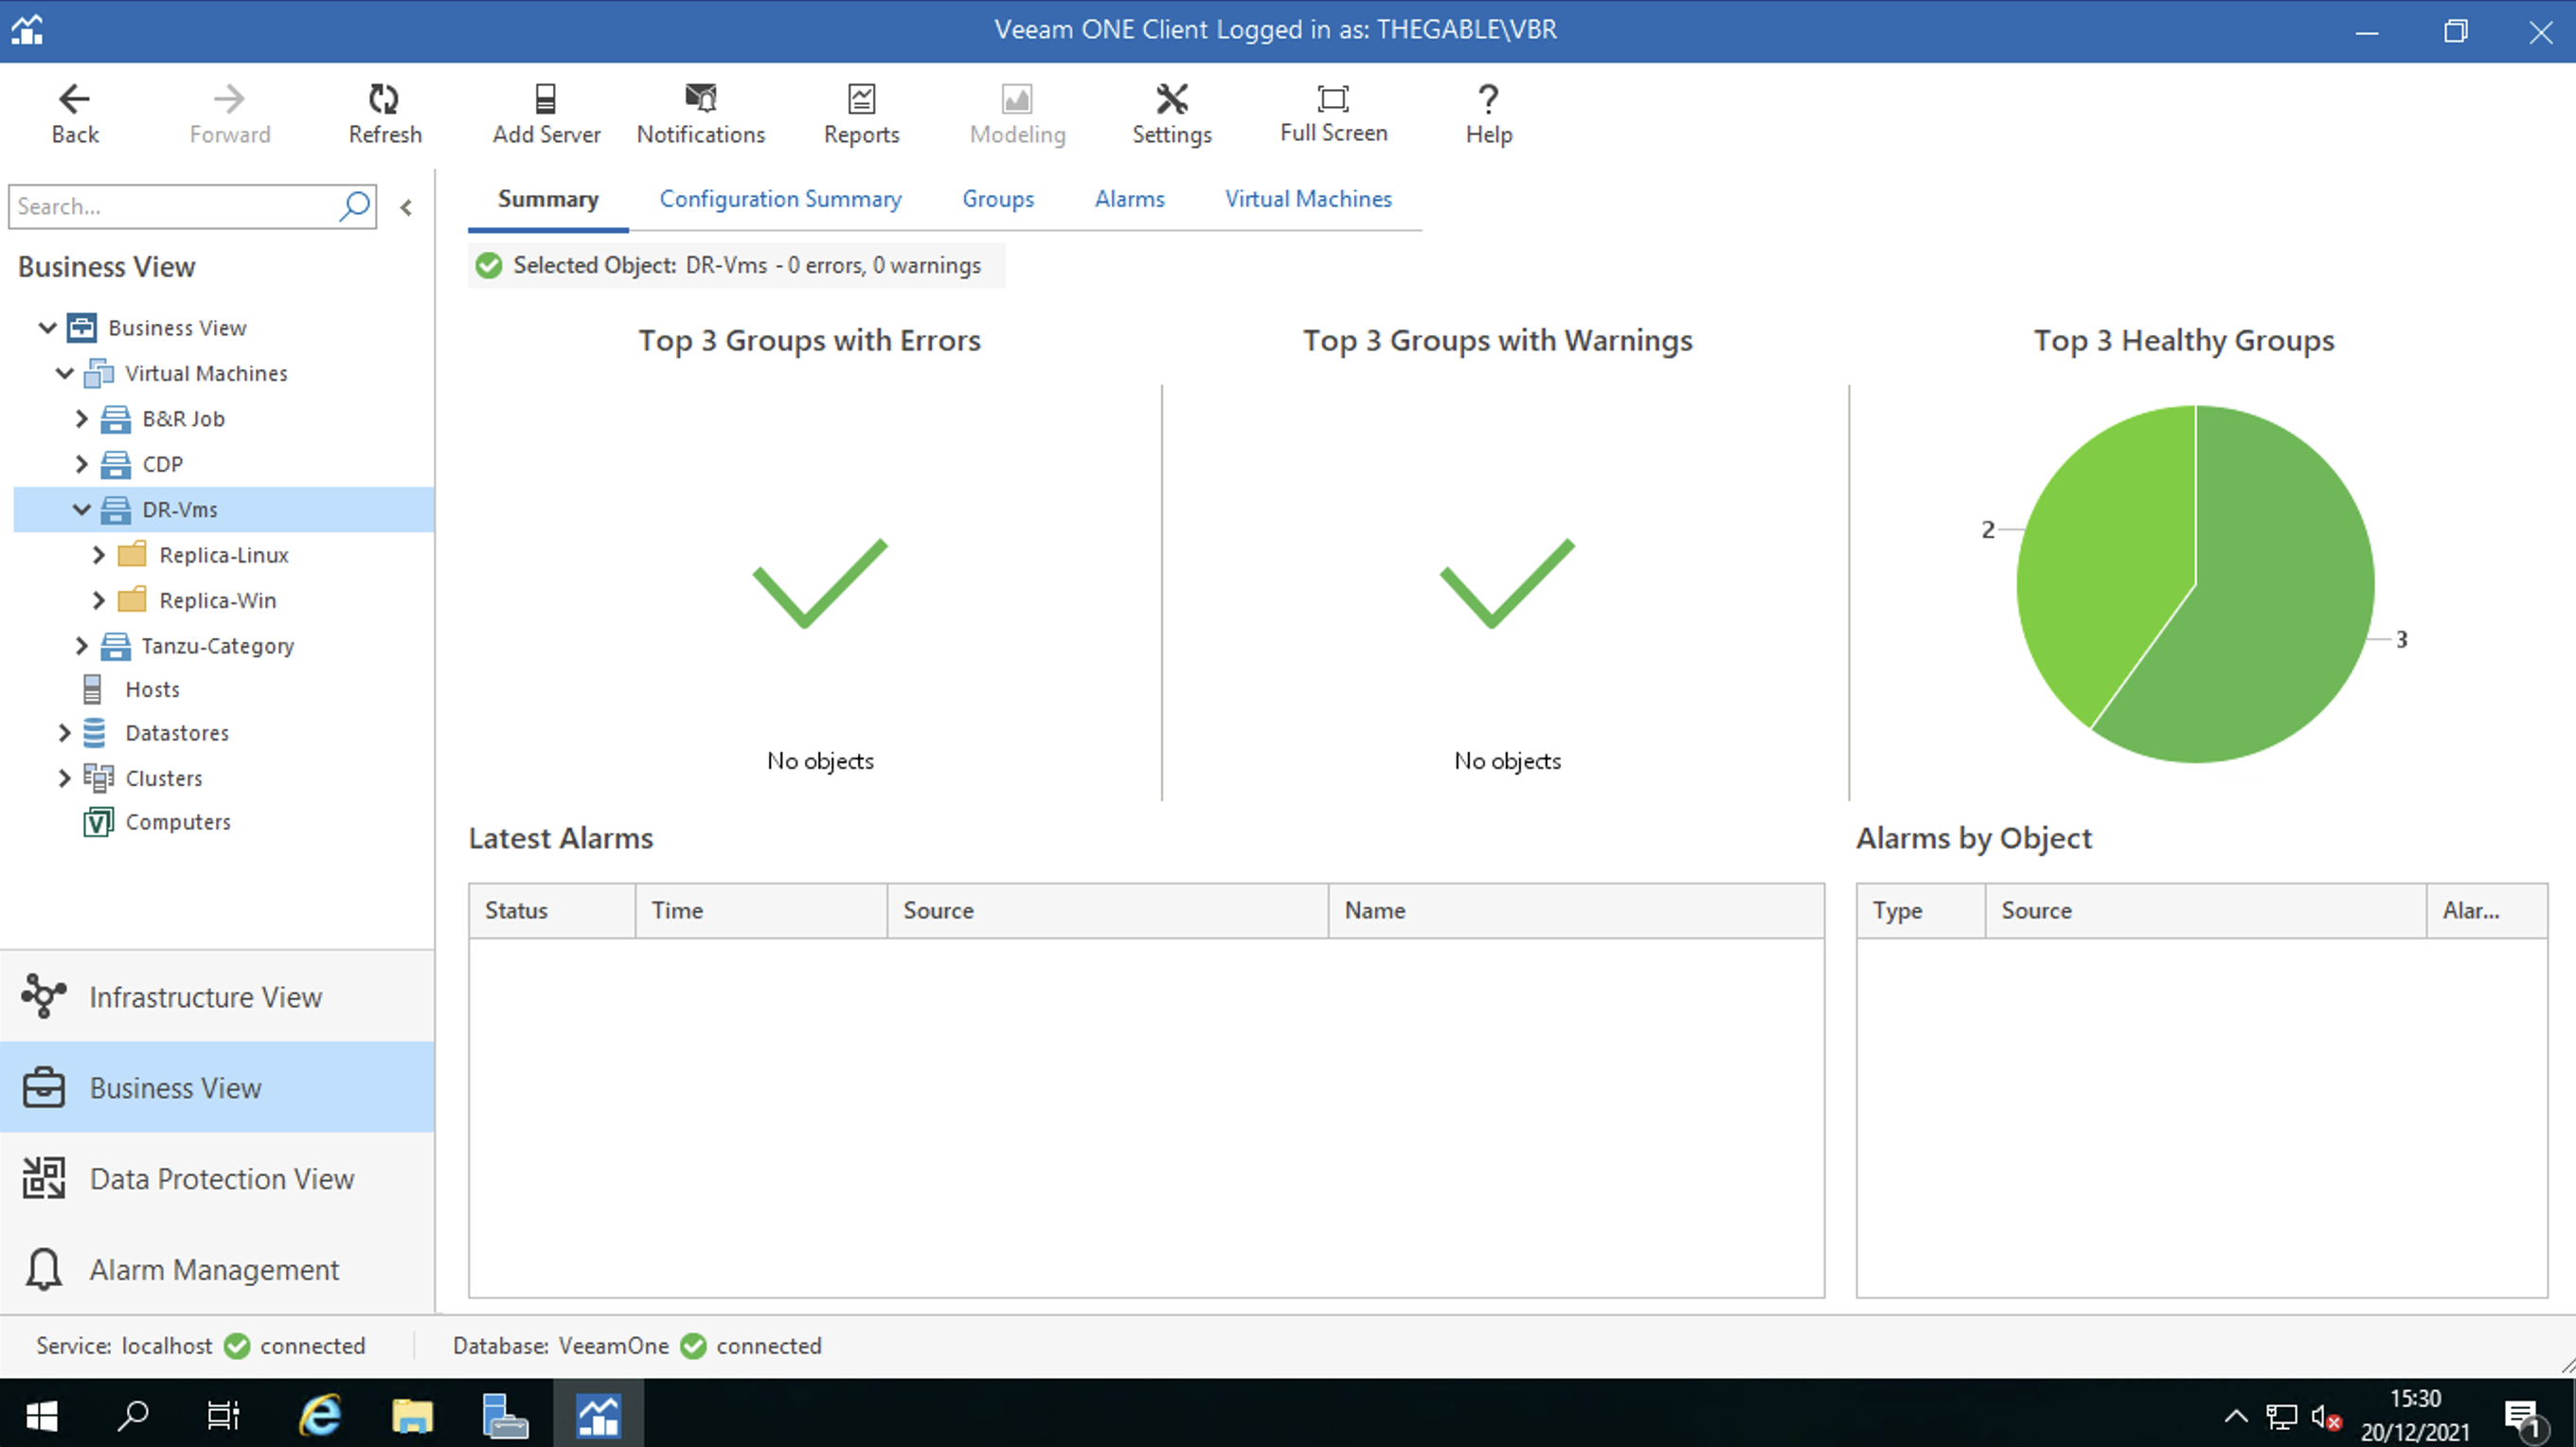
  3. Virtual Machines: this item identifies the VMs that guarantee service continuity in the event of a Disaster (Figures 4 and 5).

Figure 2

Figure 3

Figure 4

Figure 5

Note 1 : The replication jobs have been configured on the embedded VBR of the VDrO server (see figure 6)

Figure 6

Note 2 : The tagging operation is discussed in a previous post available at the following link:

https://lnx.gable.it/home-page/veeam-availability-orchestrator-v-3-0-dr-from-replicas/

That’s all for today, see you soon!

VDrO v.4 – Run a DR plan

This is the last article about how to integrate the Continuous Data Protection (CDP)  technology (available from VBR v.11) and VDrO v.4 (former VAO).

In this part, we are going to see what happens when an orchestration plan is launched.

Yes, I wrote the word “see” because I created a short video showing the tasks that are automatically completed when a Disaster Recovery is occurring.

If you need more details about how to set up the environment, please read the previous articles.

Let me know if videos and youtube platform are a good way to expose technological valuable topics.

Thx for reading and watching and take care

VDrO v.4 – Setup a Plan from CDP Replica

In this article, I’m going to show you how to set up an orchestration plan using as a source a CDP replica Job.

This article will not cover how to create and run a CDP replica job from VBR console. If you need a guide please refer to the official guide.

There are four main parts:

  1. Create a Business Category
  2. Setup the Environment
  3. Create an Orchestration Plan
  4. Launch the Orchestration Plan

The first and the second topics will be described in this article. The third and the fourth ones in the next articles.

A. To create a business category for CDP replica, just open the Veeam ONE interface from the VAO server (picture 1).

In this example, the business category is called Ubuntu-CDP , the resource group is called CDP-Linux (Picture 2).

Picture 1

Picture 2

B. After opening the VAO web interface it’s necessary to follow the next four steps.

1. Add a Role and Scope (picture 3).

In my example, the scope is named Linux-CDP.

The plan Author/Operator is VBR.

Picture 3

2. Add or modify the Recovery Location (picture 4).

In my example, the recovery location is Verderio and has the Cluster-Verderio as Compute resource (Picture 5).

Pictures 6 and 7 show how to remap the Networking and how to set up the changing IP address rules.

Picture 4

Picture 5

Picture 6

Picture 7

Note1: The Re-IP feature is available just for Windows VMs (please have a look at the official documentation to get all detail (user guide). For Linux VMs it’s necessary creating a custom script.

3. Reporting

Pictures 8, 9, and 10 show how to assign the Linux-CDP scope to your custom reports.

Picture 8

Picture 9

Picture 10

4. Assign the plan Components

Picture 11

Picture 12 shows how to add the VM group called Ubuntu-CDP to the scope Linux-CDP.

Picture 12

Picture 13 shows how to add a recovery location, i.e. Verderio.

Picture 13

Picture 14 shows how to add the plan steps to the orchestration plan (In my example I included all the plan steps).

Picture 14

The next article shows how to create an Orchestration Plan and run it.

Suggestion: If you can’t wait and want to do it immediately, just read the previous articles 🙂

See you soon and take care.

Veeam Disaster Recovery Orchestator v.4 – How to Upgrade

Also Veeam Availability Orchestrator, commonly called VAO, changed its name with this new release.

The new name is Veeam Disaster Recovery Orchestrator (VDrO).

The main news of this version is the support of the technology of continuous data protection (CDP) introduced in VBR v.11.

Which are the main benefits allowed by this new feature?

  • New readiness checks now including RPO and SLA.
  • Recovery Point Object close to real-time.
  • Detailed reports to track and audit the Disaster Recovery plan of your company.

The next article will explain how to implement a DR plan using CDP.

Before doing the upgrade procedure please:

  1.  Perform backup of all existing databases (VAO, VBR, ONE)
  2. Make sure there is enough space for the upgrade of the Microsoft SQL Server configuration database
  3. Make sure there are no orchestration plans being tested or executed
  4. Make sure there are no orchestration plans scheduled to run during the upgrade.
  5. Read carefully the user guide.

Before proceeding please check that the VAO current version on the server is 3.0 (picture 1).

Picture 1

After downloading the ISO file from the Veeam website and mounting it (picture 2)

Picture 2

just select the “Setup” voice; the wizard immediately begins the upgrade (picture 3).

Picture 3

Please check that the previous version of VAO has been discovered. If so the upgrade button is available (picture 4).

Picture 4

The setup checks if Visual C++ 2019 Redistributable package is already installed.  If not it will automatically be deployed. This procedure requires the server reboot (pictures 5 and 6).

Picture 5

Picture 6

After reboot is completed, relaunch the setup.  The wizard will show which components will be automatically upgraded (picture 7).

picture 7

Now the wizard will ask for a valid license (picture 8) and will install the missing components (Pictures 9 and 10).

Picture 8

picture 9

picture 10

The next steps are about the Veeam Databases.
The wizard will ask to connect to them and update the VBR one if necessary (pictures 11 and 12).

Picture 11

Picture 12

The main point of the upgrade procedure is the certification step.
As shown in picture 13, the wizard will ask the VAO administrator which certificate to use. It can be a self-signed and autogenerated or an own certificate created from an external authority.
My suggestion is to ask your security specialist to know which is the best choice for your company.

Picture 13

Picture 14

Clicking on the install button it will complete the upgrade wizard as shown in pictures 15 & 16.

Picture 15

Picture 16

After upgrading please check the versions of VAO (4.0.0.2088), VBR (11.0.0.837), ONE (11.0.0.1379) now installed.

Just a note before ending the article: has already said, VAO (Veeam Availability Orchestrator) has changed its name to VDrO  (Veeam Disaster Recovery Orchestrator).
The web pages of the product still show the old name. It will be updated in the next release.

That’s all for now guys. Take care