
In the previous article, we saw how to operate on backup jobs to obtain Fulls that can be used to create a GFS retention policy when the destination of the jobs is a tape.
In this second article, we find out how a similar result can be achieved by copying tapes.
Note1: A second tape library must be present in the DataCenter to pursue this protection process.
Note2: The most common use case for Copy-Tape is to migrate data contained on tapes from an old technology (LT06) to a new one (LTO9), since the new technology would not be able to natively read the data contained on the old tapes.
There are two steps that will enable us to achieve our goal:
- Step 1: Creation of a tape pool afferent to the second library.
- Step 2: Tape copy job.
Stage 1
The creation of the Media Pool (image 1), will need to be customized by setting:
-
- The use of a new tape for each copy session (image 2).
- Setting a retention that for that tape group coincides with that required by the GFS policy (image 3).
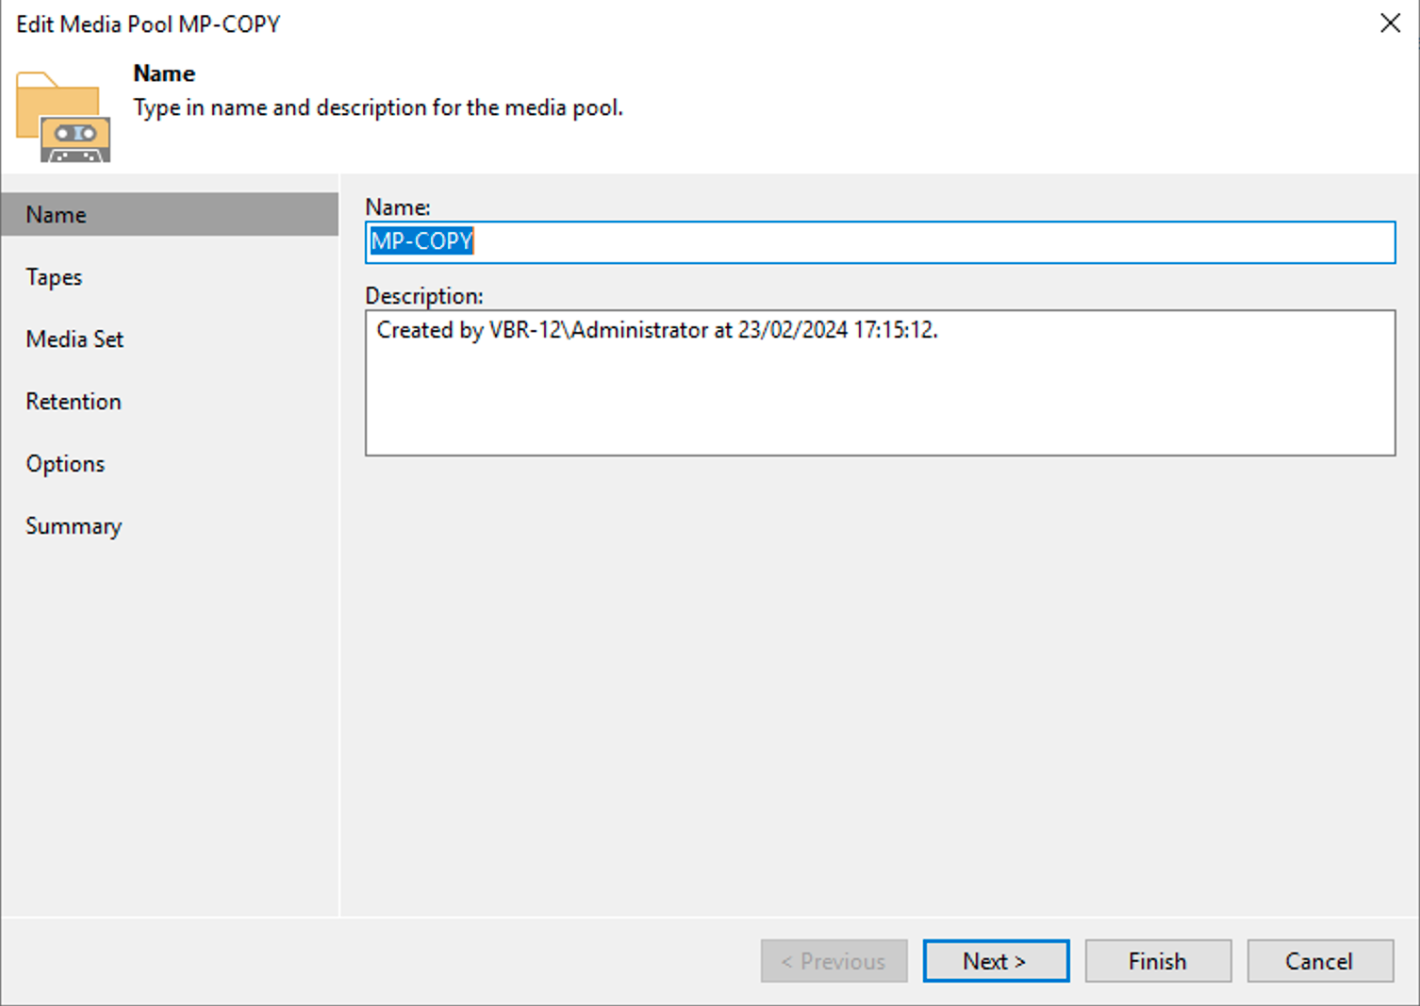 Picture 1
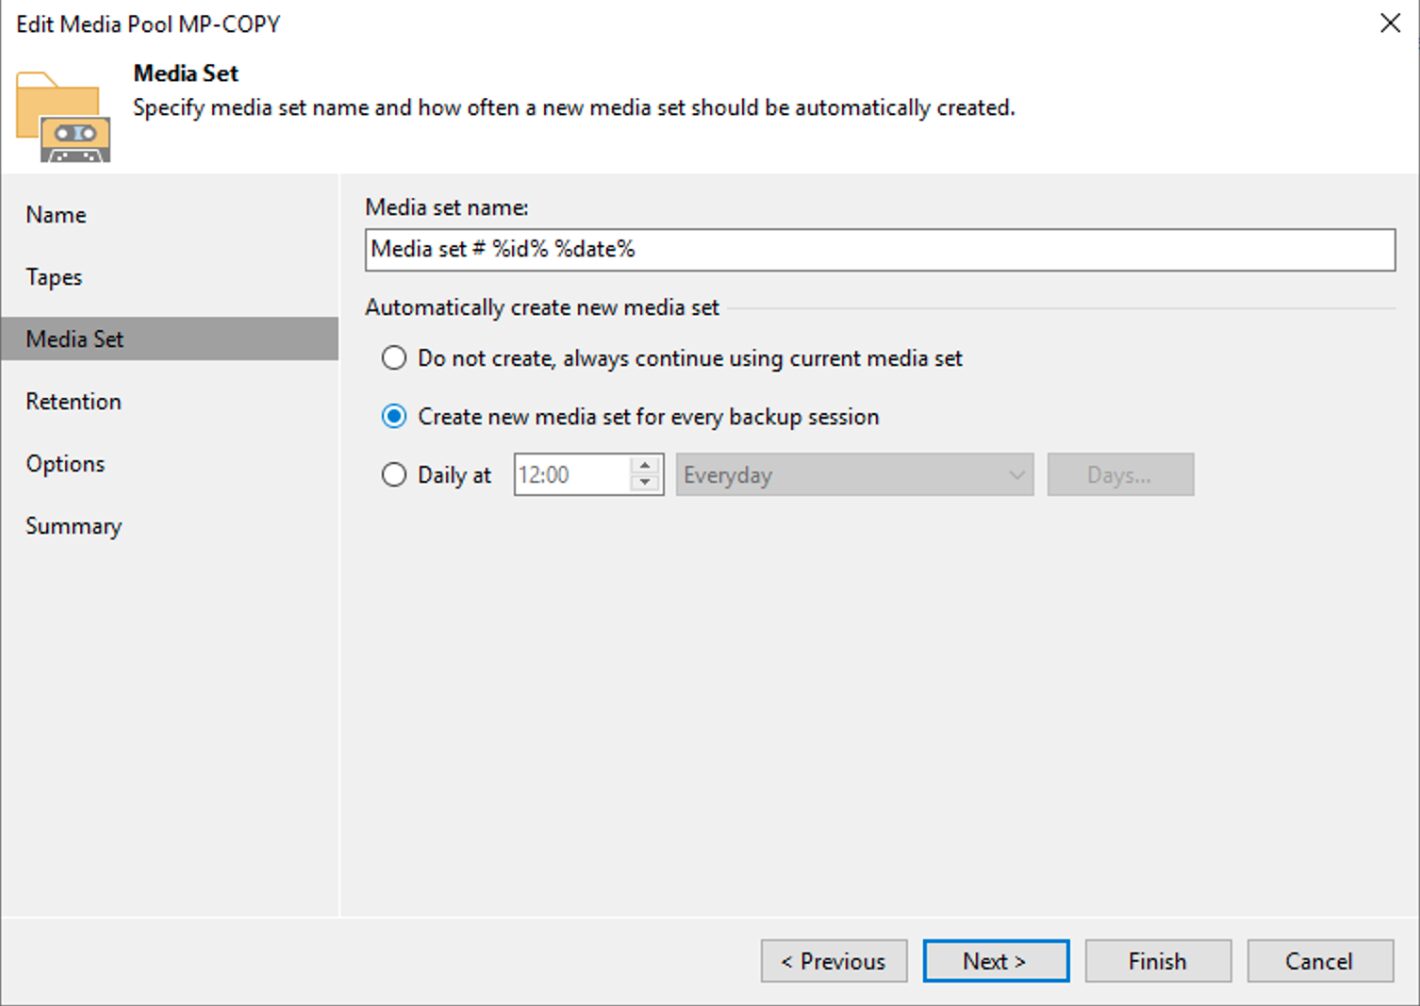 picture 2
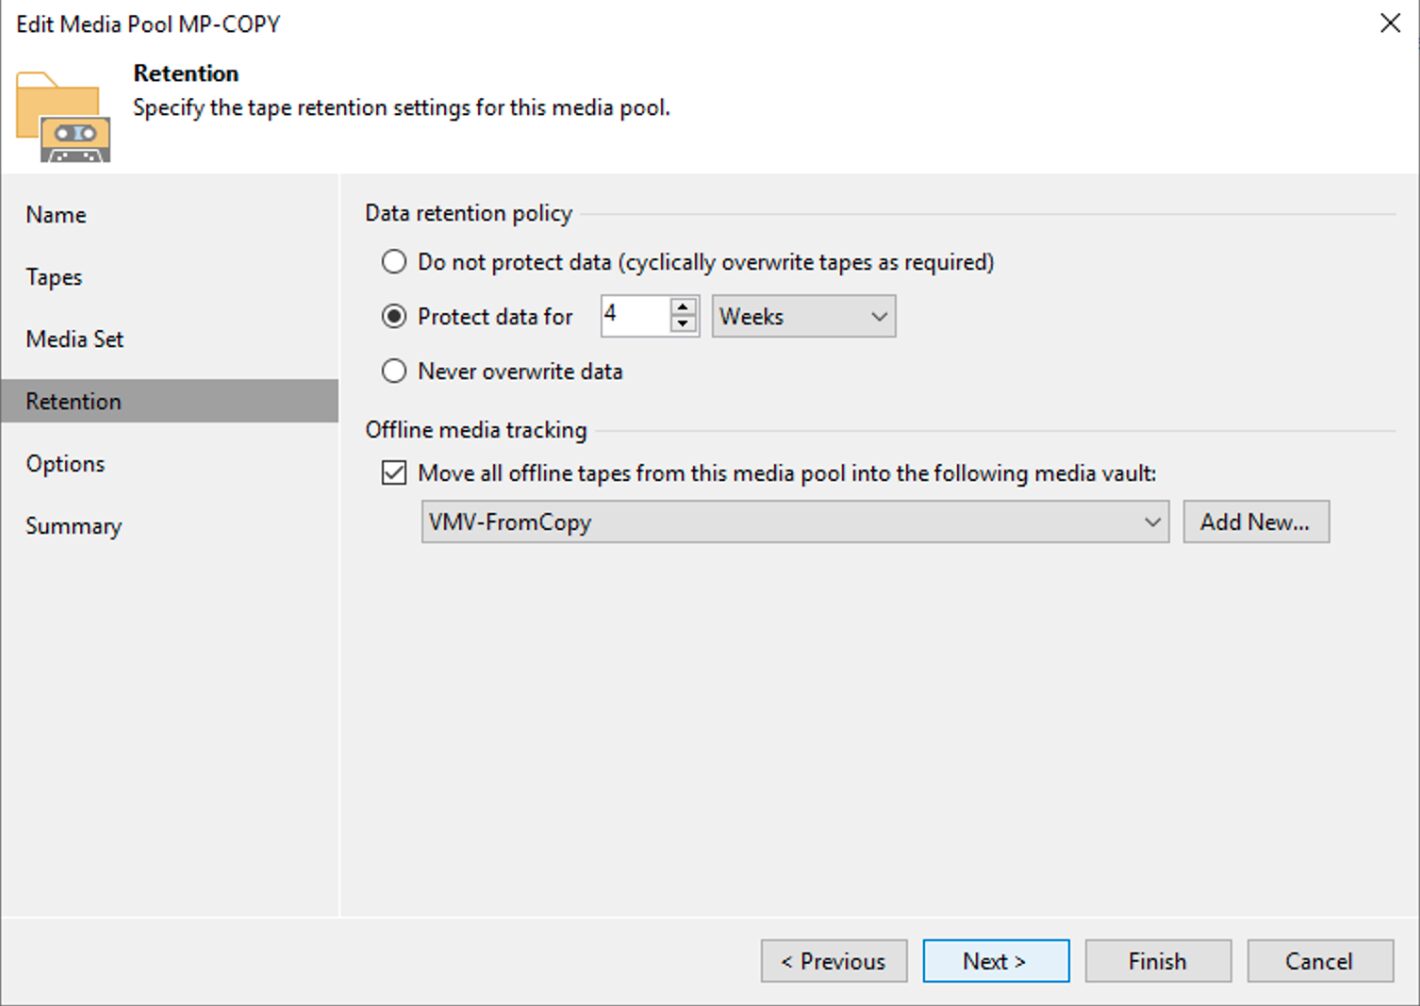 Picture 3
Note3: A 4-week retention was set in Image 3, which addresses the need to keep the full weekly for 1 month.
Note4: Image 4 highlights the possibility of implementing a Vault policy for tape storage.
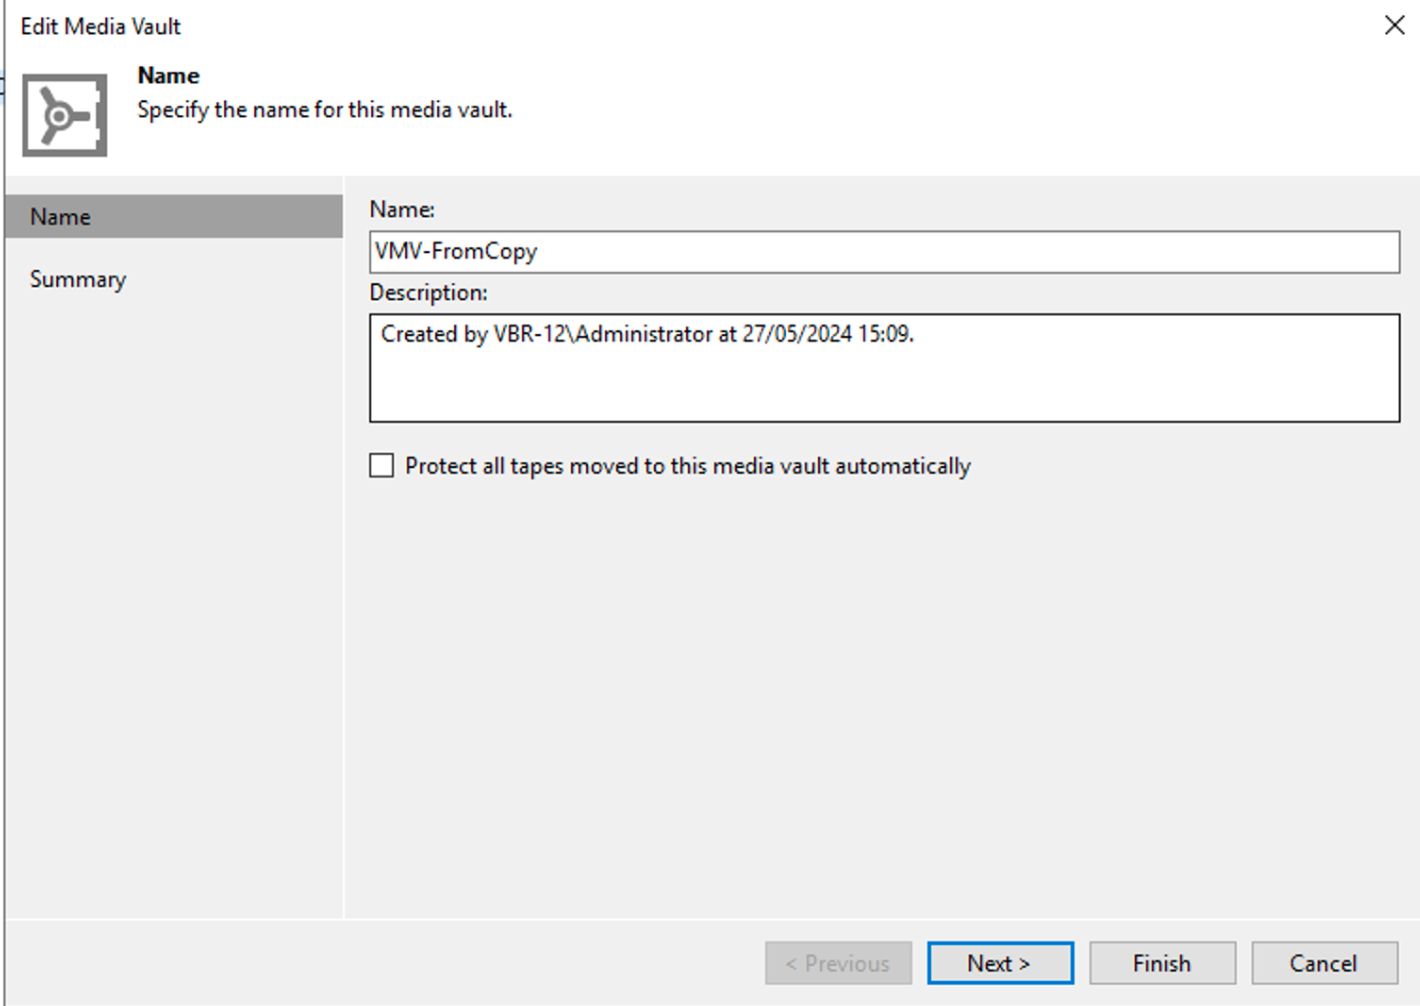 Picture 4
PHASE 2
From the VBR GUI by selecting the tape to be copied with the right mouse button (image 5), the copy command can be initiated.
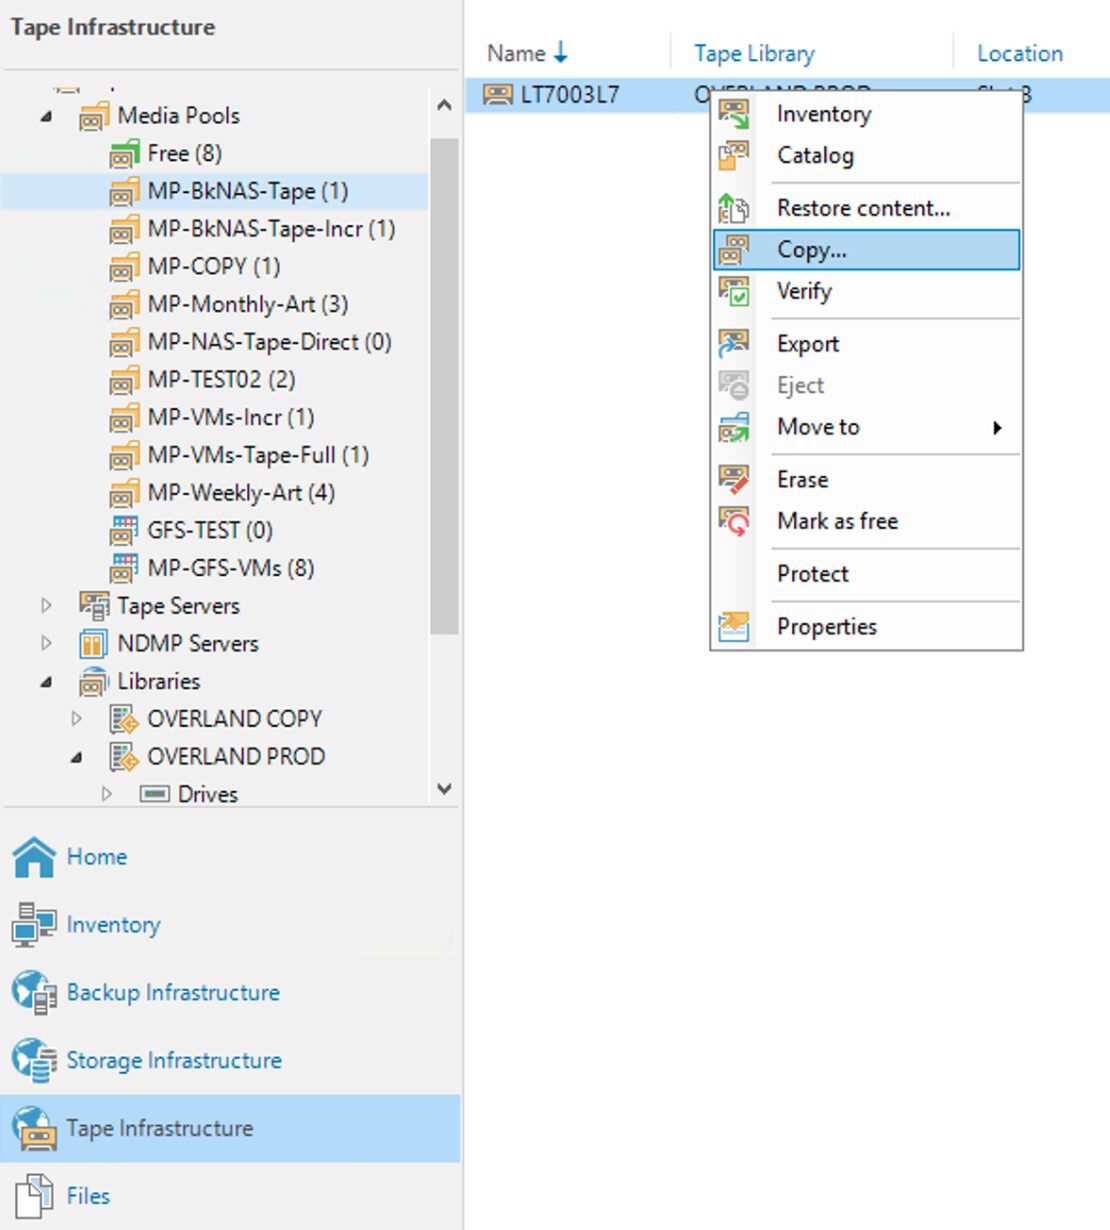 Picture 5
The simple next steps shown by images 6,7,8 and 9 show how to complete the copying operation.
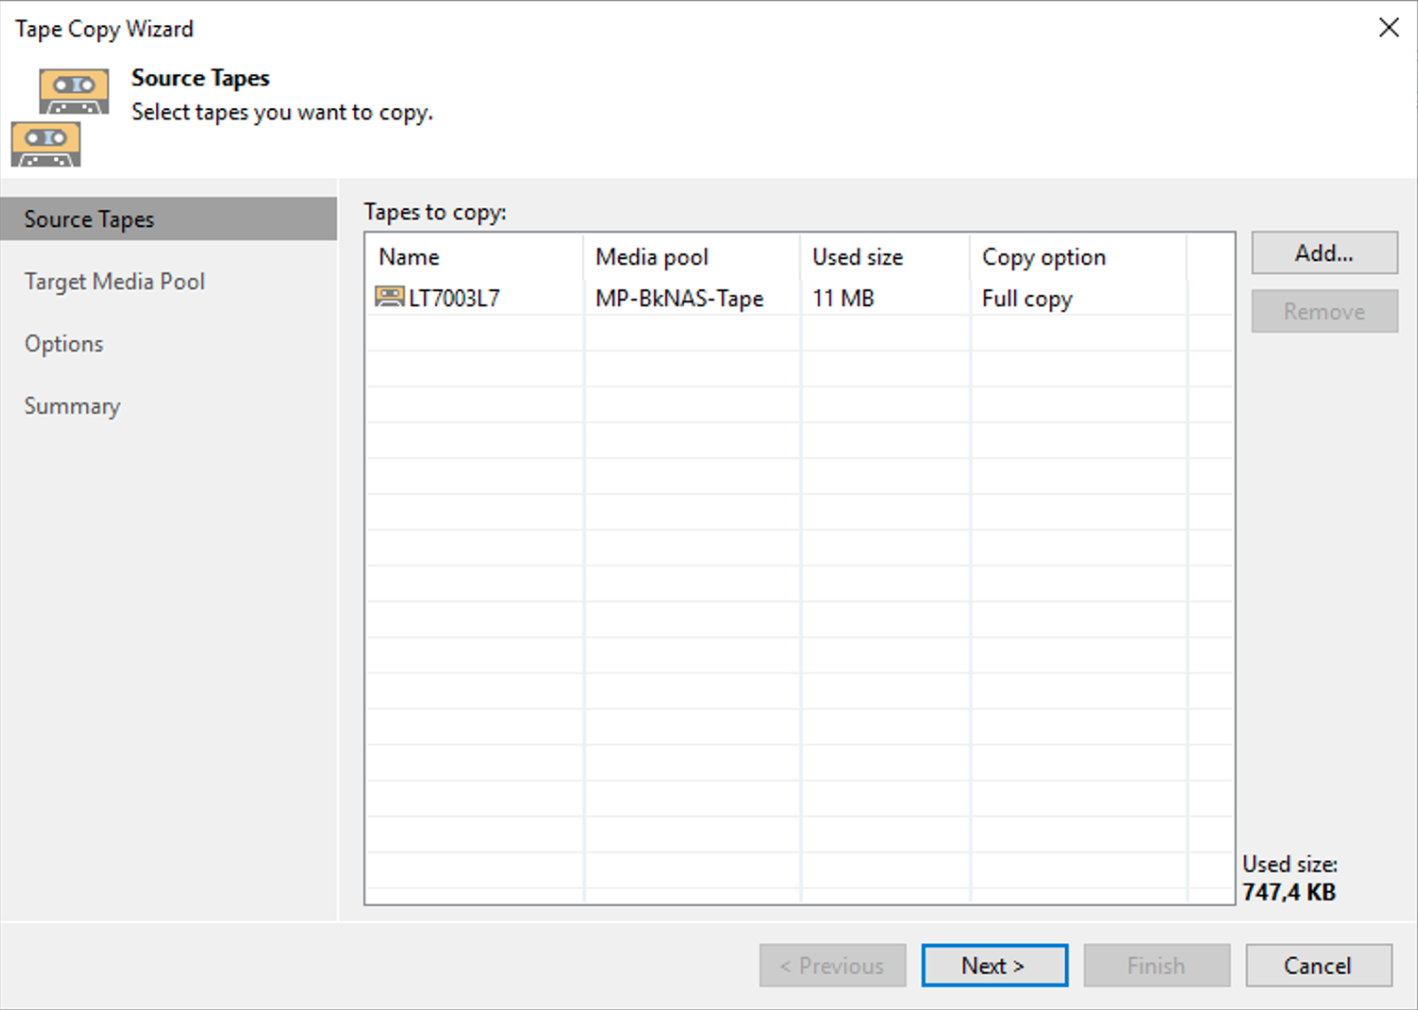 Picture 6
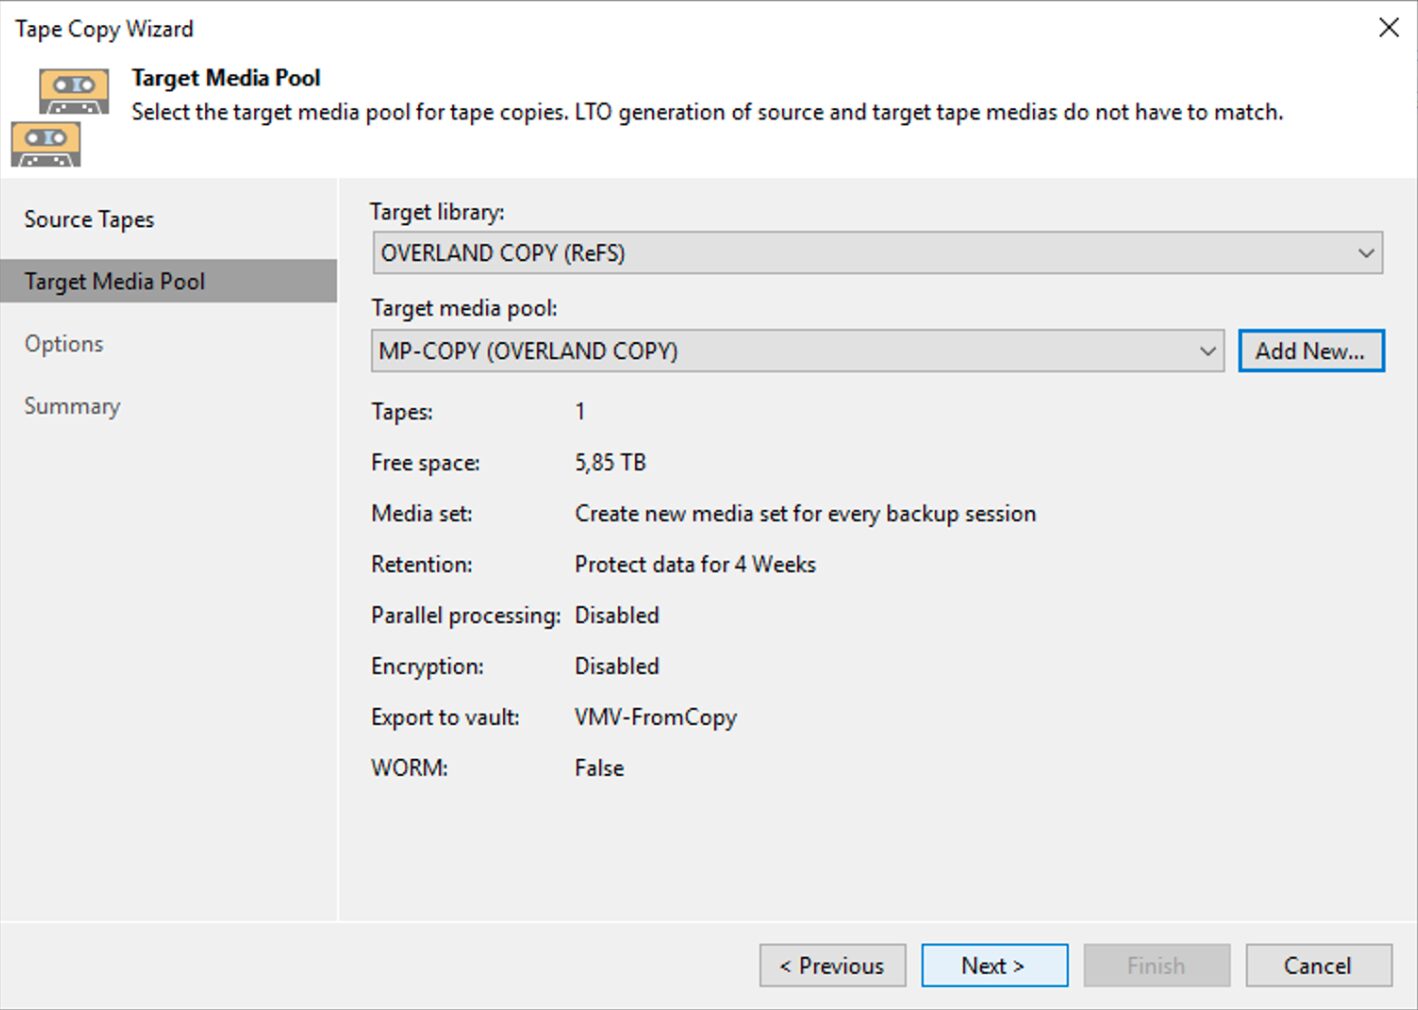 Picture 7
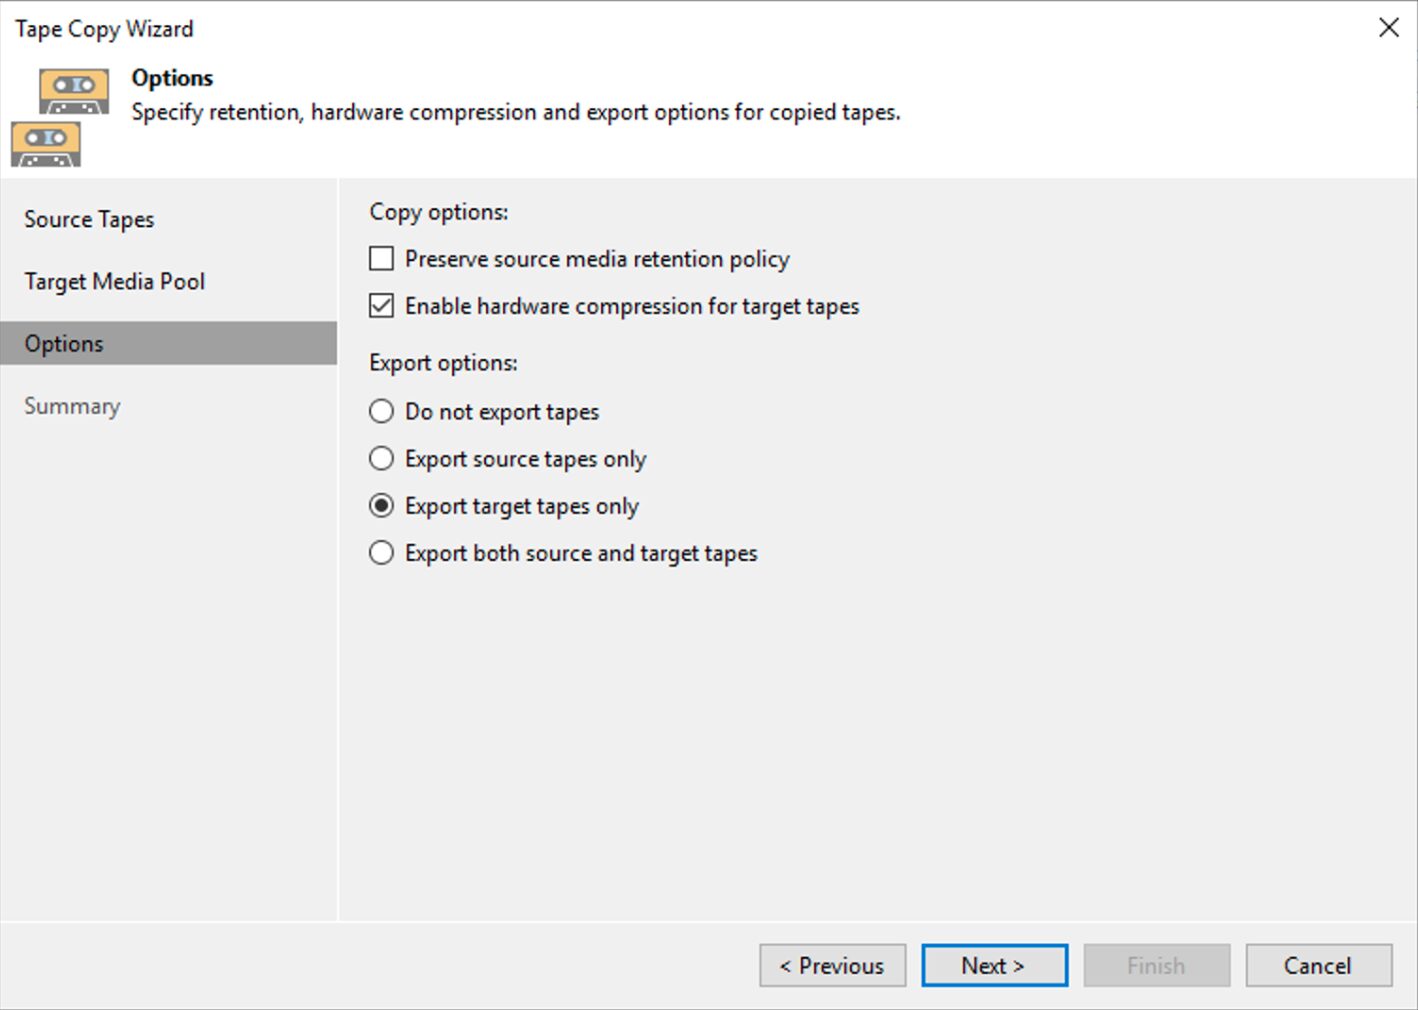 Image 8
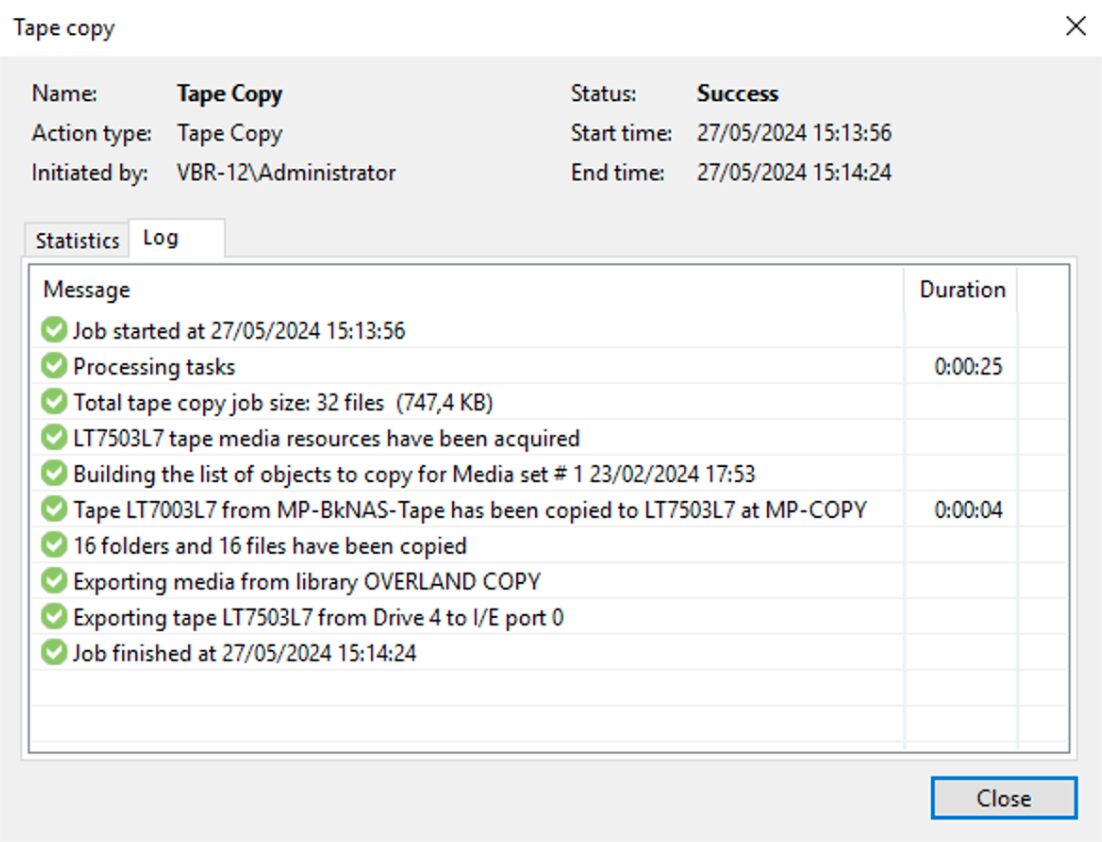 Image 9
Latest notes:
- Documentation to refer to in order to know how many resources it is essential to allocate to the various components is available at the following link.
- Automation of copying can be done through scripts in powershell.
- Copy to Tape does not consume capacitive licensing but refer to the following link, Capacity Licensing item to know all the details.
 Picture 1
 picture 2
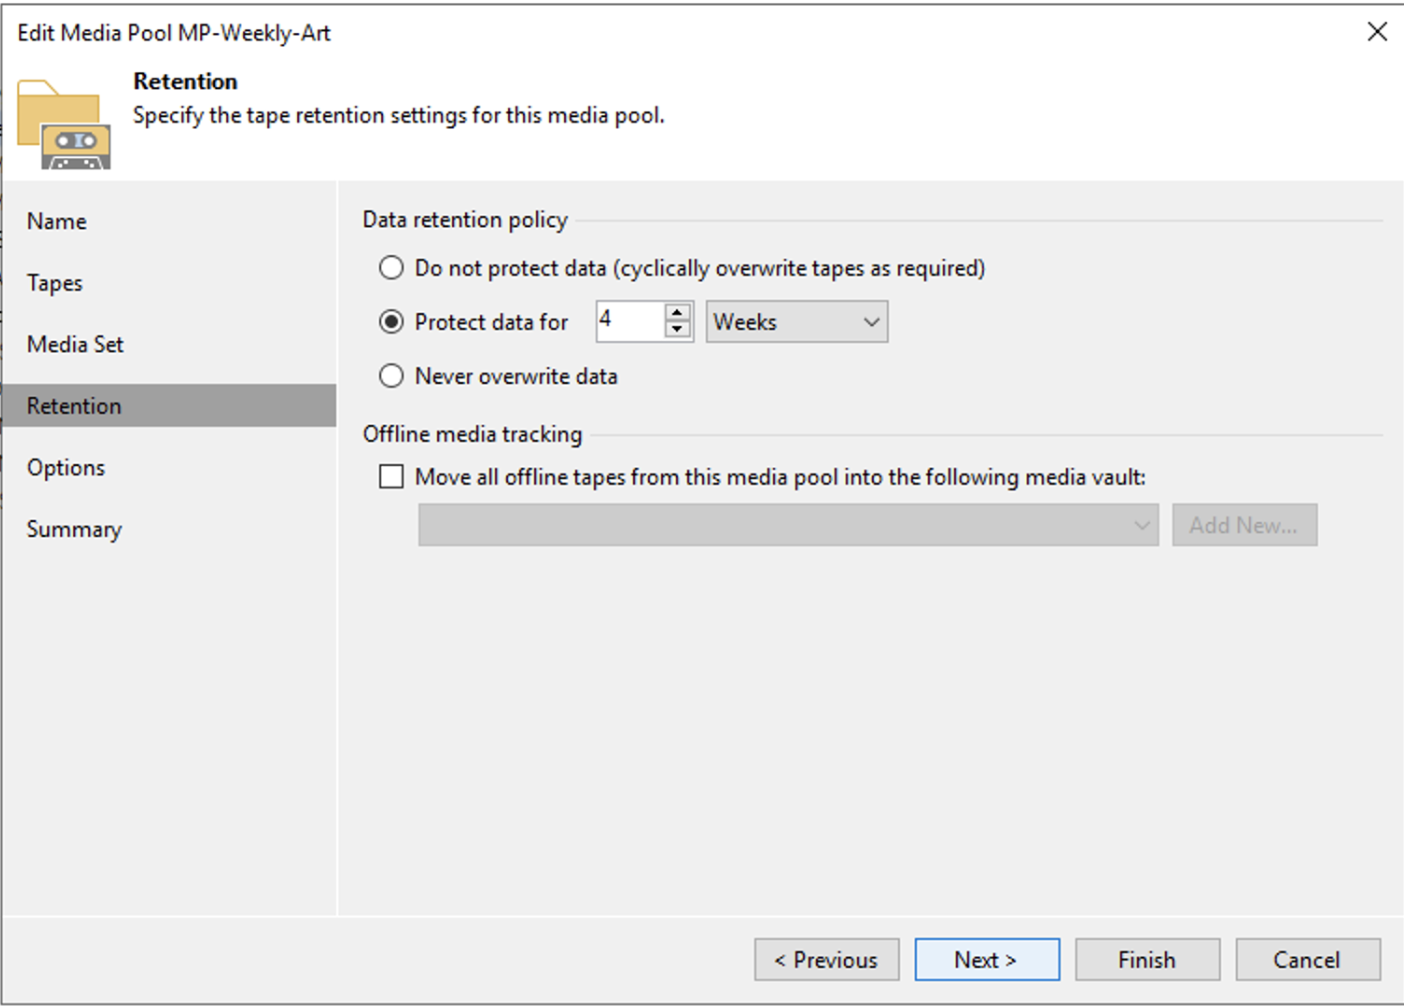 Picture 3
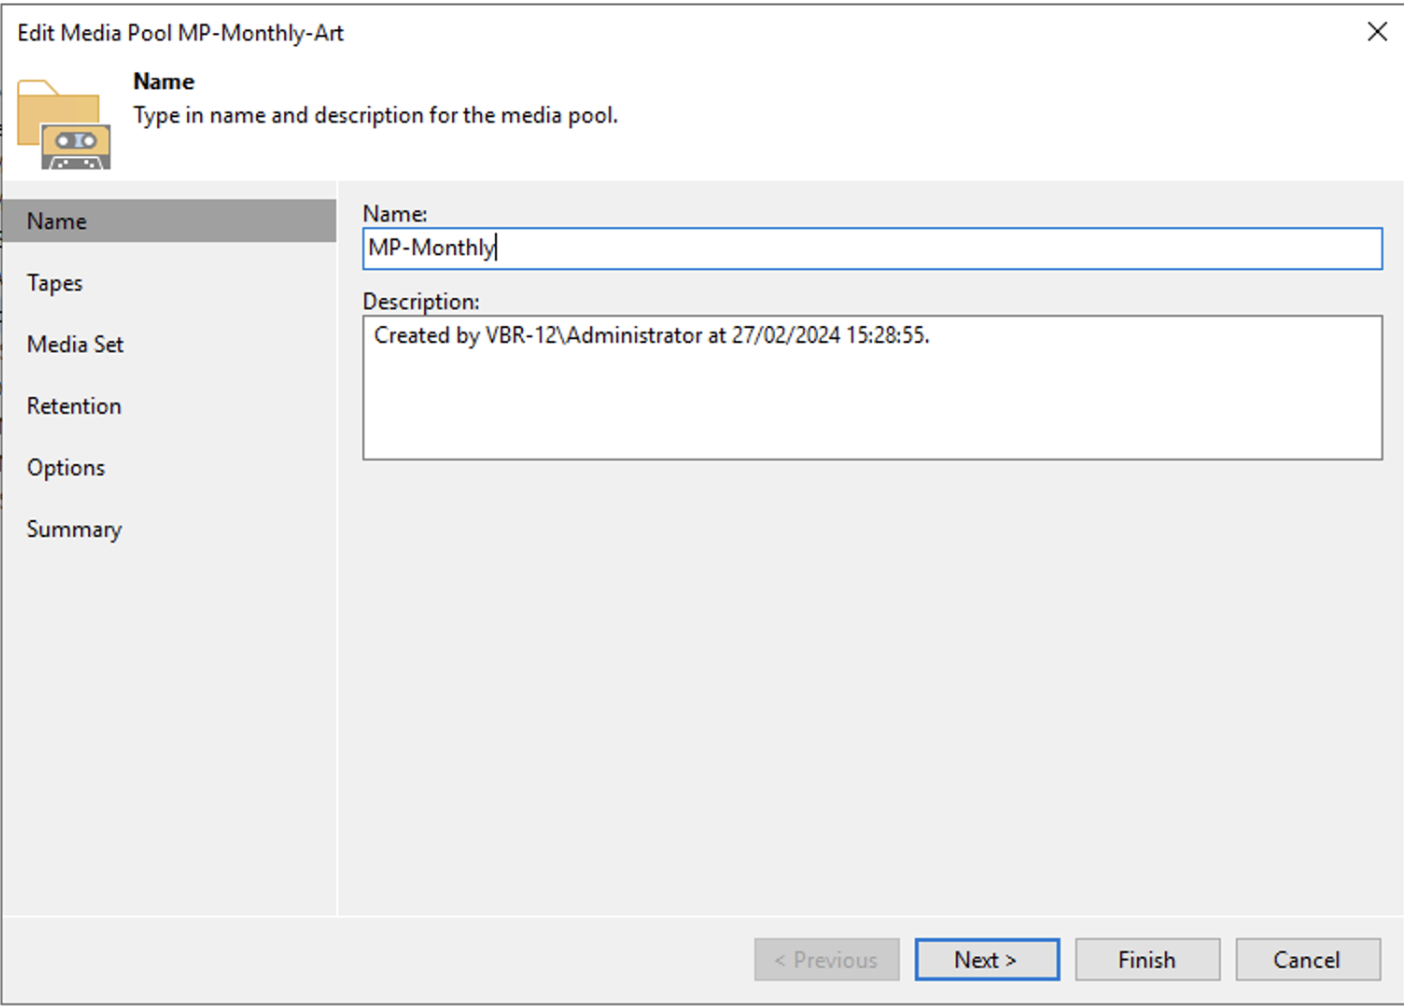 Picture 4
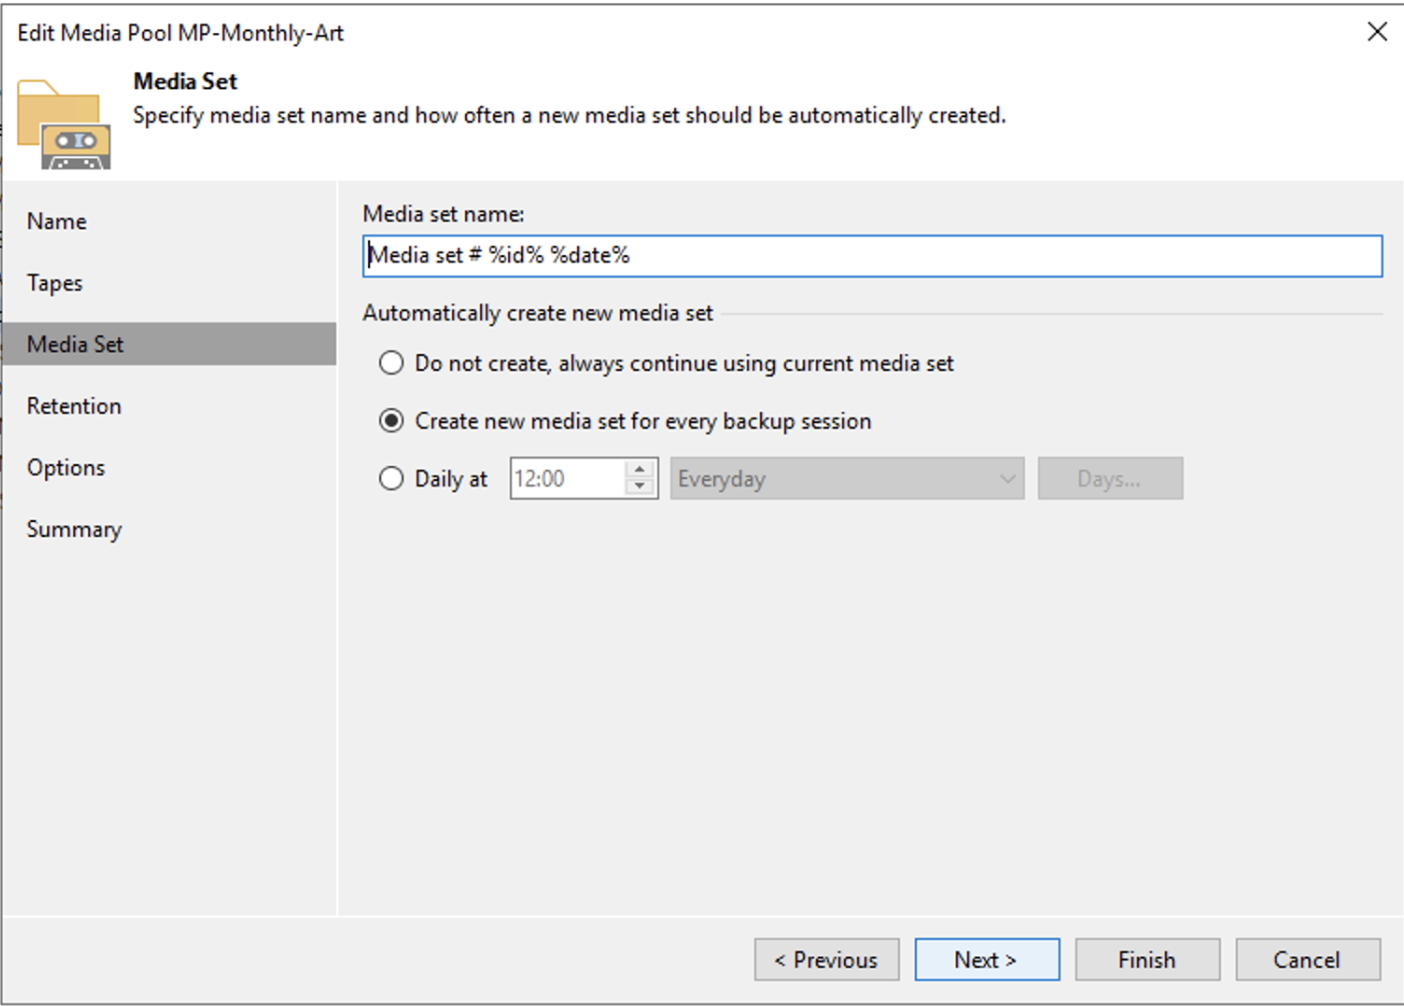 Picture 5
 Picture 6
 Picture 7
 image 8
 Image 9
 image 10
 Image 11
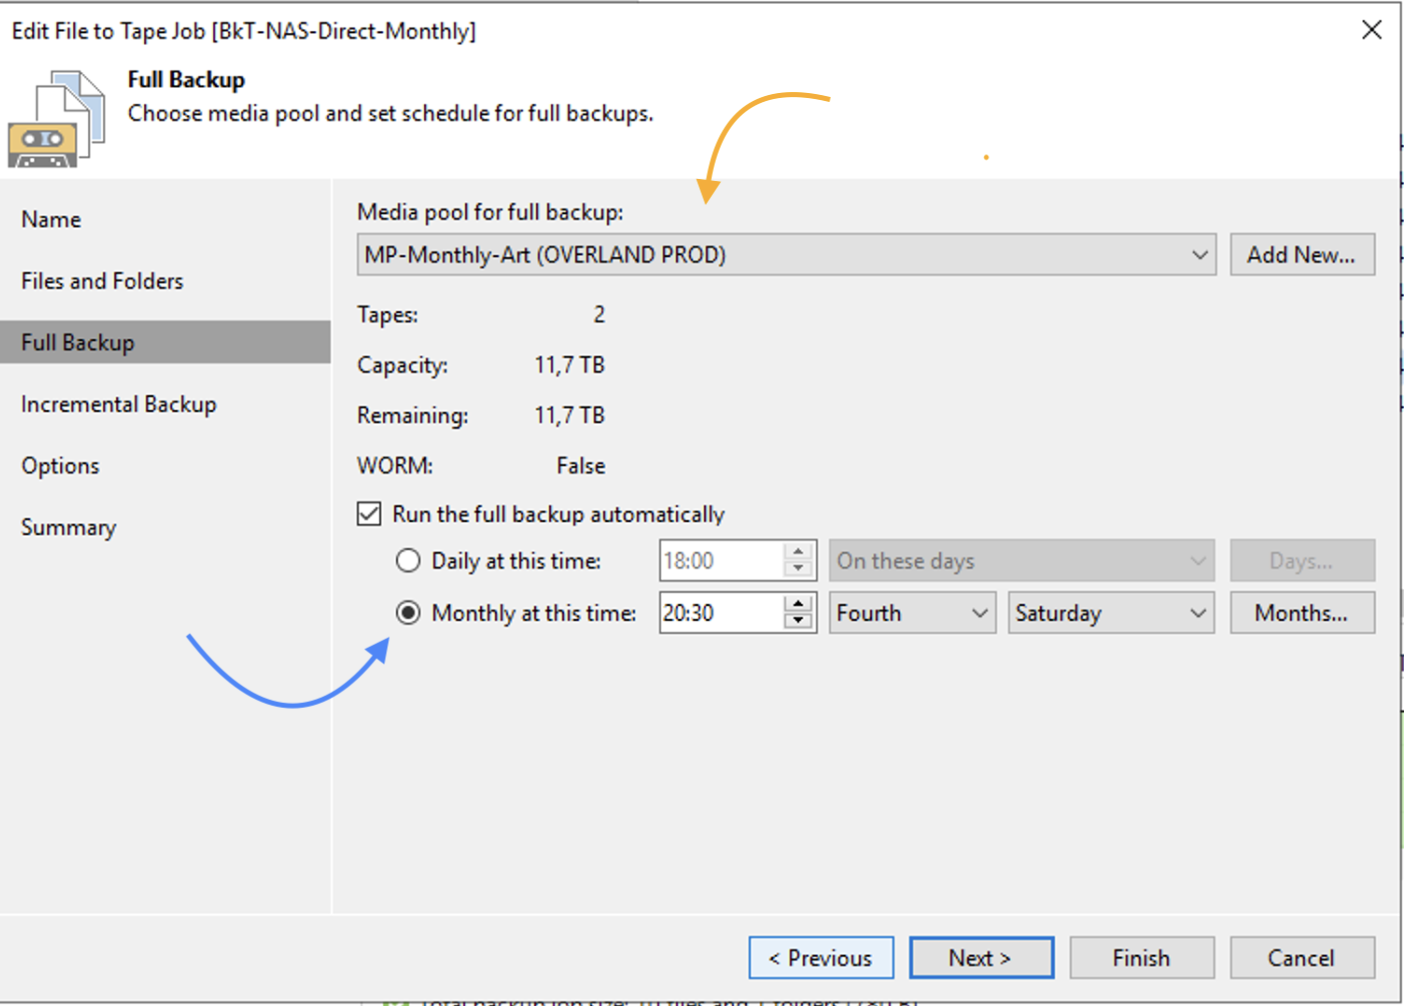 Image 12
 Image 13