
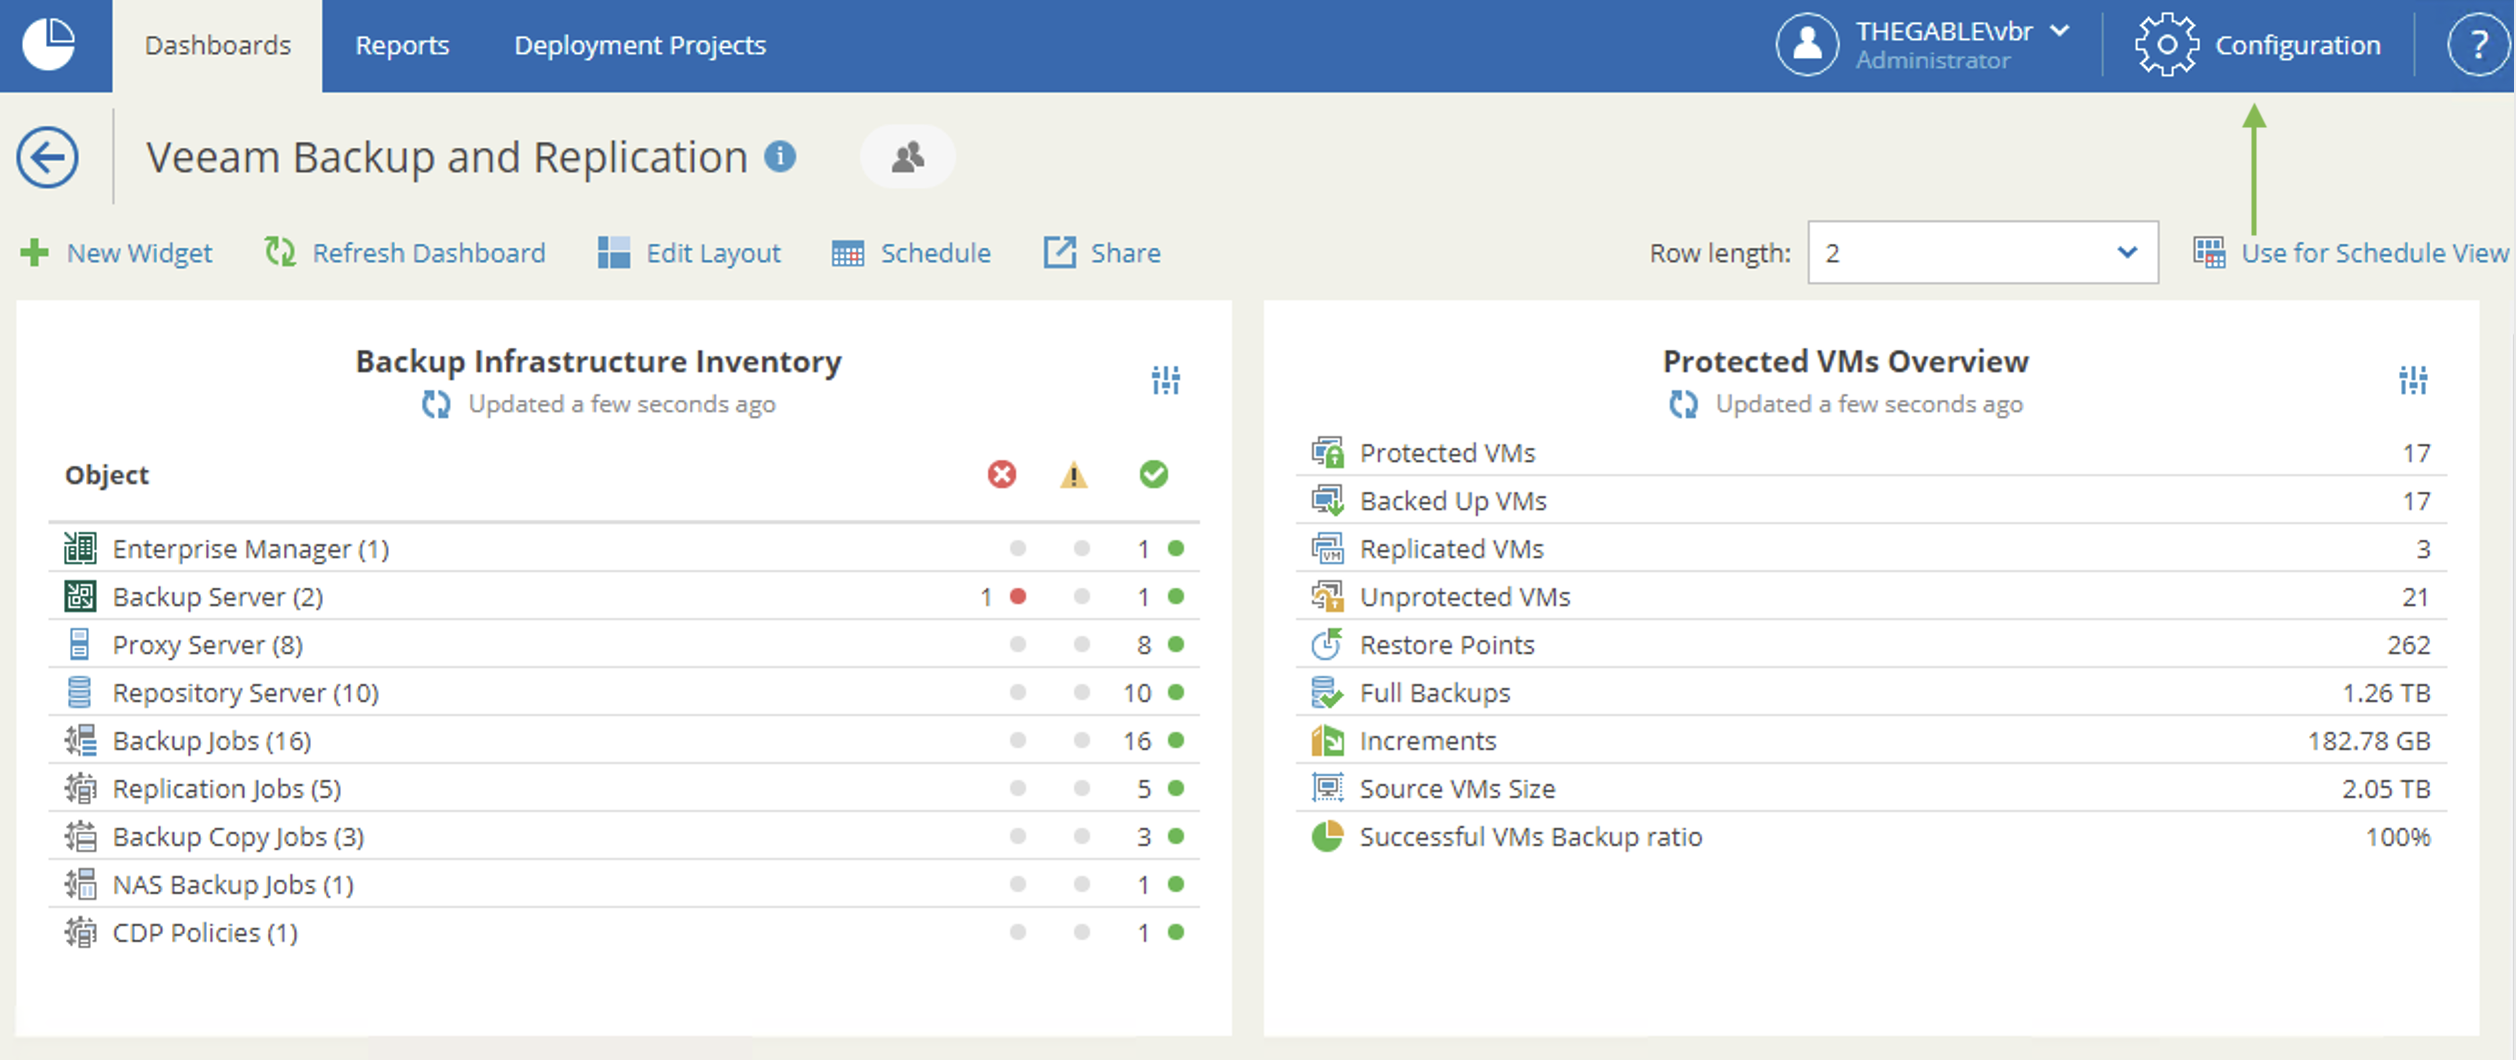
Veeam One is a splendid Advanced Analysis and Reporting tool for virtual and backup environments.
In an Enterprise architecture, the Veeam One roles are distributed on different Servers.
Let’s talk about the DataBase ( MS-SQL ), the Reporting Server ( SSRS ) and obviously the Veeam ONE Server ( VOS )
In this article, I will illustrate how you can streamline your reporting by creating an encrypted connection between Veeam ONE and the Reporting Server at the same time.
The procedure consists of three macro phases.
- The first creates the certificate that enables the HTTPS encrypted connection on the SSRS server.
- In the second, you configure SSRS to accept HTTPS connections.
- In the third, we configure the Veeam ONE server to use SSRS for reporting.
1- Creation of the certificate
If there is no certificate authority installed in your domain (like mine), you need to create a Self-Signed certificate.
Let’s see how to proceed:
On the SSRS , start a PowerShell console as administrator and run the following commands:
- New-SelfSignedCertificate -CertStoreLocation cert: \ LocalMachine \ my -dnsname NAMESERVER -NotAfter (Get-Date) .AddMonths (60) (replace NAMESERVER with your Server name).
- $ pwd = ConvertTo-SecureString ” yourpassword ” -asplainText -force (replace your password with a complicated one of your choice).
- $ file = ” C: \ MyFolder \ SQLcertificate.pfx ” (this is the location where the certificate will be exported ).
- Export-PFXCertificate -cert cert: \ LocalMachine \ My \< Thumbprint created from the output of the first command> -file $ file -Password $ pwd ( Copy the certificate to the file created in step 3 ).
- Import-PfxCertificate -FilePath $ file cert: \ LocalMachine \ root -Password $ pwd ( imports the certificate into the SSRS ).
Now it’s time to copy the SQLcertificate.pfx file (point 3) into the VOS and proceed with its installation as indicated in the next lines.
- Double click on the file and in the first window choose ” Local Machine “.
- When prompted for the password , provide the one set in step 2.
- On the next screen select ” Place all certificates in the following store “, and after selecting Browse, select from the ” Trusted Root Certification Authorities ” list.
- Ok and after selecting Next, finish the installation.
2- SSRS configuration
Using the SSRS configuration manager it is possible to set the HTTPS connection as shown in images 1,2 and 3.
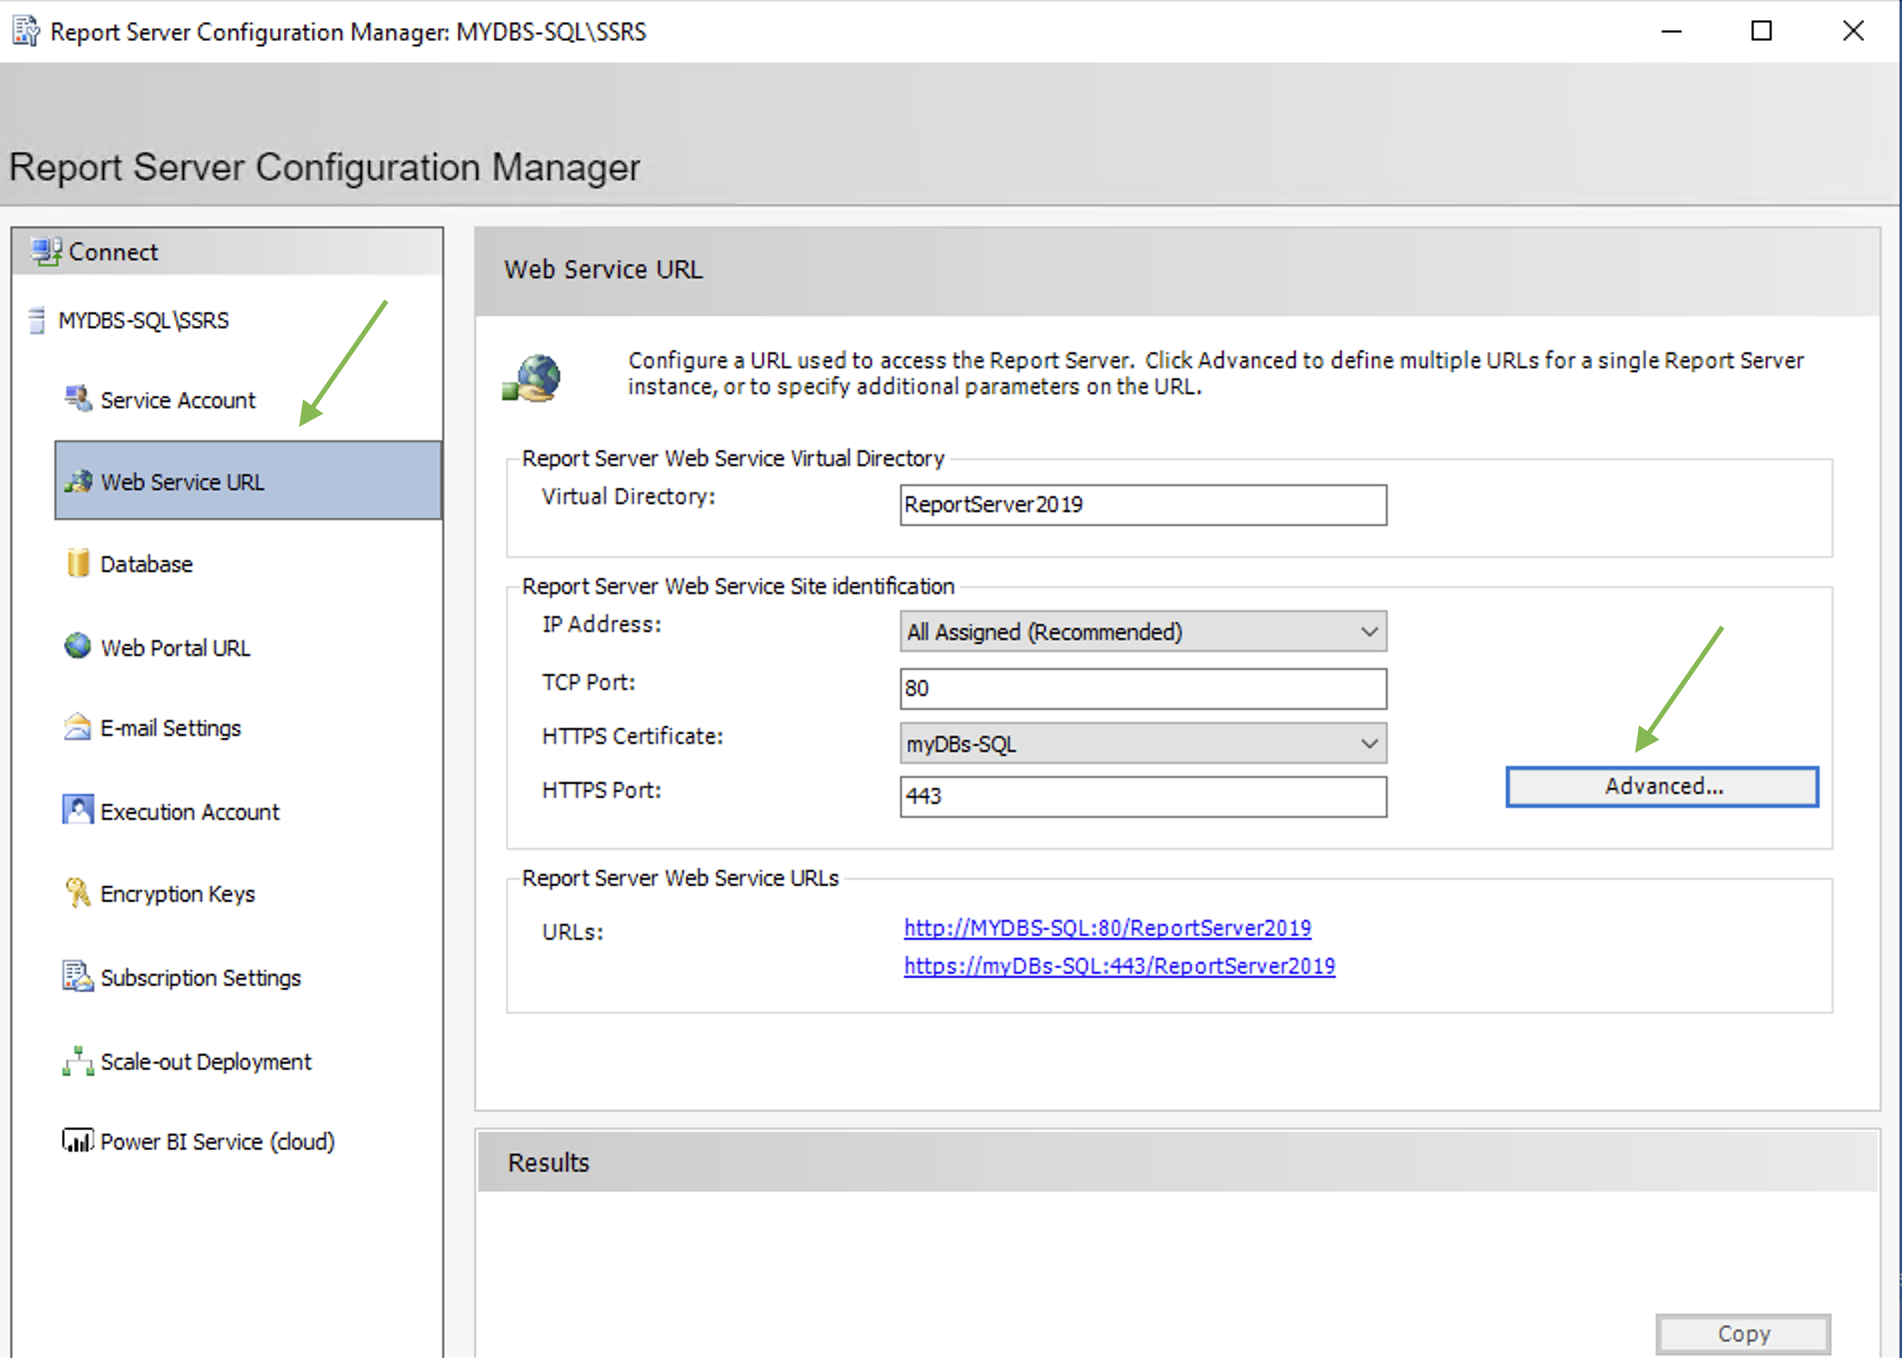 Picture 1
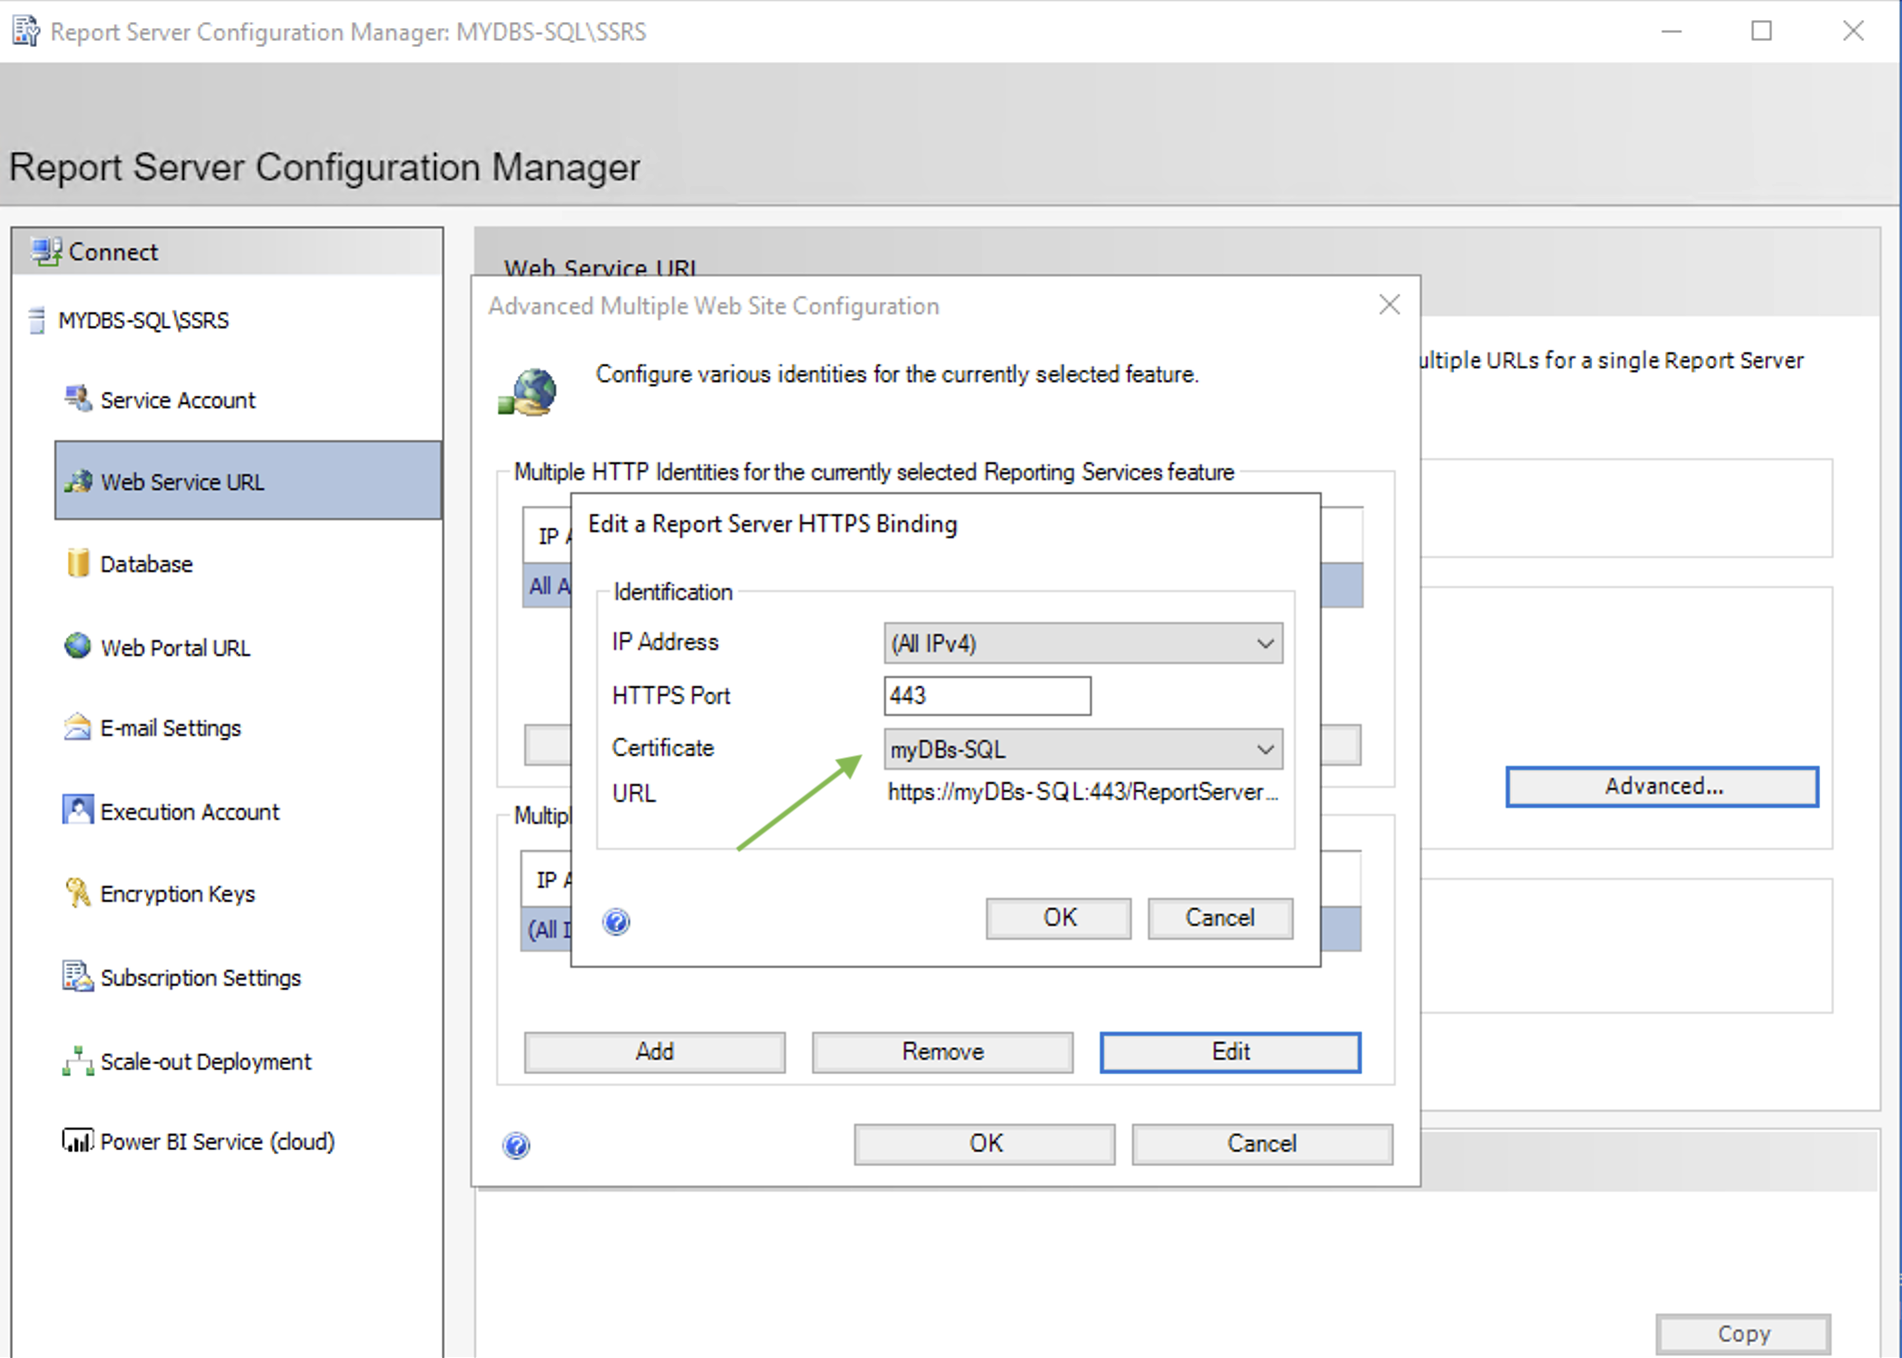 picture 2
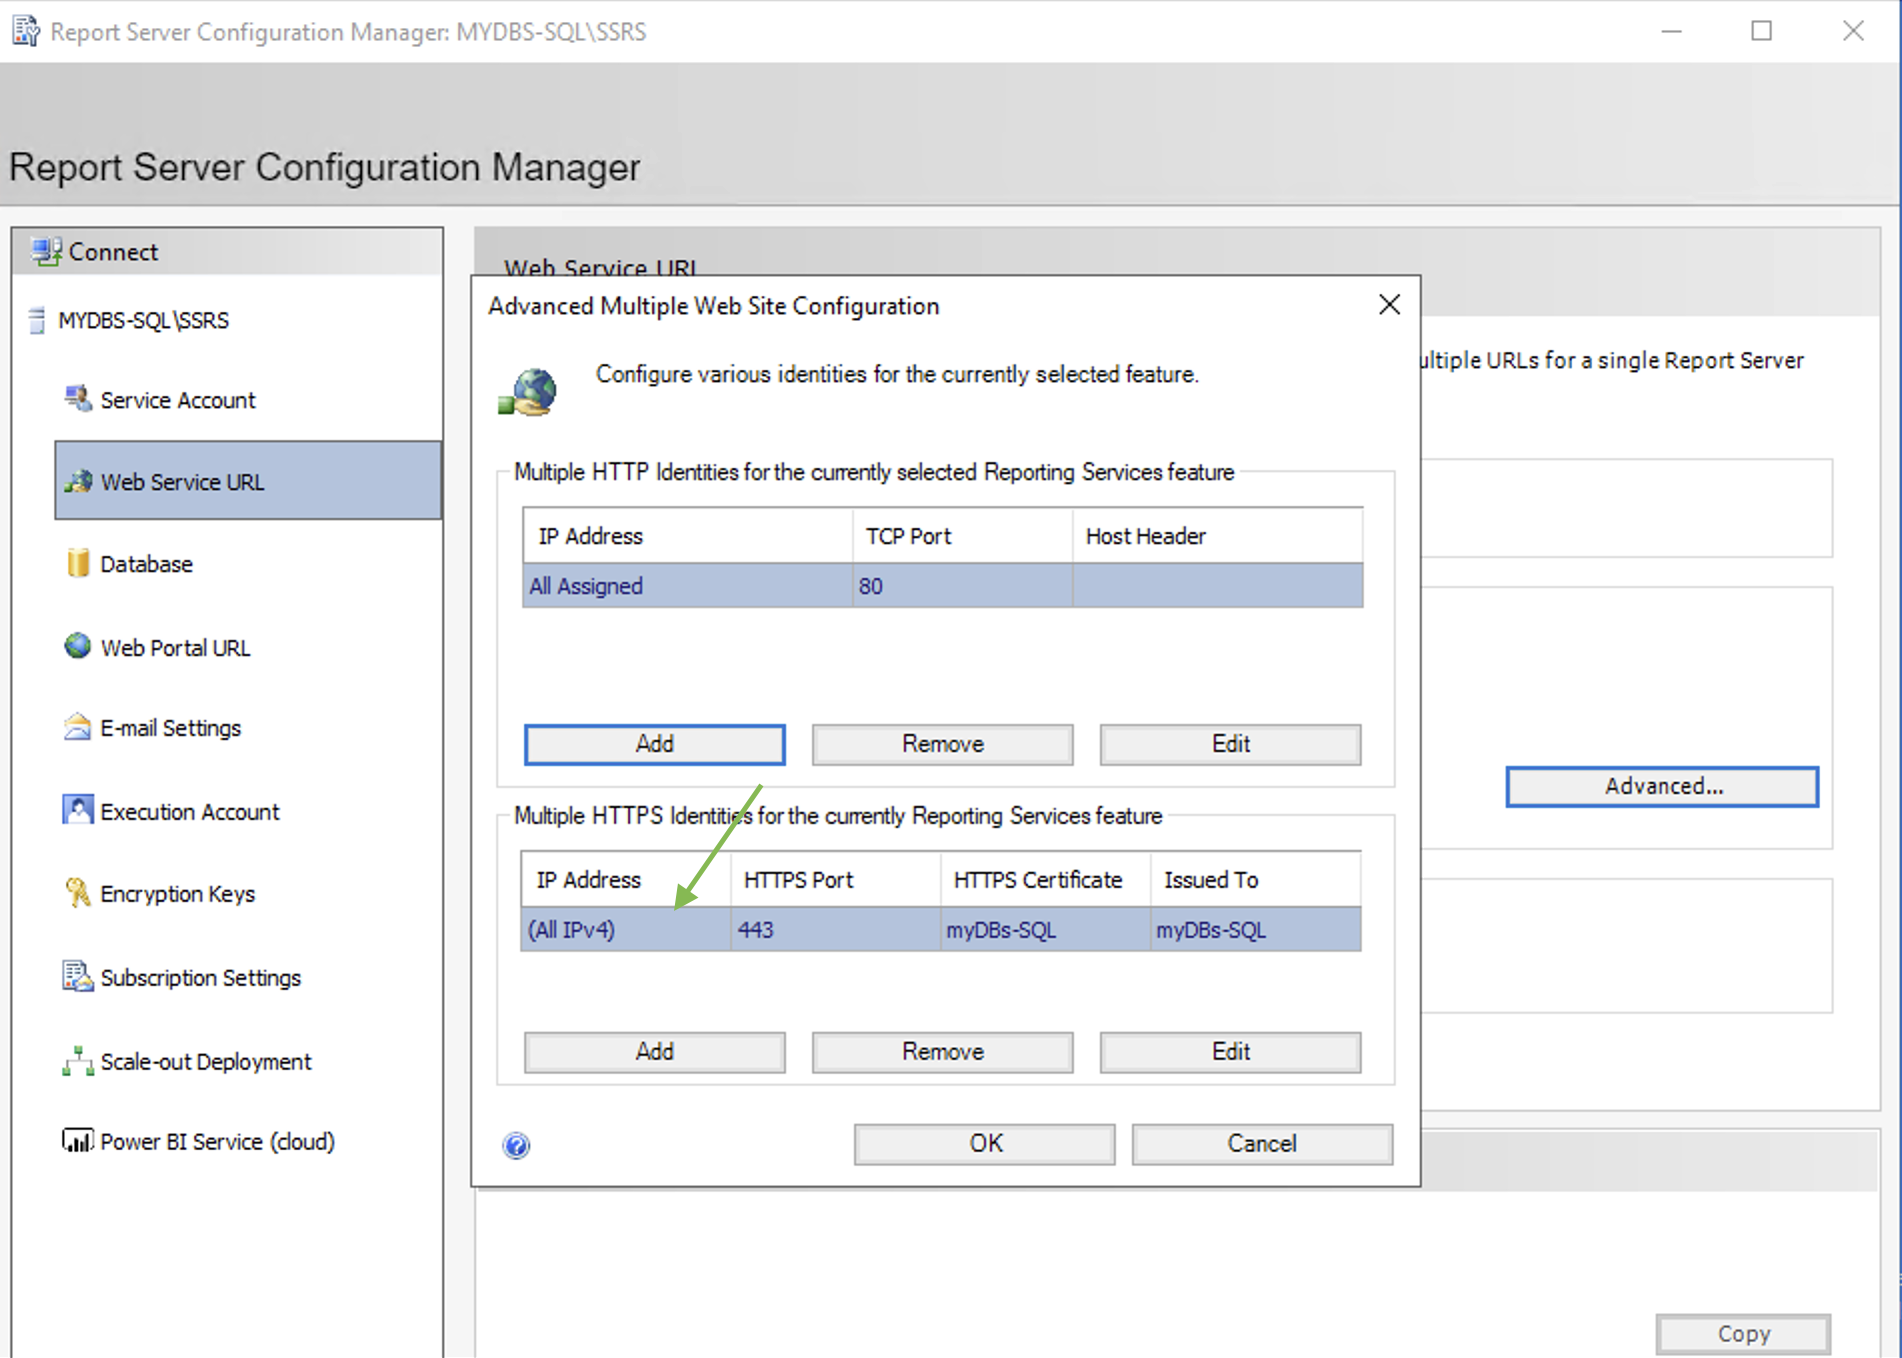 Picture 3
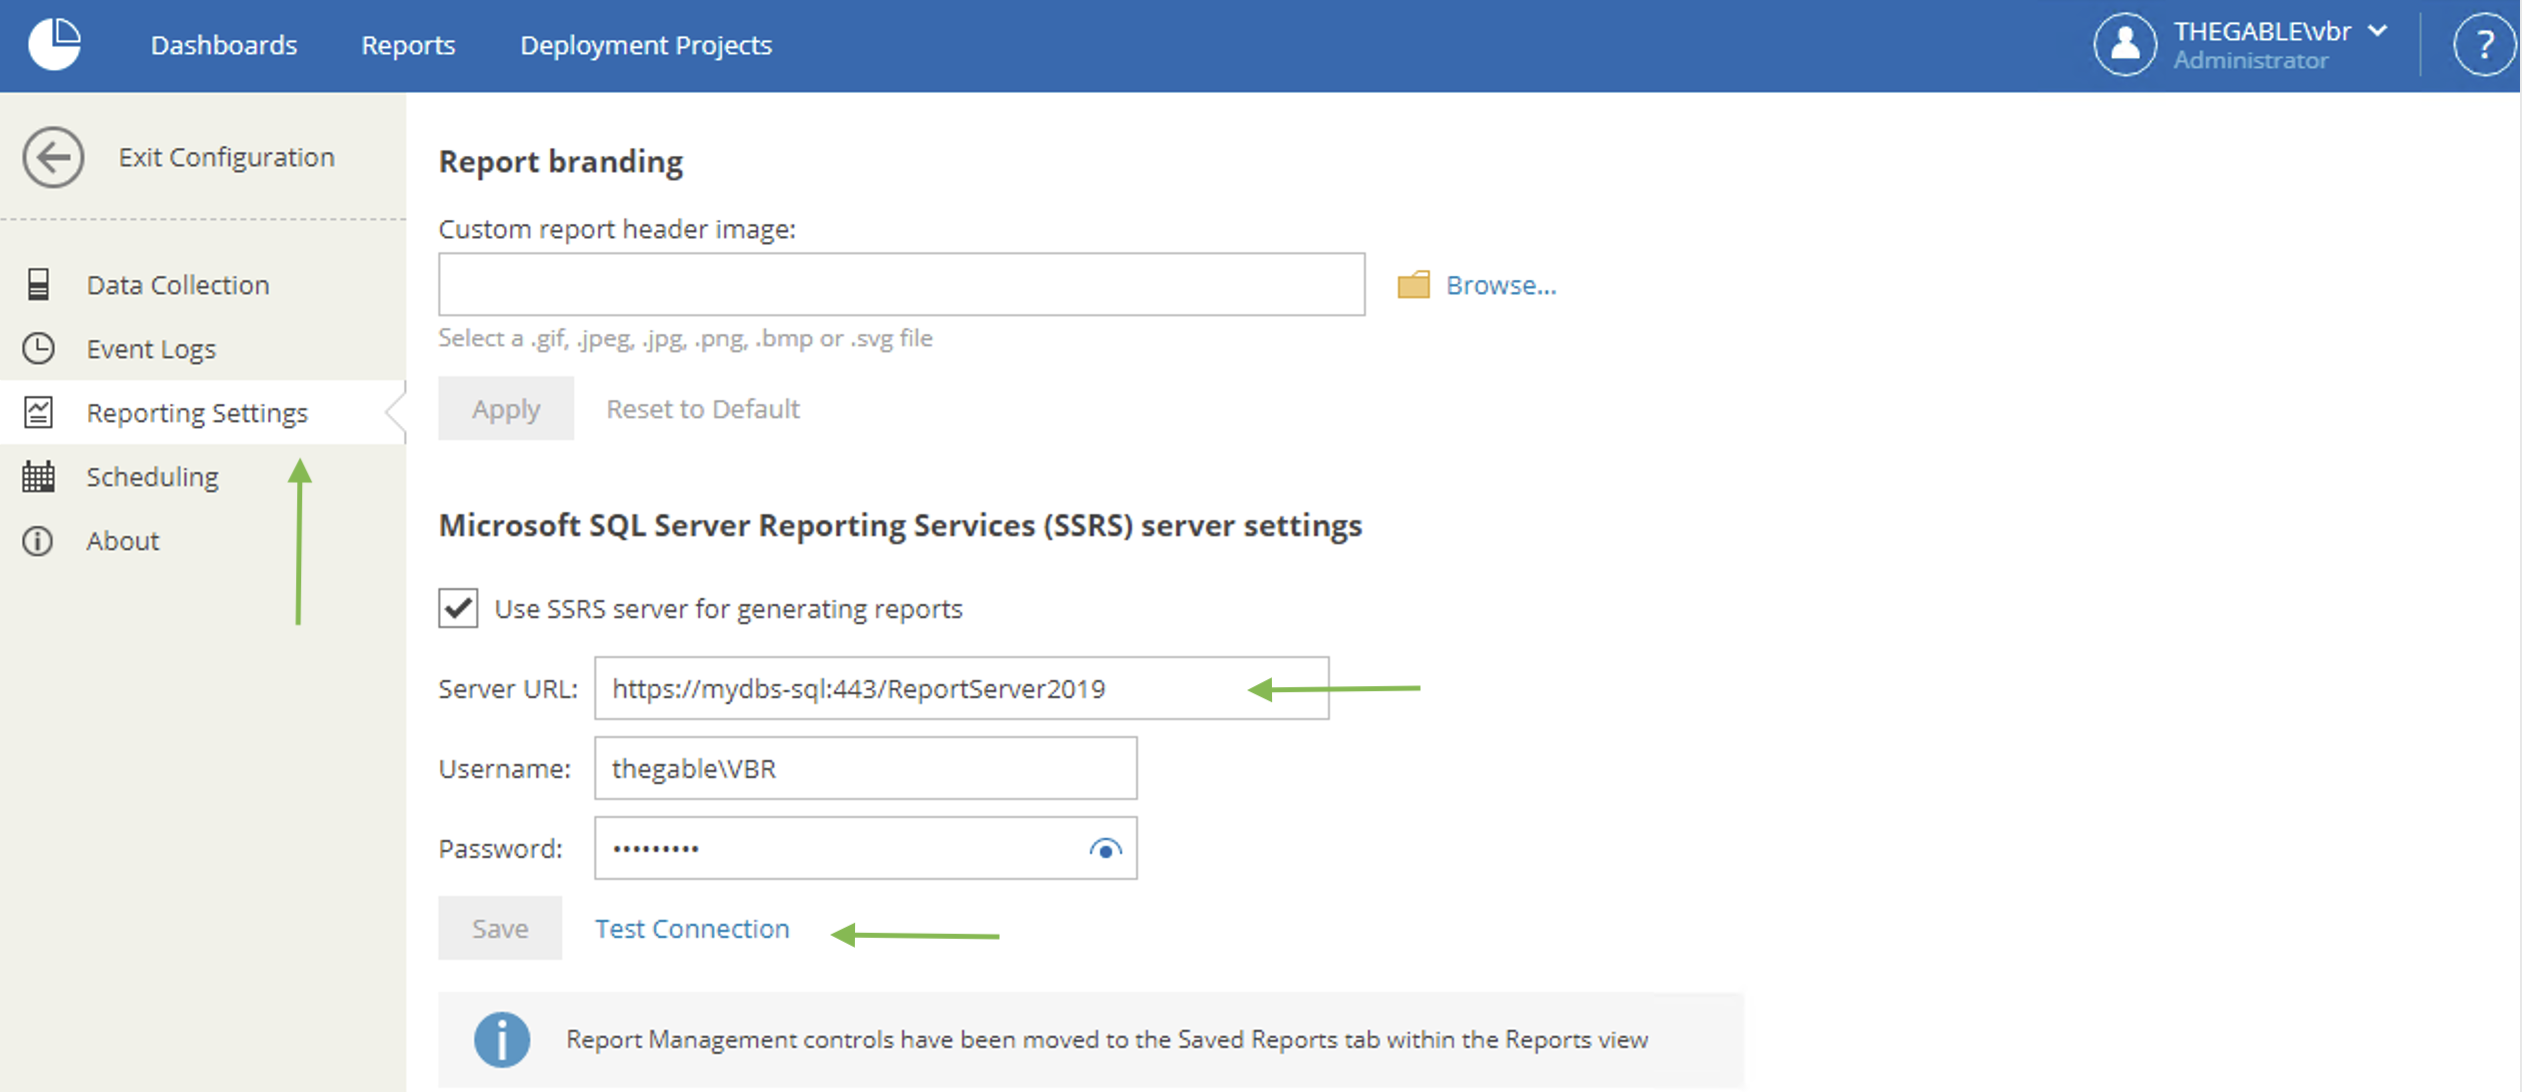
3- Veeam ONE configuration
Images 4 and 5 show how to configure VOS to use SSRS to generate reports.
 Picture 4
 Picture 5
Note 1: From image 5 we can see that it is possible to test the connection via the Test Connection button.
Note 2: The details on which ports open in the firewalls are documented in the guide. ( helpcenter.veeam.com) ; remember to add port 443 🙂
See you soon

 Figure 1
 Figure 1
 Figure 2
 Figure 3
 Picture 1
 Image 2