NAS Backup – GFS to TAPE – Parte II

Nel precedente articolo abbiamo visto come operare sui job di backup per ottenere dei Full che possano essere utilizzati per creare una politica di retention GFS quando la destinazione dei job è un nastro.

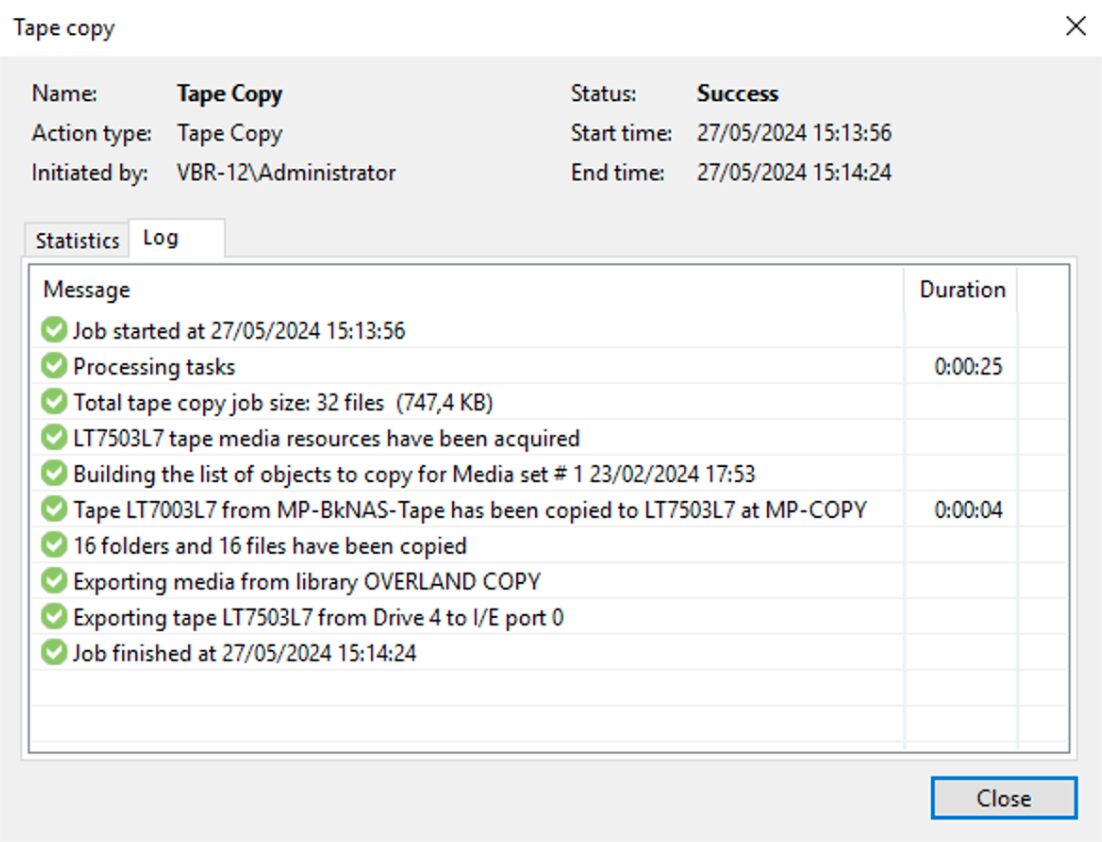
In questo secondo articolo, scopriamo come sia possibile ottenere un risultato simile copiando i nastri.

Nota1: Per perseguire questa processo di protezione  è necessario che nel DataCenter sia presente una seconda libreria a nastro.

Nota2: Il caso d’uso più comune per il Copy-Tape è quello di migrare i dati contenuti sui nastri di una vecchia tecnologia (LT06) verso una nuova (LTO9), visto che la nuova tecnologia non sarebbe in grado di leggere nativamente i dati contenuti sui vecchi nastri.

Le fasi che ci permetteranno di raggiungere il nostro scopo sono due:

  • Fase 1: creazione di un pool di nastri afferente alla seconda libreria.
  • Fase 2: job di copia del tape.

Fase 1

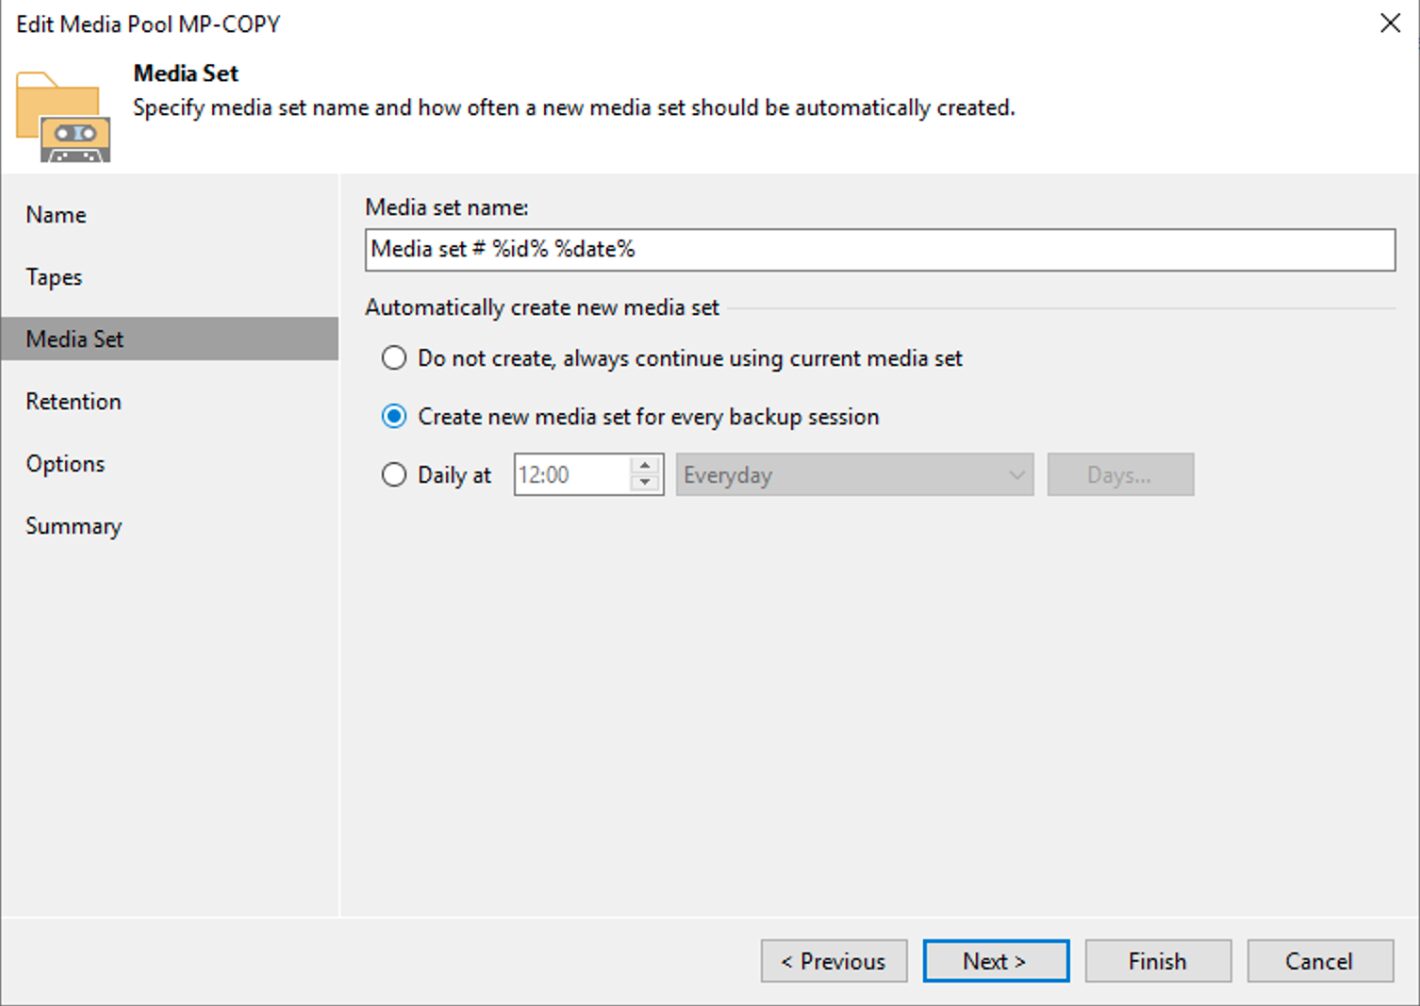
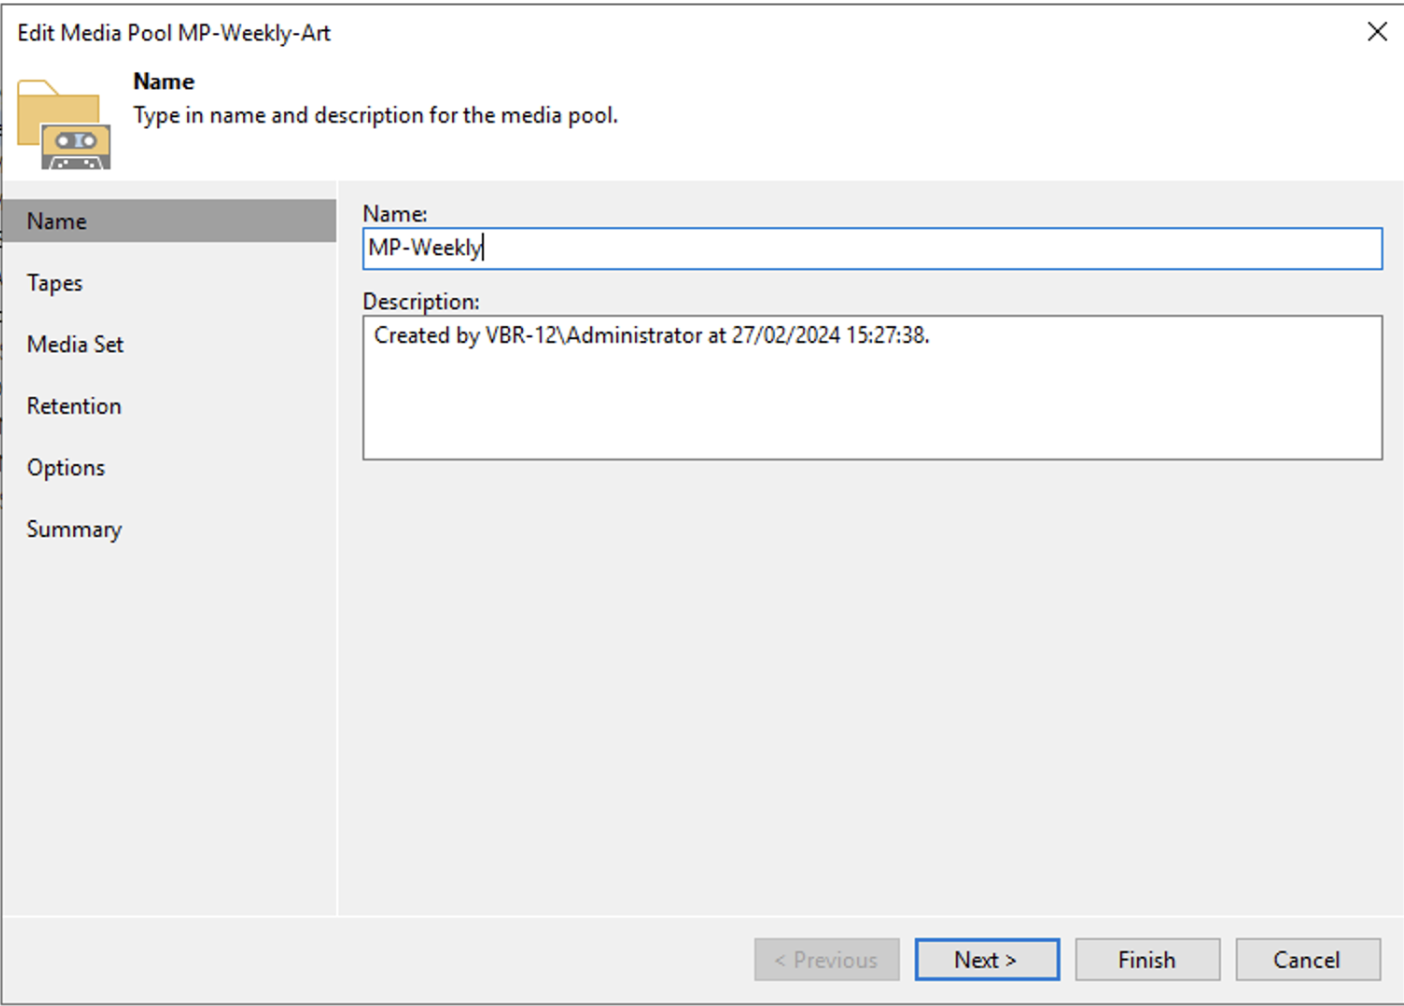
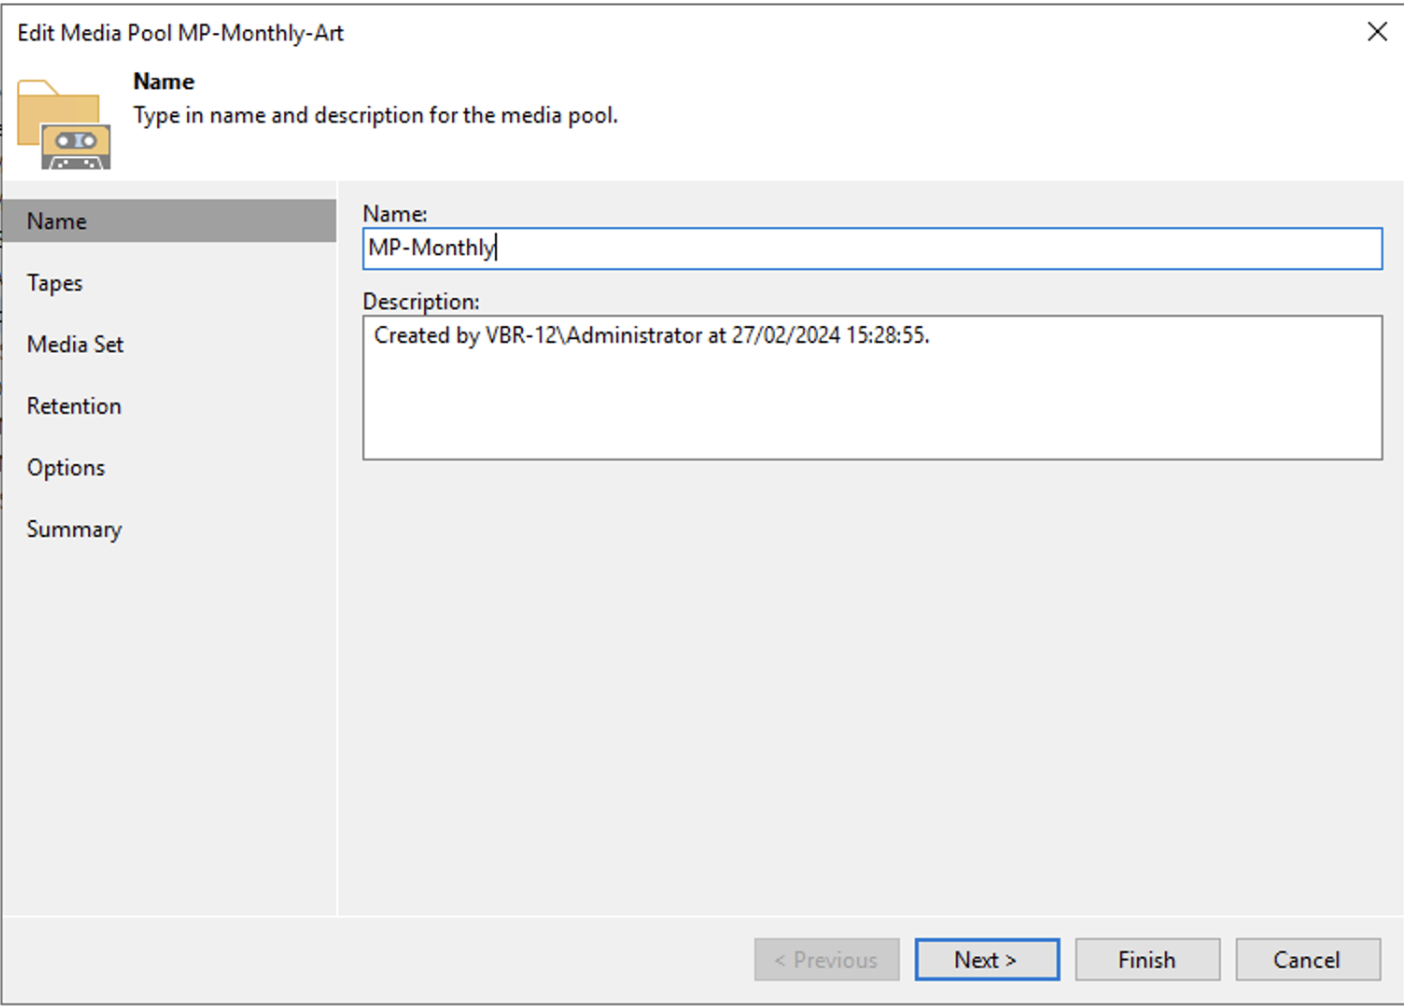
La creazione del Media Pool (immagine 1), dovrà essere personalizzato impostando:

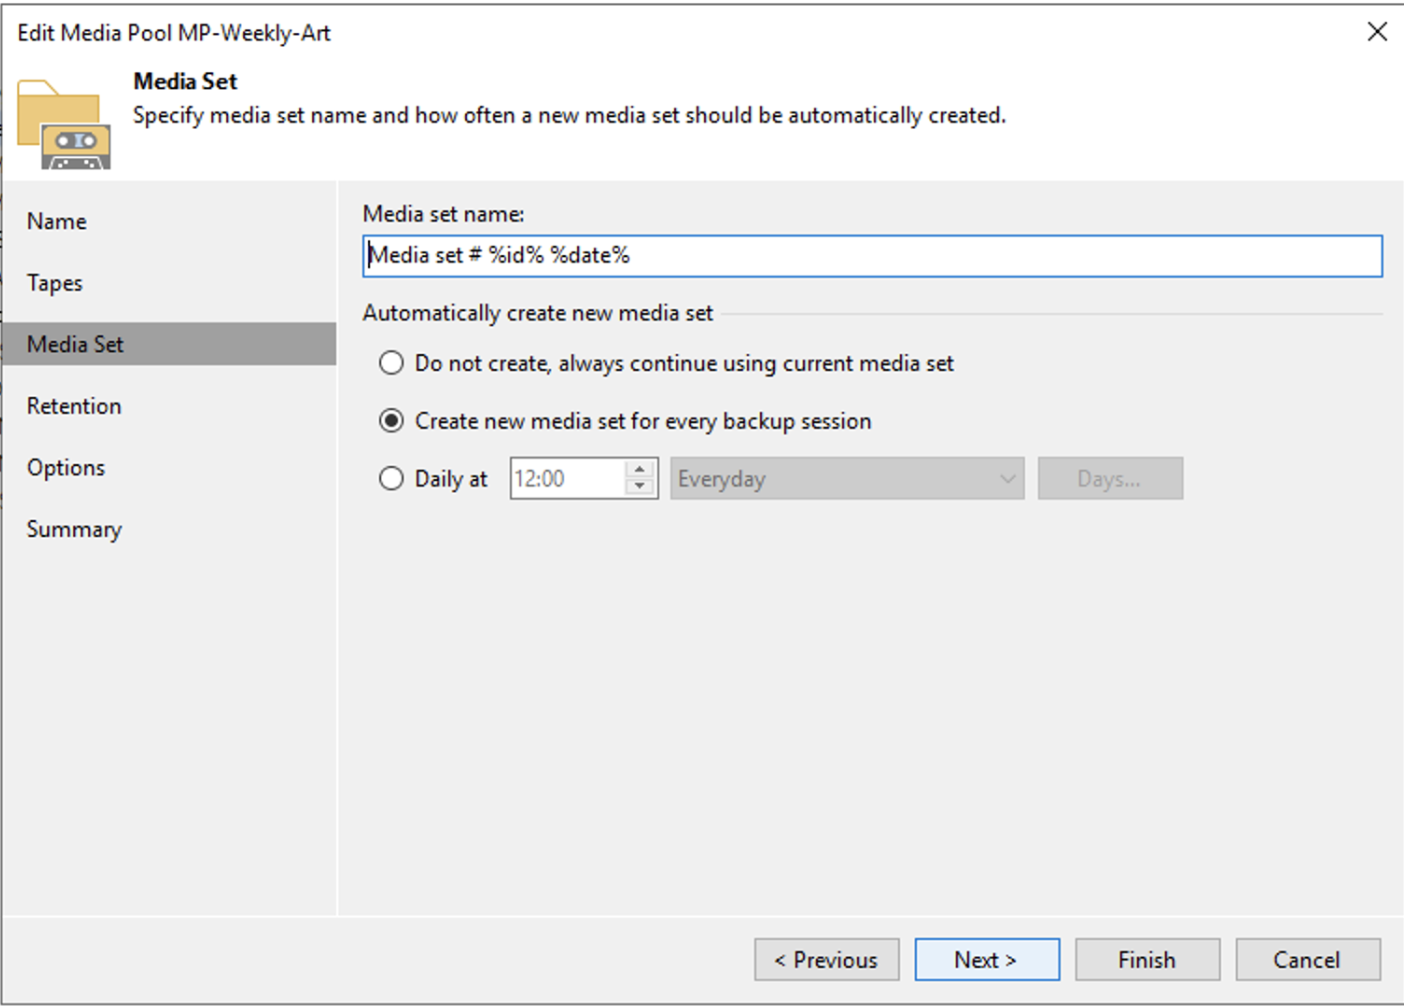
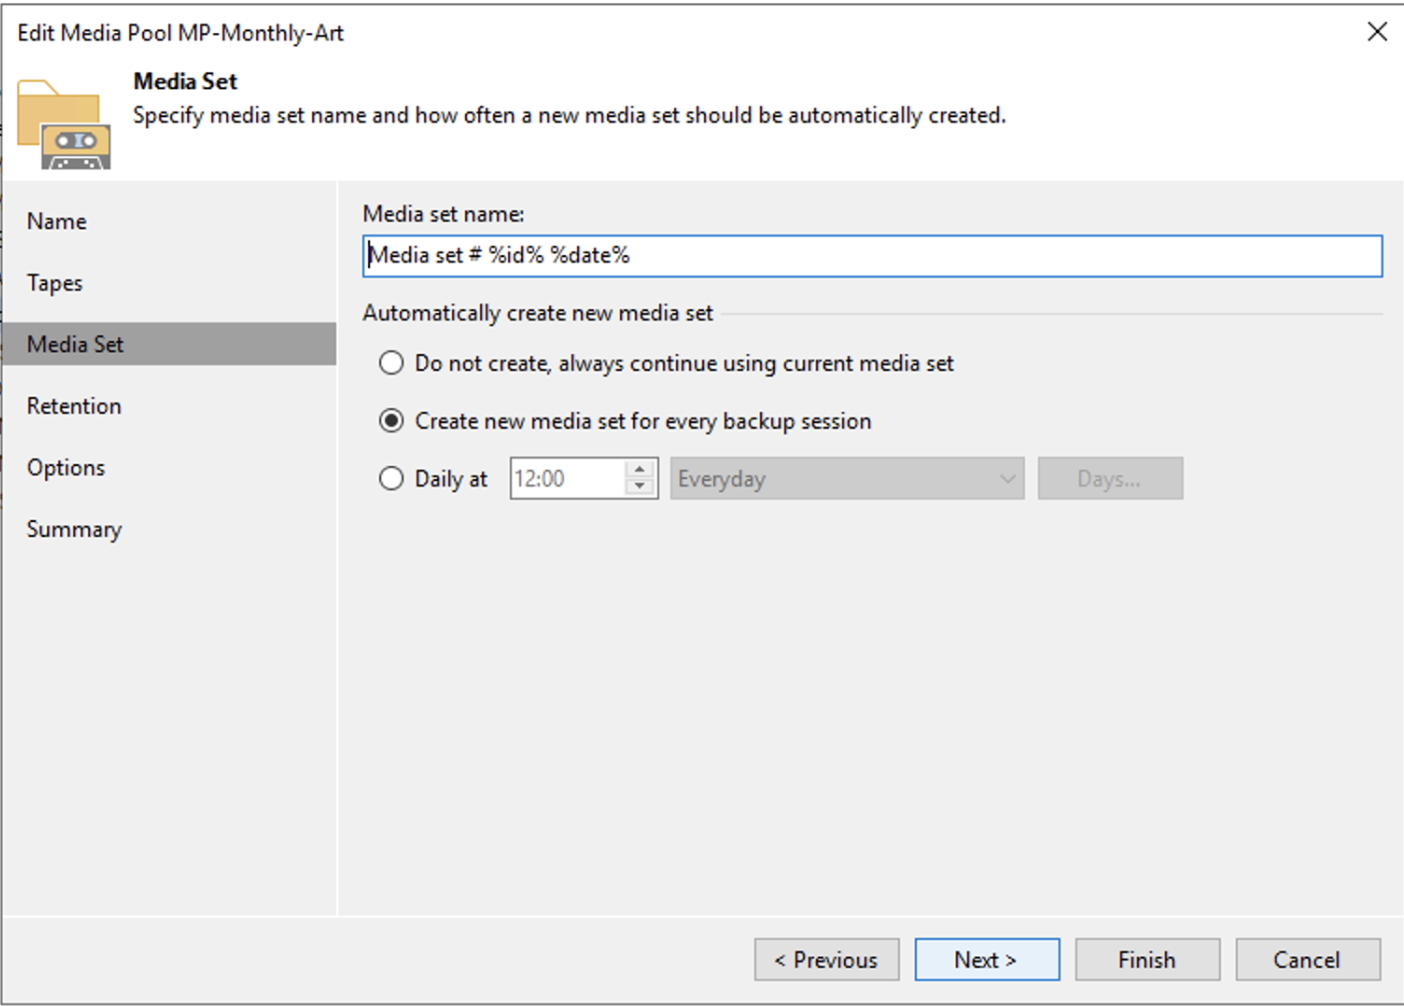
    • L’utilizzo di un nuovo nastro per ogni sessione di copia (immagine 2).
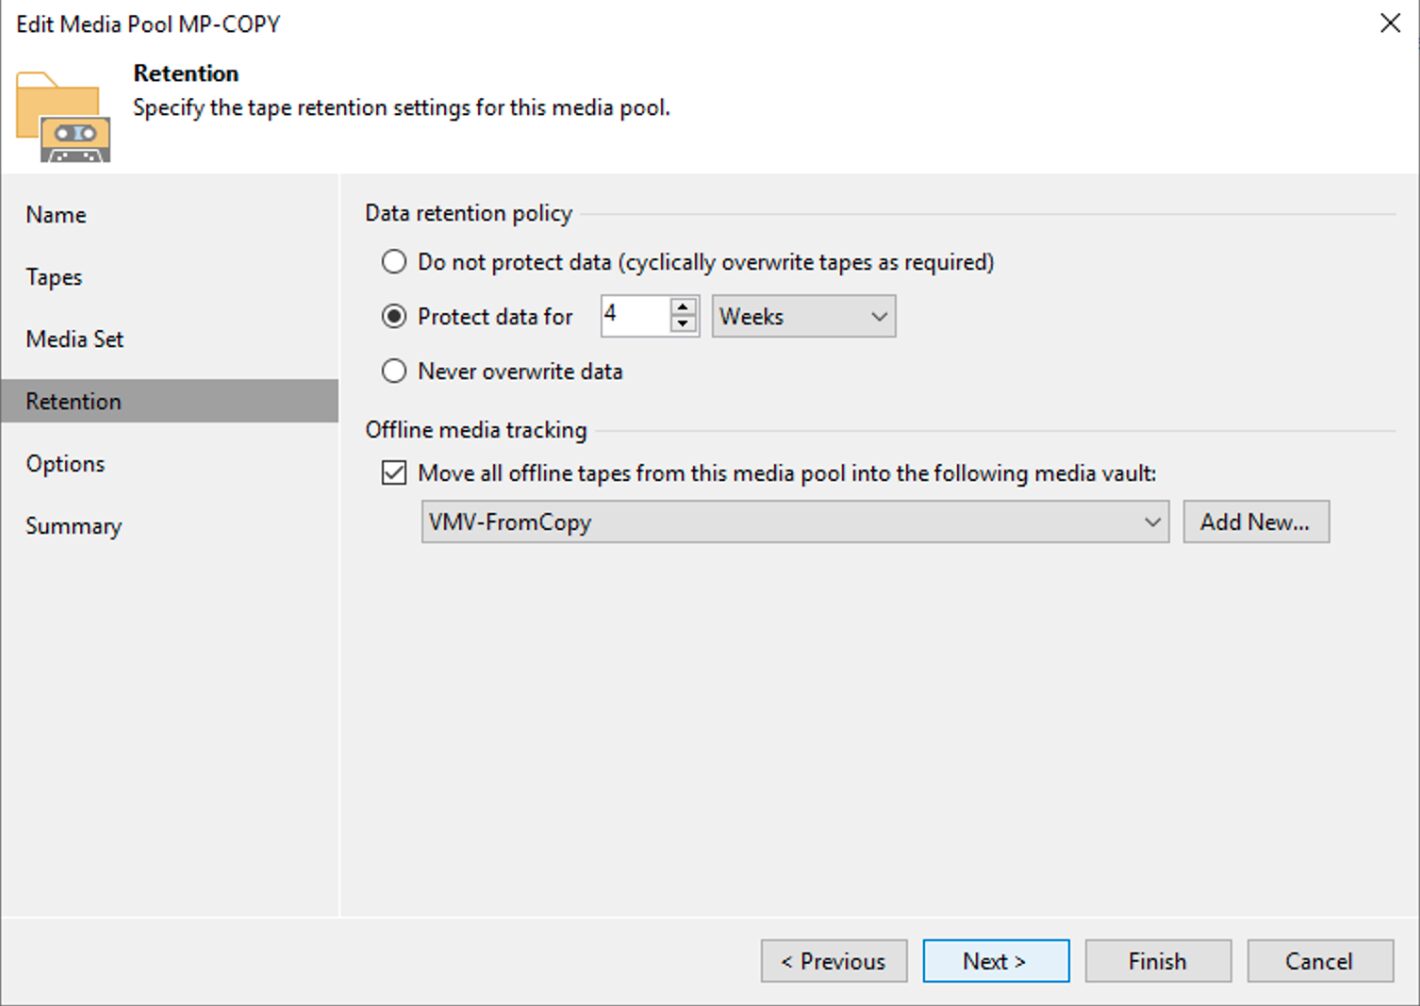
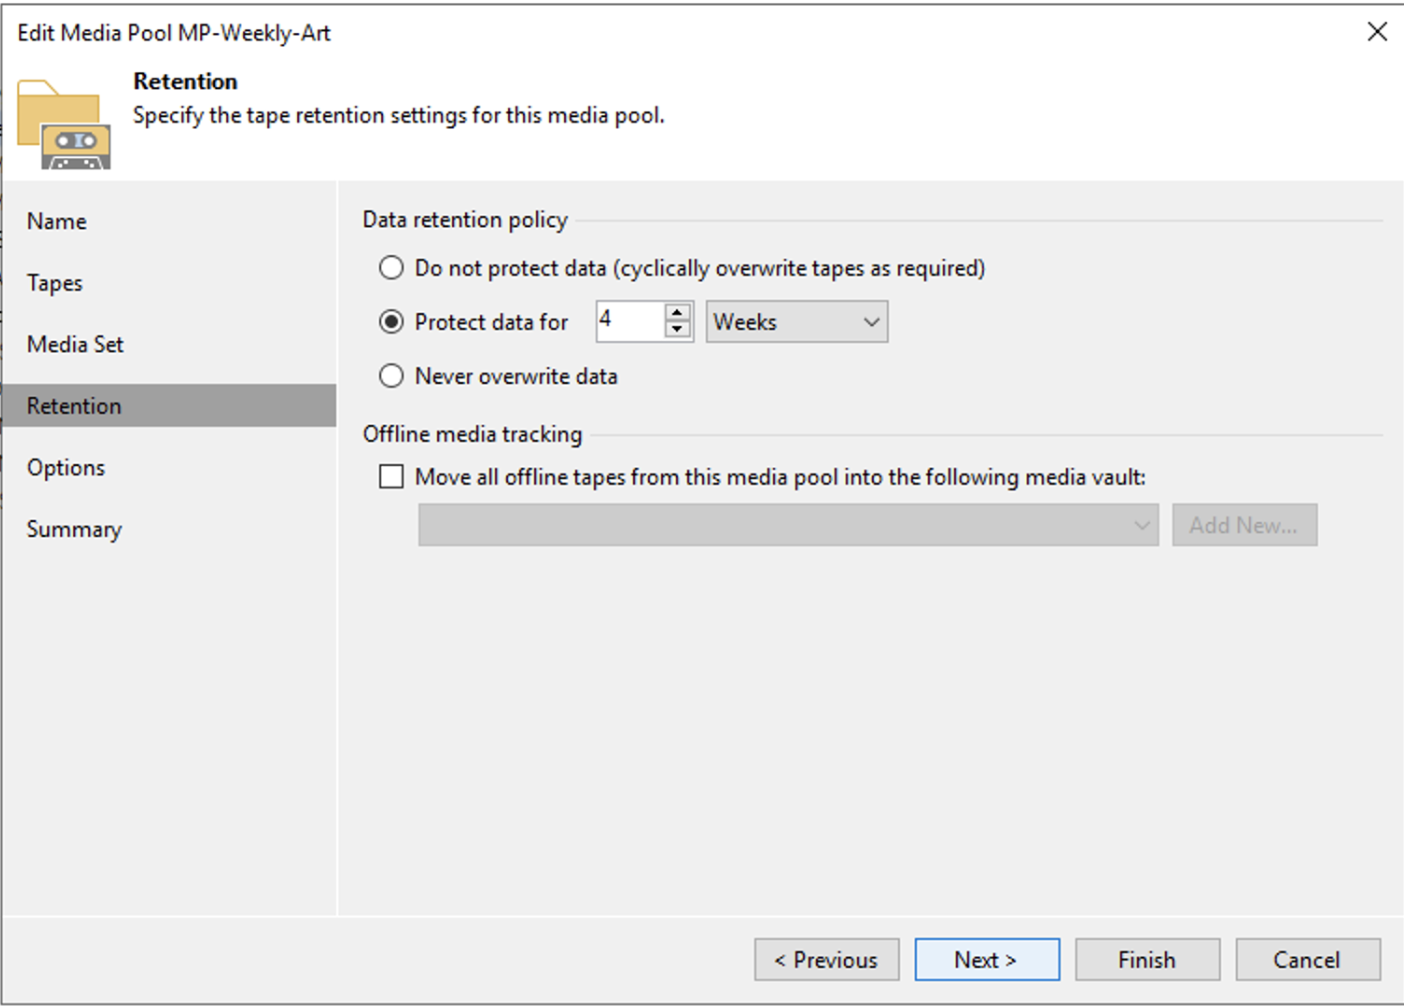
    • Impostazione di una retention che per quel gruppo di nastri coincida con quella richiesta dalla politica GFS (immagine 3).
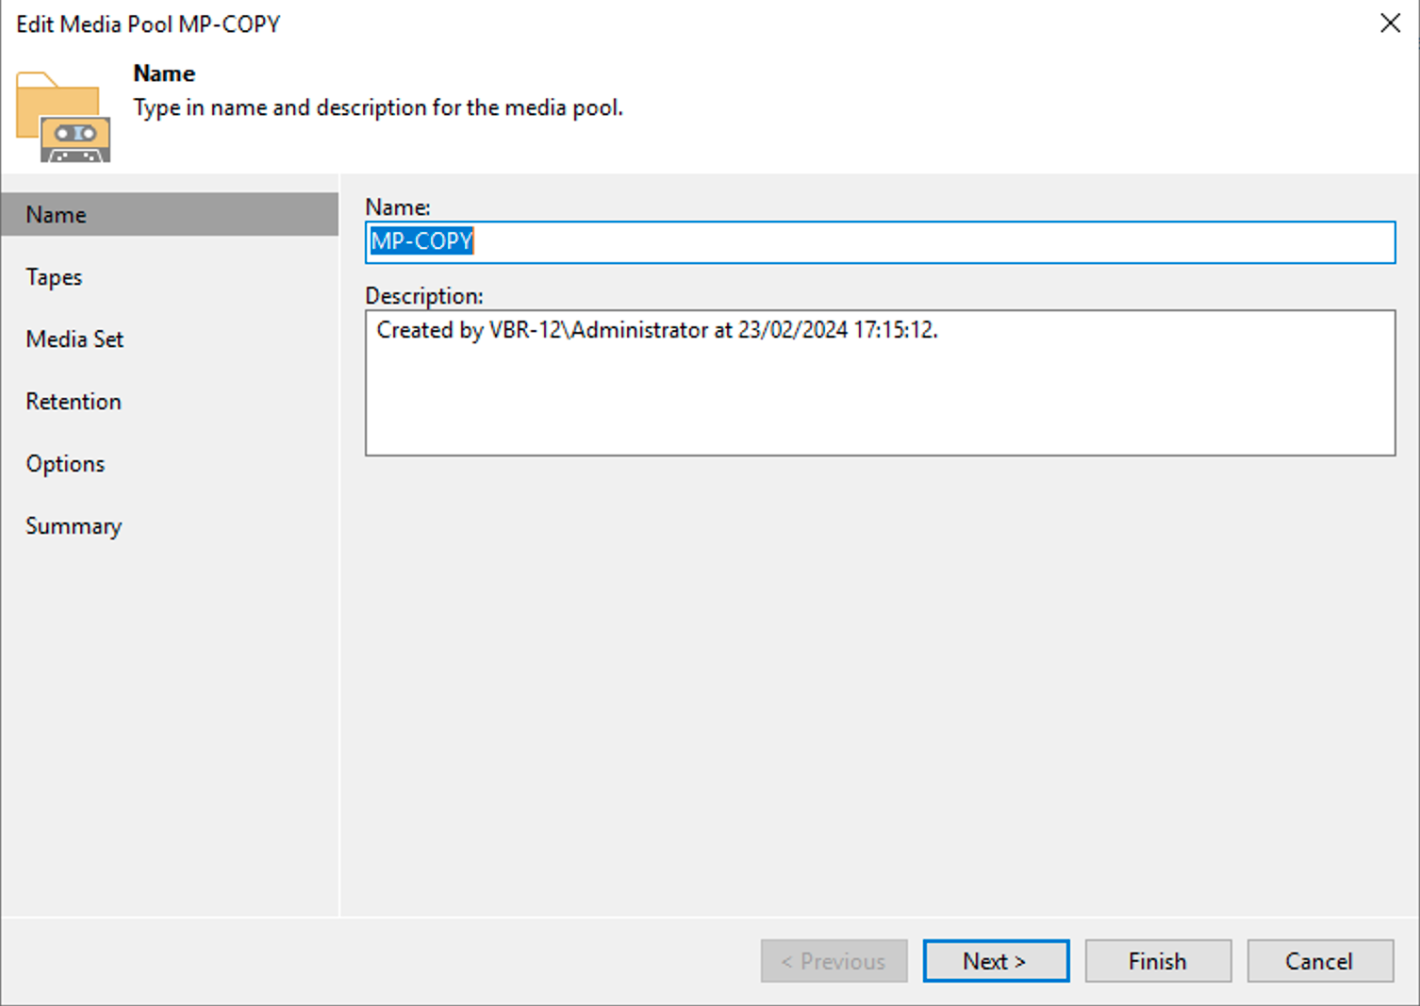
Immagine 1

Immagine 2

Immagine 3

Nota3: Nell’immagine 3 è stata impostata una retention di 4 settimane che risponde alla necessità di tenere il full settimanale per 1 mese.

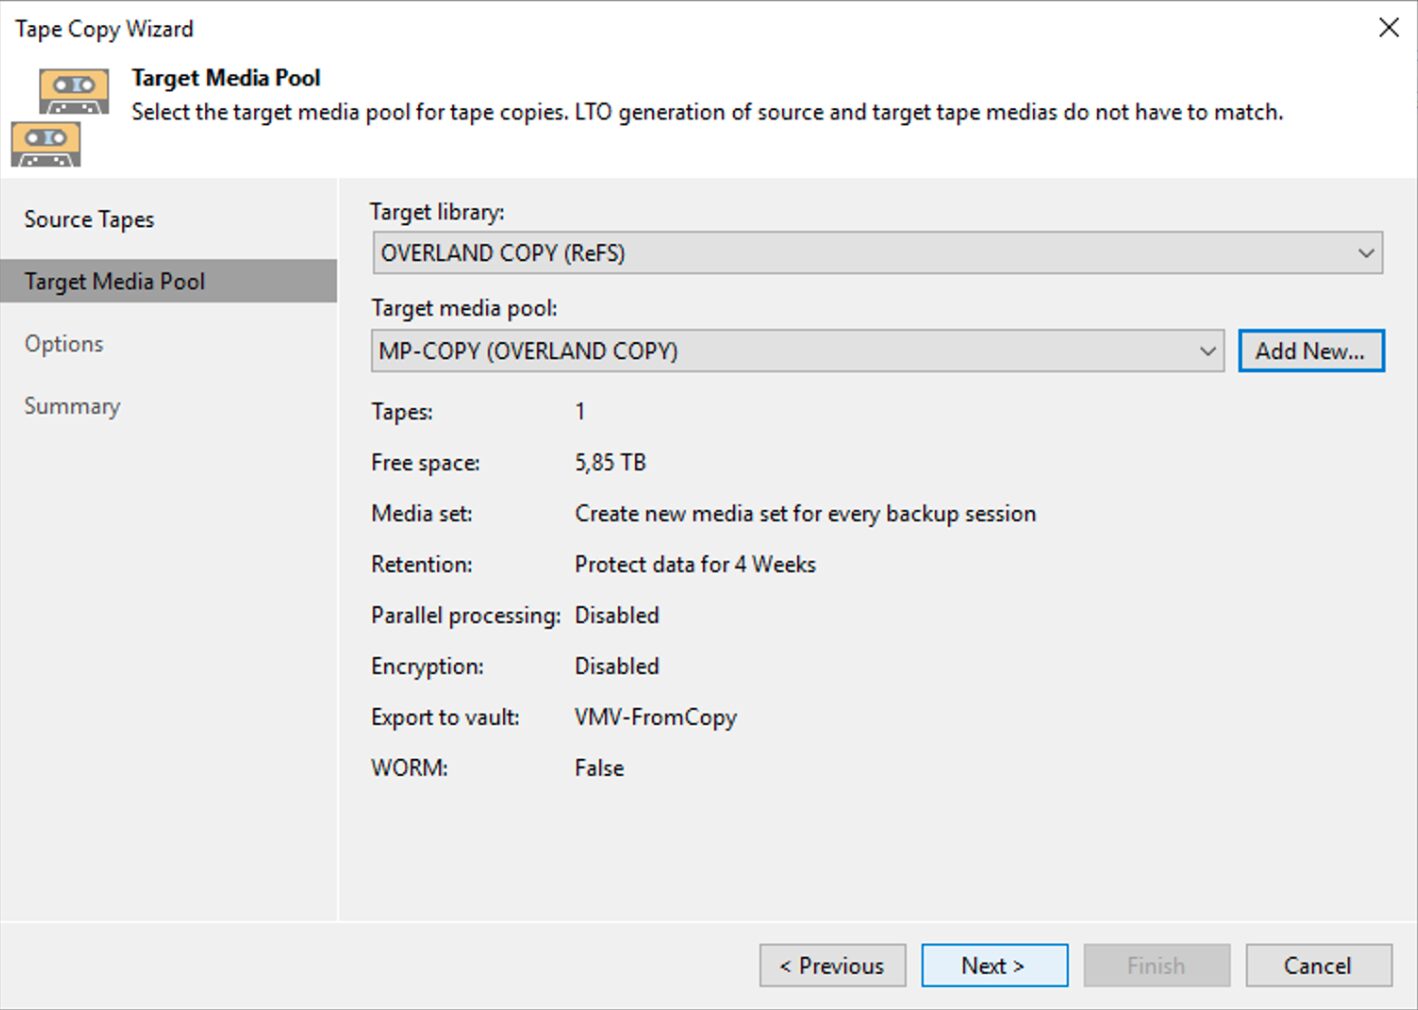
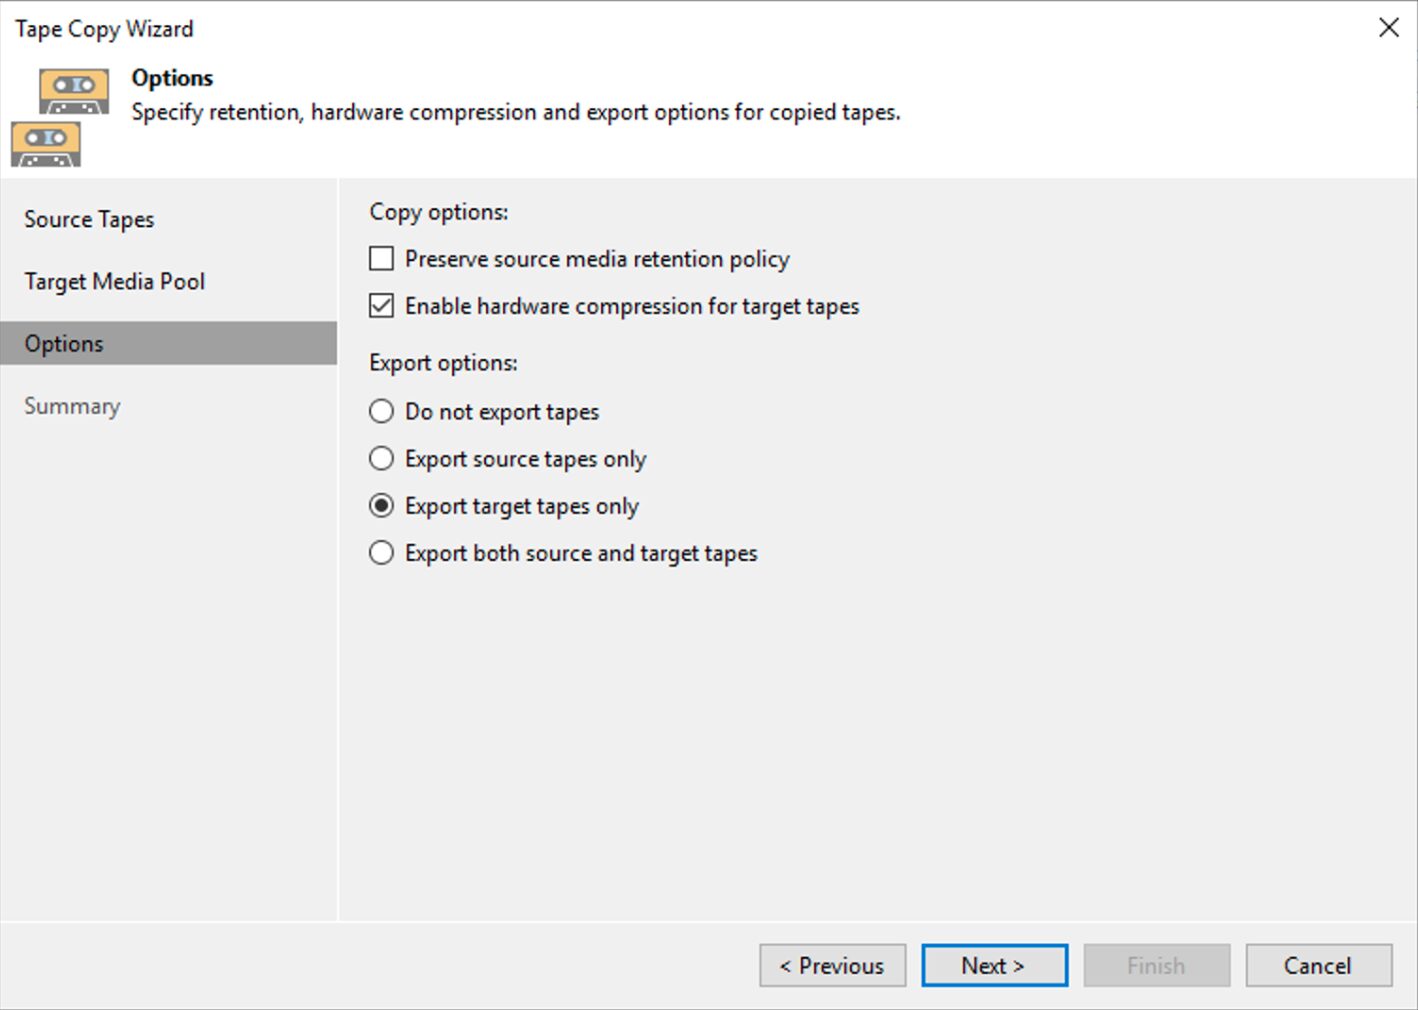
Nota4: L’immagine 4 evidenzia la possibilità di realizzare una politica di  Vault per l’archiviazione dei nastri.
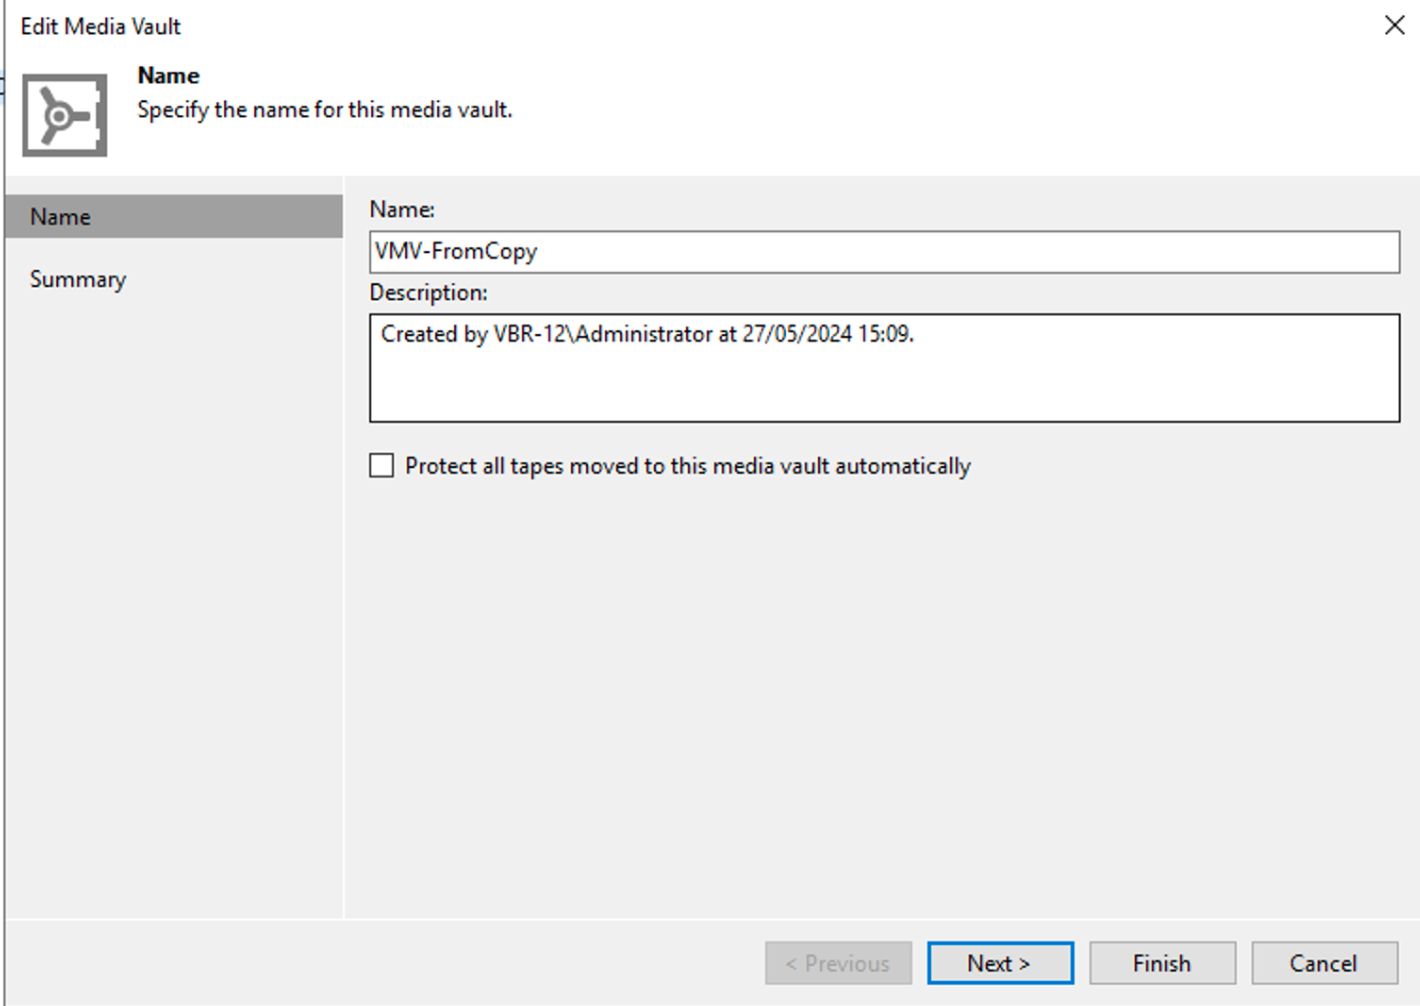
Immagine 4

FASE 2

Dall’interfaccia grafica di VBR selezionando con il tastro destro del mouse il nastro da copiare (immagine 5) è possibile avviare il comando di copia.
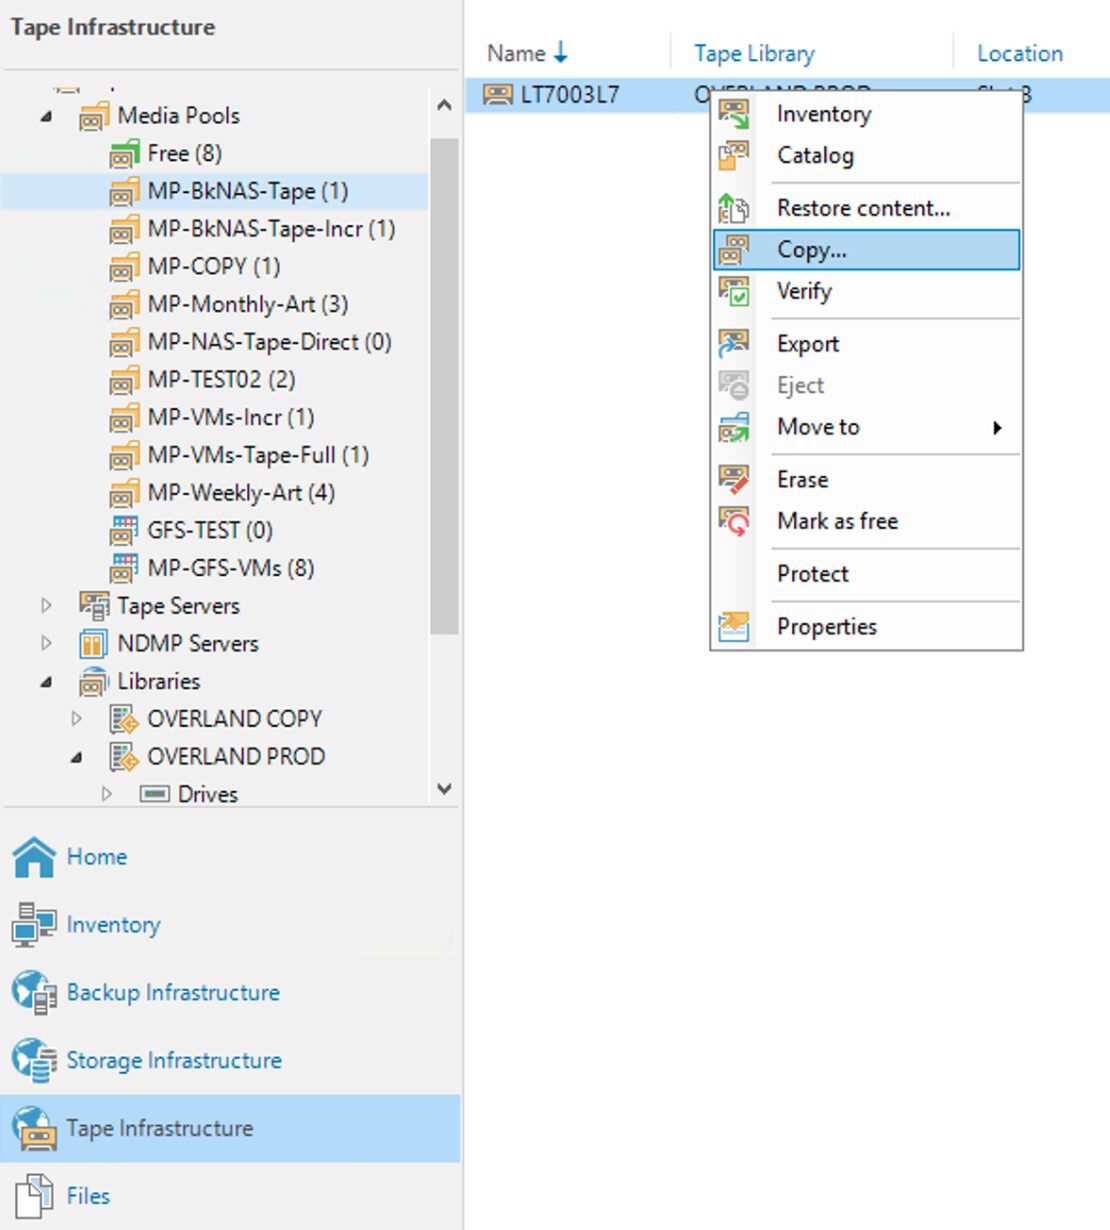
Immagine 5

I semplici passaggi successivi mostrati dalle  immagini 6,7,8 e 9 mostrano come completare l’operazione di copia.
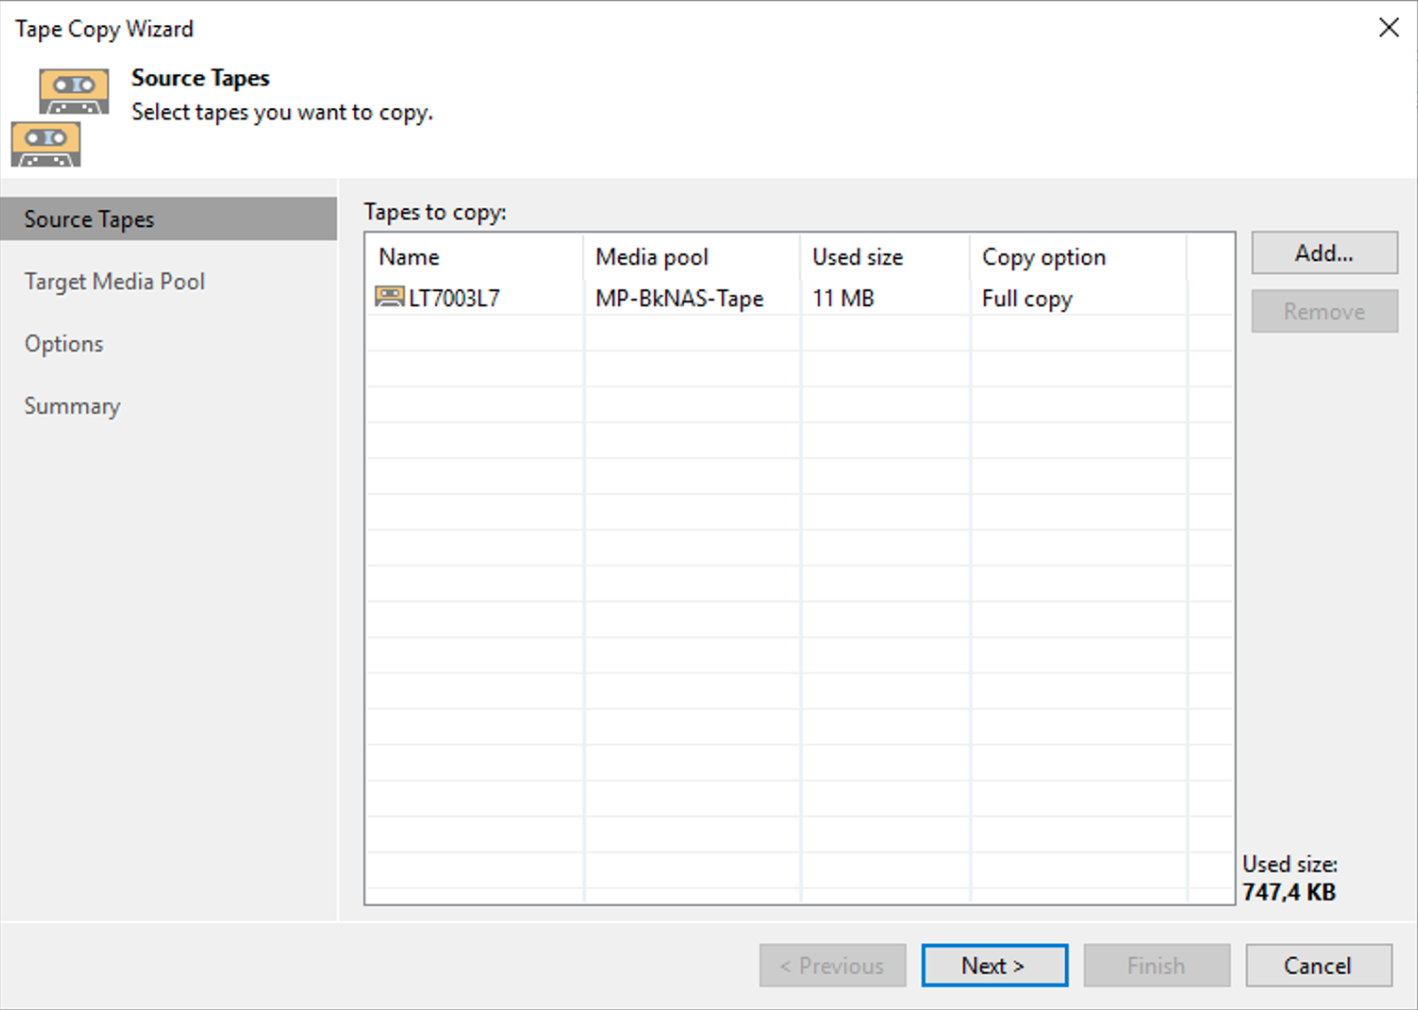
Immagine 6

Immagine 7

Immagine 8

Immagine 9

Ultime note: 

  • La documentazione alla quale fare riferimento per conoscere quante risorse è indispensabile assegnare ai vari componenti è disponibile al seguente link.
  • L’automazione della copia può avvenire tramite script in powershell.
  • Il Copy to Tape non consuma license capacitive ma fate riferimentoal seguente link,  voce Capacity Licensing per conoscerne tutti i dettagli.

NAS backup – GFS su Tape – Parte I

Molti clienti e partner chiedono se sia possibile implementare una politica di protezione di tipo GFS (Grandfather – Father – Son), quando i dati da proteggere afferiscono ad una NAS (Network Attacched Storage) e la destinazione è una libreria a nastri.

Tale automatismo con la versione attuale di Veeam Backup & Replication (VBR) 12.1 non è ancora disponibile,  cosa invece è già possibile effettuare quando la sorgente del dato è un backup di VM e  Server Fisici.

In questo primo articolo vi aiuterò a raggiungere l’obiettivo, sfruttando la grande flessibilità di  VBR nella creazione dei job di backup.

Nota1: Nel prossimo vi illustrerò come realizzare copie GFS sfruttando una funzionalità poco conosciuta di VBR, il  Tape Copy.

Flessibilità dei Job di Backup:

a. VBR gestisce i nastri utilizzando un architettura che si basa su:

  •  Media Pool (MP) sono i contenitori logici dei nastri e possono afferire ad uno o più job di Backup (nel nostro scenario creeremo un MP per Job).
  • Media Set (MS) identifica i restore point presenti sul nastro (nel nostro scenario creeremo un MS per job di Backup per singolo nastro).

b. La soluzione proprosta è quella di creare job di backup settimanali, mensili e annuali  in modalità full.  Tali backup dovranno essere creati in uno specifica data e i backup dovranno risiedere su pool di nastri creati all’uopo.

Vediamo step by step come procedere:

c.  Creazione dei Media Pool (MP) settimanale e mensile

Immagine 1

Dall’immagine 2 è importante osservare che verrà utilizzato un nuovo nastro per ogni sessione di backup.

Immagine 2

Nell’immagine 3 è mostrato come impostare la retention che in questo scenario è di 4 settimane.

Immagine 3

Per il MP Mensile si utilizza la stessa procedura, modificando la retention in 12 mesi (vedi immagini 4,5,6).

Immagine 4

Immagine 5

Nell’immagine 6 si osserva che la retention per i Full Mensili è di 12 mesi.

Immagine 6

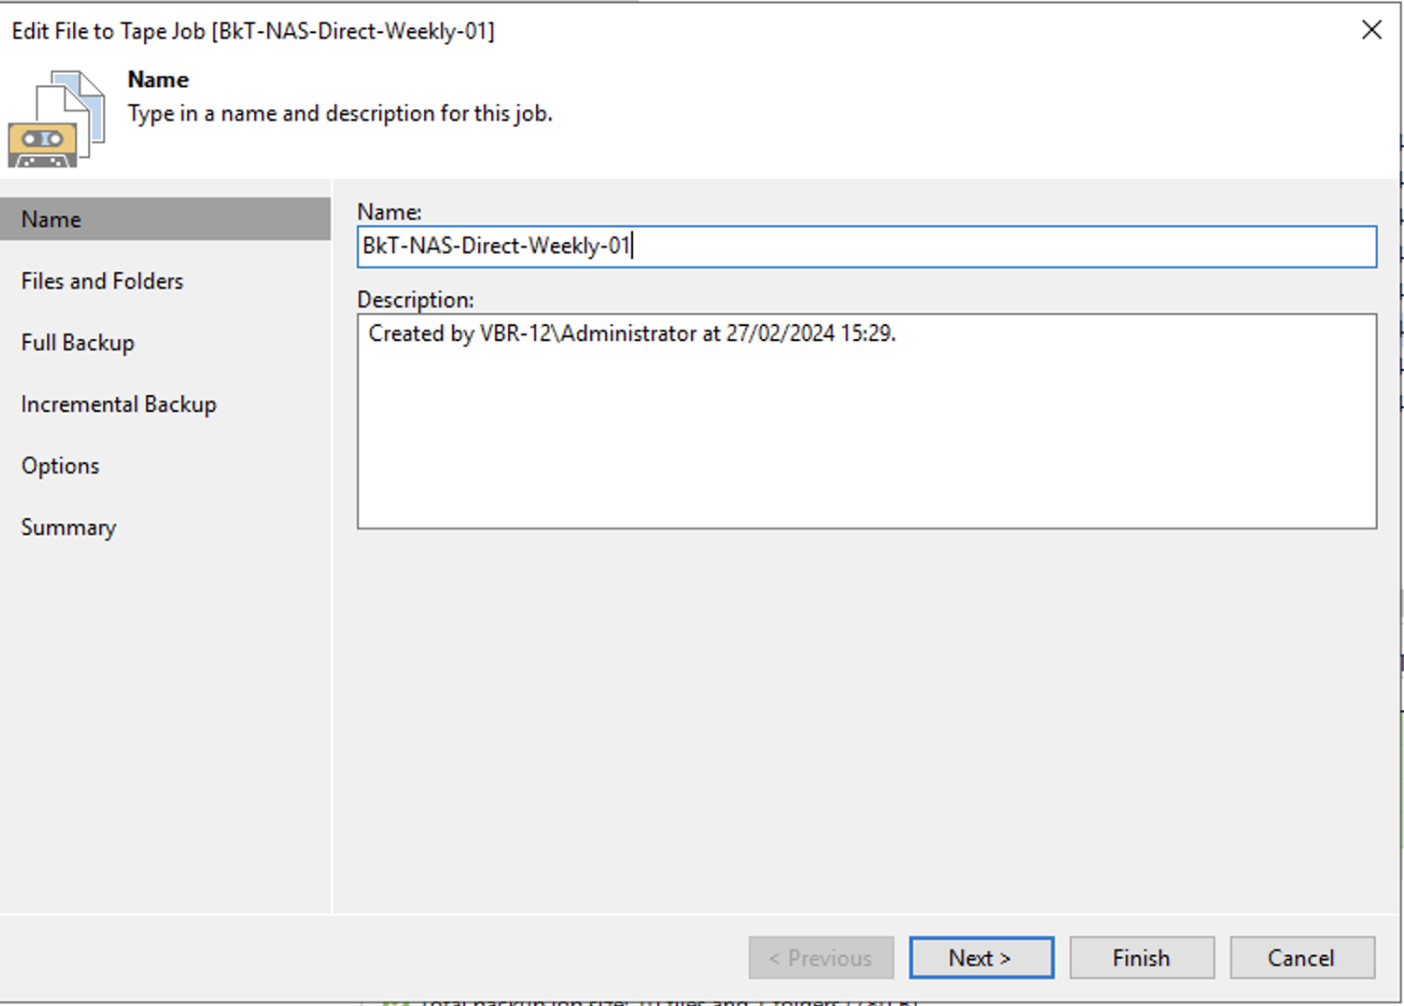
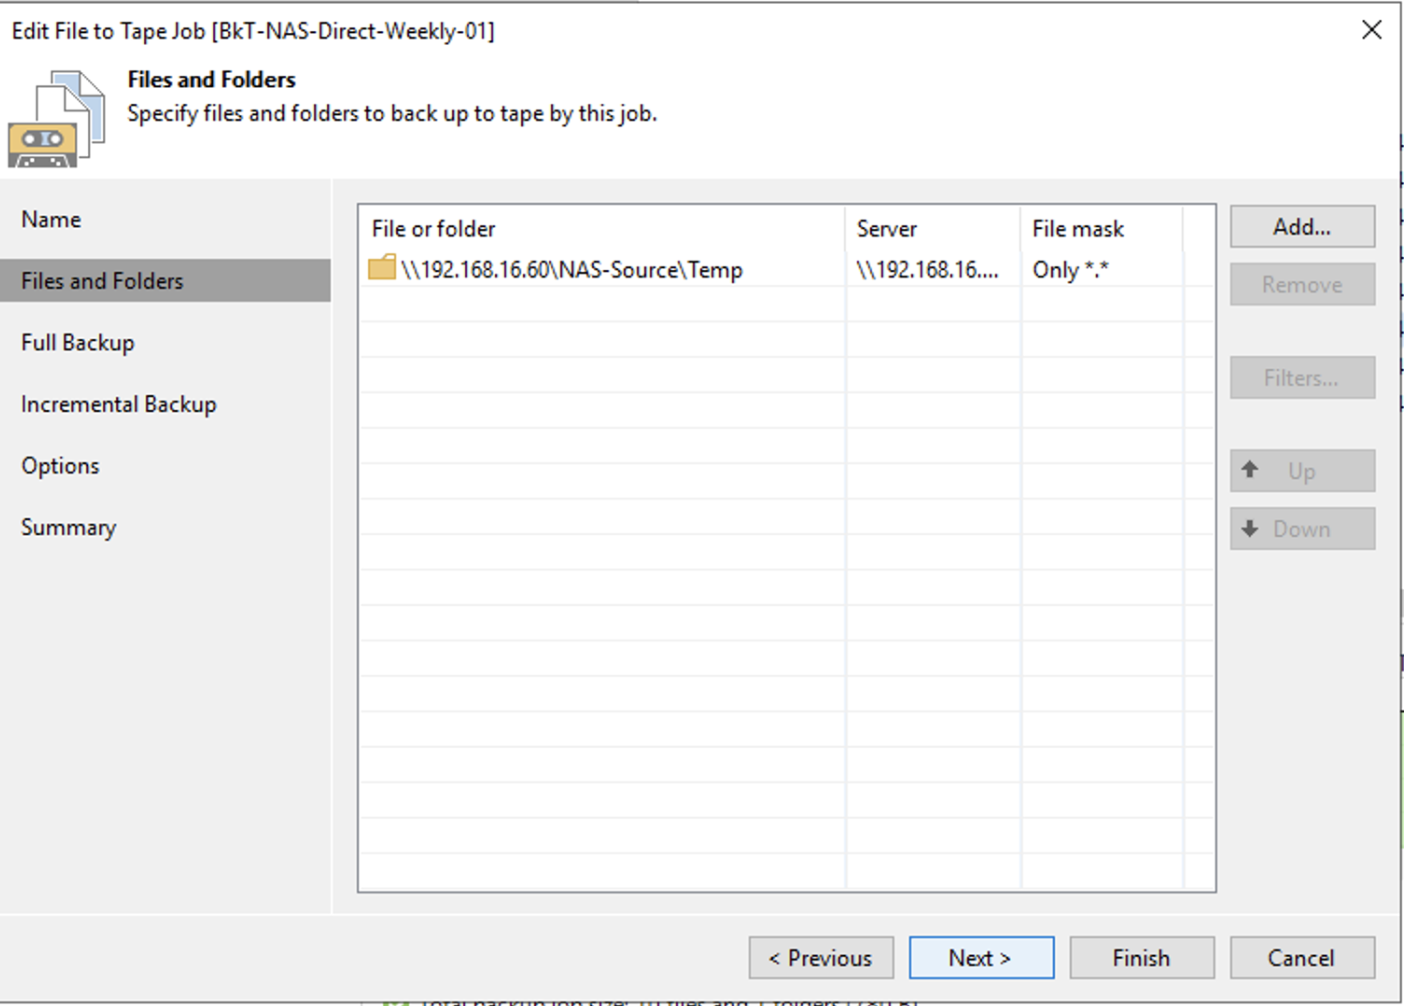
d. Creazione dei job di Backup

Immagine 7

immagine 8

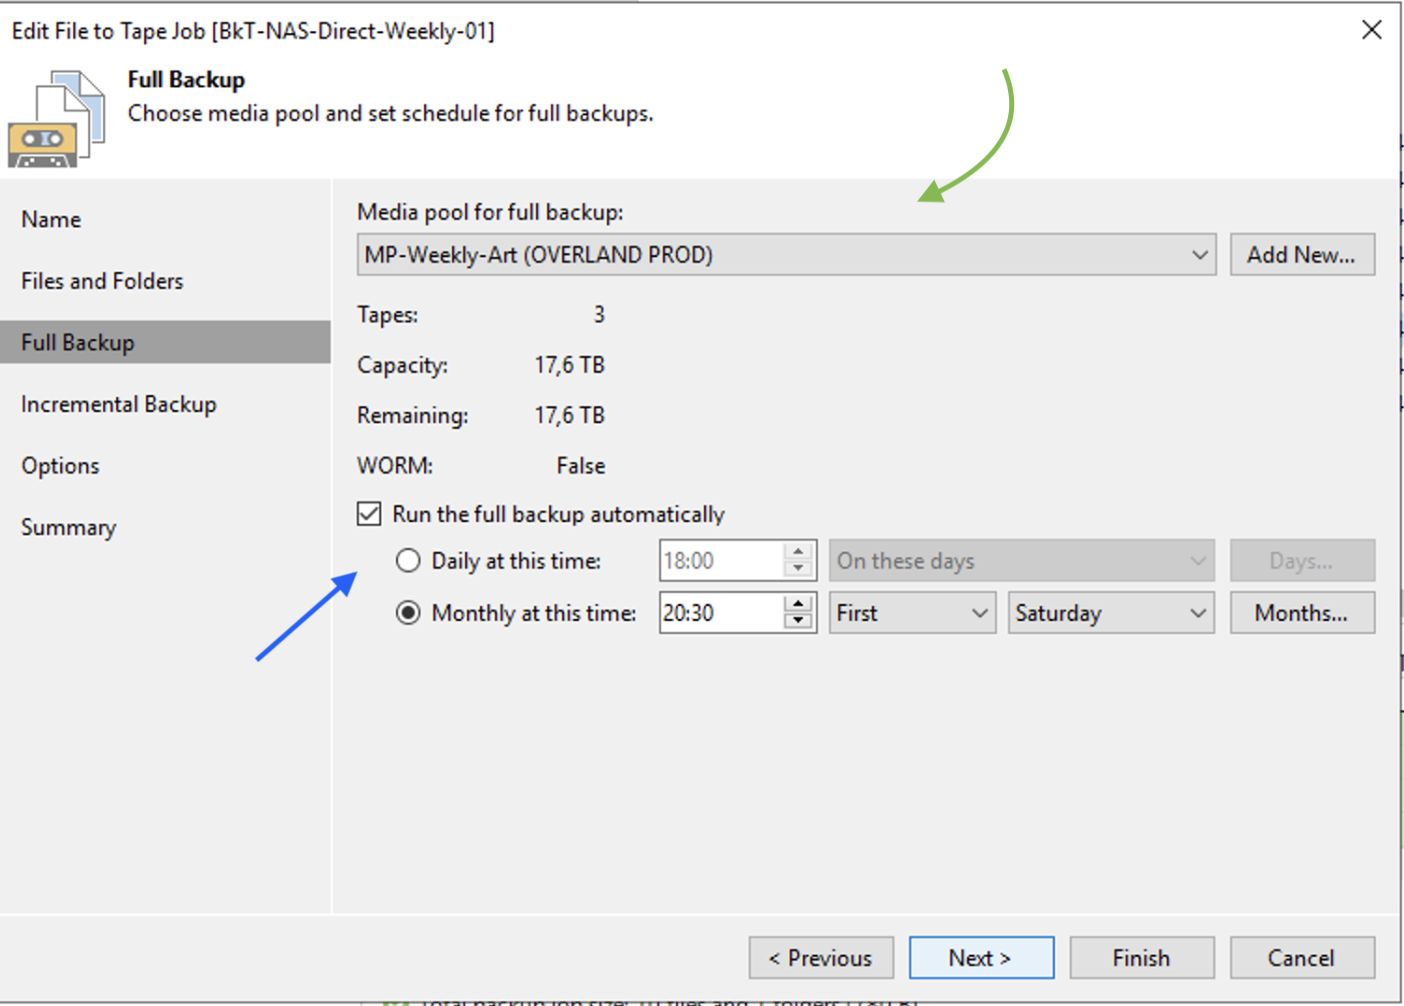
L’immagine 9 evidenzia lo scheduling del job di Backup.

L’ipotesi è di realizzare n job di  backup full per ogni politica GFS.

Nel nostro scenario di esempio è riportato il job della prima settimana (freccia blue) con retention settimanale (freccia verde). Per la seconda, terza e successiva  settimana si procederà in modo del tutto analogo, sostituendo alla voce “Run the full backup automatically” il valore first con second, third ecc.

Immagine 9

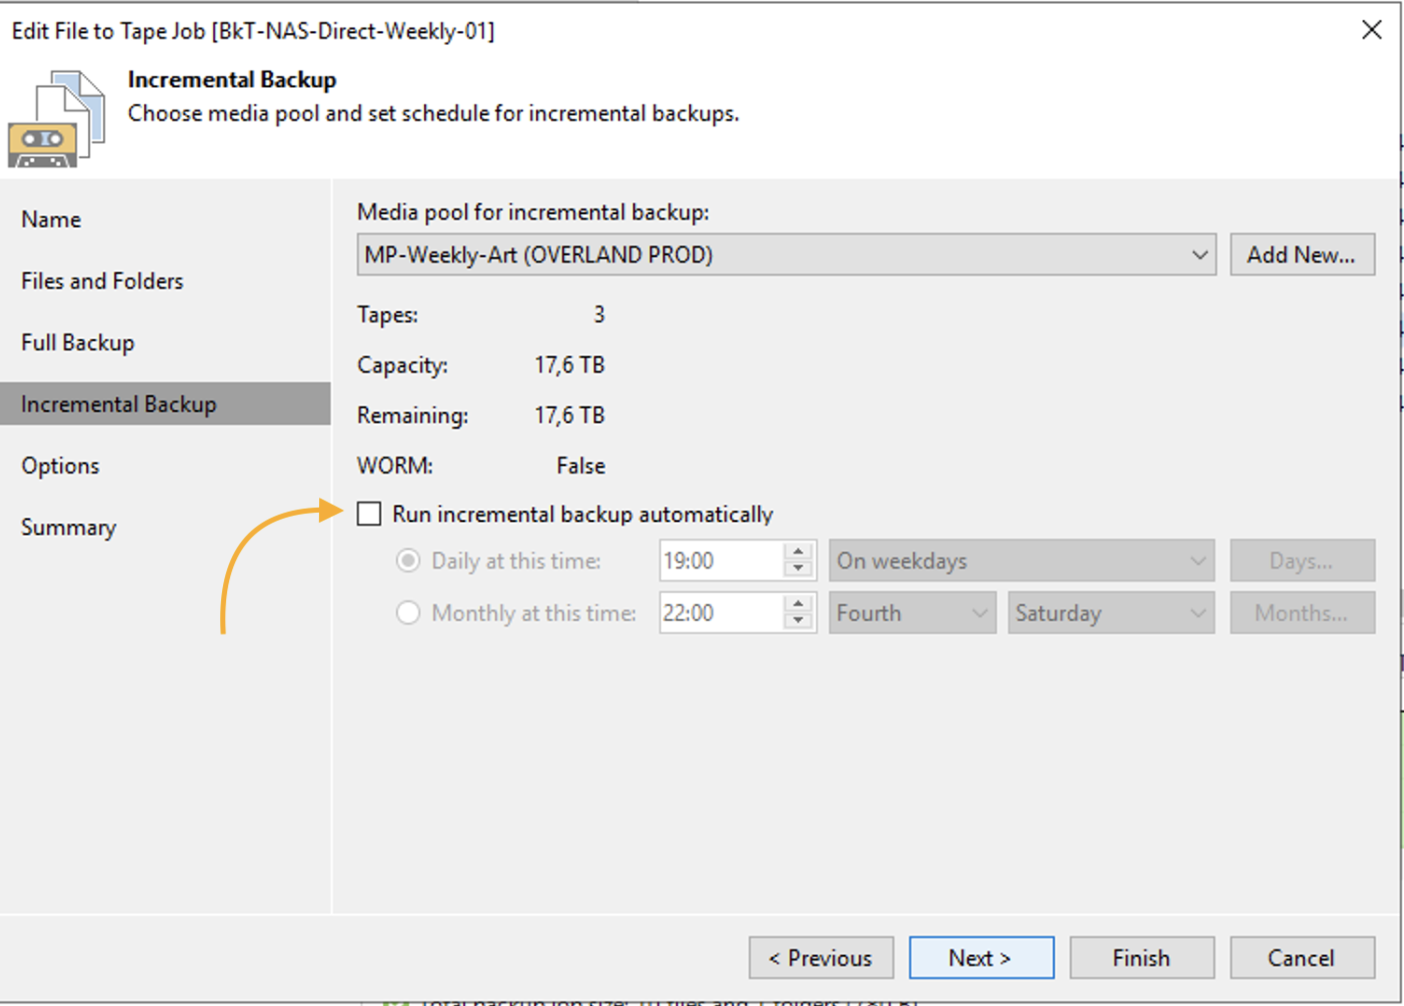
L’immagine 10 evidenzia (freccia arancio) che non saranno avviati backup incrementali.

immagine 10

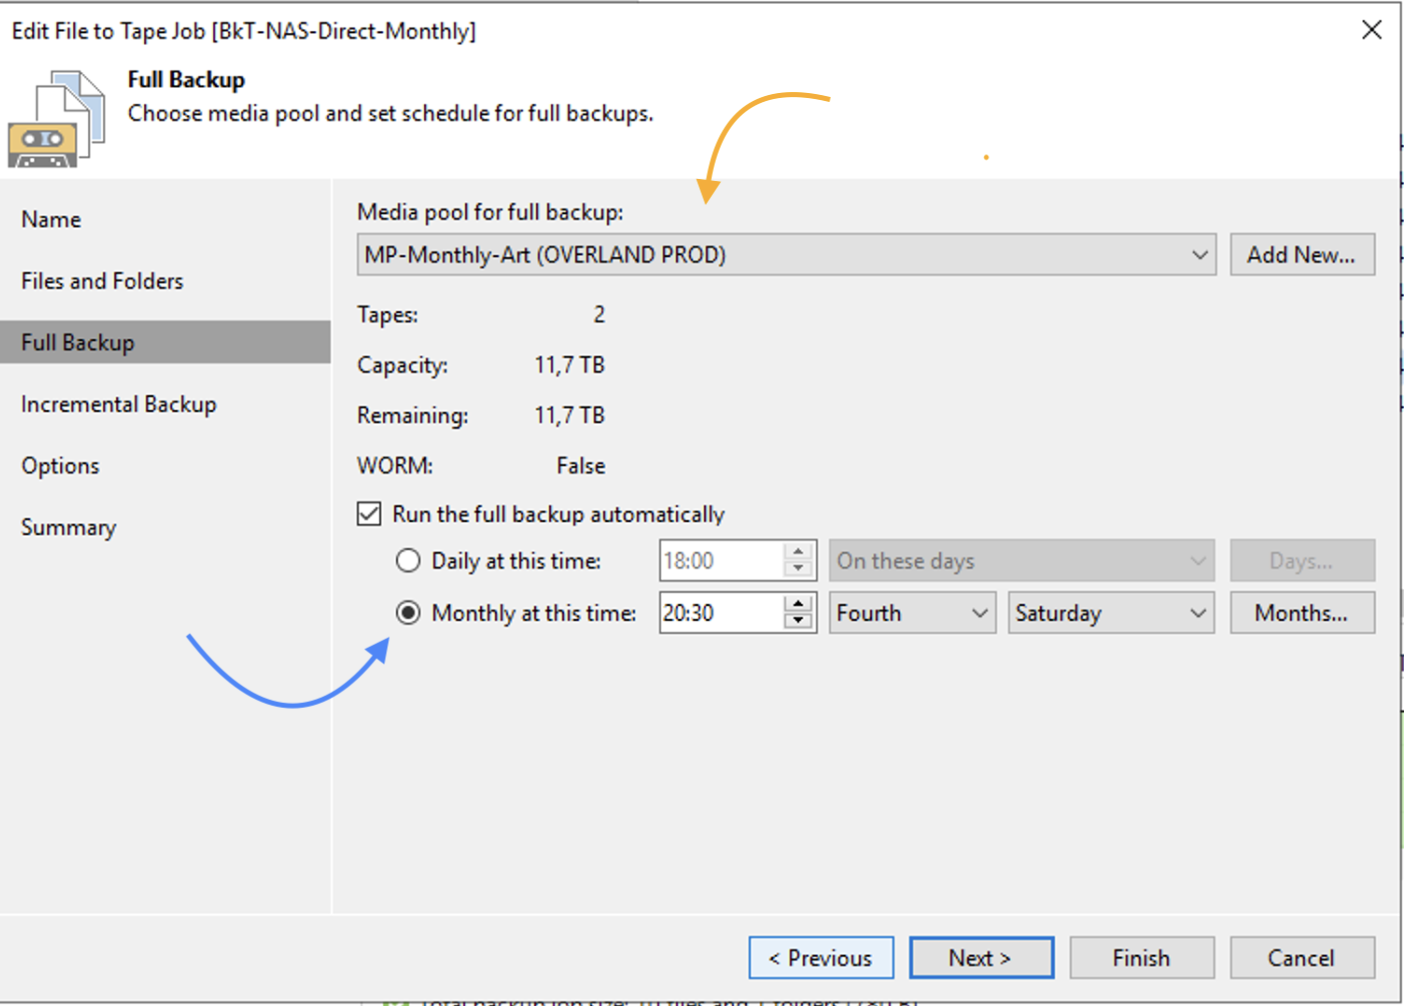
Gli stessi passaggi devono essere  implementati per creare backup GFS di tipo mensile, nell’esempio ho impostato l’avvio del job di backup il 4 sabato del mese (immagine 12 – freccia blue).

Immagine 11

Immagine 12

Immagine 13

Nota 2:

  • Il licensing conteggia le licenze per singolo job di Backup (verisione 12.1).
  • Effettuate dei test per essere certi che lo scenario corrisponda alle vostre necessità. Fatevi aiutare dal supporto Veeam.

Nel prossimo articolo vedremo come utilizzare la funzionalità di Tape Copy.

Enterprise Manager – Delega dei ripristini

Un articolo dedicato a come poter delegare i ripristini  con Veeam Backup & Replication (VBR).

Il case study è legato alla protezione di file in cartelle condivise, ma può essere esteso a molti degli oggetti protetti con VBR. (vedi immagine 7)

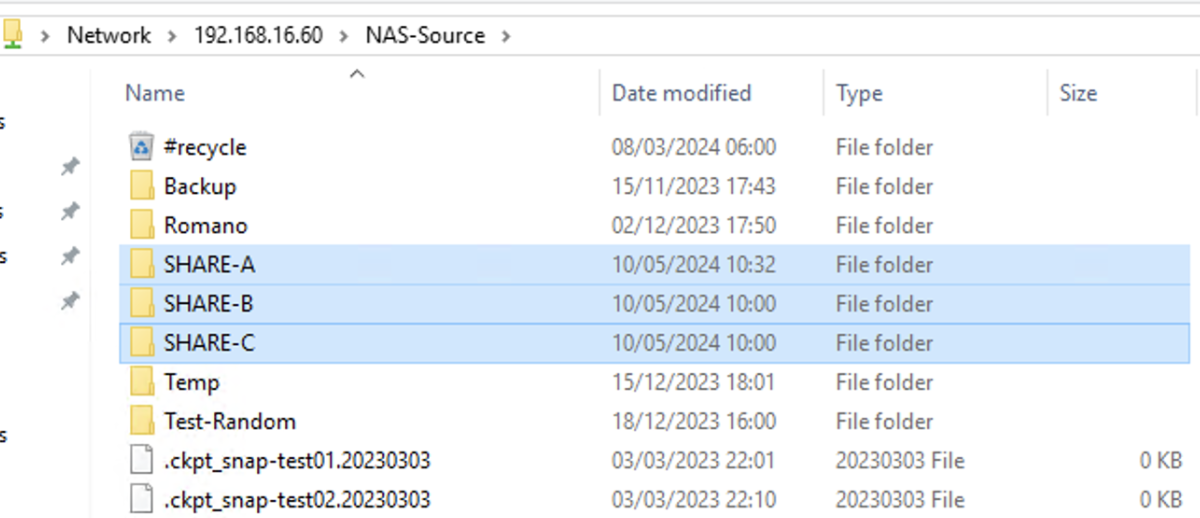
  1. Nell’immagine 1 sono illustrate le tre cartelle di rete condivise (SHARE-A, SHARE-B, SHARE-C) che sono utilizzate come sorgente dei file da proteggere.

share-sorgenteImmagine 1

Nello scenario si ipotizza che per ogni singola cartella condivisa, solo uno specifico utente possa procedere alle attività di ripristino.

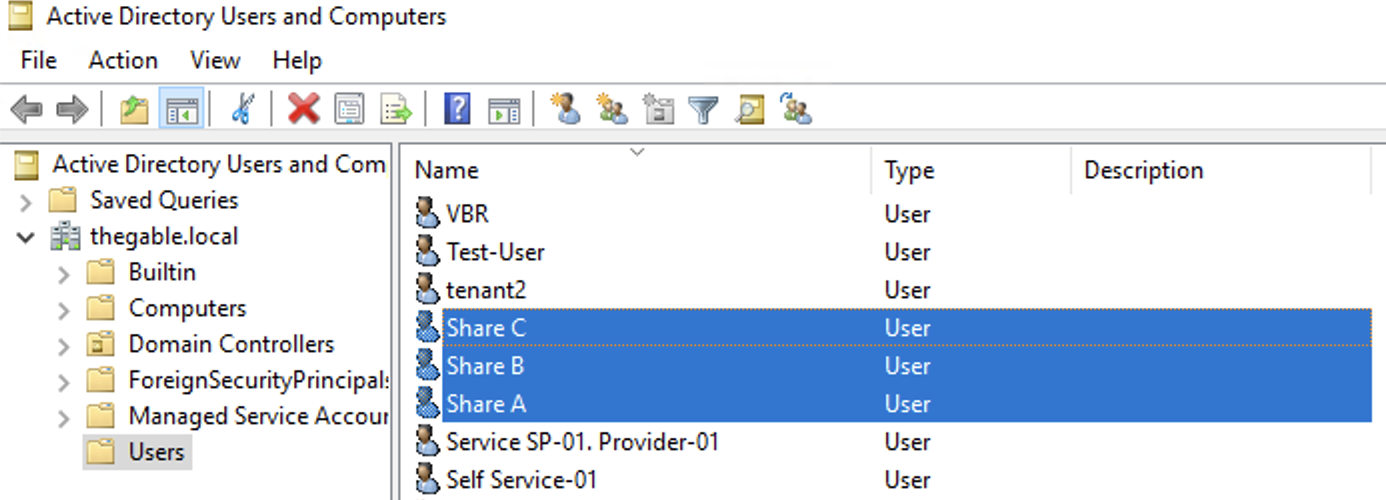
  1. L’ immagine 2 evidenzia la creazione di tre utenti di Dominio, ShareA, ShareB, ShareC.

utenti-ADImmagine 2

I file afferenti ad una specifica cartella condivisa saranno ripristinabili dall’utente che ha nel nome l’identica lettera finale. Ad esempio, i file afferenti alla SHARE-A saranno ripristinabili dall’utente ShareA.

(NDR: Per semplicità espositiva la lettera X sostituirà una delle tre lettere dell’alfabeto A-B-C)

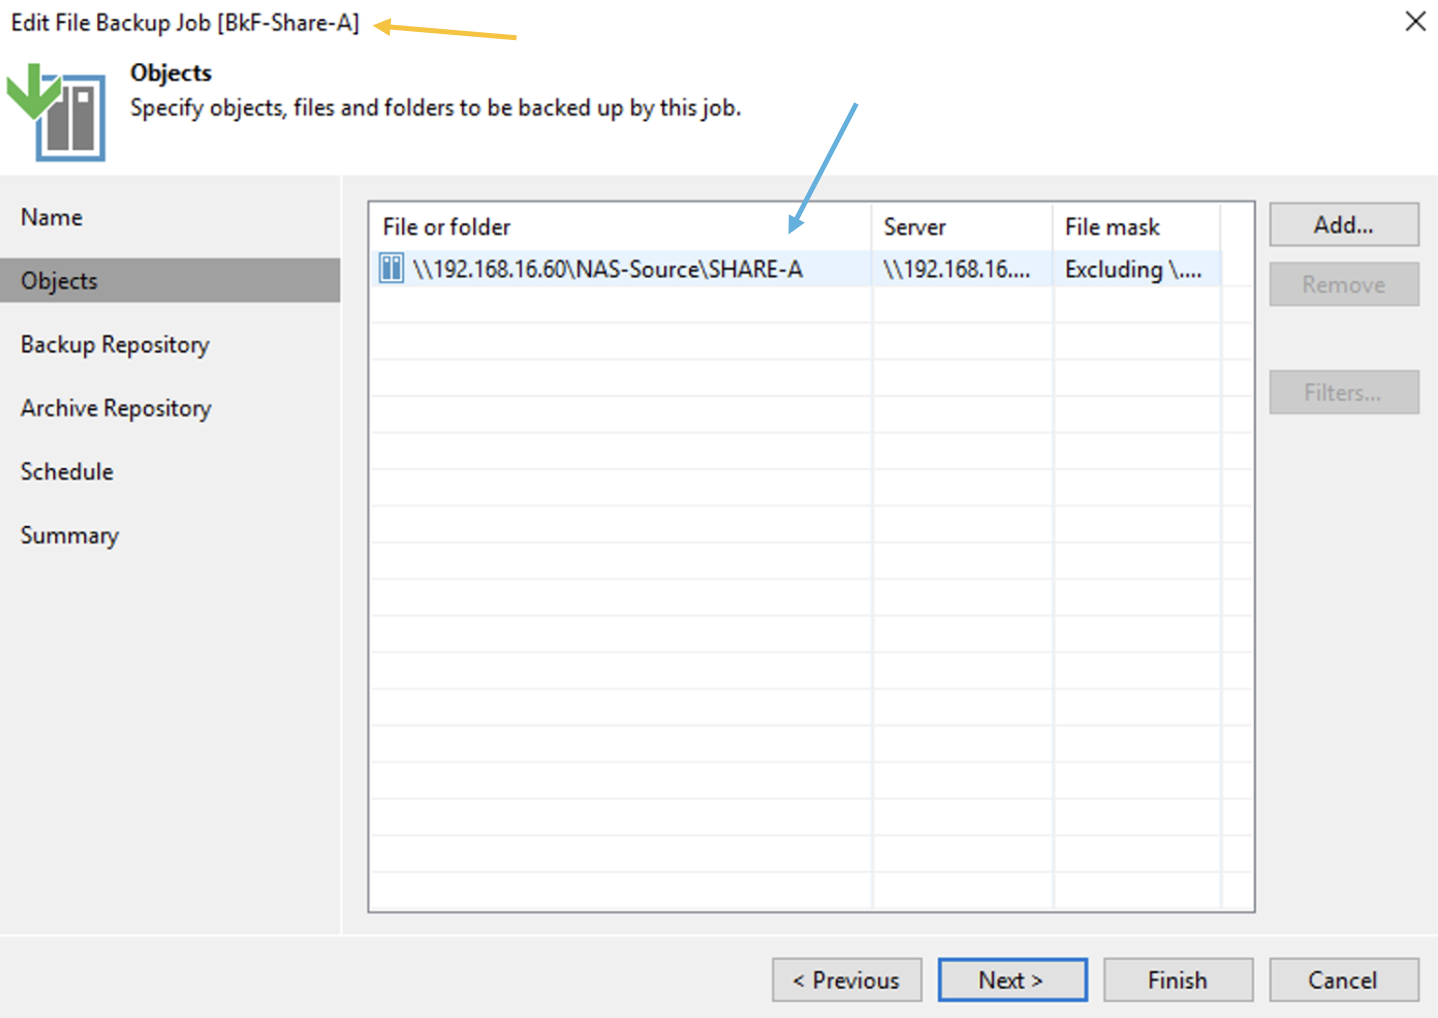
  1. Per ogni cartella condivisa è stato creato un job di Backup denominato “BkF-Share-X”

L’immagine 3 evidenzia che il job “BKF-Share-A” (freccia arancio) protegge l’intera SHARE-A (freccia Blue).

Immagine 3

  1. Nell’immagine 4 viene evidenziato il menù “configurazione” dall’ Enterprise Manager.

In questa fase di configurazione sono necessarie le credenziali amministrazione.

Immagine 4

  1. Dal sotto menù role (immagine 5 – freccia arancio) vengono aggiunti (freccia verde) i tre utenti precedentemente creati (ShareX) ai quali viene assegnato il ruolo di Restore Operator (freccia blue).

roleImmagine 5

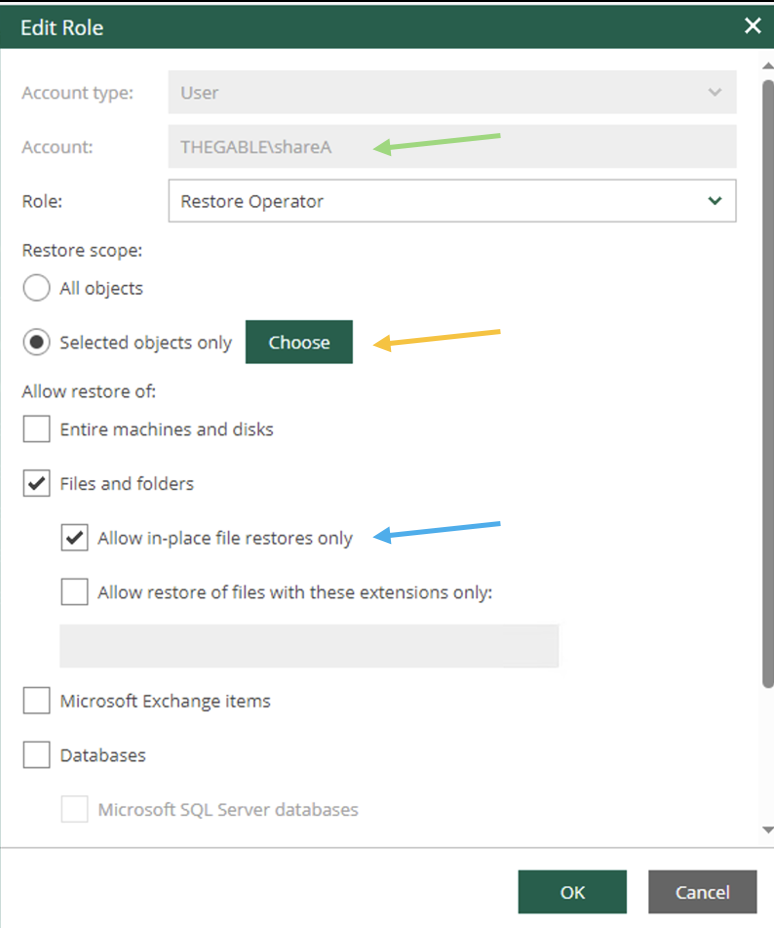
  1. L’immagine 6 mostra le opzioni di delega.

All’ utente ShareA (freccia verde) viene assegnata la possibilità di effettuare il ripristino di tutti gli oggetti protetti da VBR attraverso il pulsante “Choose” (freccia arancio); nelle opzioni di ripristino è possibile permettere il solo ripristino in-place  (freccia blue).

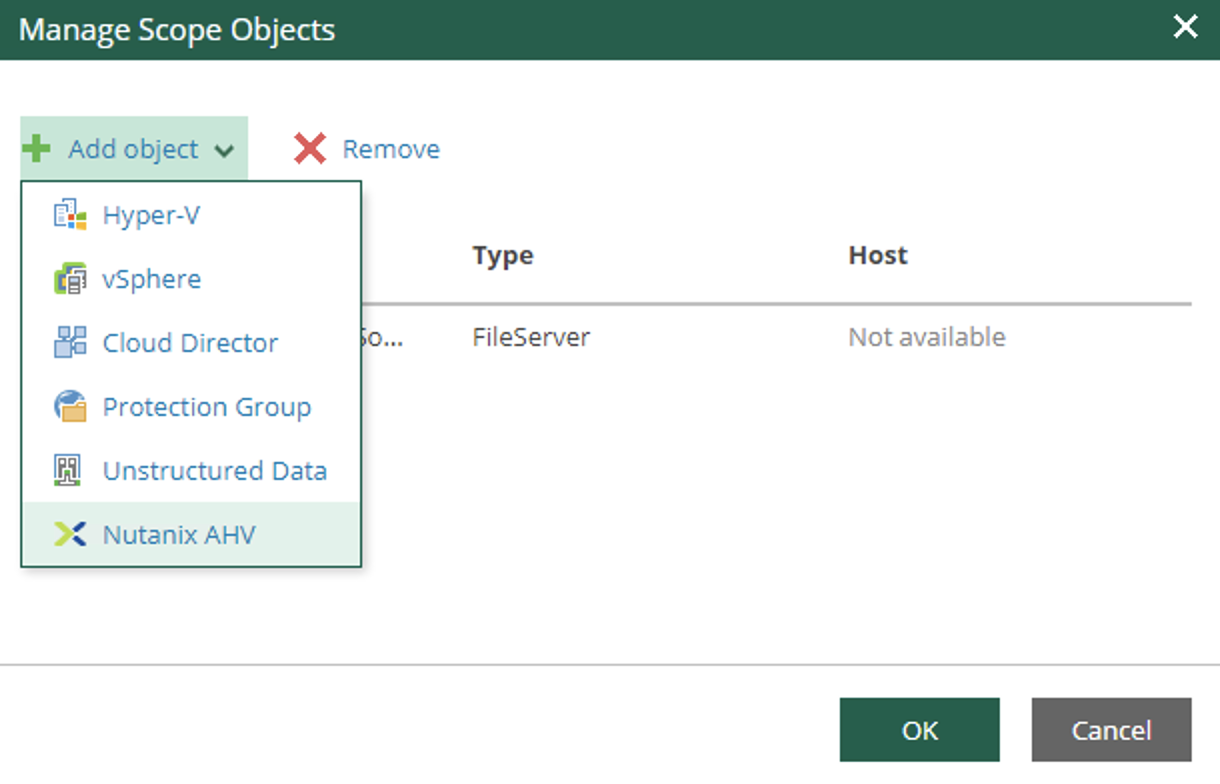
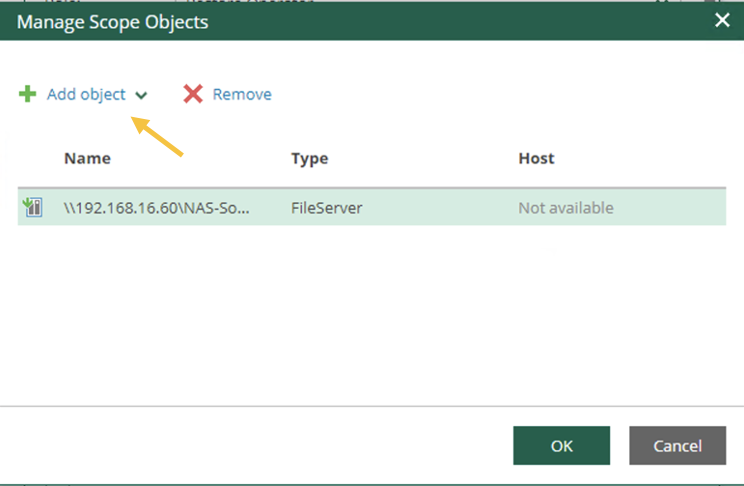
Nelle immagini successive (7-8) viene indicato come effettuare la scelta degli oggetti da visualizzare durante le operazioni di delega del ripristino.

role-1Immagine 6

scopeimmagine 7

role-2Immagine 8

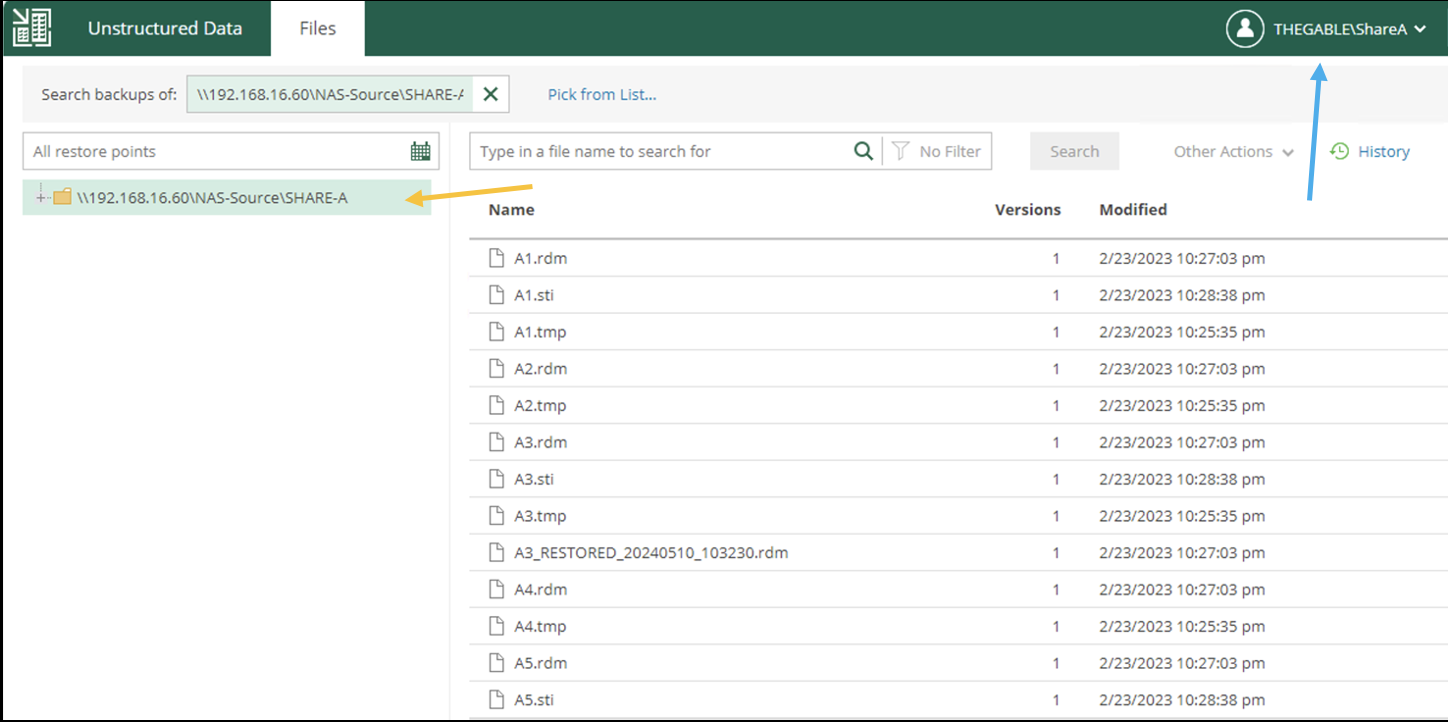
  1. L’immagine 9 illustra e conferma che effettuato il login dall’Enterprise Manager con le credenziali dell’utente ShareX (freccia Blue), siano visibili e ripristinabili solo i file della corrispettiva cartella condivisa (freccia arancio).

DelegaImmagine 9

Nota Finale:

A flexible file backup Strategy – Part 4

This is the last article about NAS series.

The scope is recapping the different technology available for NAS backup pointing in which scenario they can be adopted.

The following table has the scope of helping and discovering which VBR technology can better fit with the NAS protection service.

Technology v.11 and later NAS Backup File to Tape NDMP
 Backup to Disk Yes No No
 Backup to Tape No Yes Yes
 Restore Files Yes Yes No
 Restore Entire NAS Yes Yes Yes
 Speed Backup High Low Medium
 Speed Restore High Low Medium
 Second copy Yes to Disk v.11  (Tape cloning) v.11 (Tape cloning)
 Archiving copy Yes No No
 Immutability v.11 (Hardened Repository) Yes Yes
 Object Storage Yes No No
 Scheduling Yes Yes Yes
 Licensing VUL Any Enterprise Plus

Table 1

An example:

Your managers are asking for a NAS backup architecture able to answer very astringent requests of backup and restore.

Watching table 1 and looking for the word speed it is possible to assess which VBR technology can answer the request of your managers better (in this case v.10 and later NAS backup).

Note-1: For sure the table can be improved by adding more details.

Note-2: The second tape copy and harden repository will be available with VBR v.11. Further details are available on the following web pages:

(https://community.veeam.com/blogs-and-podcasts-57/tape-improvements-in-vbr-v11-277)

(https://community.veeam.com/blogs-and-podcasts-57/veeam-v11-hardened-repository-aka-immutable-backups-275)

Note-3: v.11 is coming soon !!! Please take a look at the launching page and register yourself: https://go.veeam.com/v11-it.

Before closing this series, I show you a hidden gem that allows extending the use of the file copy feature.

What is “File Copy” option already present on the VBR menu?

It allows to copy and move files and folders between servers and hosts added to the backup infrastructure.

Is it possible to use it with Network share?

Not in a direct way.

Actually, No becomes a yes through the PS-tools.

What these tools are?

It is a free utility part of the Sysinternals pstools suite built by Mark Russinovich many years ago.

They allow the administrators to remotely execute commands, install software, launch applications, and run apps as the system account.

The PS-Tools package can be downloaded from the Microsoft web site:

(https://docs.microsoft.com/en-us/sysinternals/downloads/pstools)

A detailed guide is available on the following site:

https://adamtheautomator.com/psexec-ultimate-guide/

Which are the requirements?

Important Note:  File copy is a copy. It means that if you launch the same job twice, the second time it will delete the files previously saved. It’s like launching two times a copy command without changing any option. To be clearer, it’s not a backup so it can not manage retention policy,  nor deduplication/compression.

Note-4: I don’t know if this scenario is supported by Veeam, open a ticket before proceeding.

The following video will explain the steps to set up the environment, perform backup and restore (ps-tools are located to c:\Users\VBR\Desktop\PStools)

That’s all guys. Take care

A flexible file backup Strategy – Part 3

This article’s topic is how to set up and work VBR when it is combined with the NDMP protocol.

This type of configuration is part of the category “file to tape” I treated in my last article “A flexible file backup Strategy – Part 2”.

One more note before starting: VBR requires NDMP version 4 and later.

  • How does it work?

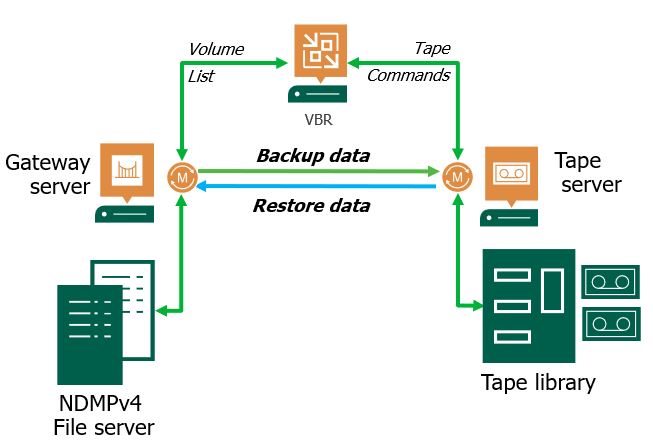
Picture 1

The architecture is quite easy.

Files are gathered from the File Server through the data mover present on the Gateway server. Then they are sent to the Tape Server that performs the write on Tape.

The Datamover installed on Tape Server has the ownership of managing the data traffic to Tape Device.

VBR has the task of enumerating the Volumes and launch the command to Tape Devices.

Point-1: VBR works with a 3 layer backup architecture. It means there is no direct connection between File Servers and Tape Devices. All Data have to pass through the tape Sever.

In this article, I’m not covering the procedure to set up the NAS correctly. Please ask your storage vendor specialist to get all details needed.

How to add the NDMP server to VBR and set up a backup job?

The next video will answer the question.

Video 1

After the backup is completed how to perform a restore?

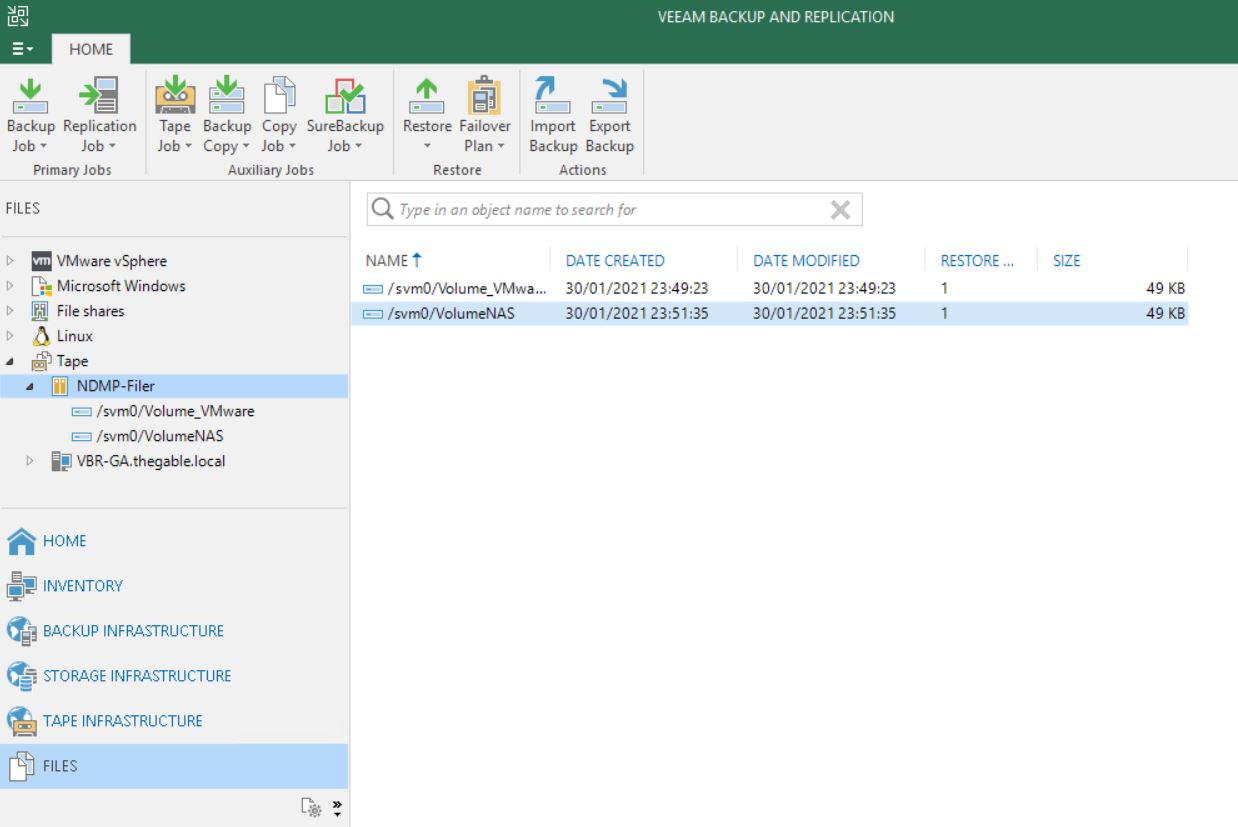
NDMP backup files are available to perform restores from the FILE menu at the voice Tape and then NDMP as shown in picture 2

Picture 2


Please have a look at the next short video (video 2) to see the easy step to perform a restore.

Video 2

Point-2: The backup chain stored on tapes will consist of 10 restore points maximum. On the 11th run, VBR will force an active full.

  • Common scenarios

One of the main characteristics of NDMP backup is that it allows to perform backup and restore of entire volumes.

The most common scenario is the Disaster Recovery of the entire Filer. Imagine the case in which the customer NAS filer is completely out of order and the only way to restart the file sharing service is formatting all the disks and then restoring the volumes (or the worst case is getting a new NAS).

In this case, NDMP volume restores from tape is an excellent low-cost solution.

Main Pro:

NDMP servers backup to tape is available in the Enterprise Plus Edition of VBR.

It means that there is no limit on the amount of data that can be saved. Could be 1 TB or 100 PB it doesn’t matter.

Veeam Universal License (VUL) has the Enterprise Plus Edition available. Is it time to move your old sockets license to the subscription model (VUL)?

Cons:

The granular restore (files and folders) it’s not an available option with VBR and NDMP backup.

Please note that NAS backup is now completely supported by VBR (please refer to article 1 of this series) and it’s the fastest way to perform the granular restores.

Point-3: Even if the NAS device supporting NDMP protocol is already added to VBR, you need to add the NDMP server as a separate procedure. Otherwise, you will not be able to perform file backup to tape.

The next article will cover a recap of the different techniques and show a hidden gem of VBR.

See you next week and take care

A flexible file backup Strategy – Part 2

In this second article, we are going to cover the File to Tape strategy.

Why tape devices are still widely present in the IT department?

  • It’s a good way (but not the only one) to manage the offline backup data (read it as improving the Security Strategy of your data).
  •  Media can be easily carried or moved (read it as Portability).
  • Deployment is often very quickly (read it as speeding up the adoption).
  • It has a potentially infinite capacity (Just adding media).
  • The LTO is a neverending technology in a continued evolution.
  • The tape is a well-known device, IT operators have the skills to manage it.
  • The costs for GB is lower than disk technologies.
  • The costs are quite predictable, managers can budget it easily.

VBR needs a Windows Physical Server named Tape Server to control the Drives and Robotic, LTO3 or later Drives, and MS-Windows drivers (supply by the hardware vendor).

The official user guide available on the Veeam site gives all detailed info.

Just a note before starting:

VBR uses Tape Technology in two different ways.

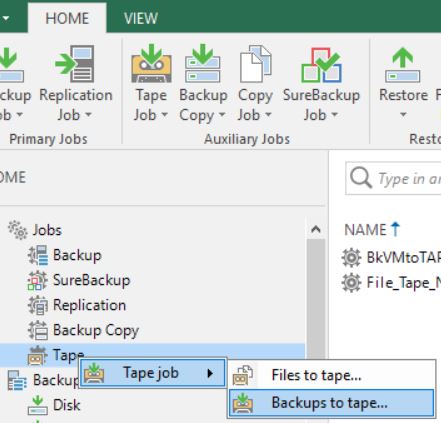
The most used one is back up to tape (Picture 1).

In this case,  the source backup data are the backups already present and created with a backup job or backup copy job.

They are saved to Repository (Repository is a Disk technology).

It means that the scope of backup to tape is to pour out data to tape.

Picture 1

Please have a look at the following video (https://www.youtube.com/watch?v=Il8mH2KB_Uo) to get more details.

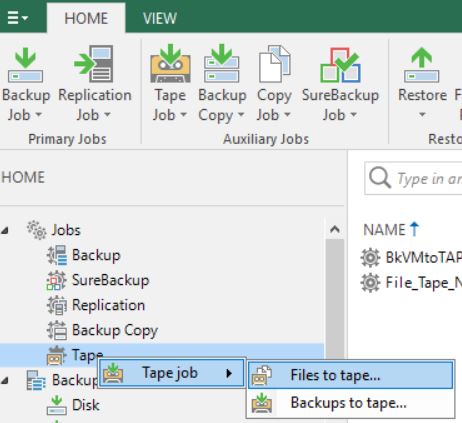
The second way is File to Tape and it is the topic of this article (picture 2).

https://lnx.gable.it/wp-content/uploads/2021/01/nas-7.jpgPicture 2

Which type of source files can be saved to tape?

  • Windows & Linux servers (virtual or physical doesn’t matter)
  • NAS file share (SMB (CIFS) and NFS ).
  • NDMP filers (it will be covered in the next article).
  • How does it work?

Picture 3

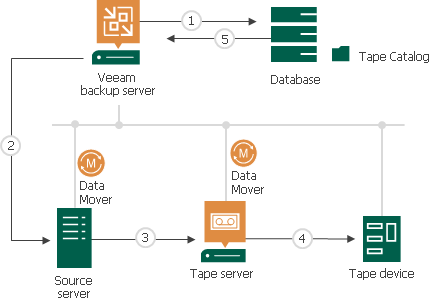
Picture 3 shows the data streams when a tape process is performed:

  1. The main components are Data Movers. These Services run on the source and on the Tape Server.
  2. VBR triggers the source Data Mover to perform a copy of the files to the target. At the destination, the target Data Mover check if the files have arrived correctly.
  3. The tape Server manages the write operation to the tape also.
  4. VBR stores all info about files saved (media used, retention, etc.)  in a catalog.
  5. In the restore scenario, the step order is four to one.
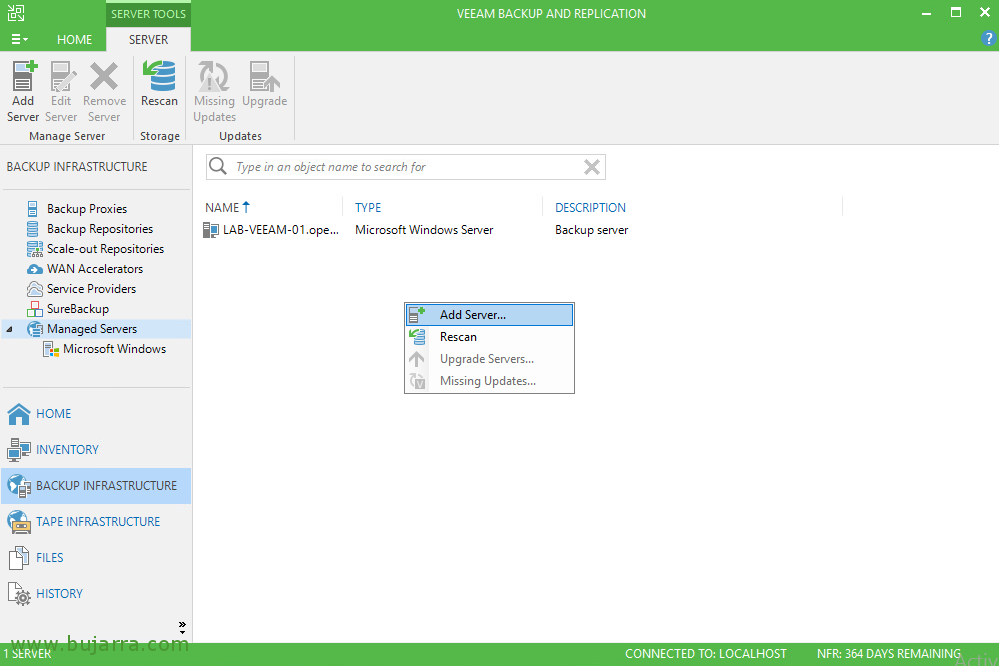
  • *Note: To perform a backup of Windows and Linux servers, it is requested to add those servers to the managed server as shown in picture 3. Through this process, the Data mover service is properly installed.
  • Network Share: Adding SMB/NFS Share as shown in the previous article (A Flexible file backup strategy – Part 1).
Picture 3
  • Common scenarios

File to Tape backup can be used by any customer. You need just a Tape Server, Tape Devices, Drivers, and VBR.

There are at least two main cases:

  • Customers who want a copy of their data to tape.
  • Customers with a small budget who doesn’t need rapid restore

The next video will show how to set it up.

Main Pro

  • There is not a room limit. It means the license doesn’t count how many GB, TB, PB will be written to Tape.
  • The VBR architecture is as usual flexible. It’s possible to add more tape servers and more than 1 tape library.

Version 11 will add more great features:

  • Tape cloning (https://community.veeam.com/blogs-and-podcasts-57/tape-improvements-in-vbr-v11-277)
  • Tape verification (https://community.veeam.com/blogs-and-podcasts-57/part-ii-tape-improvements-in-vbr-v11-289)

Cons

*This behavior is quite common to all backup software that writes data directly to Tape.

  • For saving a file, VBR needs to trigger a process of discovering the file to the source, gathering and writing it to a media.

If you consider that the common NAS scenario is composed of millions of small files and thousands of folders and that the tape technology has to choose for every file the location in the media (where the file will be copied)  it’s clear that this process, common to all backup servers, stresses the hardware architecture and in particular the drive header.

The backup process has a small speed advantage compared to restoring because writings to media are often sequential and not random.

Image to restore 10k files located in 10k different positions in a single tape.

The drive has to perform a great job. It is going to suffer from an effect called shoe-shining (also known as tape back-hitching)  which occurs when a tape drive cannot transfer data at an acceptable speed.

Shoe shining can contribute to data loss over time, as the repeated back-and-forth motion will wear the tape drive’s read/write heads and negatively affect the readable portion of the tape

  • Loss of Tape Cartridge Capacity
  • Increased Risk of Read/Write Issues
  • Excessively Worn Tape Drive Heads
  • Low Data Transfer Rates
  • Data Loss
  • The Veeam DB needs to be sized correctly and the best practice is to switch from SQL Express to SQL Standard
  • Media management is quite challenging when the amount of tapes is big. Remember to store them in a fireproof and non-magnetic safe.

Do you also prefer the NAS backup feature introduced in v.10? Let me know!

That’s all for now.  

See you next week for talking about NDMP