
This article explains how to configure the Veeam Disaster Recovery Orchestrator (VDrO) administration menu.
Before proceeding to the administration phase, it is essential to have already labeled the resources that will have to be part of the Disaster Recovery plans.
The classification was illustrated in the previous article, available by clicking on the following link: VDrO – VOne – Tagging .
Note 1 : To access the administration menu, select the item called “Administration” (see image 1)
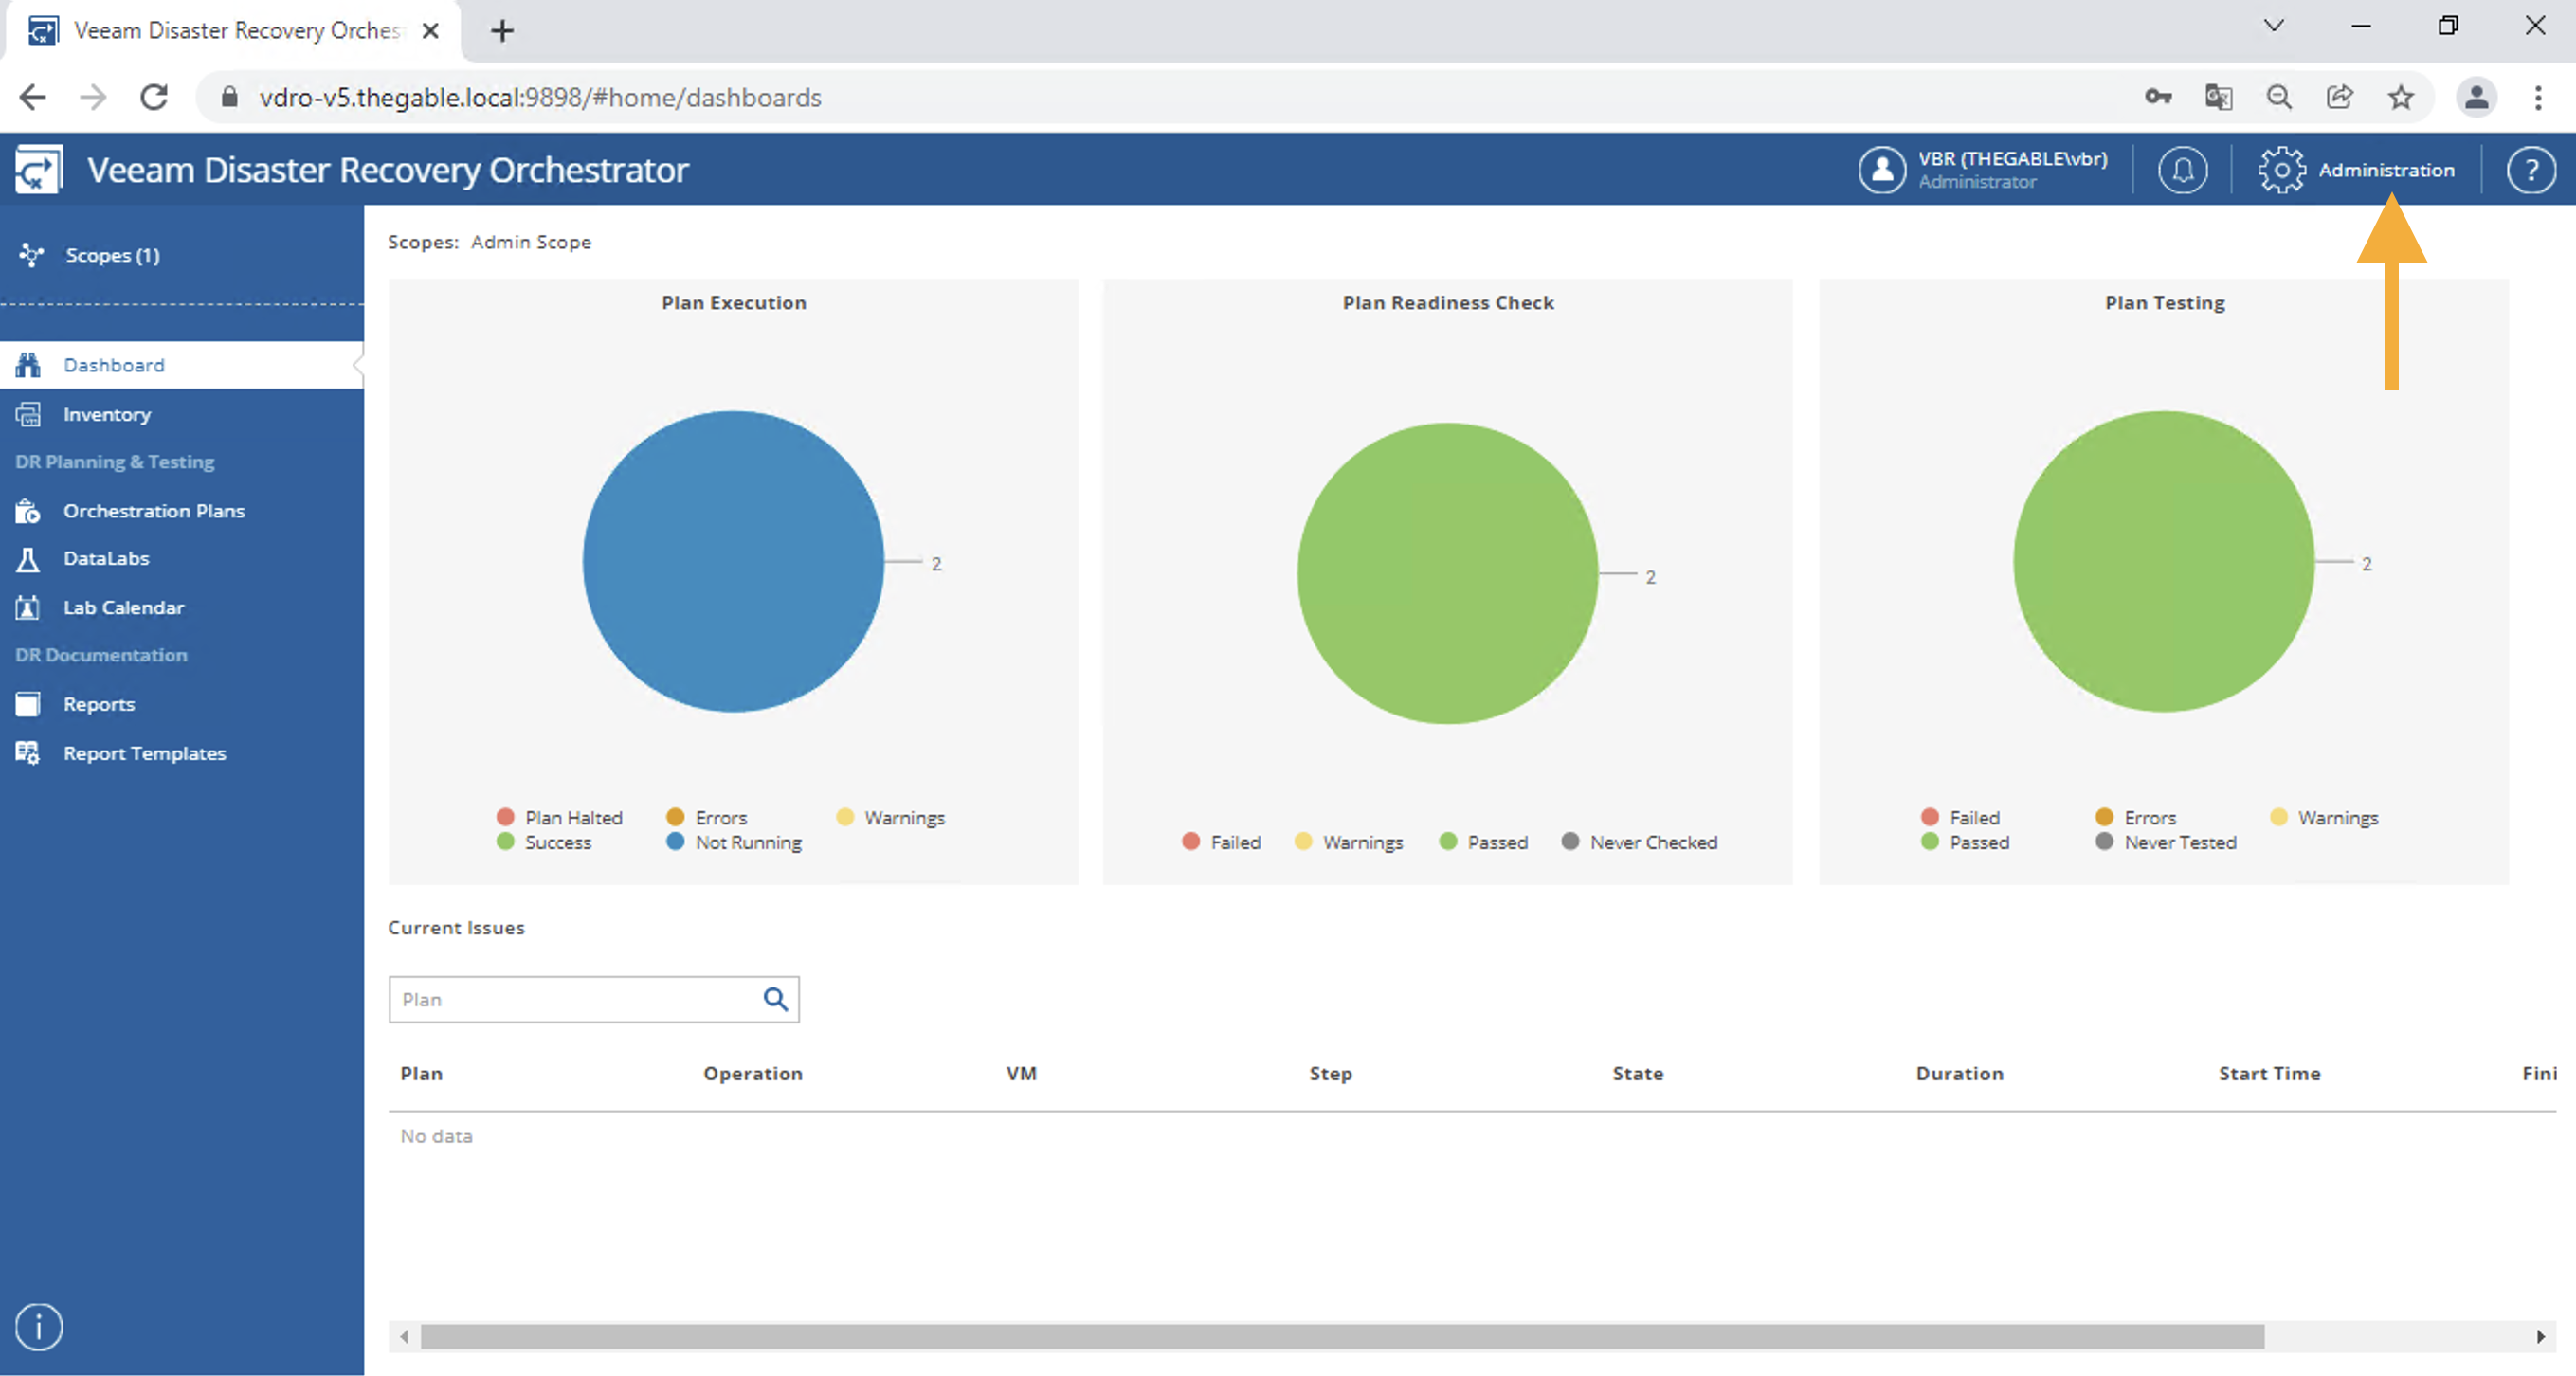 Picture 1
The configuration of the administration menu is divided into three main areas:
In the first, the following are set:
- The name of the VDrO Server and the contact name (image 2).
- connections to Veeam Backup & Replication Servers (VBR) (image 3)
- connections to vCenters (image 4)
- the optional connection to the storage (image 5) (refer to this article to find out the details)
 picture 2
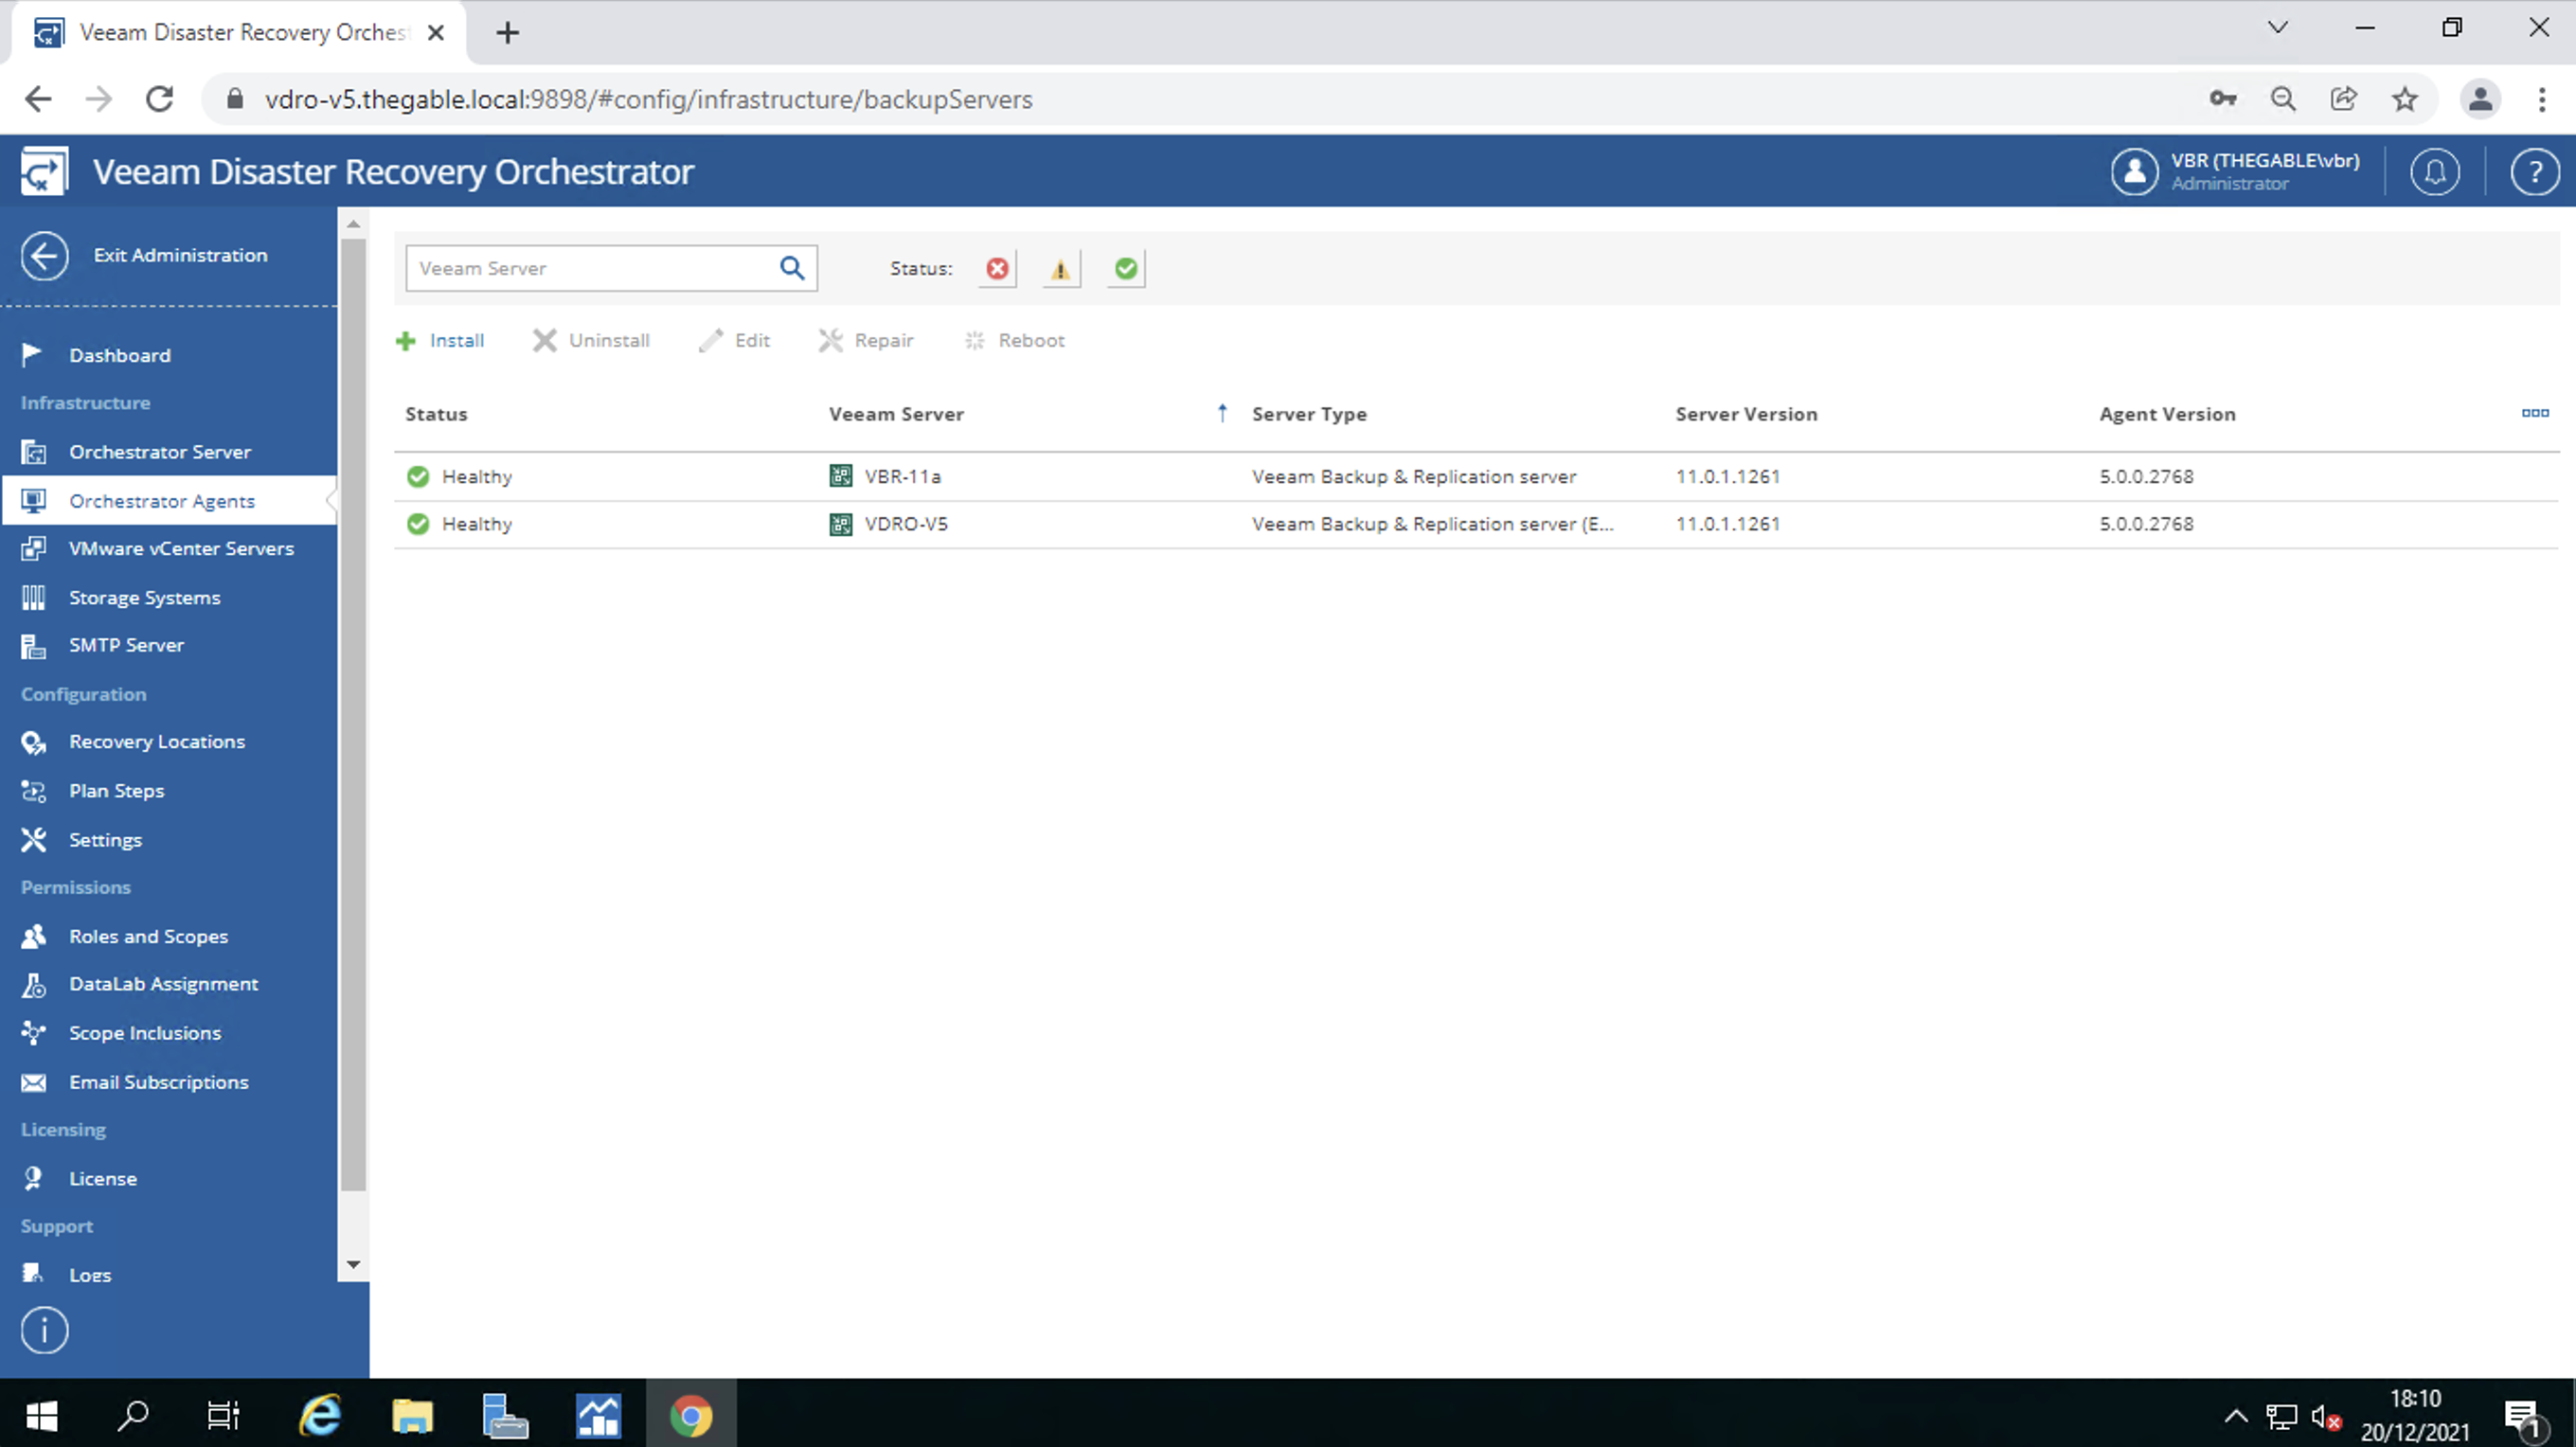 Picture 3
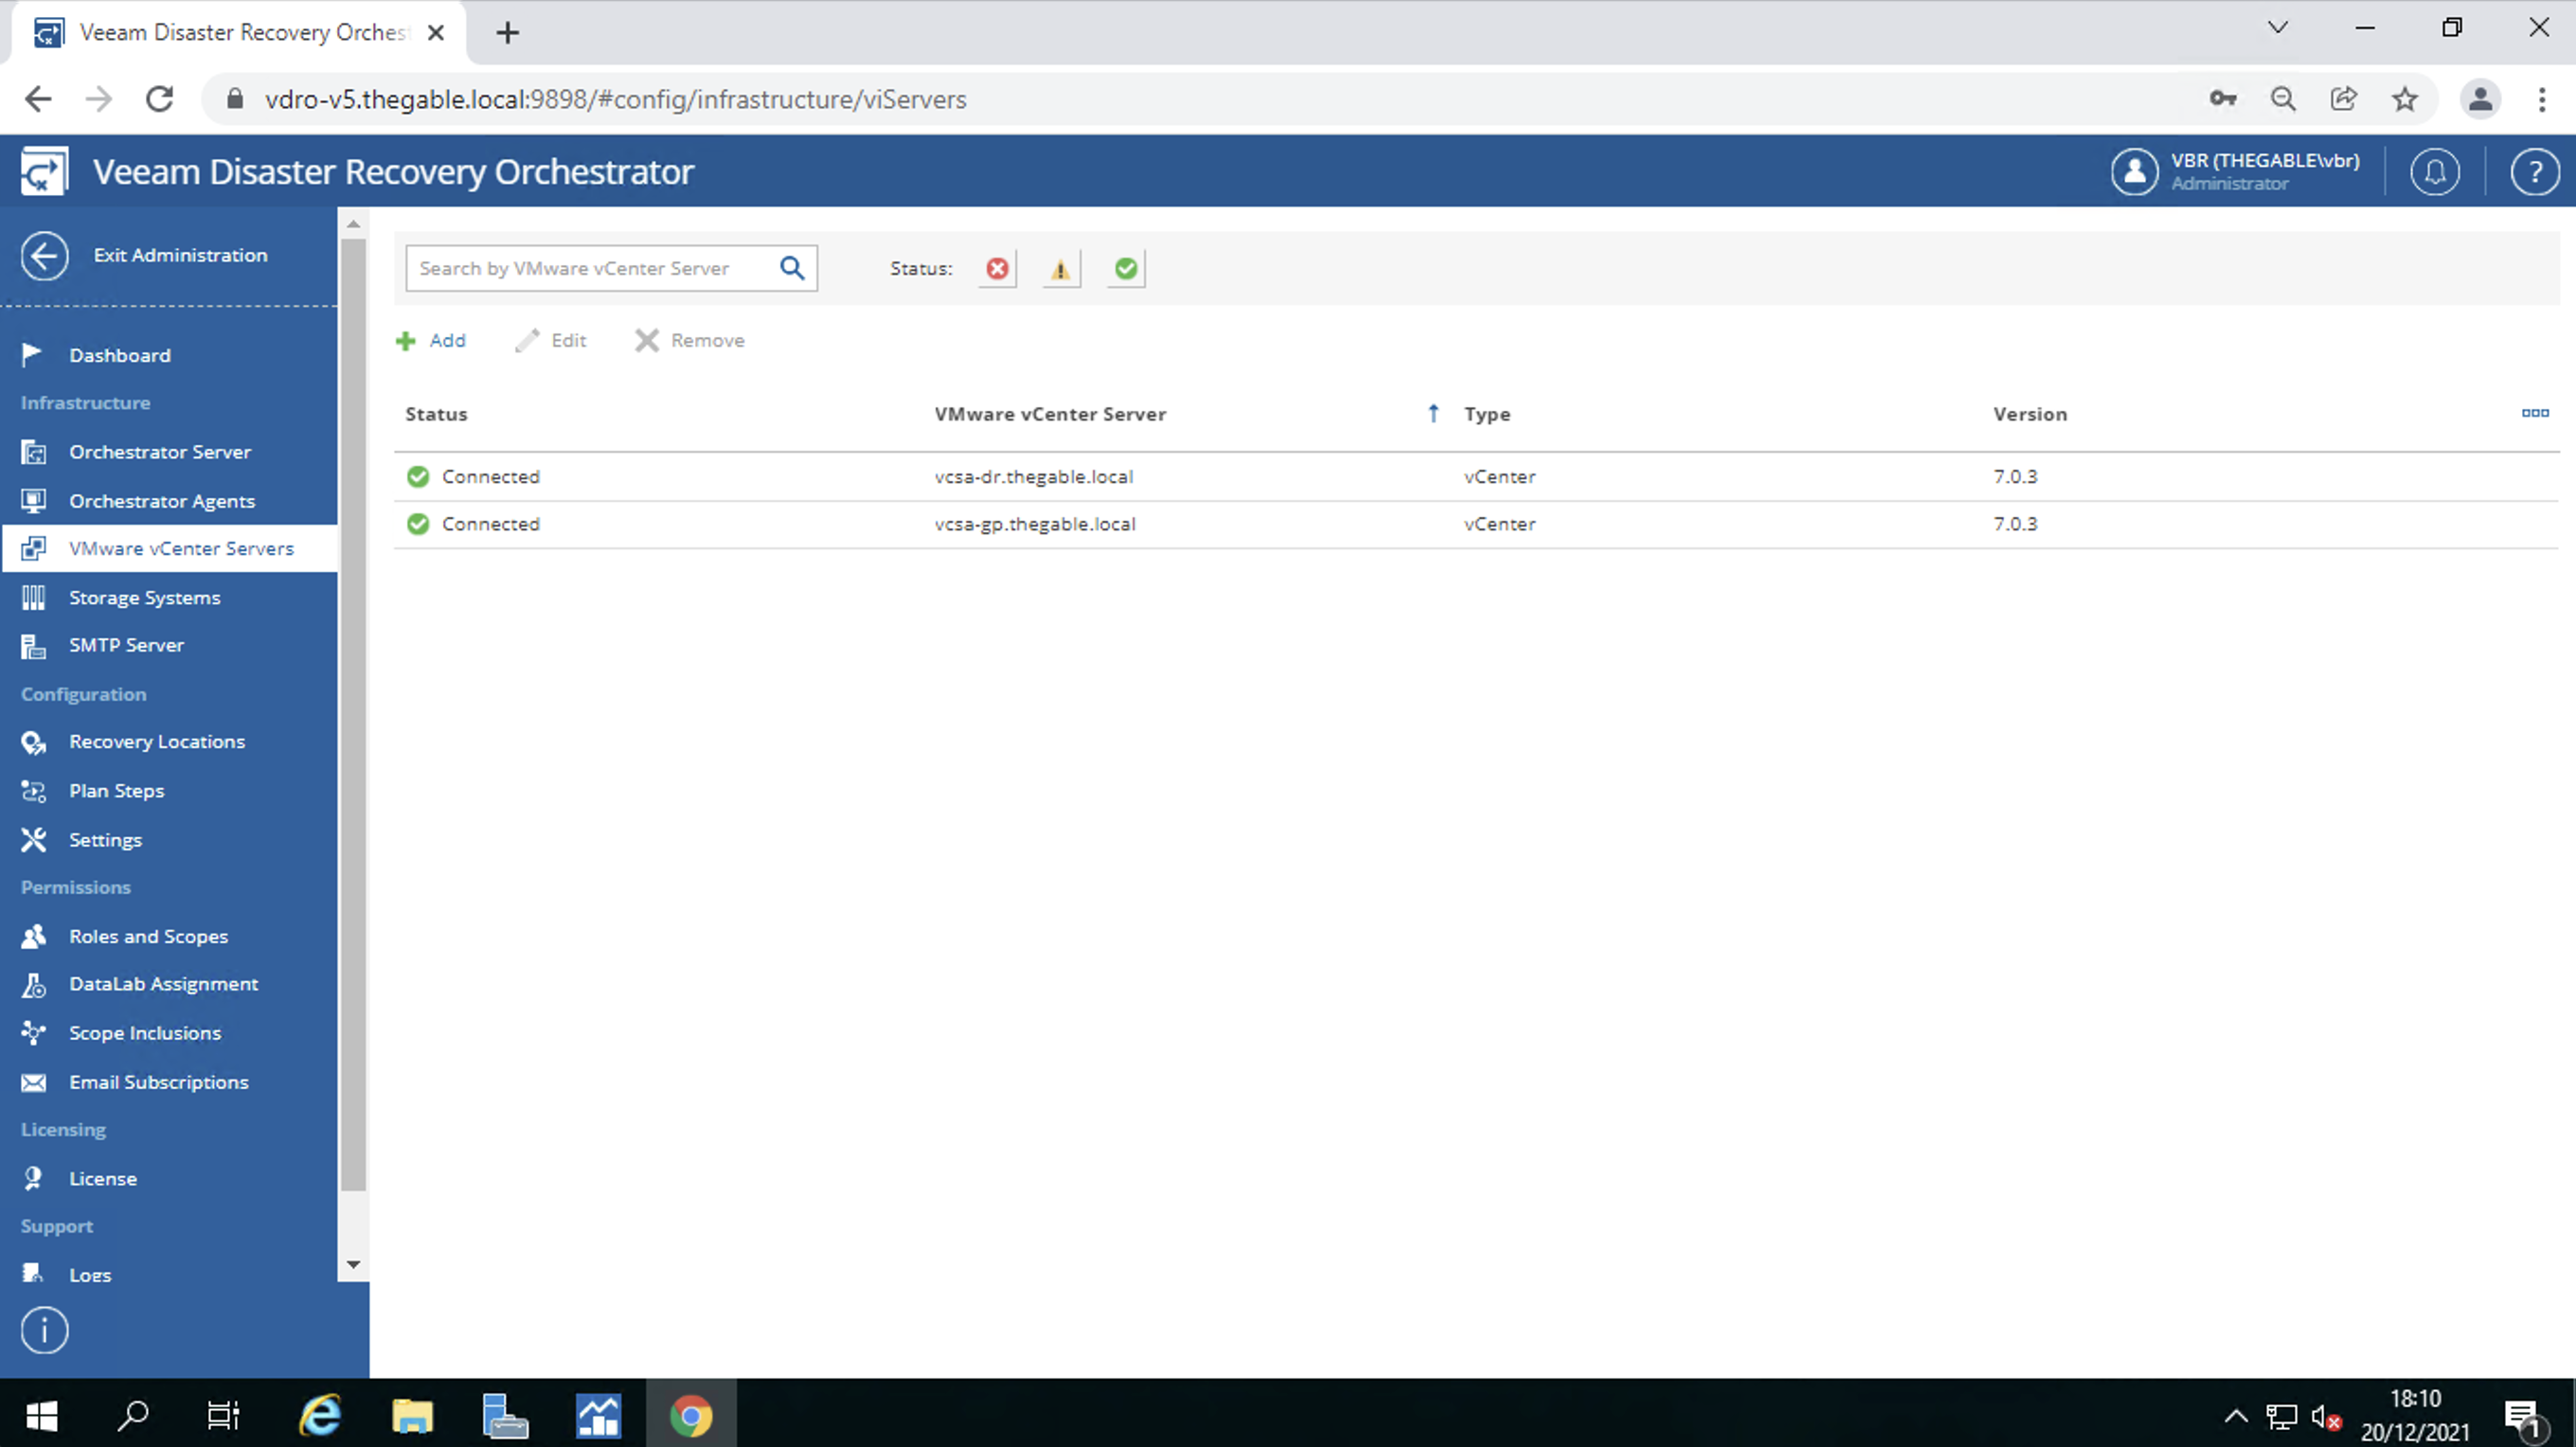 Picture 4
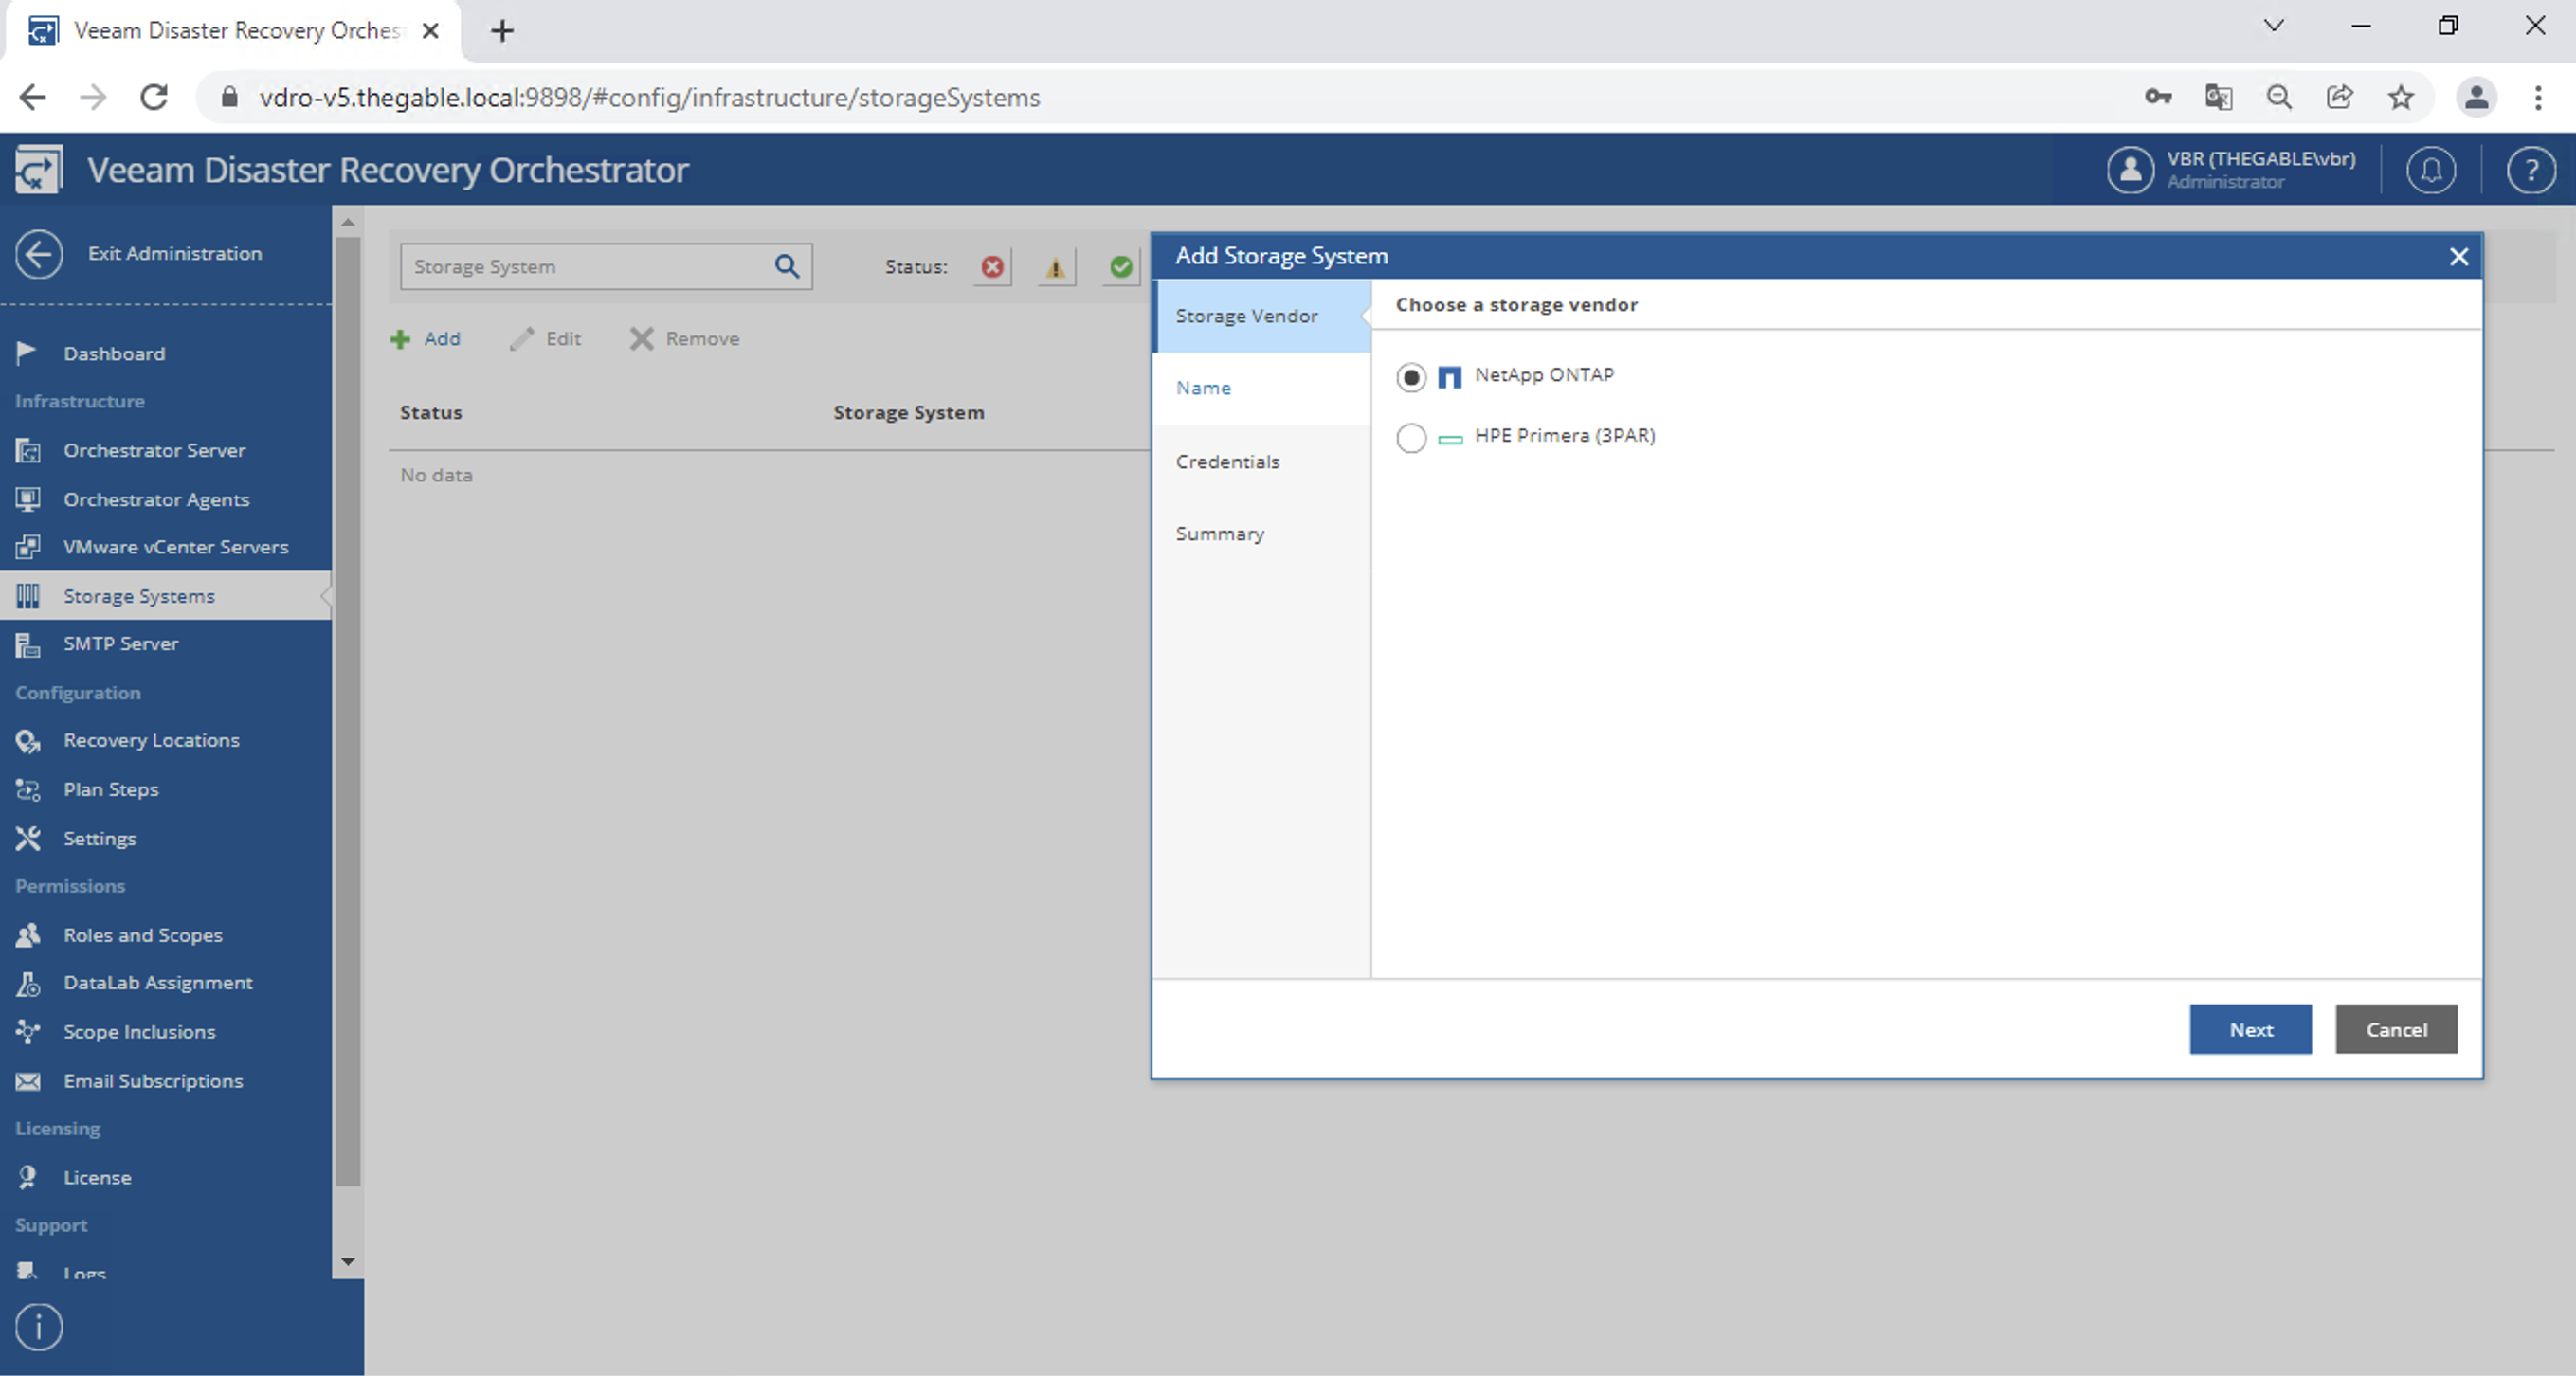 Picture 5
The second area identifies the resources to be added to the DR plans through tagging:
- The recovery location (image 6)
- In the recovery location the datastores where the VM filesystems will reside (image 7)
- Network mapping (image 8)
- IP address remapping (image 9)
Note 2: The operations described above are possible if and only if all necessary resources have been tagged.
Note 3: Automatic remapping of IP addresses when starting a DR plan is only available for Windows VMs.
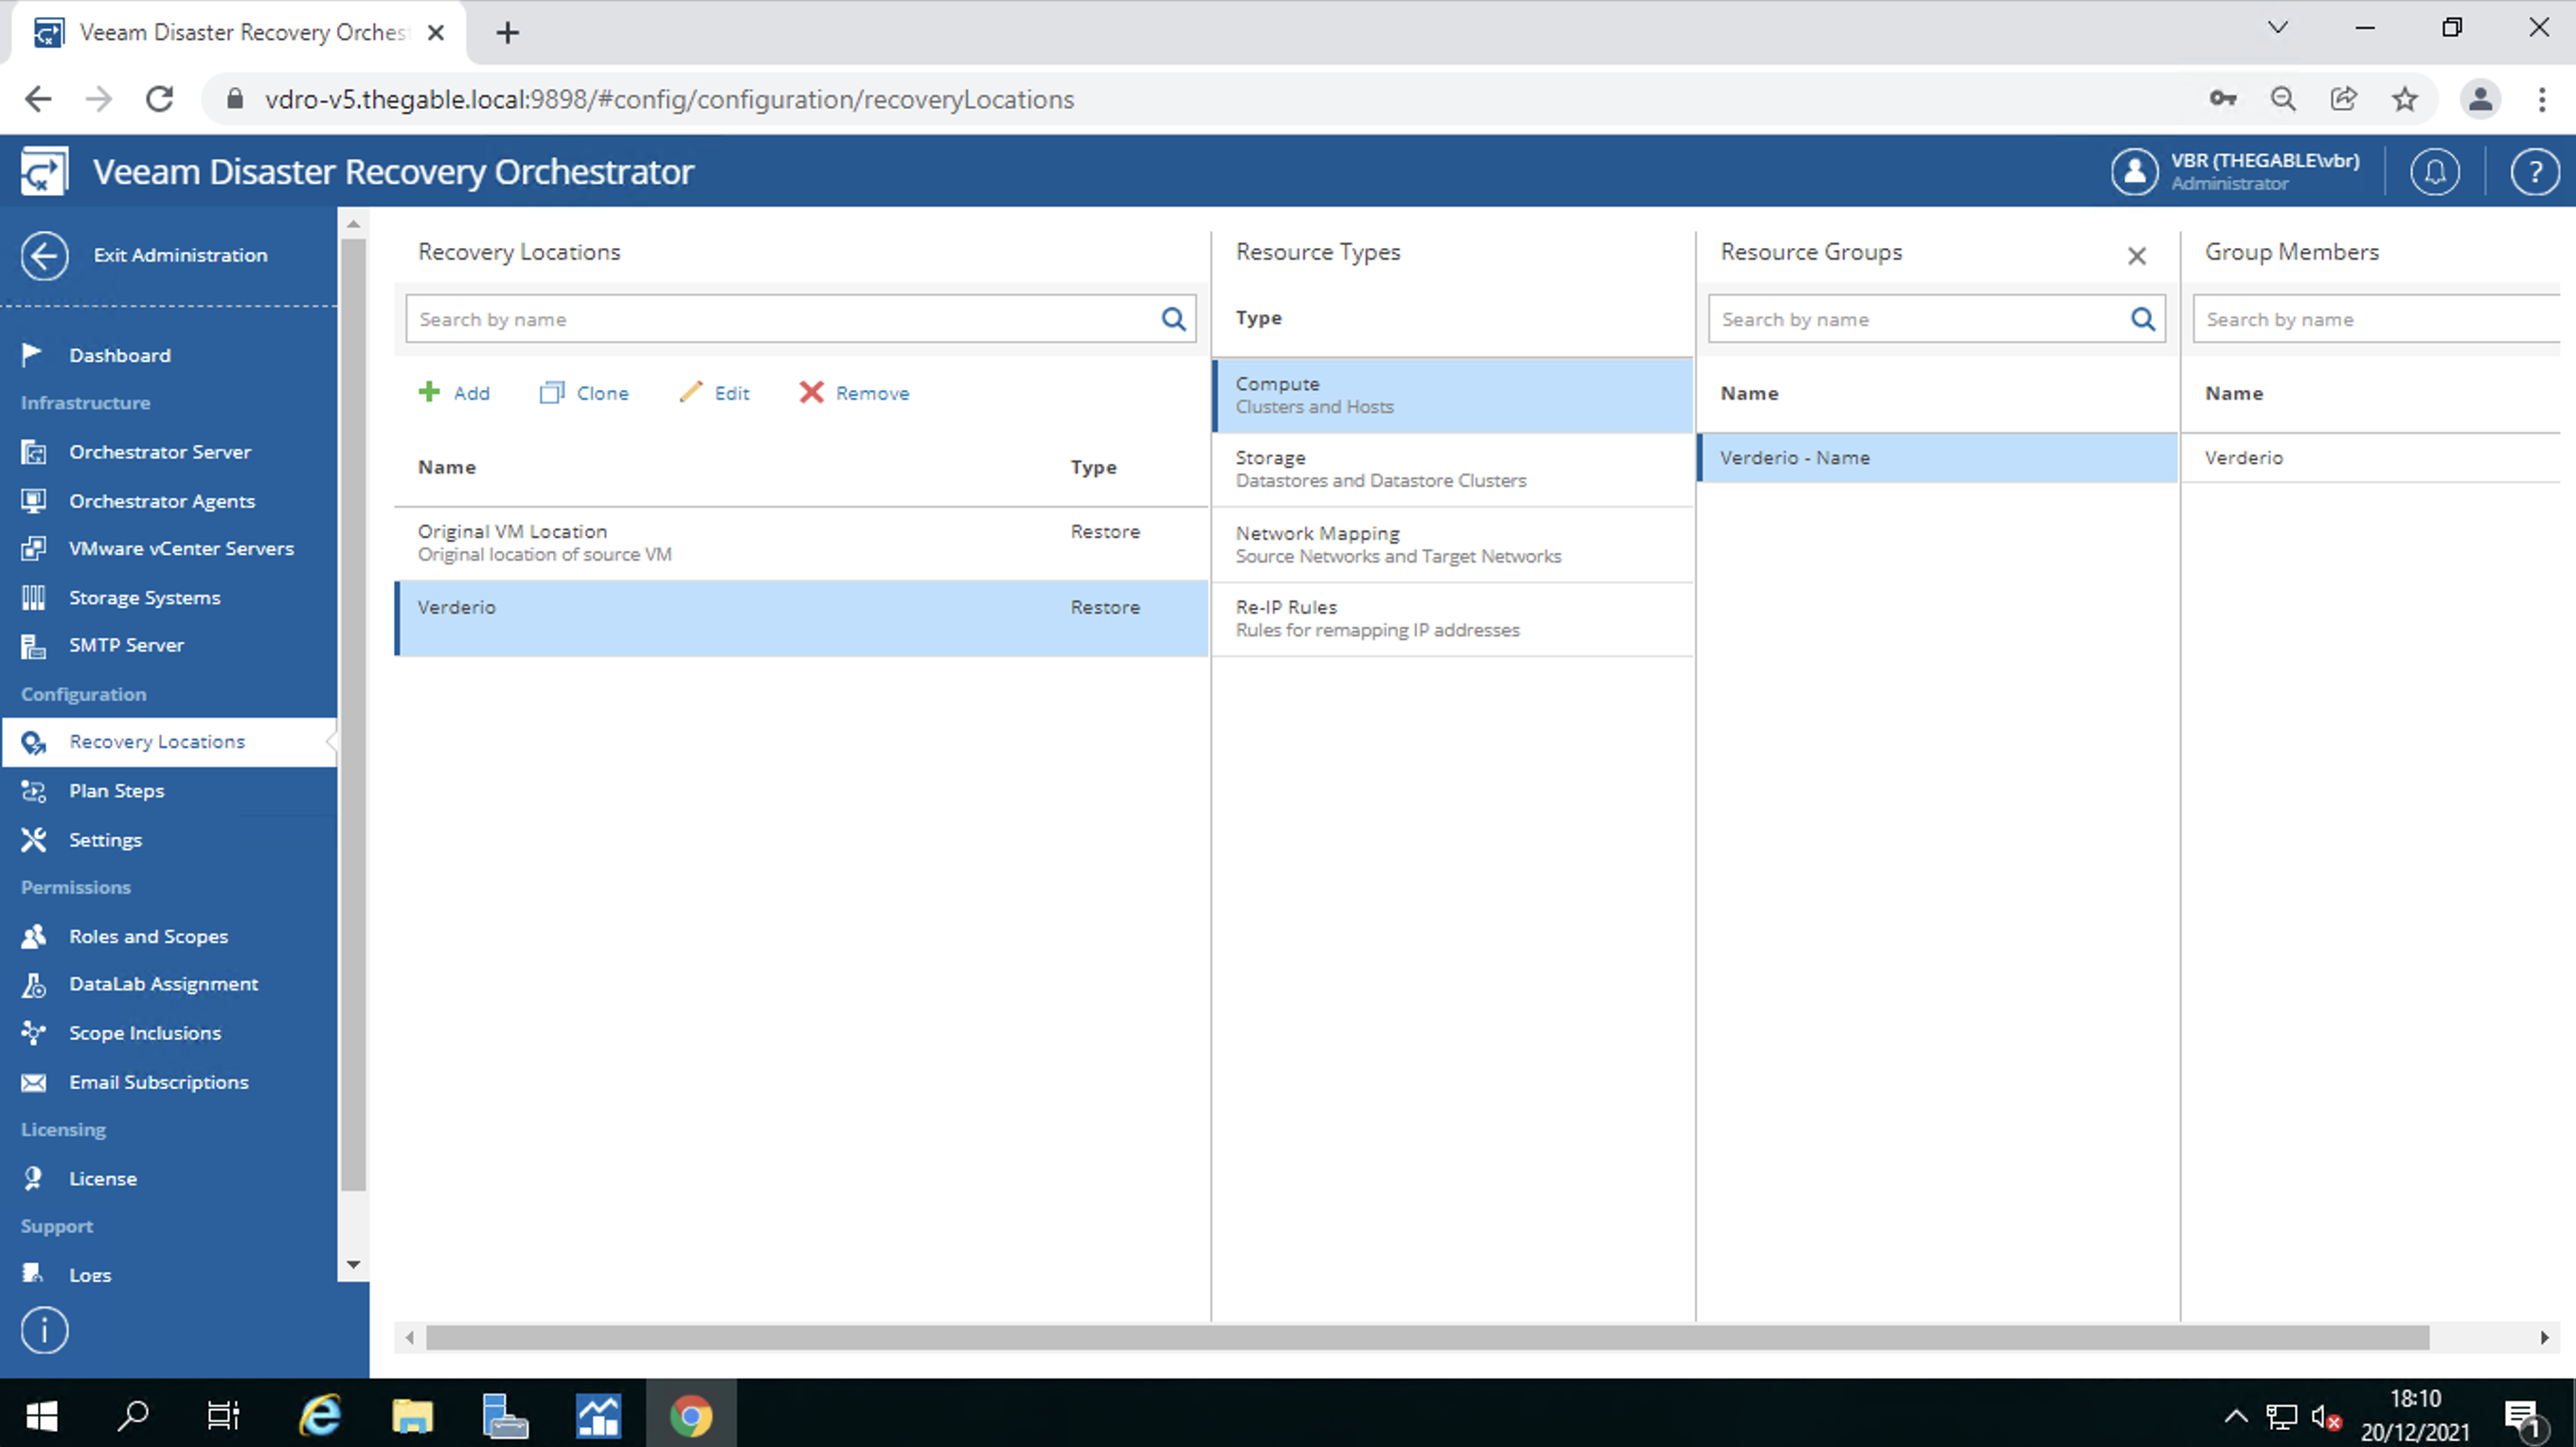 Picture 6
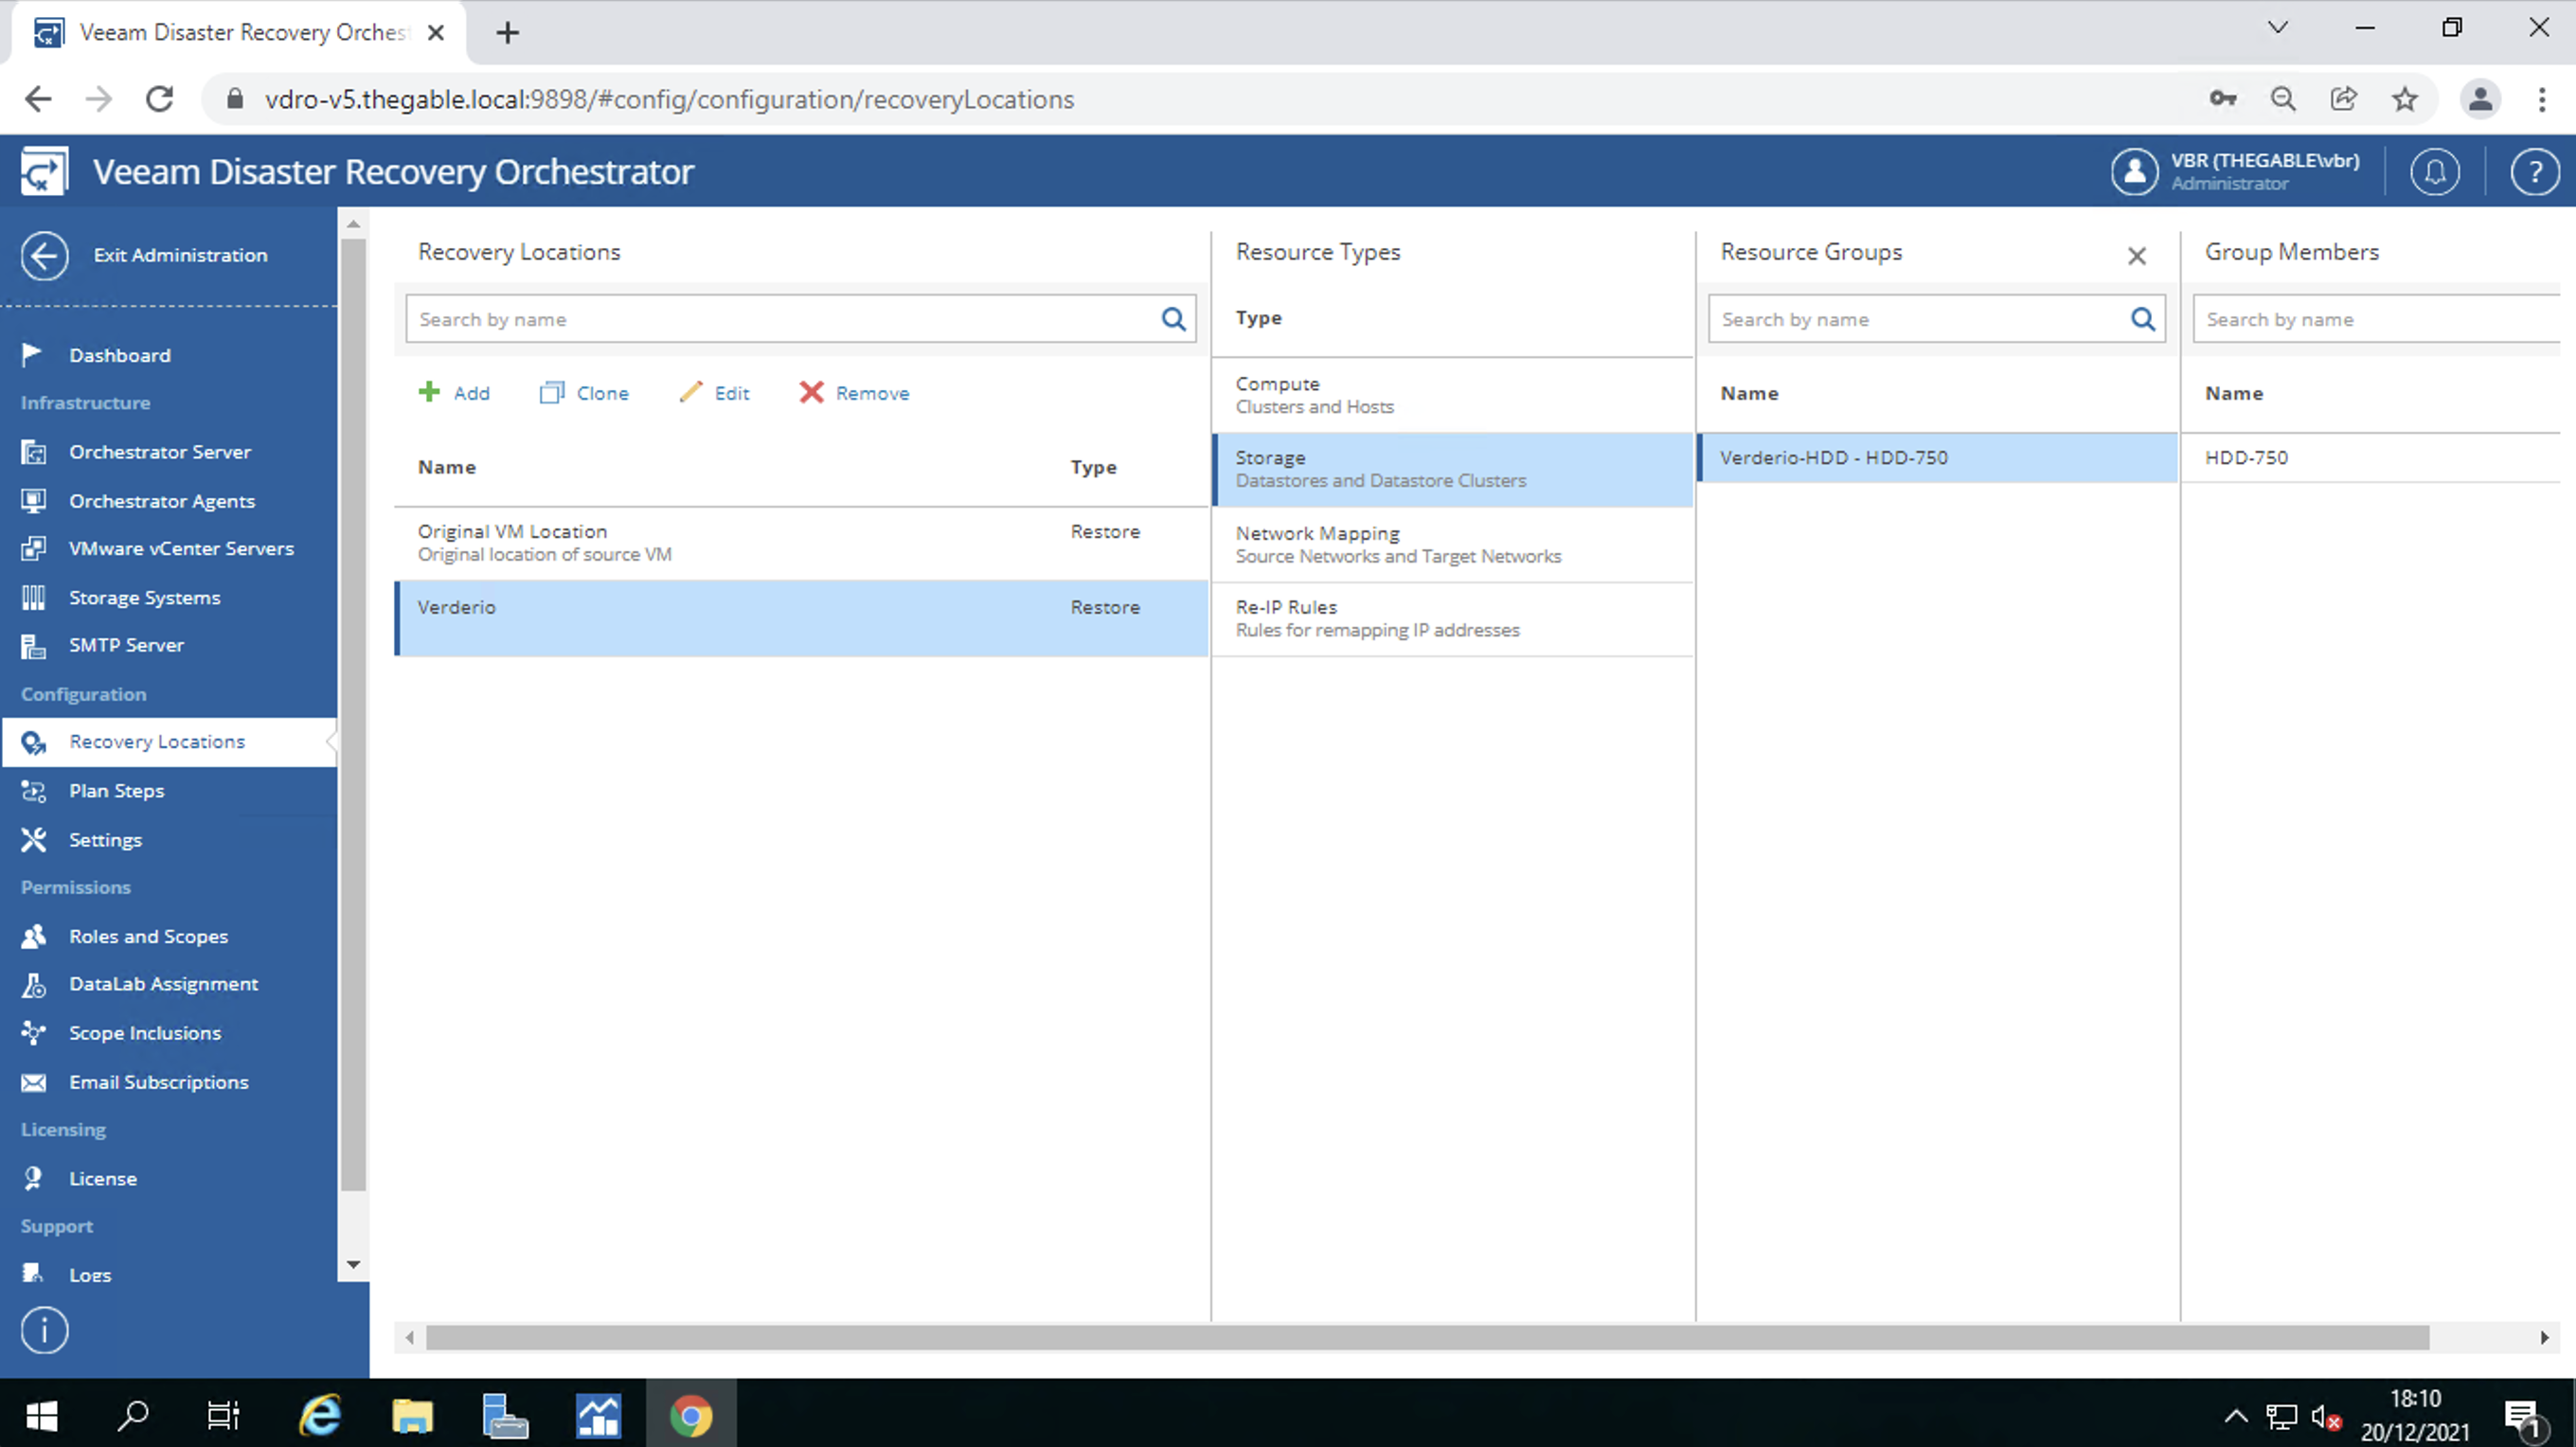 Picture 7
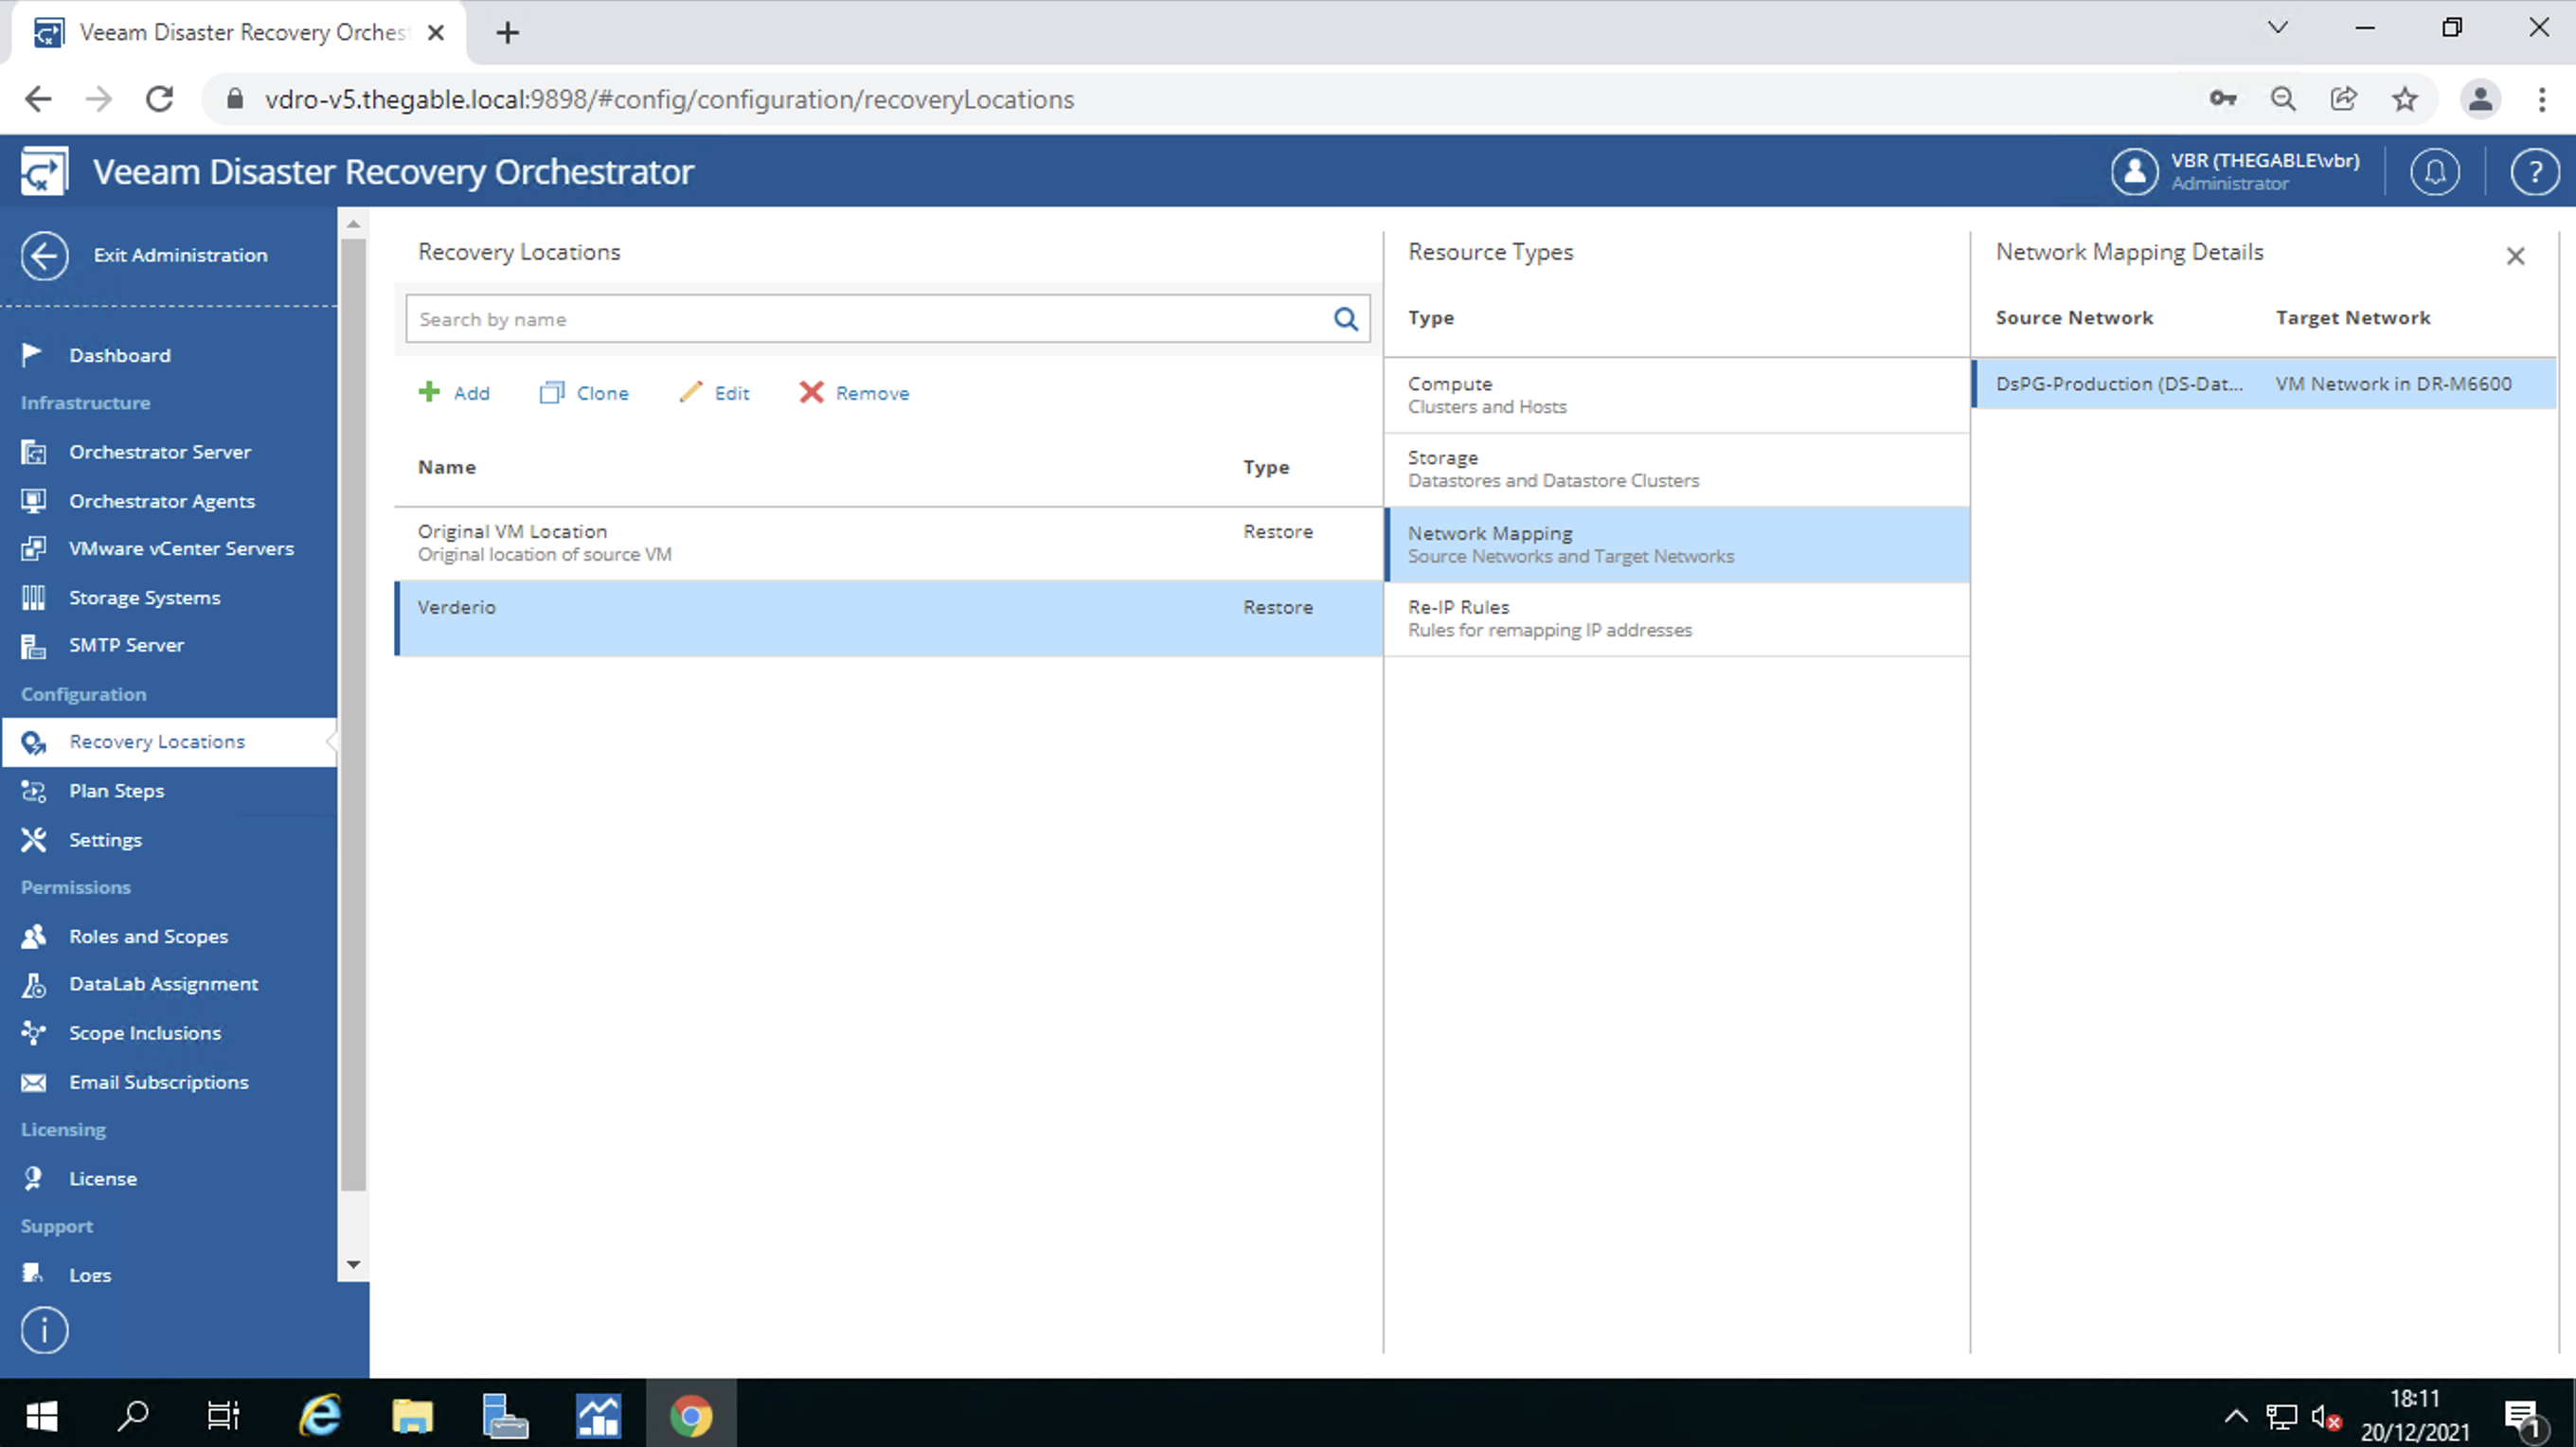 Image 8
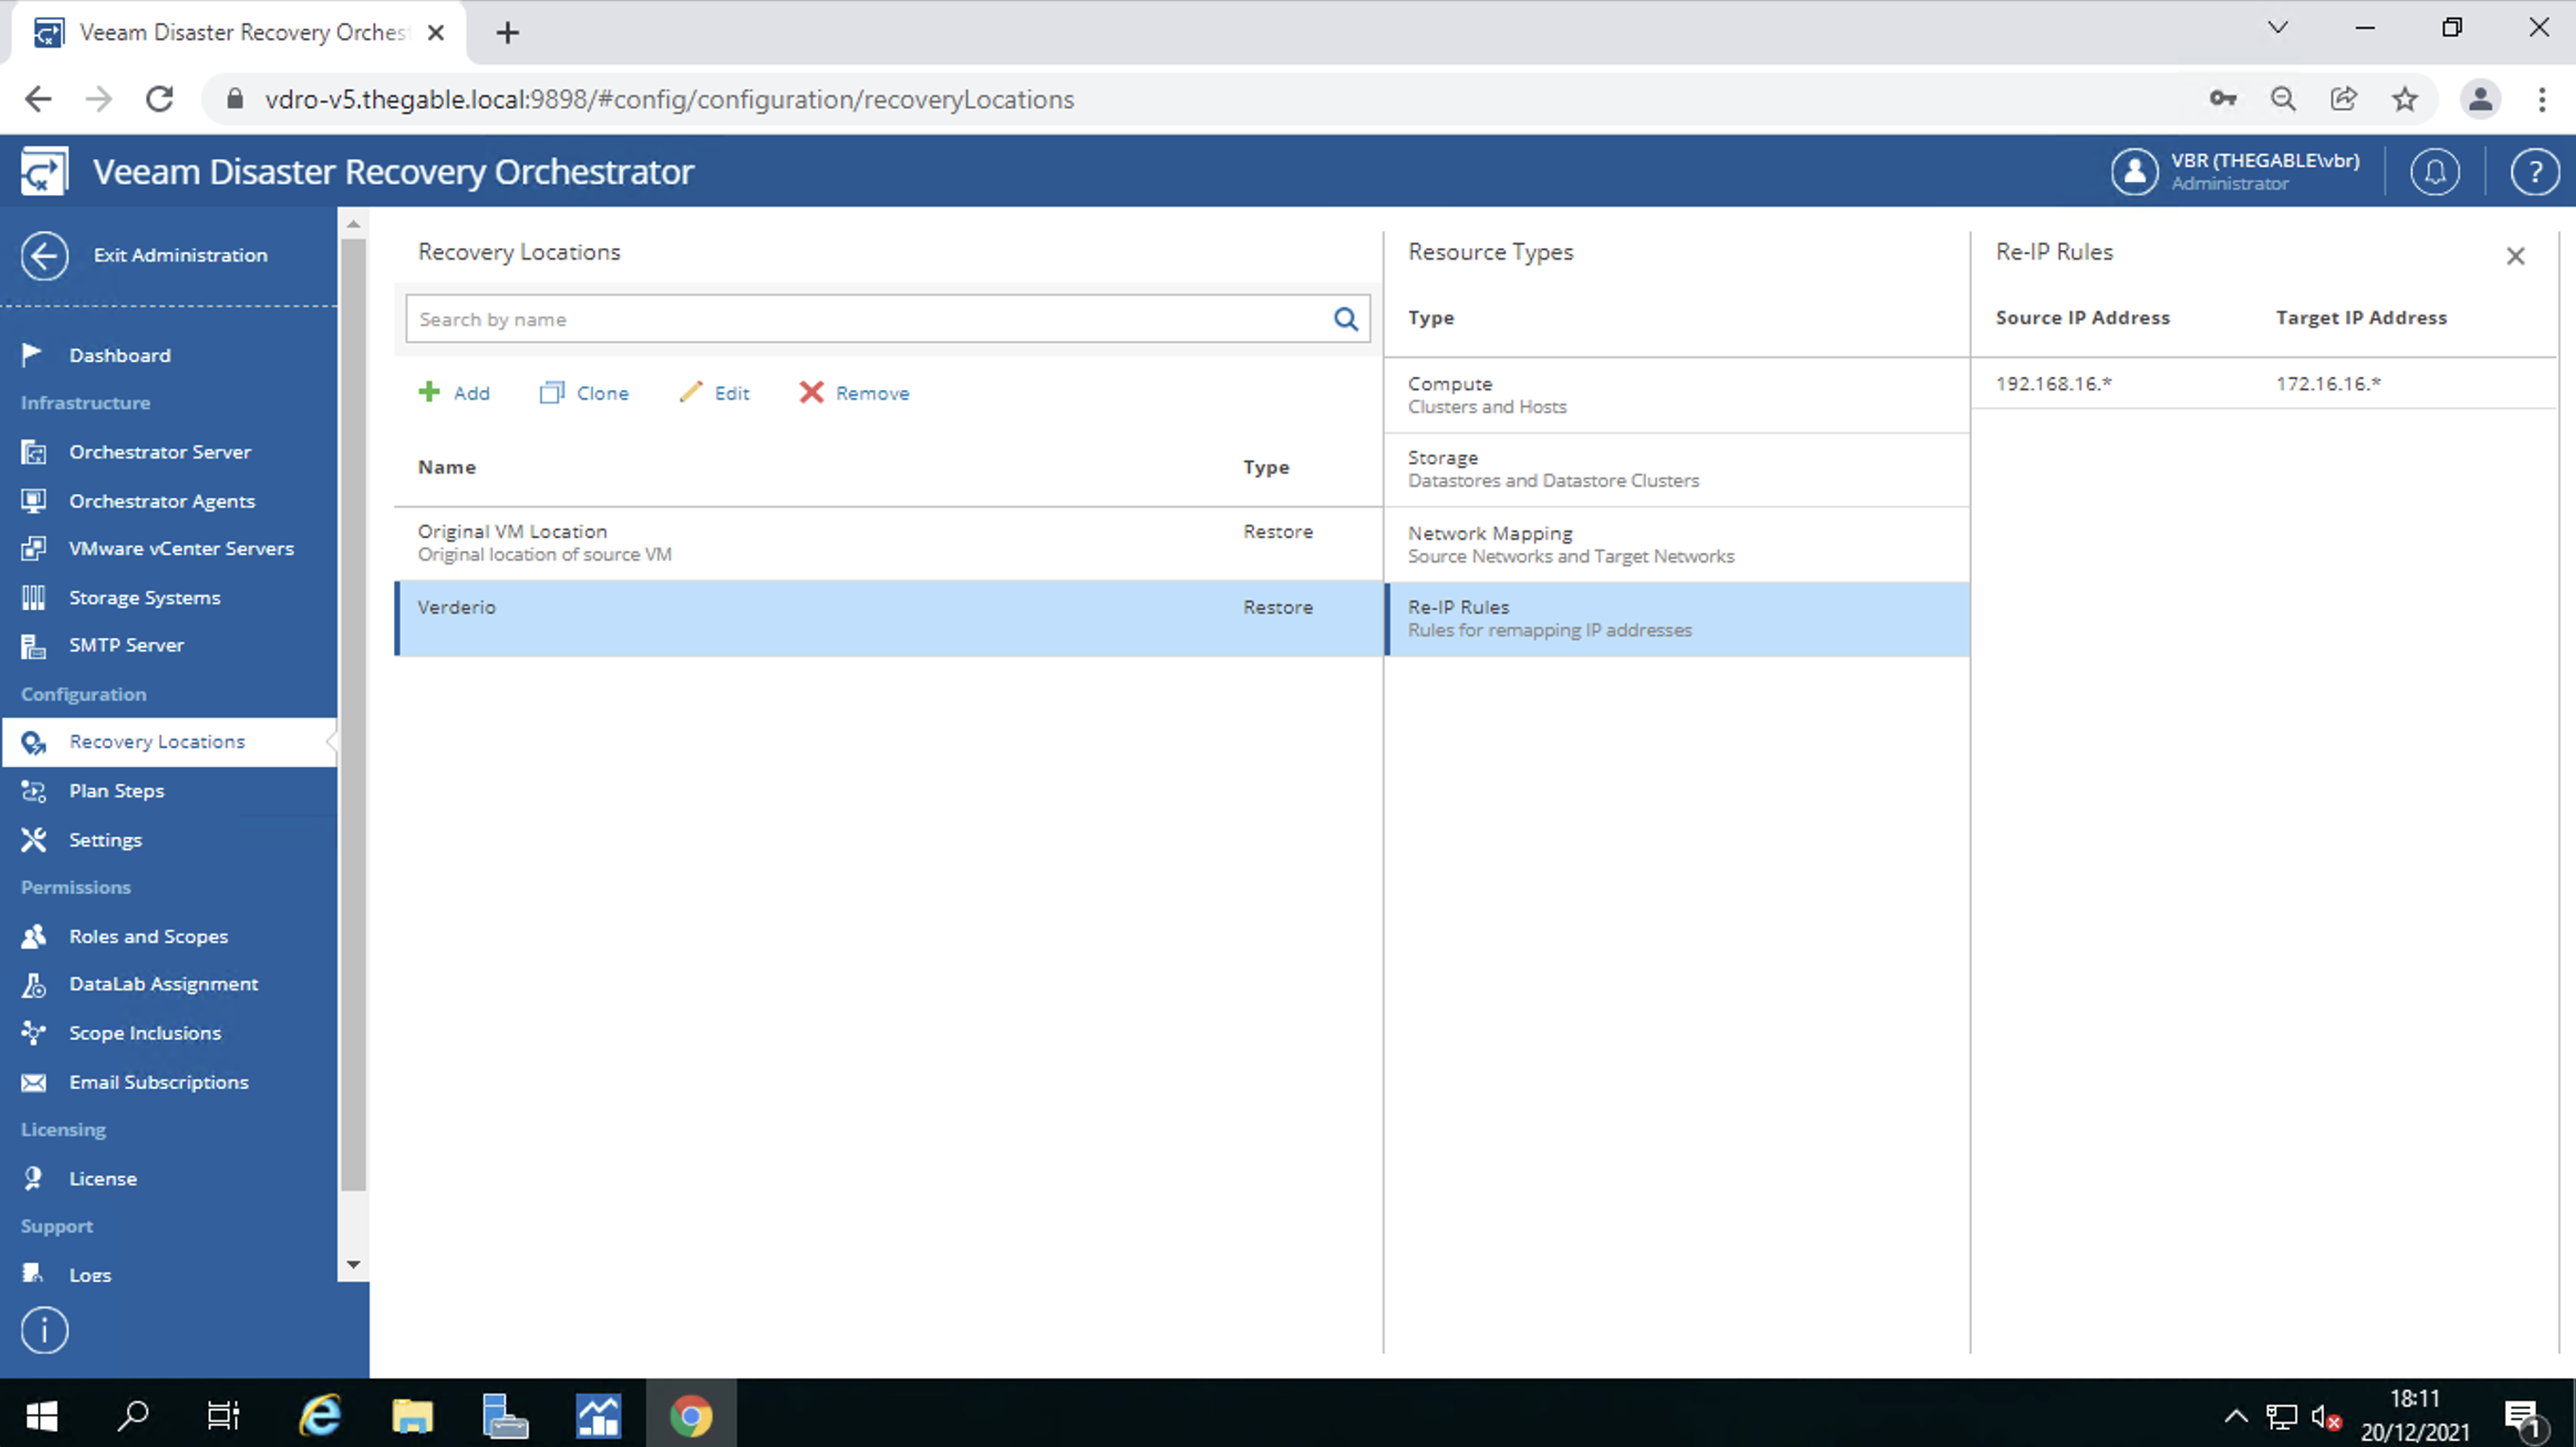 Image 9
In the third area are identified:
- User profiling. In simple terms, the VDrO allows you to create users capable of administering only specific workloads which are called “scopes” (image 10).
- The assignment of the DataLabs to the “scopes”. Remember that the DataLabs allow you to verify that the DR plan is usable (image 11).
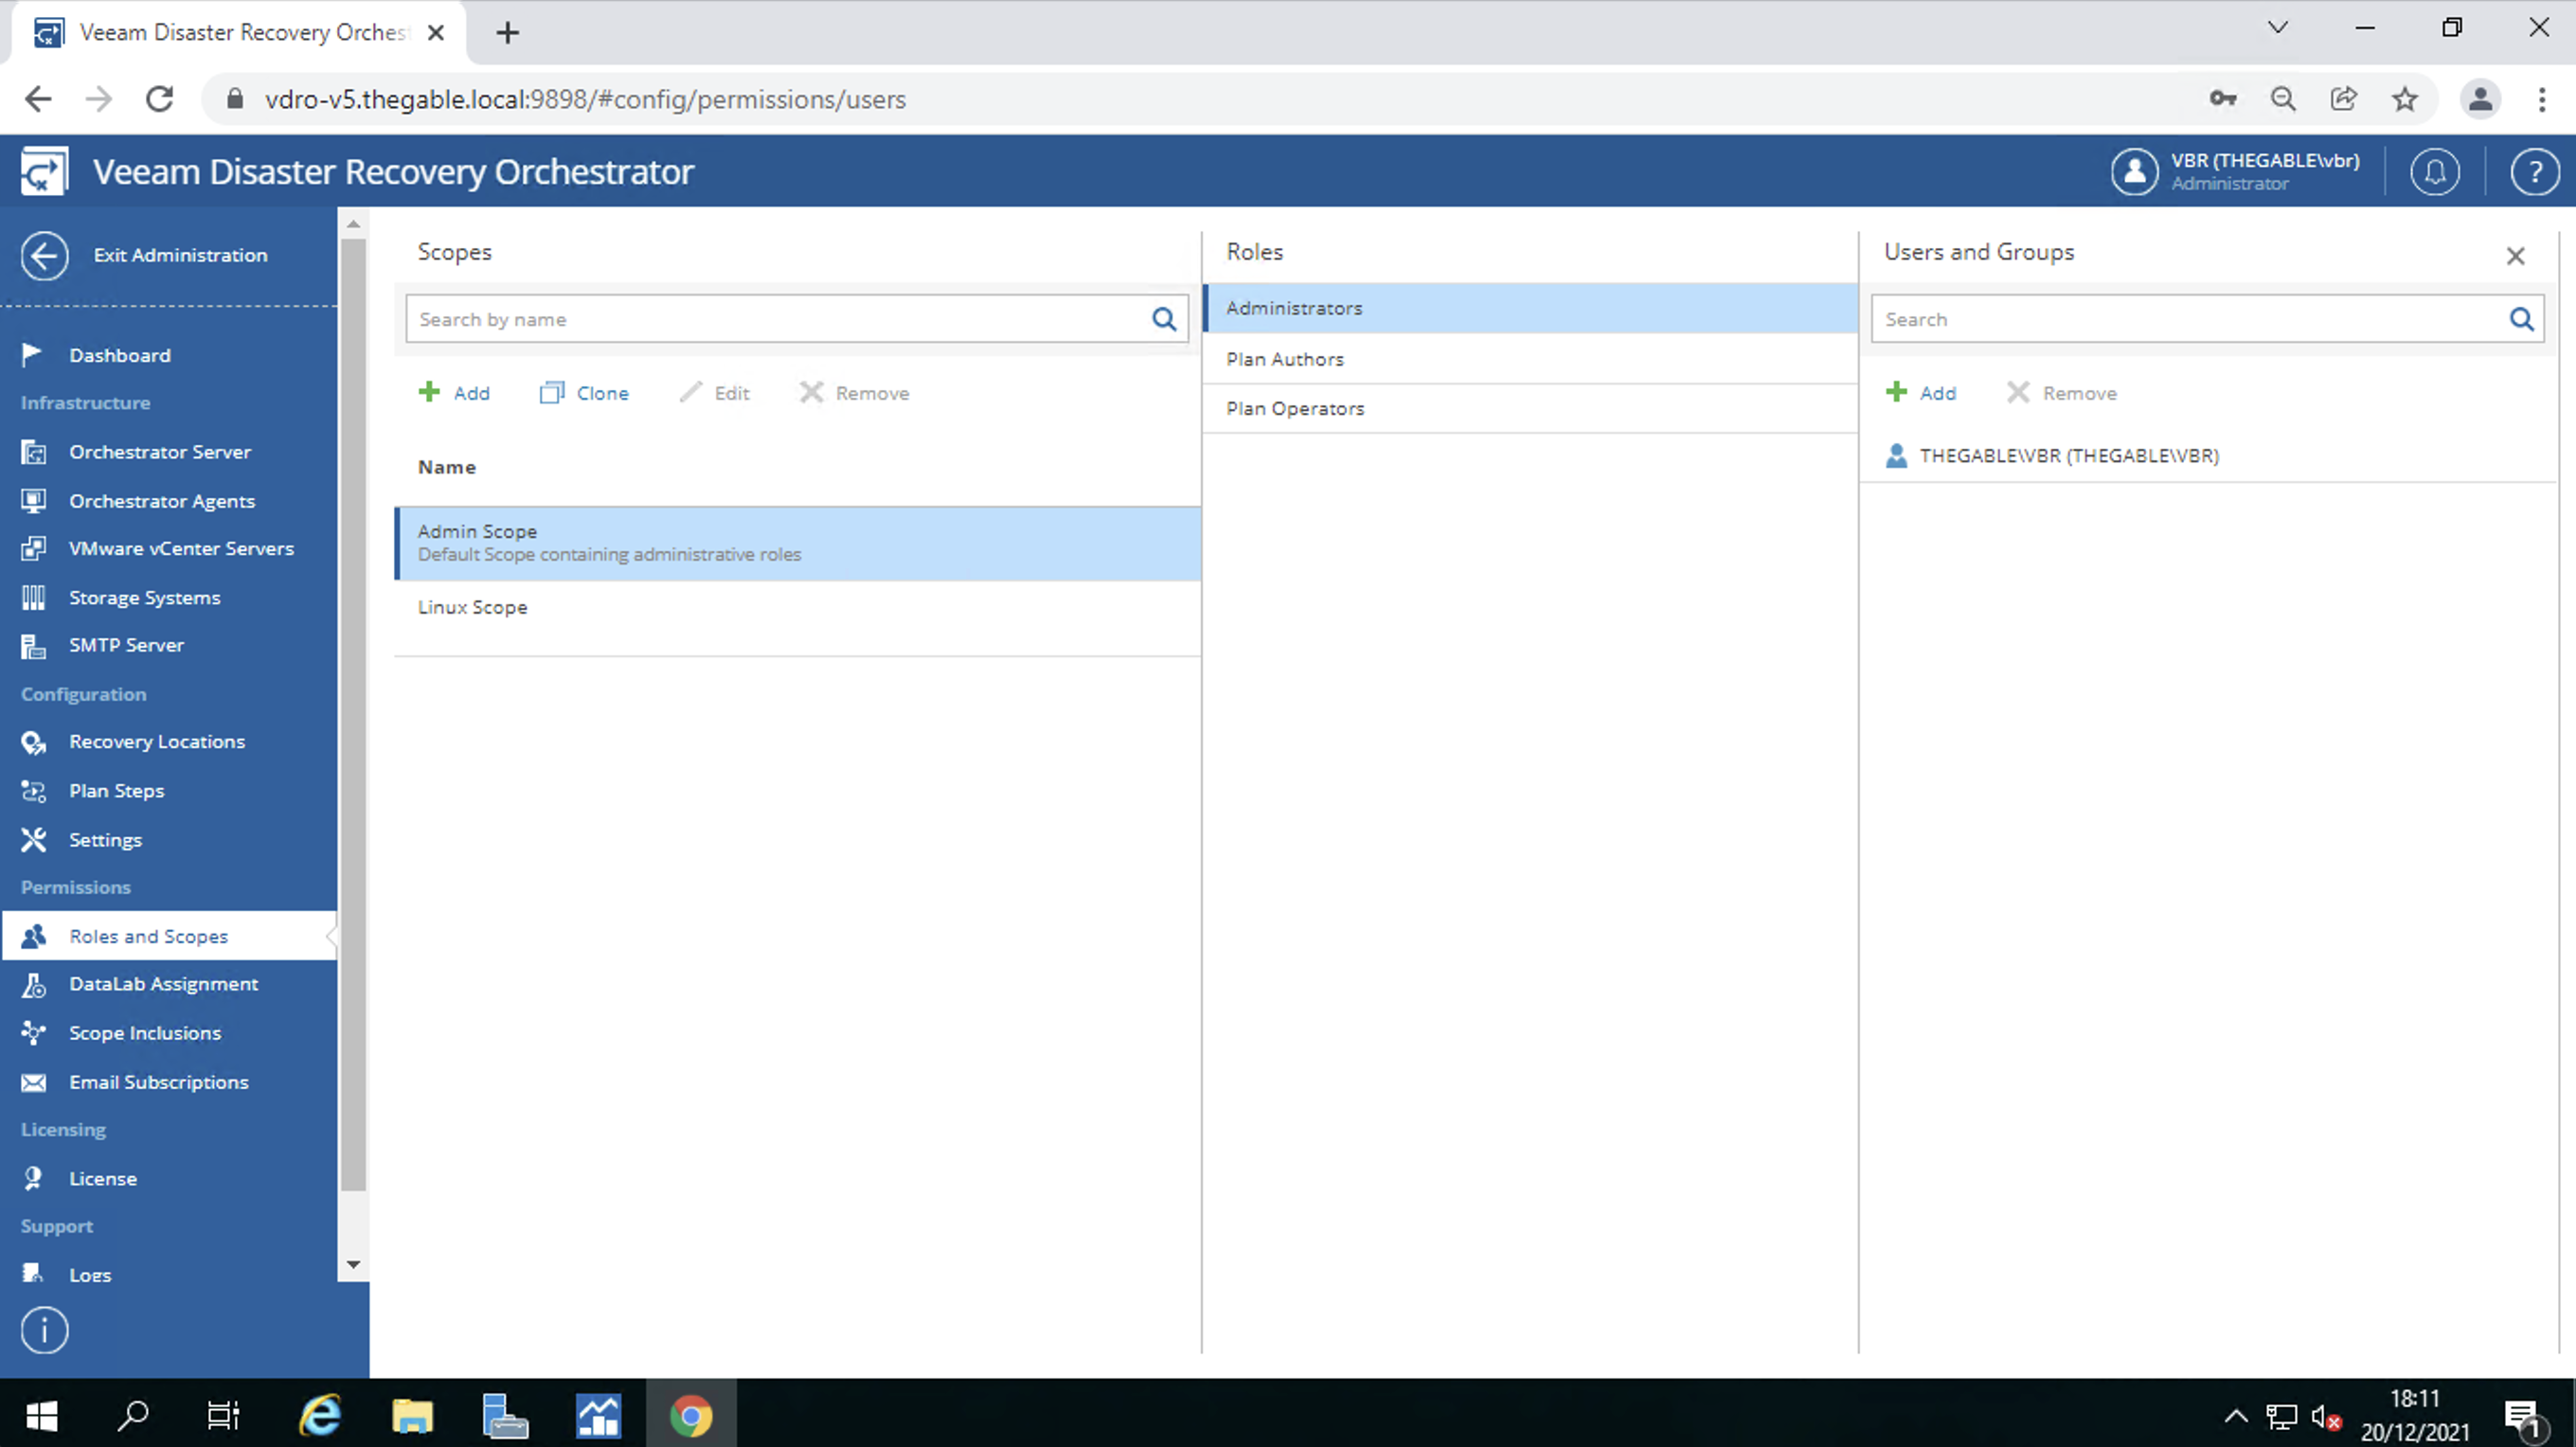 Image 10
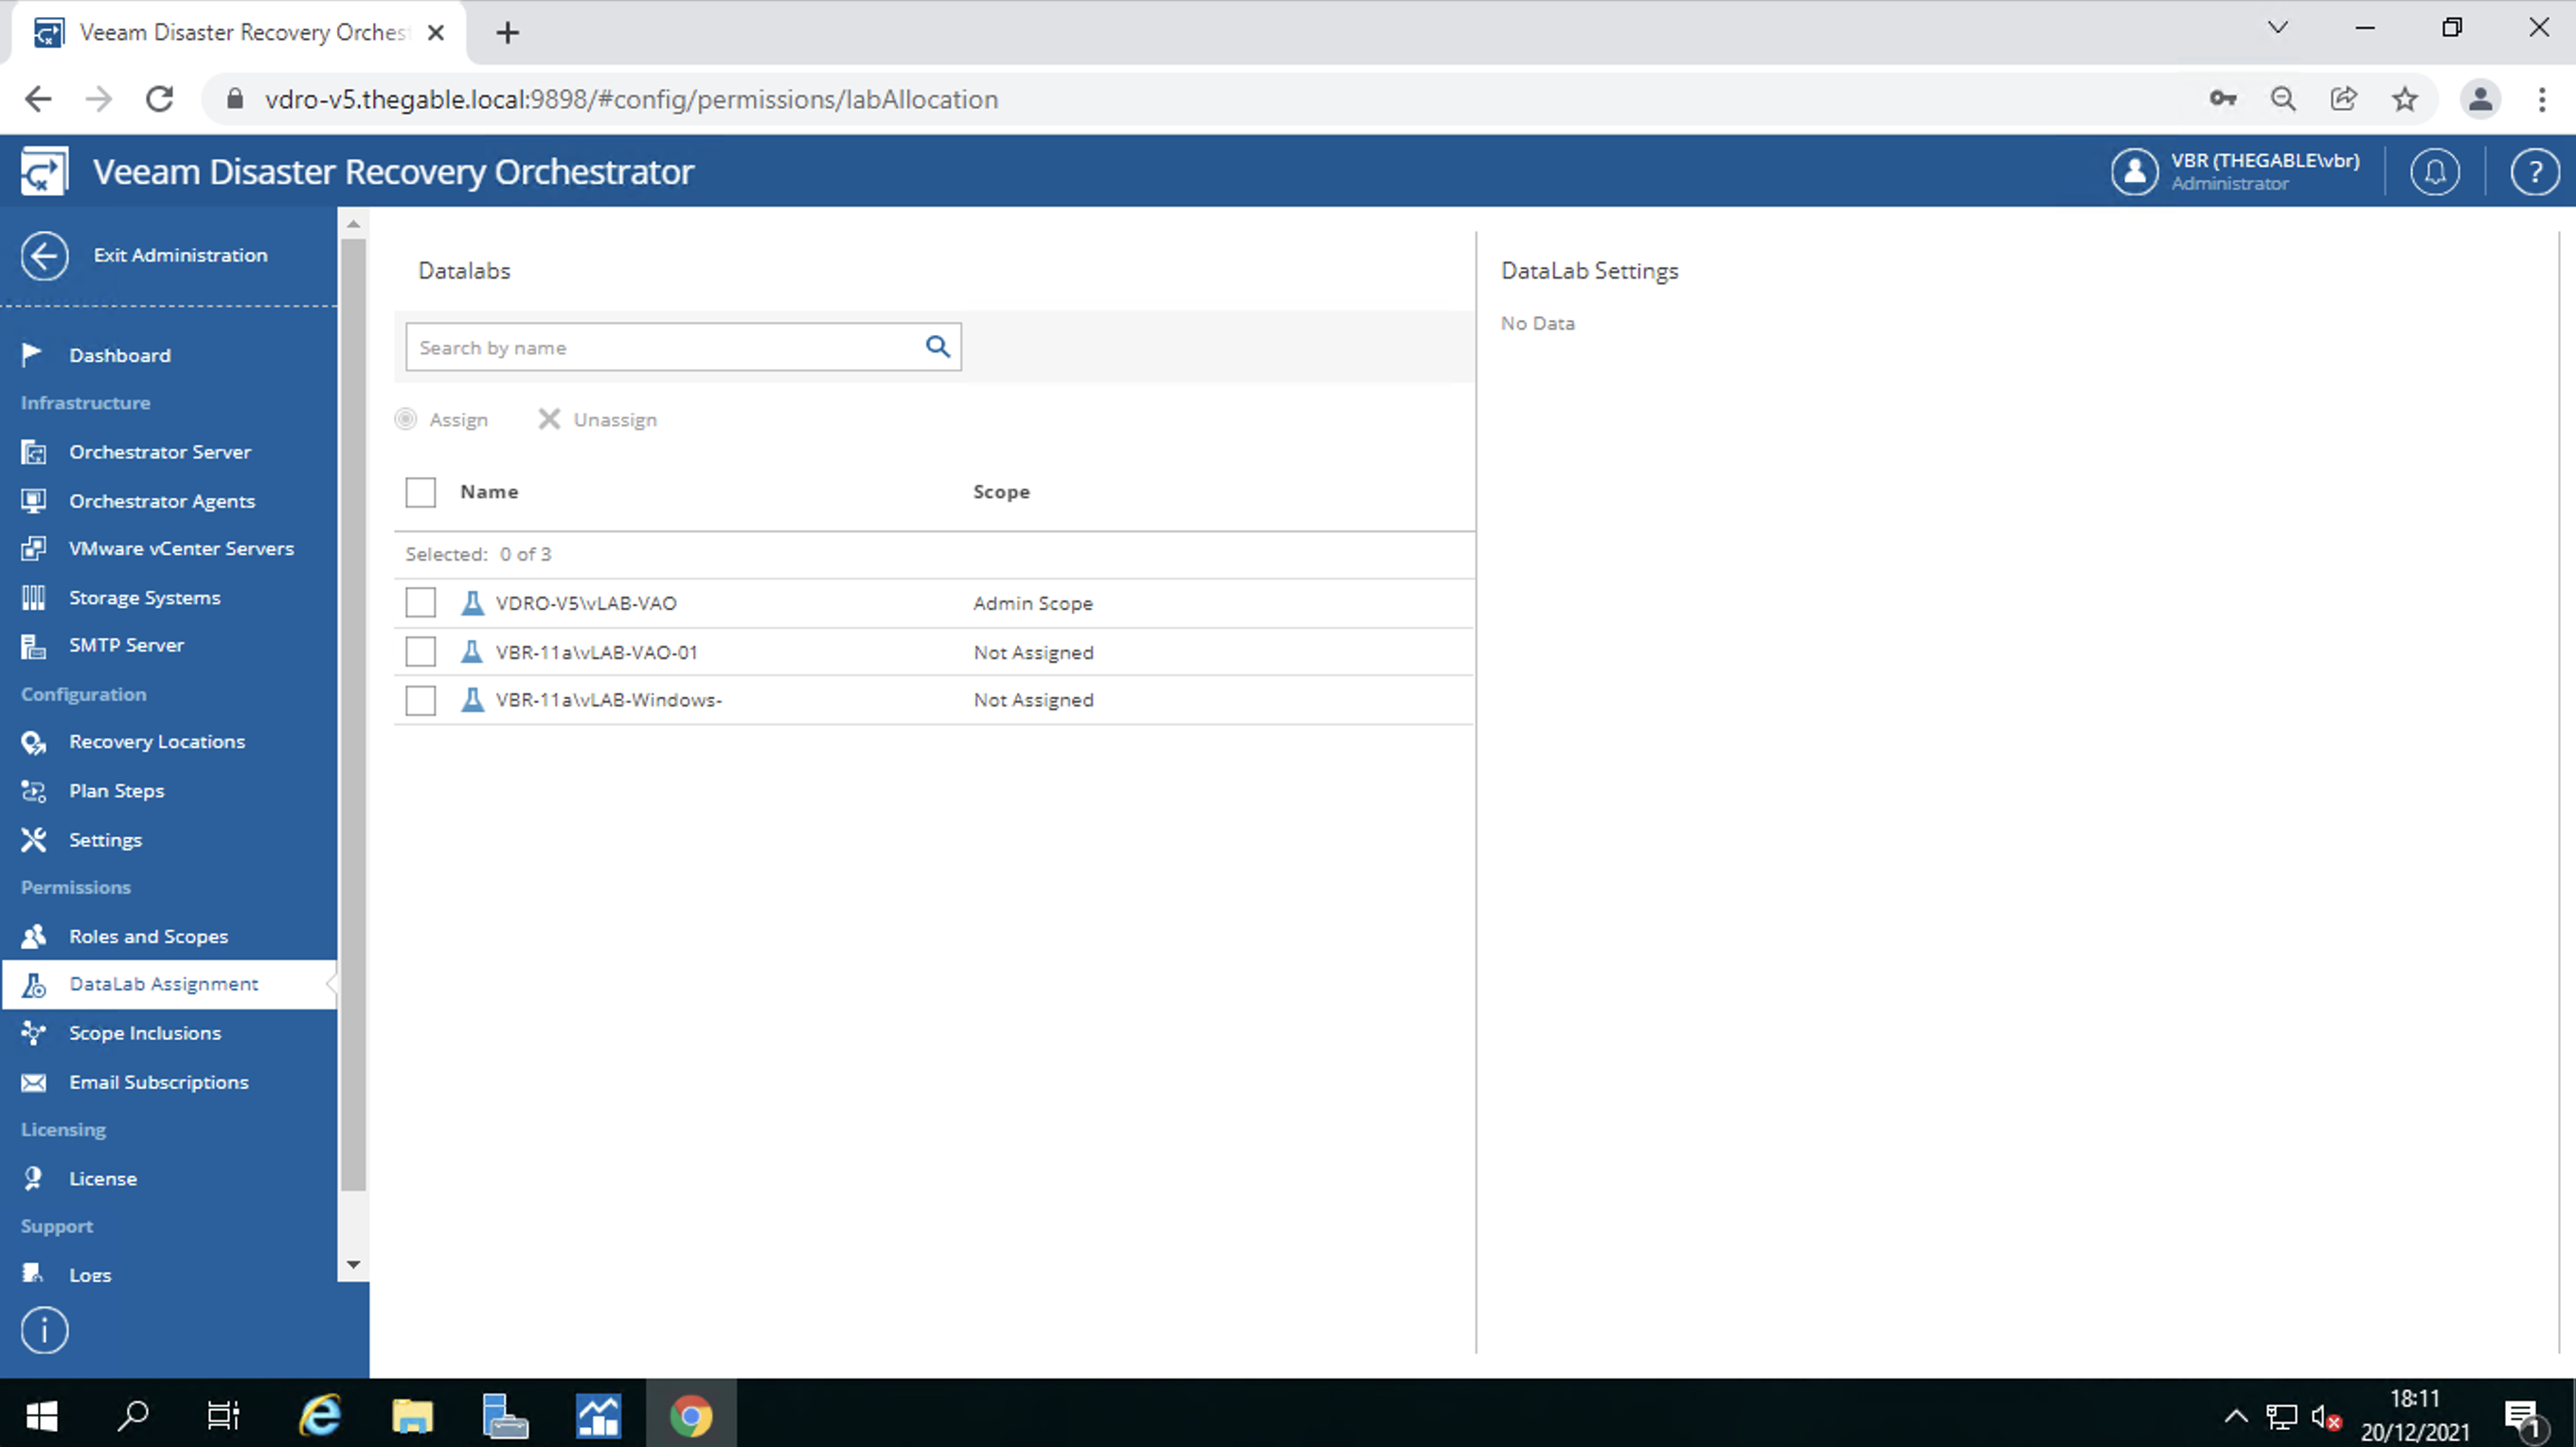 Image 11
The last configuration allows you to link the group of VMs replicated or saved via backup (called VM Groups) to the users’ scopes.
For example, image 12 shows that the VM Group “B&R Job – Replication VAO Win 10” is assigned (included) to both the Admin and Linux scopes.
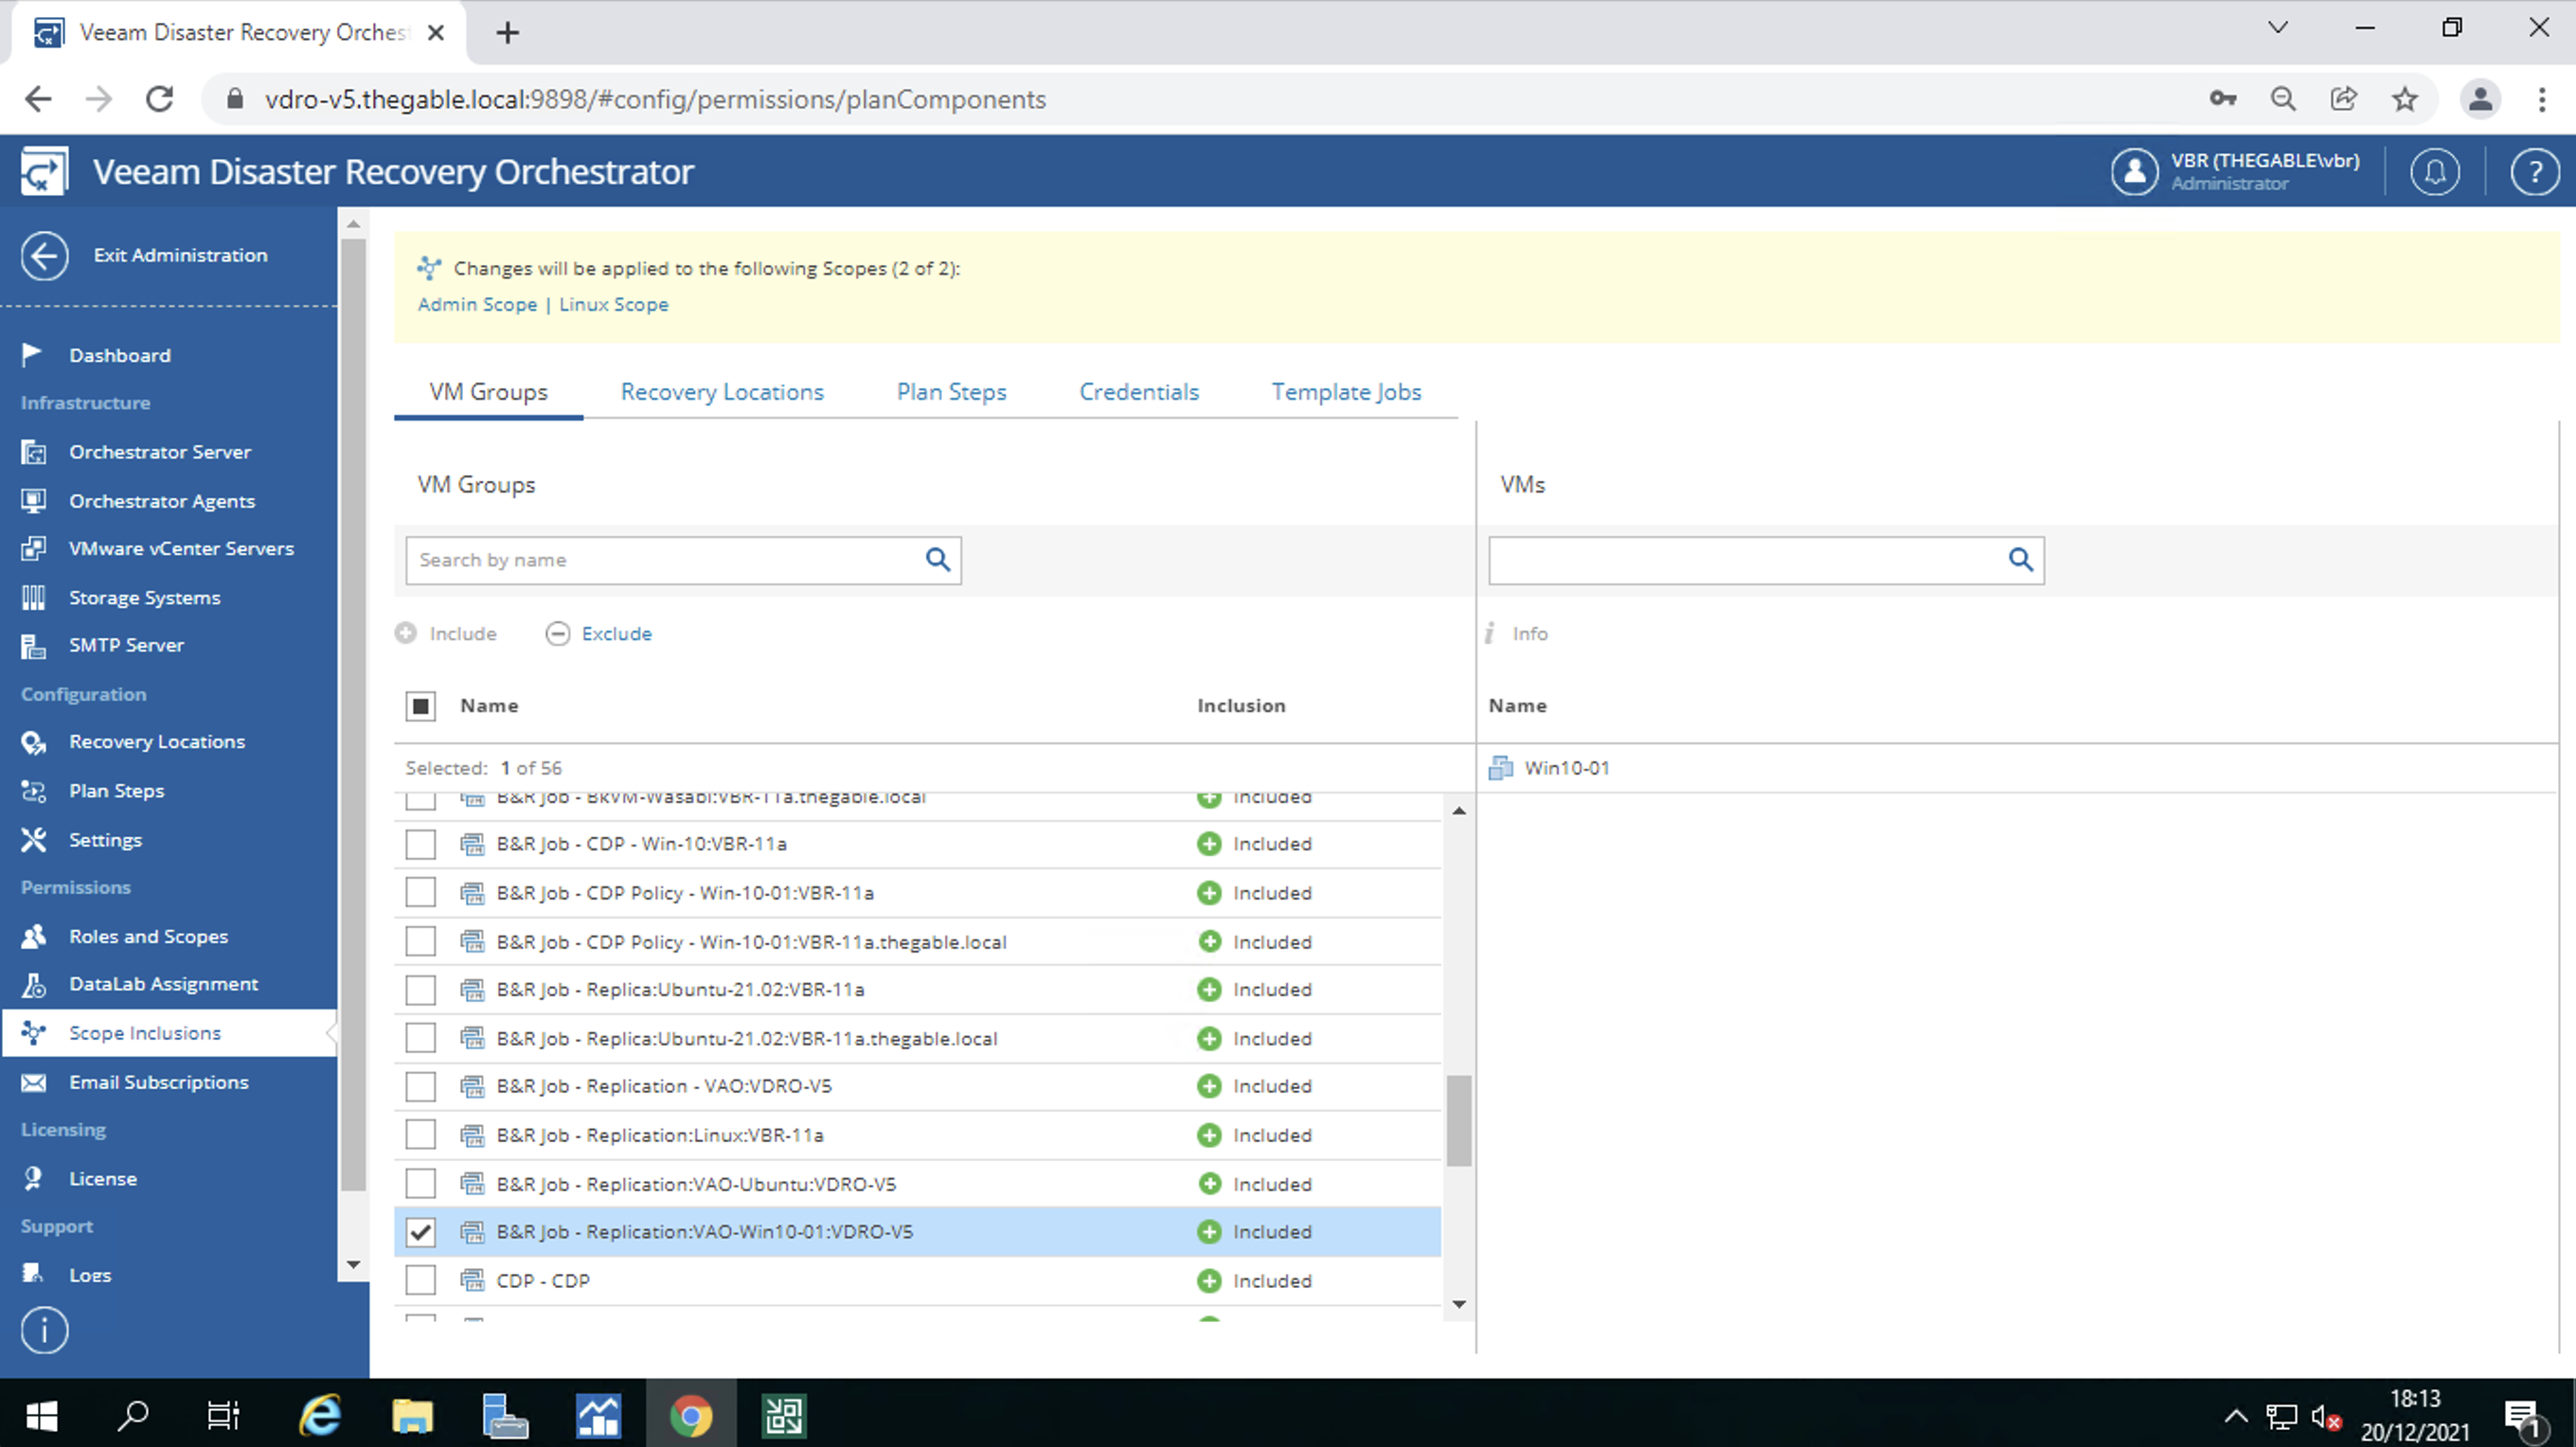 Image 10
In the next and last article, we will find out how to create and verify a DR plan.
See you soon