
We have arrived at the latest article on Veeam Disaster Recovery Orchestrator version 5.
In this last part, we will concentrate on the efforts made previously and available on this site, to implement the Disaster Recovery Orchestration plan.
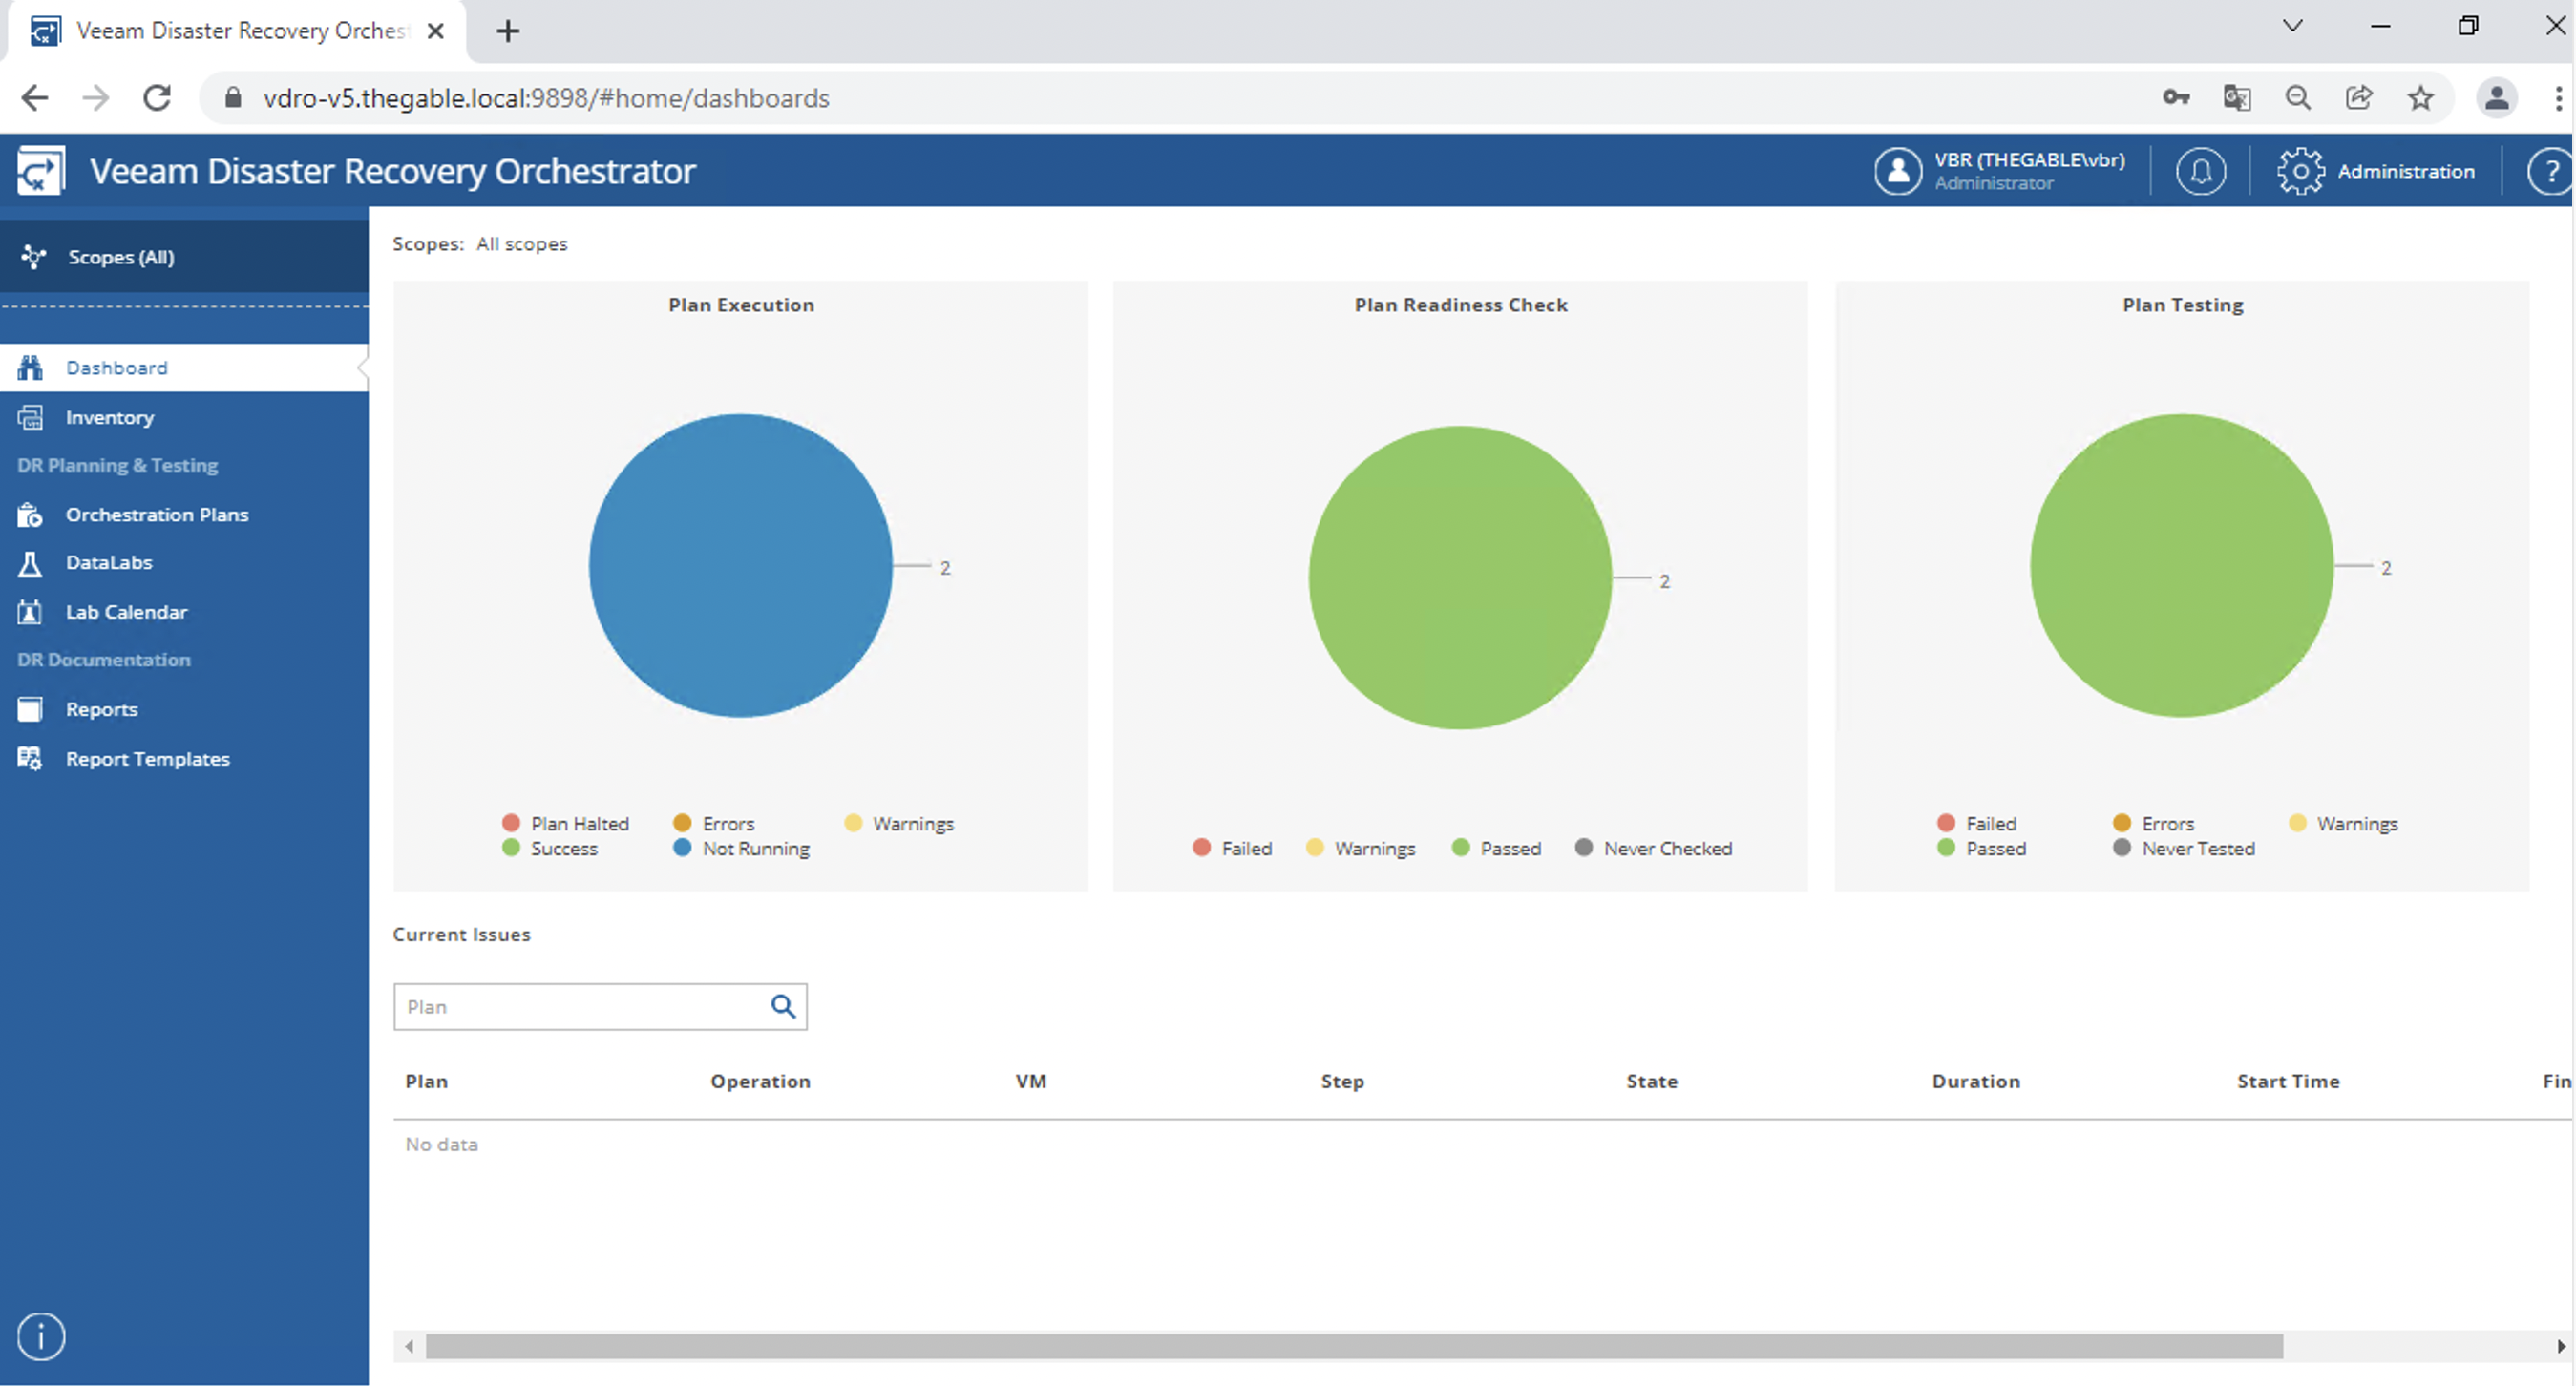
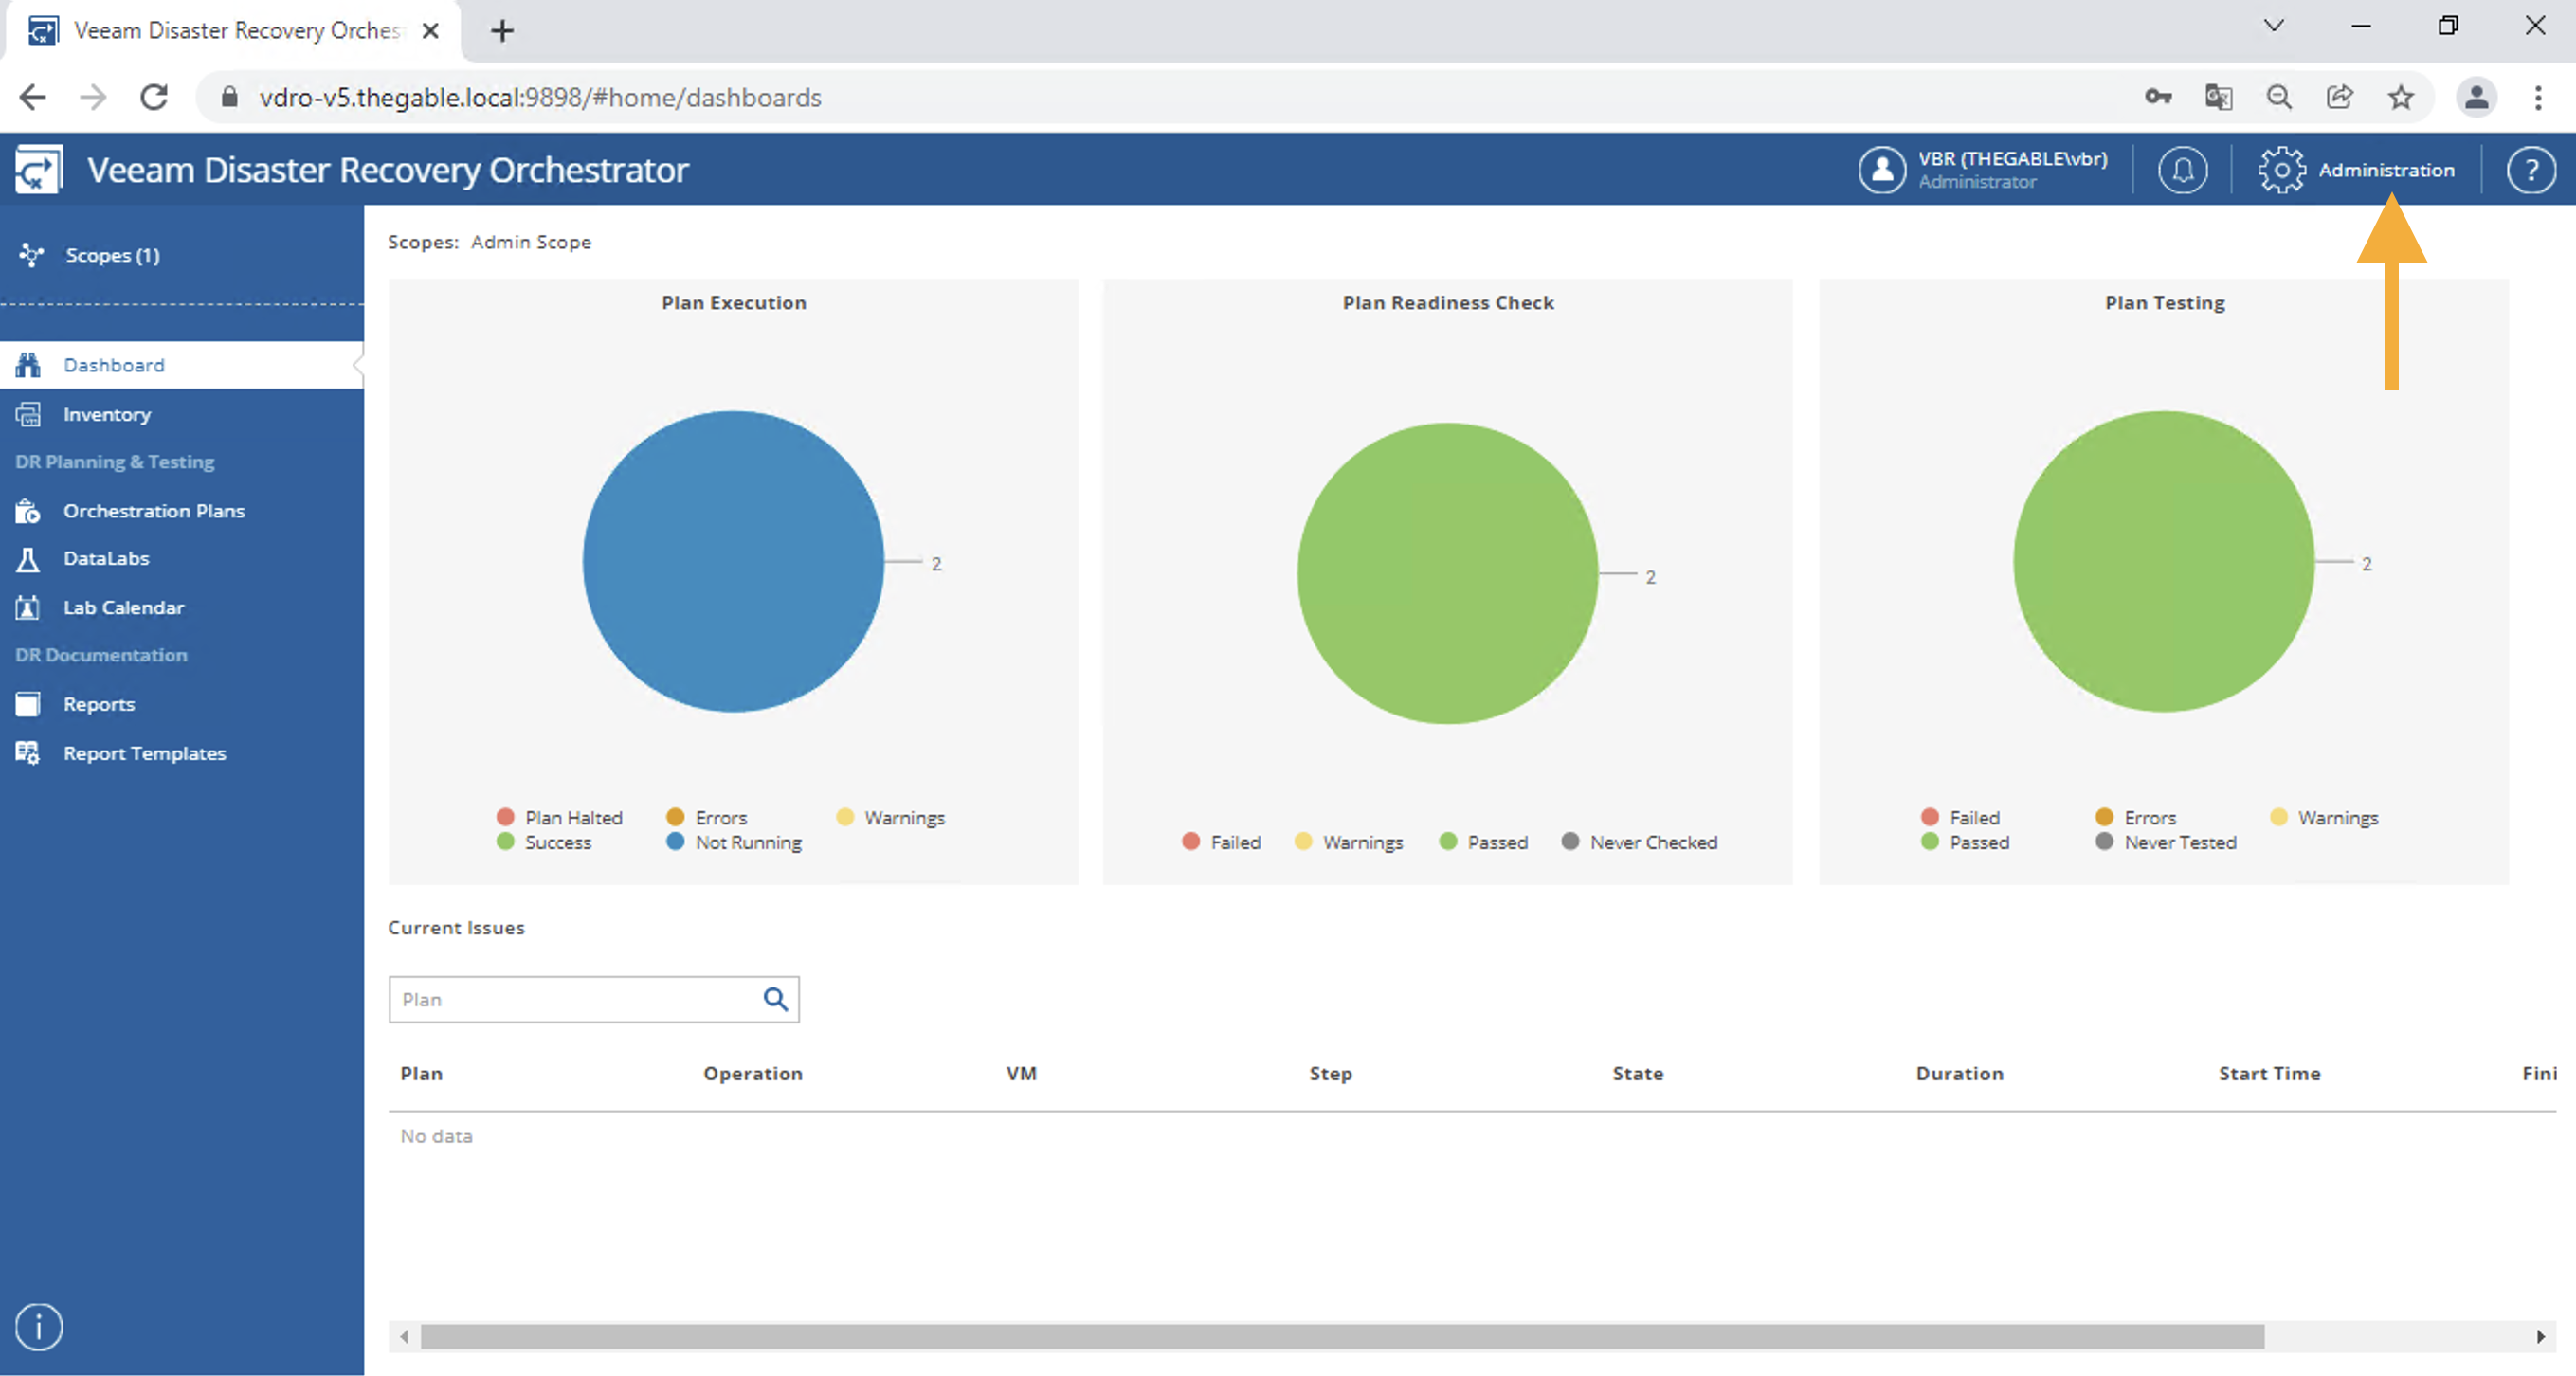
After logging in, the dashboard illustrates the status of the completed plans (image 1).
 Picture 1
Note that, unlike the previous VDrO version, it is possible to filter planes based on “scopes” (image 2).
 picture 2
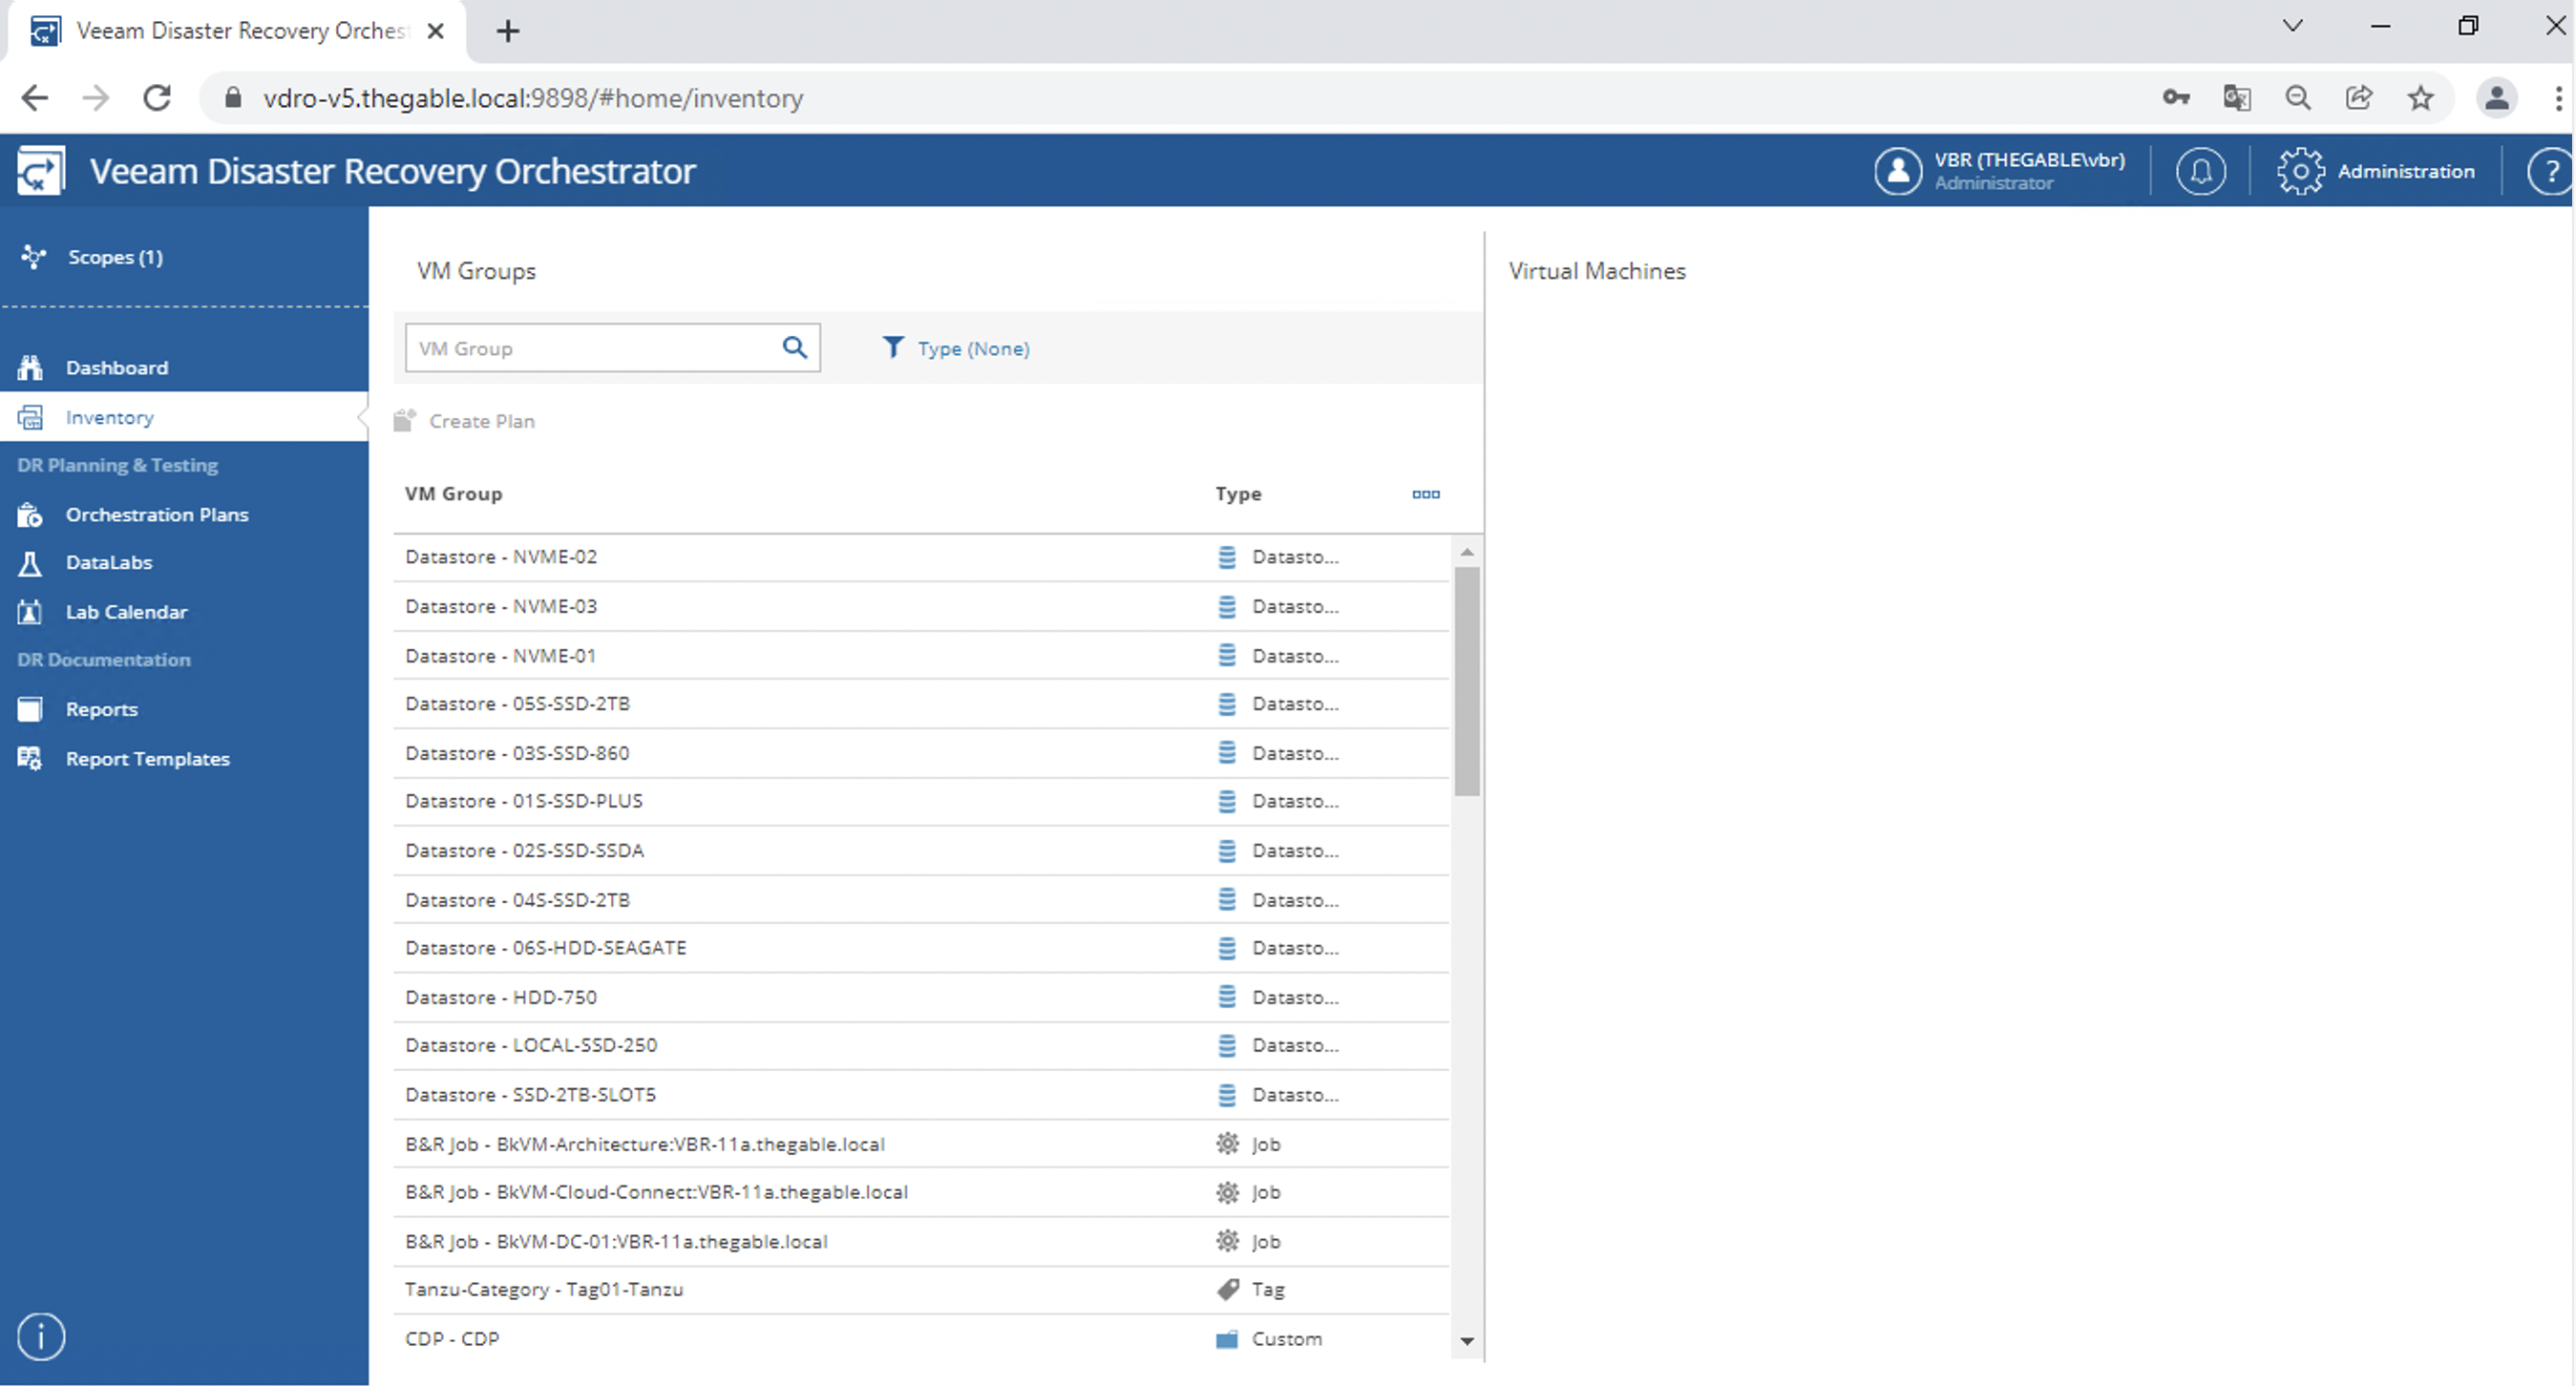
A second and very useful novelty of version 5 is the presence of the inventory items (image 3), where the VM Groups are reported.
This option immediately verifies that in the chosen “scope” there is the group of VMs that will implement the DR plan.
 Picture 3
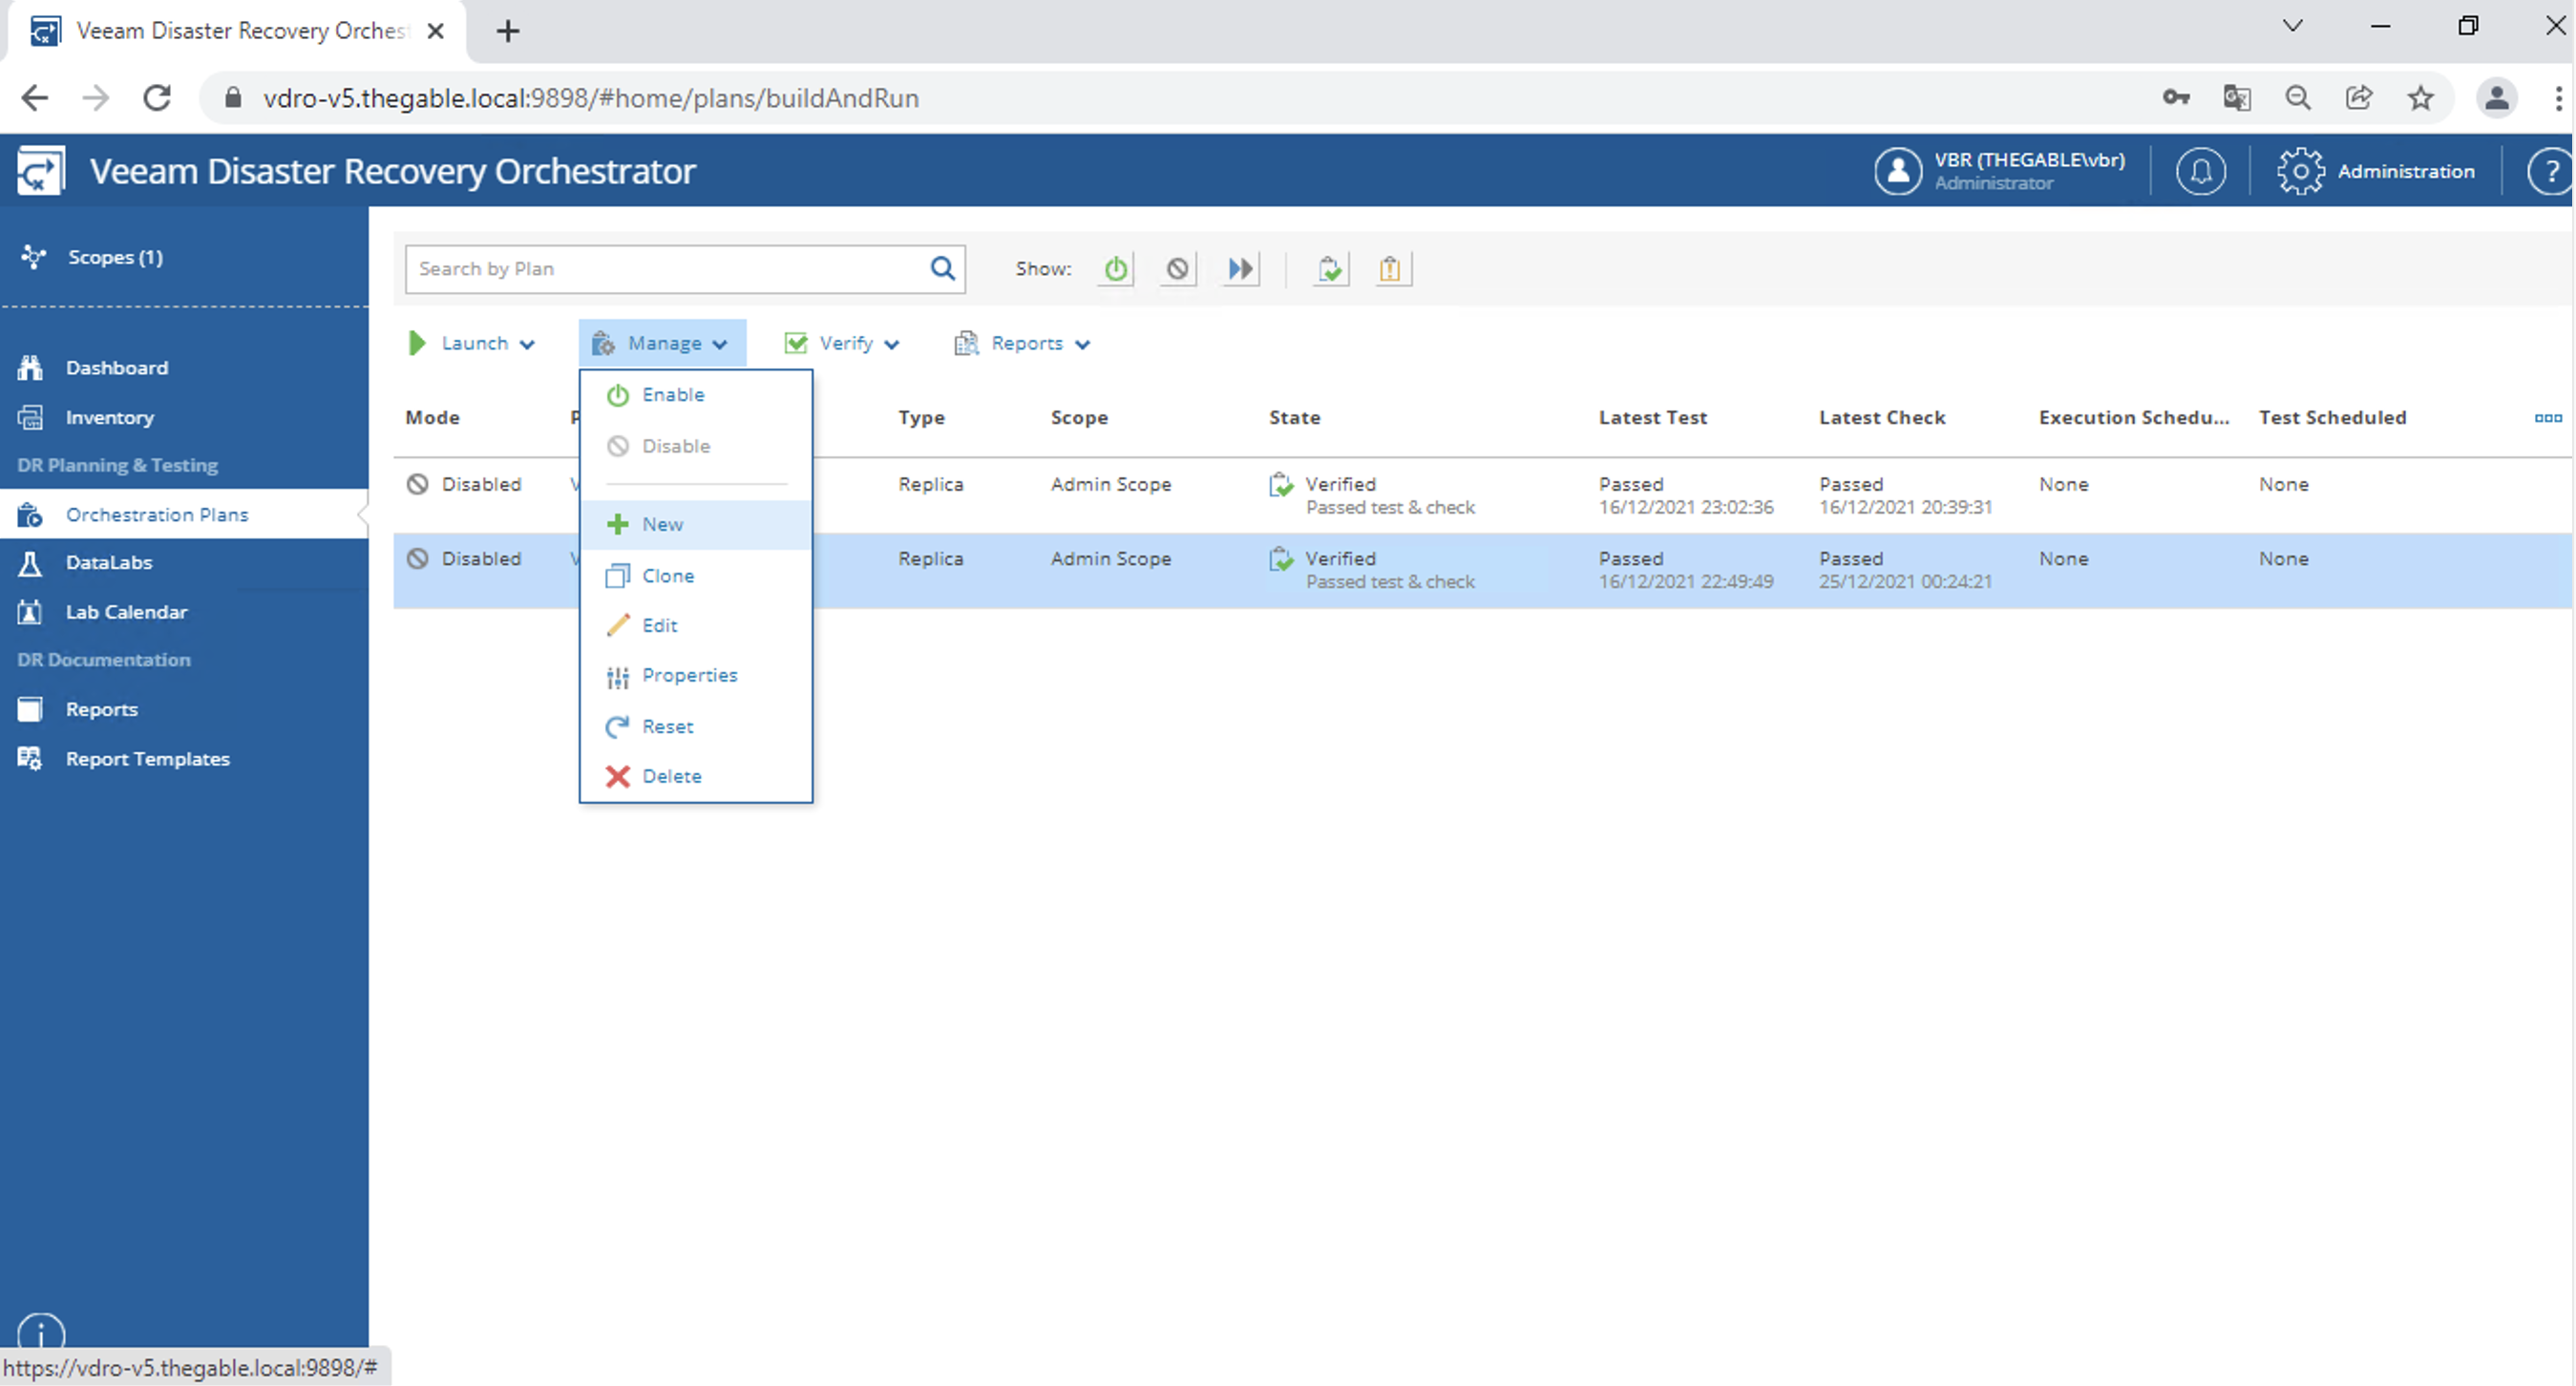
Image 4 shows the details of the Orchestration plans already created.
 Picture 4
Let’s see now how to create a plan:
From the manage, menu selects the New item (image 5).
 Picture 5
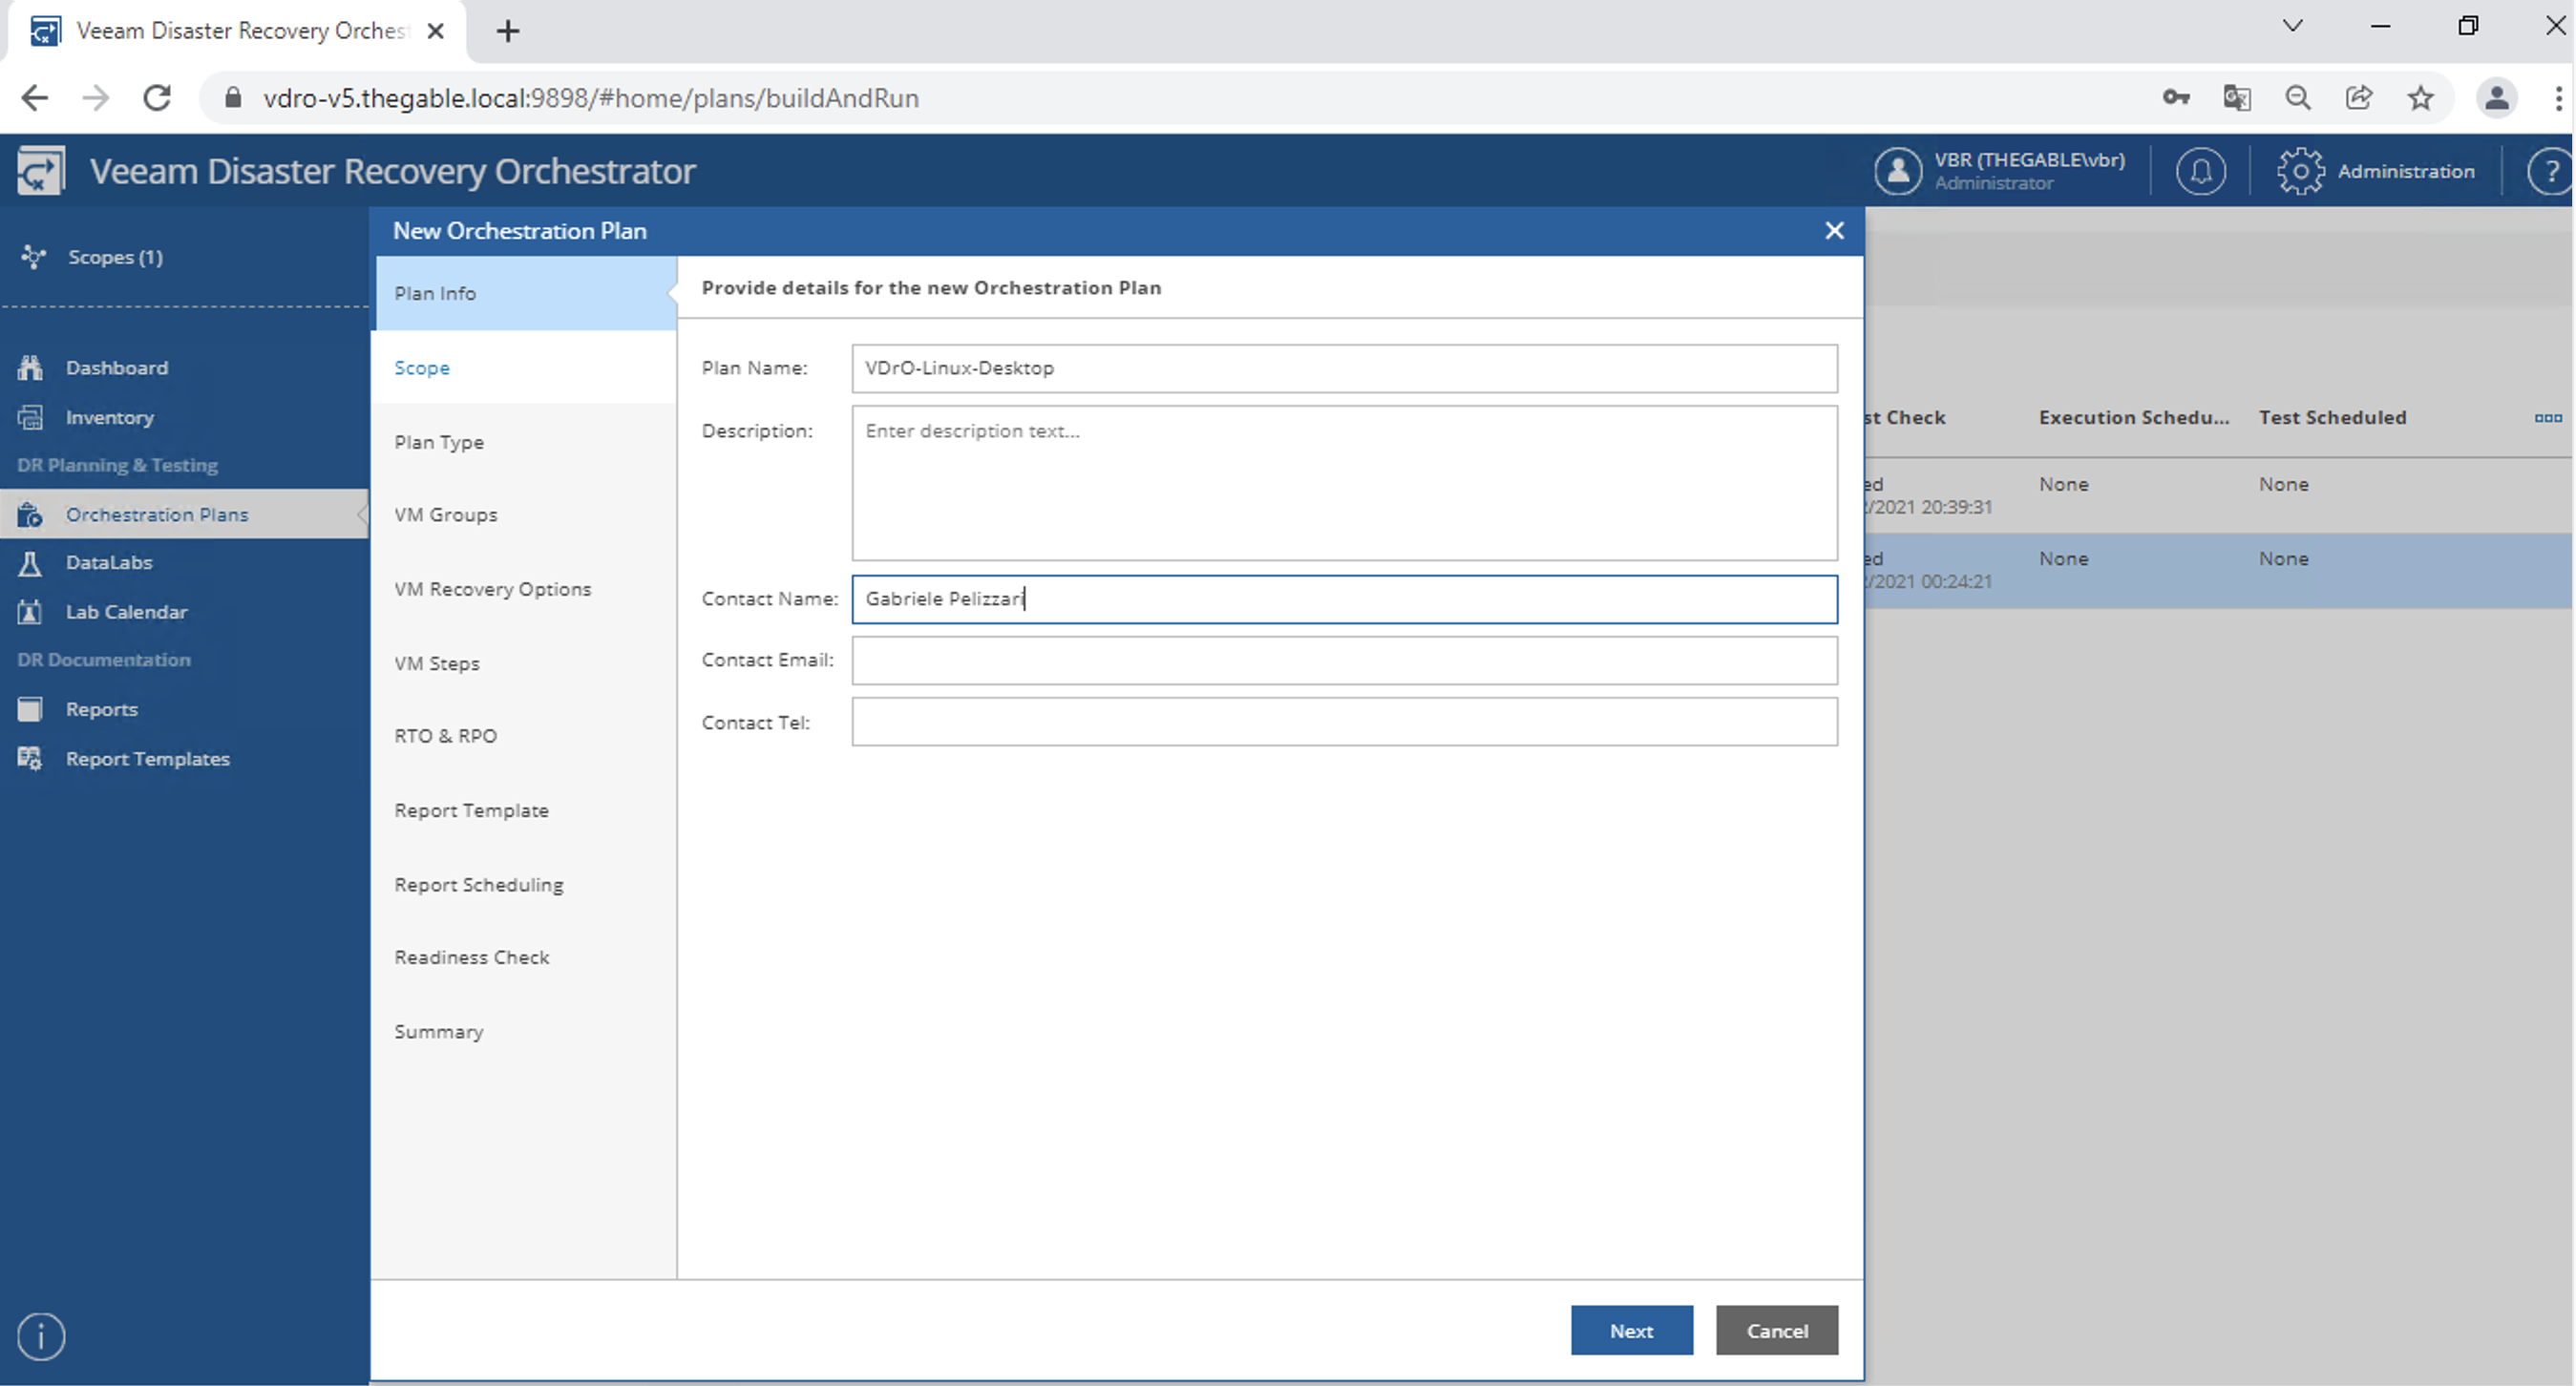
And continuing with the wizard, we enter a name (image 6), the scope (image 7), and the type of floor (image 8).
 Picture 6
 Picture 7
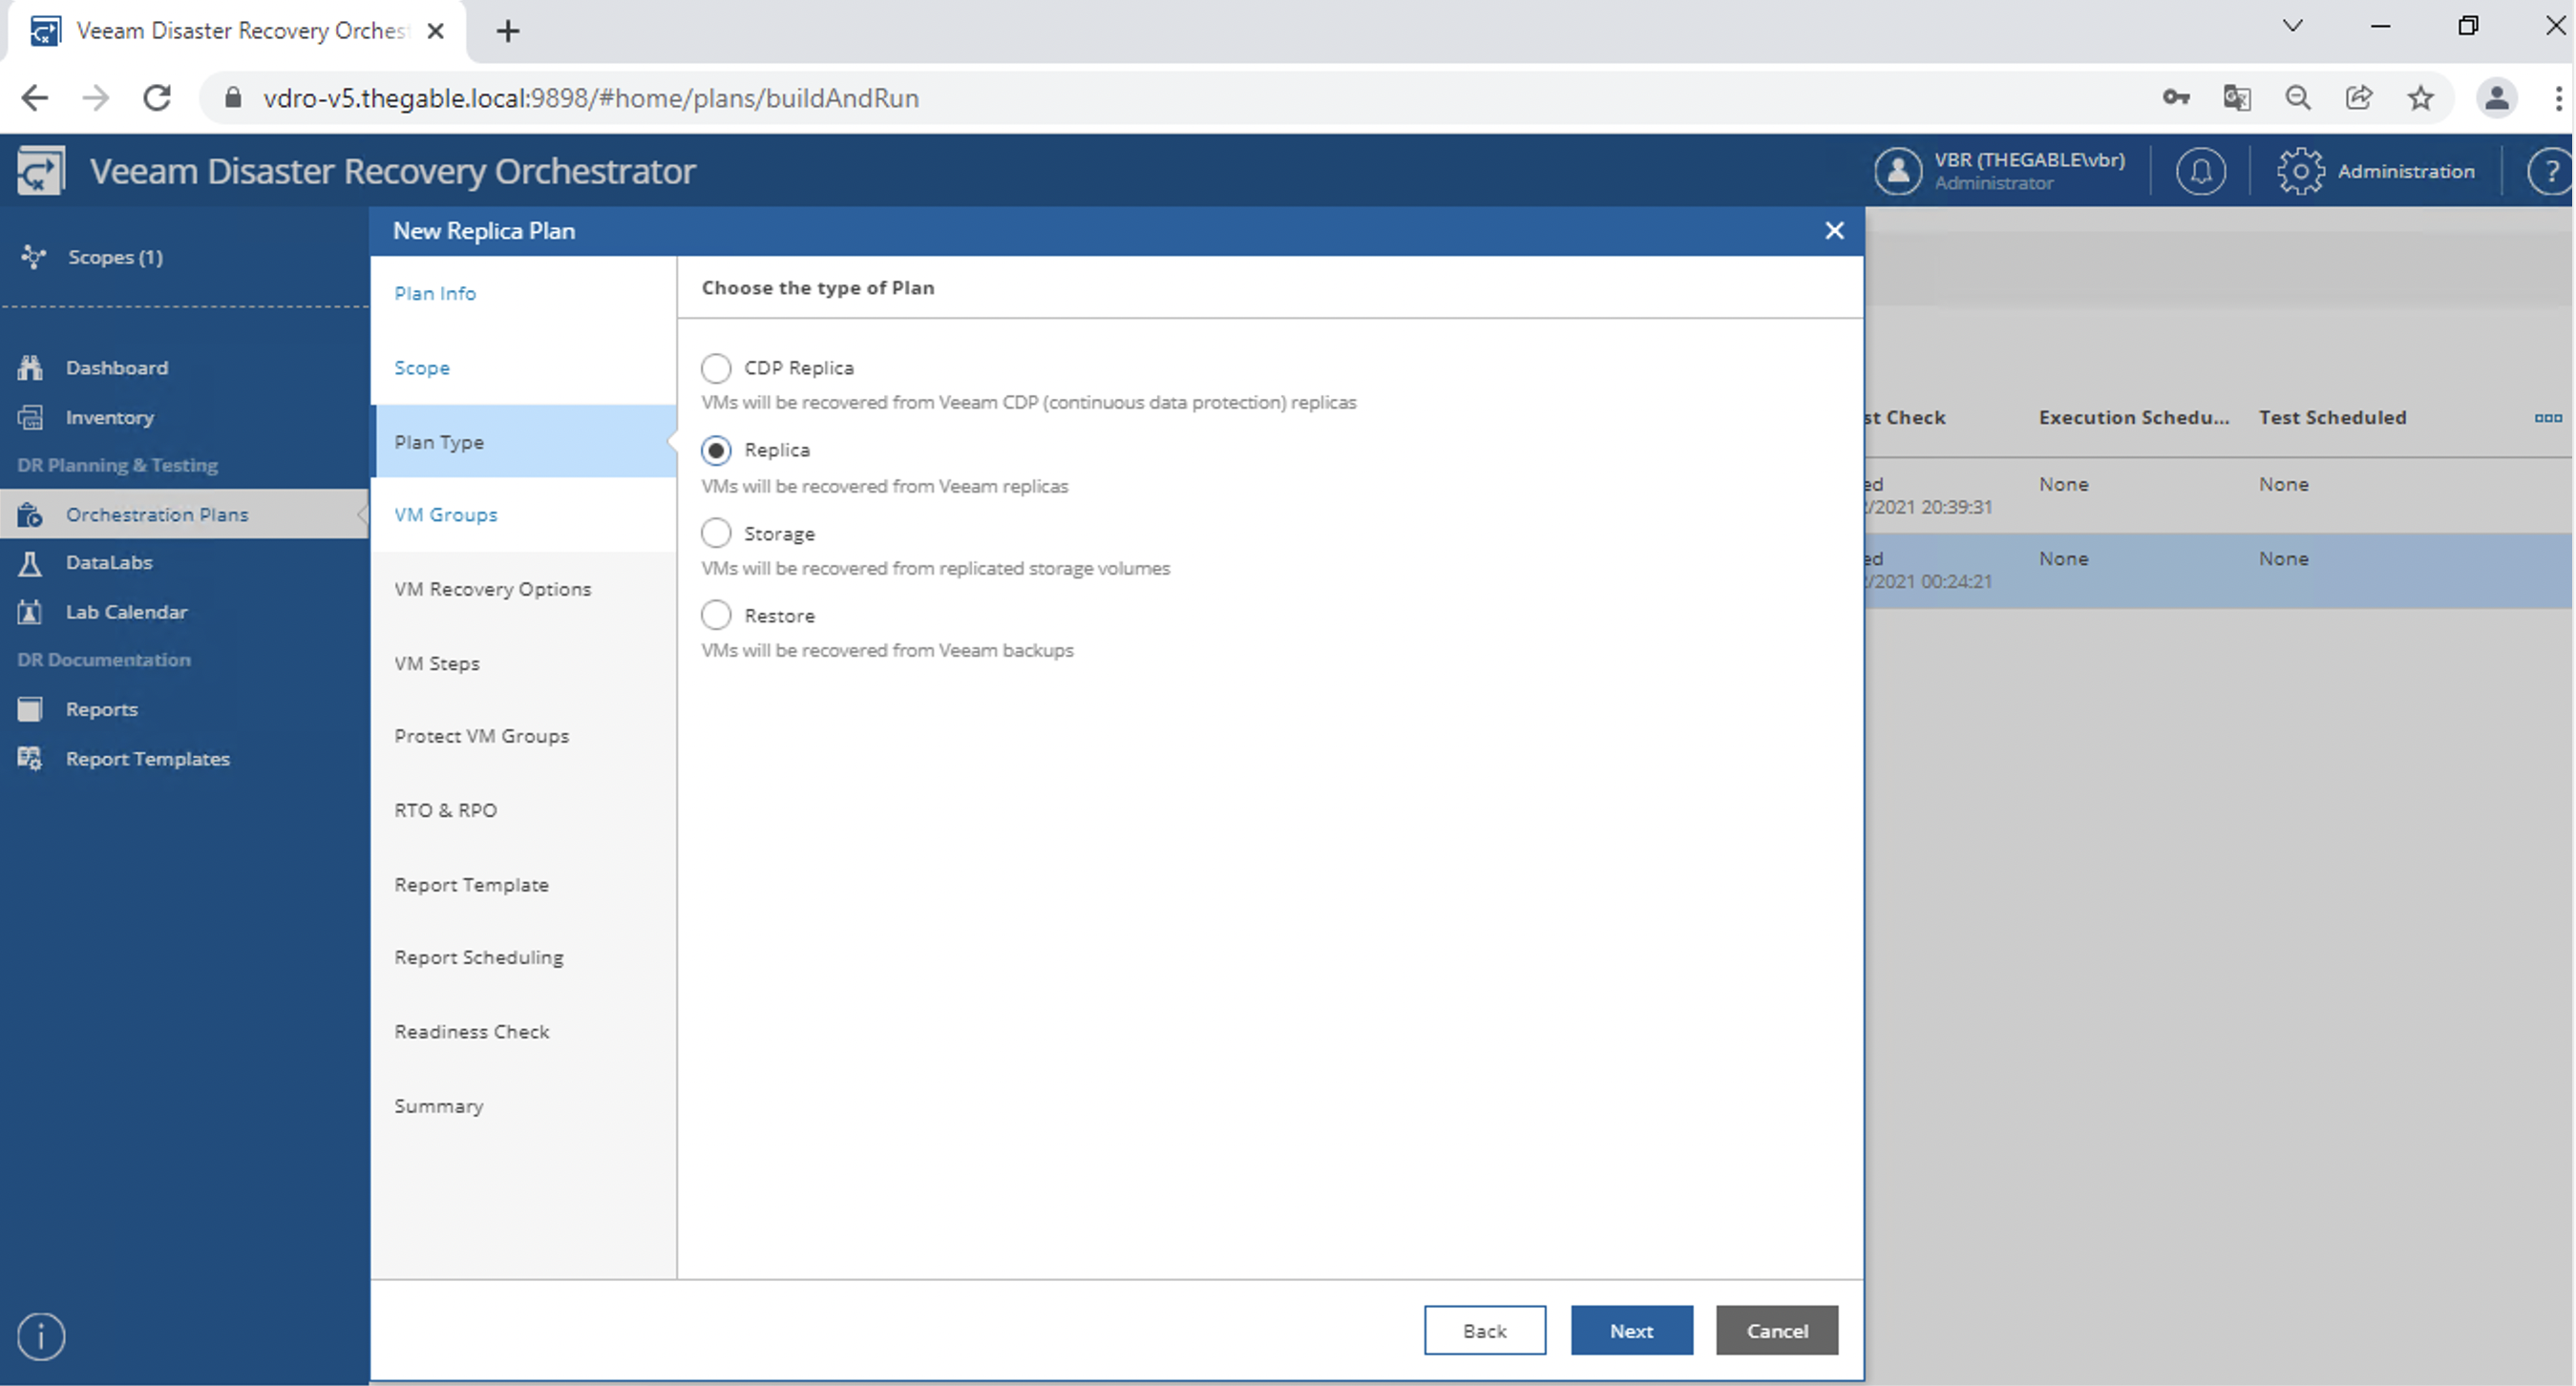 Image 8
After adding the VM group to be orchestrated (image 9, 10 and 11)
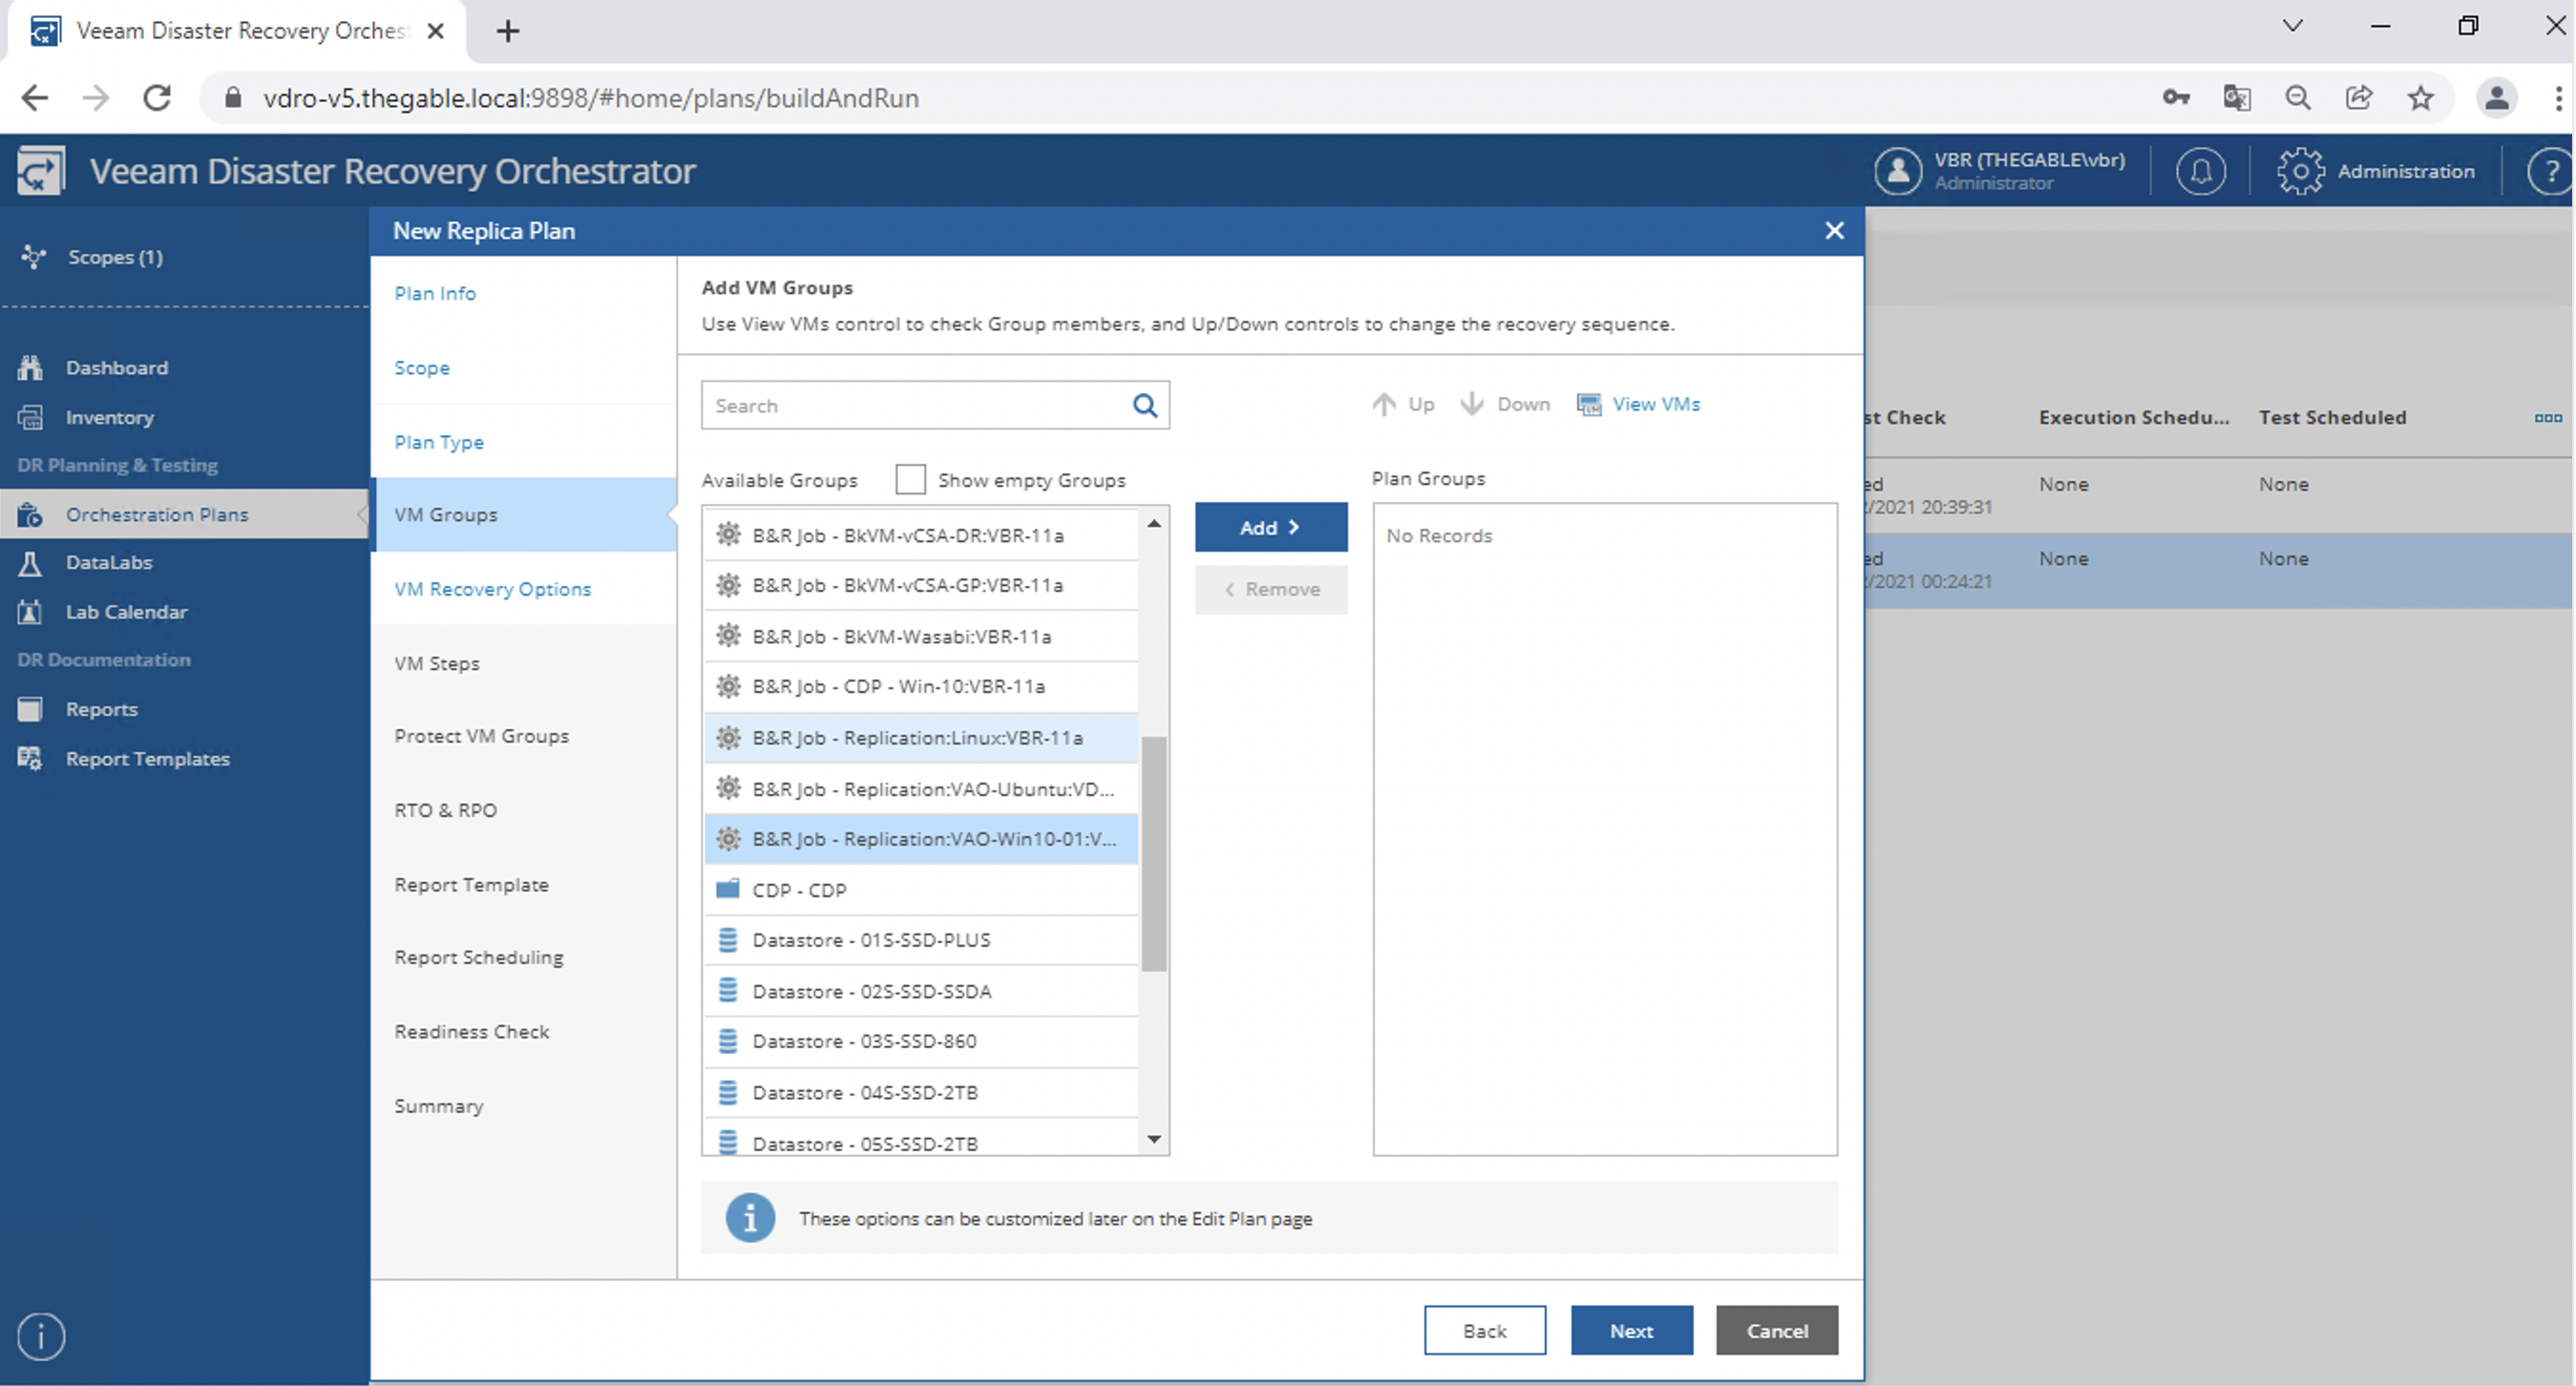
Image 9
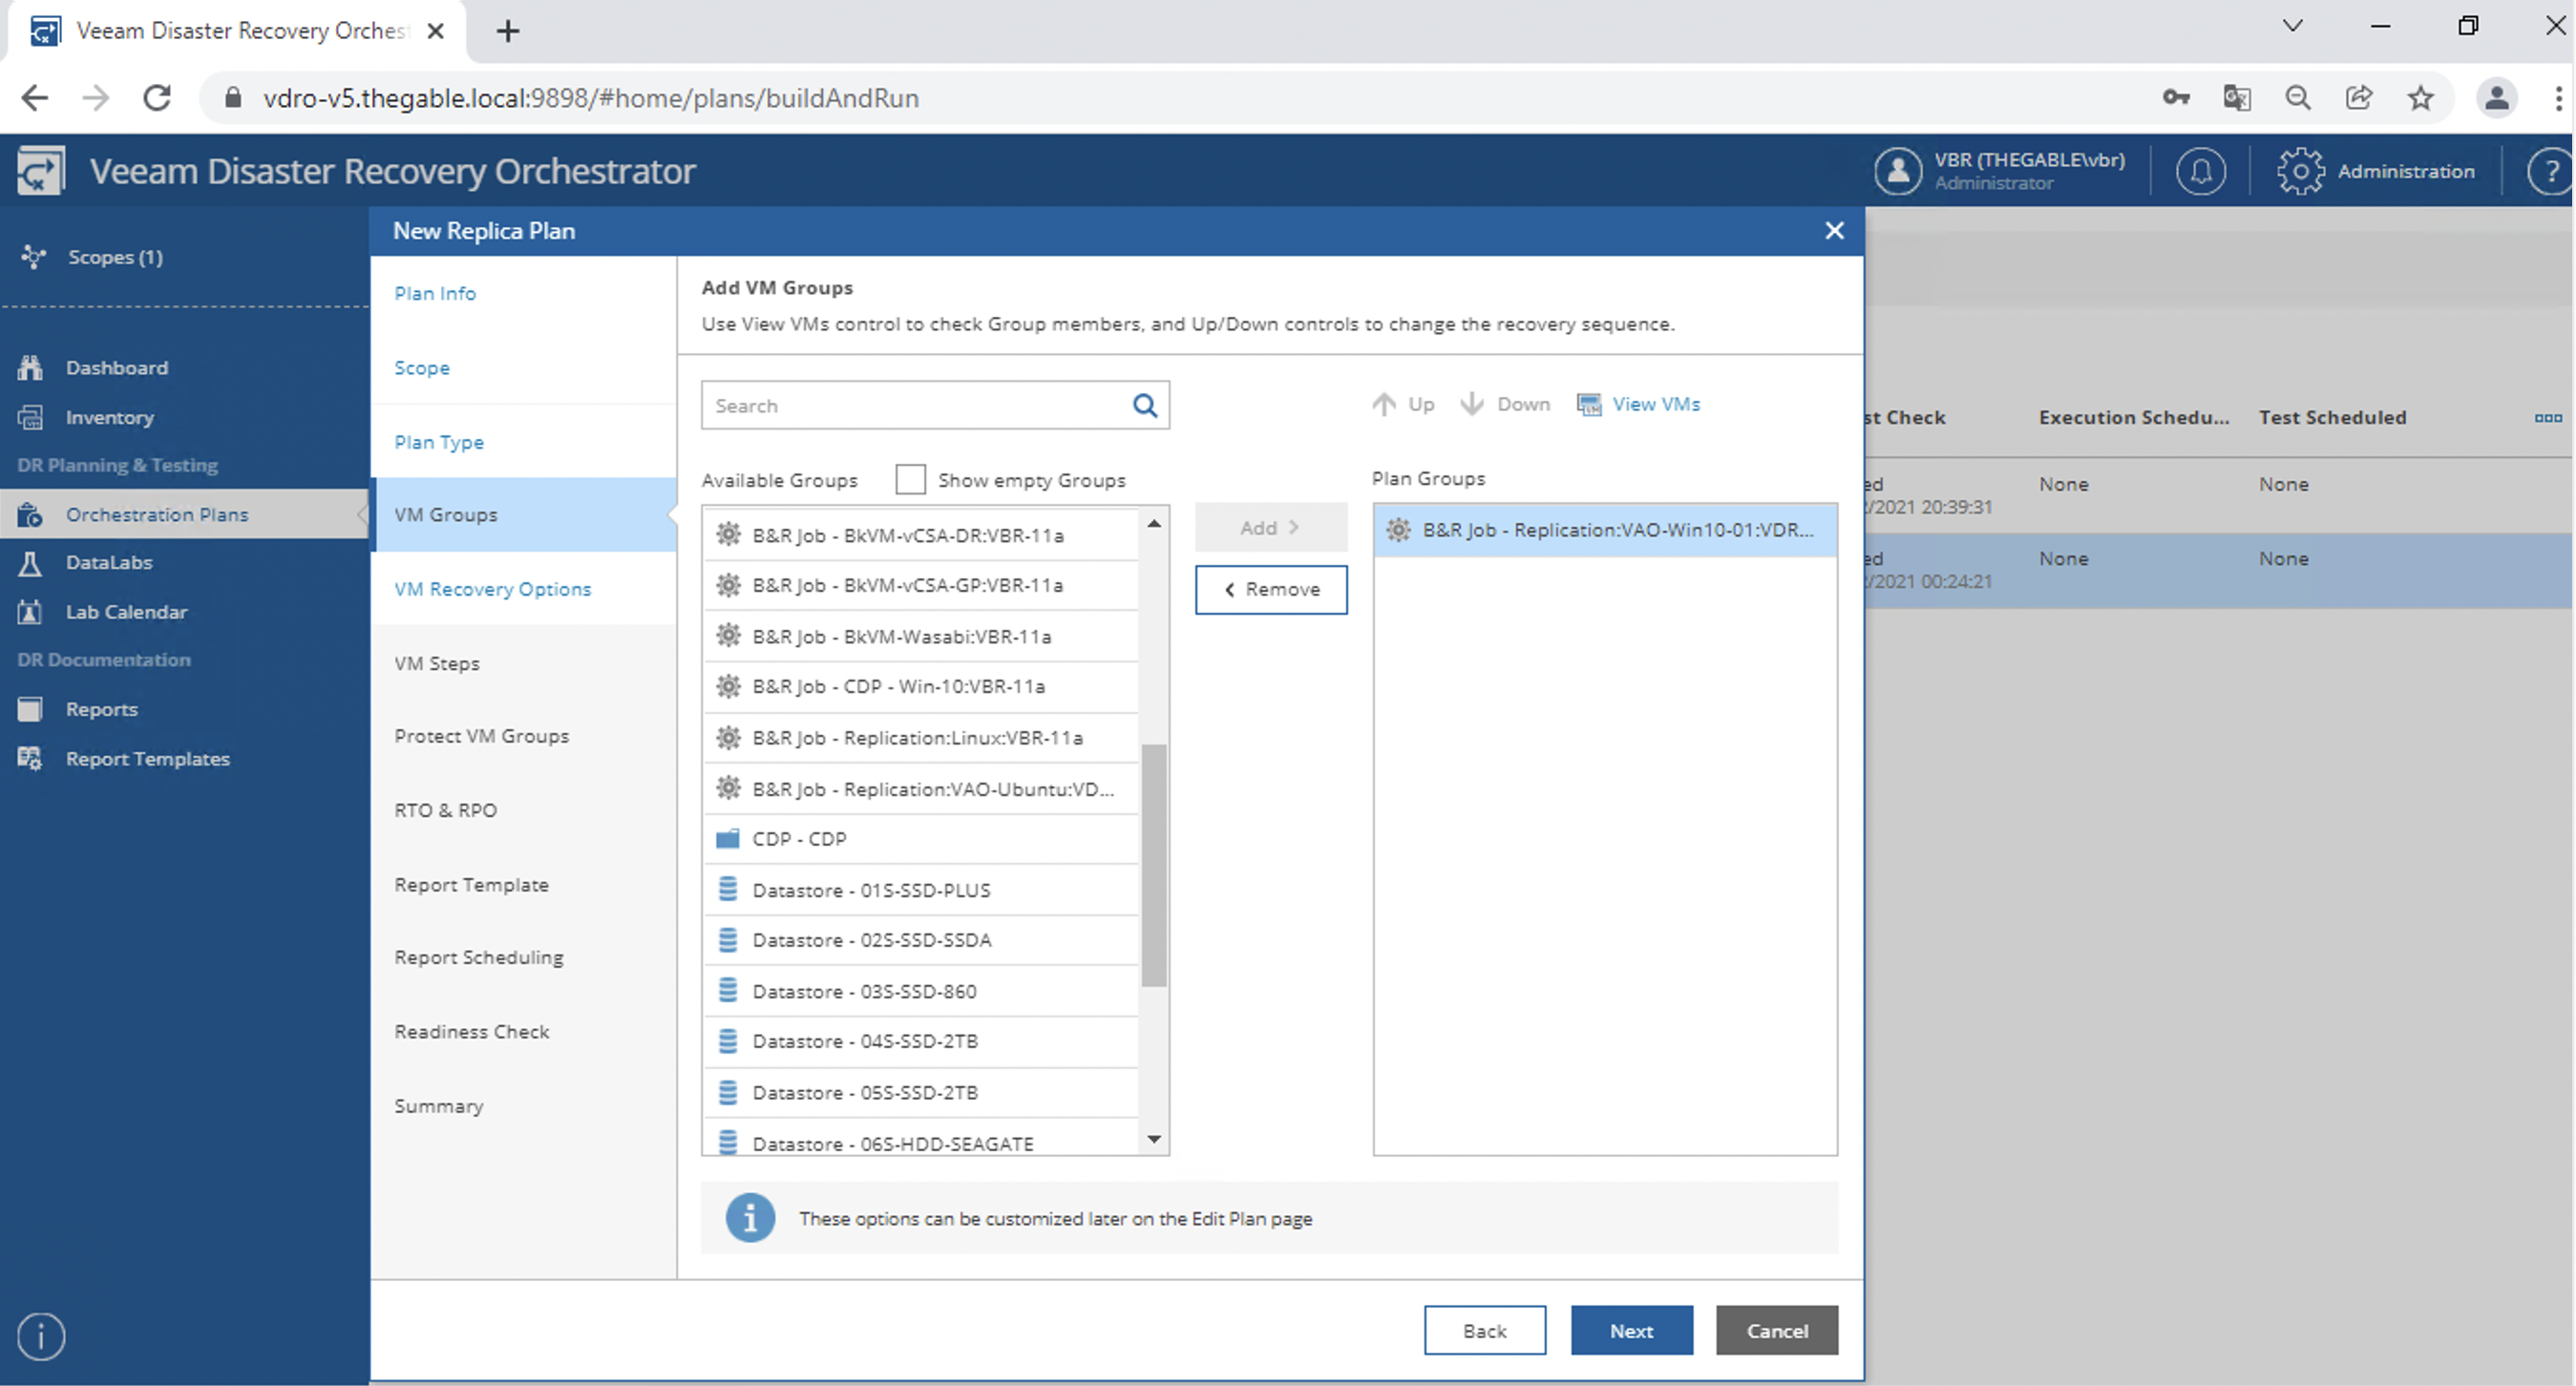 Image 10
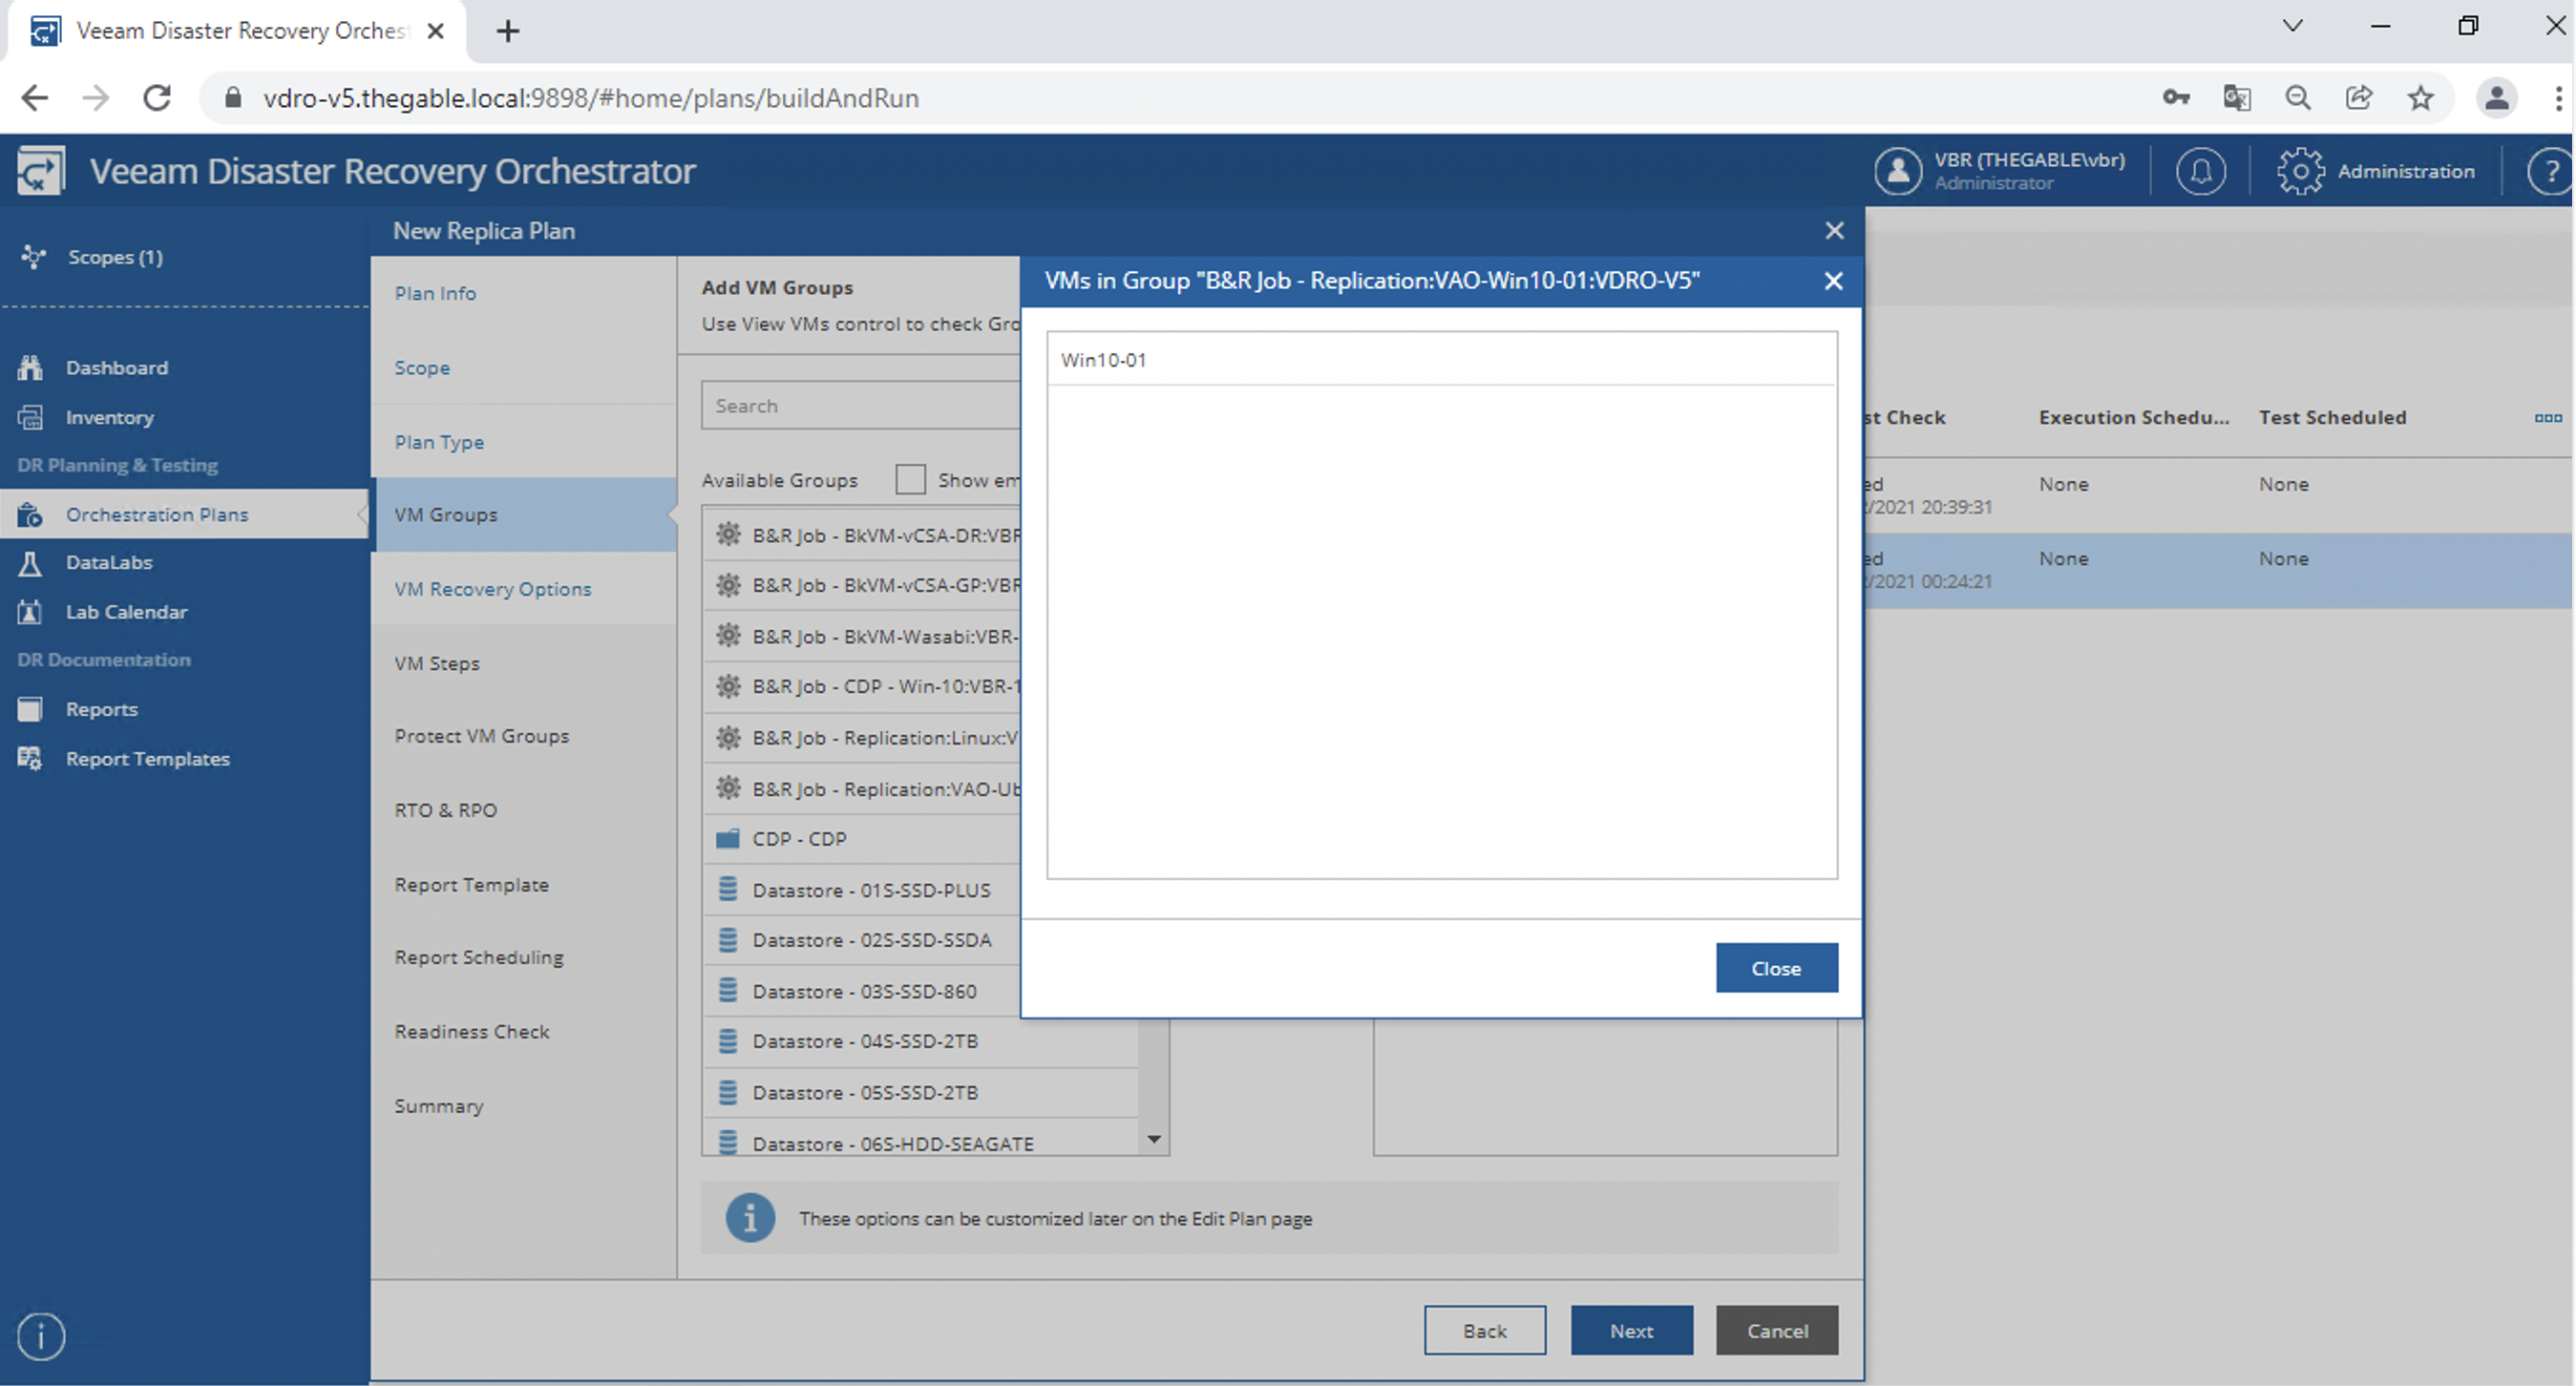 Image 11
It is possible to customize the Recovery options, (for example whether to process the VMs in parallel or sequential mode) (image 12).
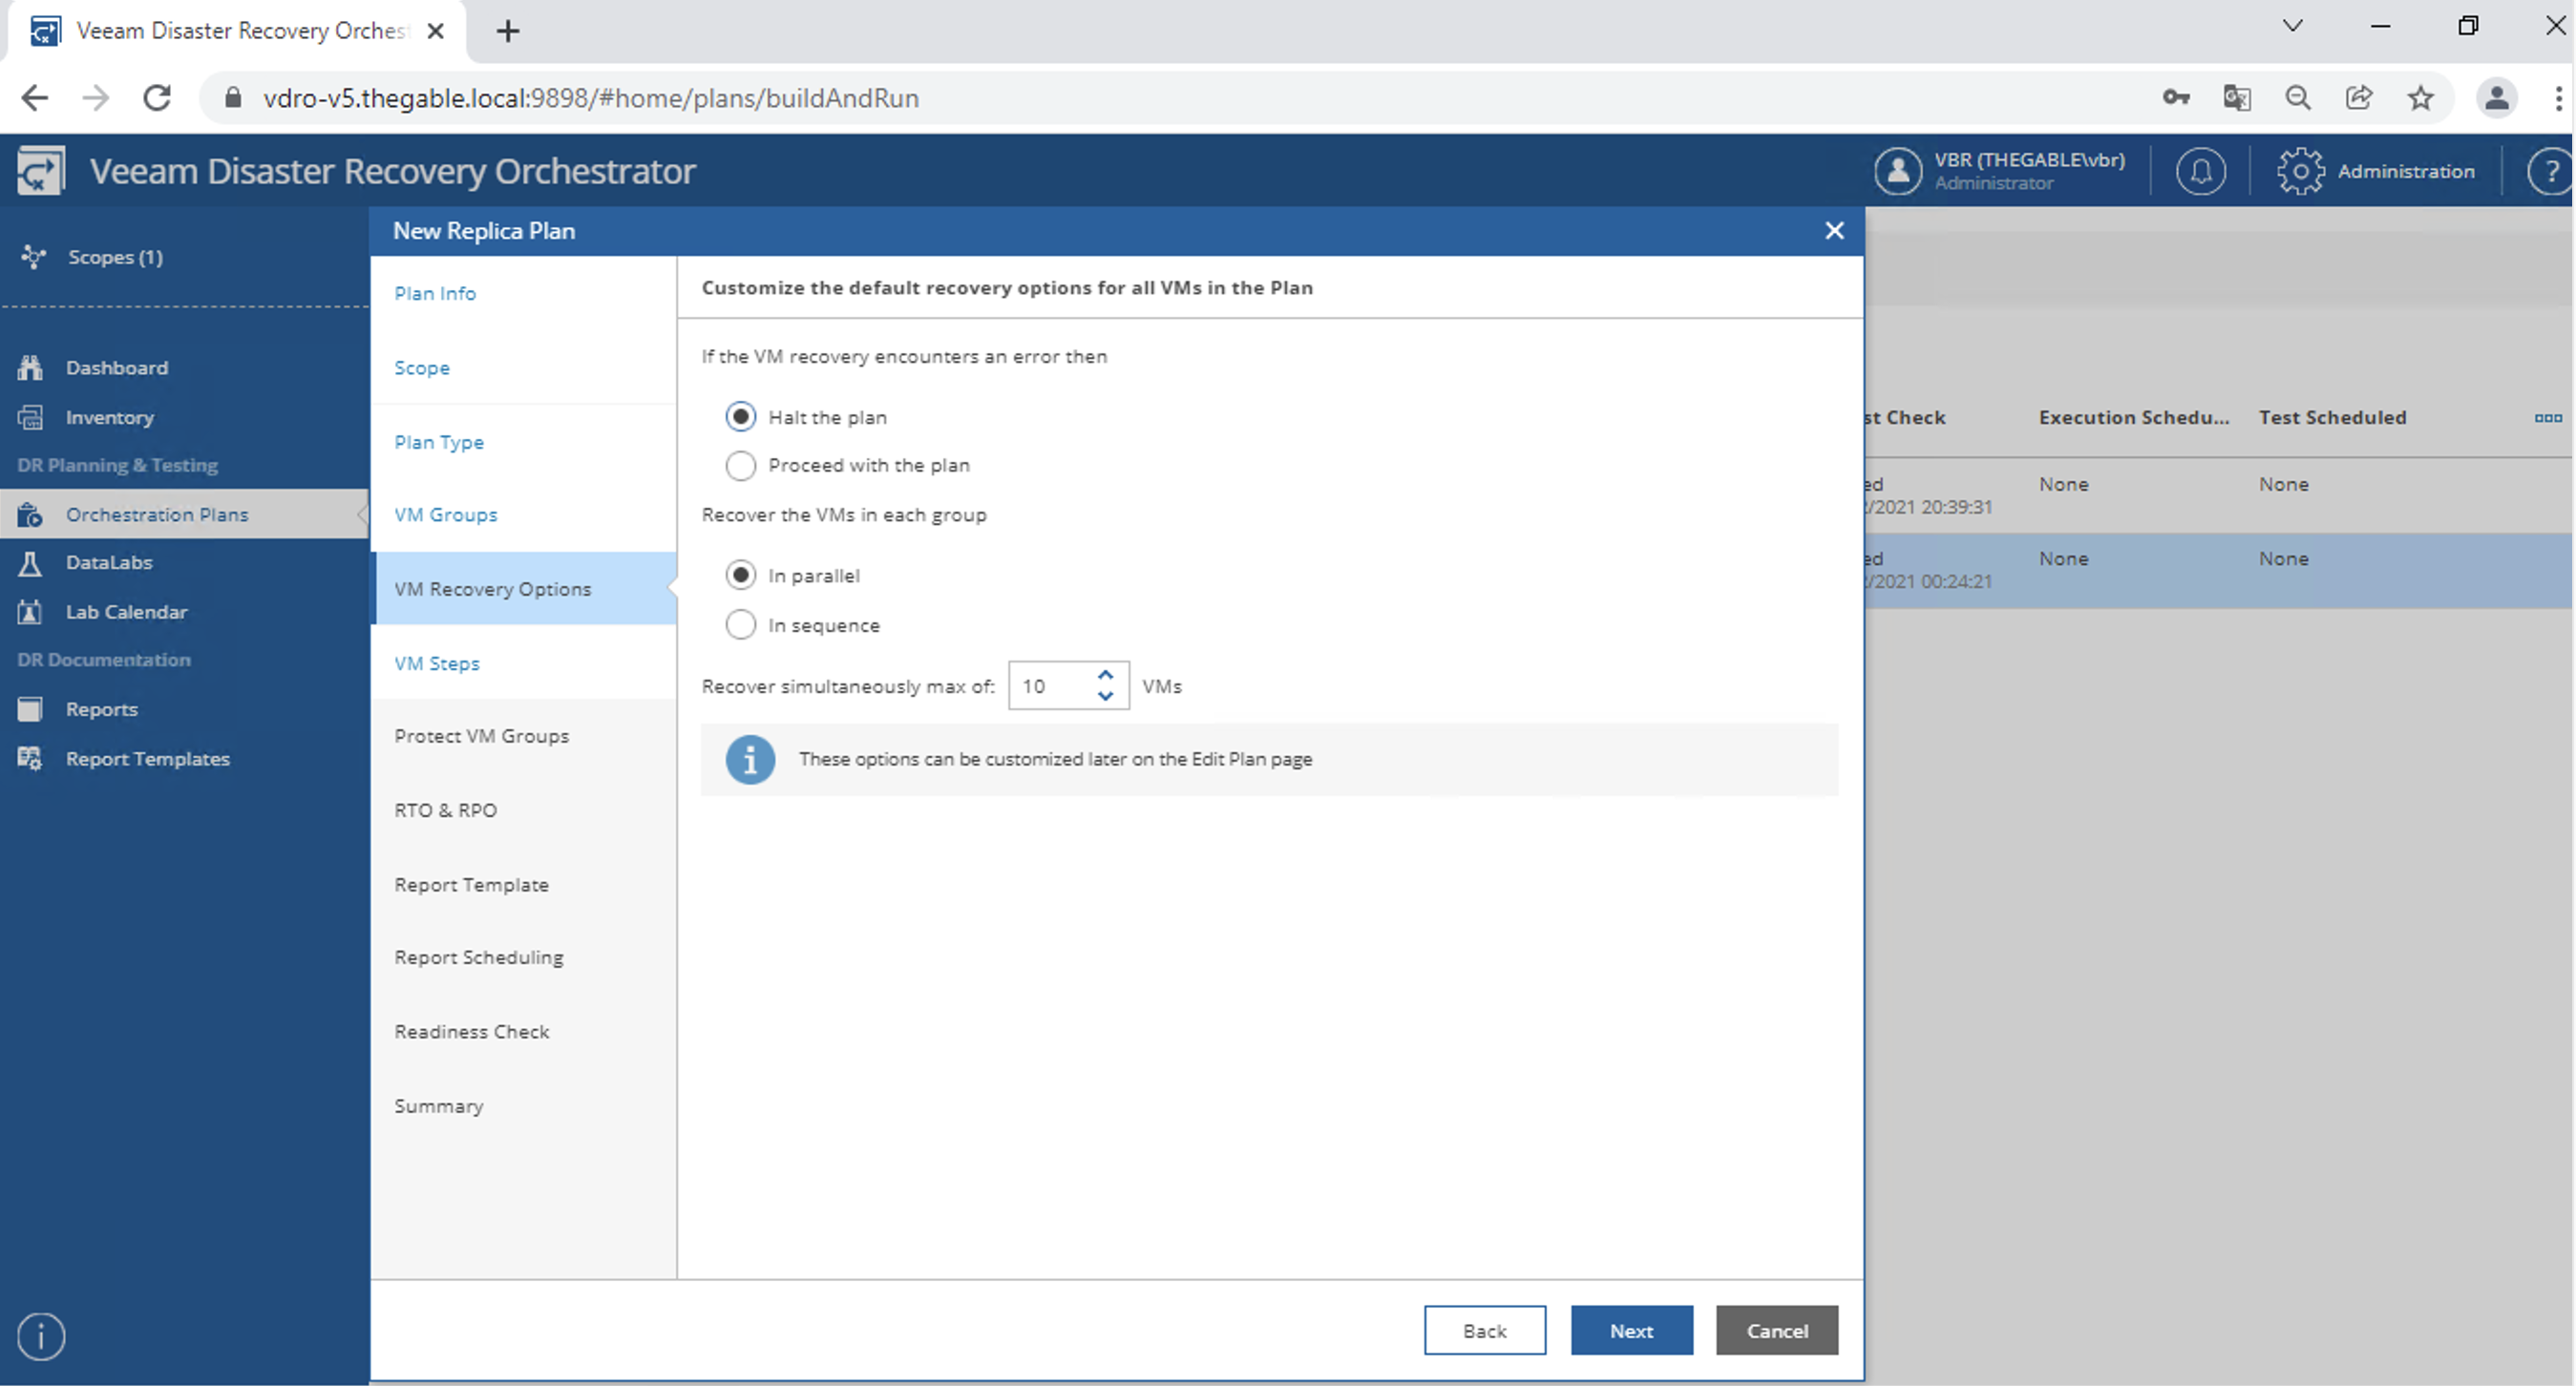 Image 12
Now I add the steps necessary for the realization of the plan (in the example the shutdown of the production VM was added as the first activity of the plan) (see images 13, 14, 15, and 16).
 Image 13
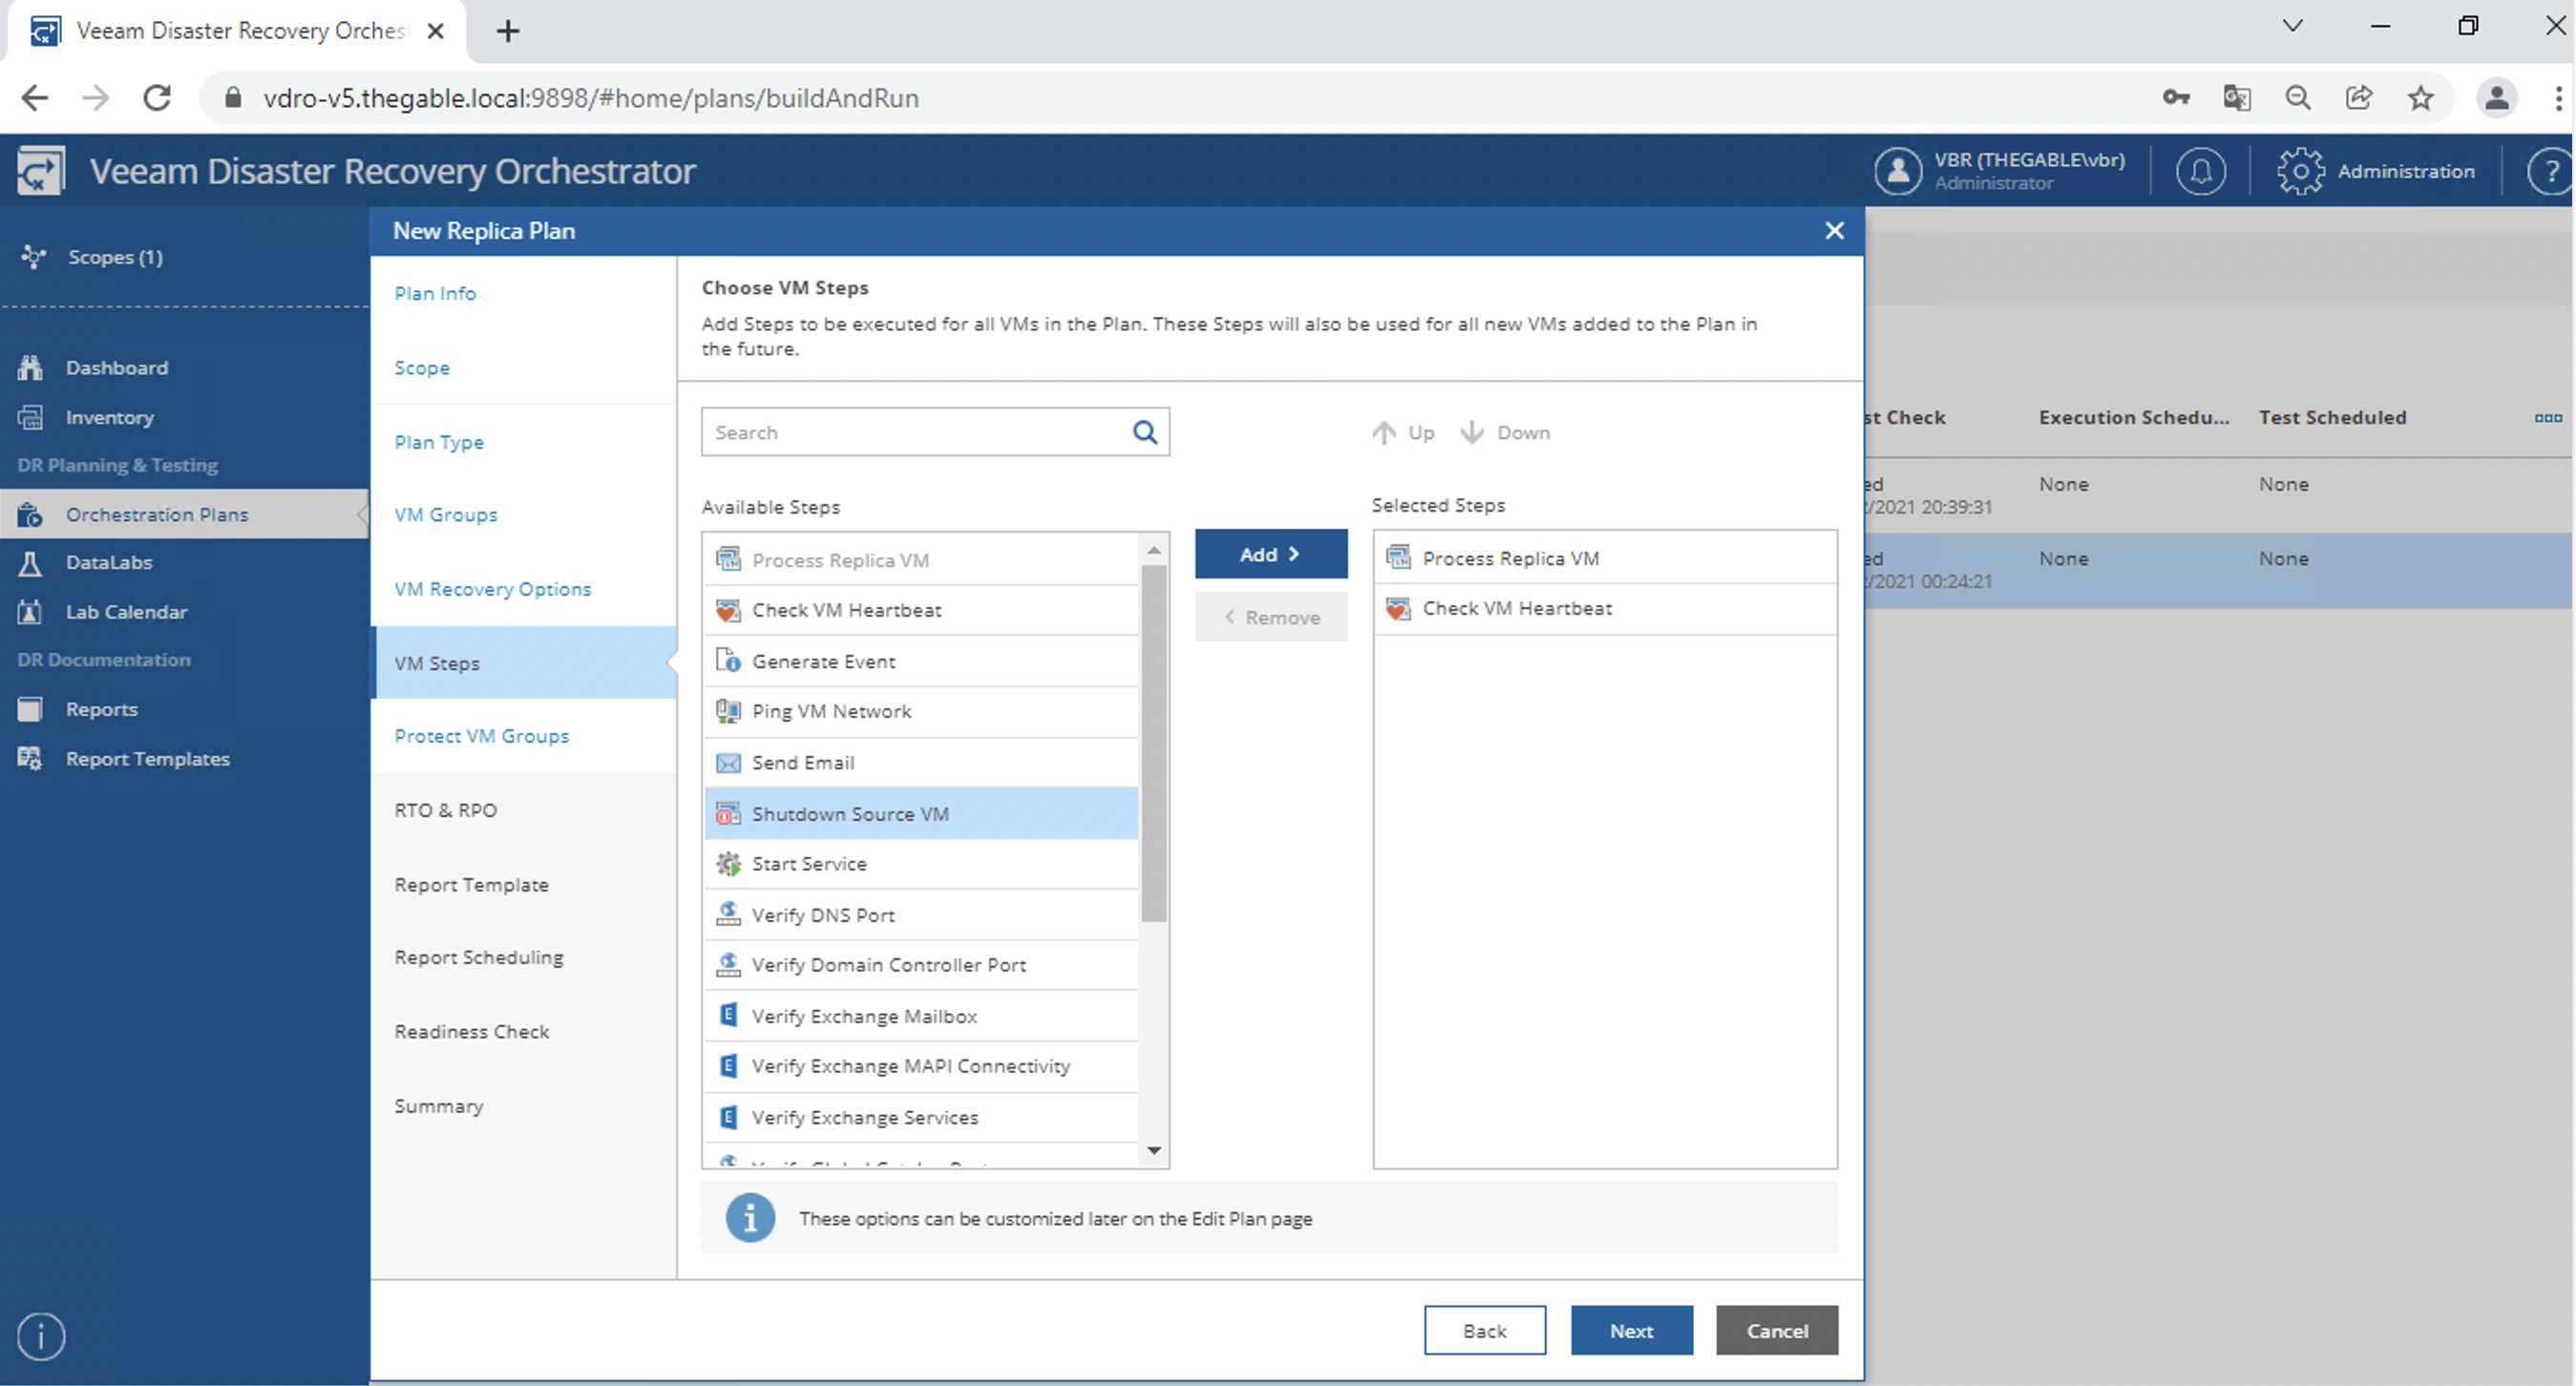 Image 14
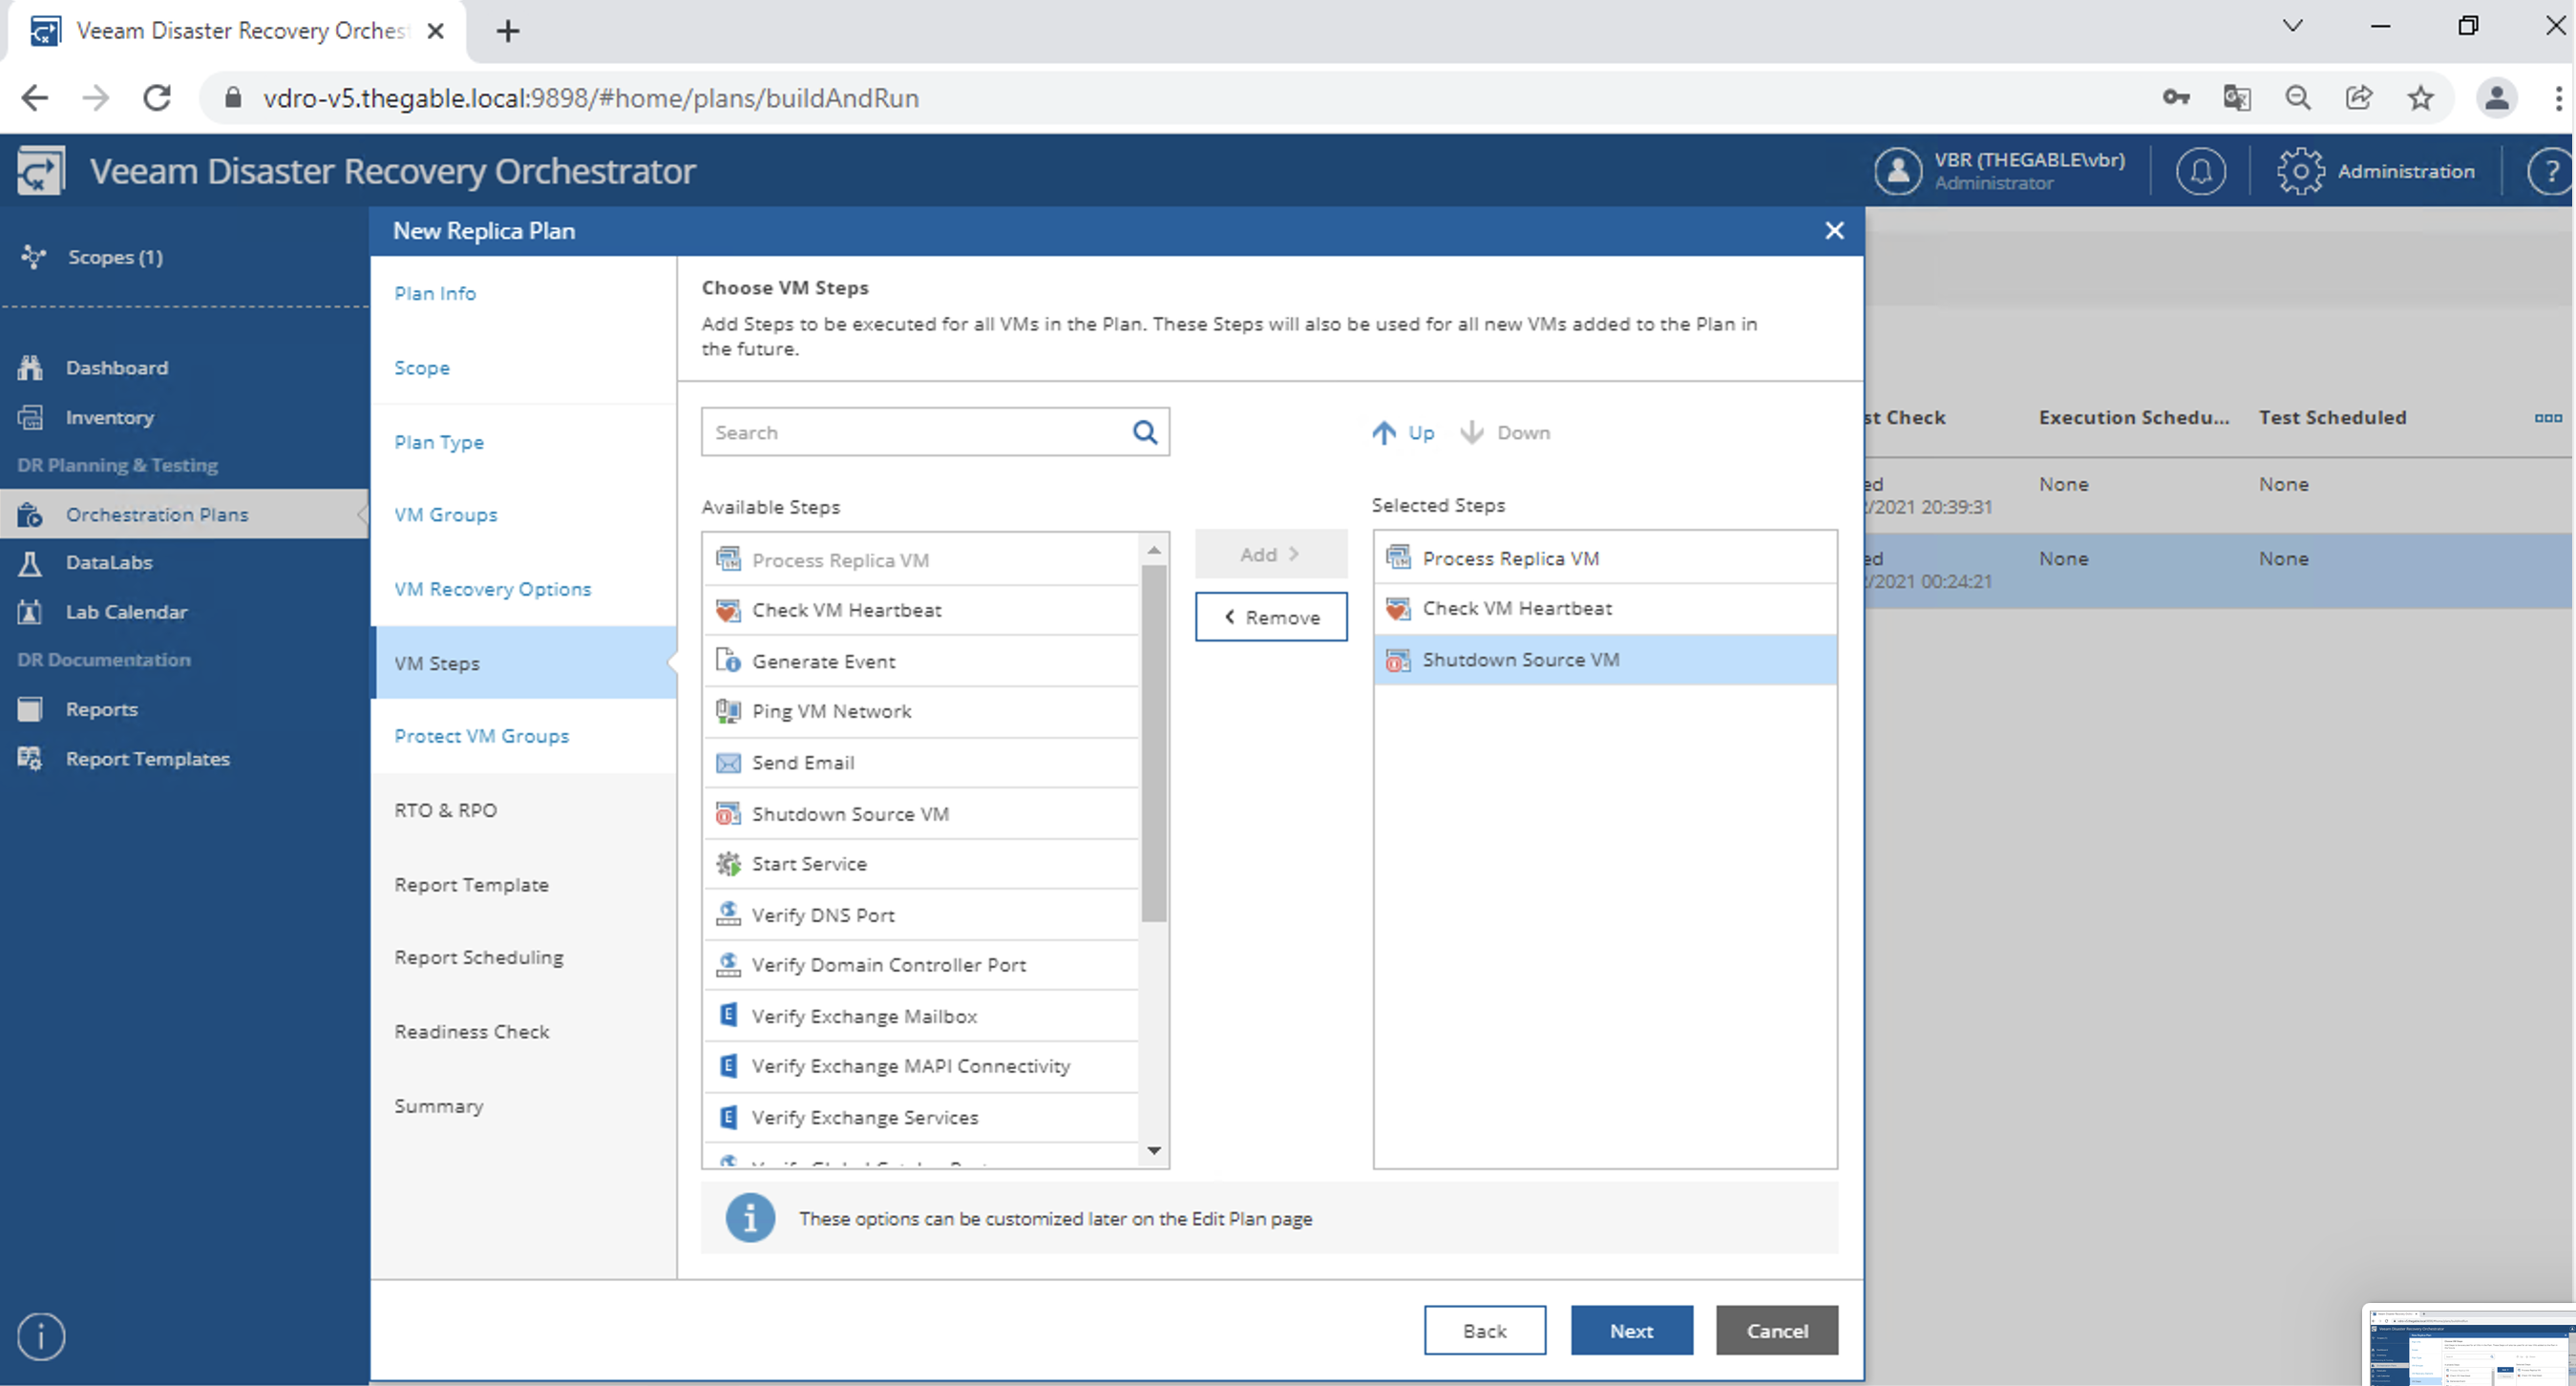 Image 15
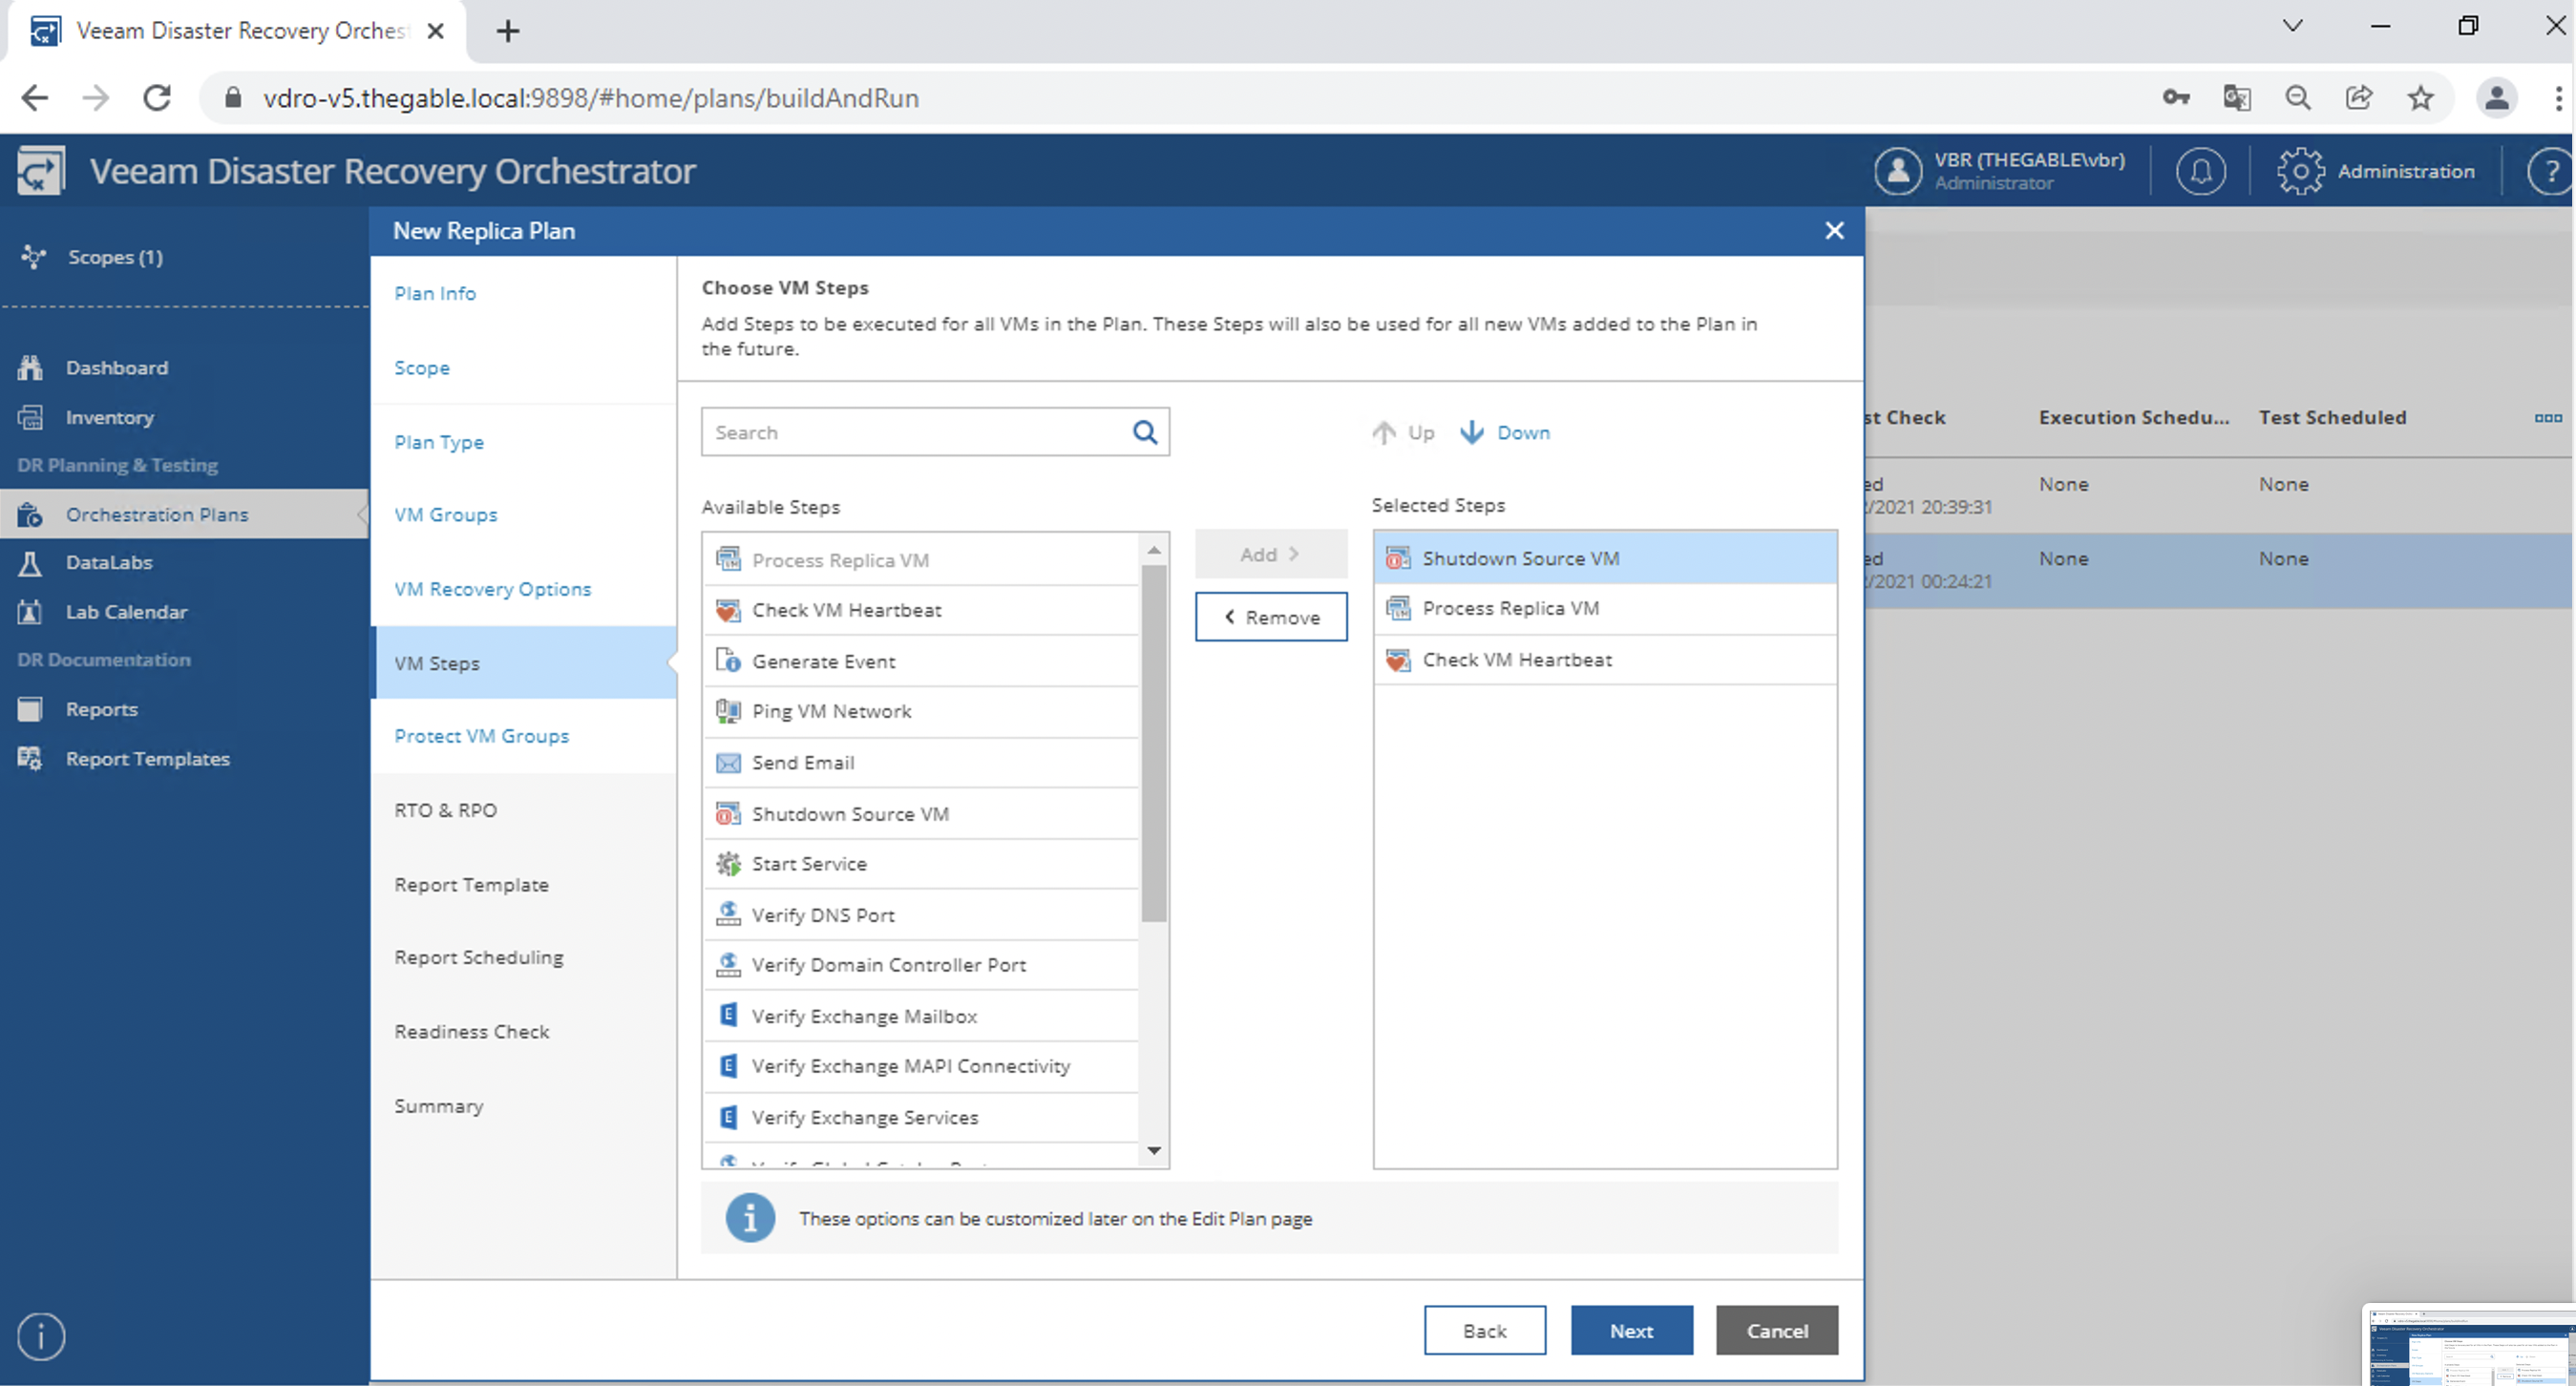 Image 16
The wizard ends with:
- The option to backup the VMs that were started during the DR plan (image 17)
- The RTPO values that must be respected for the plan to be executed (image 18)
- The choice of the language of the template to be used (image 19)
- The time at which the reports will be automatically generated (image 20)
- Whether to immediately create the readiness report (which verifies all components of the plan) (image 21)
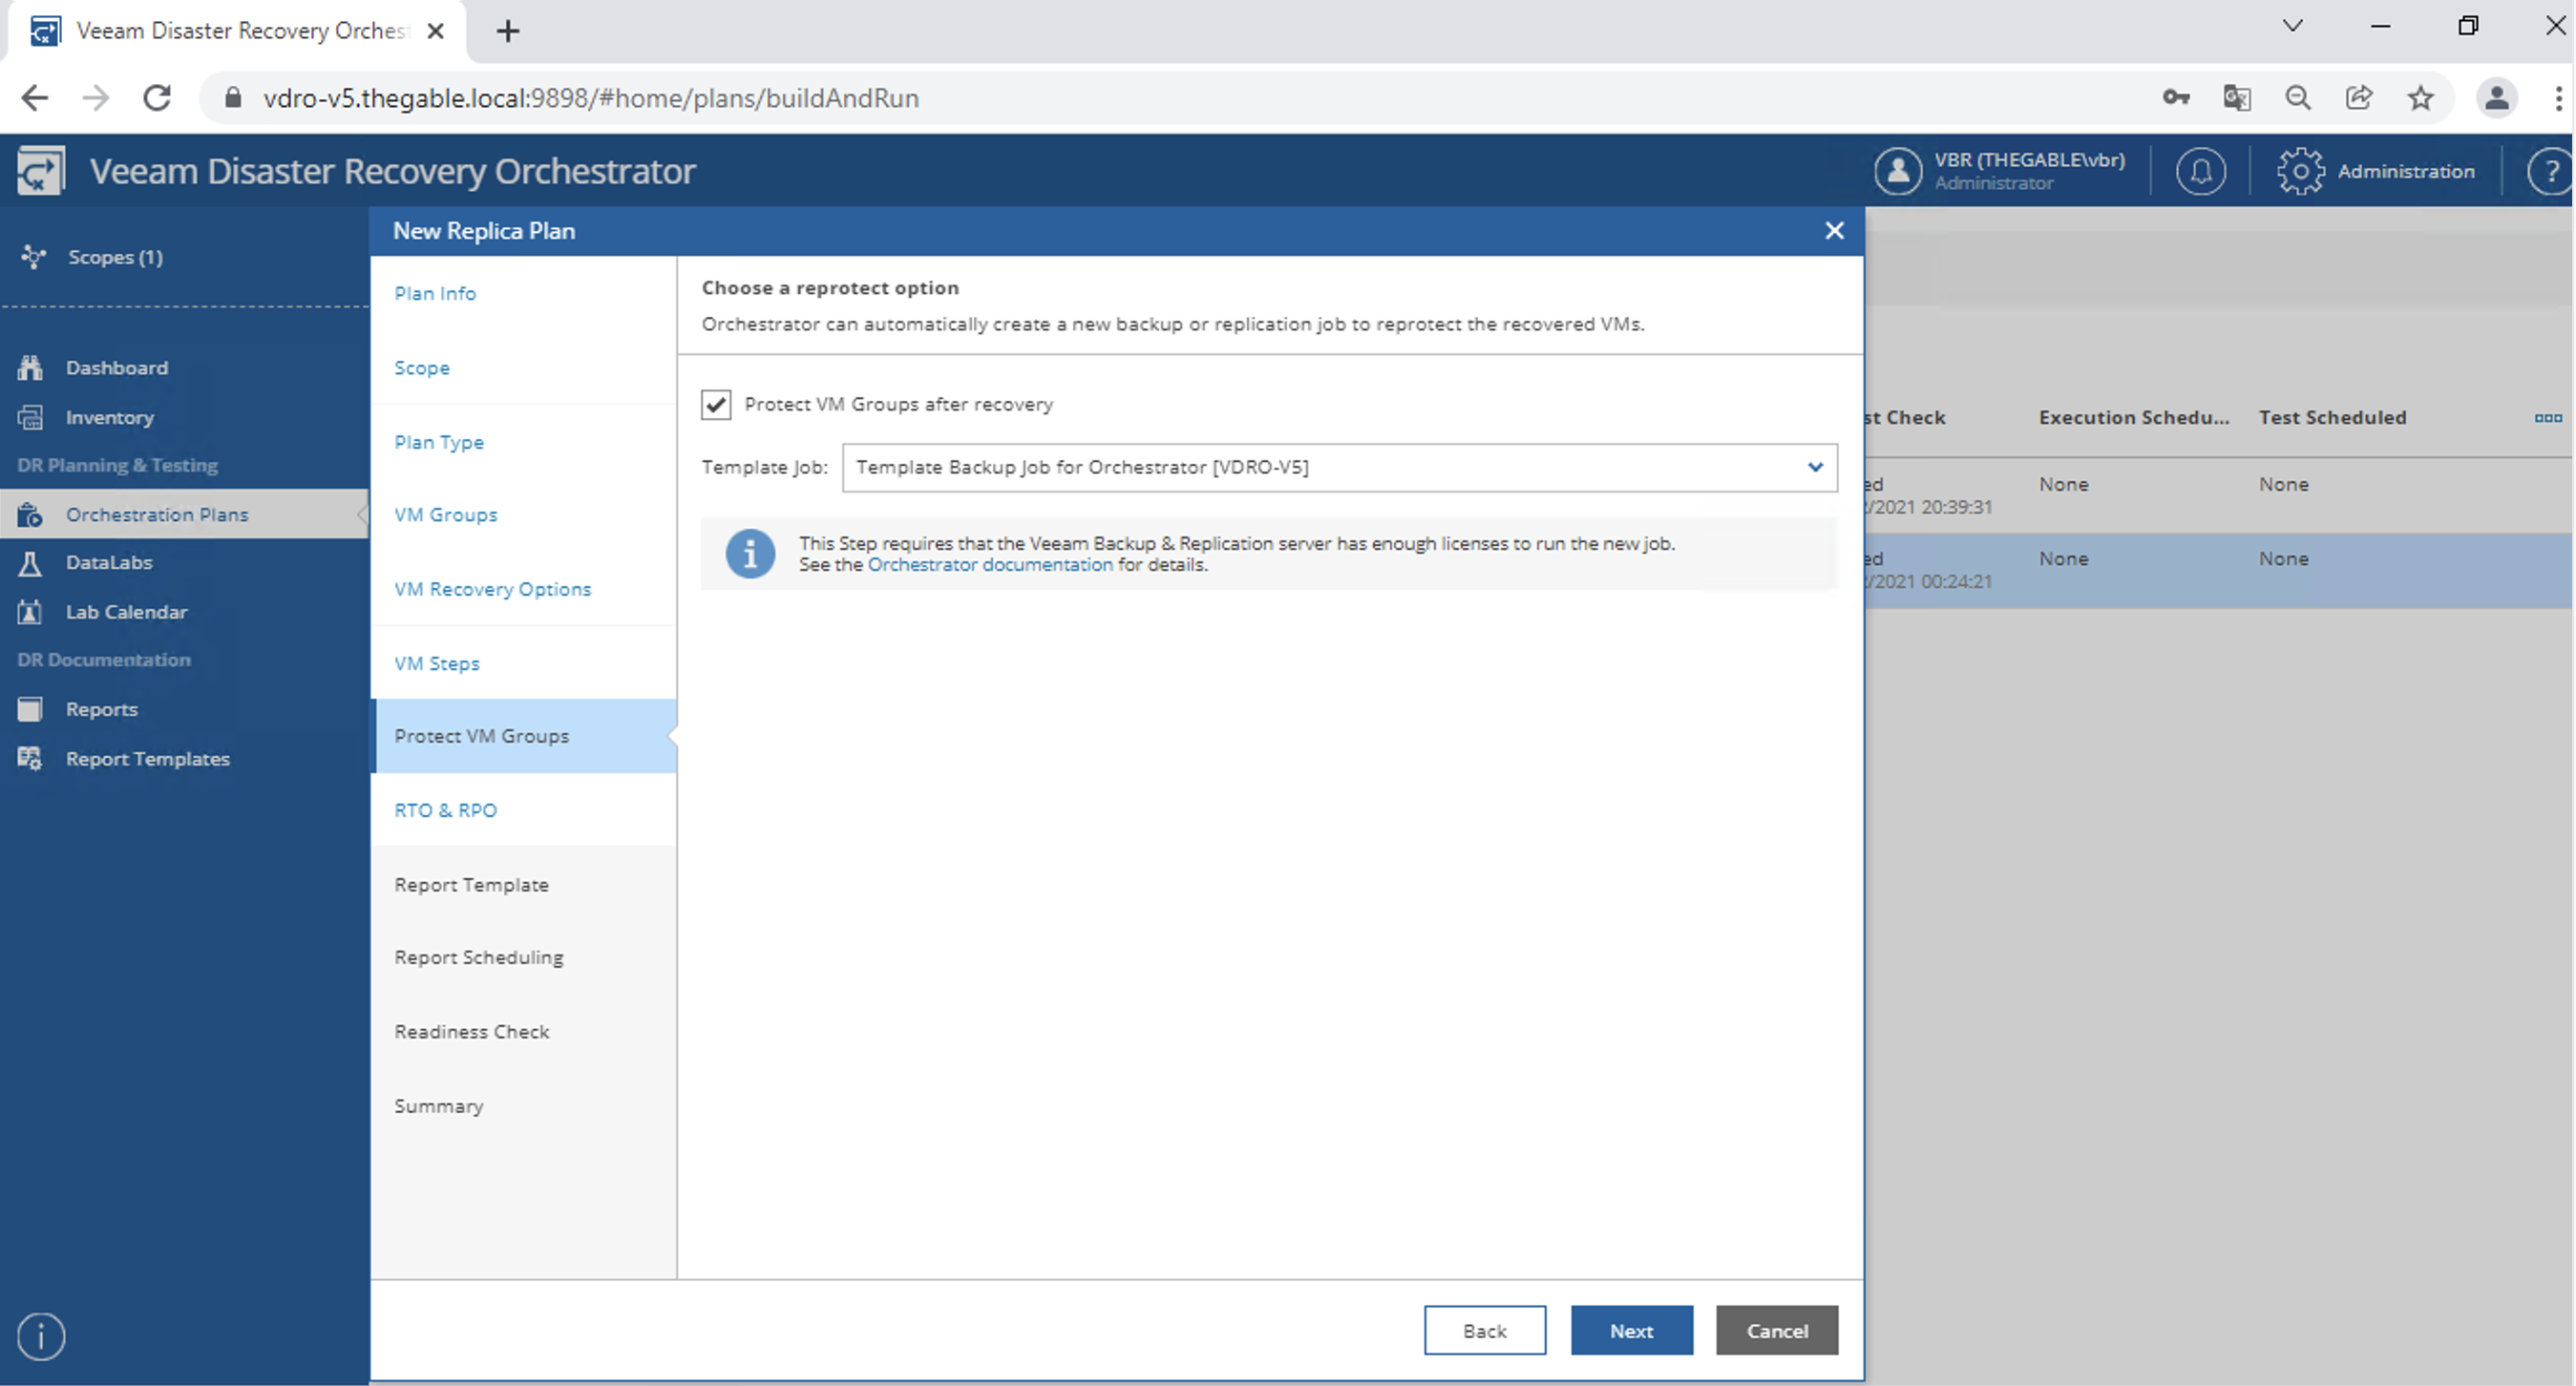 image 17
 image 18
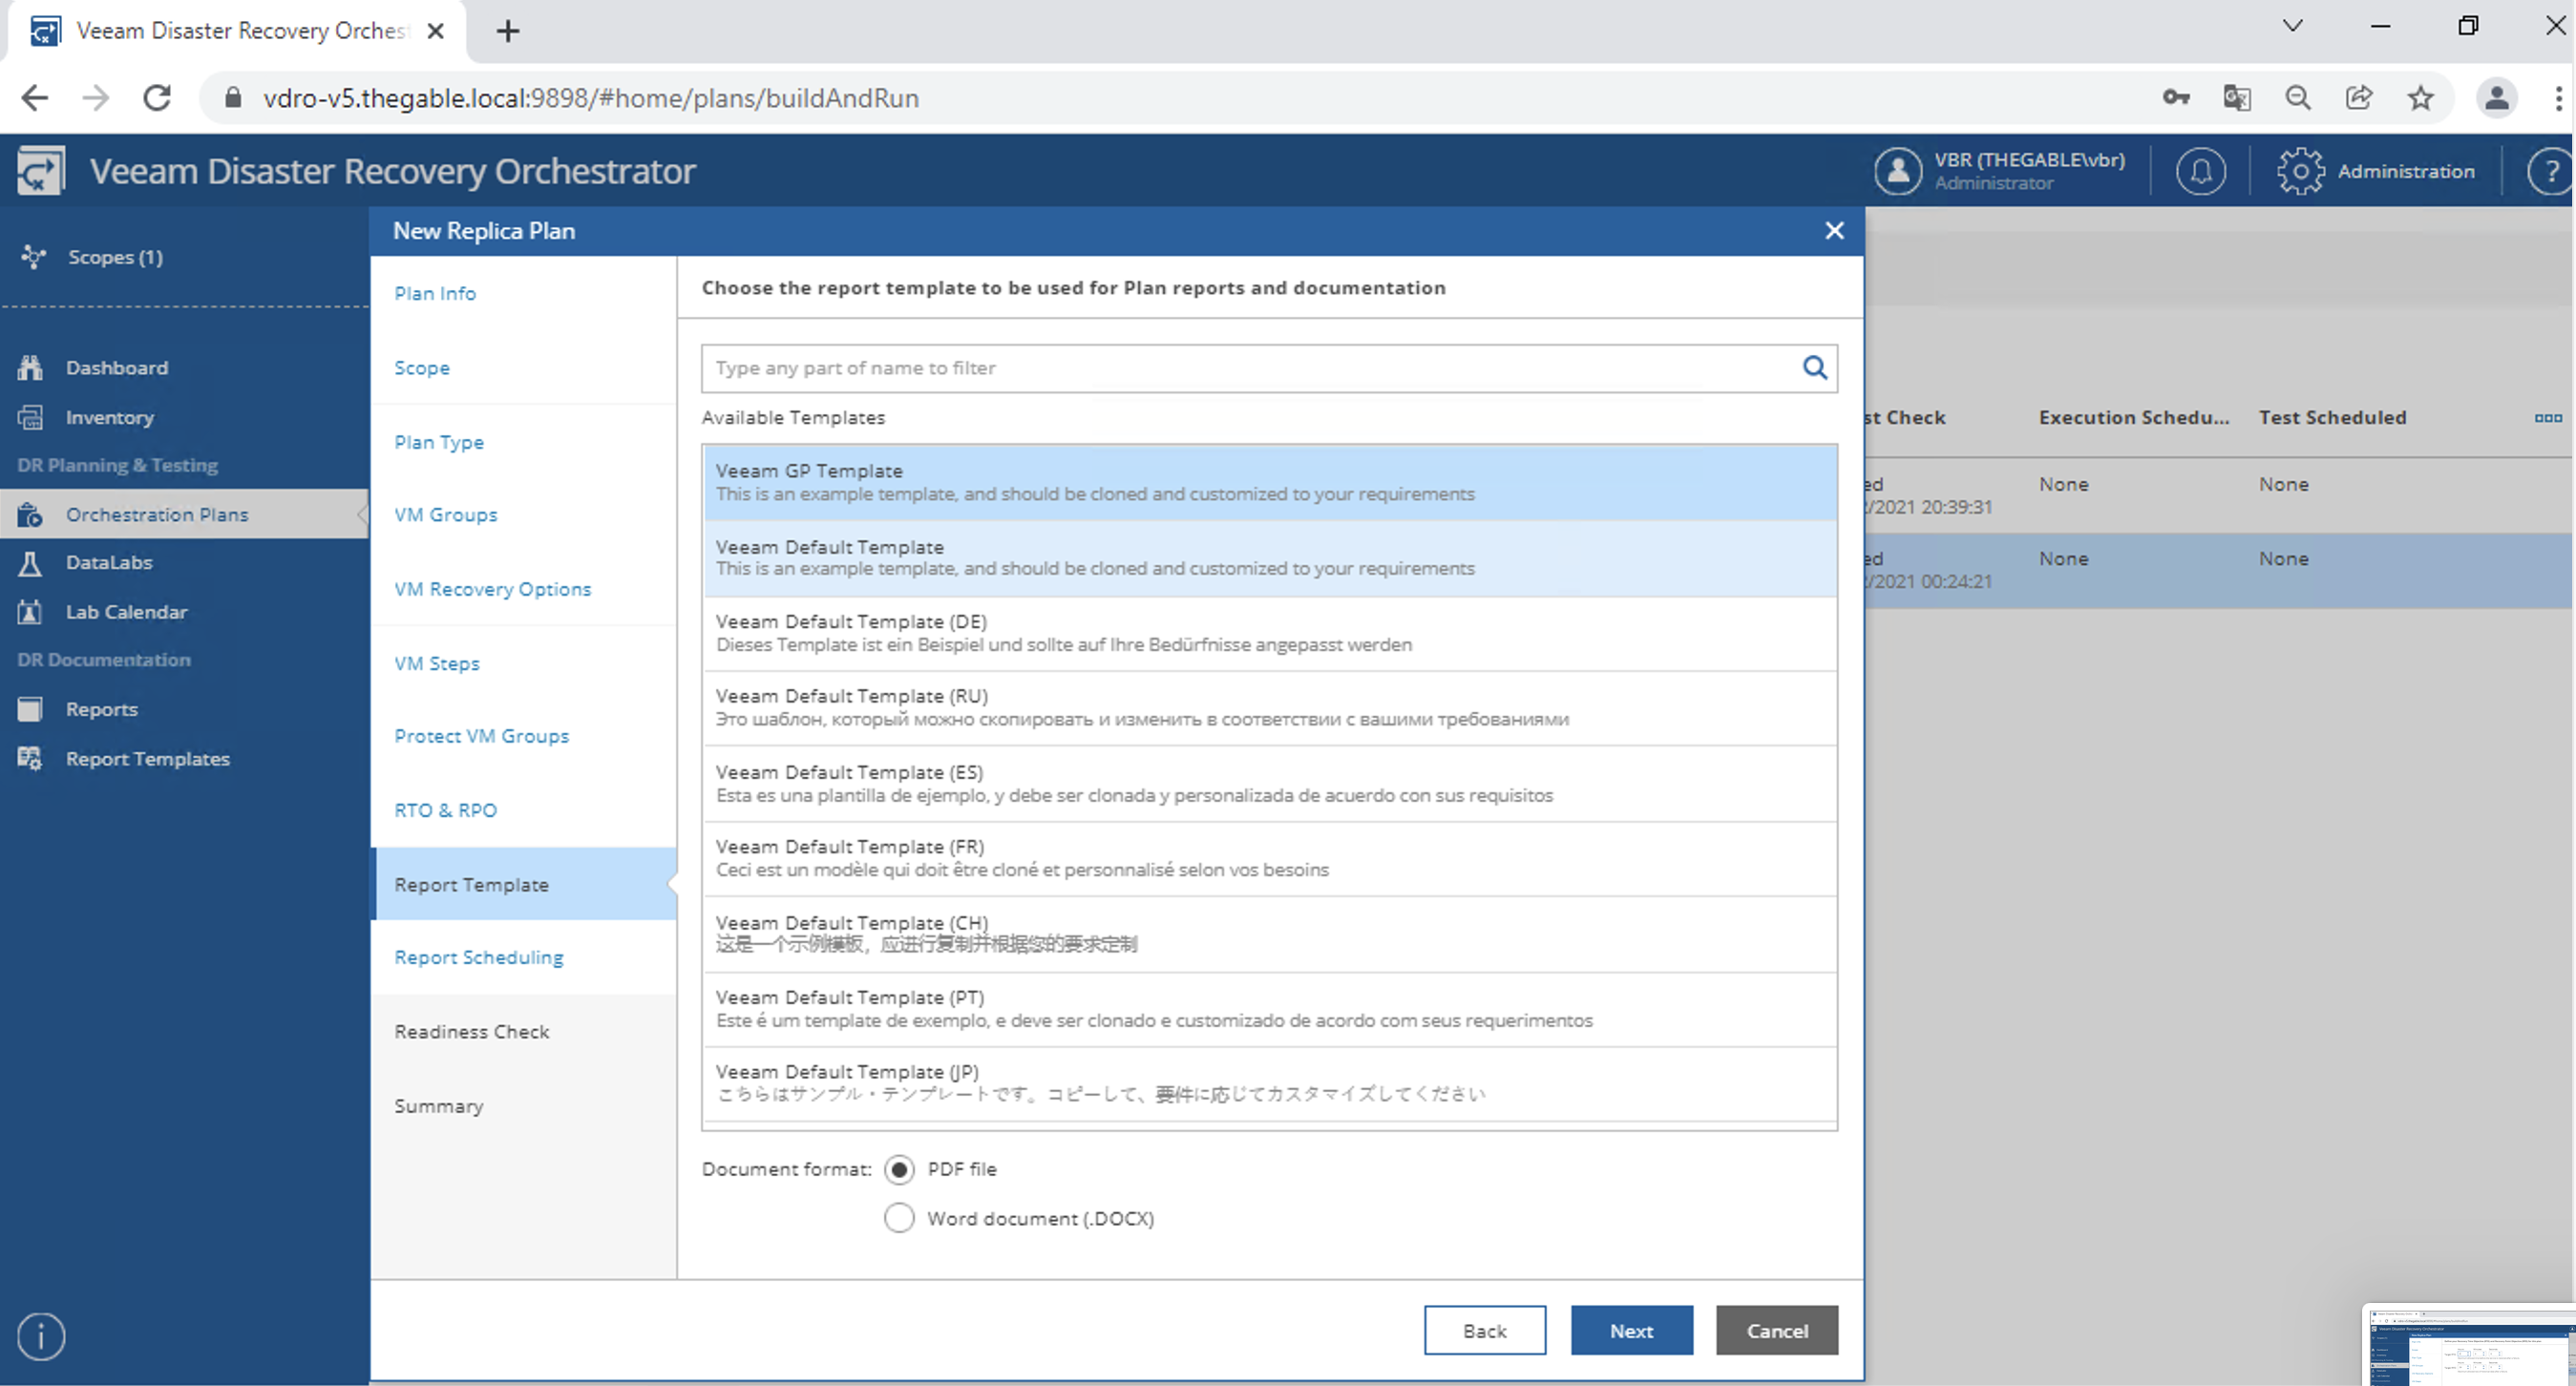 image 19
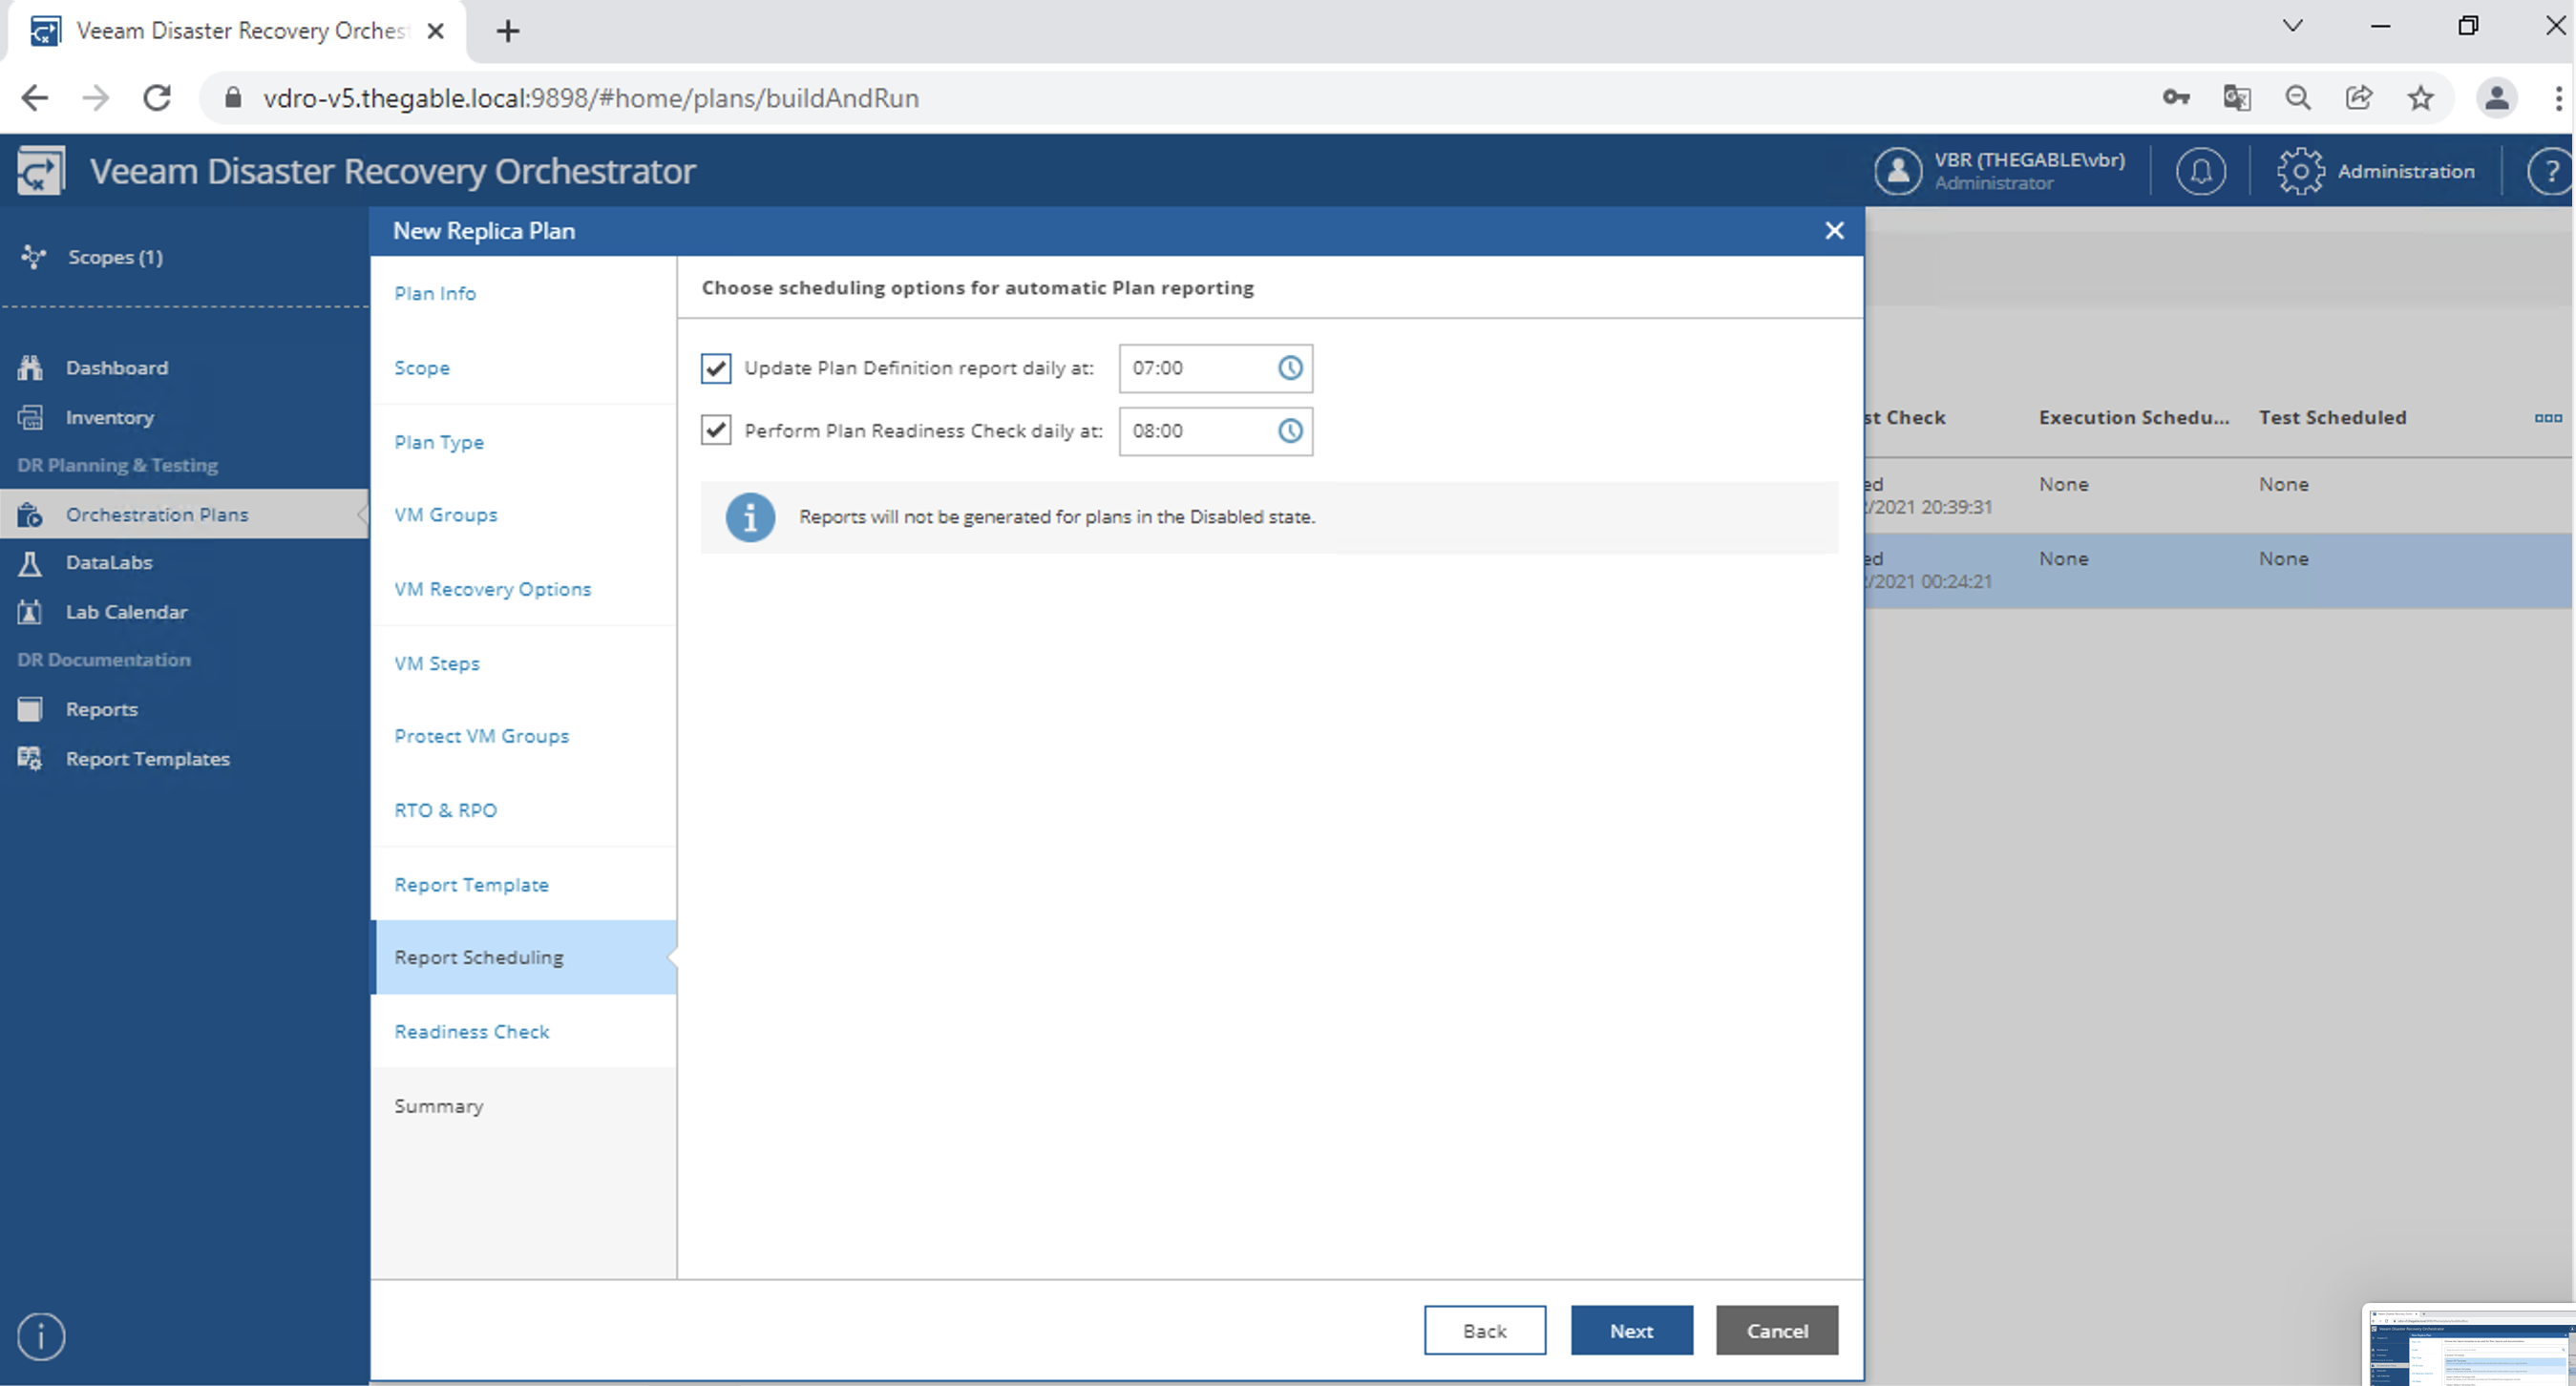 image 20
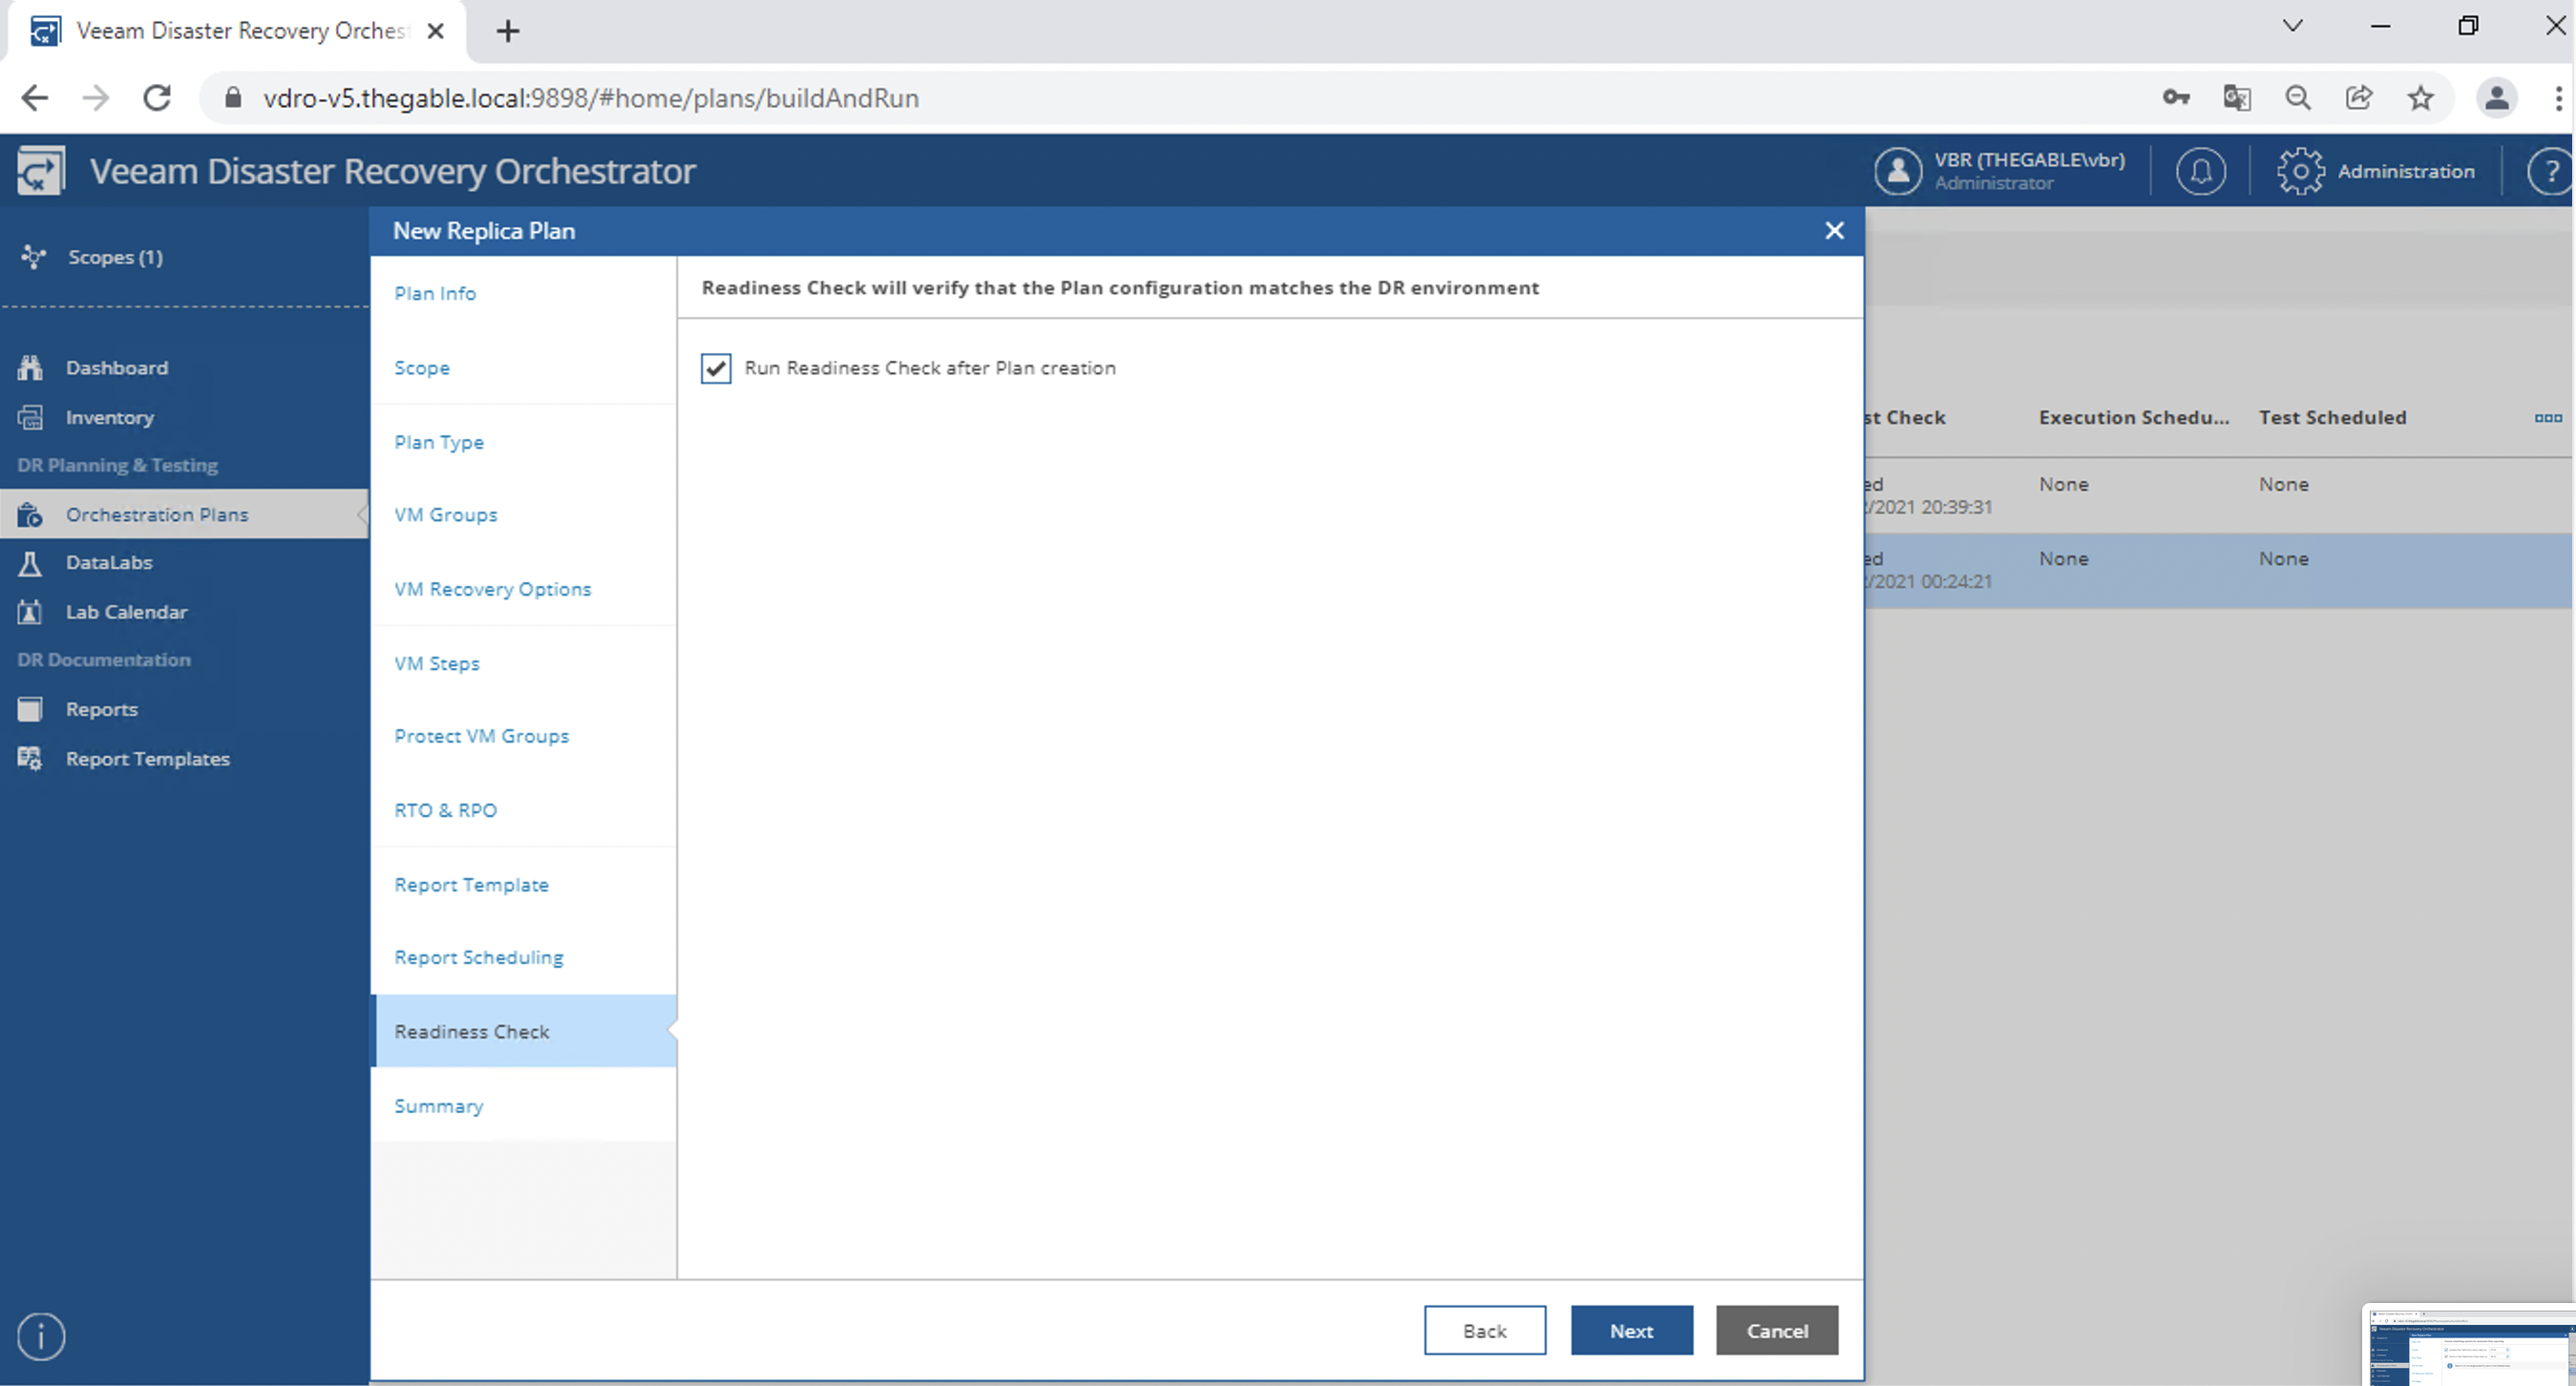 image 21
Now you can test and start your orchestration plans later
 Picture 1
 picture 2
 Picture 3
 Picture 4
 Picture 5
 Picture 6
 Picture 7
 Image 8
 Image 9
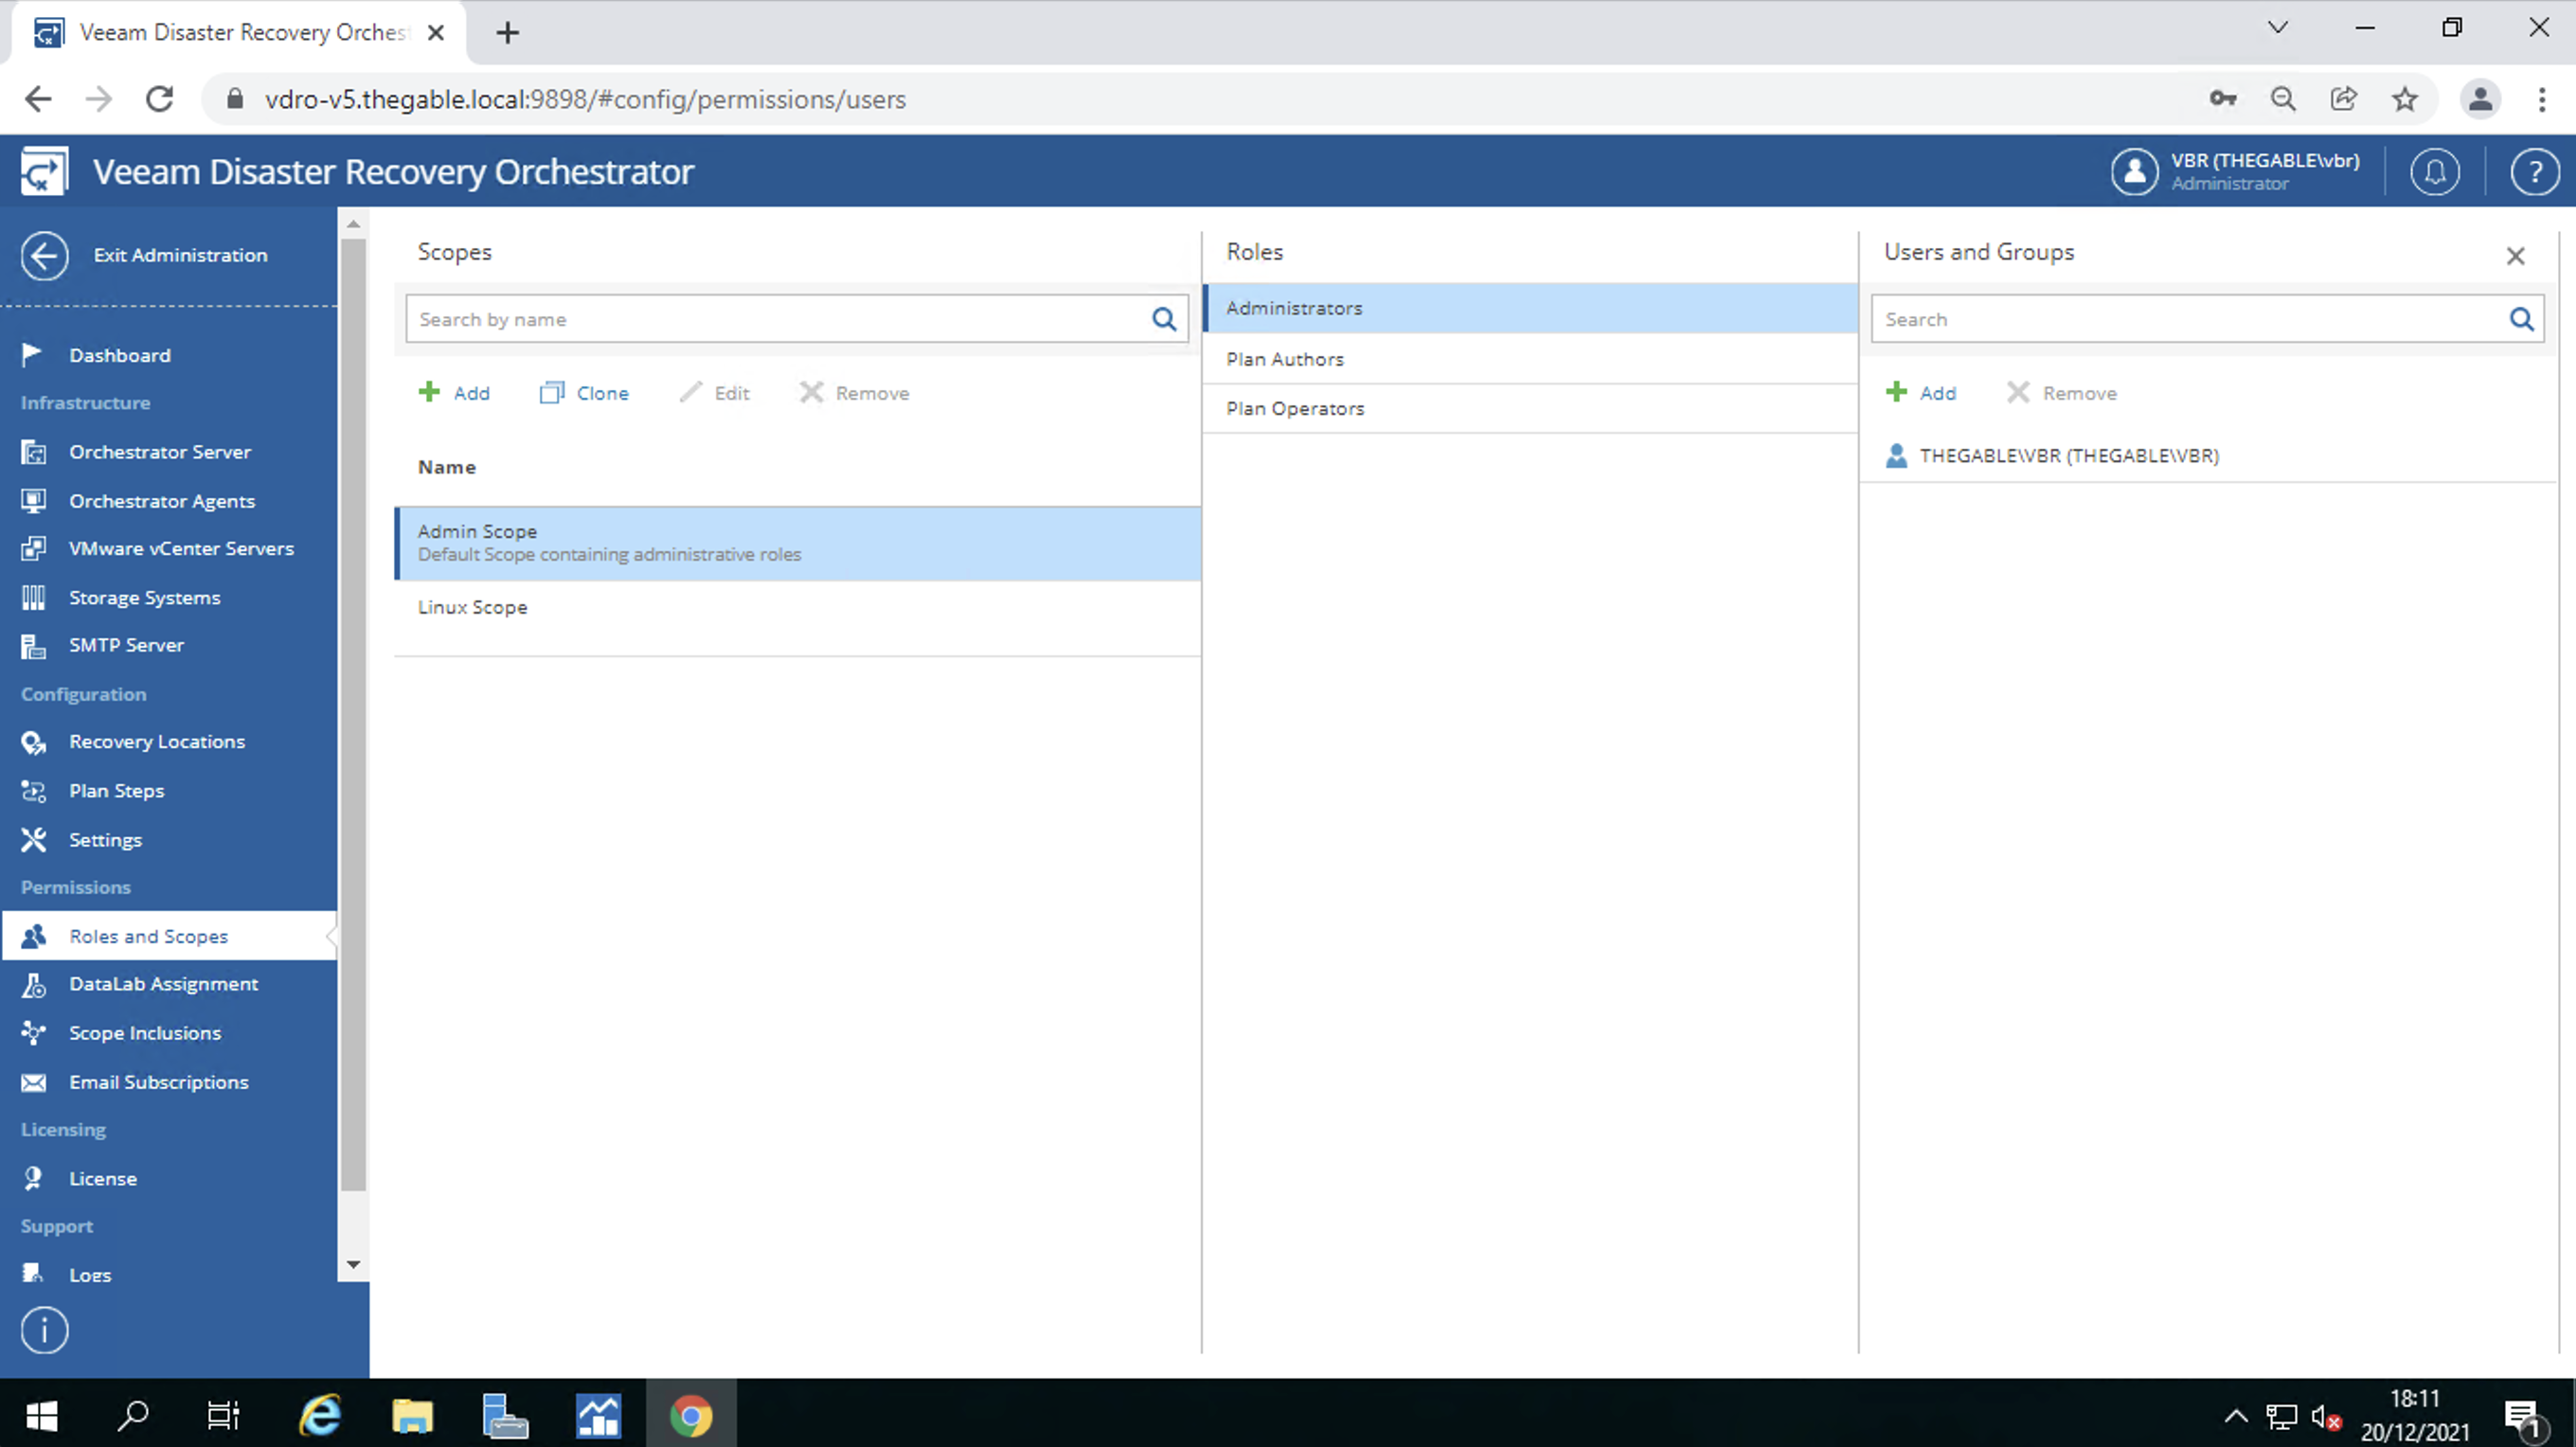 Image 10
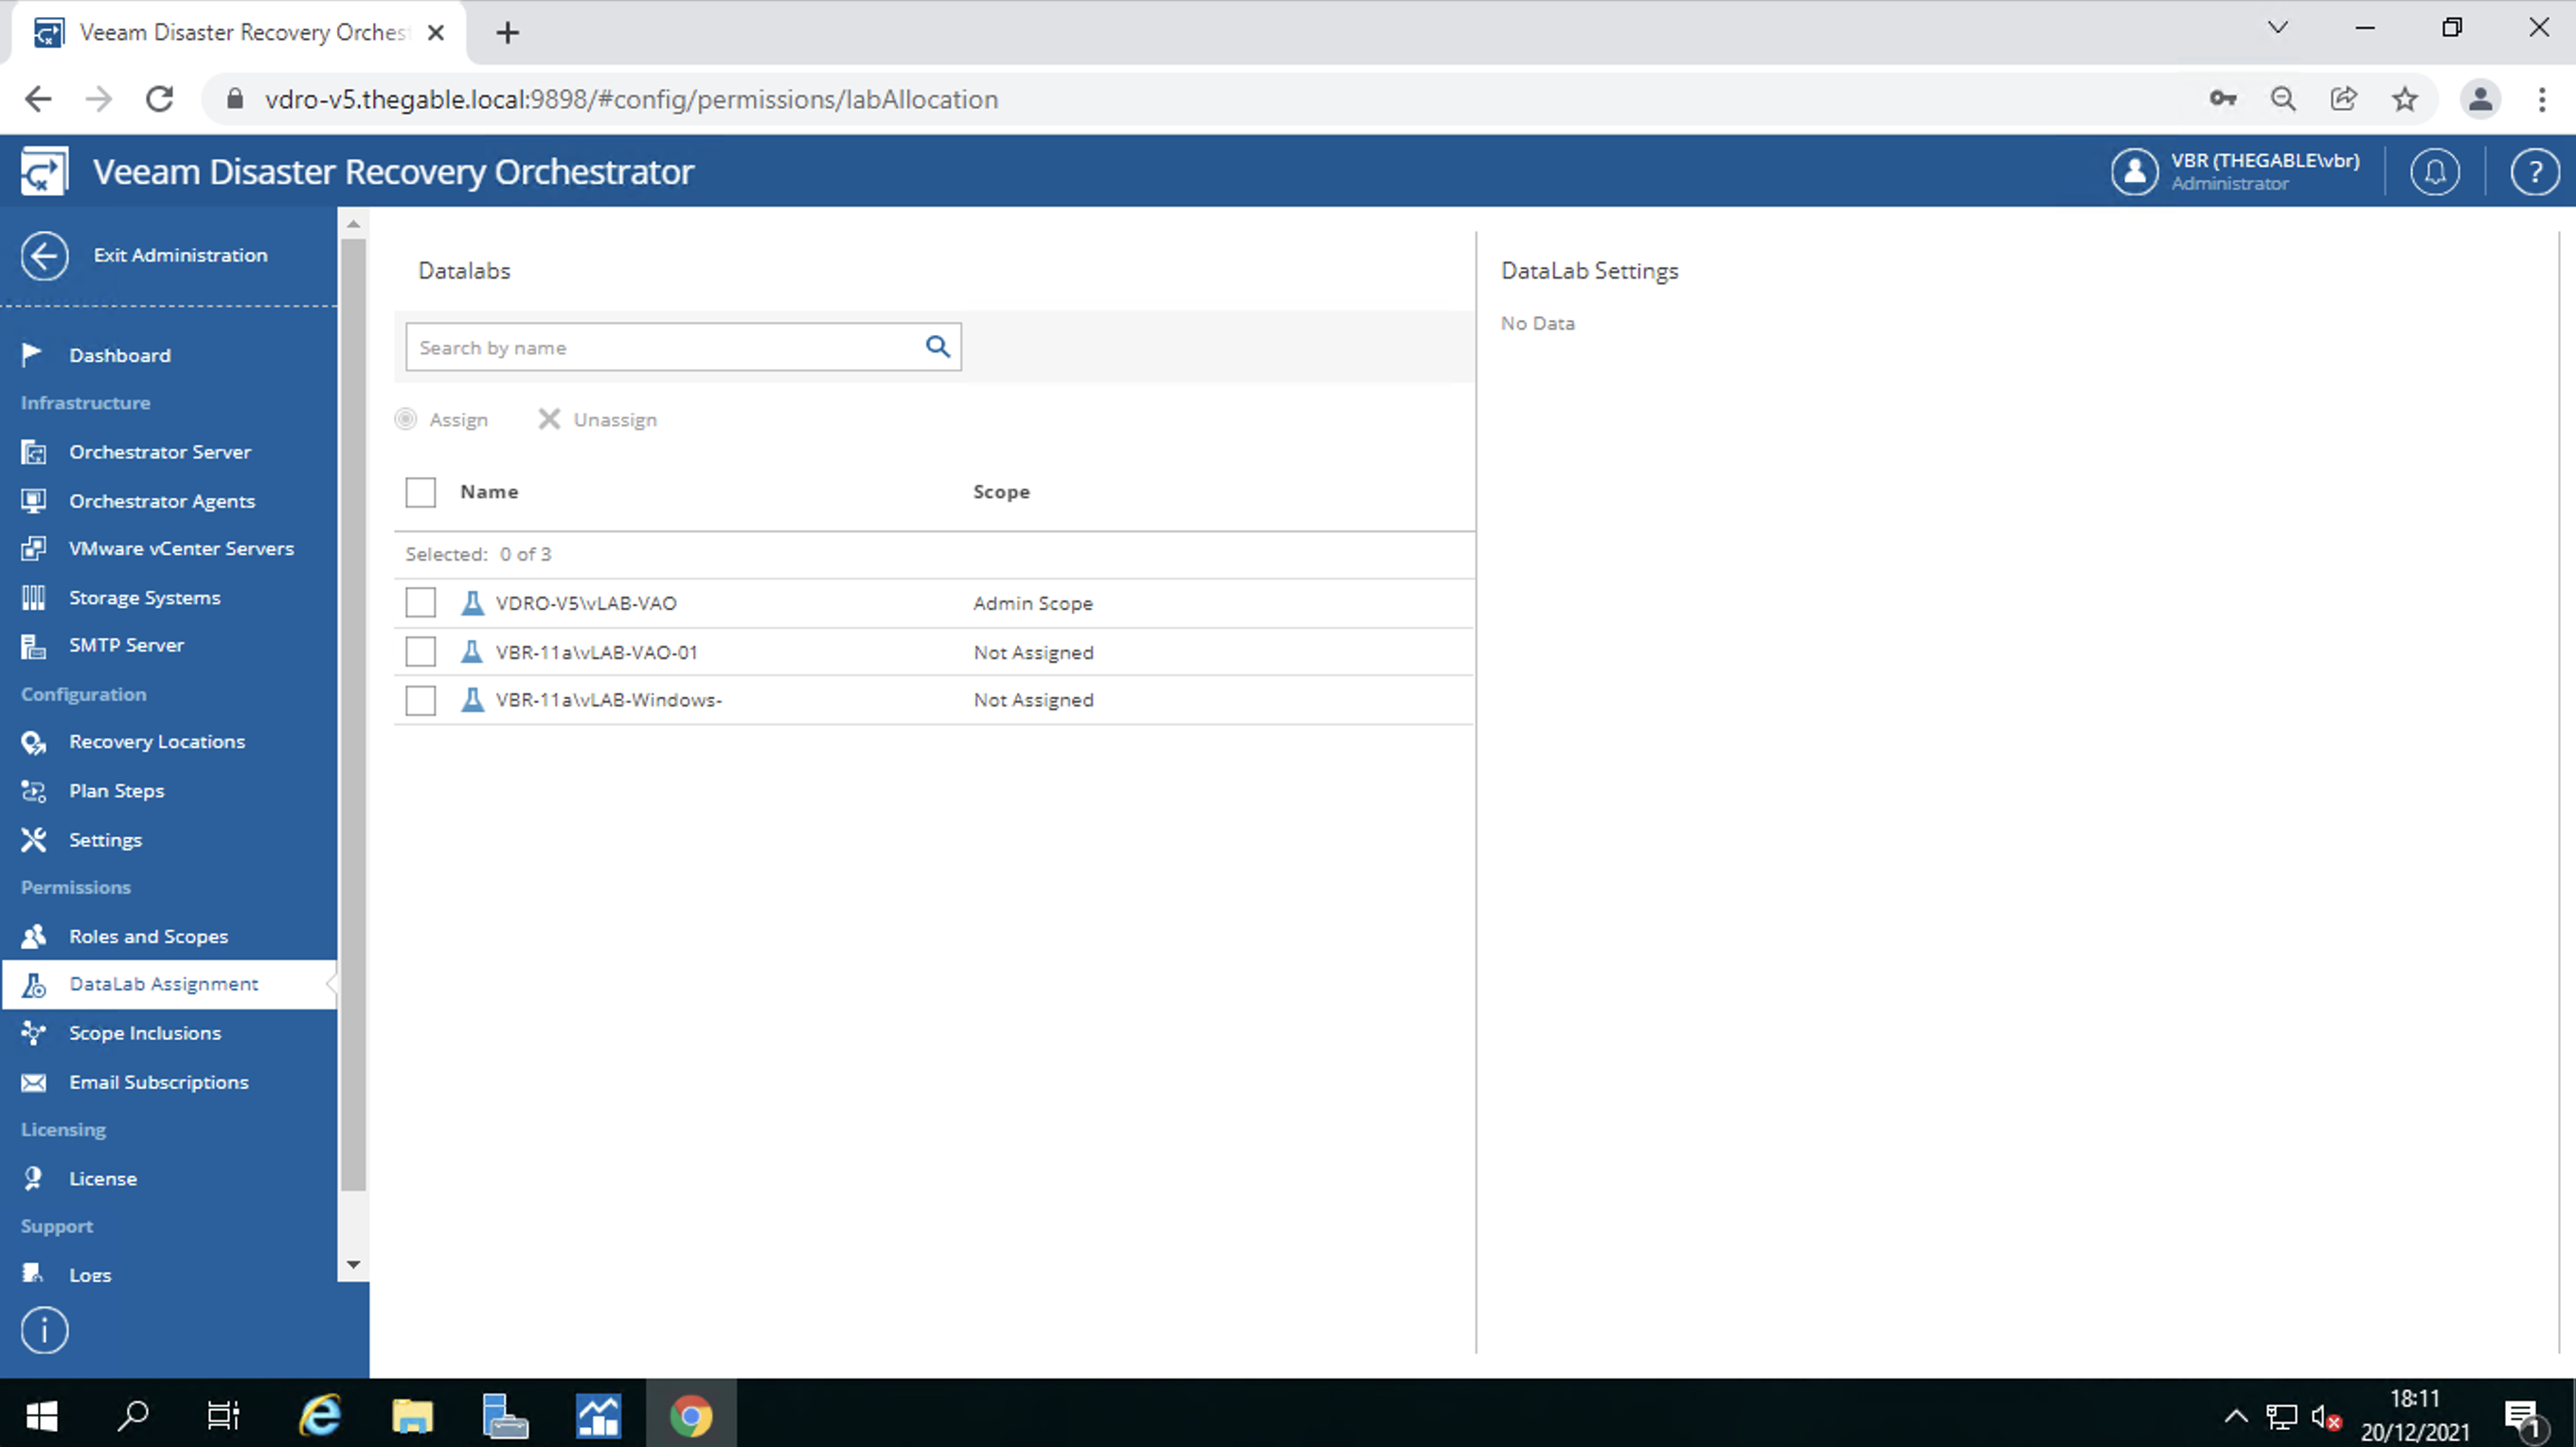 Image 11
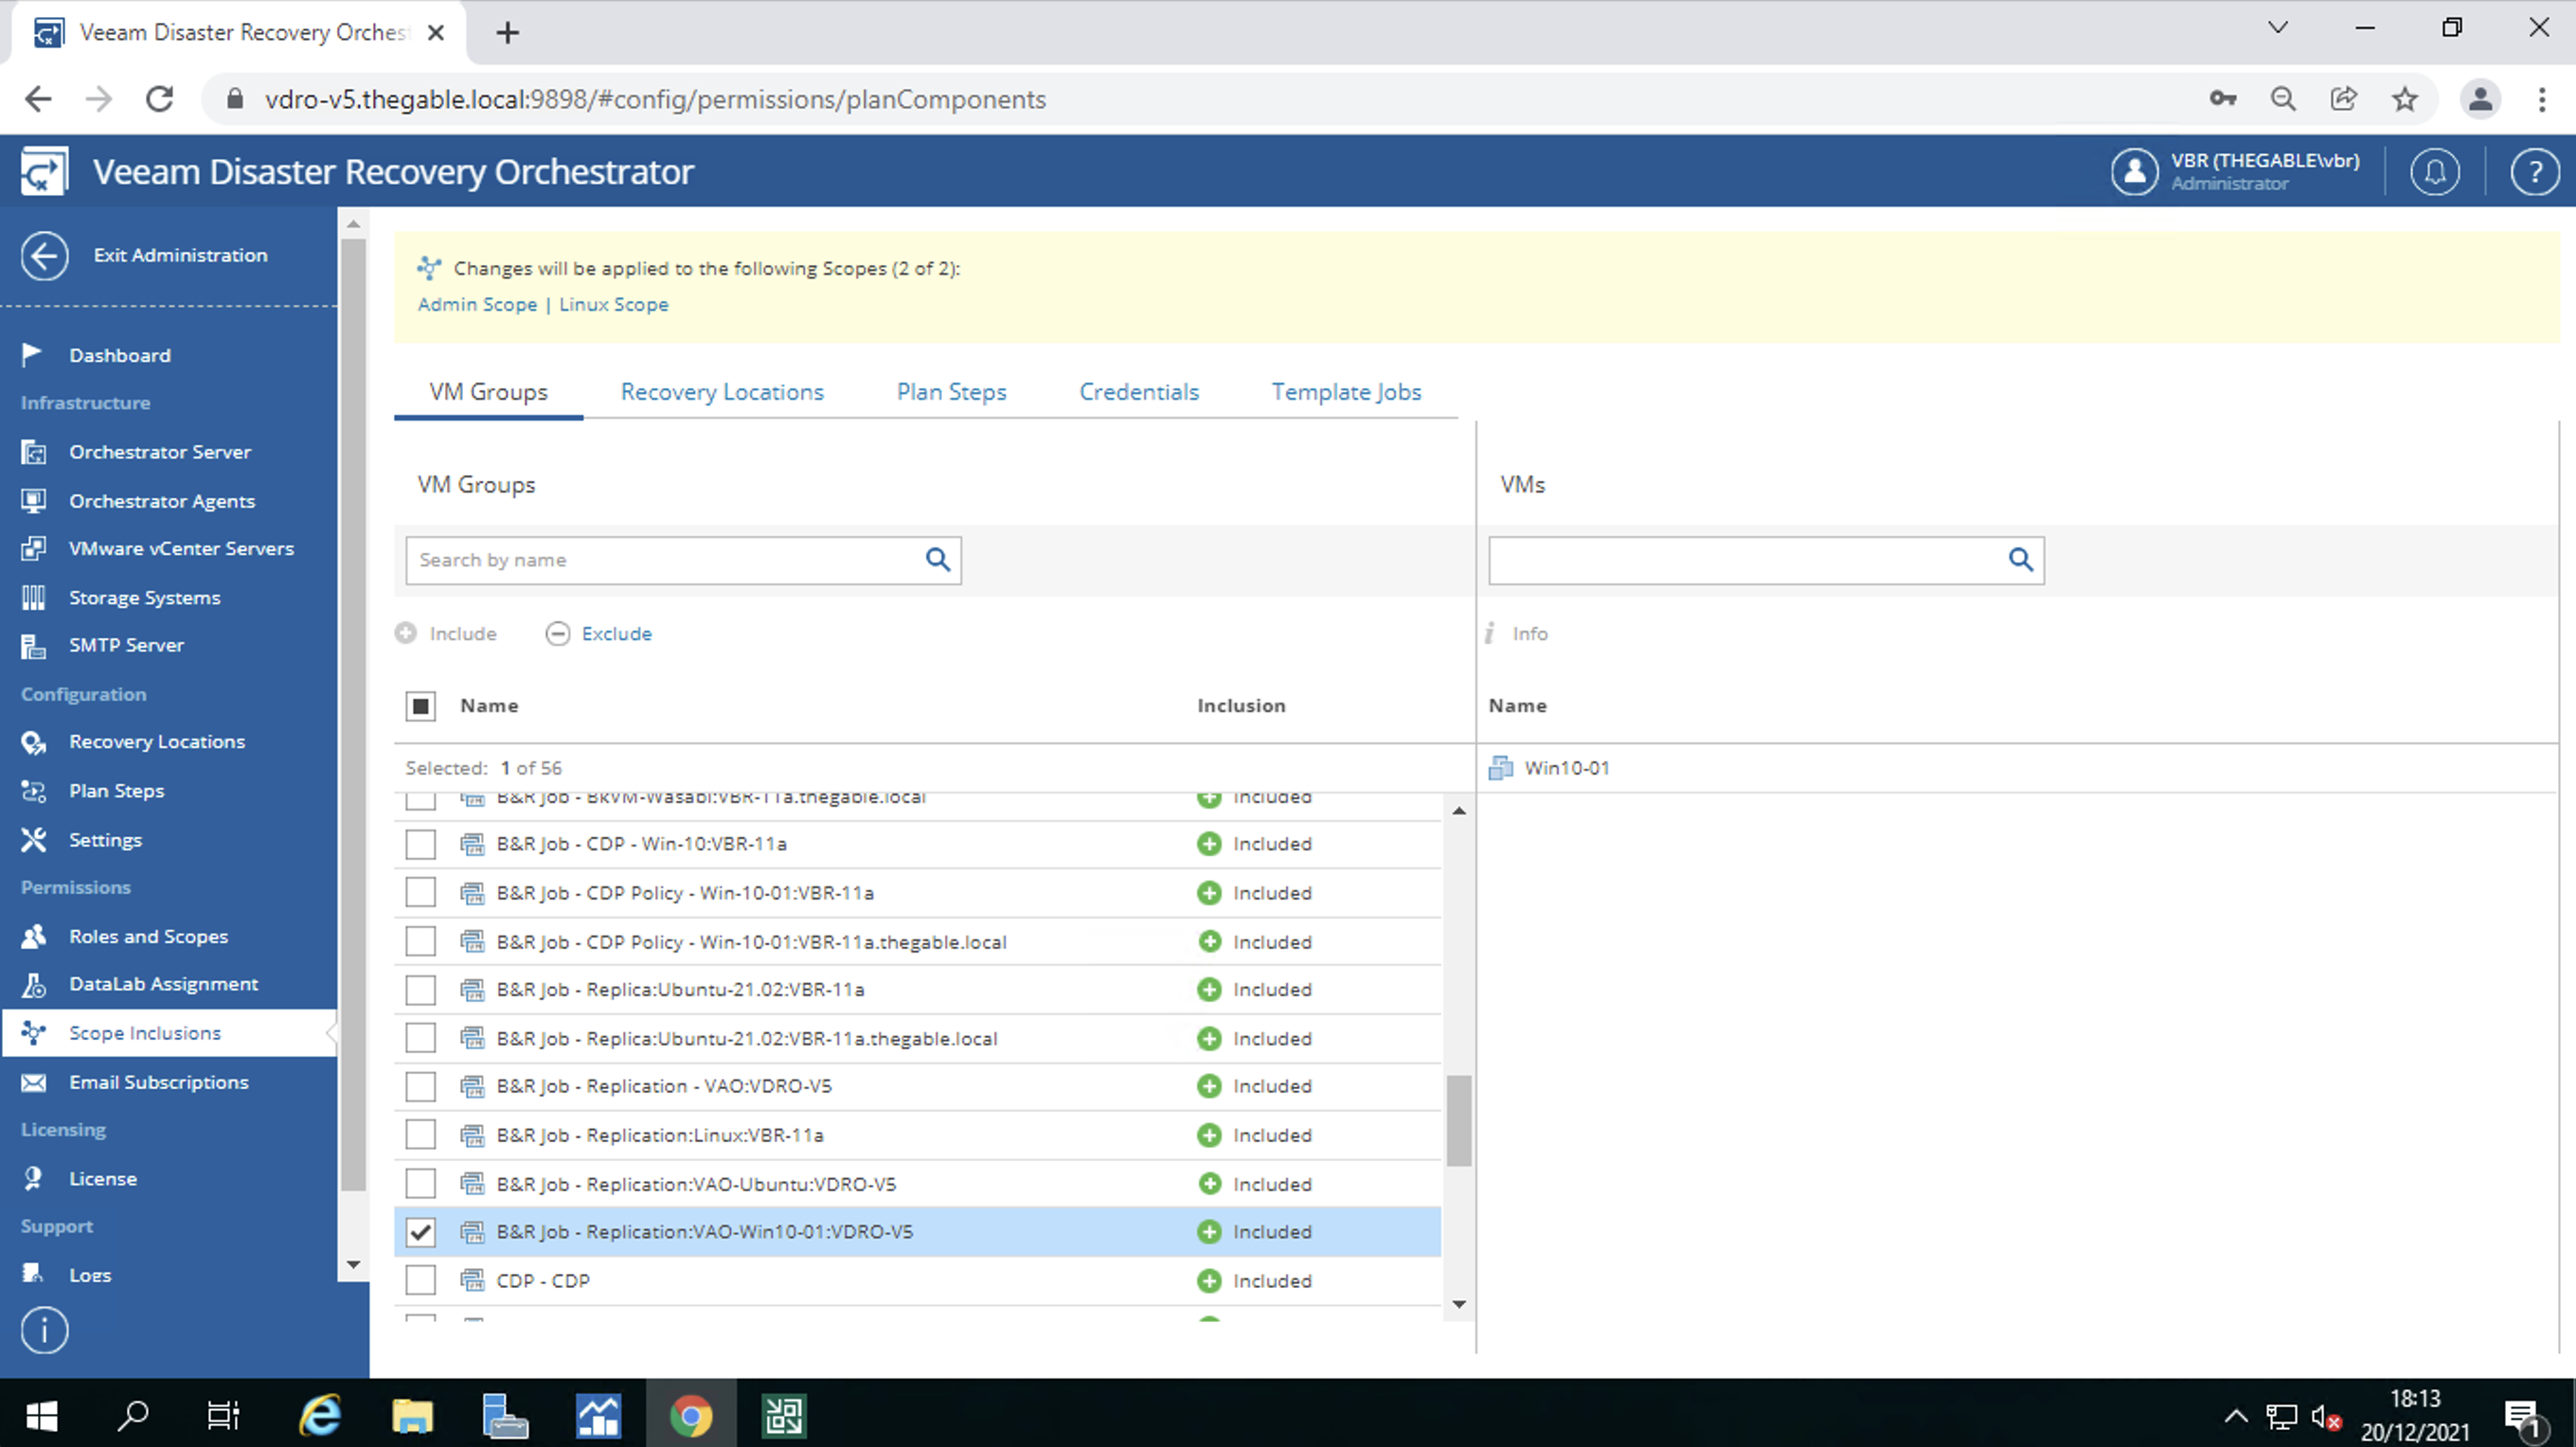 Image 10
 Picture 1
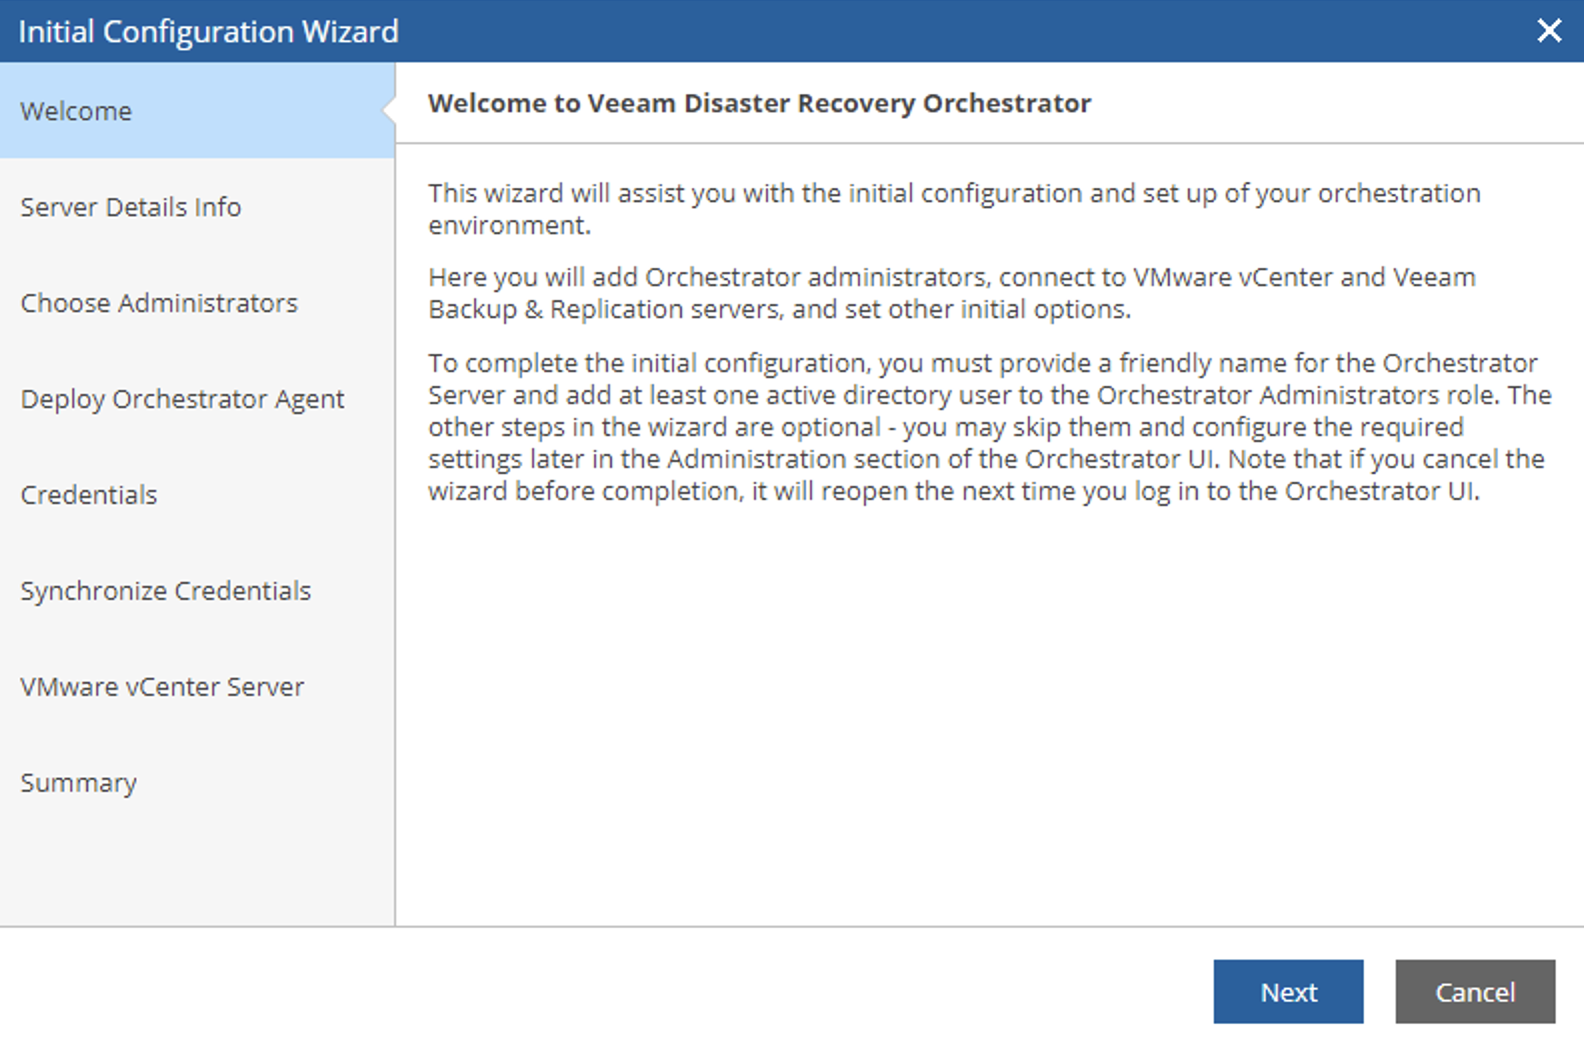 picture 2
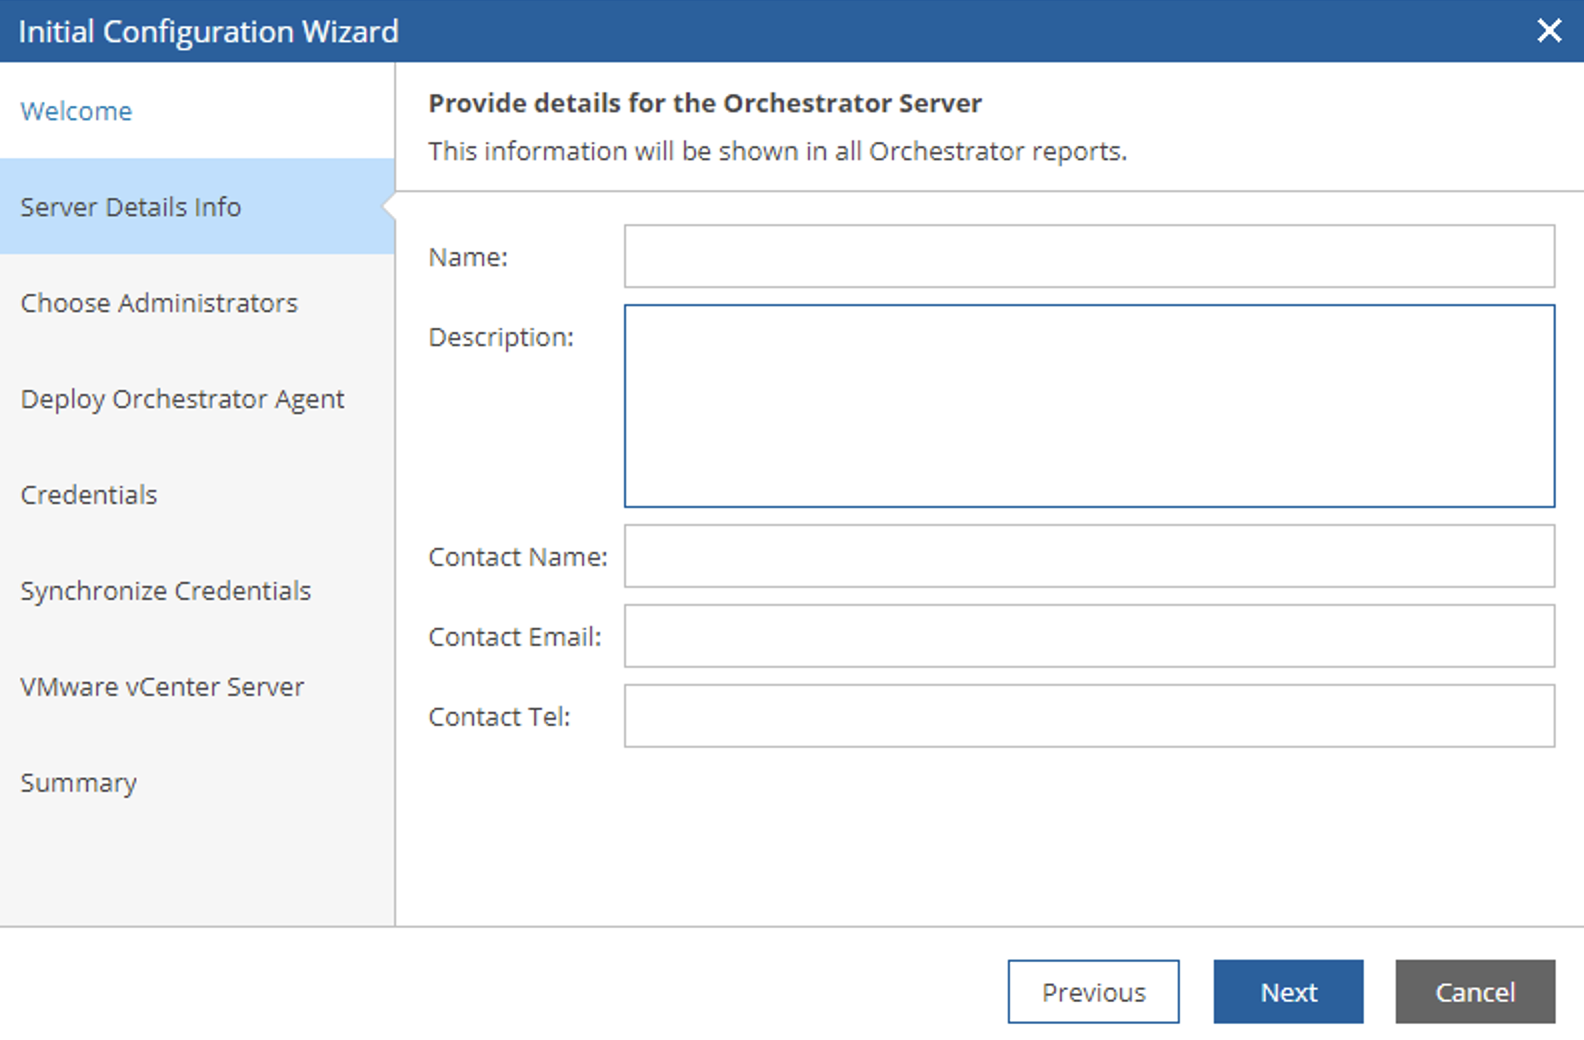 Picture 3
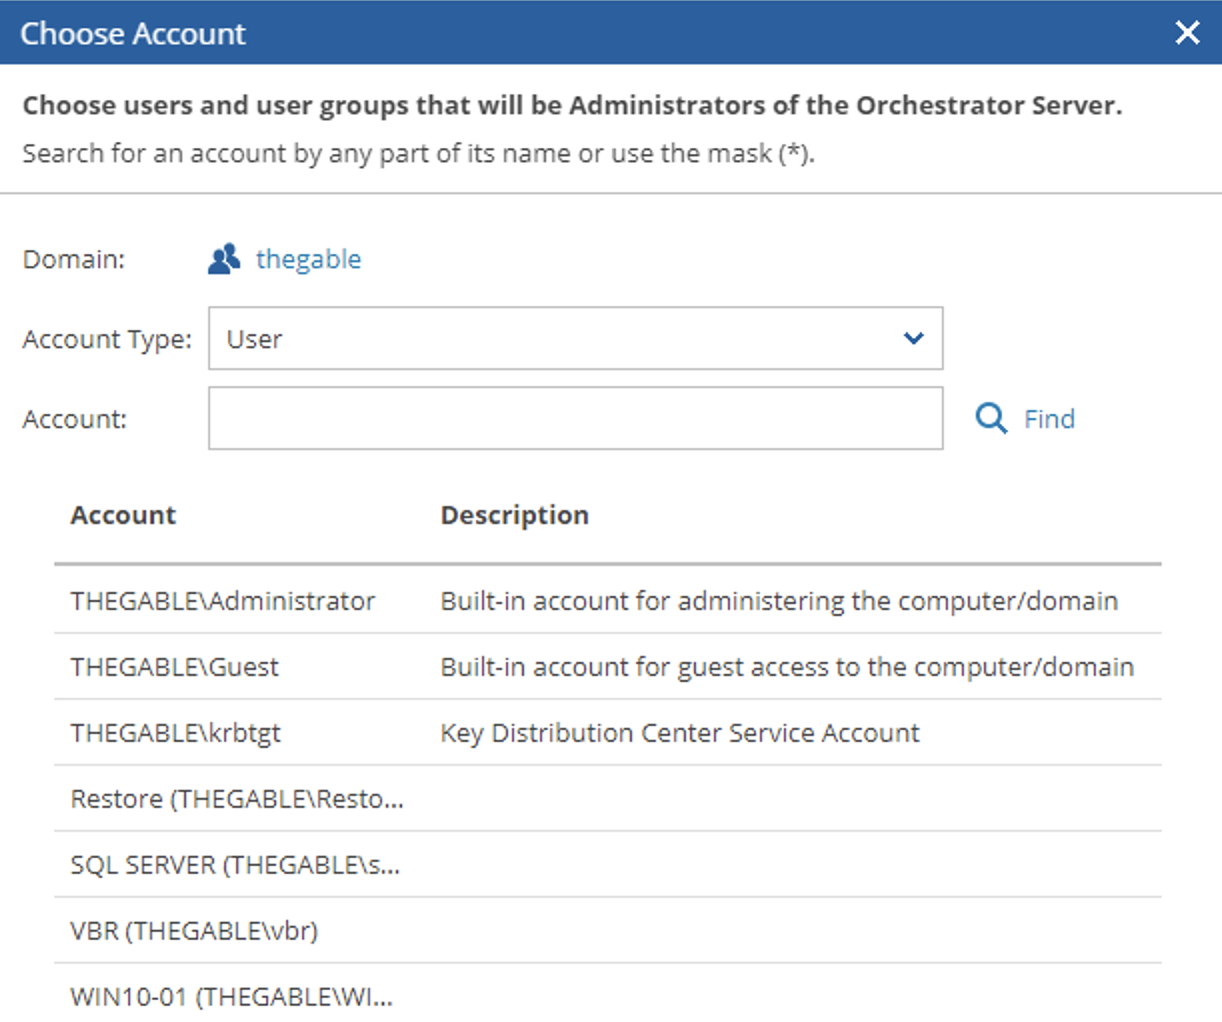 Picture 4
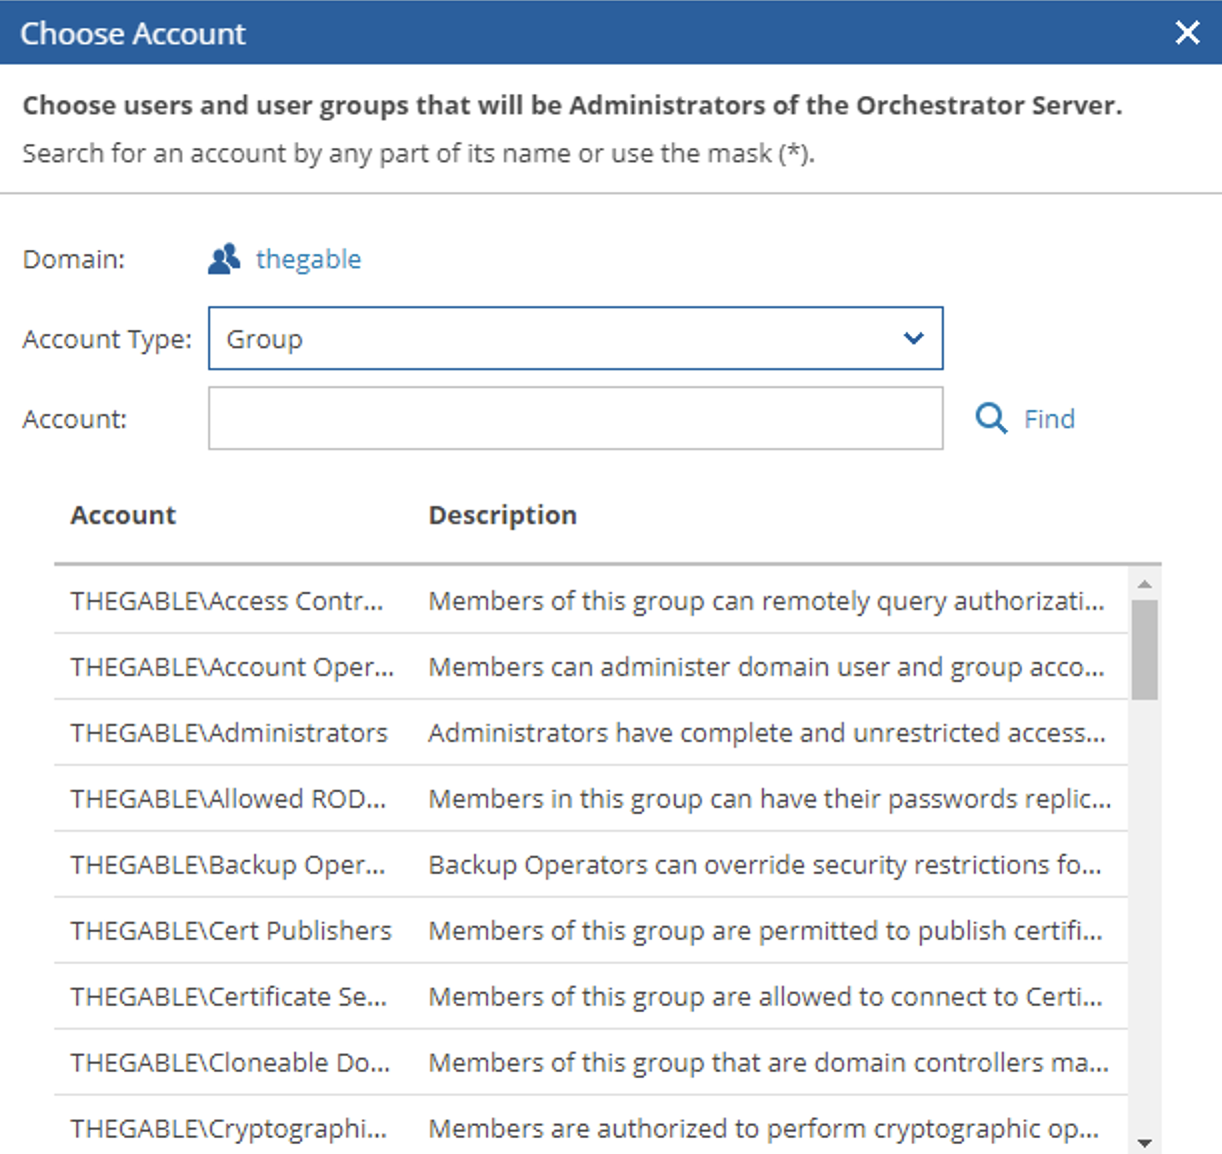 Picture 5
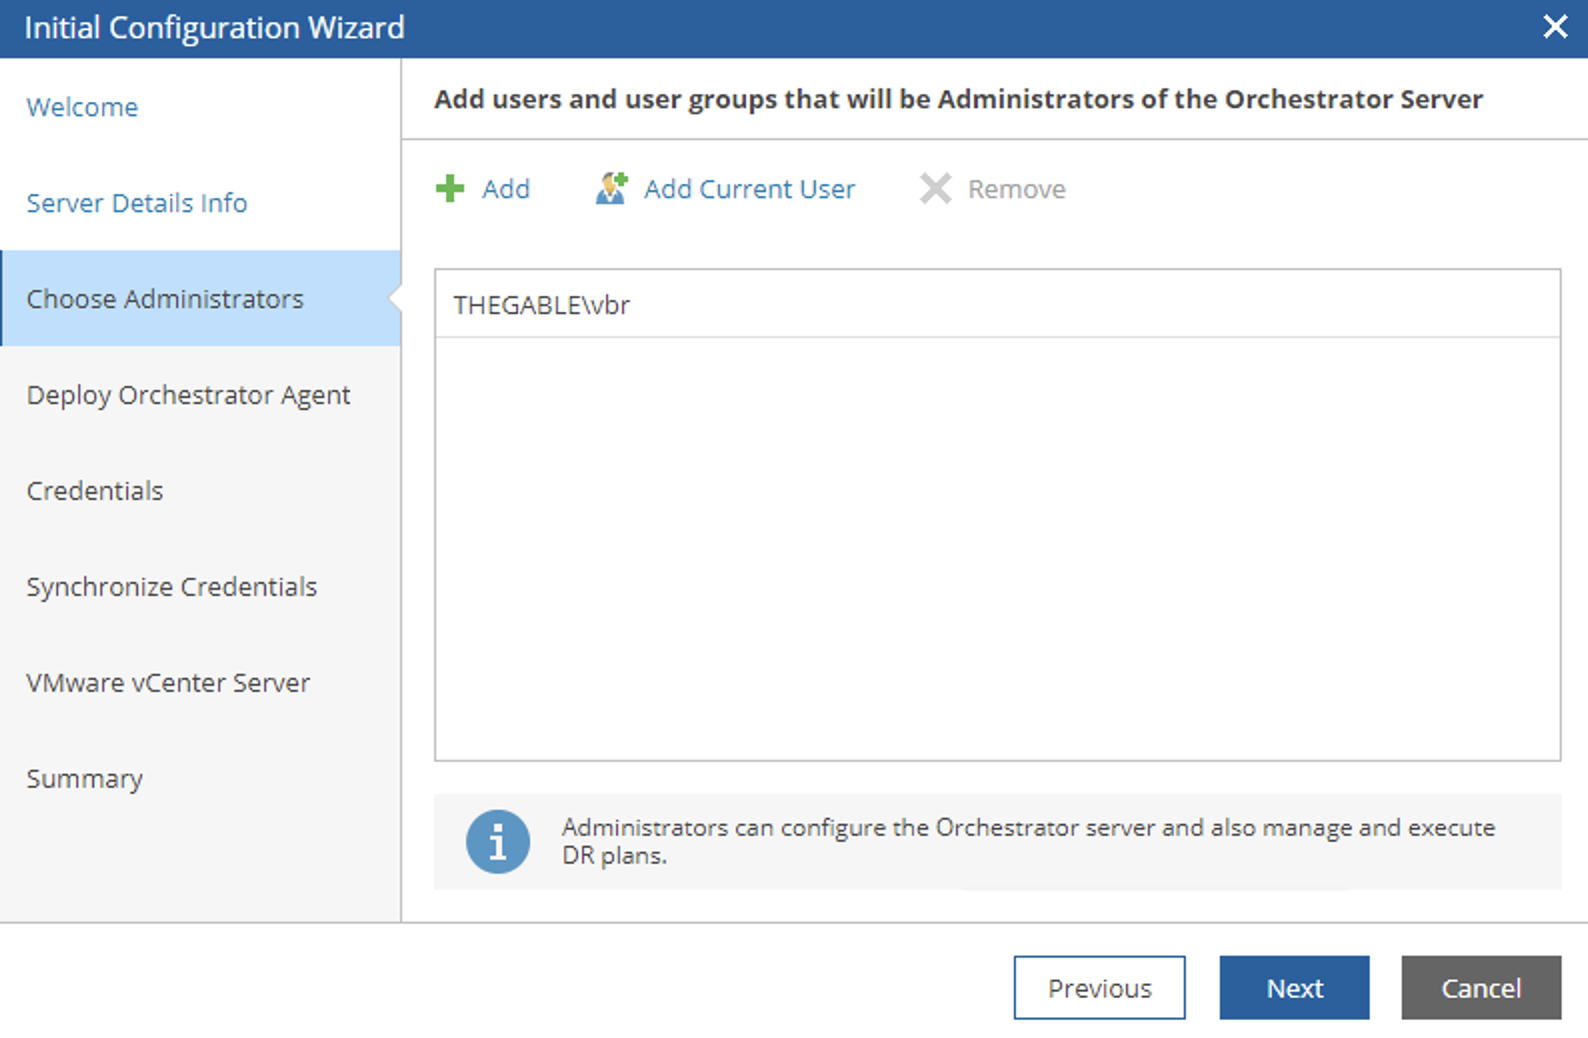 Picture 6
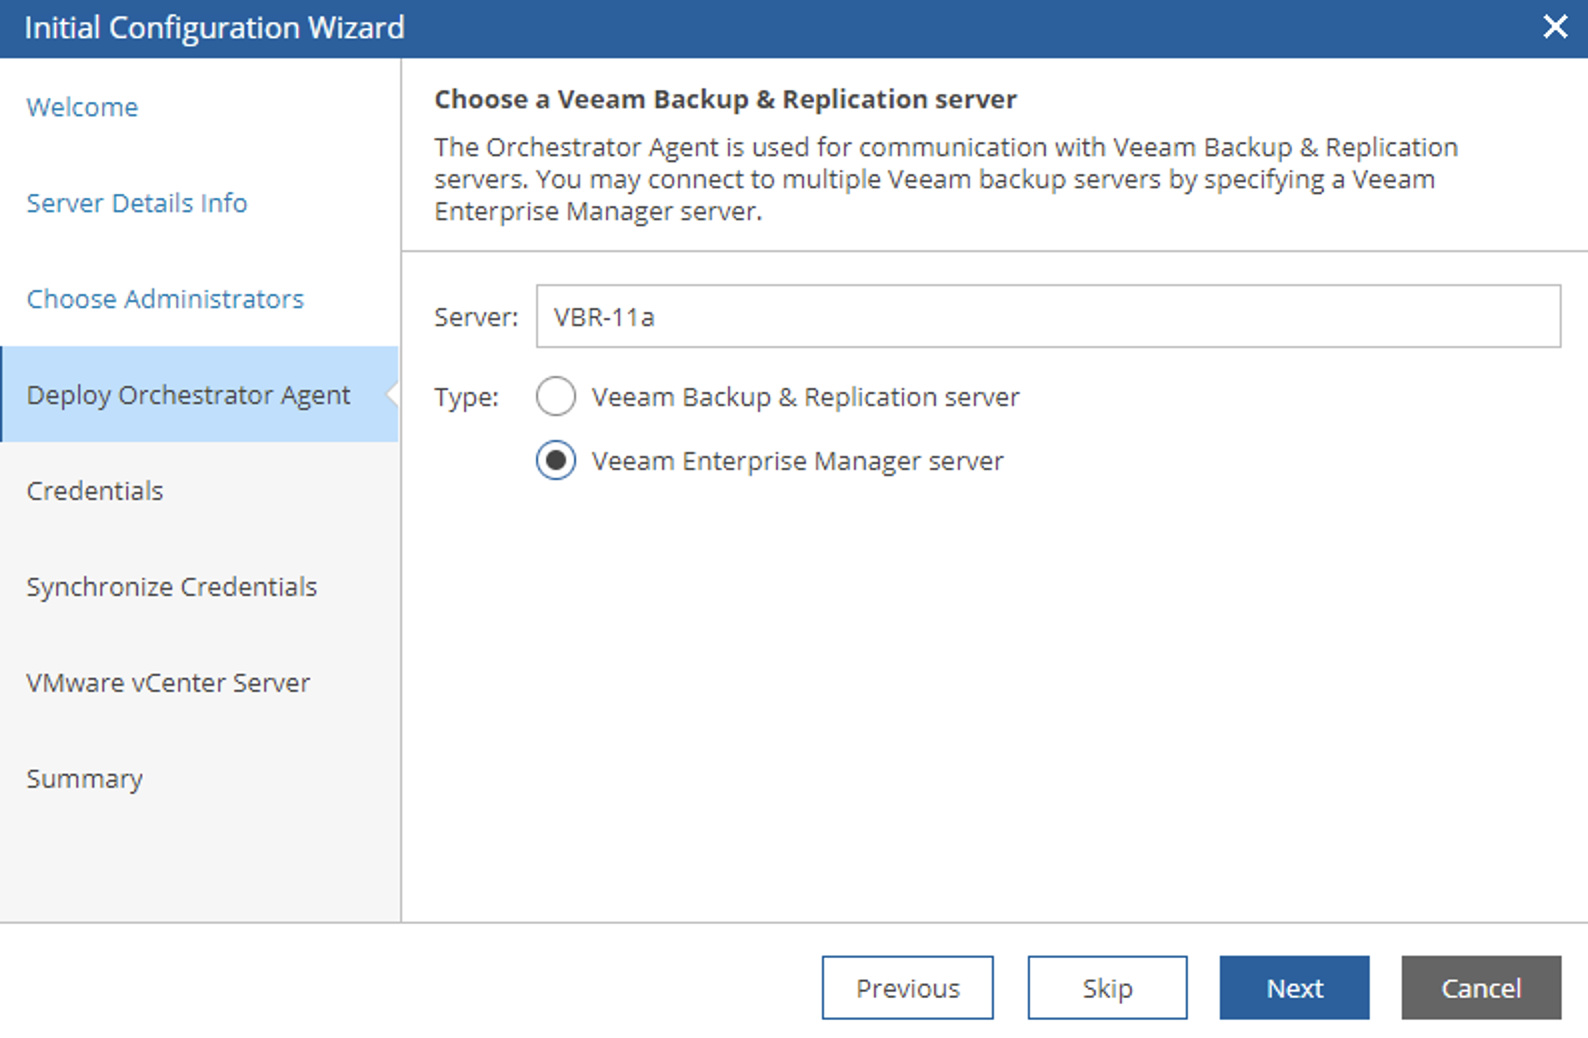 Picture 7
 Image 8
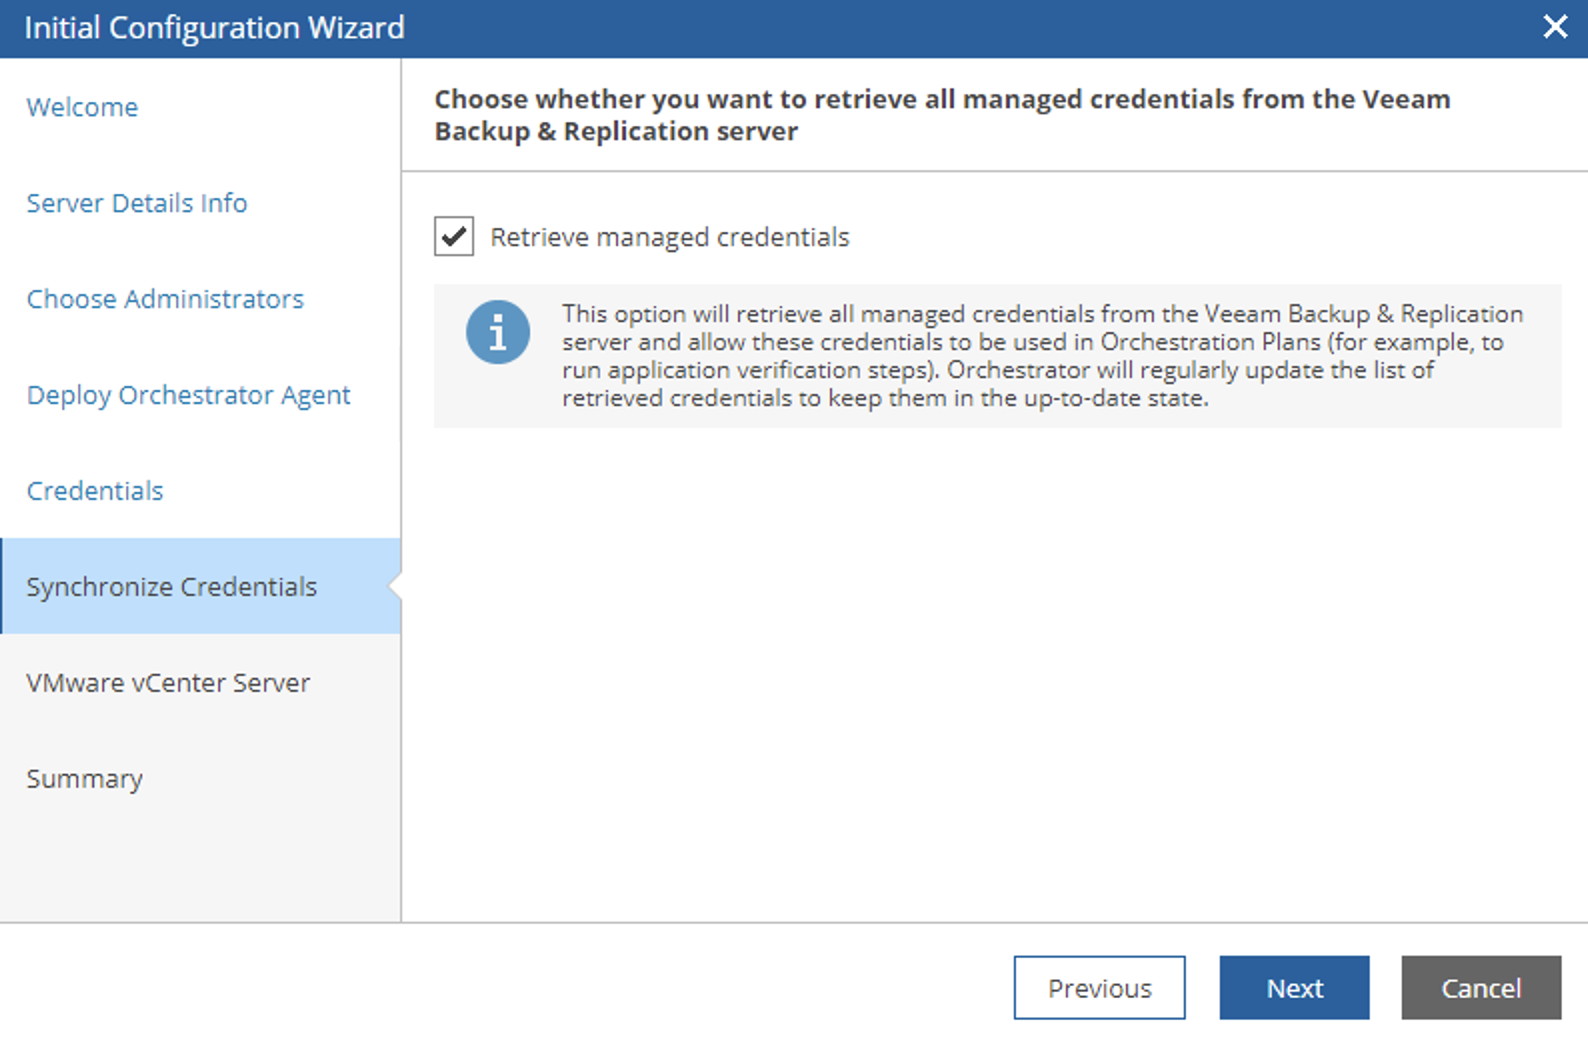 Image 9
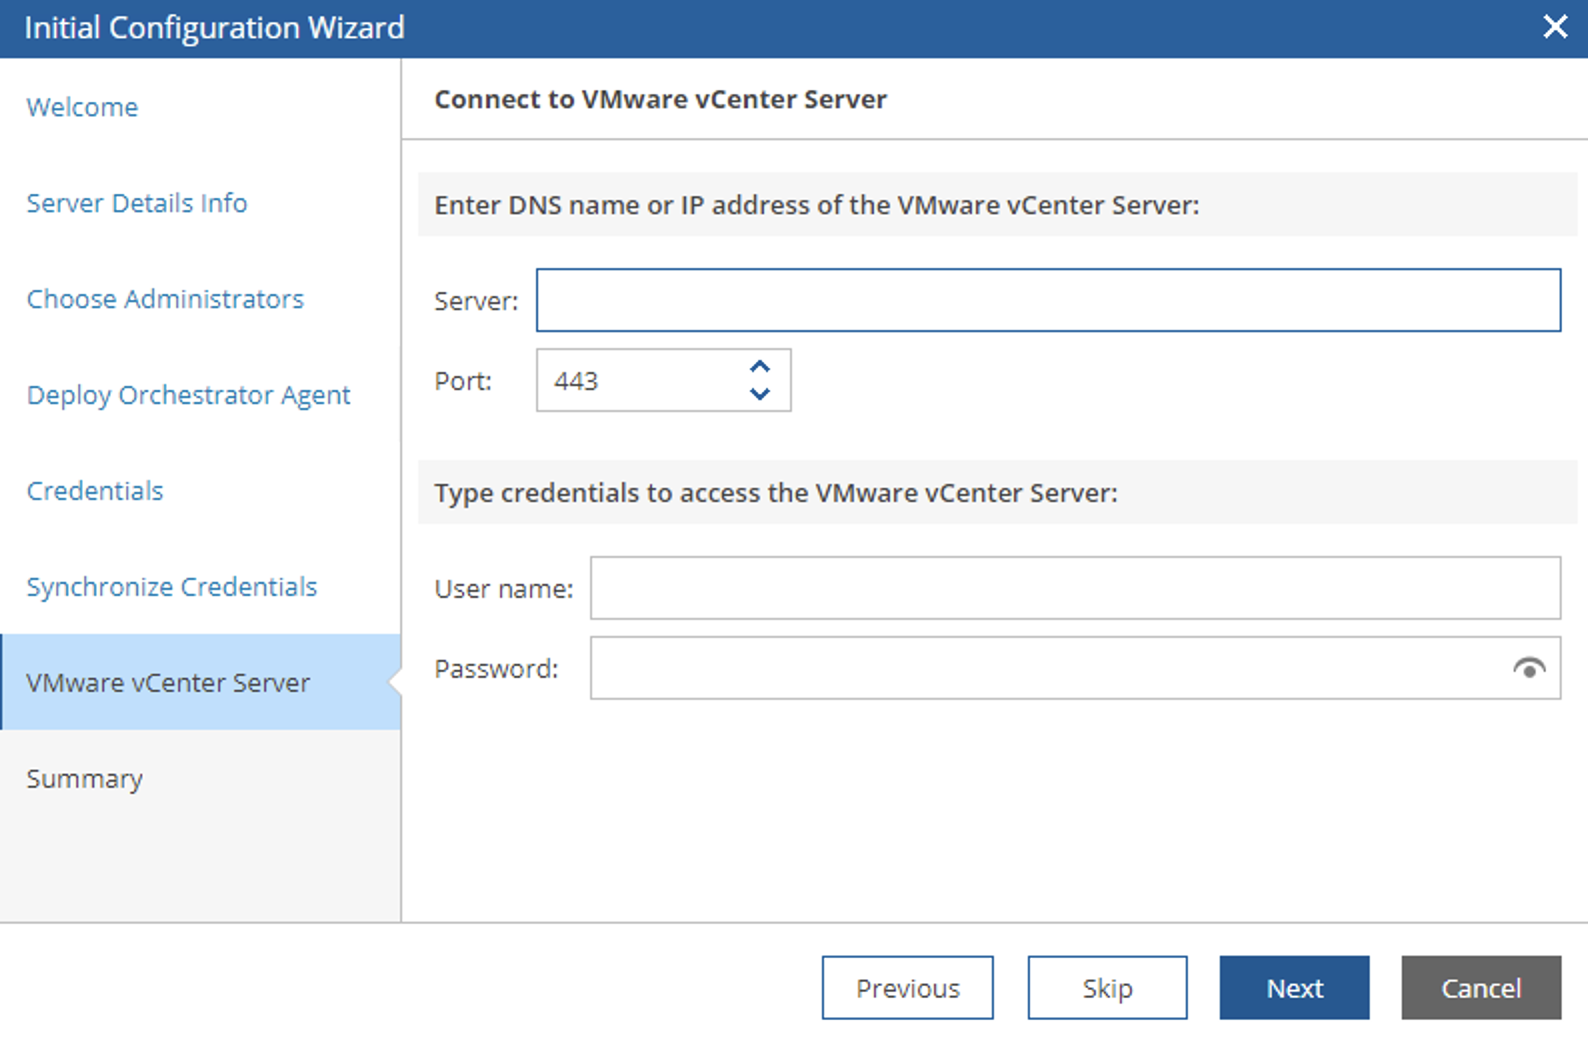 Image 10