
Imagine a disaster, in which the virtual infrastructure has to be restored from scratch.
All is lost except the backup files, which are still available on at least one repository, preferably immutable, on-premises or in the cloud.
To restore the environment you have five different options that are a function of how the Veeam Backup & Replication protection and resilience architecture is designed and implemented.
Note 1: Veeam Backup & Replication will hereafter be referred to as. VBR.
Scenario A (Restoration from scratch):
- You have not made an application-aware backup of the server VBR.
- You have not performed application aware replication of the server VBR.
- Export of server DB configuration is not available VBR.
- You want to restore production workloads immediately.
What to do?
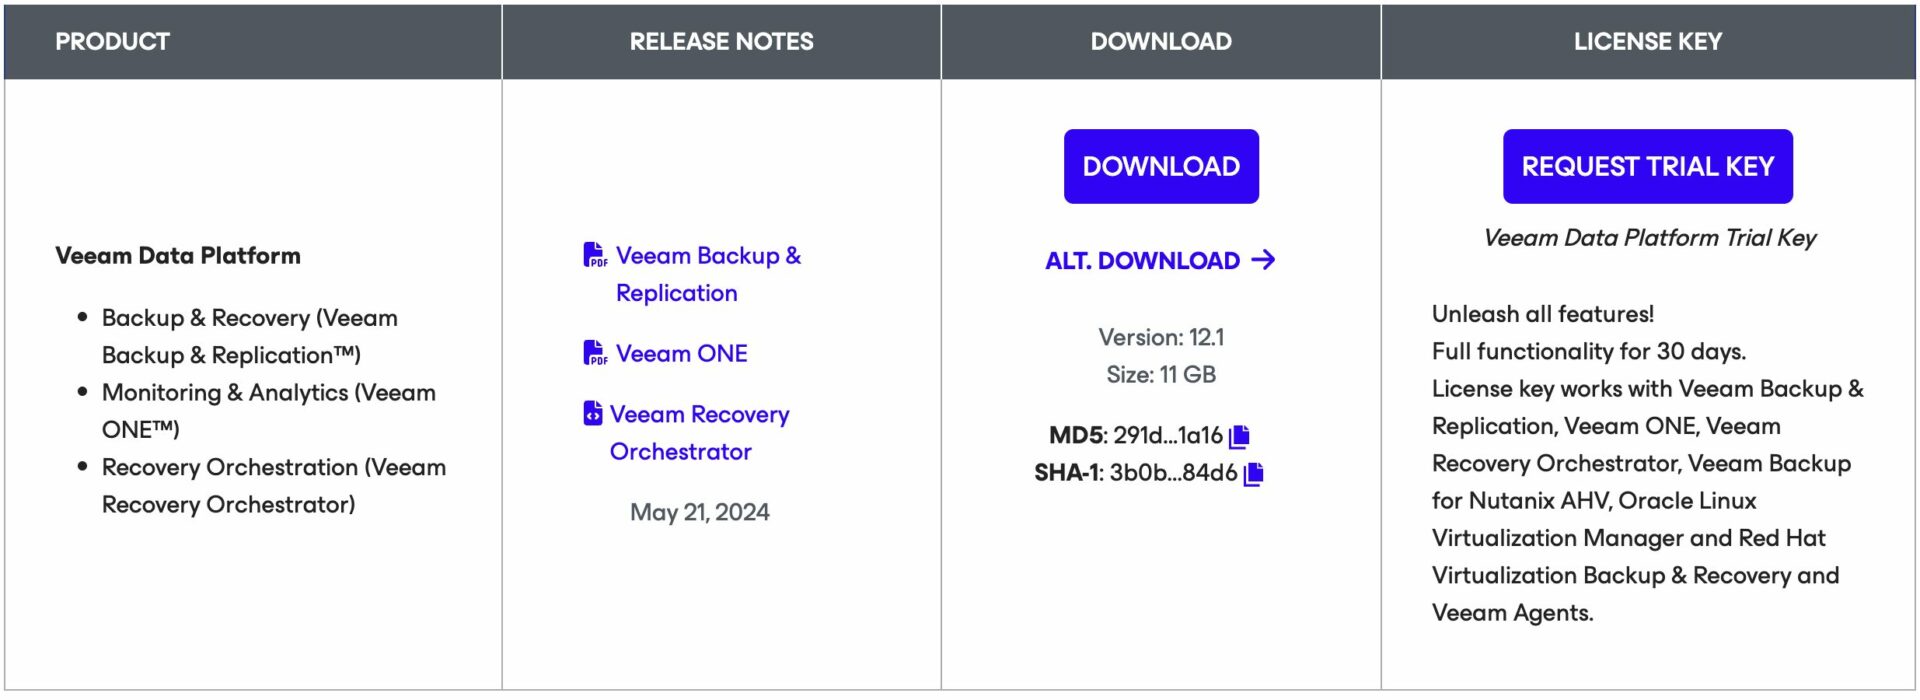
Step 1A: Install Veeam Backup & Replication.
How to: From Veeam’s website(https://www.veeam.com) download the latest version of VBR.
(direct link -> https://www.veeam.com/products/data-platform-trial-download.html?tab=cloud-plugins).
 Picture 1
Note 2: VBR can read Backup files created with earlier versions.
The simplicity of installing Veeam Backup & Replication makes it easy, fast, and can be done in unattended mode.
(https://helpcenter.veeam.com/docs/backup/vsphere/silent_mode.html?zoom_highlight=Unattended&ver=120)
In this step, just clicking “next” to complete the operation is often sufficient.
Note 3: It is recommended that you use your license file (which can be downloaded from my.veeam.com) although the Community Edition (unlicensed) is often sufficient for most restores needed at this stage.
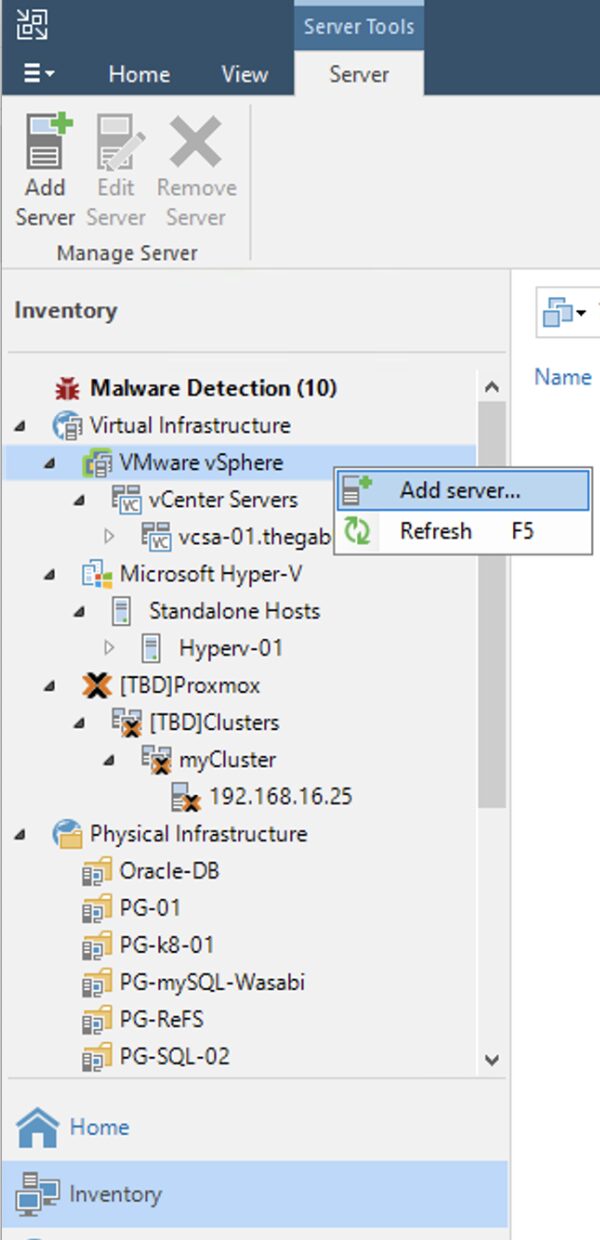
Step 2A: Add the production virtual infrastructure where you want to restore workloads protected by VBR.
How: after completing the first step, from the console of VBR add the virtual infrastructure (Menu: “Inventory” -> “Vmware vSphere“-> “Add Server“) (Image 2).
 picture 2
The following steps depend on the type of Hypervisor (VMware vSphere, Microsoft Hyper-V, Nutanix AHV, …) but are always very simple.
Step 3A (optional): Add backup proxies.
Even if we are operating at the recovery level, improving the performance by adding backup proxies is always a good idea.
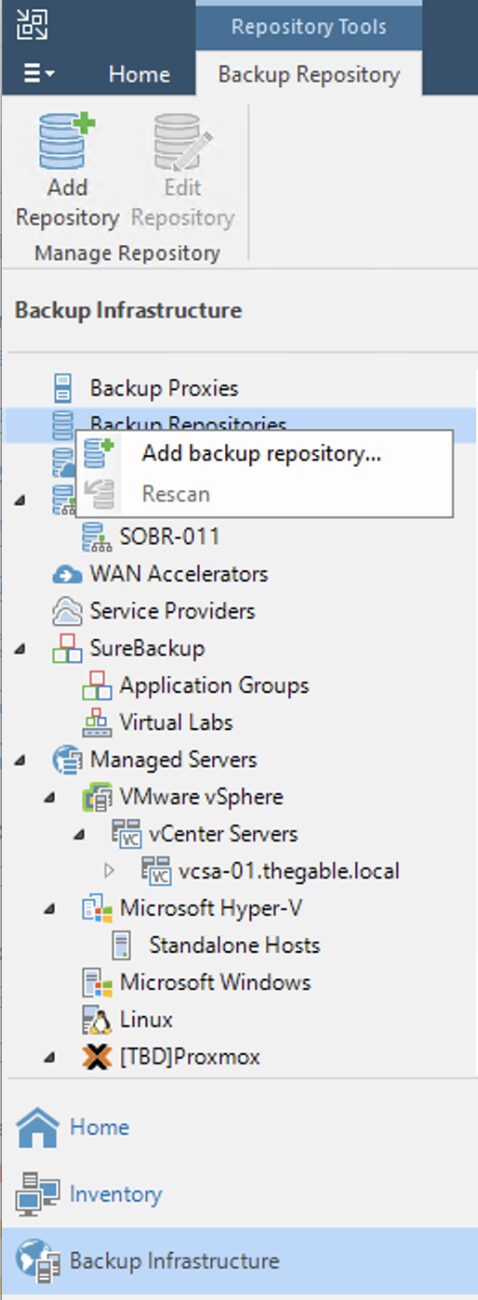
Step 4A: Adding Veeam backup repositories.
The last preparatory step before starting restores is to add the repositories with the backup data.
How: from the console, select “Backup Infrastructure,” “Backup Repository,” and then “Add Repository” (image 3).
 Picture 3
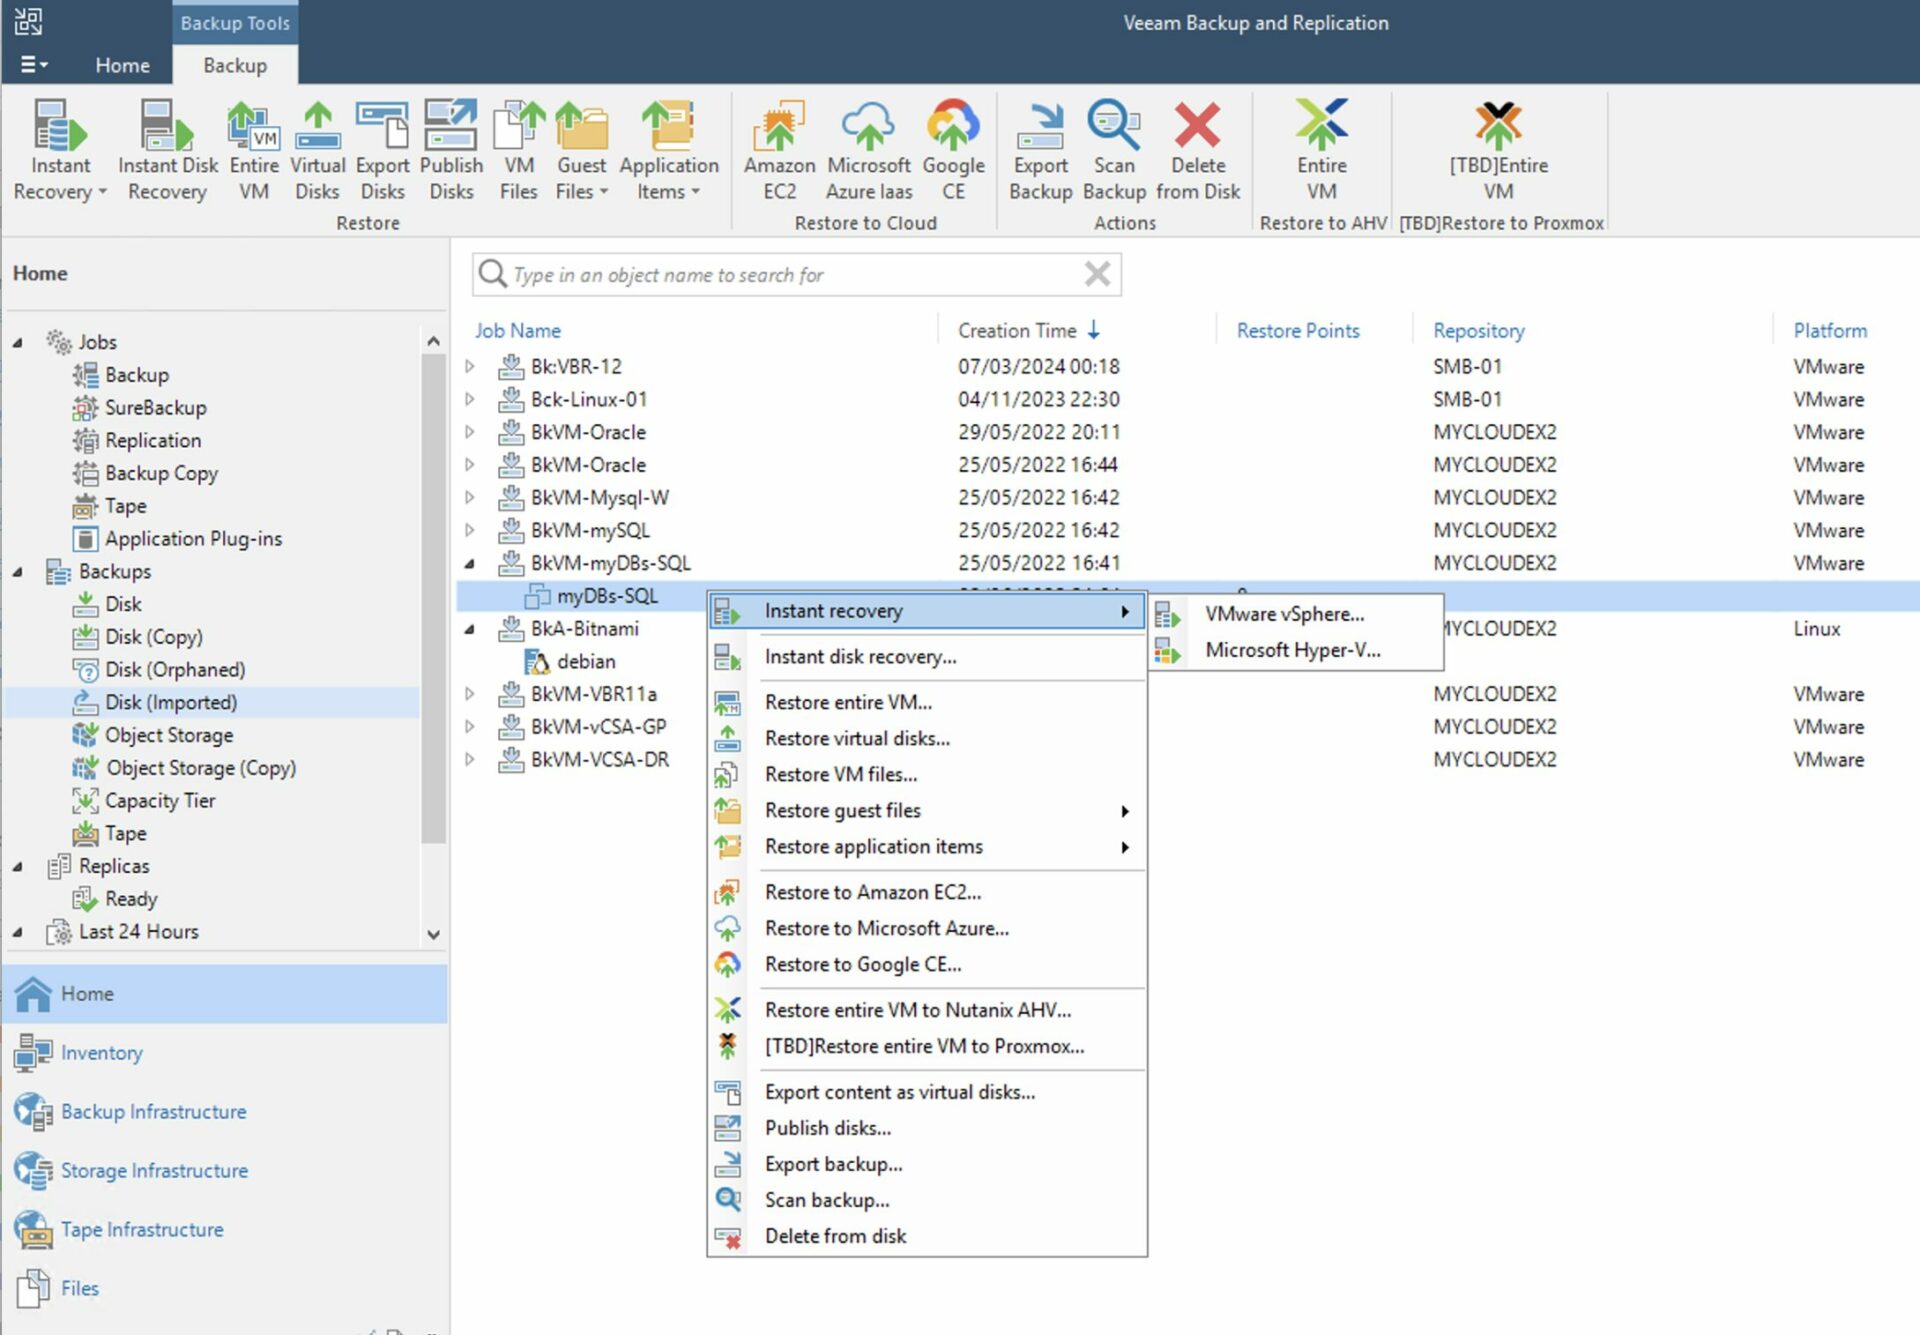
Step 5A: Starting the restore
How: from the console of VBR select “Home,” “Backup,” “Disk imported,” the VM you want to restore, and right-click to start the restore process (Image 4).
 Picture 4
Note 4: Recovery can be instantaneous. With this mode, VMs are started directly from the backup repository. In this option, the repository serves as the data store (for VMware the DataStore) for the virtual environment.
(Instant VM recovery was invented by Veeam more than a decade ago and has since improved its performance and flexibility.)
Now your production architecture is back up and running!
https://www.veeam.com/blog/restoring-infrastructure-from-scratch-with-veeam.html
Scenario B: The VBR is a virtual server.
- You have made an application-aware backup of the server VBR.
- You have not performed application-aware replication of the server VBR.
- Export of server DB configuration is not available VBR.
- You want to restore the server immediately VBR.
What to do?
Step 1B: Make a download of the utility “Veeam.Backup.Extractor.exe” from Veeam’s Download site.
(https://www.veeam.com/products/data-platform-trial-download.html?tab=extensions).
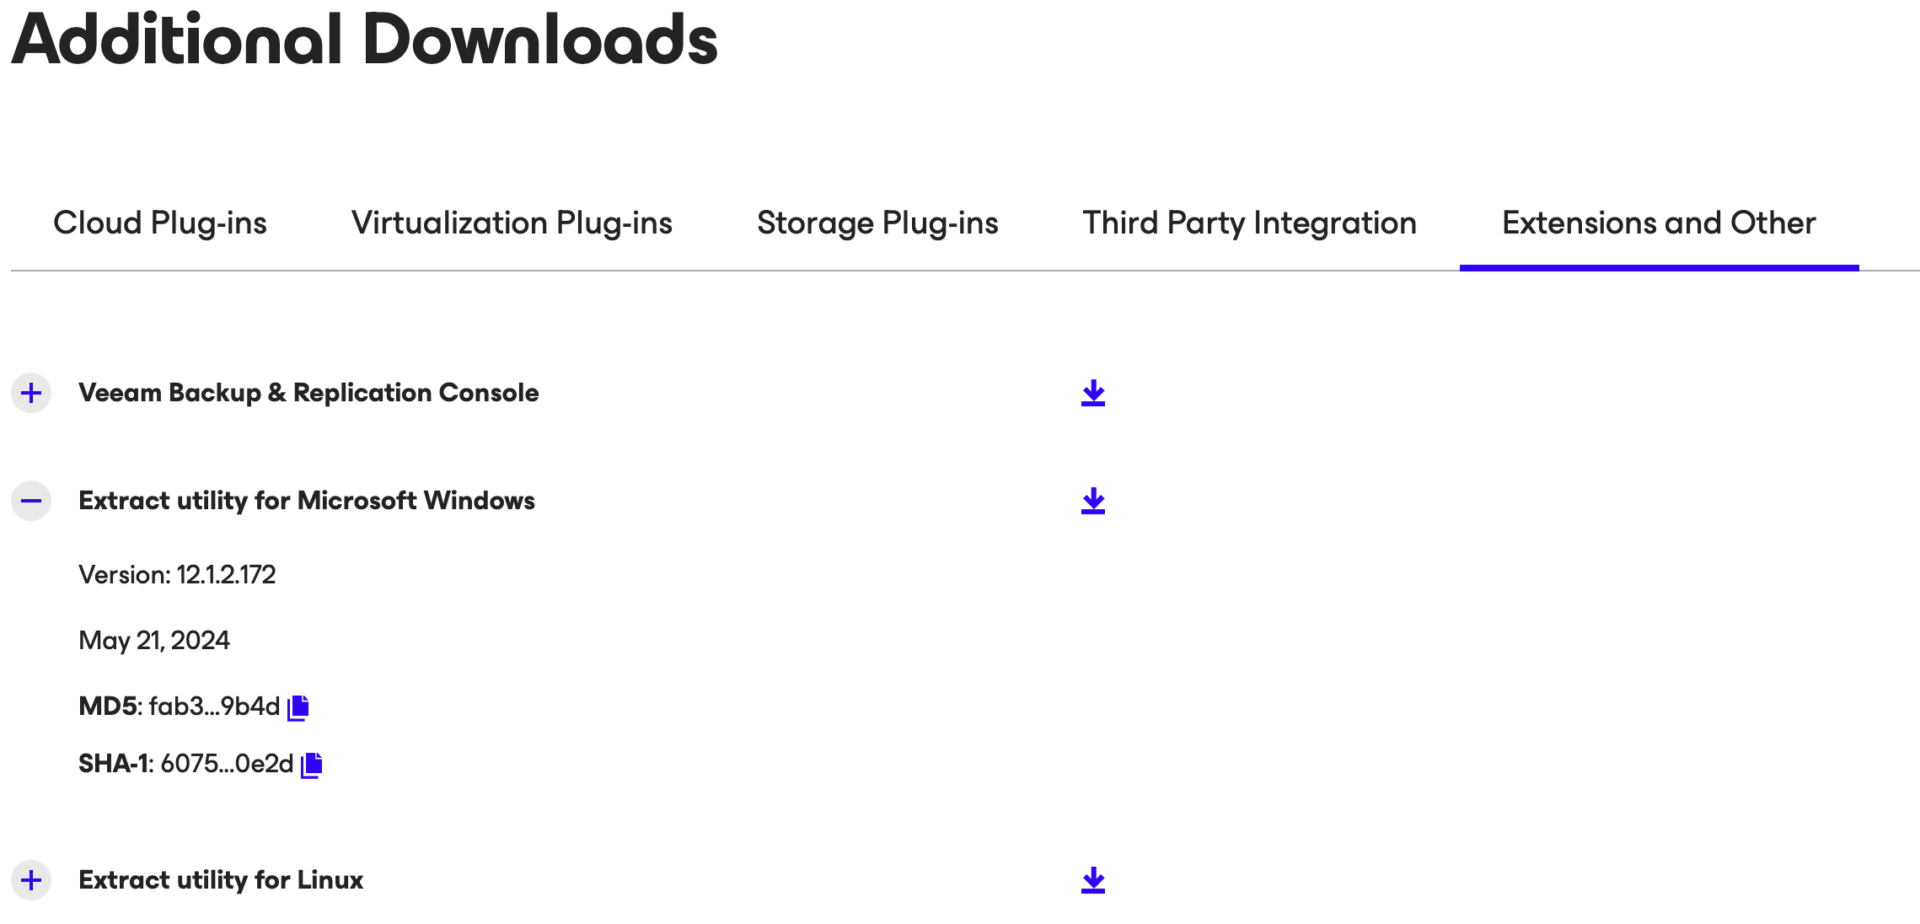 Picture 5
Note 5: There is also a command-line Extract option for Windows and Linux platforms.
Step 2B: Start Extract, select the backup of the VBR, and once the files of the VM-VBR are copied them to your preferred VMware datastore.
Now from the vCenter register the VM you just copied.
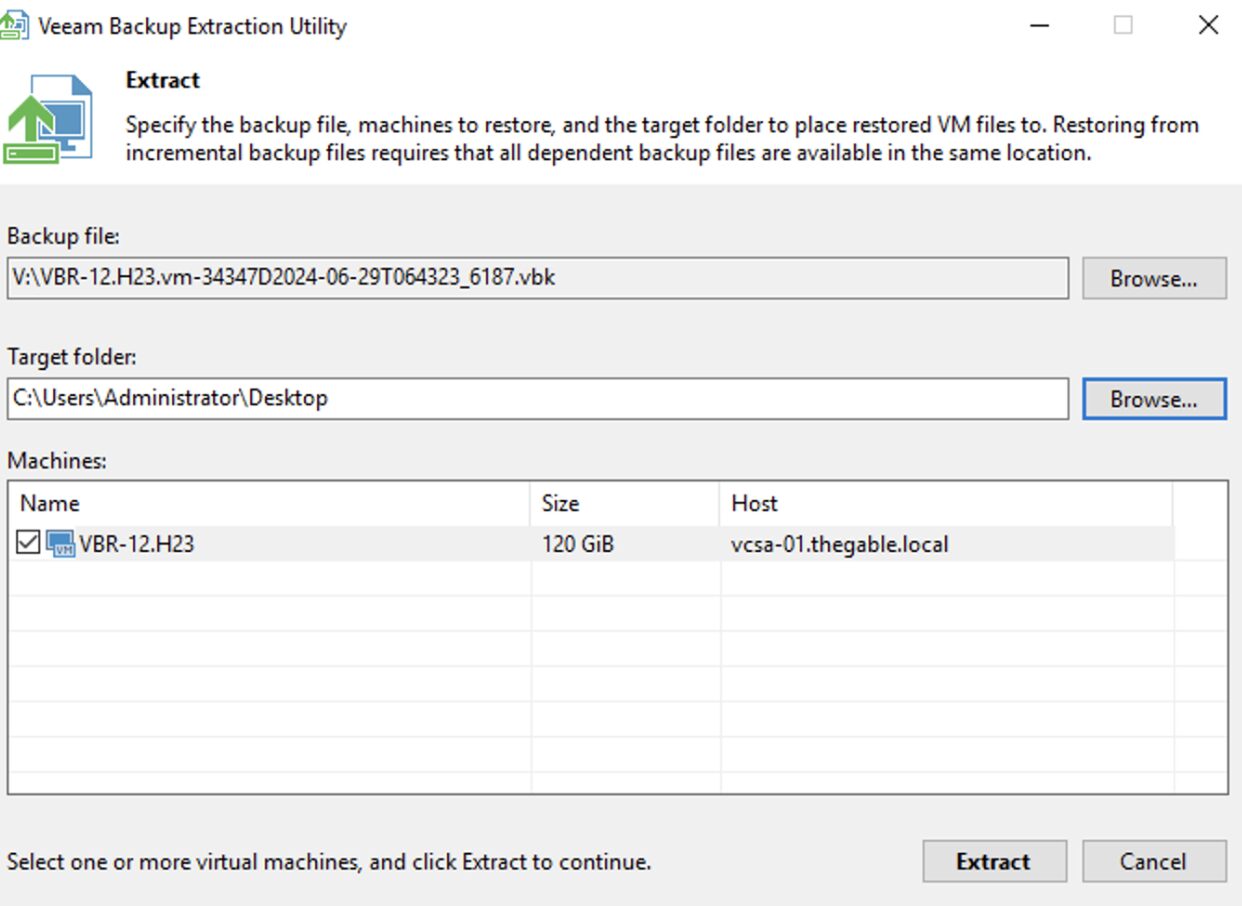 (Image 6)
Note 6: A command-line extract option is available for Windows and Linux platforms.
Note 7: It is possible to automate and simplify copying to the VMware Datastore by publishing an NFS network share as mentioned in the following article:
https://www.virtualtothecore.com/veeam-extract-utility-quick-restores-without-veeam-server
Step 3B: After completing the recovery of step 2B, start the VBR and carry out the standard operations of use (see Step 5A).
Scenario C: The VBR is a physical server
- You have made the application aware backup of VBR by creating the recovery media.
- Export of the configuration file of (VBR).
- You want to restore the server immediately VBR.
What to do?
Step 1C: Make the recovery media available to the Physical Server VBR (via Network or USB).
Step 2C: Start the Bare Metal Recovery operation by selecting the necessary backup (image 7 and image 8) in the recovery step.
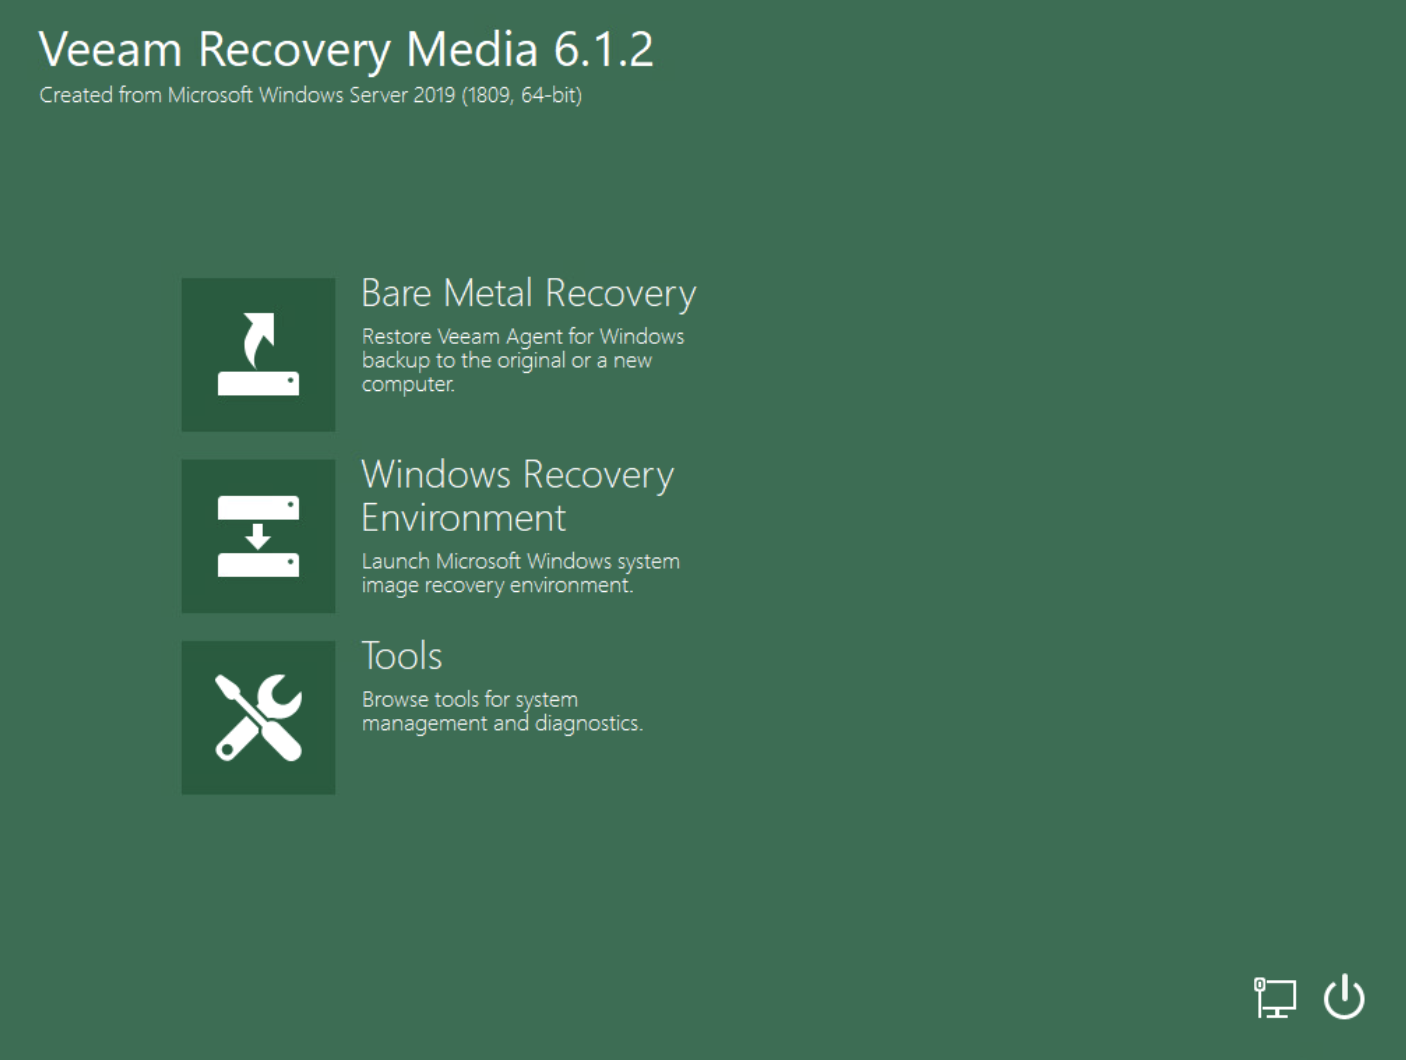 Picture 7
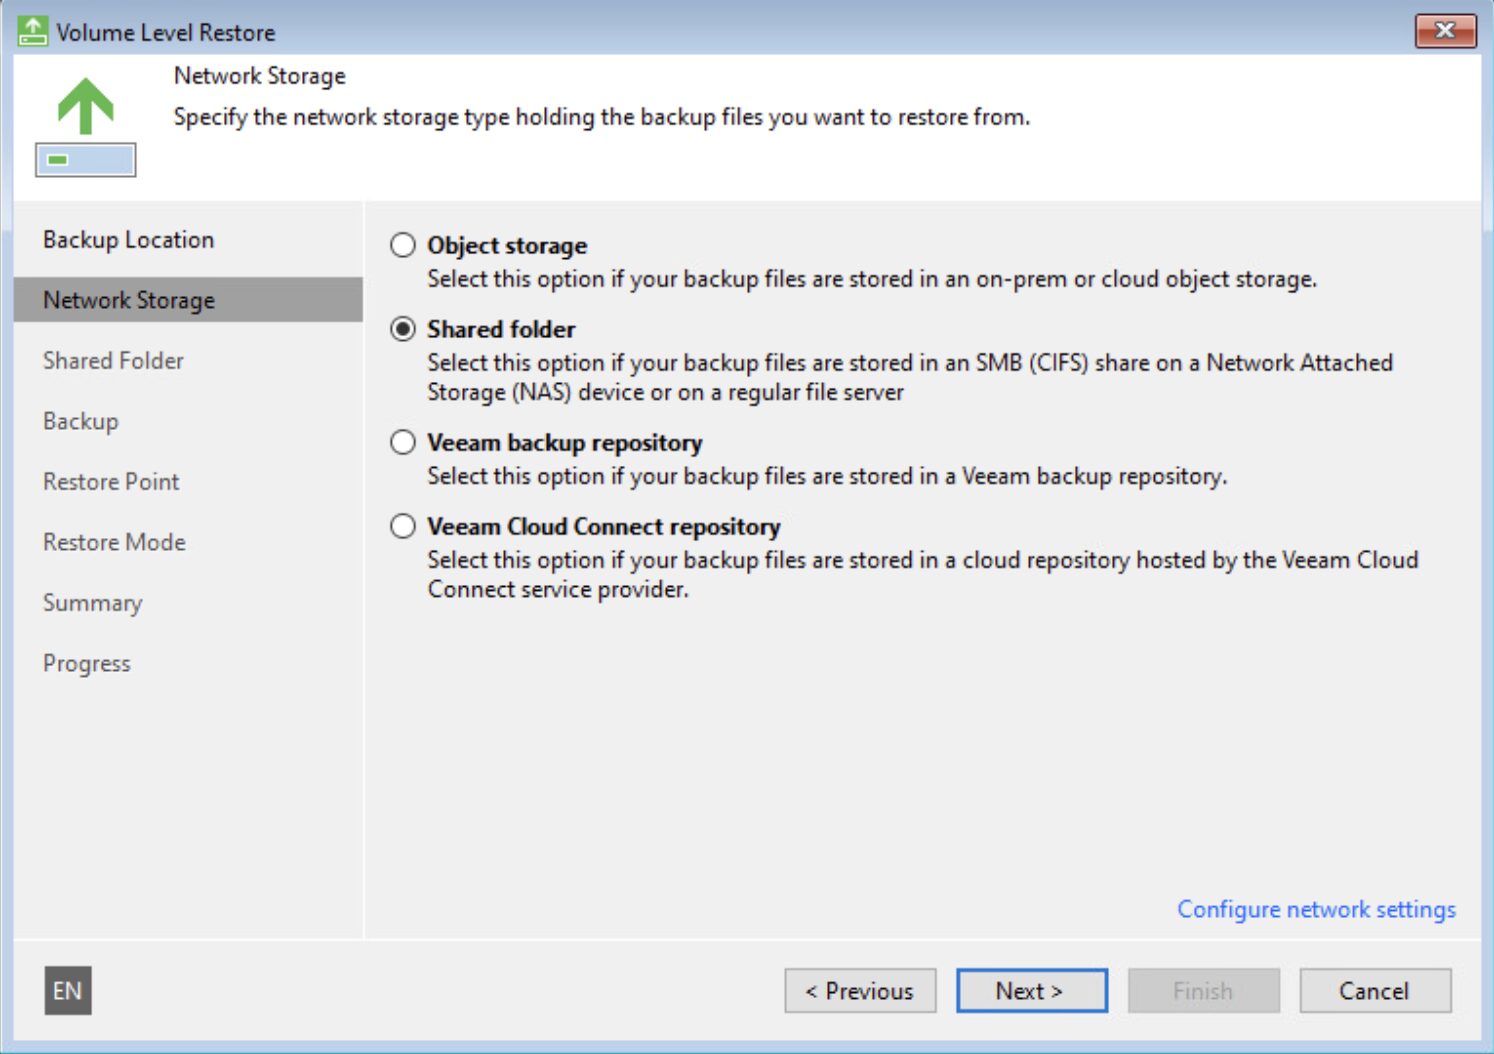 Image 8
(https://helpcenter.veeam.com/docs/agentforwindows/userguide/howto_baremetal_recovery.html?ver=60)
Step 3C: After completing the recovery of step 2C, start the VBR and carry out the standard recovery operations as indicated in Step 5A.
Scenario D: The VBR is a replicated VM.
- You have not made an application-aware backup of the server VBR.
- You have performed application-aware replication of the server VBR.
- Export of server DB configuration is not available VBR.
- You want to restore the server immediately VBR.
What to do?
Step 1D: Connect to the vCenter and search for the VBR already replicated.
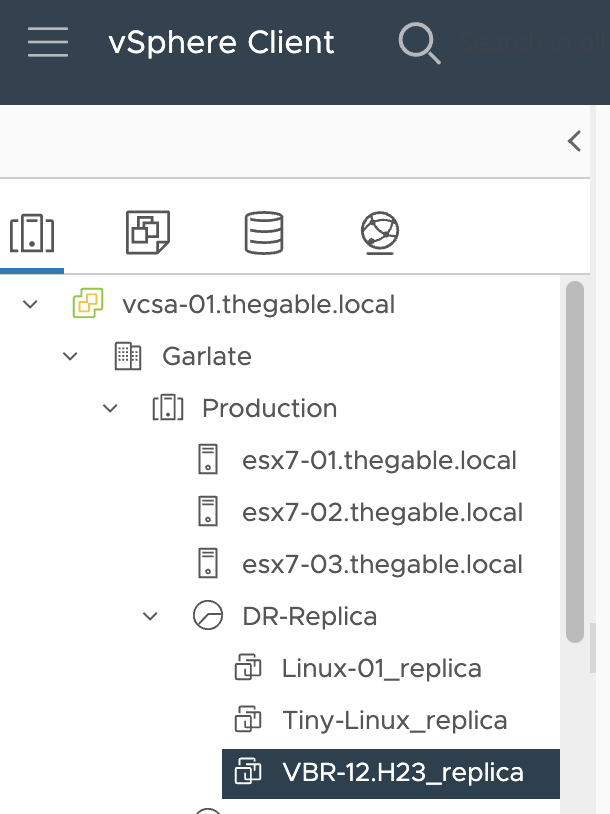 Image 9
Step 2D: Trigger the failover of the VBR.
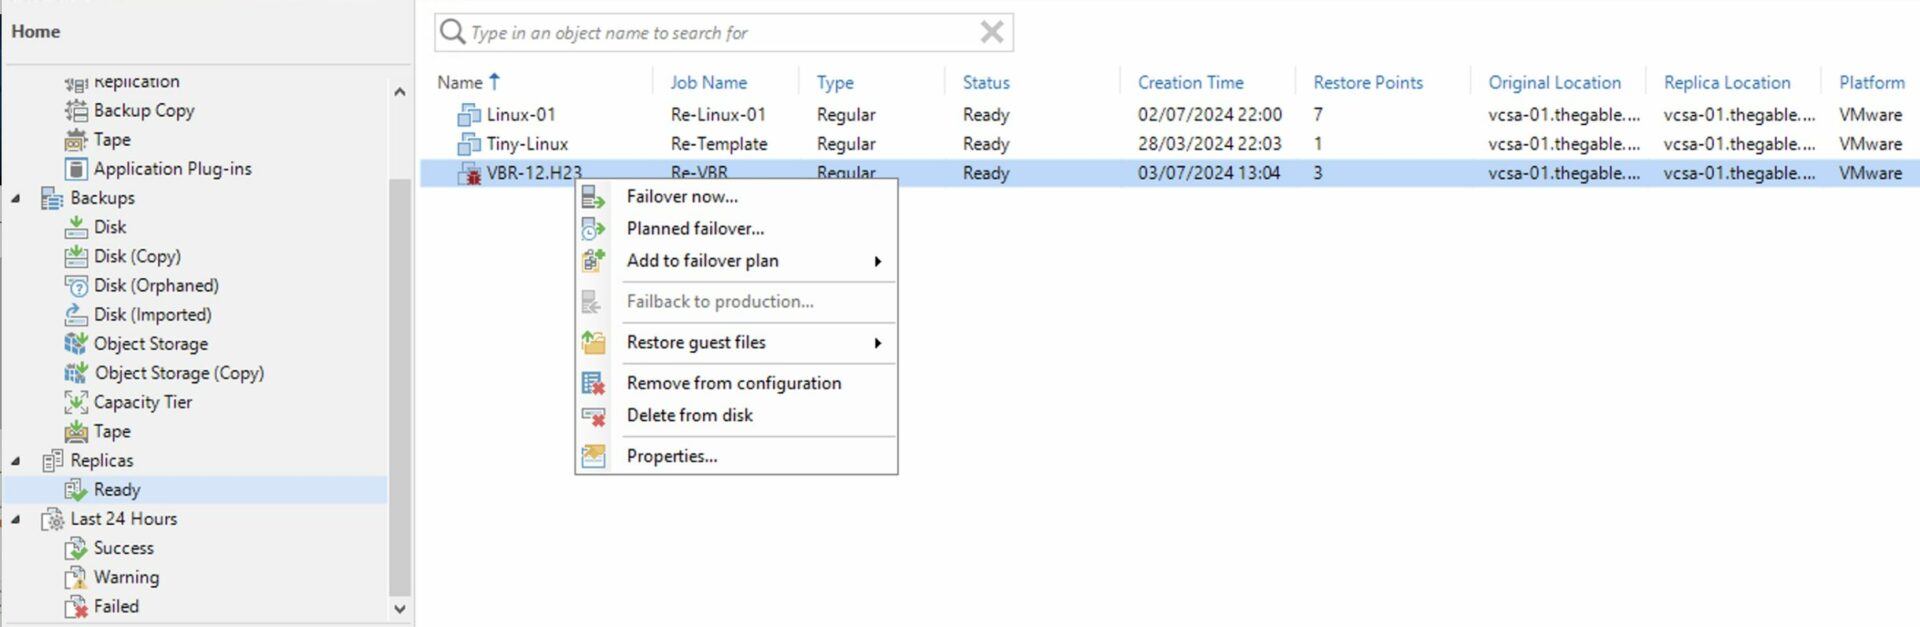 Image 10
Step 3D: Realize the management operations of VBR as per Step 5A.
Scenario E: The configuration of the VBR.
- You have not backed up the server VBR.
- You have not performed Server Replication VBR.
- Export of the server DB configuration is available VBR.
- You want to restore the server immediately VBR.
What to do?
Step 1E: Install VBR on the server (physical or virtual, see step 1A).
Step 2D: Perform a configuration reset of the VBR as indicated in the guide.
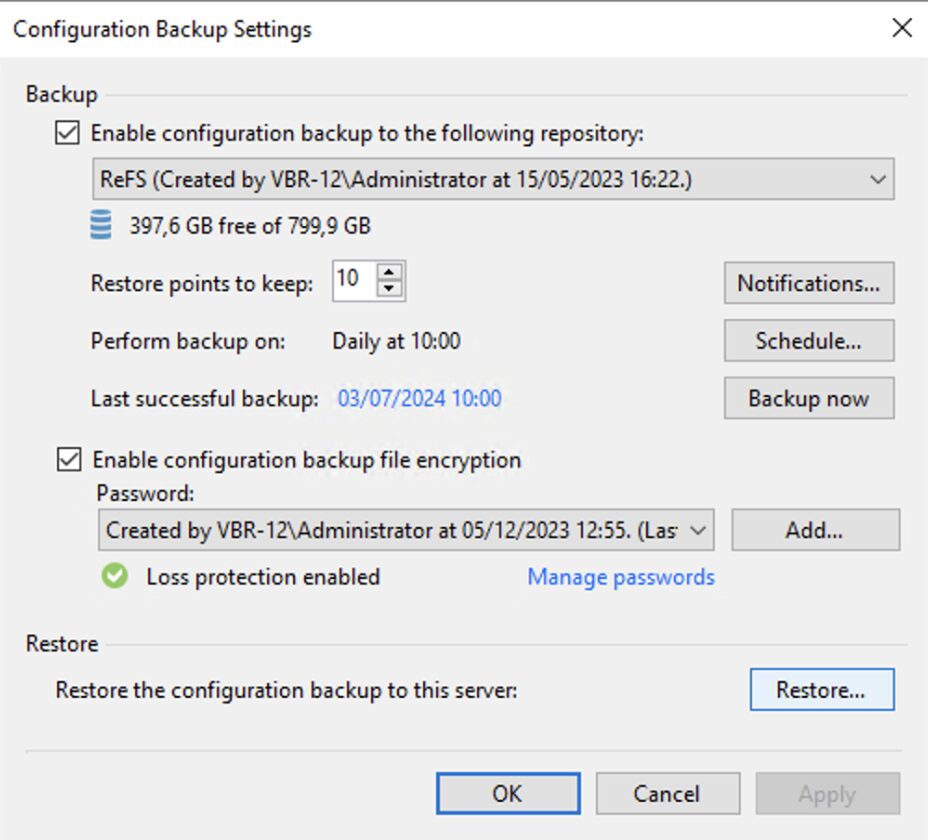 Image 11
Step 3D: Realize the management operations of VBR as per Step 5A.
Note 8: It is always a good idea to save the Backup server configuration.
Final Note: The advice is to strive to be able to use all the strategies described in this article so that if one is not available, a second one can be used.
 Picture 1
 picture 2
 Picture 3
 Picture 4
 Picture 5
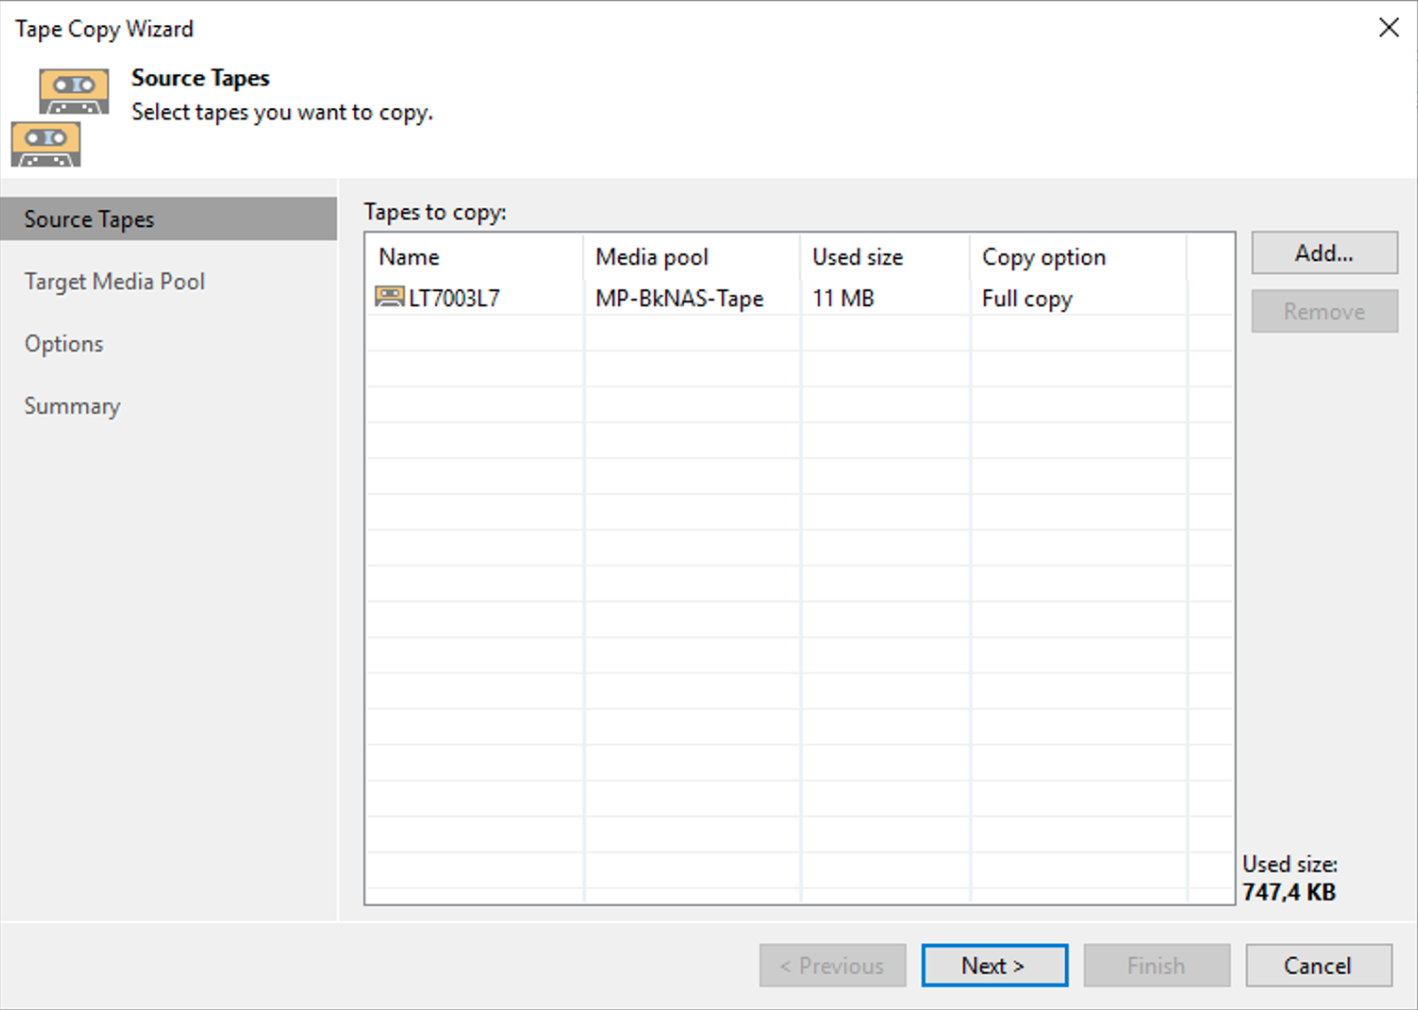 Picture 6
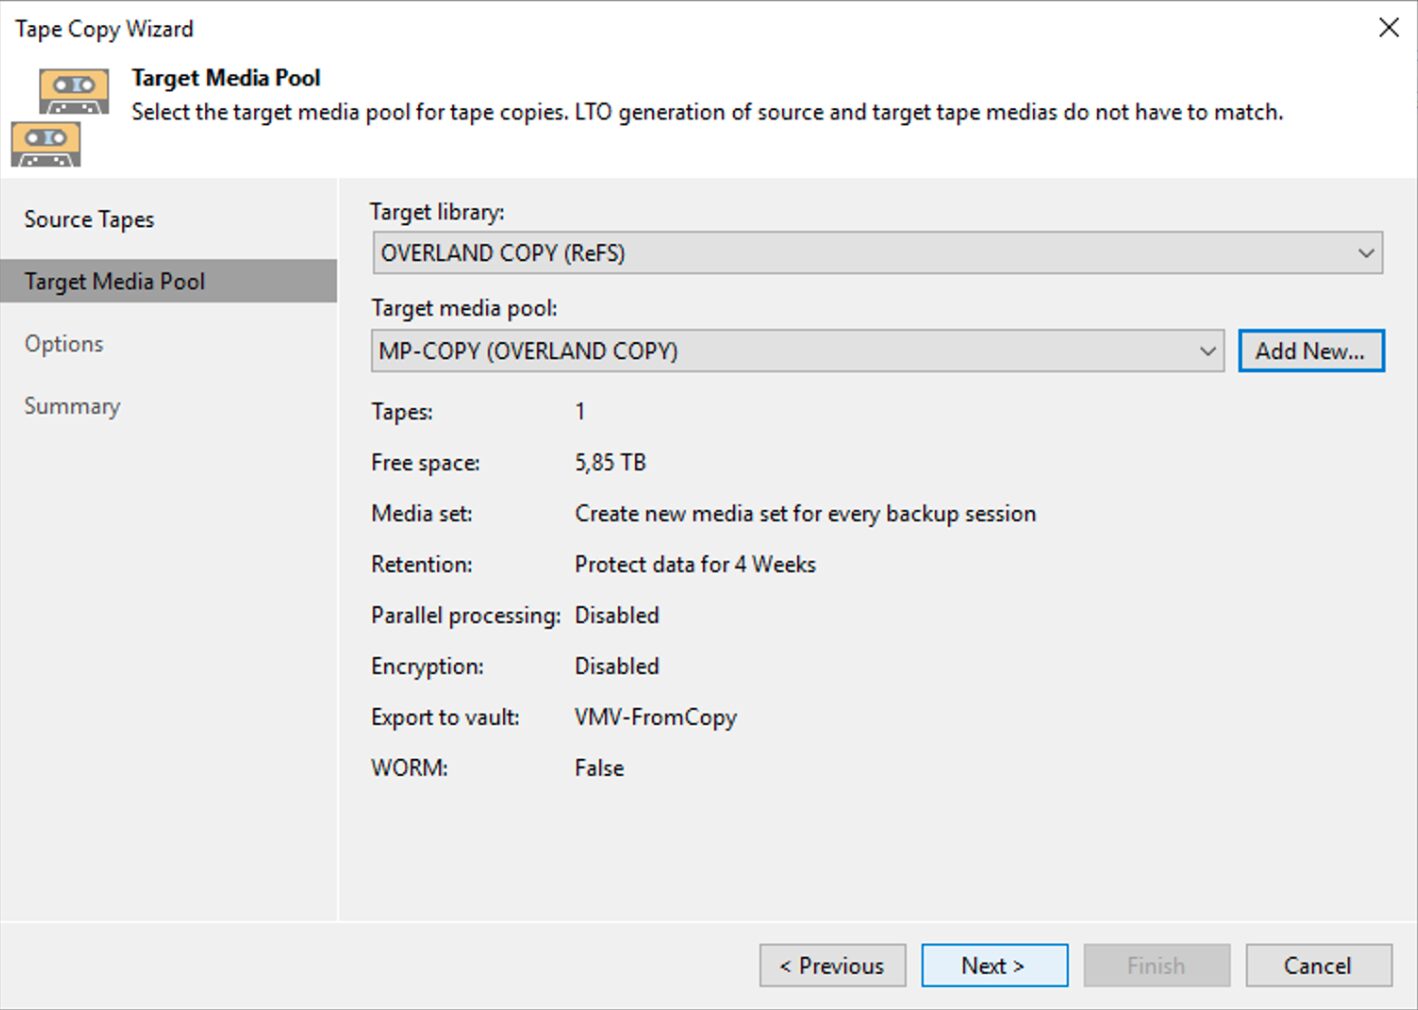 Picture 7
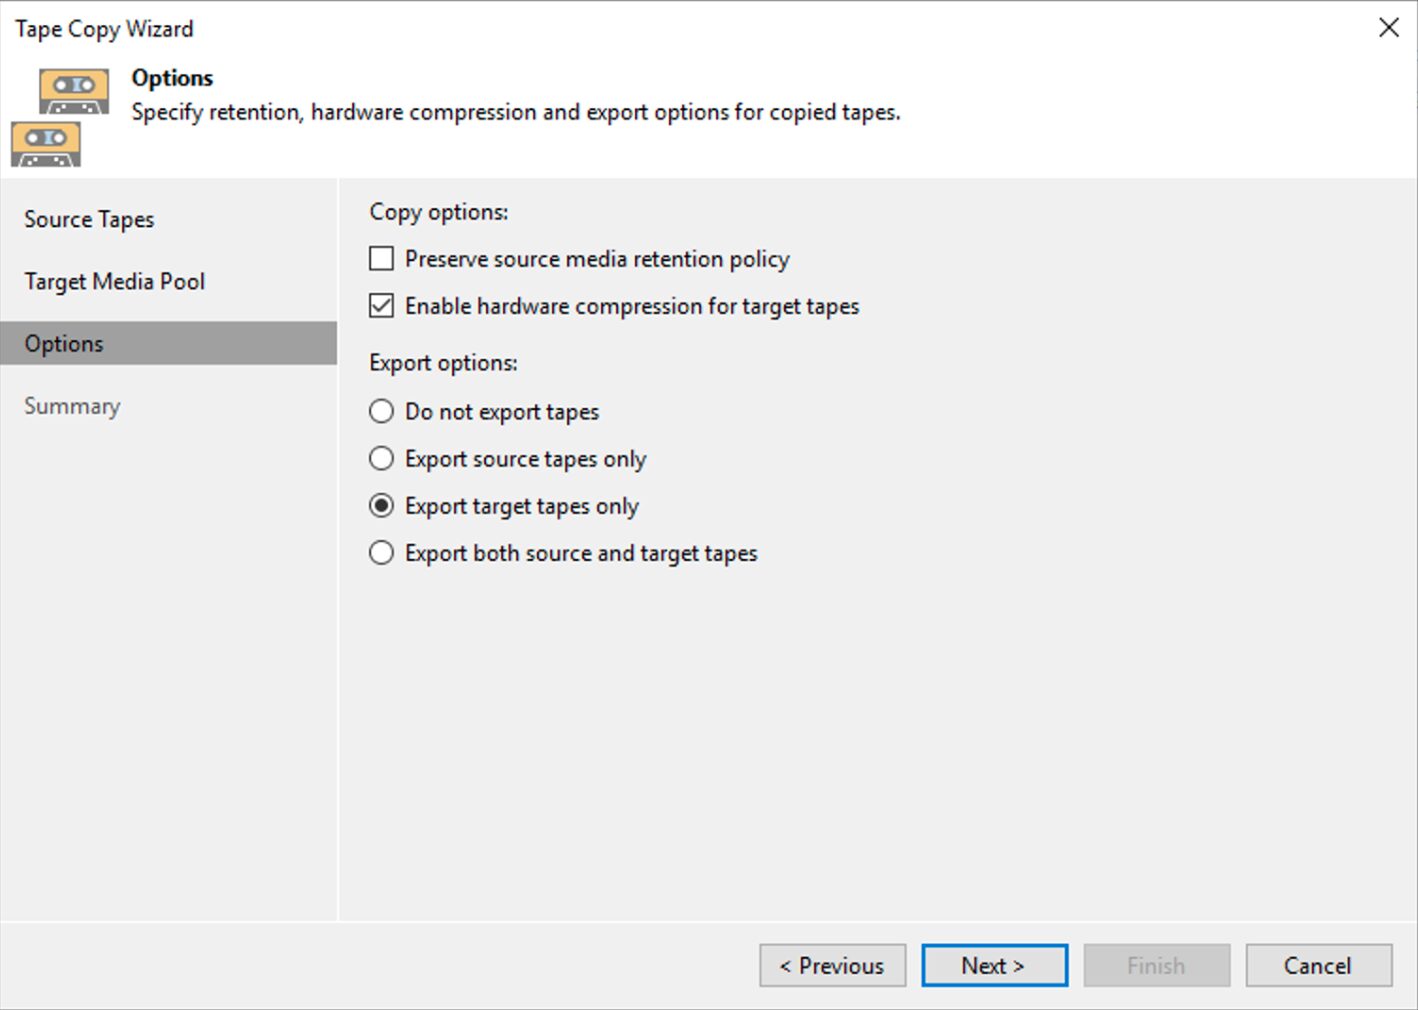 Image 8
 Image 9
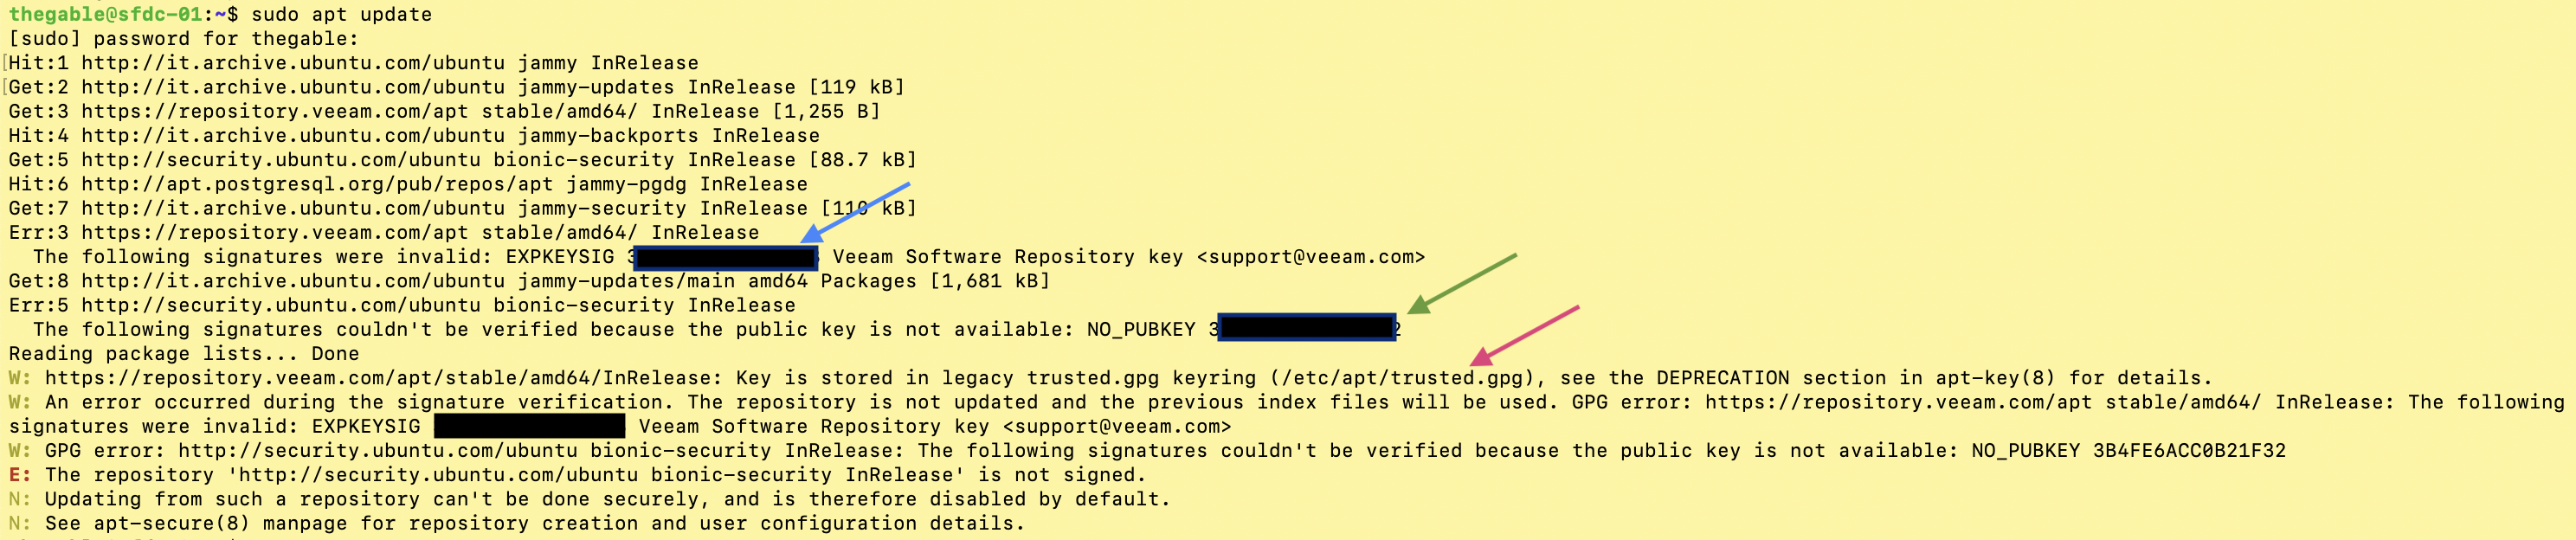 Picture 1
 picture 2
 image 3
 Picture 4
 Picture 1
 picture 2
 Picture 3
 Picture 4
 Picture 5
 Picture 6
 Picture 7
 image 8
 Image 9
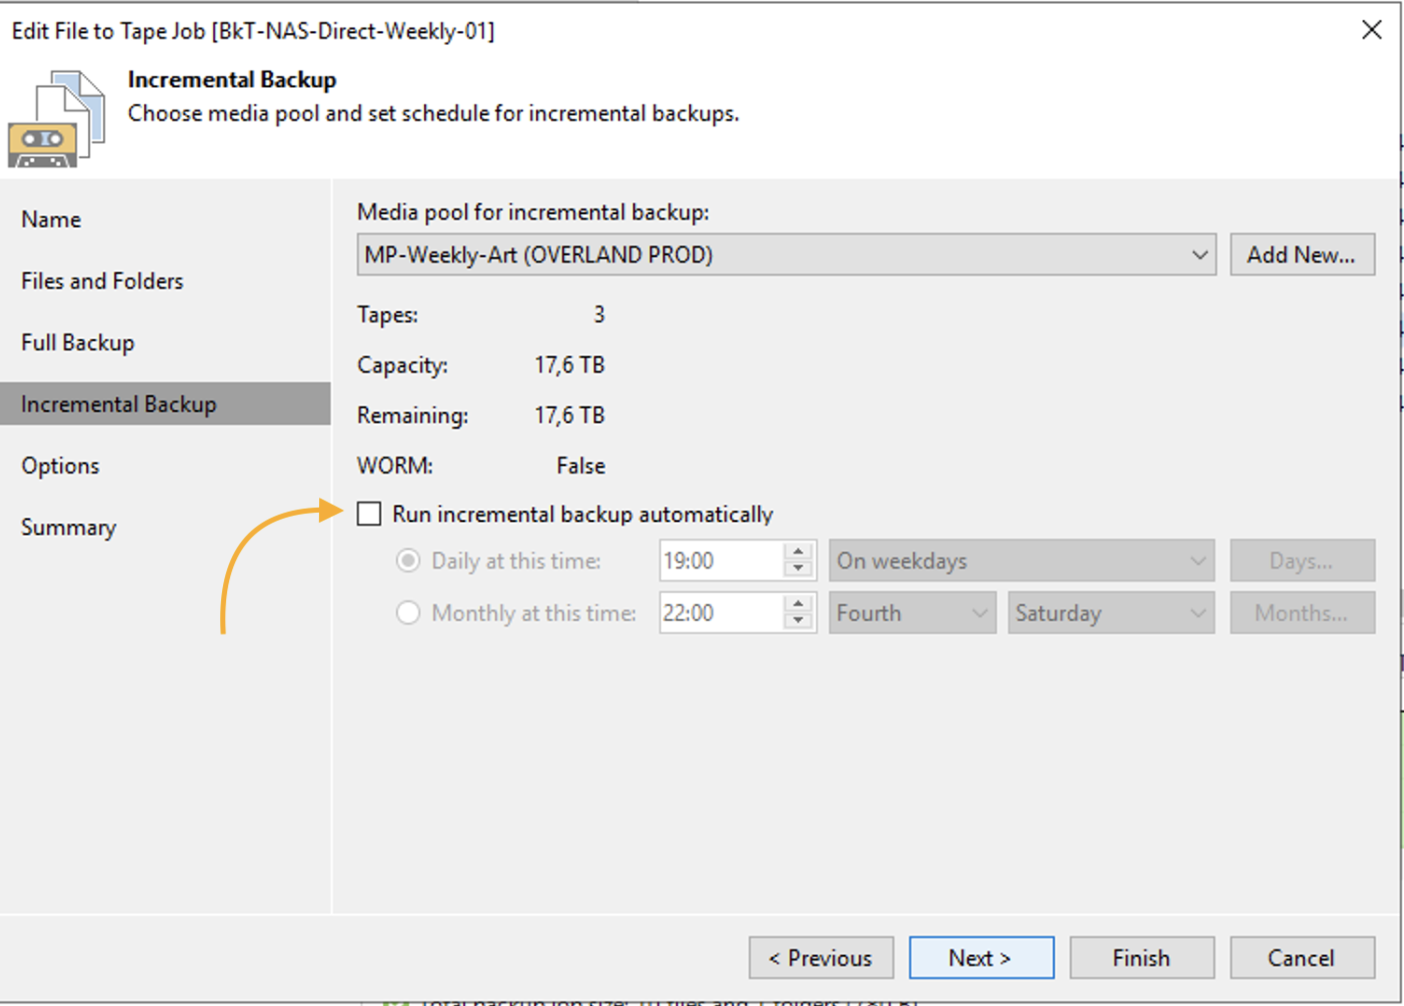 image 10
 Image 11
 Image 12
 Image 13
 picture 2
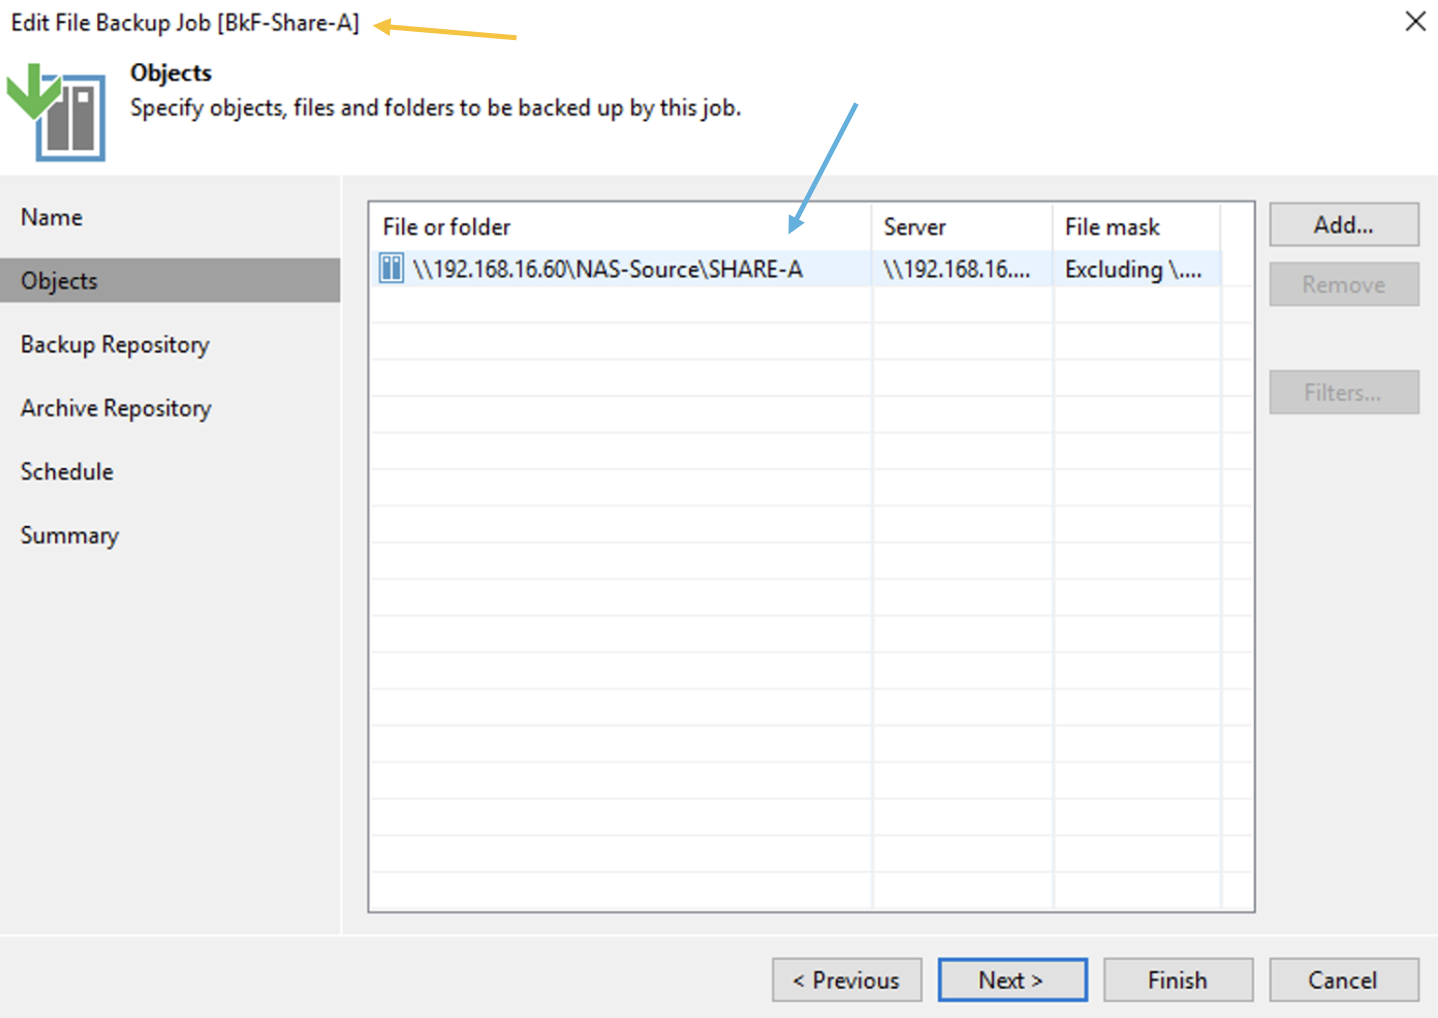 Picture 3
 Picture 4
 Picture 5
 Picture 6
 image 7
 Image 8
 Image 9