

Una buona modalità per descrivere gli ambient cloud-native è rifarsi all’immagine della vostra autovettura.
Il container è il motore, k8s è la centrale elettronica che gestisce il buon funzionamento del mezzo, i conducenti, indicando il percorso e la meta, selezionano il tipo di servizio che dovrà essere erogato.
L’articolo di oggi vi svelerà alcuni dettagli di architettura per comprendere come “l’automobile” riesce a giungere la destinazione in modalità efficente.
I Container sono di due tipologie:
Il primo è detto System Container. E’ la carrozzeria dell’autovettura (intendo dalle lamiere a sedili, volante, leva del cambio e accessori).
Spesso per semplicità di creazione è una Virtual Machine (VM) con sistema operativo Linux (può essere anche Windows).
I servizi più comuni presenti nella VM sono ssh, cron e syslog, il File System è di tipo ext3, ext4, ecc.
La seconda tipologia è detta Application Container ed è il luogo dove l’immagine realizzerà le attività.
Nota1: L’immagine non è un singolo e grosso file. Di norma sono più file che attraverso un sistema interno di puntamento incrociato permettono all’applicazione di operare nel modo corretto.
L’application Container (d’ora in avanti solo container), ha una modalità di funzionamento basata su una rigida logica, dove tutti livelli (layers) hanno la peculiartità di comunicare tra loro e sono interdipendenti.
 Figura 1
Questo approccio è molto utile poiché è in grado di gestire i cambiamenti che possono avvenire nel corso del tempo in modalità efficace perchè gerarchica.
Facciamo un esempio: Nel momento in cui avviene un cambio di configurazione del servizio, per il quale viene aggiornato il Layer C, il Layer A e B non ne sono impattati, il che significa che NON devono essere a loro volta modificati.
Visto i Developer hanno piacere nell’affinare le proprie immagini (program file) piuttosto che le dipendenze, ha senso impostare la logica di servizion nella modalità indicata in figura 2 dove le dipendenze non sono impattate da una nuova immagine.
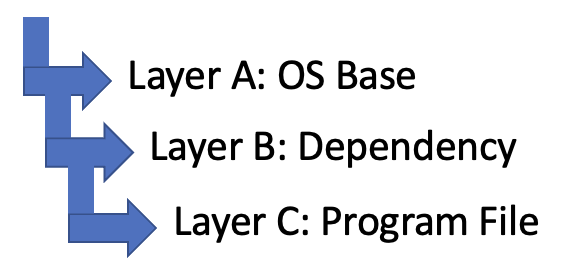 Figura 2
Nota2 : Il File system sul quale si appoggiano le immagini (nell’esempio del motore dell’auto parliamo di pistoni, bielle, alberi …) è principalmente di tre differenti tipologie:
- Overlay
- Overlay 2
- AUFS
Nota3: Un buon consiglio lato sicurezza è quello do non costruire l’architettura in modo che le password siano contenute nelle immagini (Baked in – Cucinata)
Una delle splendide novità introdotte nel mondo containers è la gestione delle immagini:
In un ambiente classico di alta affidabilità, l’applicazione viene installata su ogni singolo nodo del cluster.
Nei container, l’applicazione viene scaricata e distribuita solo quando il carico di lavoro richiede maggiori risorse, quindi un nuovo nodo del cluster con una nuova immagine.
Per questo motivo le immagini sono salvate all’interno di magazzini “virtuali”, che possono essere locali oppure distribuiti su internet. Sono chiamati “Register Server”.
I più famosi sono Docker Hub, Google Container Registry, Amazon Elastic Container Registry, Azure Container Registry.
Concludiamo il presente articolo parlando di gestione delle risorse associate ad un servizio.
La piattaforma container utilizza due funzionalità denominate Cgroup e NameSpace per assegnare le risorse che lavorano a livello di kernel.
Lo scopo del Cgroup è di assegnare allo specifico processo (PID) le corrette risorse (CPU&RAM).
I Name space hanno lo scopo di ragguppare i differenti processi e fare in modo che siano isolati tra loro (Multitenancy).
La tipologia di NameSpace puo interesare tutti i componenti del servizio come indicato nella lista qui sotto.
- Cgroup
- PID
- Users
- Mount
- Network
- IPC (Interprocess communication)
- UTS (consente a un singolo sistema di apparire con nomi di host e domini diversi e con processi diversi, utile nel caso di migrazione)
Un esempio di limitare le risorse di un’applicazione è indicata nella figura 3 dove l’immagine thegable, scaricata dal Register Server grcgp,ha un limite di risorse RAM e CPU assegnate.
 Figura 3
A presto

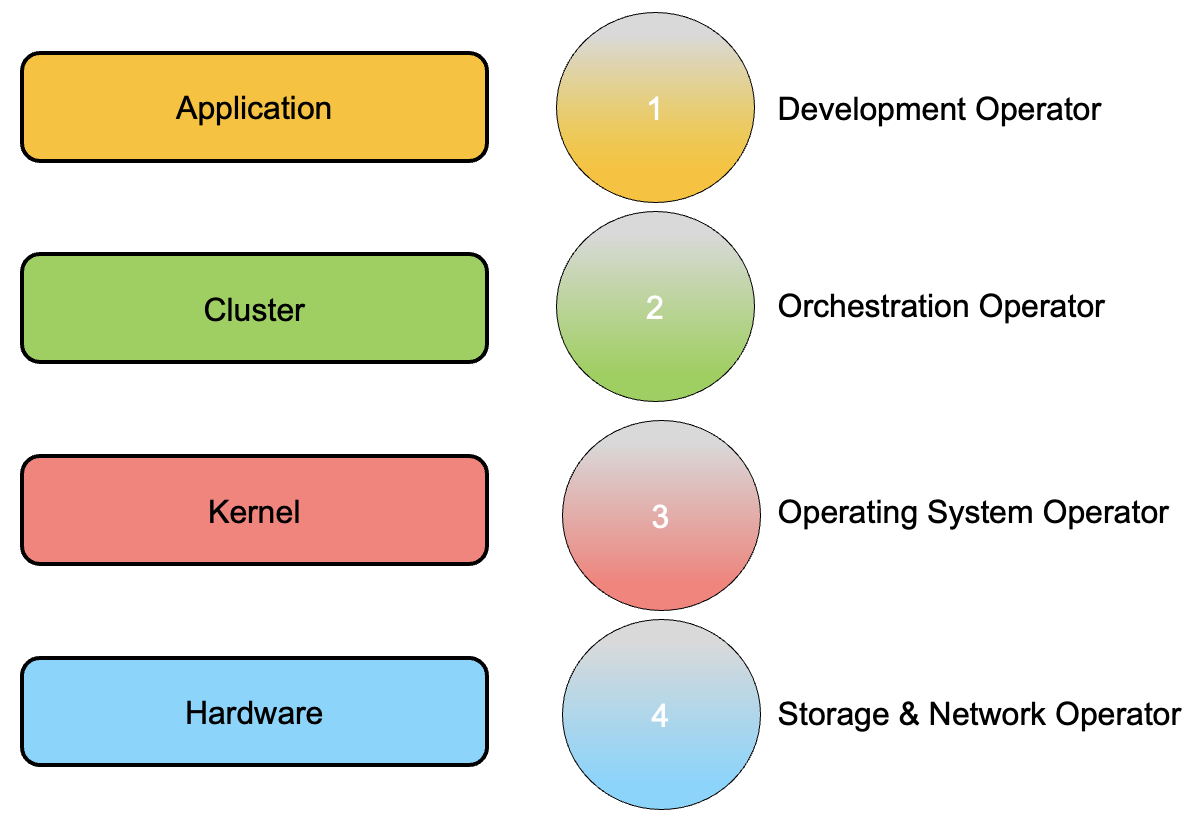 Immagine 1
 Immagine 2
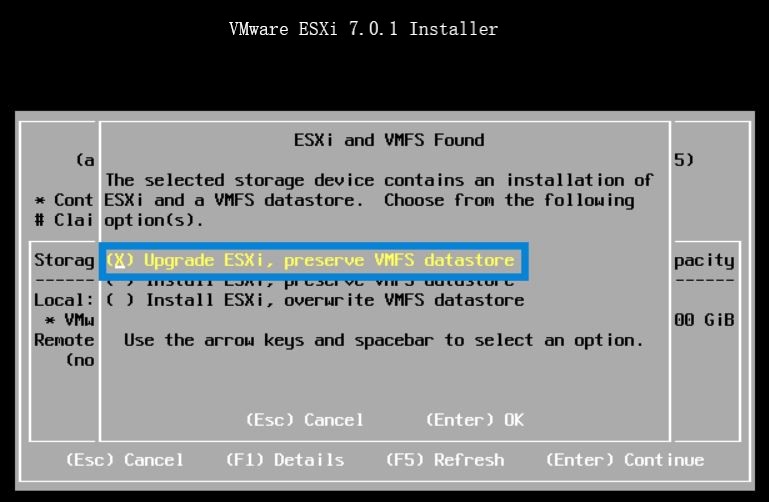 Picture 1
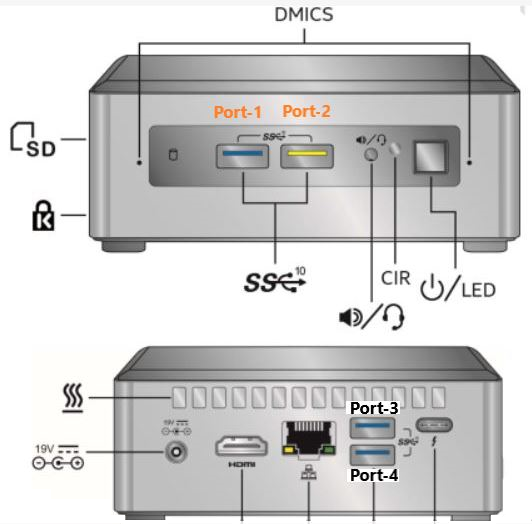
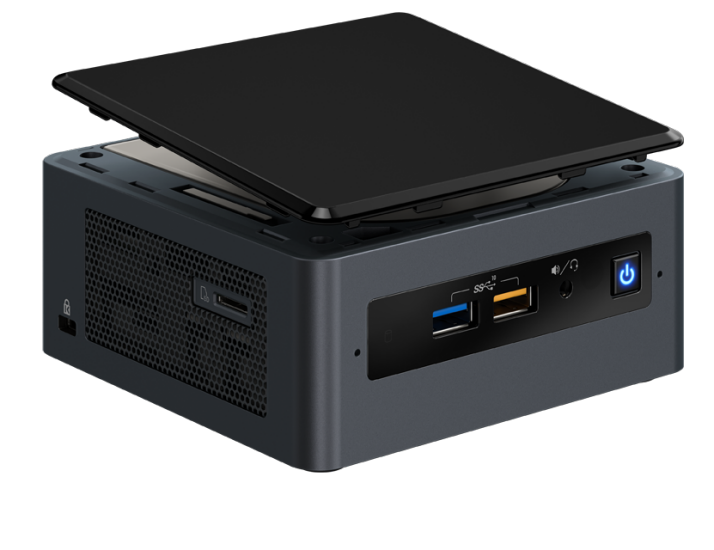 Last weekend I upgraded all my Servers to the last VMware ESXi release (7.0.1 C) and this article is meant to describe all steps I performed.
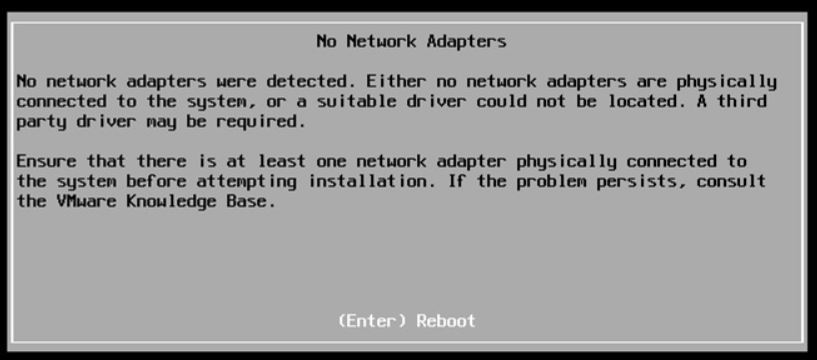 Picture 1
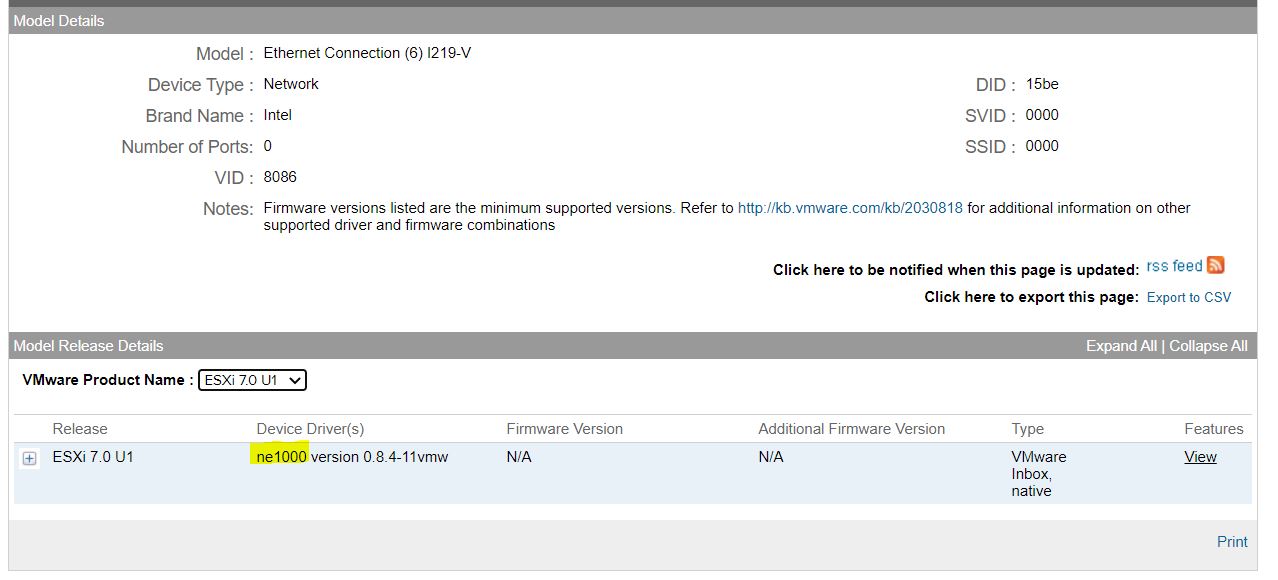 Picture 2