

Also Veeam Availability Orchestrator, commonly called VAO, changed its name with this new release.
The new name is Veeam Disaster Recovery Orchestrator (VDrO).
The main news of this version is the support of the technology of continuous data protection (CDP) introduced in VBR v.11.
Which are the main benefits allowed by this new feature?
- New readiness checks now including RPO and SLA.
- Recovery Point Object close to real-time.
- Detailed reports to track and audit the Disaster Recovery plan of your company.
The next article will explain how to implement a DR plan using CDP.
Before doing the upgrade procedure please:
- Perform backup of all existing databases (VAO, VBR, ONE)
- Make sure there is enough space for the upgrade of the Microsoft SQL Server configuration database
- Make sure there are no orchestration plans being tested or executed
- Make sure there are no orchestration plans scheduled to run during the upgrade.
- Read carefully the user guide.
Before proceeding please check that the VAO current version on the server is 3.0 (picture 1).
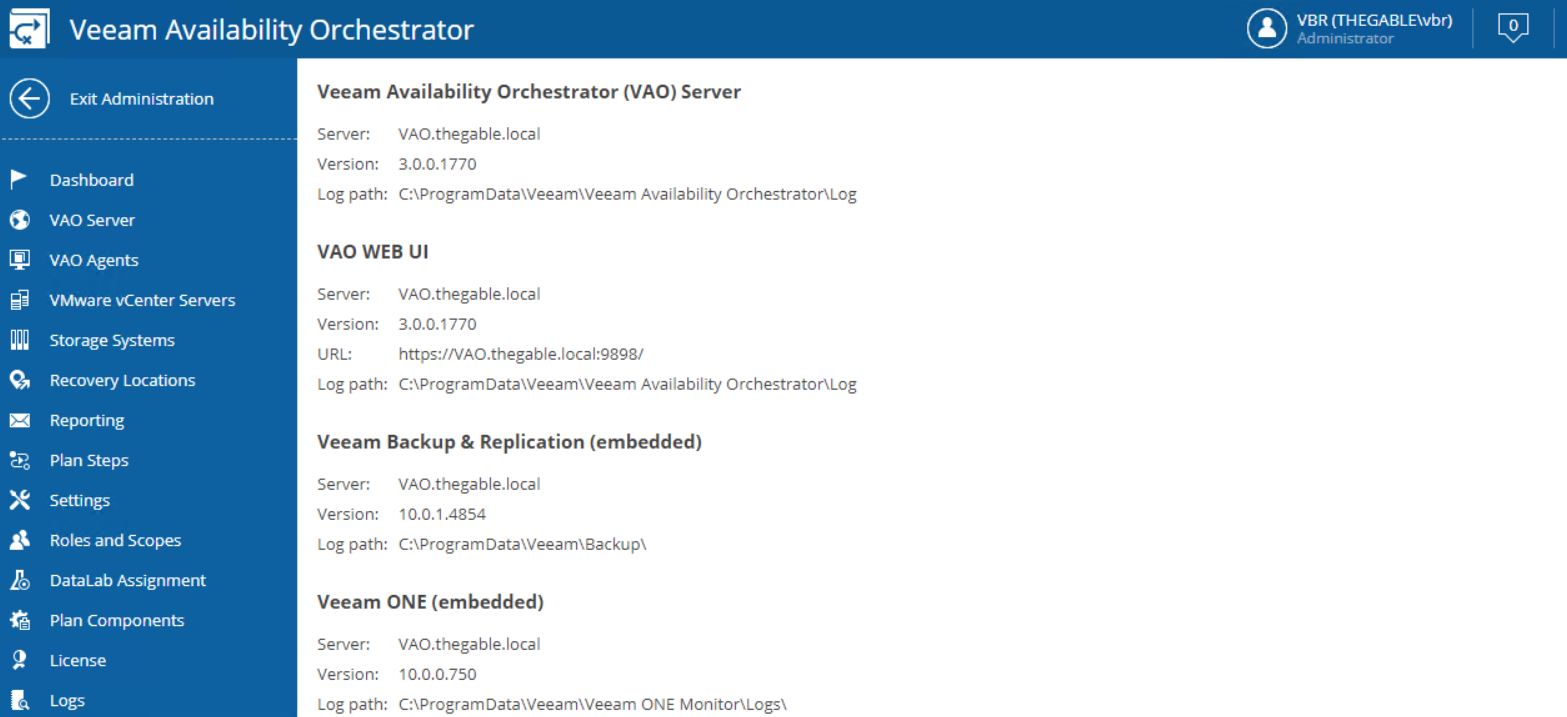 Picture 1
After downloading the ISO file from the Veeam website and mounting it (picture 2)
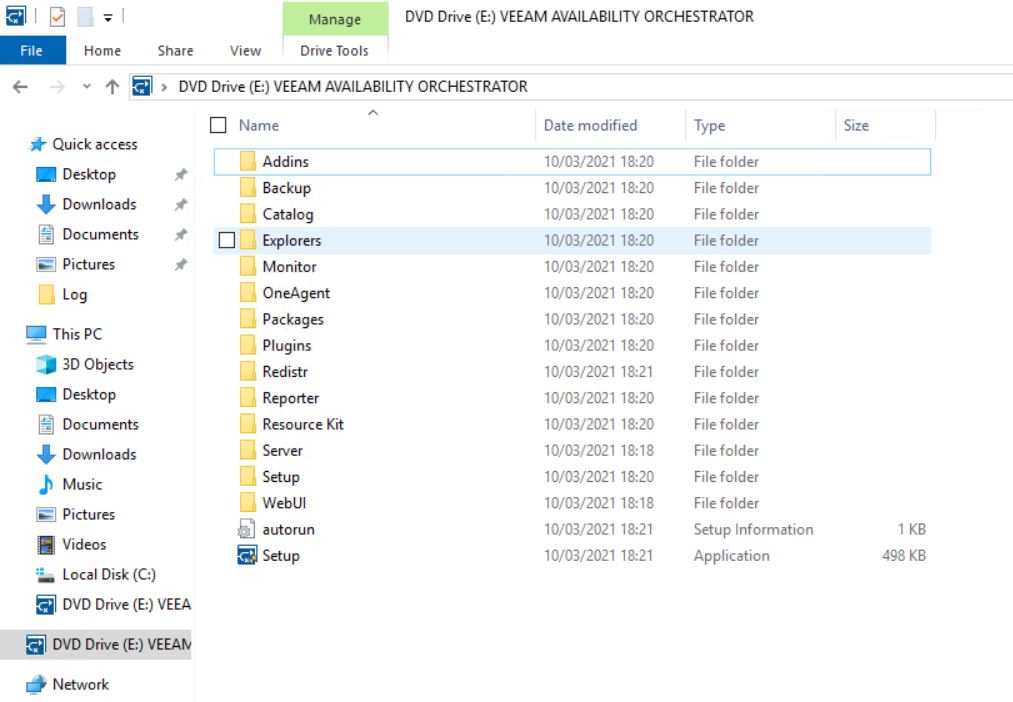 Picture 2
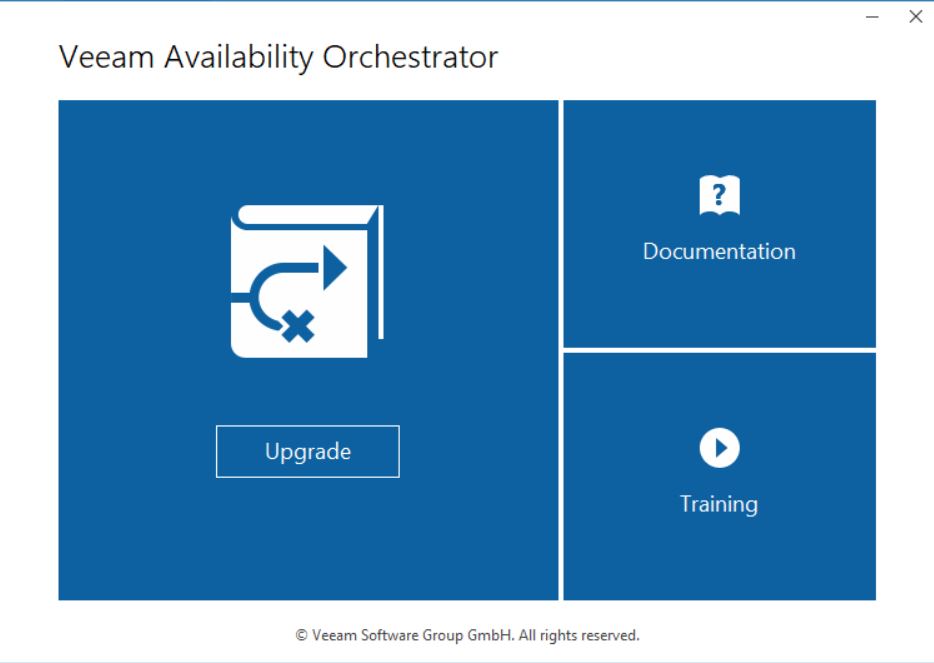
just select the “Setup” voice; the wizard immediately begins the upgrade (picture 3).
 Picture 3
Please check that the previous version of VAO has been discovered. If so the upgrade button is available (picture 4).
 Picture 4
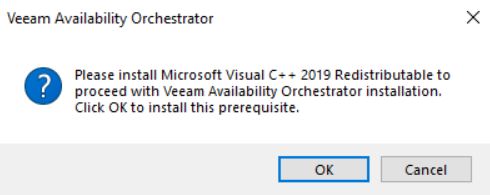
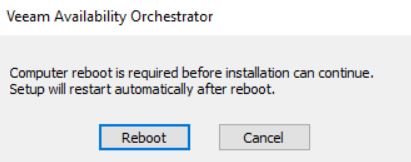
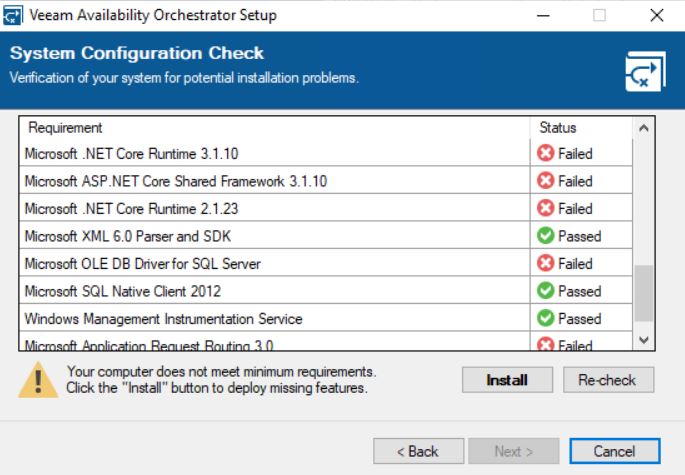
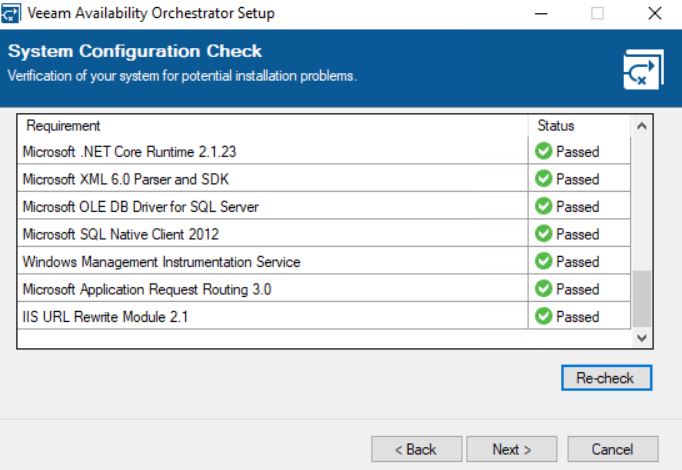
The setup checks if Visual C++ 2019 Redistributable package is already installed. If not it will automatically be deployed. This procedure requires the server reboot (pictures 5 and 6).
 Picture 5
 Picture 6
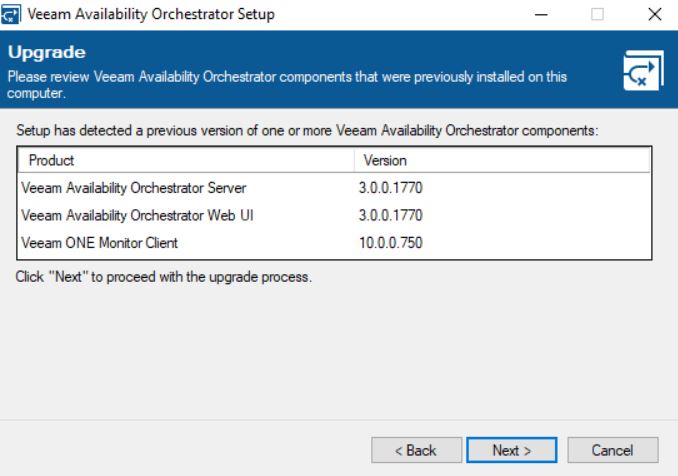
After reboot is completed, relaunch the setup. The wizard will show which components will be automatically upgraded (picture 7).
 picture 7
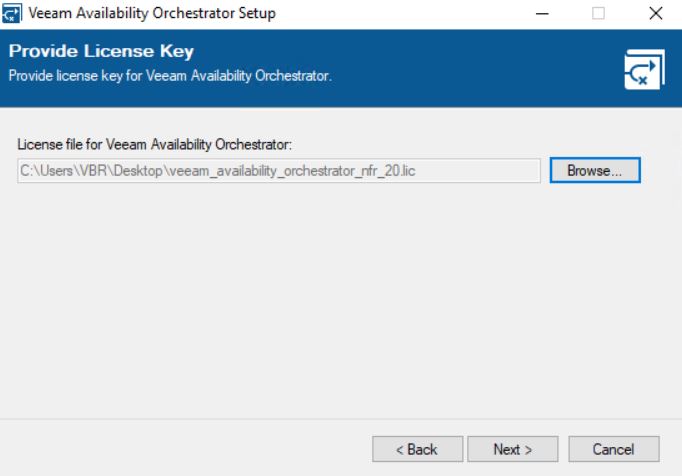
Now the wizard will ask for a valid license (picture 8) and will install the missing components (Pictures 9 and 10).
 Picture 8
 picture 9
 picture 10
The next steps are about the Veeam Databases.
The wizard will ask to connect to them and update the VBR one if necessary (pictures 11 and 12).
 Picture 11

Picture 12
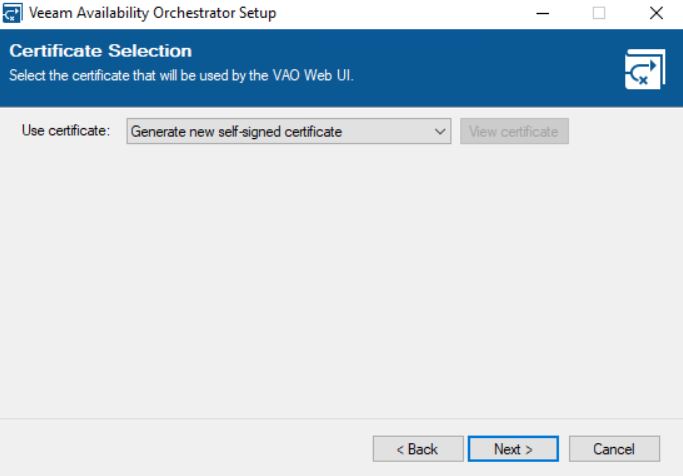
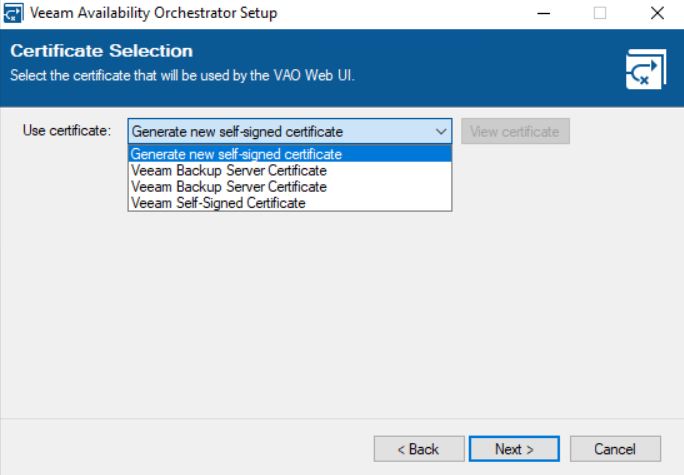
The main point of the upgrade procedure is the certification step.
As shown in picture 13, the wizard will ask the VAO administrator which certificate to use. It can be a self-signed and autogenerated or an own certificate created from an external authority.
My suggestion is to ask your security specialist to know which is the best choice for your company.
 Picture 13
 Picture 14
Clicking on the install button it will complete the upgrade wizard as shown in pictures 15 & 16.
 Picture 15
 Picture 16
After upgrading please check the versions of VAO (4.0.0.2088), VBR (11.0.0.837), ONE (11.0.0.1379) now installed.
Just a note before ending the article: has already said, VAO (Veeam Availability Orchestrator) has changed its name to VDrO (Veeam Disaster Recovery Orchestrator).
The web pages of the product still show the old name. It will be updated in the next release.
That’s all for now guys. Take care
 Picture 2
 Picture 1
 Picture 2

 Picture 1
 Picture 2
 Picture 3
 Picture 4
 Picture 5
 Last weekend I upgraded all my Servers to the last VMware ESXi release (7.0.1 C) and this article is meant to describe all steps I performed.
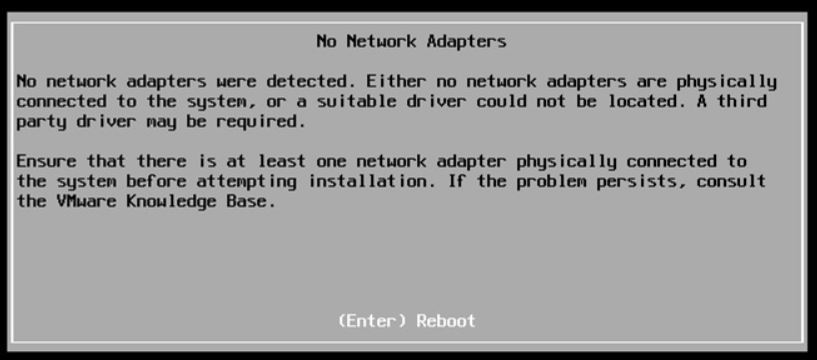 Picture 1
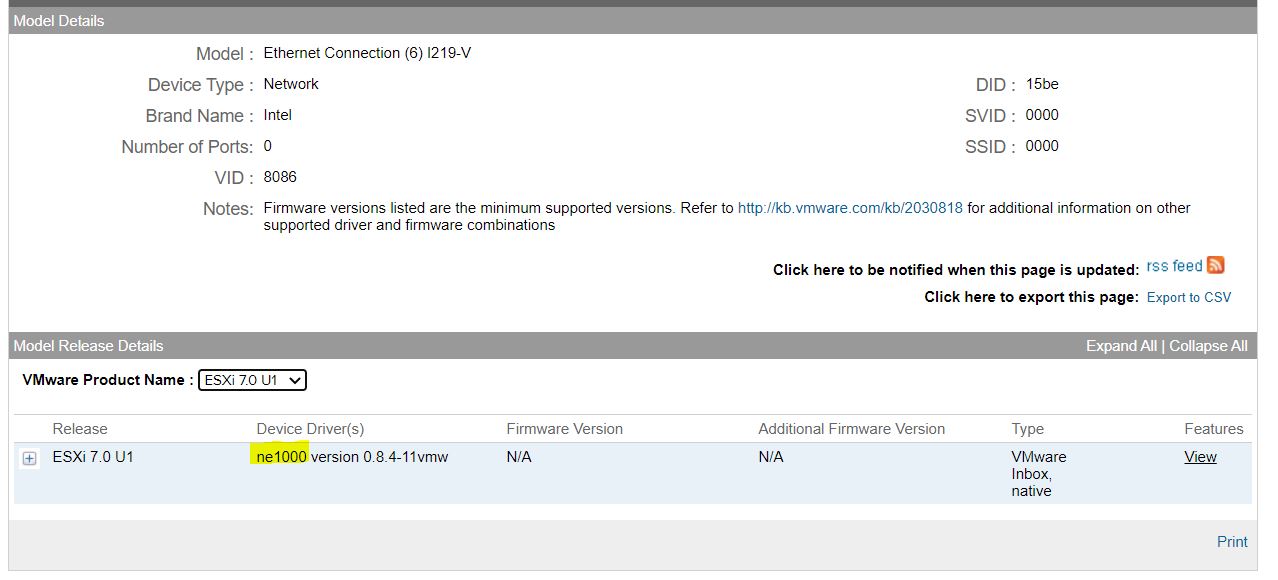 Picture 2