
ReFS is the advanced file system from Microsoft that improves data availability through technologies that can:
- Ensuring greater resilience of data stored on the file system.
- Increase the performance in reading and writing.
- Improve the scalability (we are talking about millions of TB).
One of the most useful and widely used features in backup is the technology of Block-Cloning which allows Veeam Backup & Replication to create full backups equal in size to an incremental.
The operation logic is simple and consists of 3 phases:
- TheBackup copies to the target Repository (ReFS), the incremental data of the VM / Instances / Physical Servers/ Clients To be protected.
- The File System ReFS will take care of storing the new blocks and creating the metadatarelated to the newly written data.
- The option “create a Syntethic-full” actually triggers anoperation at the level of metadata. ReFS adds to the metadata just created, those related to previous backups, thus creating a new full child of the union of all the necessary metadata. To further simplify, a logical full is created without any block being copied/moved.
Note 1: The result is not only a saving in space but also in the time it takes to make the full.
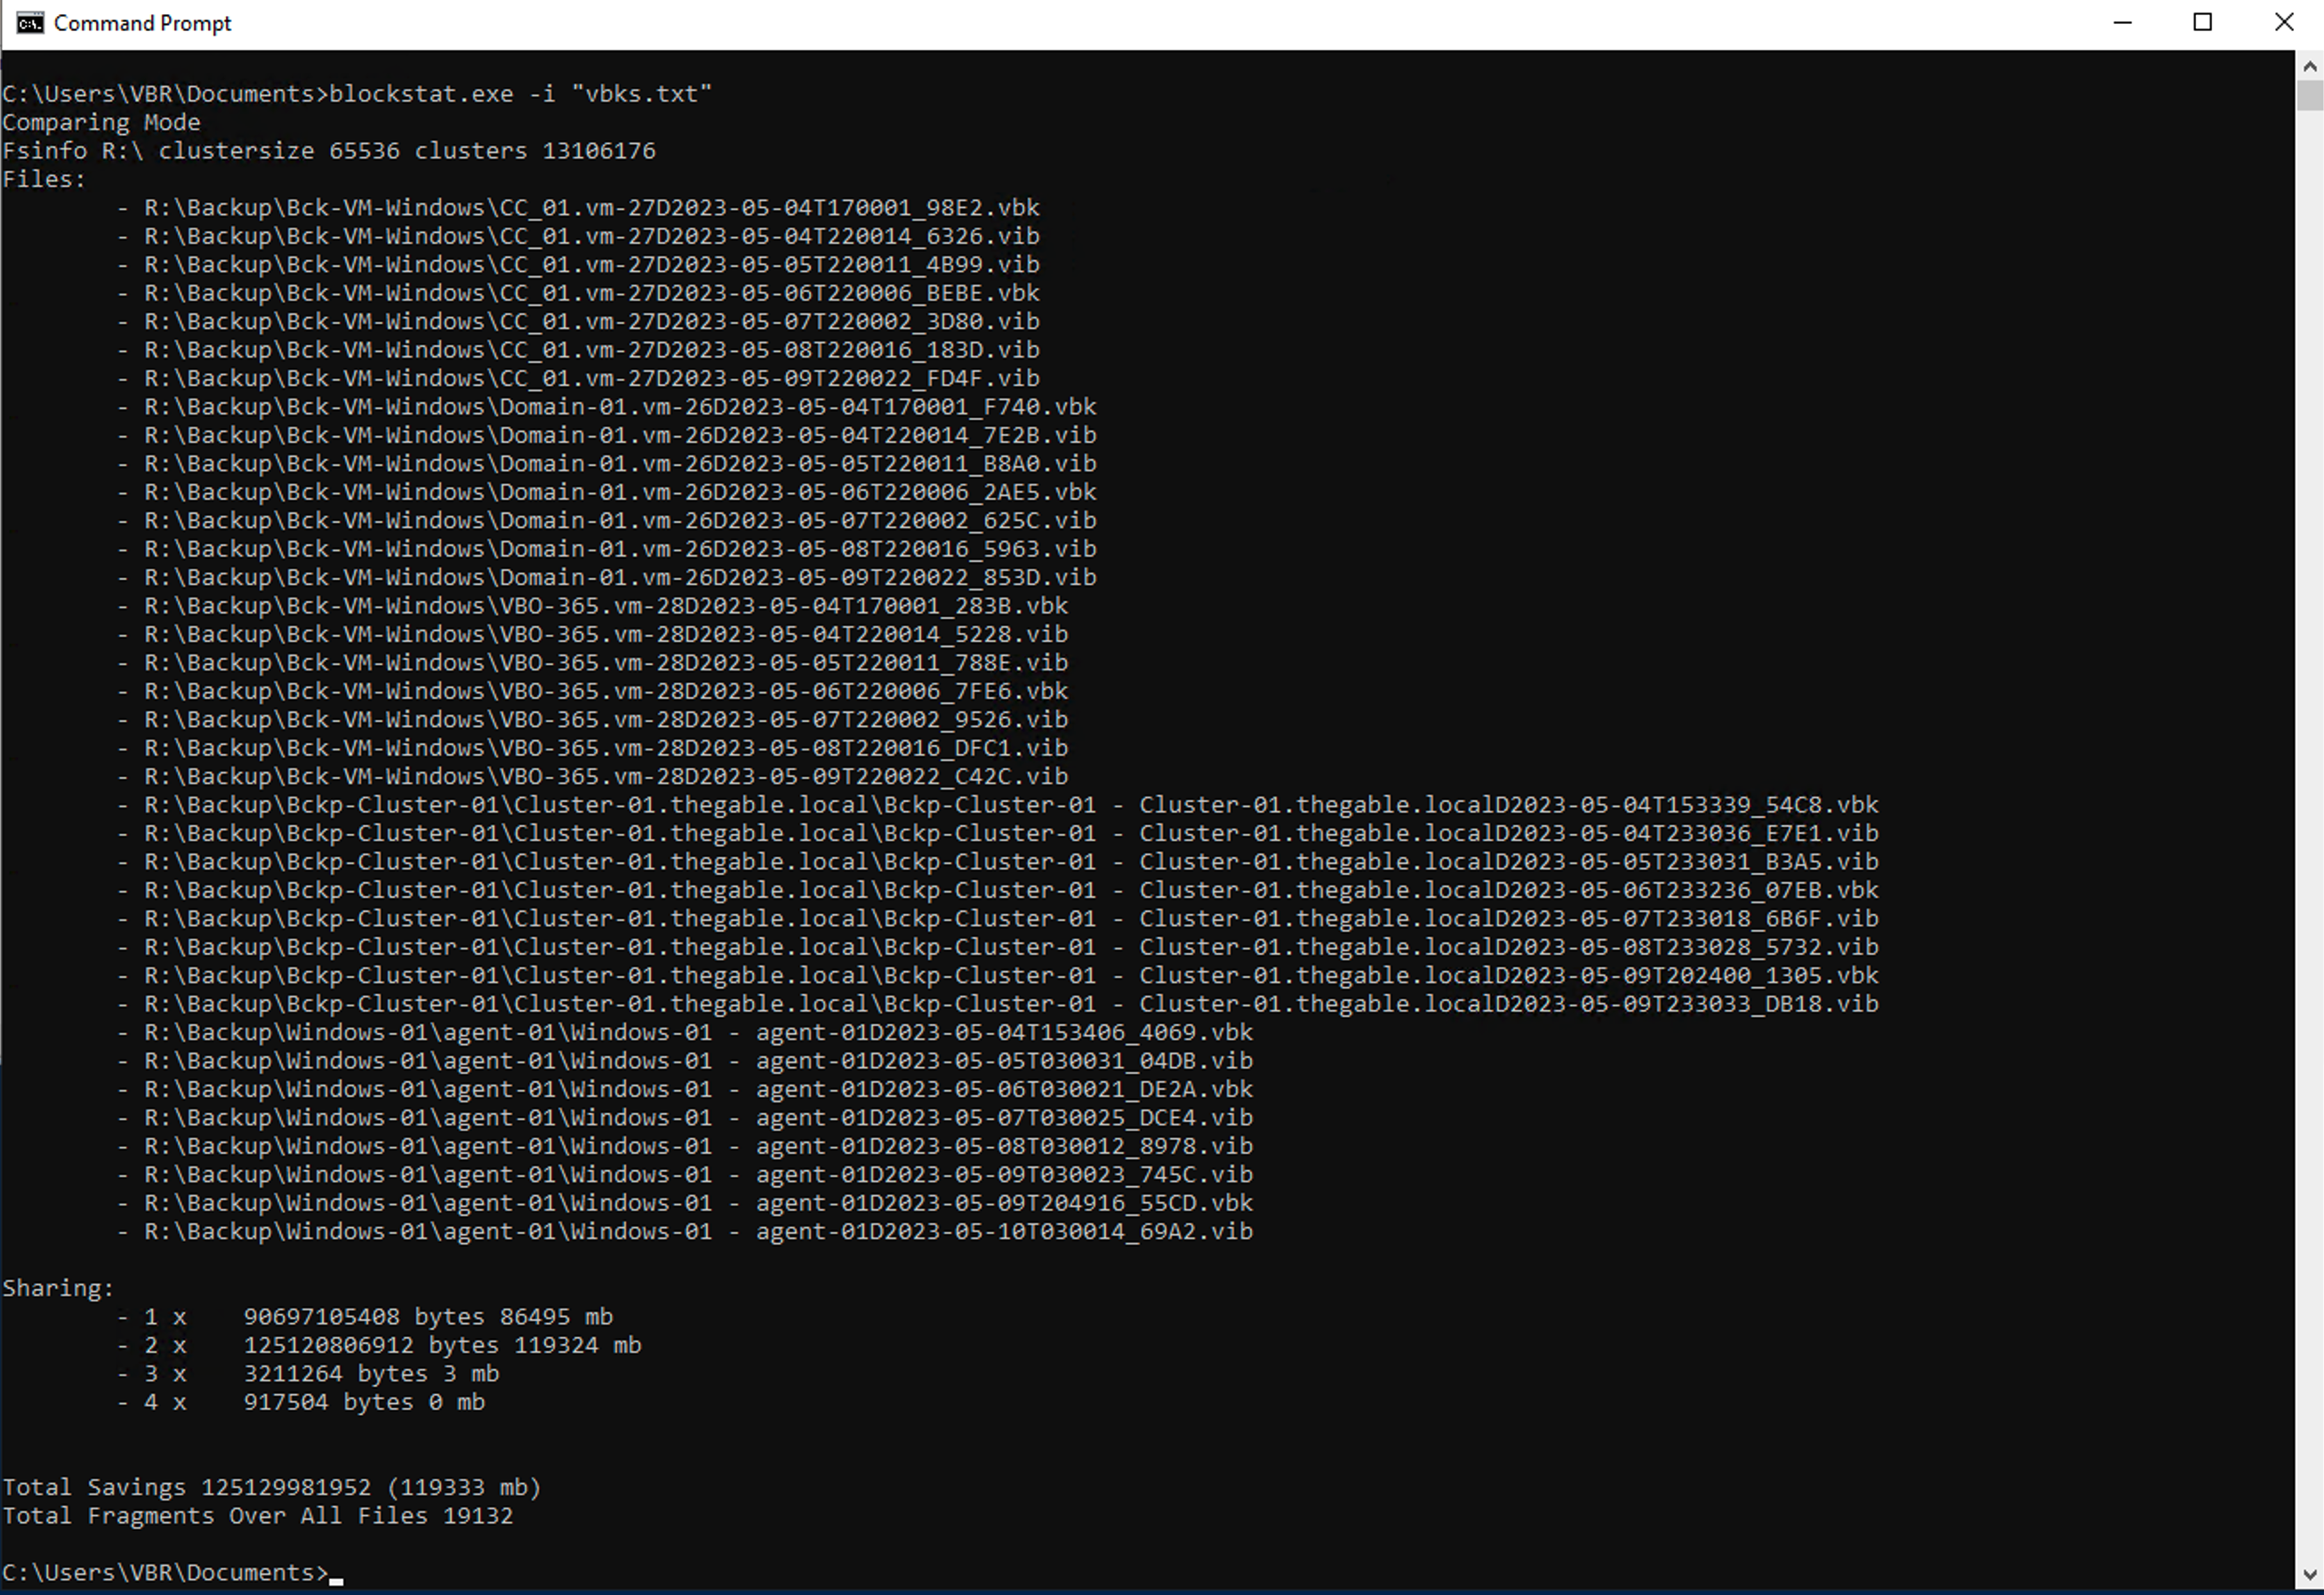
Well, how is it possible to quantify the disk space saved in the repository (ReFS)?
Timothy DeWin has made a tool (blockstat.exe) perfect for this calculation, to which I refer you for all possible options.
In my case, I solved the client’s need through:
- Creation through powershell of a text file (Unicode format) that would search all the Backup files generated by Veeam Backup & Replication within the ReFS repository. (See image 1)
- Captured the output of the bloclstat command. (see image 2)
 Picture 1
 picture 2
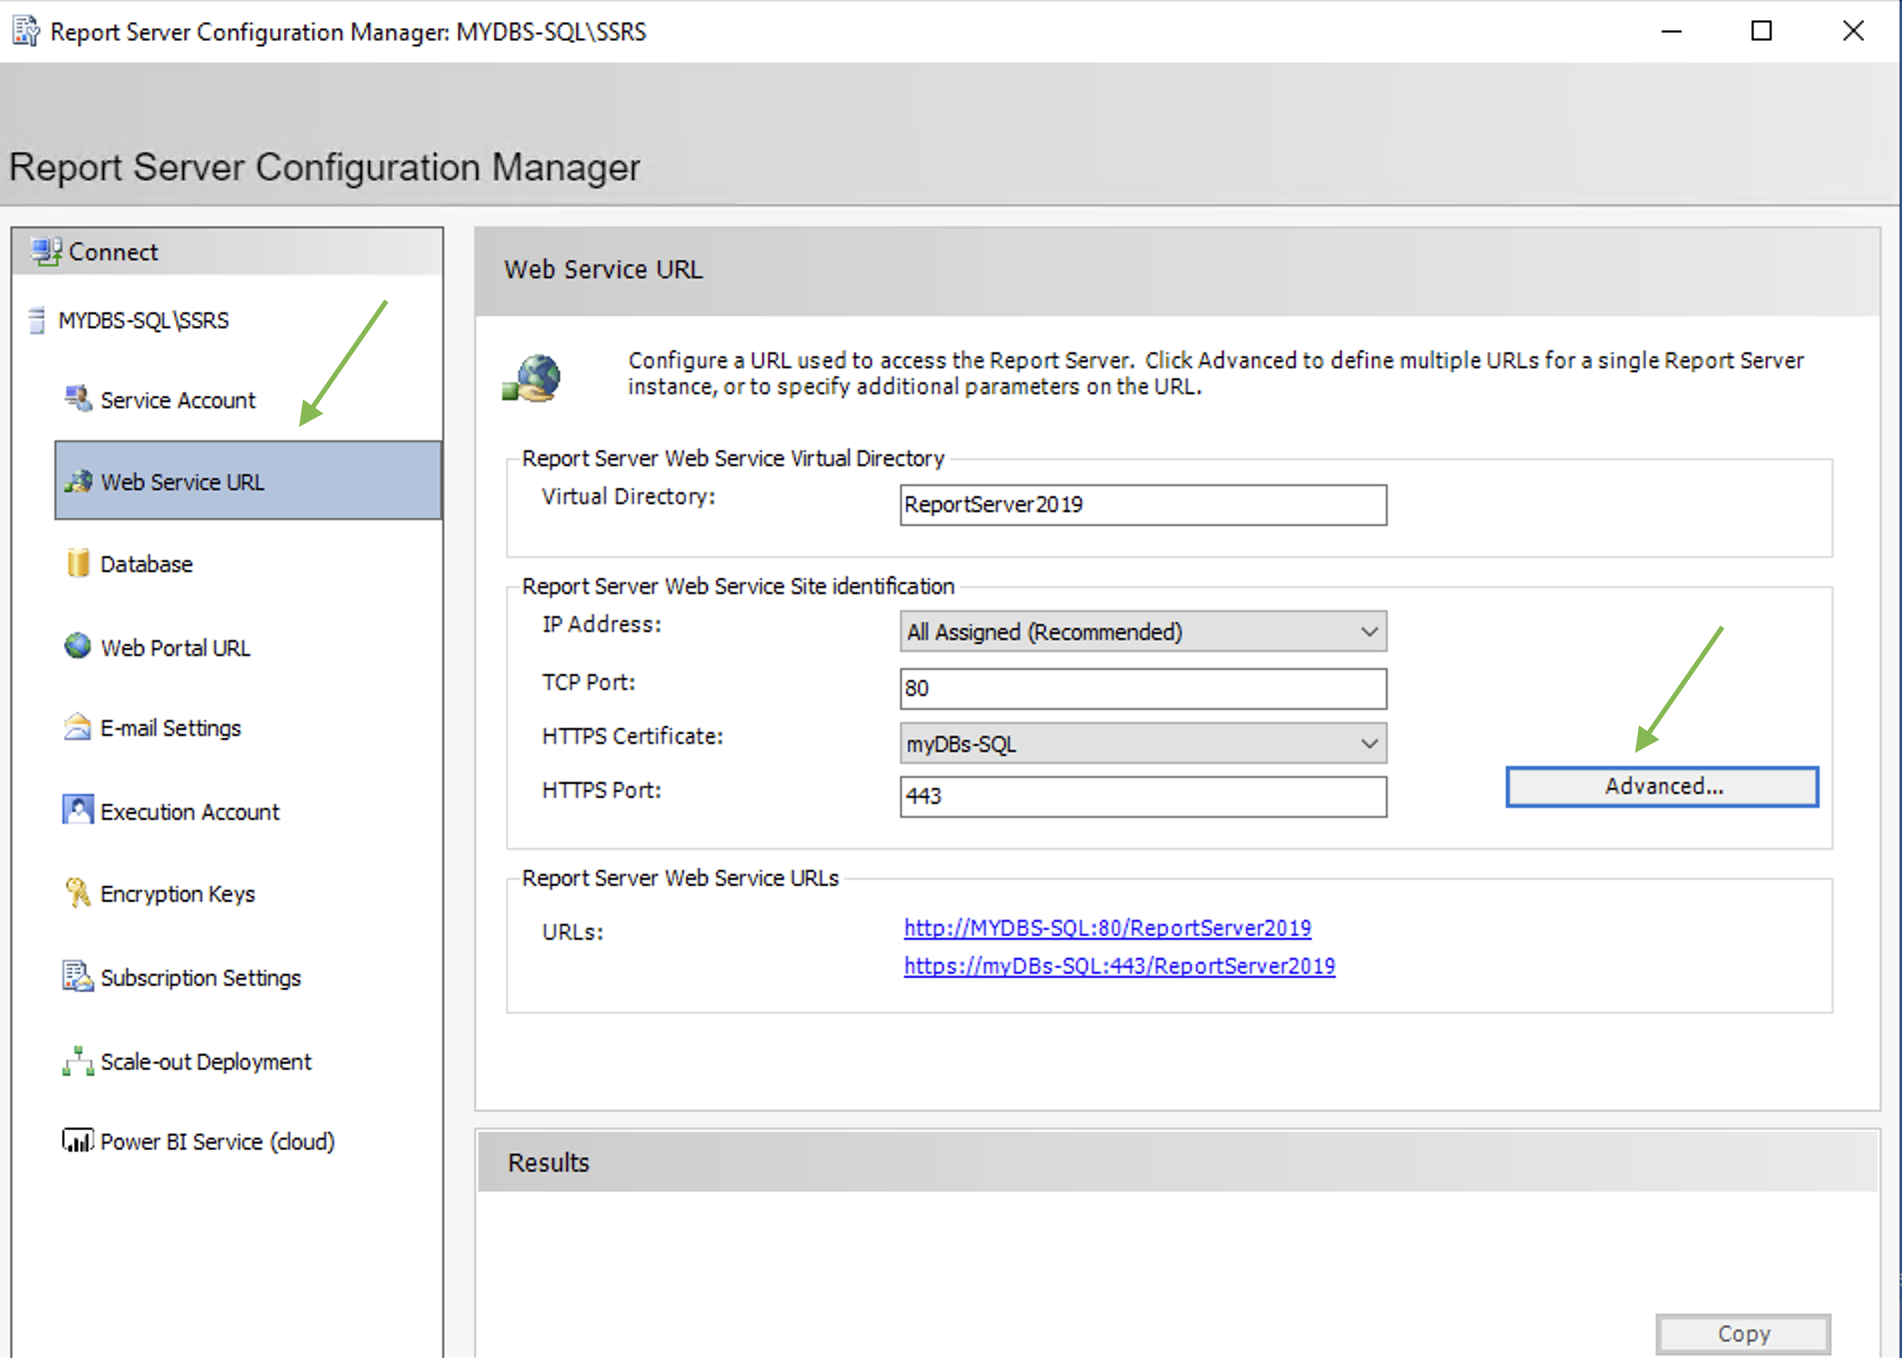 Picture 1
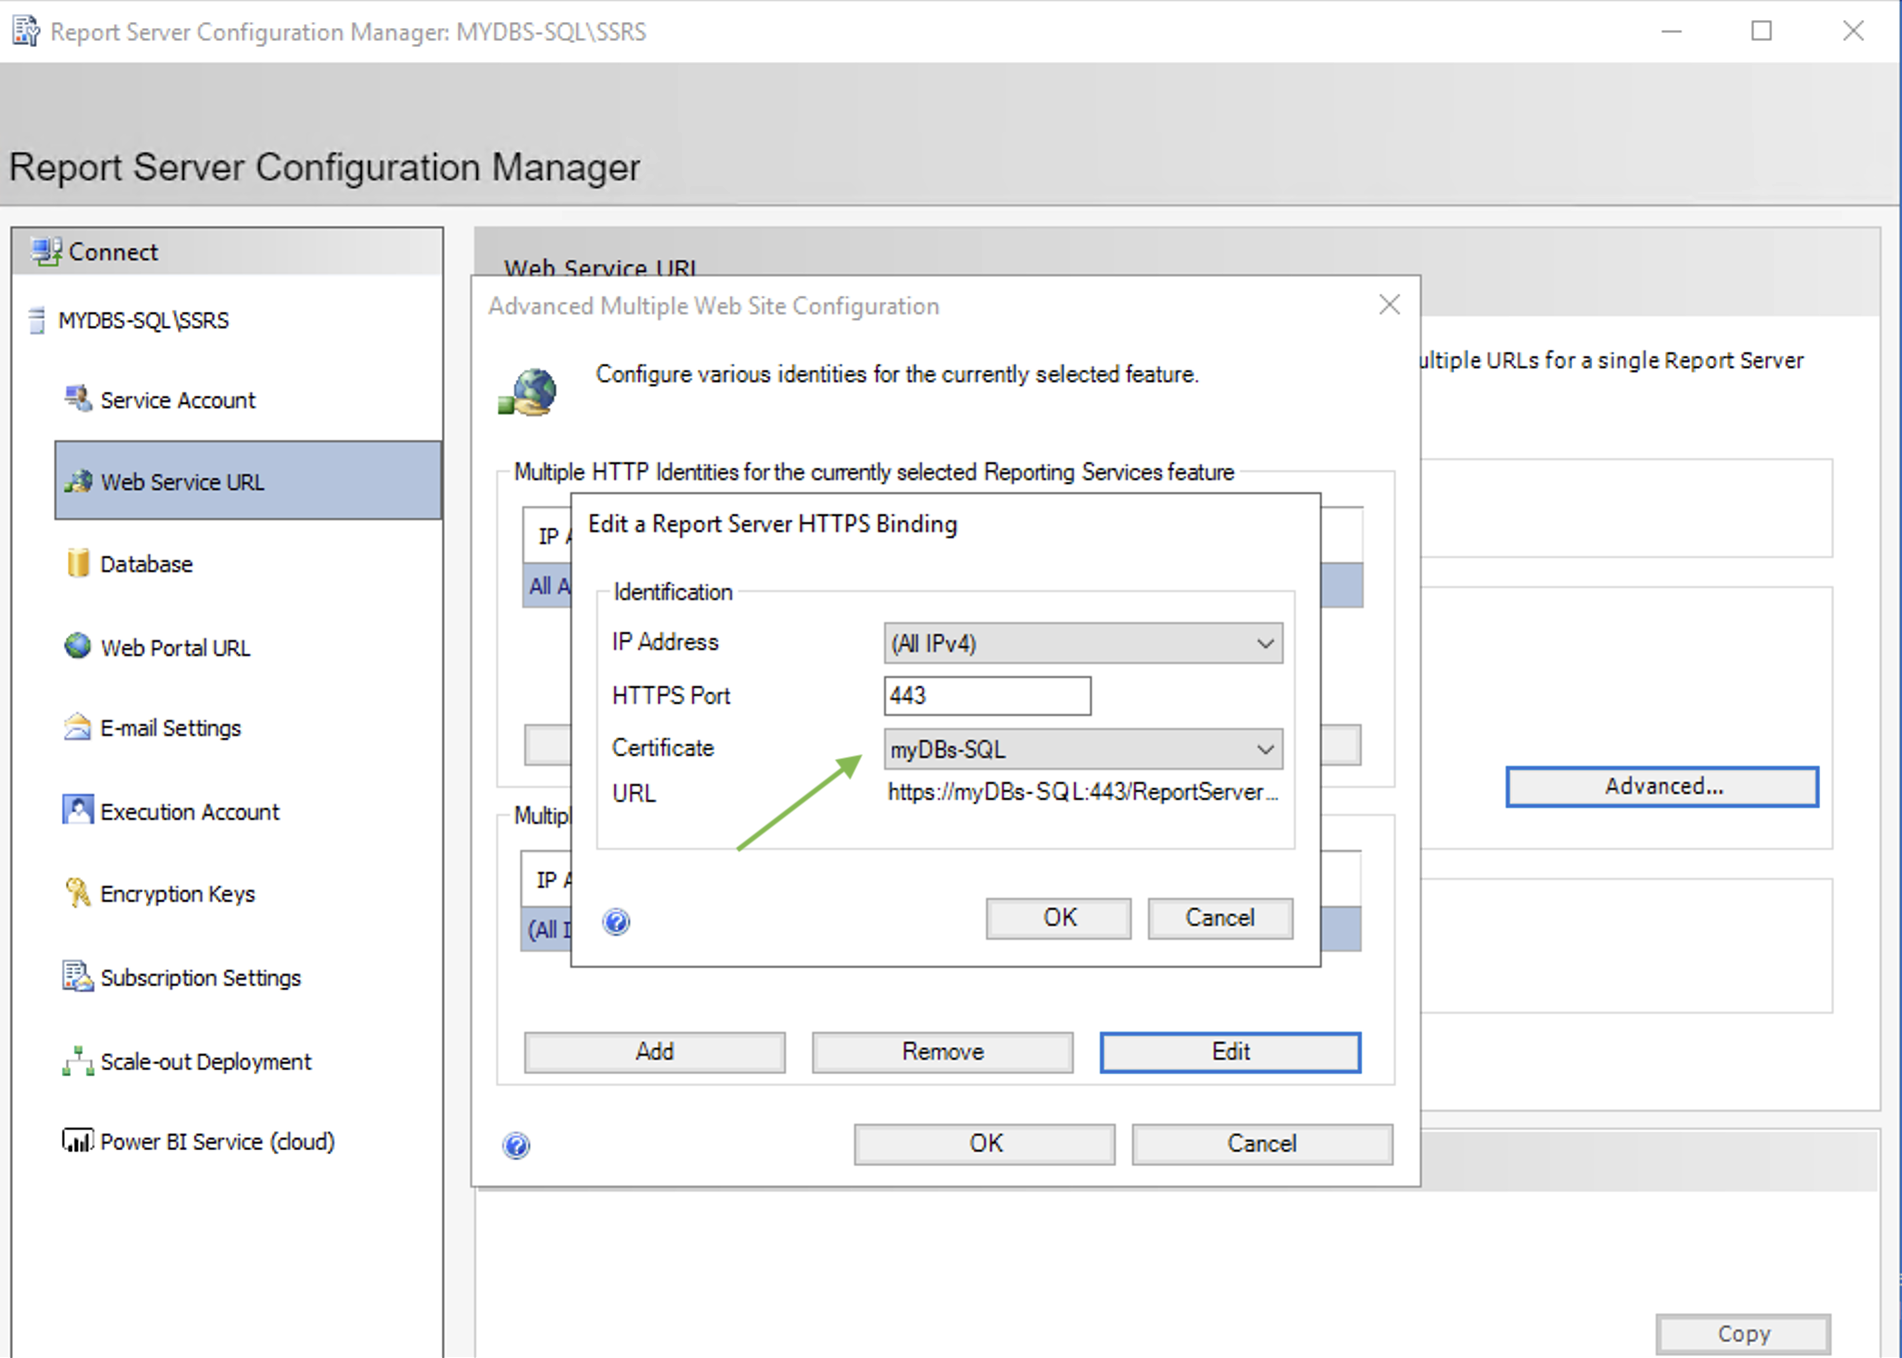 picture 2
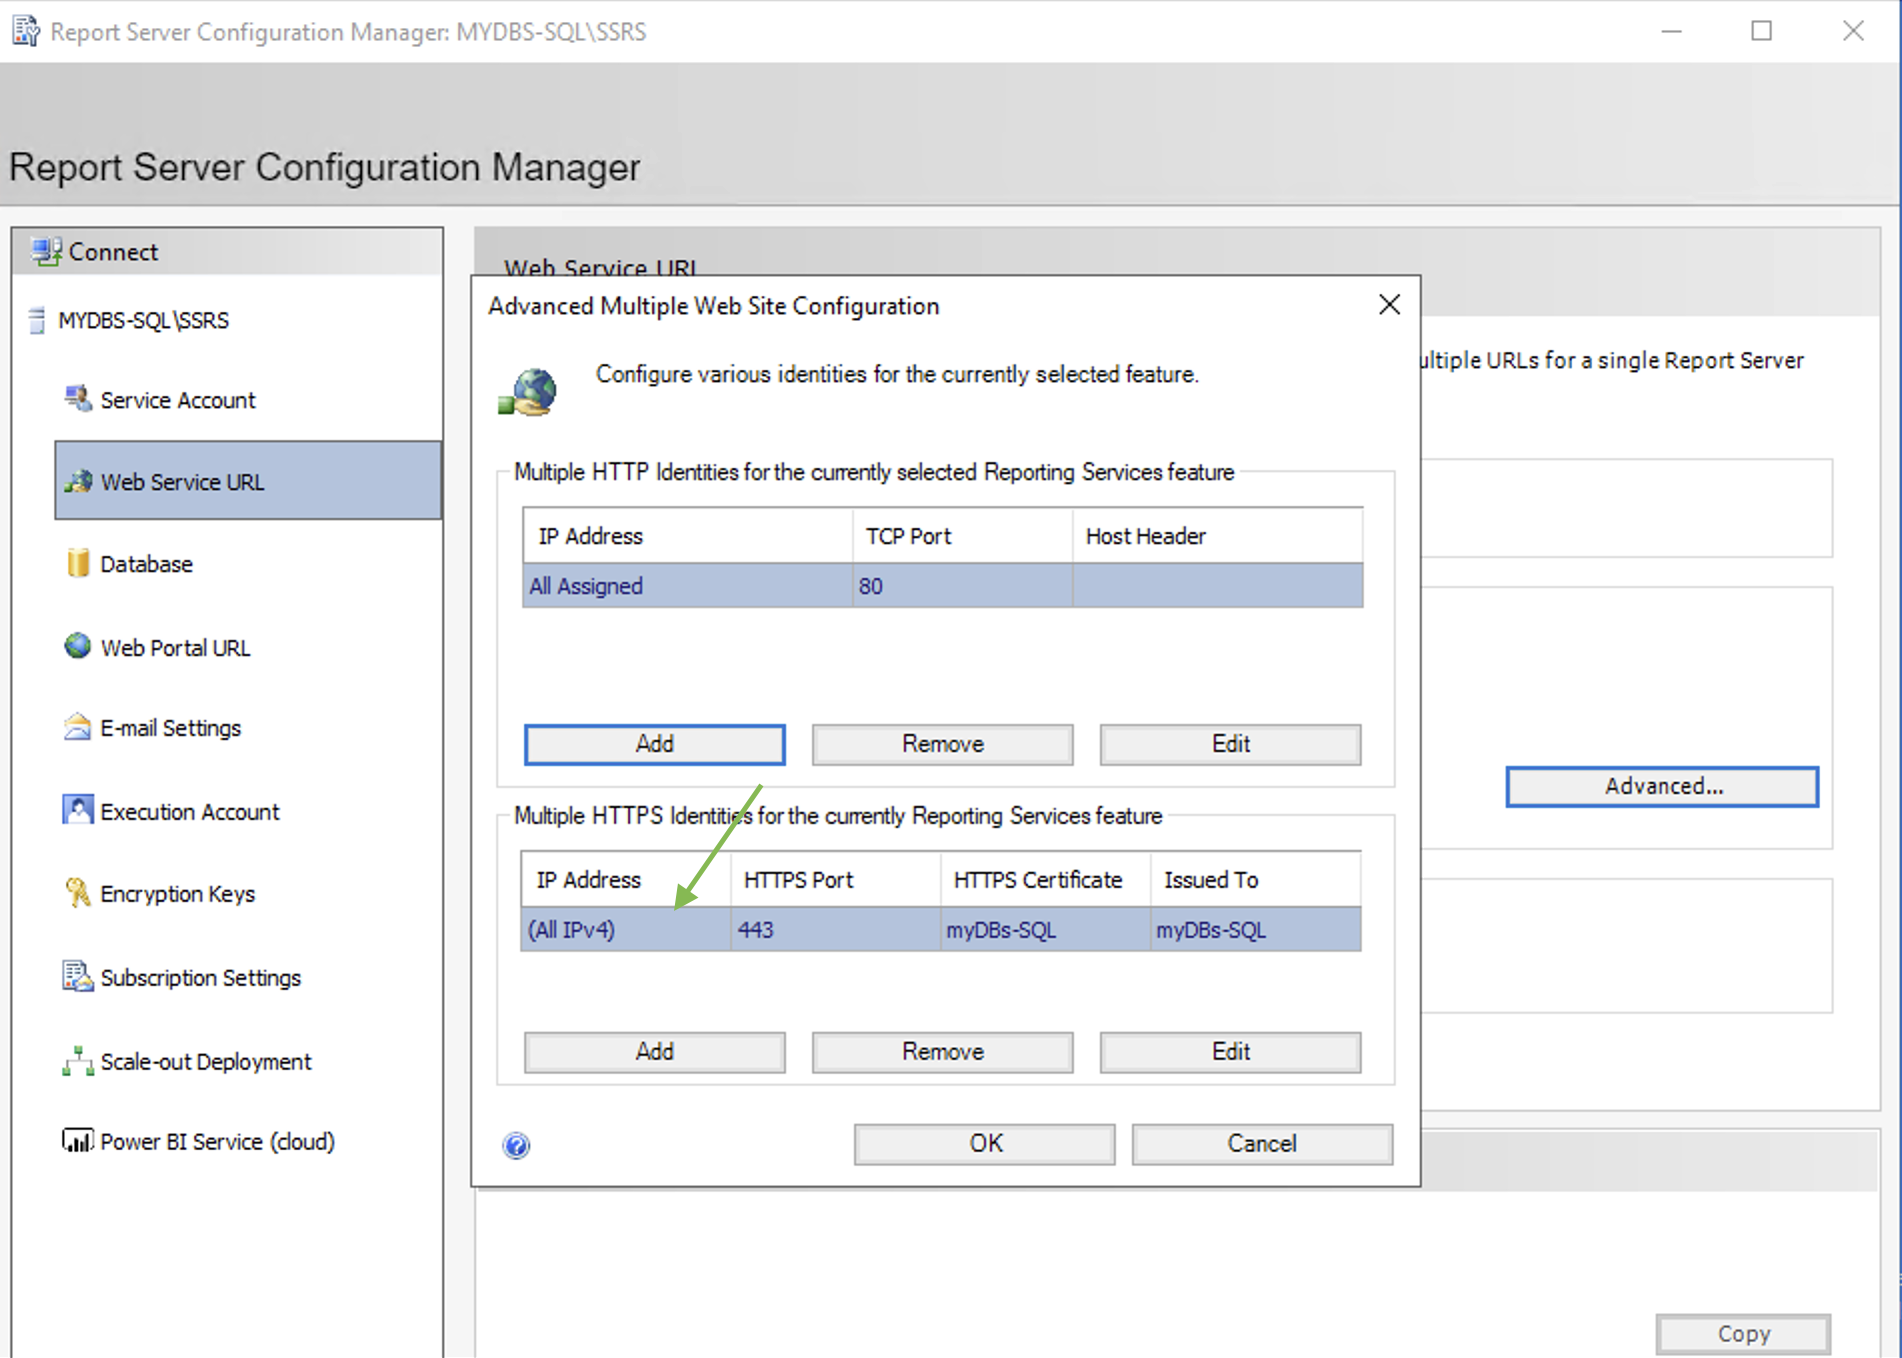 Picture 3
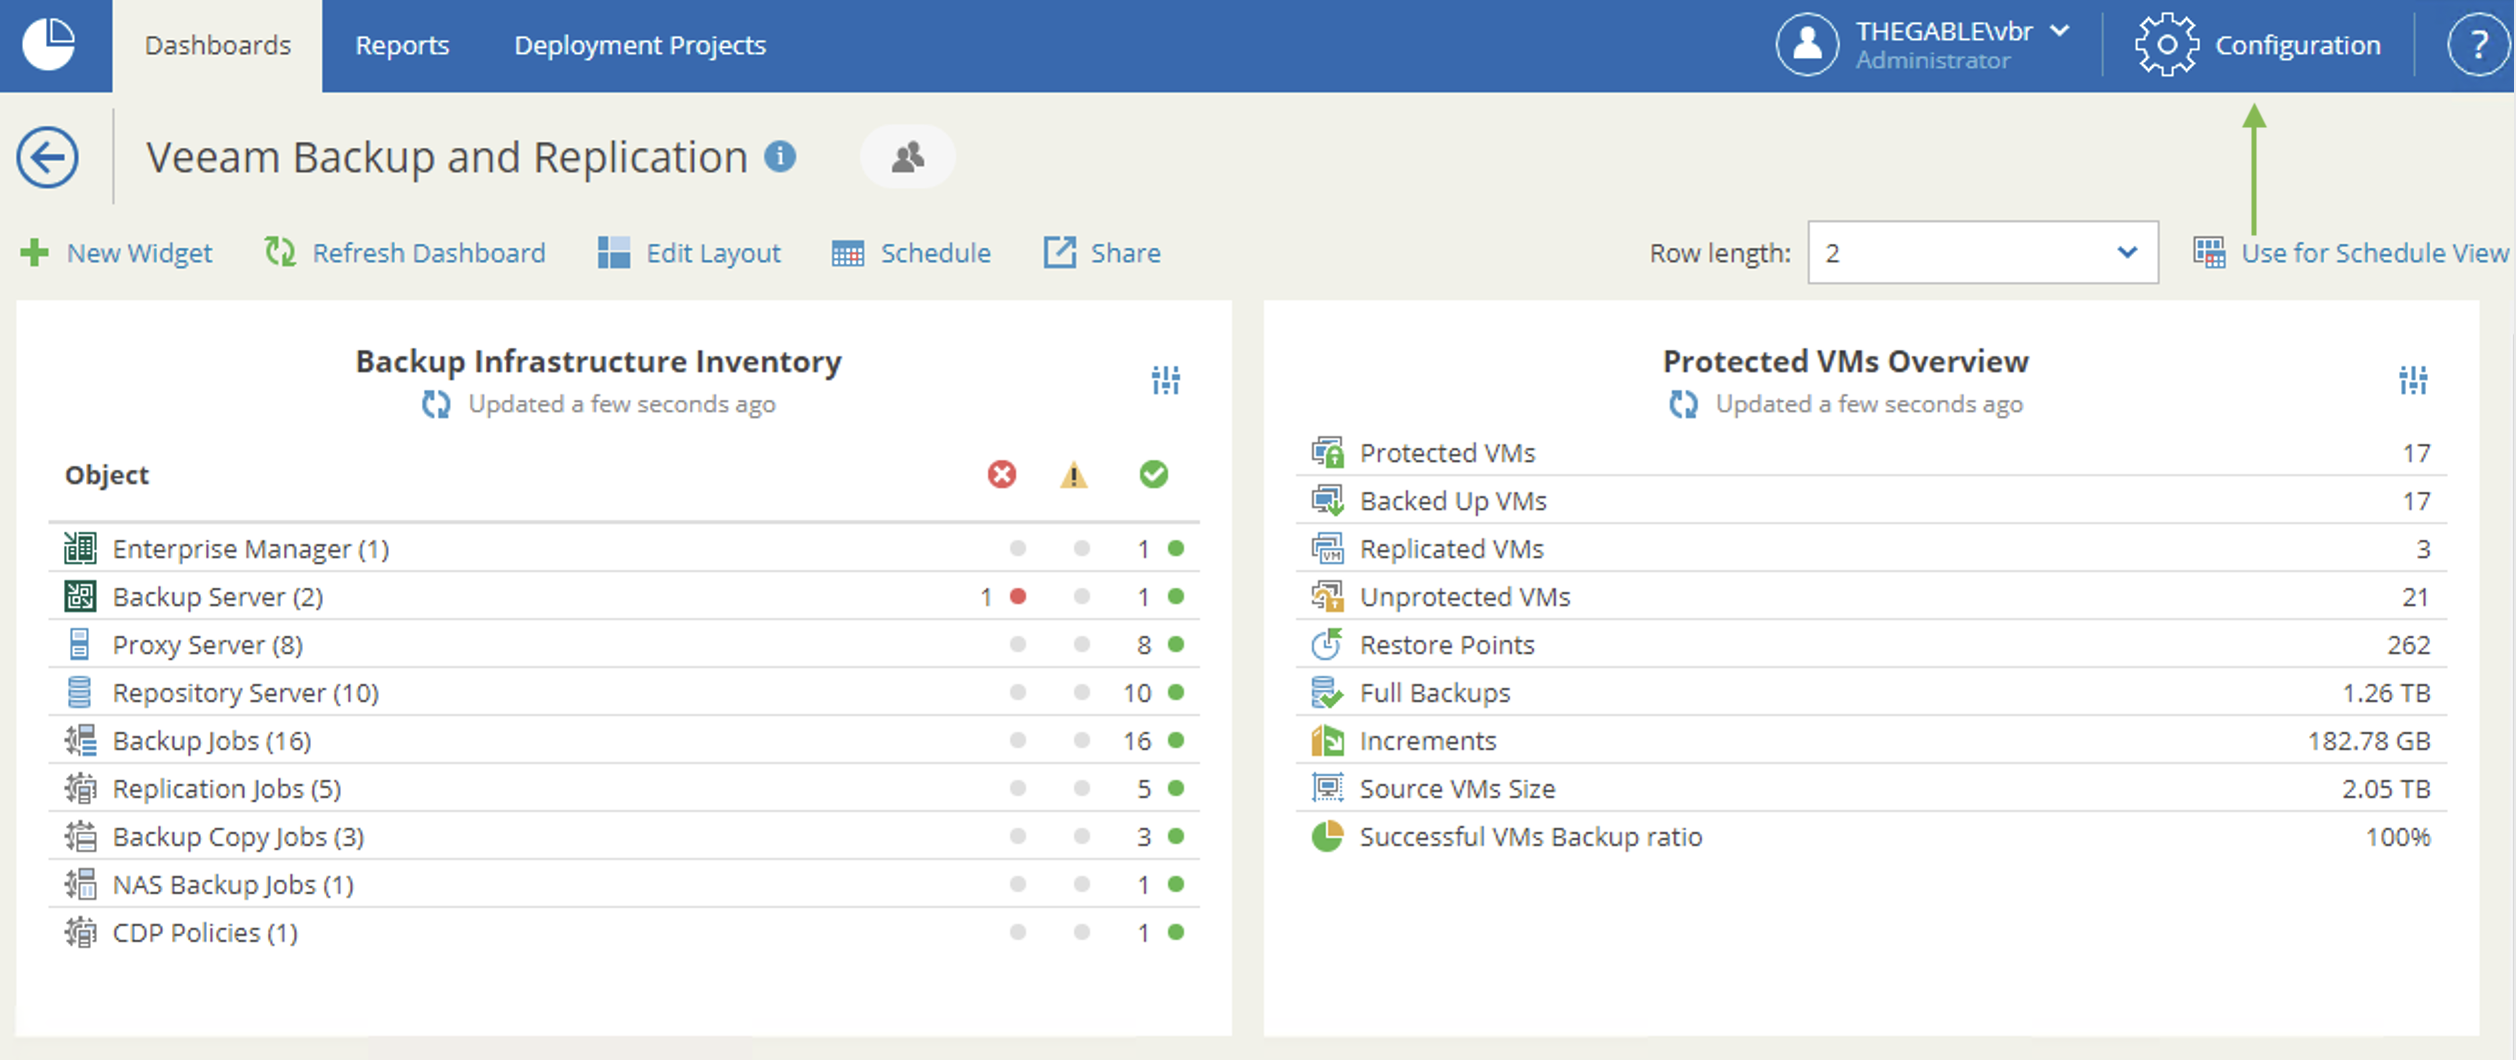 Picture 4
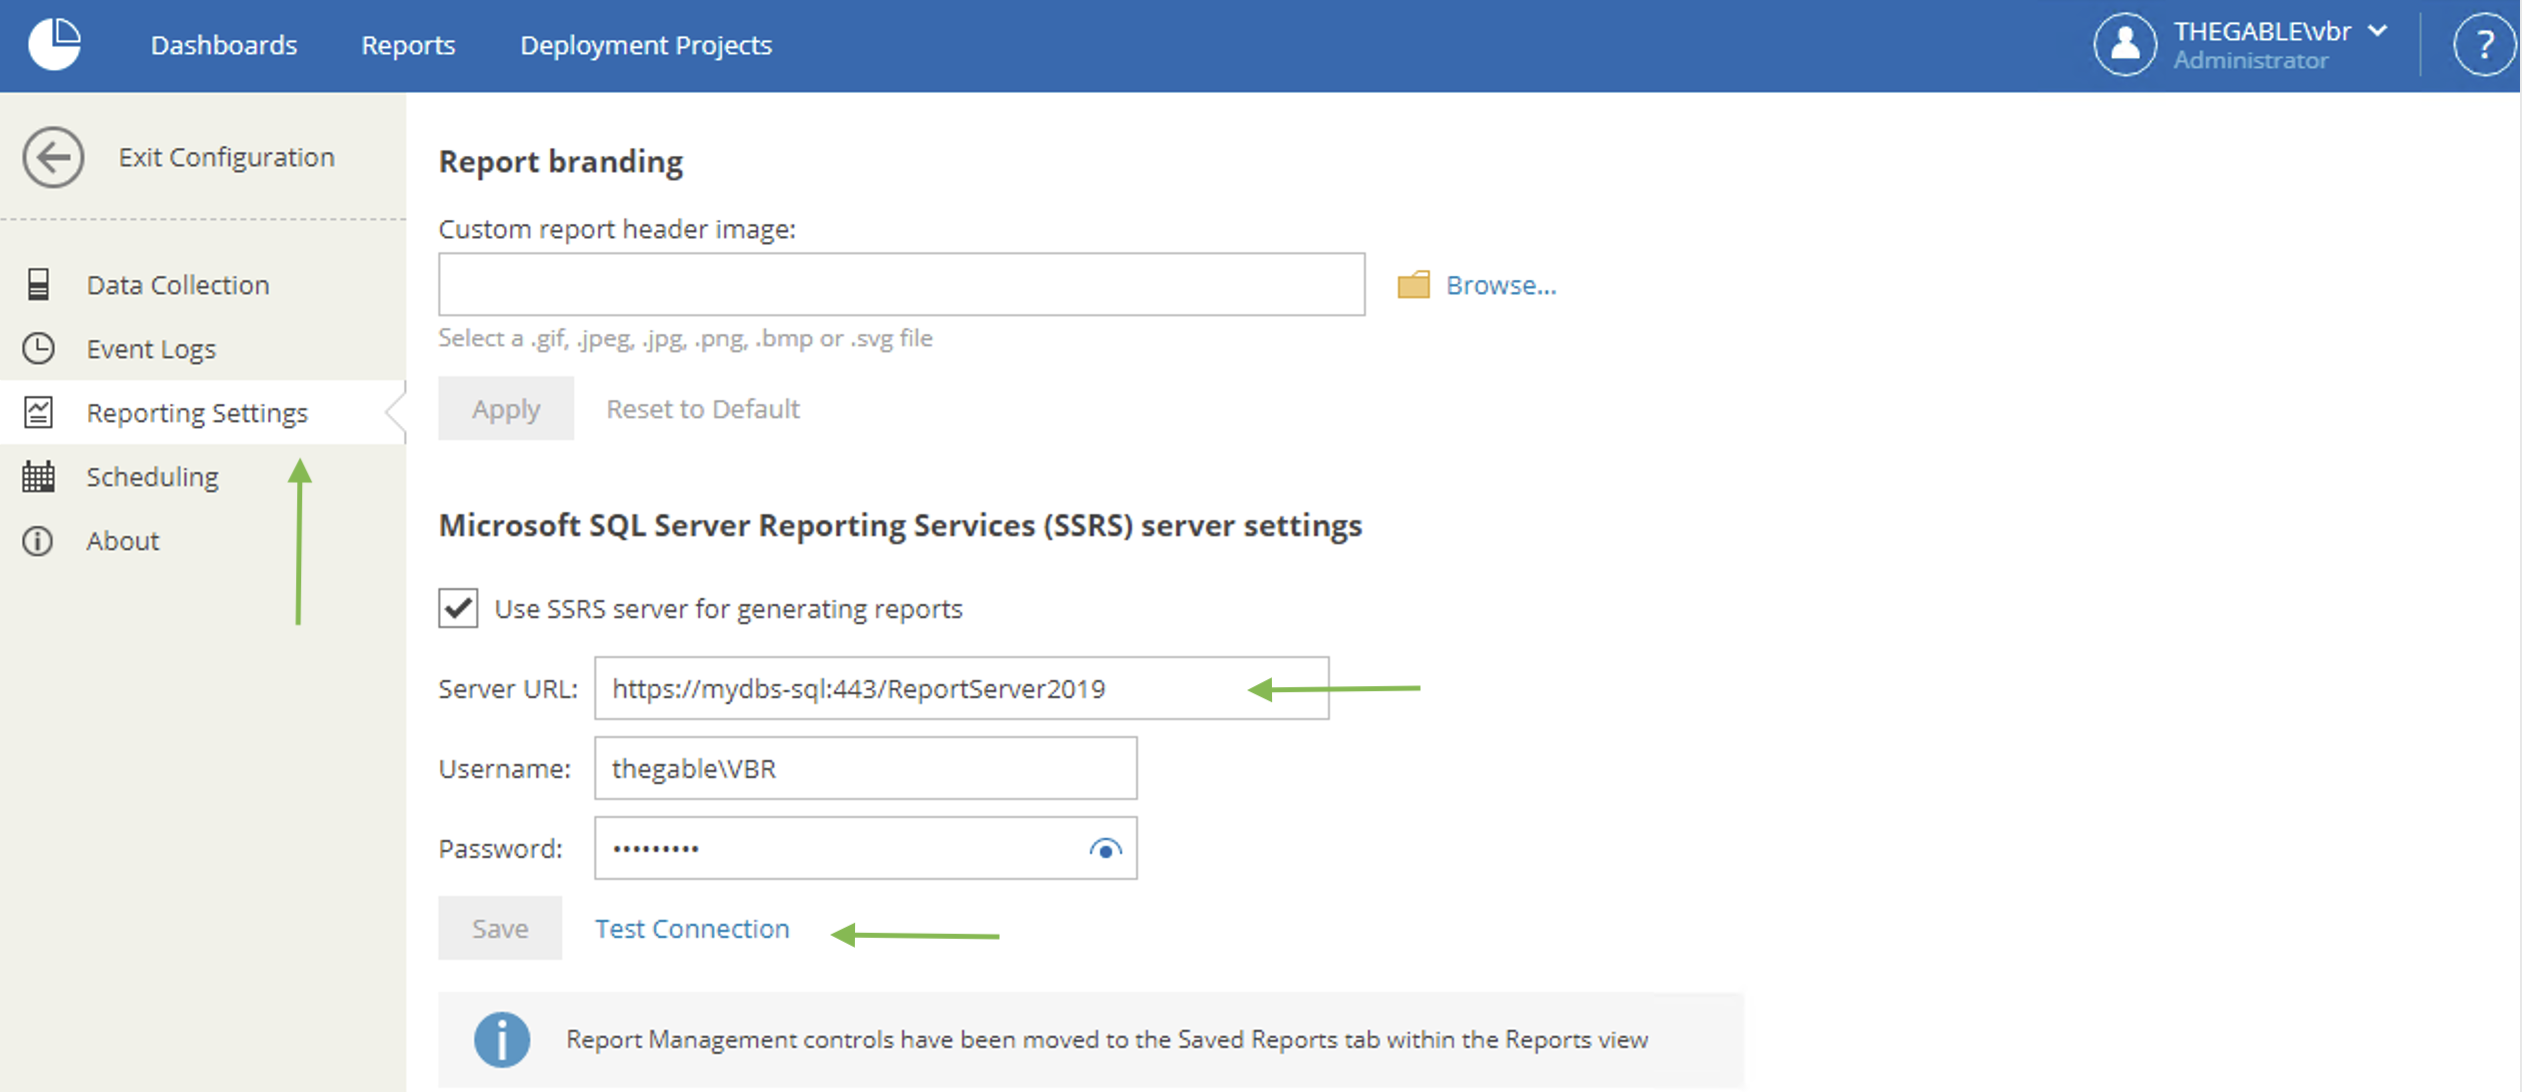 Picture 5