
Nei precedenti articoli, abbiamo visto che i container sono dei luoghi “astratti” dove girano le applicazioni sotto forma di immagini.
I POD sono l’aggregazione di più container.
Un servizio è l’aggragazione di più POD.
L’immagine di figura 1 mostra il concetto appena esposto.
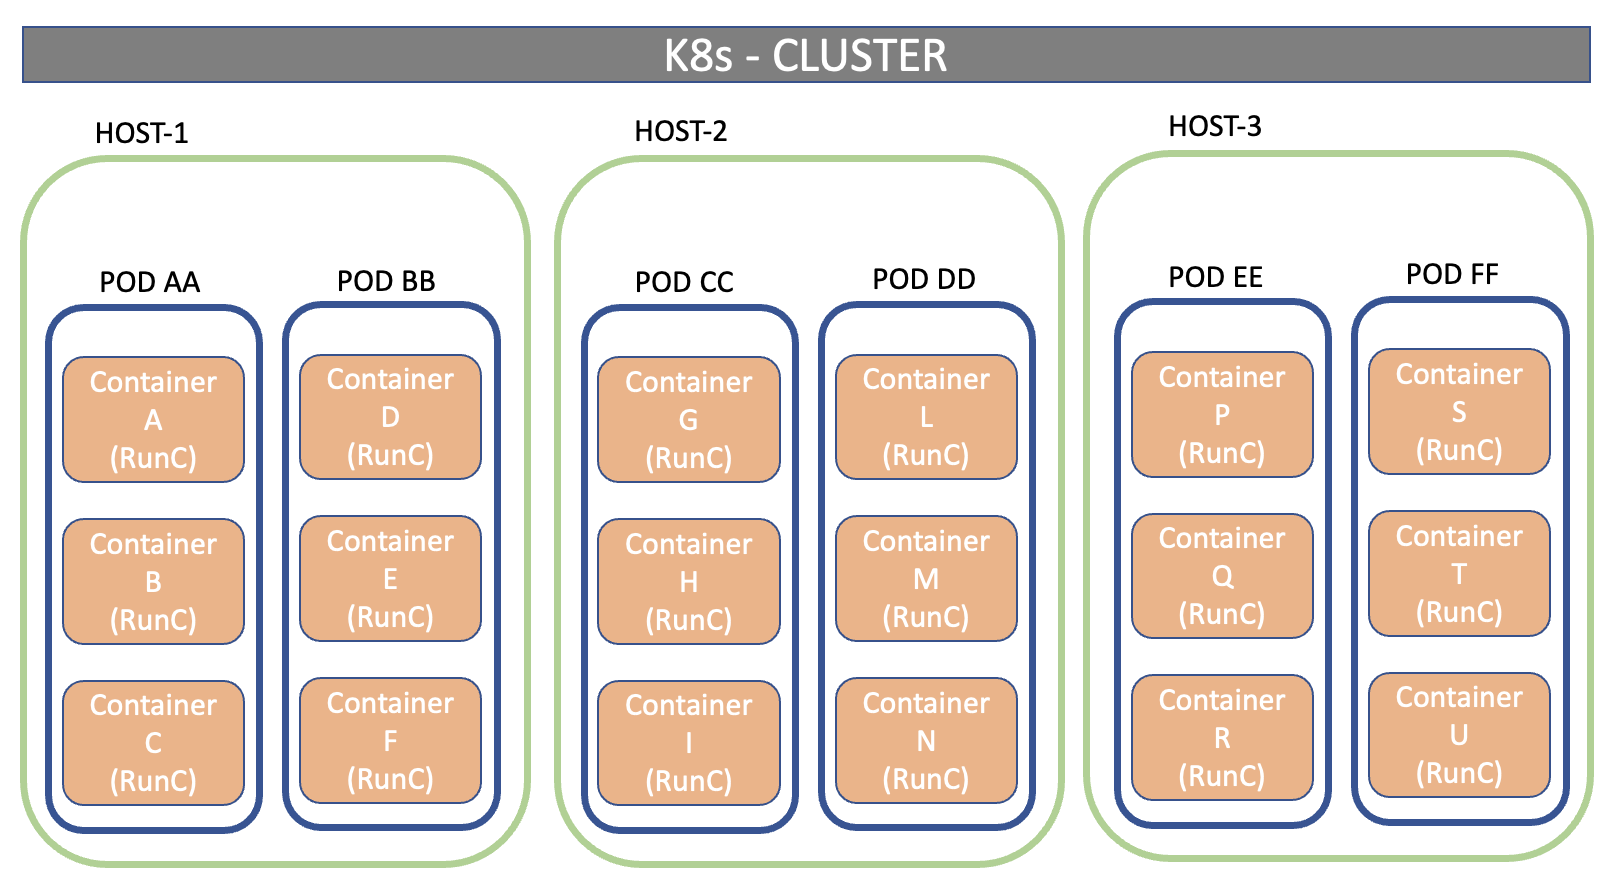 Figura 1
Tutte le applicazioni (immagini) presenti all’interno dello stesso POD, avranno lo stesso indirizzo IP (condiviso) e lo stesso Hostname (UTS NameSpace).
La comunicazione tra i container all’interno dello stesso HOST avviene attraverso POSIX o le IPC di System V
Immaginate ora di voler erogare il servizio “the-gable-svc“, costruito con due immagini (container): un Database e un Front-End.
In fase di progetto è meglio disegnare un unico POD che contenga i due contanier (figura 2) oppure due POD con ognuno un container (figura 3)? (1POD x 2 CONTAINER oppure 2 POD x 1 CONTAINER)
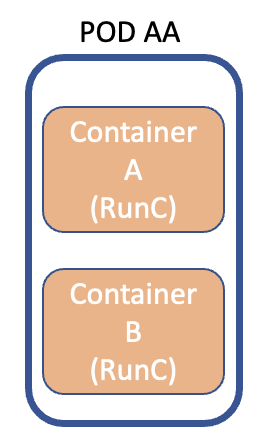 Figura 2
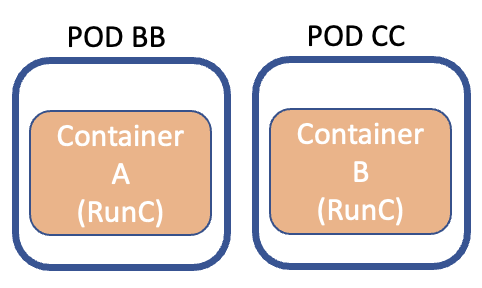 Figura 3
Per rispondere accuratamente è necessario comprendere quale applicazione ha la necessita di maggiore scalabilità e flessibilità.
Nel nostro esempio è il DB che per gestire picchi di accesso, potrebbe richiedere maggiori risorse (RAM & CPU).
Se avessi disegnato un unico POD, l’aumento delle risorse coinvolgerebbe entrambe le applicazioni, andando di fatto a non ottimizzare il dispendio energetico.
Nota 1: Le risorse CPU & RAM sono assegnate durante la creazione del POD.
E’ sempre meglio creare più POD?
Quest’ultima affermazione non è allineata con la politica di resilienza di K8s, dove i POD dovrebbero girare su host fisici differenti (k8s è un cluster).
Per risolvere la dipartita, esista una buona regola:
Se il servizio funziona correttamente anche se i POD sono distribuiti su più host, allora è meglio utilizzare più POD (figura 2).
La Figura 4 mostra il contenuto del file mysql-pod.yaml che crea il POD per l’applicazione mySQL.
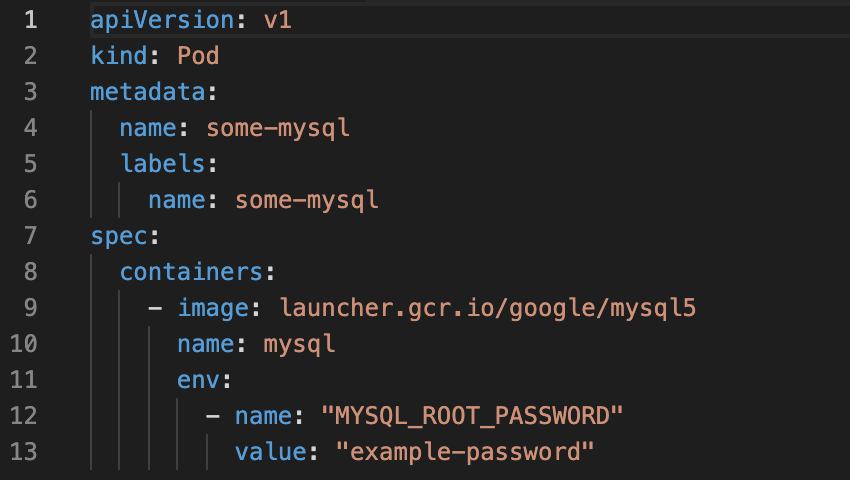 Figura 4
Vediamo la sintassi di base di gestione del POD:
- Per avviarlo è sufficiente lanciare il comando: kubectl apply -f mysql-pod.yaml
- Per verificarne lo stato: kubectl get pods
- Per ottenere tutti i dettagli: kubectl describe pods some-mysql
- Se volessimo cancellarlo: kubectl delete -f mysql-pod.yaml
Per oggi è tutto a tra poco dove parleremo di Accesso al POD, come copiare files e tanto altro ancora.
A presto