This article’s topic is how to set up and work VBR when it is combined with the NDMP protocol.
This type of configuration is part of the category “file to tape” I treated in my last article “A flexible file backup Strategy – Part 2”.
One more note before starting: VBR requires NDMP version 4 and later.
- How does it work?
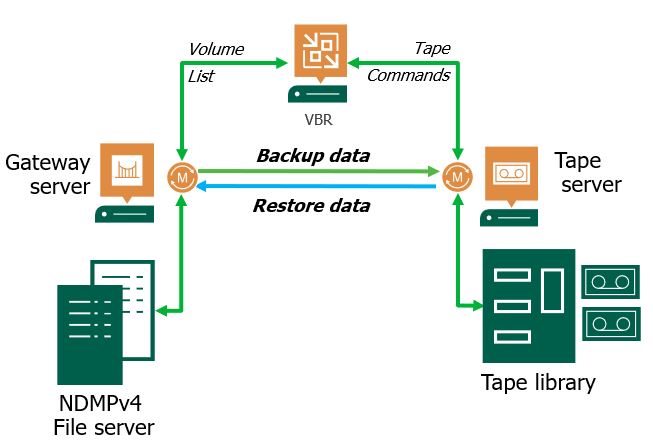
Picture 1
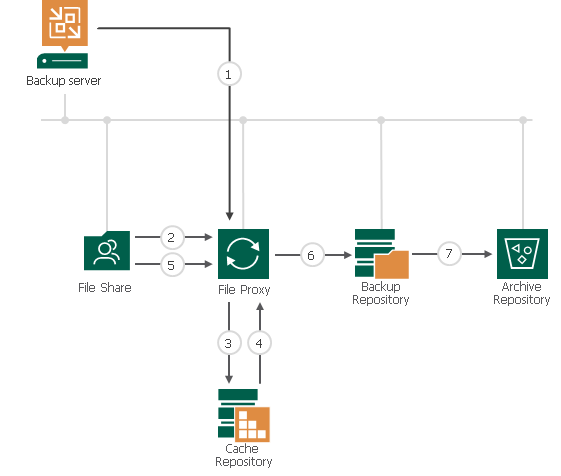
The architecture is quite easy.
Files are gathered from the File Server through the data mover present on the Gateway server. Then they are sent to the Tape Server that performs the write on Tape.
The Datamover installed on Tape Server has the ownership of managing the data traffic to Tape Device.
VBR has the task of enumerating the Volumes and launch the command to Tape Devices.
Point-1: VBR works with a 3 layer backup architecture. It means there is no direct connection between File Servers and Tape Devices. All Data have to pass through the tape Sever.
In this article, I’m not covering the procedure to set up the NAS correctly. Please ask your storage vendor specialist to get all details needed.
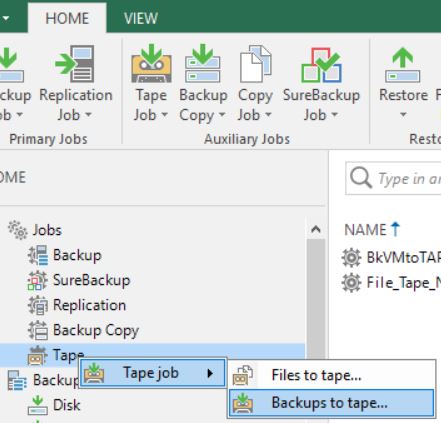
How to add the NDMP server to VBR and set up a backup job?
The next video will answer the question.
Video 1
After the backup is completed how to perform a restore?
NDMP backup files are available to perform restores from the FILE menu at the voice Tape and then NDMP as shown in picture 2
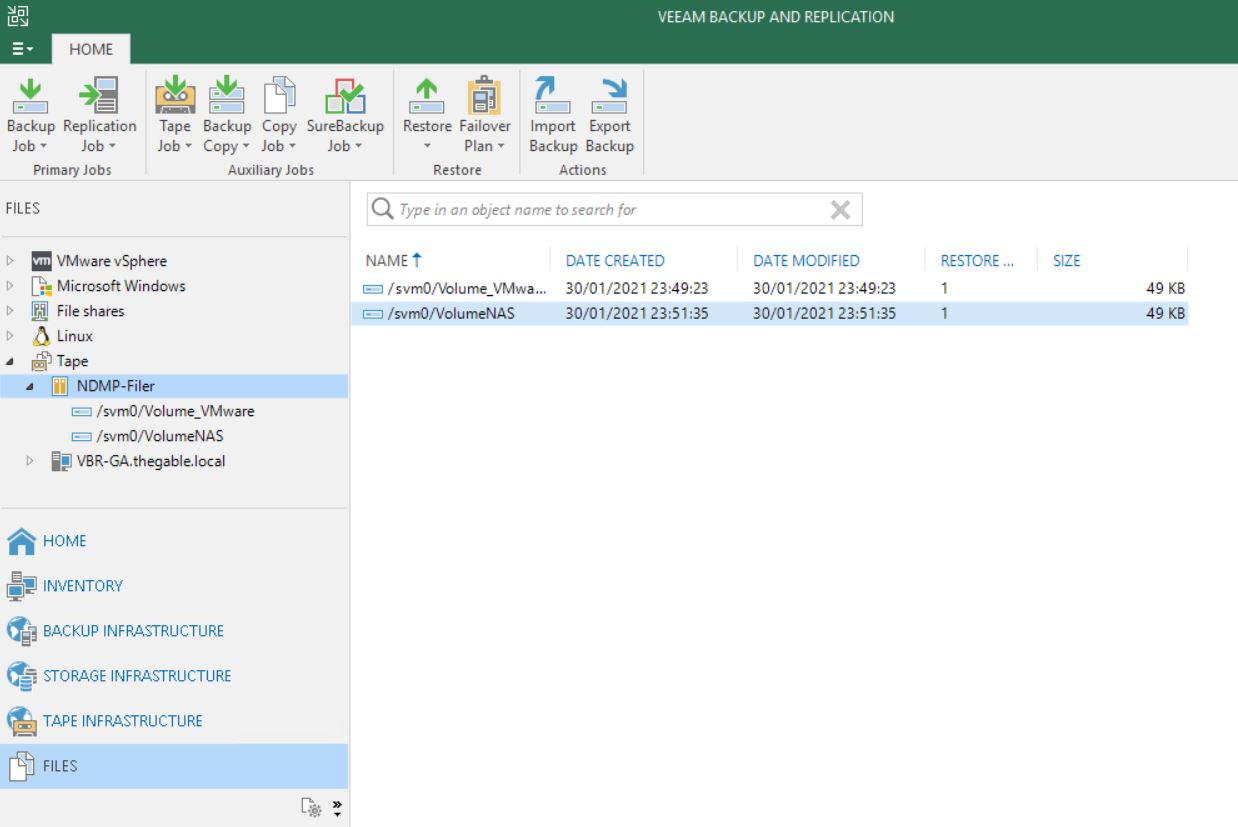 Picture 2
Please have a look at the next short video (video 2) to see the easy step to perform a restore.
Video 2
Point-2: The backup chain stored on tapes will consist of 10 restore points maximum. On the 11th run, VBR will force an active full.
- Common scenarios
One of the main characteristics of NDMP backup is that it allows to perform backup and restore of entire volumes.
The most common scenario is the Disaster Recovery of the entire Filer. Imagine the case in which the customer NAS filer is completely out of order and the only way to restart the file sharing service is formatting all the disks and then restoring the volumes (or the worst case is getting a new NAS).
In this case, NDMP volume restores from tape is an excellent low-cost solution.
Main Pro:
NDMP servers backup to tape is available in the Enterprise Plus Edition of VBR.
It means that there is no limit on the amount of data that can be saved. Could be 1 TB or 100 PB it doesn’t matter.
Veeam Universal License (VUL) has the Enterprise Plus Edition available. Is it time to move your old sockets license to the subscription model (VUL)?
Cons:
The granular restore (files and folders) it’s not an available option with VBR and NDMP backup.
Please note that NAS backup is now completely supported by VBR (please refer to article 1 of this series) and it’s the fastest way to perform the granular restores.
Point-3: Even if the NAS device supporting NDMP protocol is already added to VBR, you need to add the NDMP server as a separate procedure. Otherwise, you will not be able to perform file backup to tape.
The next article will cover a recap of the different techniques and show a hidden gem of VBR.
See you next week and take care
 Picture 1
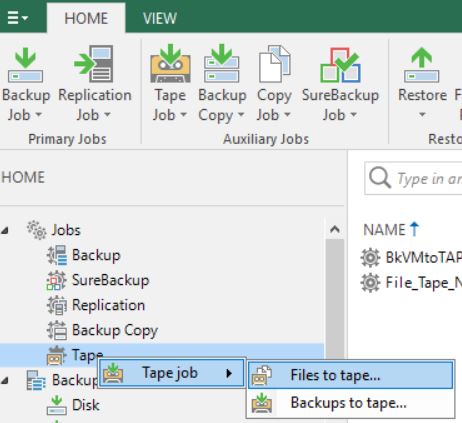 Picture 2
 Picture 1
 Picture 2
 Picture 3
 Picture 4
 Picture 5
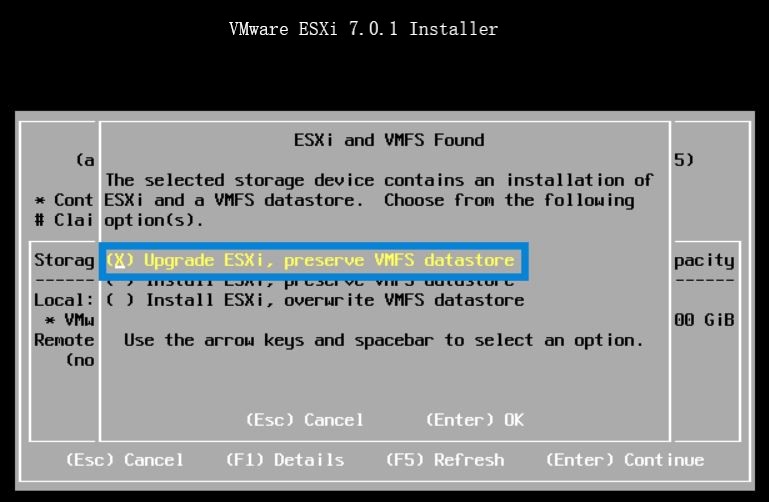 Picture 1
 Last weekend I upgraded all my Servers to the last VMware ESXi release (7.0.1 C) and this article is meant to describe all steps I performed.
 Picture 1
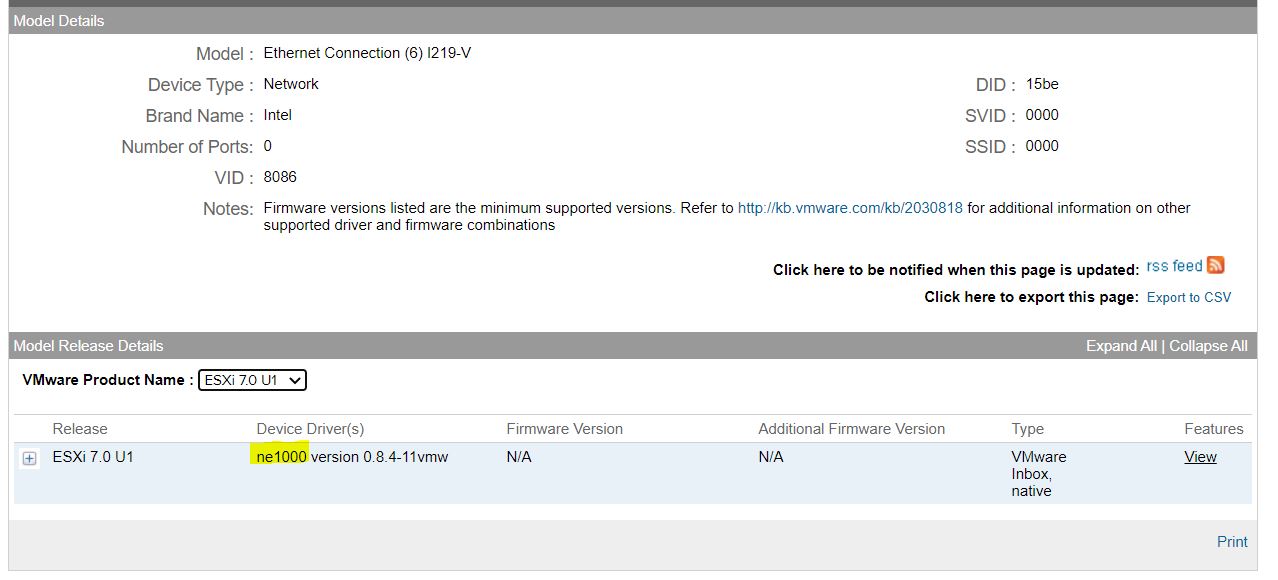 Picture 2