
ReFS è il file system avanzato di Microsoft che migliora la disponibilità dei dati attraverso tecnologie in grado di:
- Garantire una maggiore resilienza dei dati memorizzati sul file system.
- Aumentare le prestazioni in lettura e scrittura.
- Migliorare la scalabilità (si parla di milioni di TB).
Una delle funzionalità più utili ed utilizzate in ambito backup è la tecnologia di Block-Cloning che permette a Veeam Backup & Replication di creare dei backup full di dimensione pari ad un incrementale.
La logica di funzionamento è semplice e consta di 3 fasi:
- L’avvio del processo di Backup copia nel Repository di destinazione (ReFS), i dati incrementali delle VM / Istanze / Server Fisici/ Client da proteggere.
- Il File System ReFS si occuperà di memorizzare i nuovi blocchi e di creare i metadati relativi ai dati appena scritti.
- L’ opzione “create a Syntethic-full” di fatto innesca un’operazione a livello di metadati. ReFS aggiunge ai metadati appena creati, quelli relativi ai backup precedenti creando così un nuovo full figlio dell’unione di tutti i metadati necessari. Per ulteriormente semplificare è creato un full logico senza che sia copiato/spostato alcun blocco.
Nota 1: Il risultato è non solo un risparmio di spazio ma anche di tempo necessario a realizzare il full.
Orbene, come è possibile quantificare lo spazio disco risparmiato nel repository (RefS)?
Timothy DeWin ha realizzato un tool (blockstat.exe) perfetto per questo calcolo, al quale vi rimando per tutte le opzioni possibili.
Nel mio caso ho risolto la necessità del cliente attraverso:
- Creazione attraverso powershell di un file di testo (formato unicode) che ricercasse tutti i file di Backup generati da Veeam Backup & Replication all’interno del repository ReFS. (Vedi immagine 1)
- Catturato l’output del comando bloclstat. (vedi immagine 2)
 Immagine 1
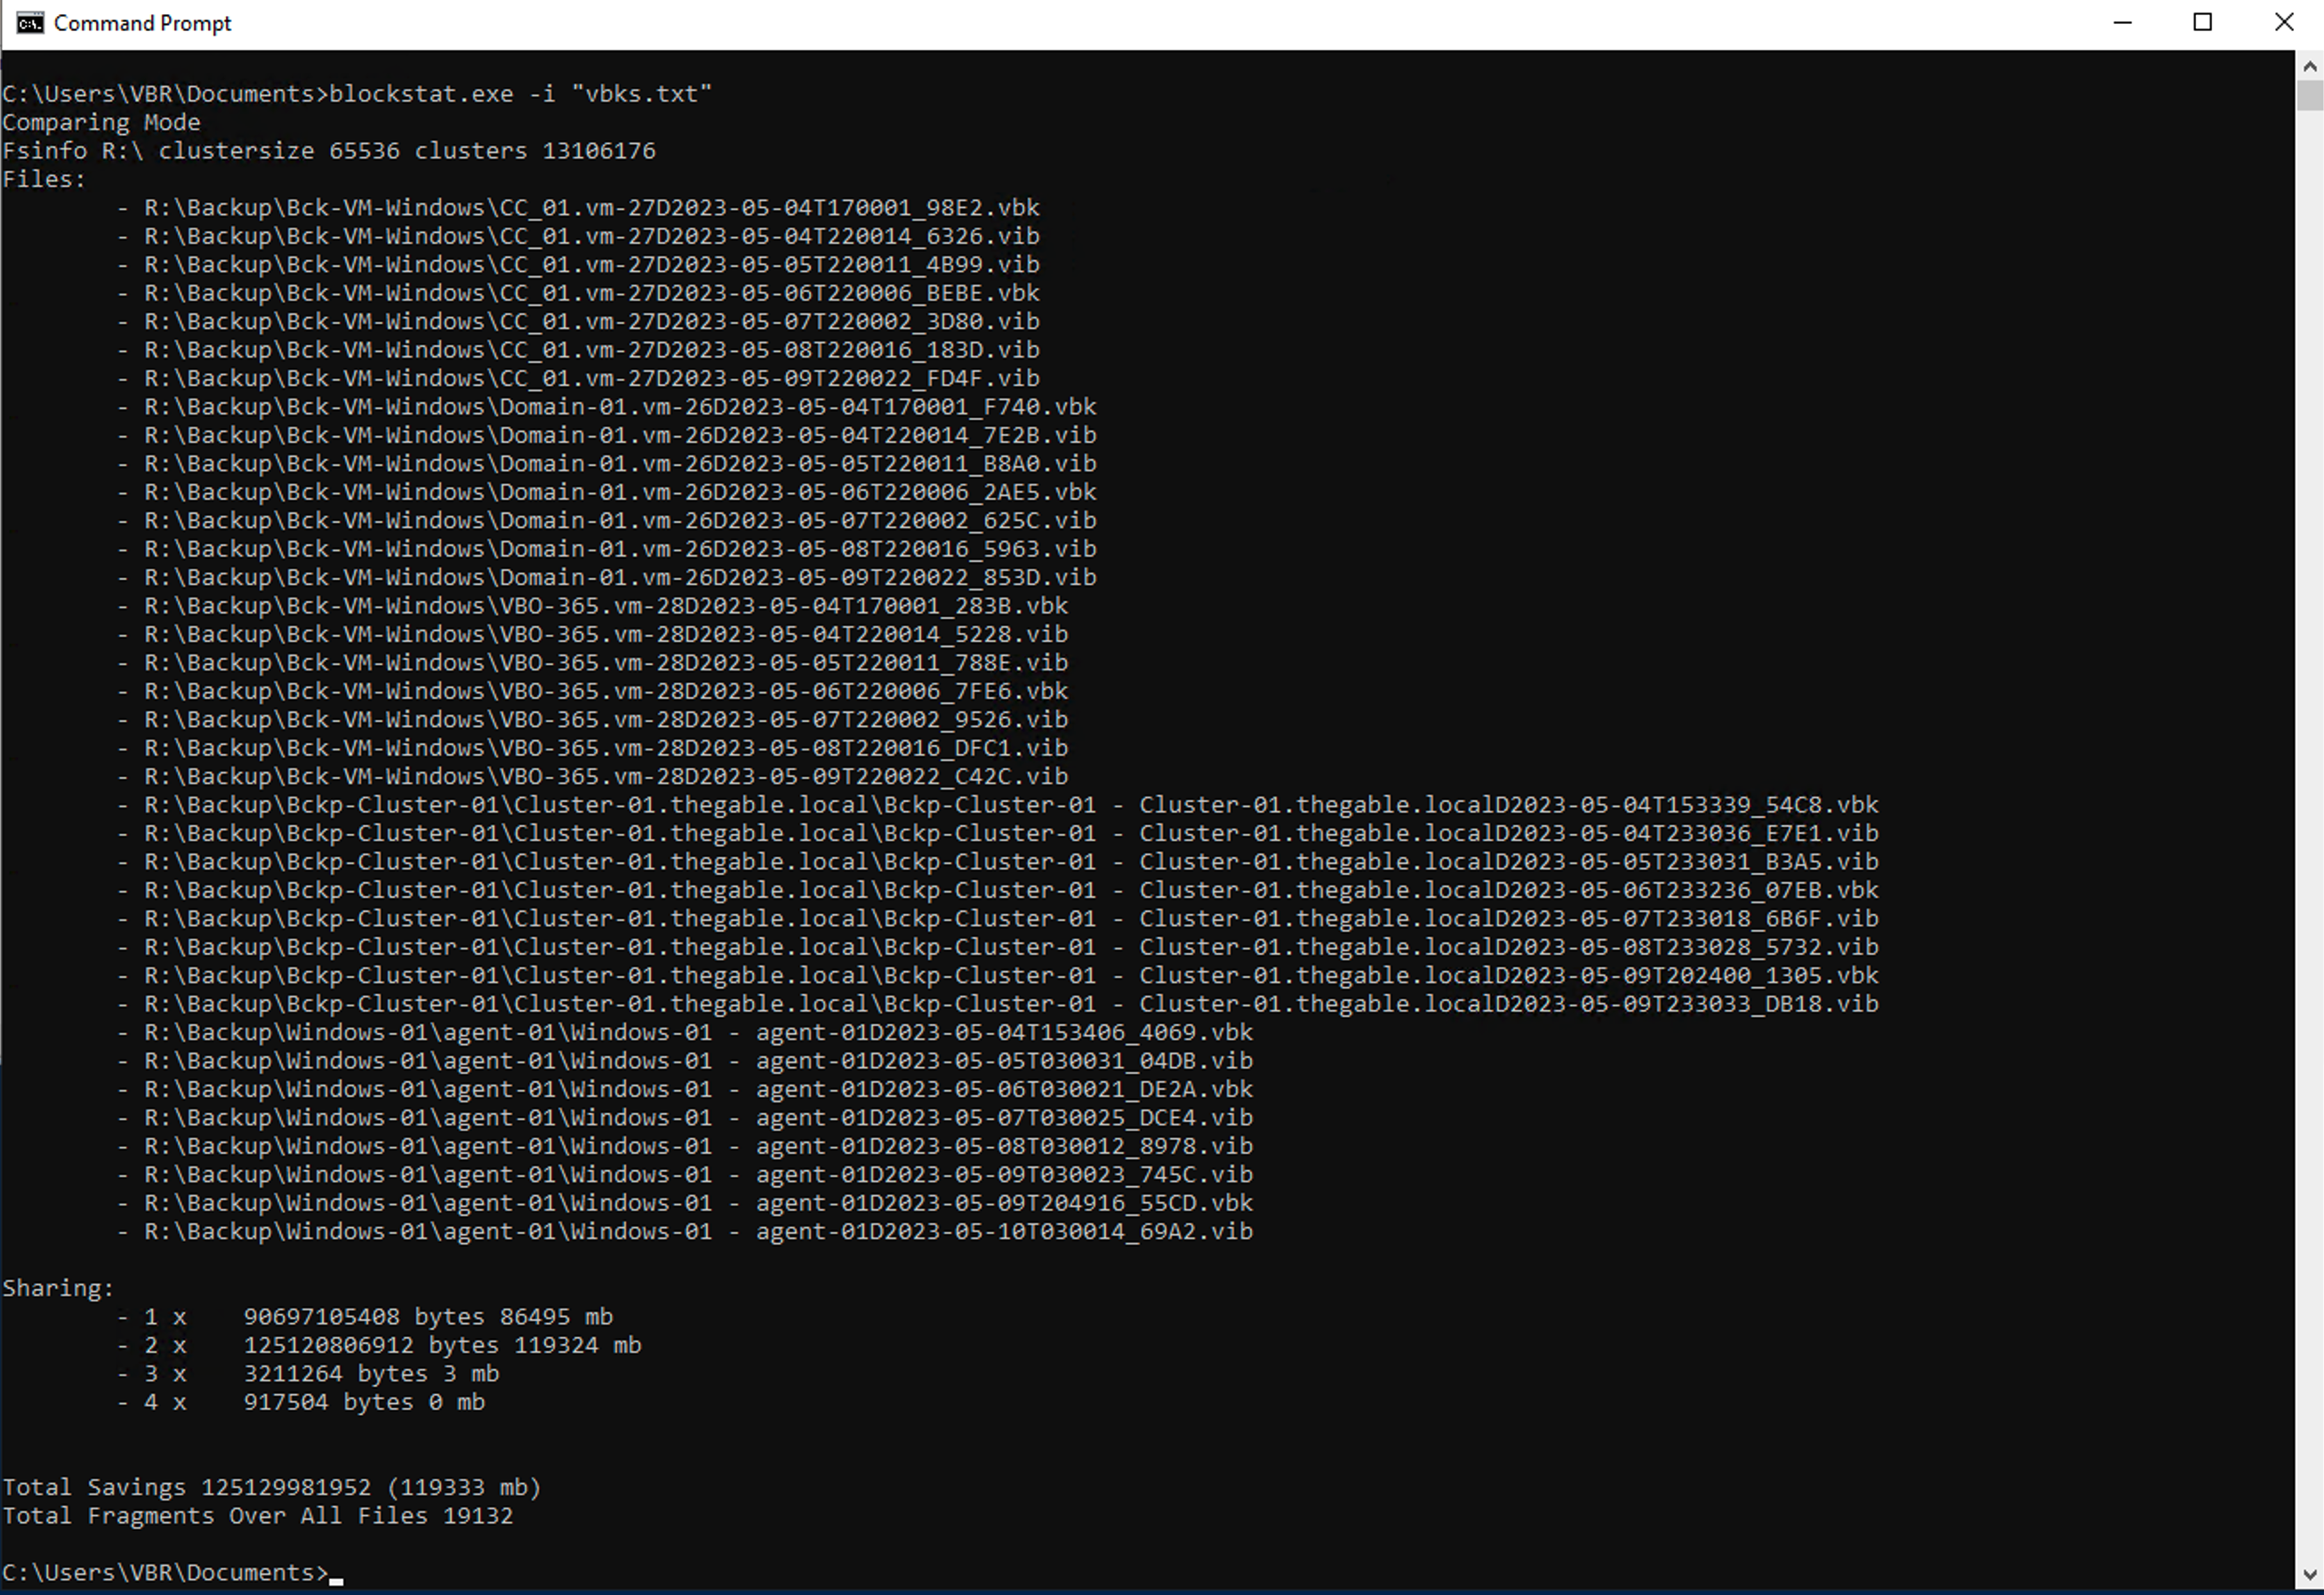 Immagine 2
 Immagine 1
 Immagine 2
 Immagine 3
 Immagine 4
 Immagine 1
 Immagine 2
 Immagine 3
 Immagine 4
 Immagine 5