

A lot of new challenges came to people who work in IT-Departments these last months.
The number of ransomware attacks has been growing day by day and their attack strategies are becoming more and more evil and dangerous.
The common questions the Managers ask the IT guys are:
a) Are the company protected against these risks?
A good answer is that a successful approach is when the percentage of certainty is more than the percentage of risk.
b) Which are the best practices to be safer?
The key is defining the right process of protection.
The scope of these articles is showing the correct behavior to keep your architecture as safer as possible or, in case of attack, gain as much time as possible to fend off the assault.
The articles will cover the storage point of view and do not deal with perimetral defenses, antimalware, antiviruses, networking strategies, and so on.
Which are the main strategies to adopt?
- Having more copies of your data
- Hardening the infrastructure
- Monitoring behaviors
Are you ready? Let’s start with the first topic !!!
-
- Having more copies of your data:
Backup software is the right tool to score the goals of this first part.
It has to be able to:
a) Create application consistency backup.
b) Copy backup data to different locations.
Almost all backup software can do that but some additional features can address better the biggest challenges:
Flexible: Backup software should write backup data to different types of repositories and be able to restore it without any required dependency. To be clearer, the backup data have to be self-consistent. The advantage is being able to fit different architecture scenarios (Let’s call it “Data mobility”).
Data-Offline: back up data should be put into a “quarantine” area where they cannot be either re-written or read. The classic deployment is a Tape Devices architecture or any scripts that automatically detach the repository devices.
Immutability: The backup data cannot be changed until the immutability period is over. This has a double advantage in comparison to data-offline strategy: It changes the repository status as written & online just for the new backup file. It is offline (as Tape technologies) for re-writing to already present backup data. The speed restore option has to remain unchanged.
Immutability can be reached in two ways:
By WORM (Write Once, Read Many) devices, where the backup files can be used just to restore once they have been added to repositories. For example, technology can be the optical disk, a technology I have been working on in the past.
At Veeam Software this common customer and partner request has been addressed using the immutability propriety of the Object Storage. The good news is that VBR v. 11 implements this great feature directly in Linux Repositories.
Is this enough? I’m still thinking that the backup solution should at least be able to:
- Check the backup file and the backup content. The only way to check if a backup file is really reusable is restoring it in a separate area where communication with the production environment is forbidden. At Veeam it is called Sure-Backup.
- Check with your anti-virus/anti-malware that the backup files have not been already attacked somewhere and sometime. At Veeam the technology used is the Data integration API.
- Before restoring files or VMs in production, check with your anti-virus/anti-malware if your data has been already attacked. At Veeam it is called Secure Restore
- Perform Replica Jobs. It helps to create a Disaster Recovery Site useful in performing a quick restart of the service. At Veeam this feature is included from the beginning and the Sure-Backup can be applied with replica too (it is called Sure-Replica). V.11 has a very powerful feature: CDP.
- Restore backup data to the public cloud when the primary and replication site is totally out of order. I call it Cold Disaster Recovery and it needs at least one restore point available.
The next article topic is how to hardening your backup architecture
See you soon and take care!
 Picture 1
 Picture 2
 Picture 3
 Picture 4
 Picture 5
 Picture 1
 Picture 2
 Picture 3
 Picture 4
 Picture 5
 Picture 6
 Picture 7
 Picture 8
 Picture 1
 Picture 2
 Picture 3
 Picture 1
 Picture 2
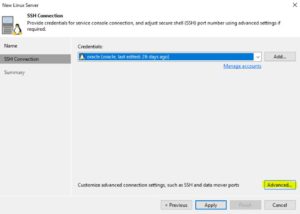 Picture 3
 Picture 4
 Picture 5
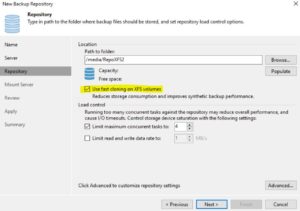 Picture 6