
The first article of 2022 is dedicated to how to secure Google instances ( GCPs ).
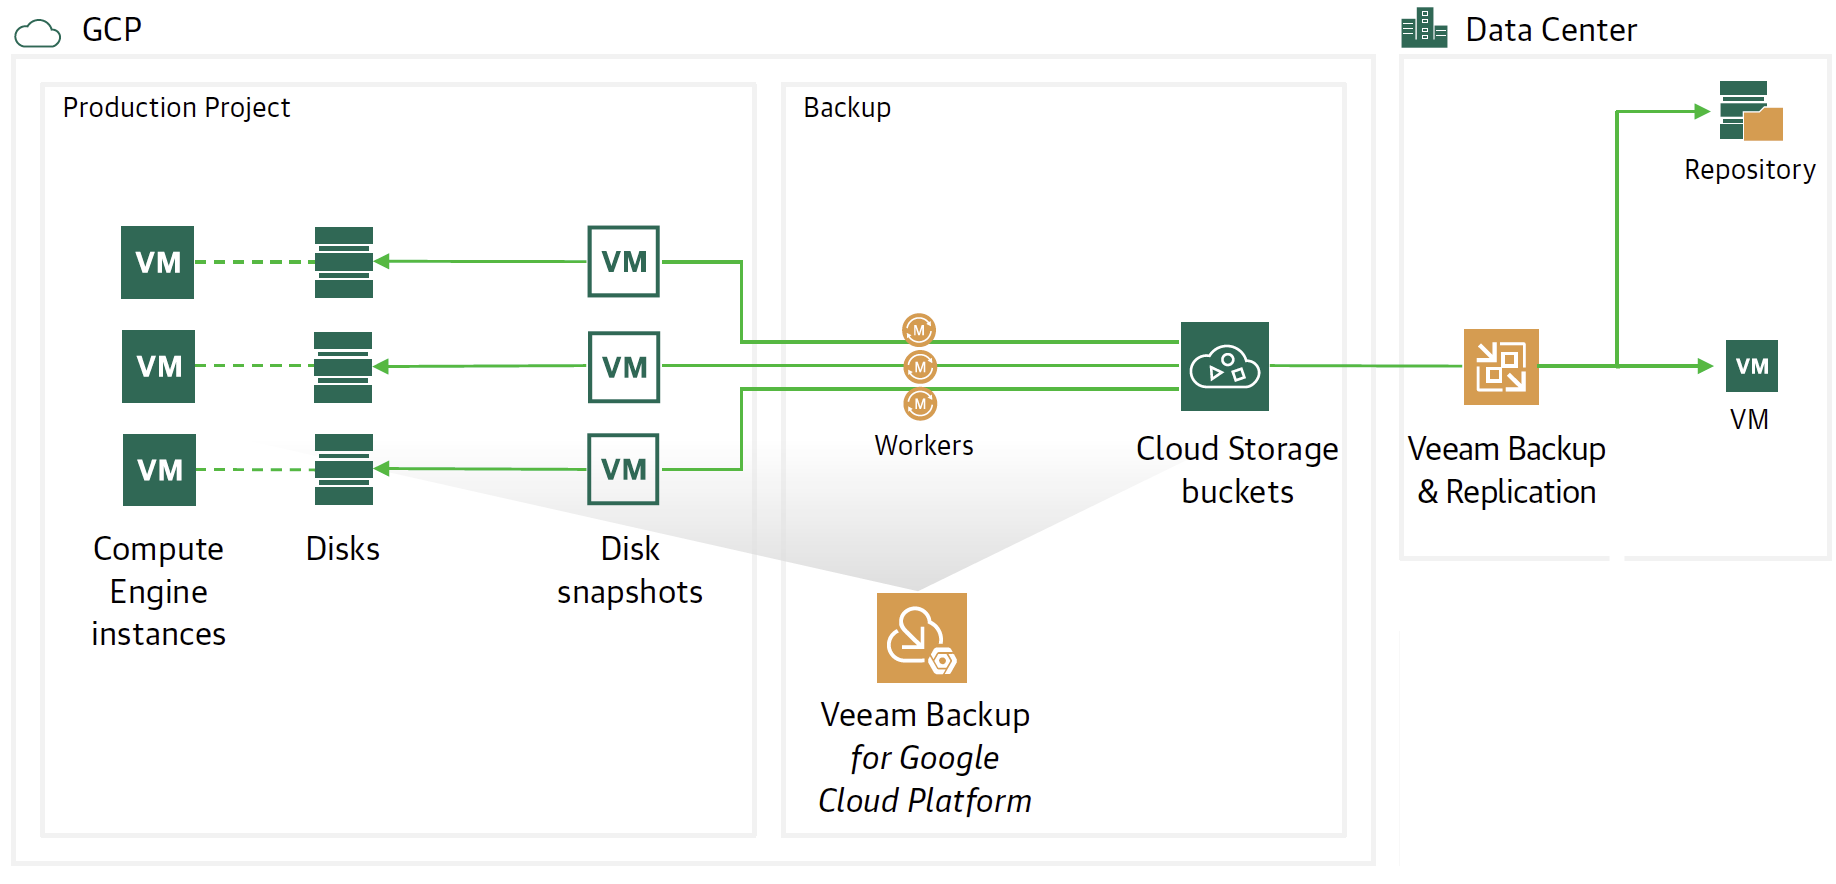
The flow and protection architecture is shown in image 1 where there are two Veeam components.
- The Veeam Backup for Google Platform ( VBGP ) instance is responsible for making backups and restores of GCP instances.
- Veeam Backup & Replication ( VBR ) has the responsibility to centrally manage the movement of Backup data to and from the cloud (Data Mobility).
 Picture 1
- Note 1 : VBGP can be installed in stand-alone mode or using the VBR wizard.
- Note 2: This article will show how to hook a VBGP instance already present in GCP from VBR.
Let’s see the steps in detail:
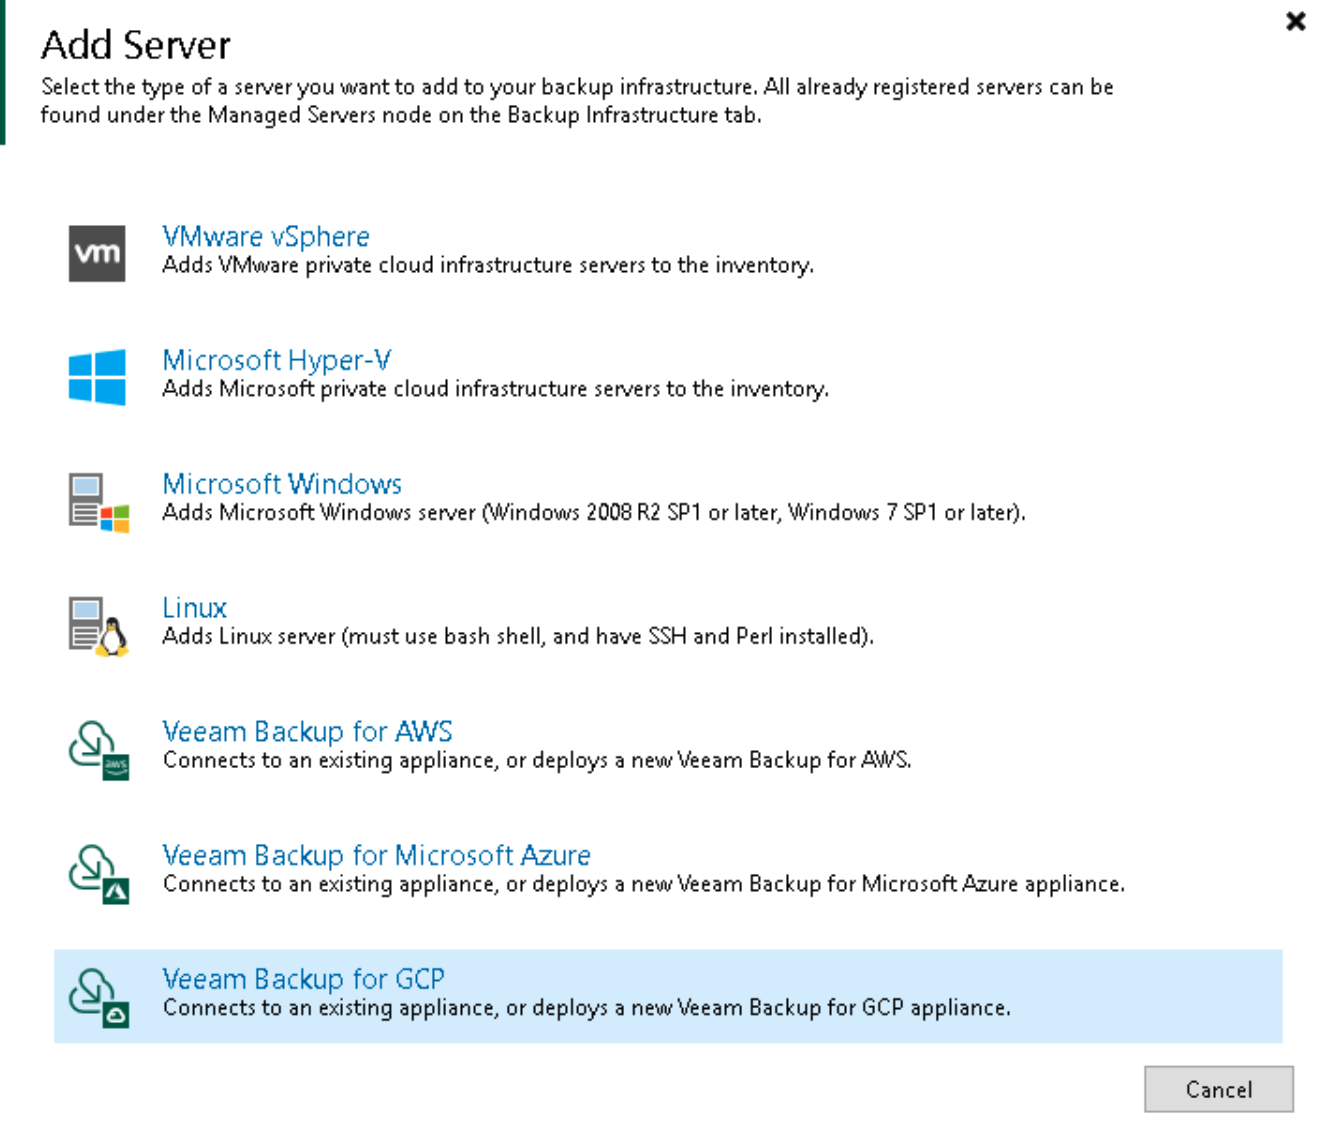
From the VBR console, we choose the Backup Infrastructure item.
By clicking with the right mouse button, select add server and then Google Cloud Platform (see image 2)
 picture 2
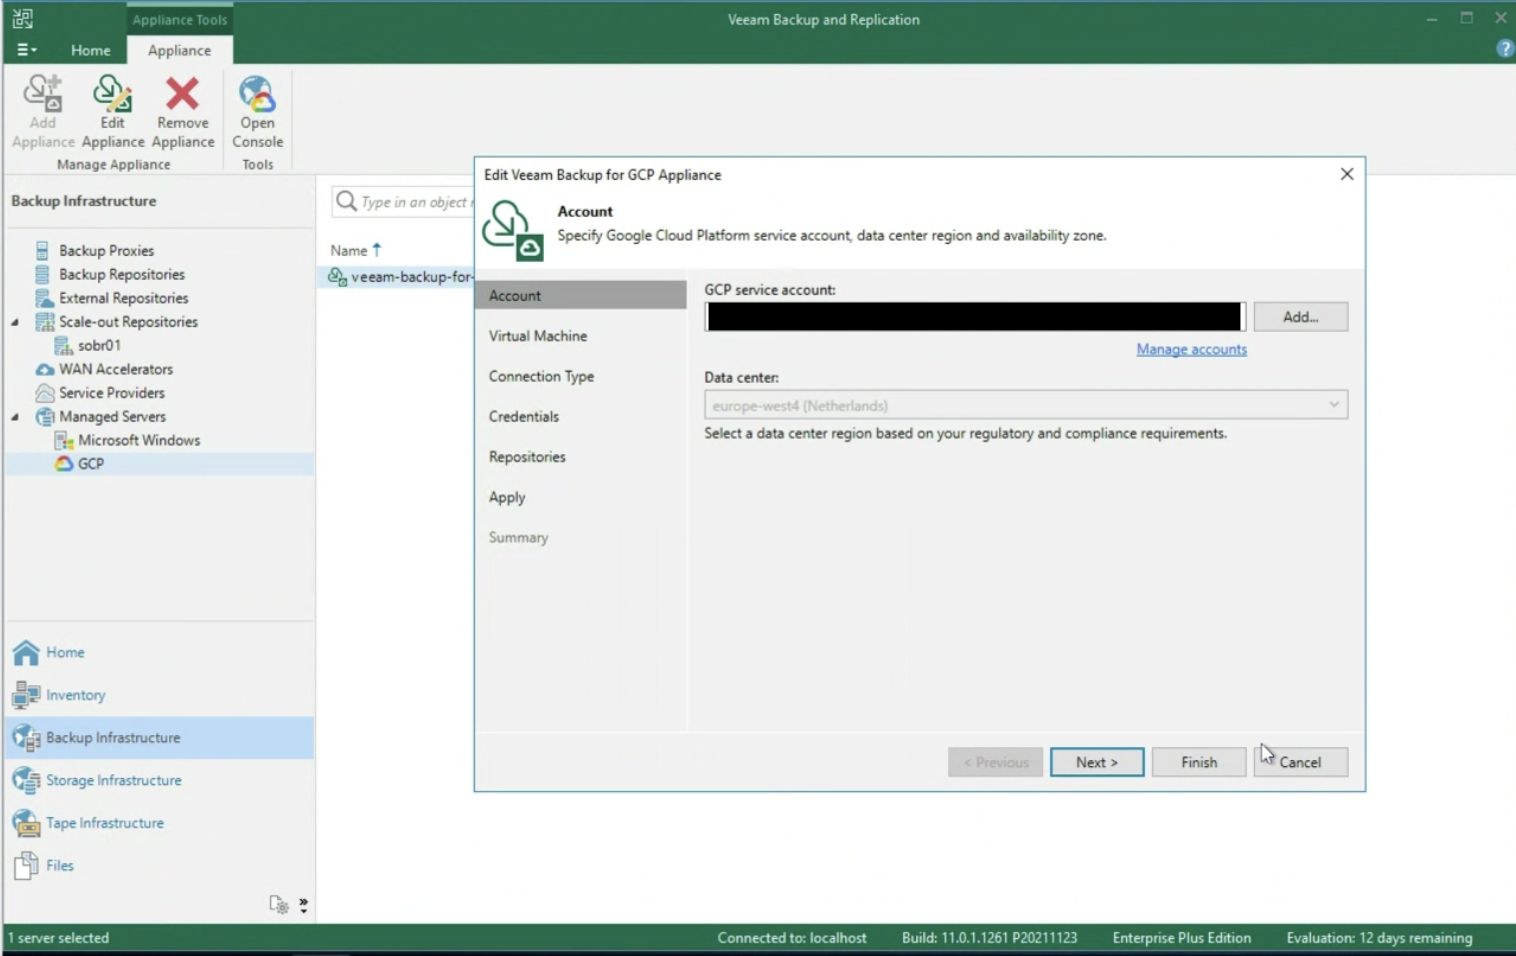
The next step is to enter the login credentials to the Google Service Account (image 3)
 Picture 3
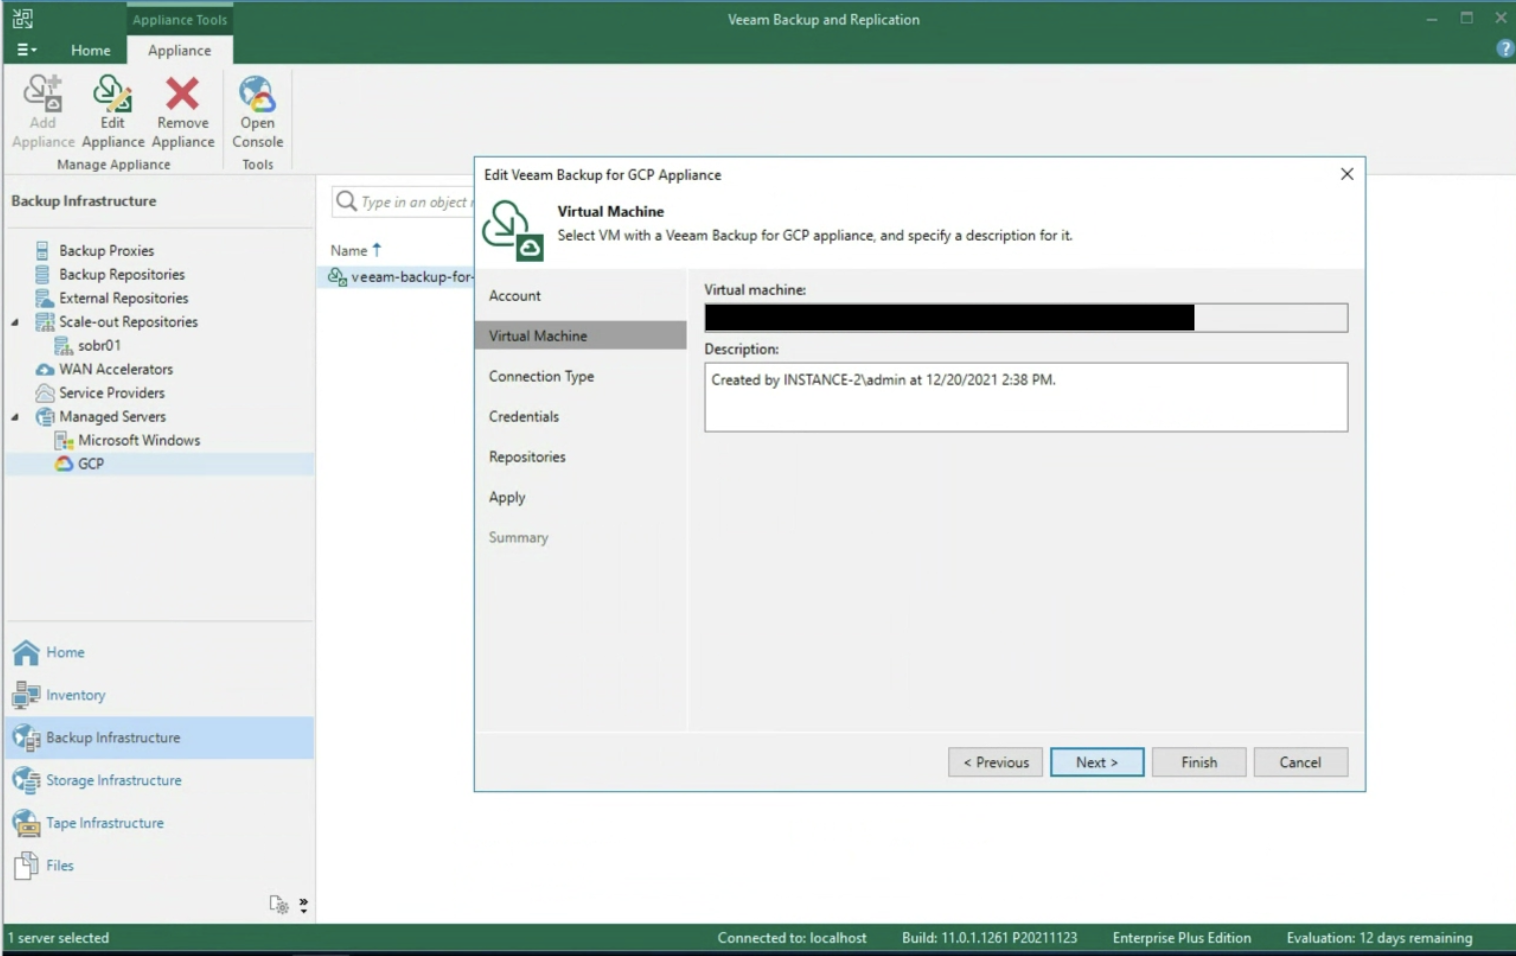
The wizard continues asking you to enter the name of the VBGP server already created (image 4)
 Picture 4
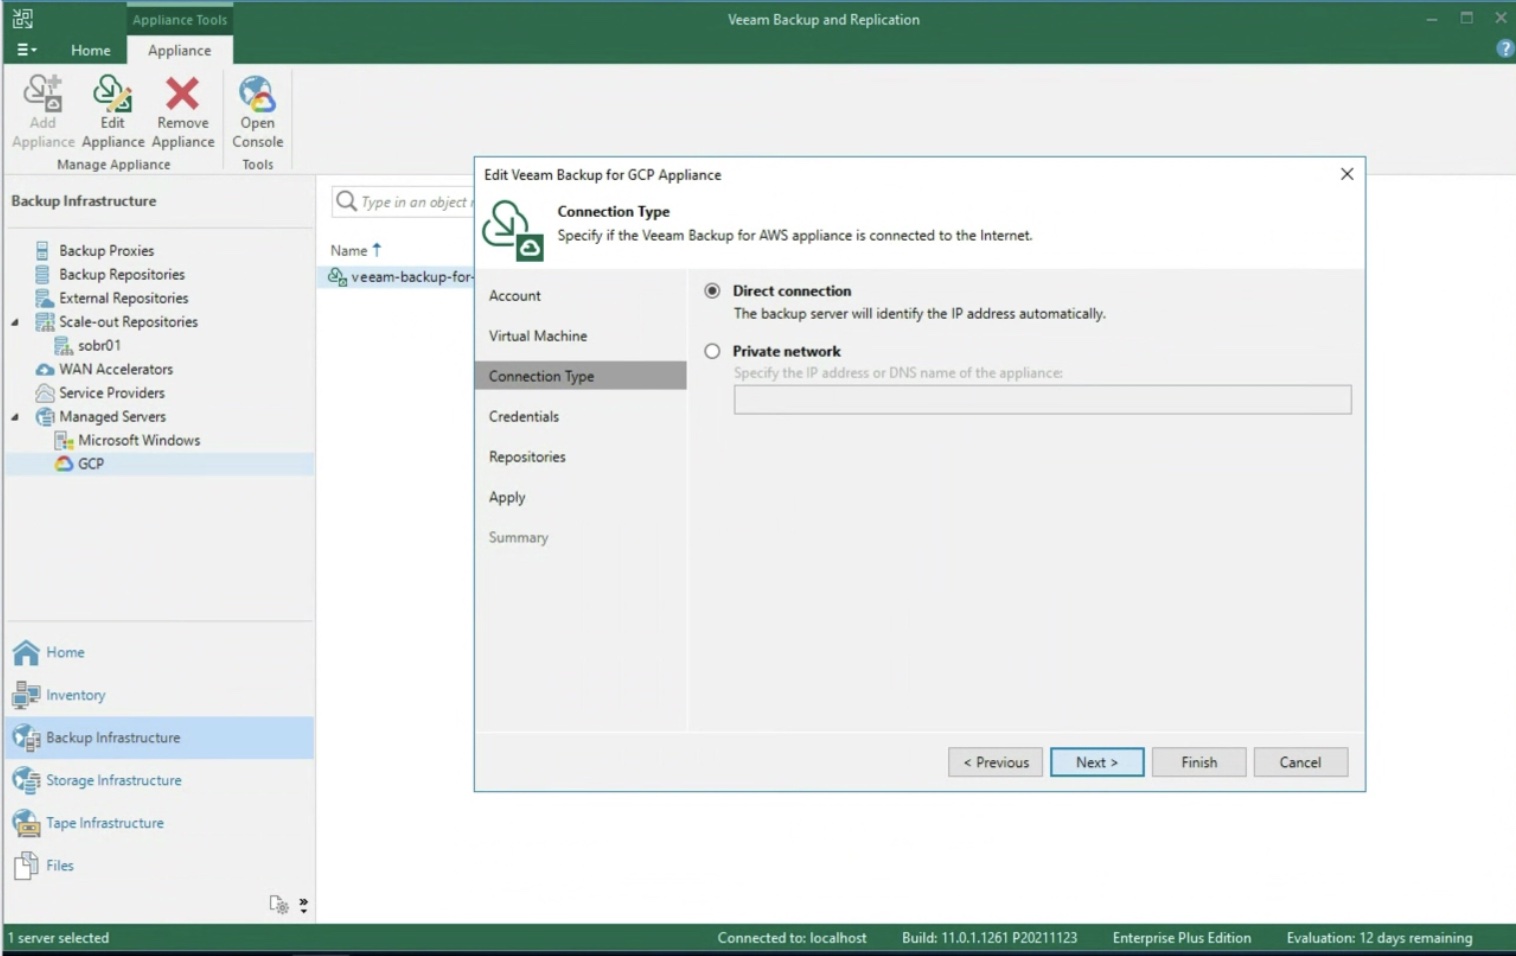
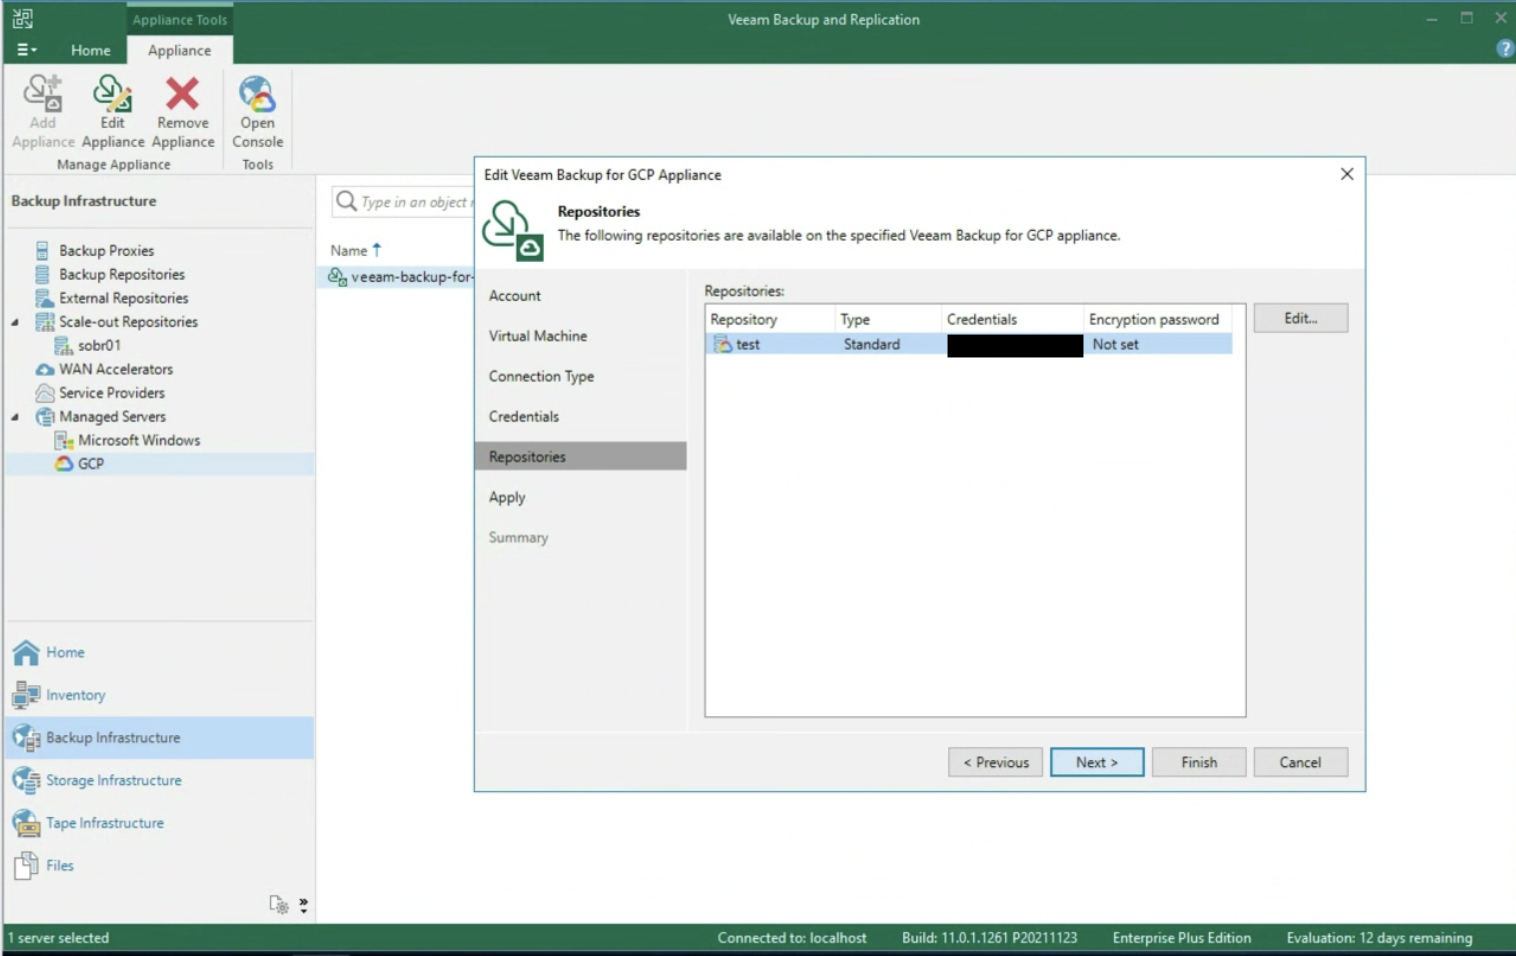
After selecting the type of network present (image 5), the next step is to enter the credentials to access the Repository (image 6).
Remember that the best protection practice is to back up the instance as a snapshot, then pour the snapshot into Google’s Cloud Object Storage.
Thus the 3-2-1 rule is respected, i.e. having 3 copies of data (Production + Snapshot + Object Storage) on two different media (Primary Storage + Object Storage) with an offsite copy (Object storage should belong to another region).
 Picture 5
 Picture 6
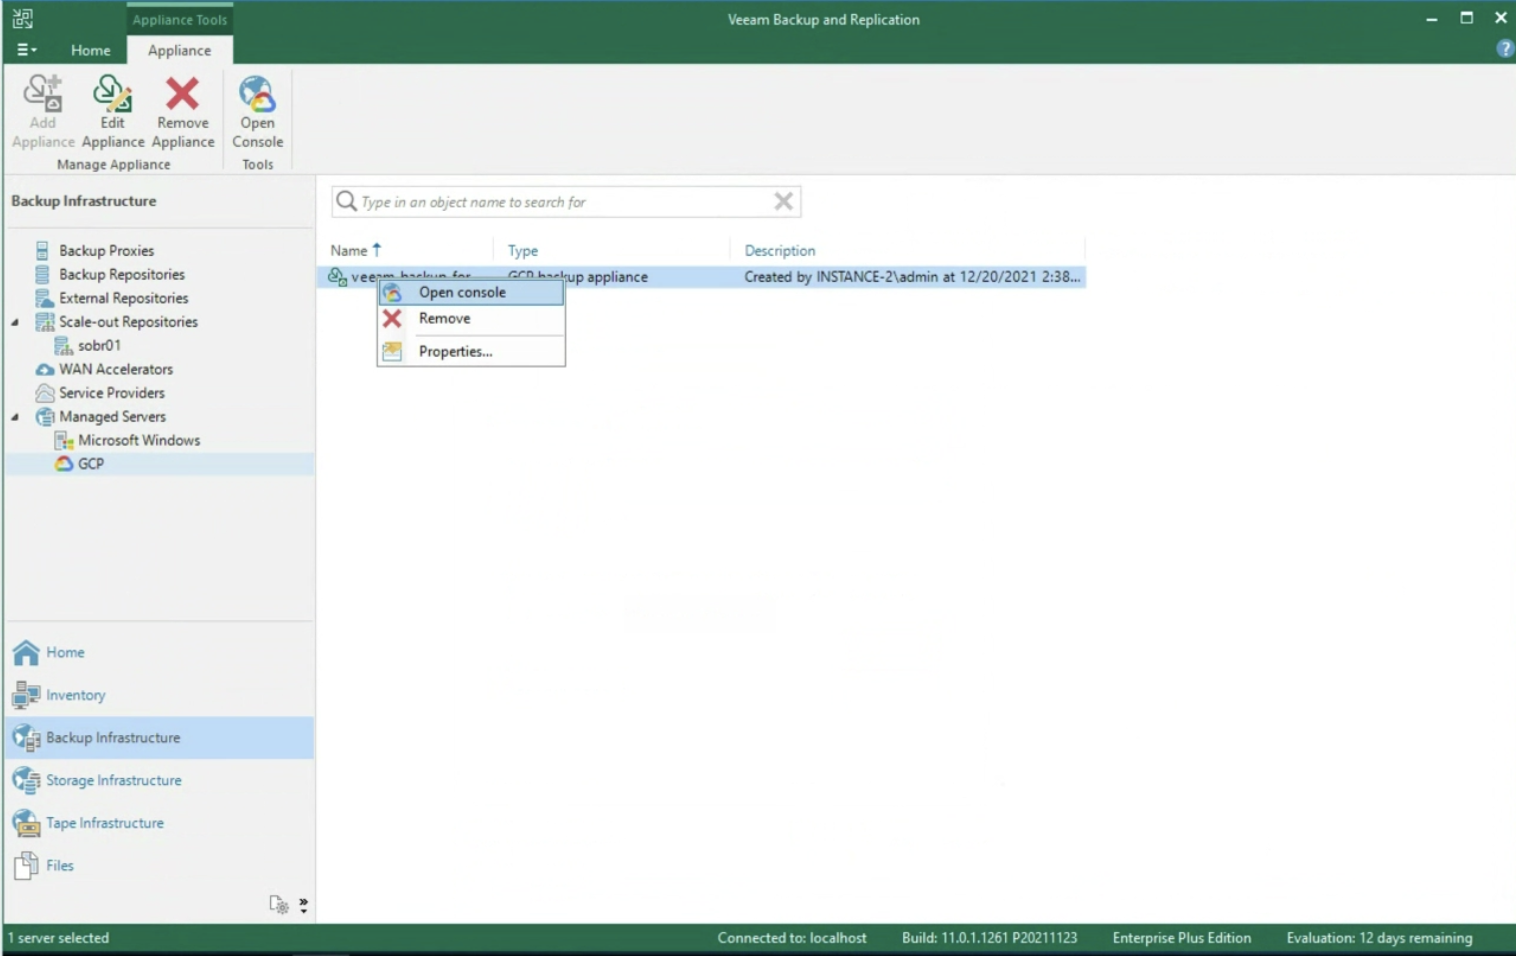
Once the wizard is finished, still from the VBR console we can connect to the console to the VBGP server (image 7) to start creating protection policies.
 Picture 7
After entering the login credentials (image 8)
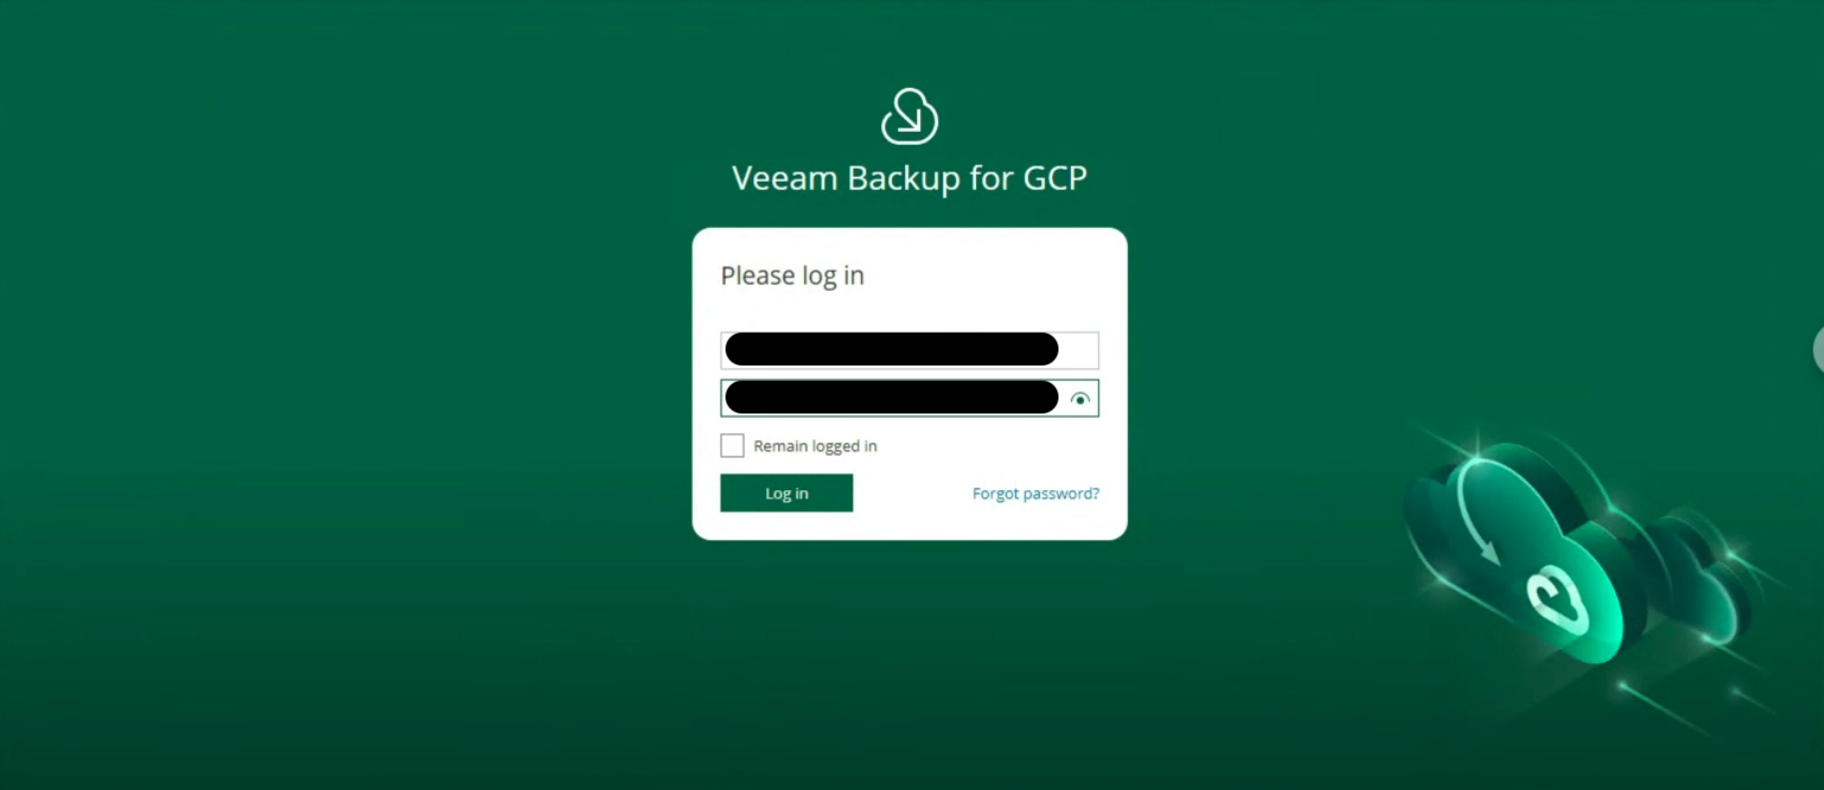 Image 8
it is possible to monitor the environment through an overview of the present instances, of the protected ones (image 9 & 10)
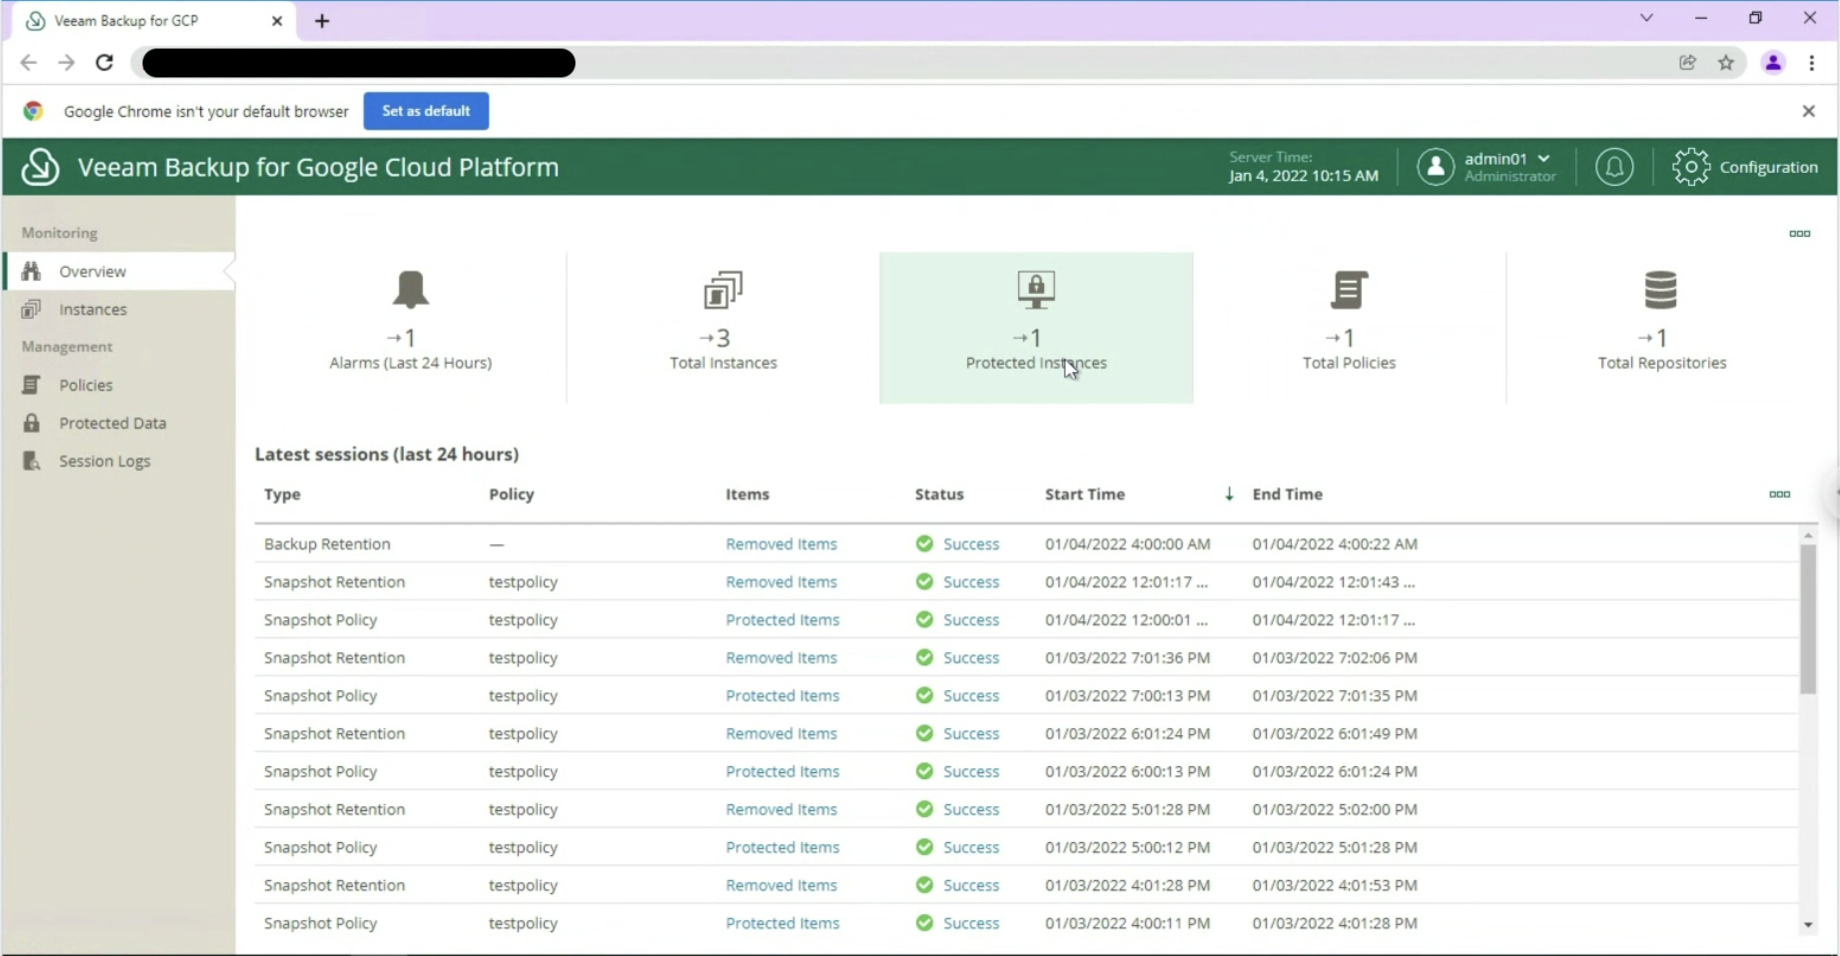 Image 9
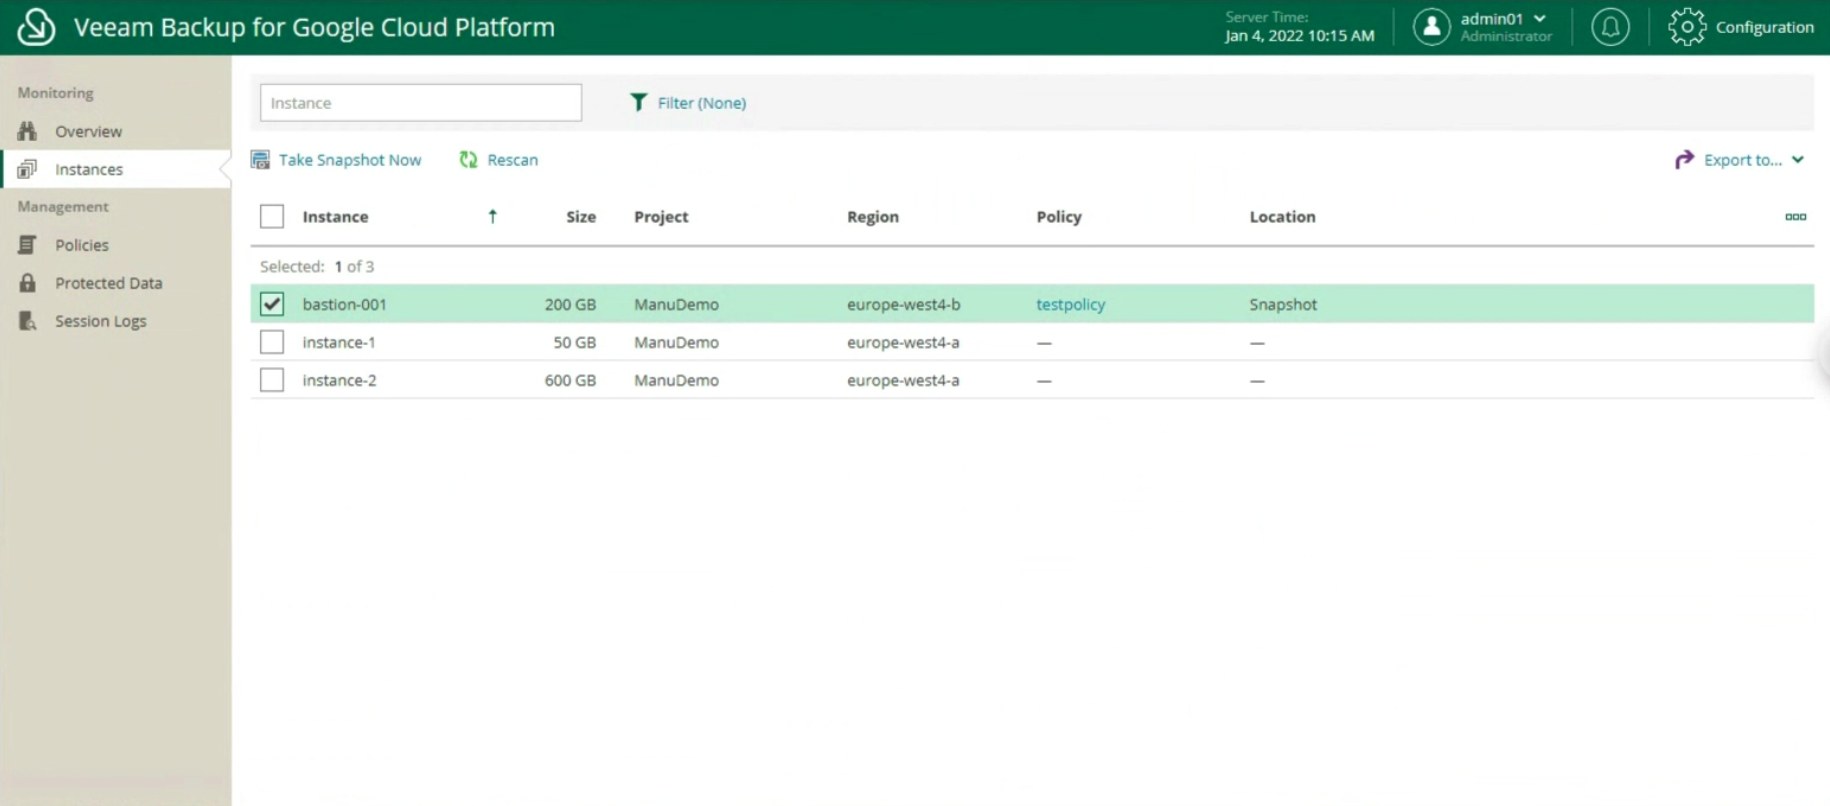
Image 10
Manage protection policies through:
The creation of the Backup policies, indicating the name (image 12), selecting the project (image 13), the region (image 14), the resources (image 15), the Backup target (image 16), the schedule, and the type backup (images 17 to 19)
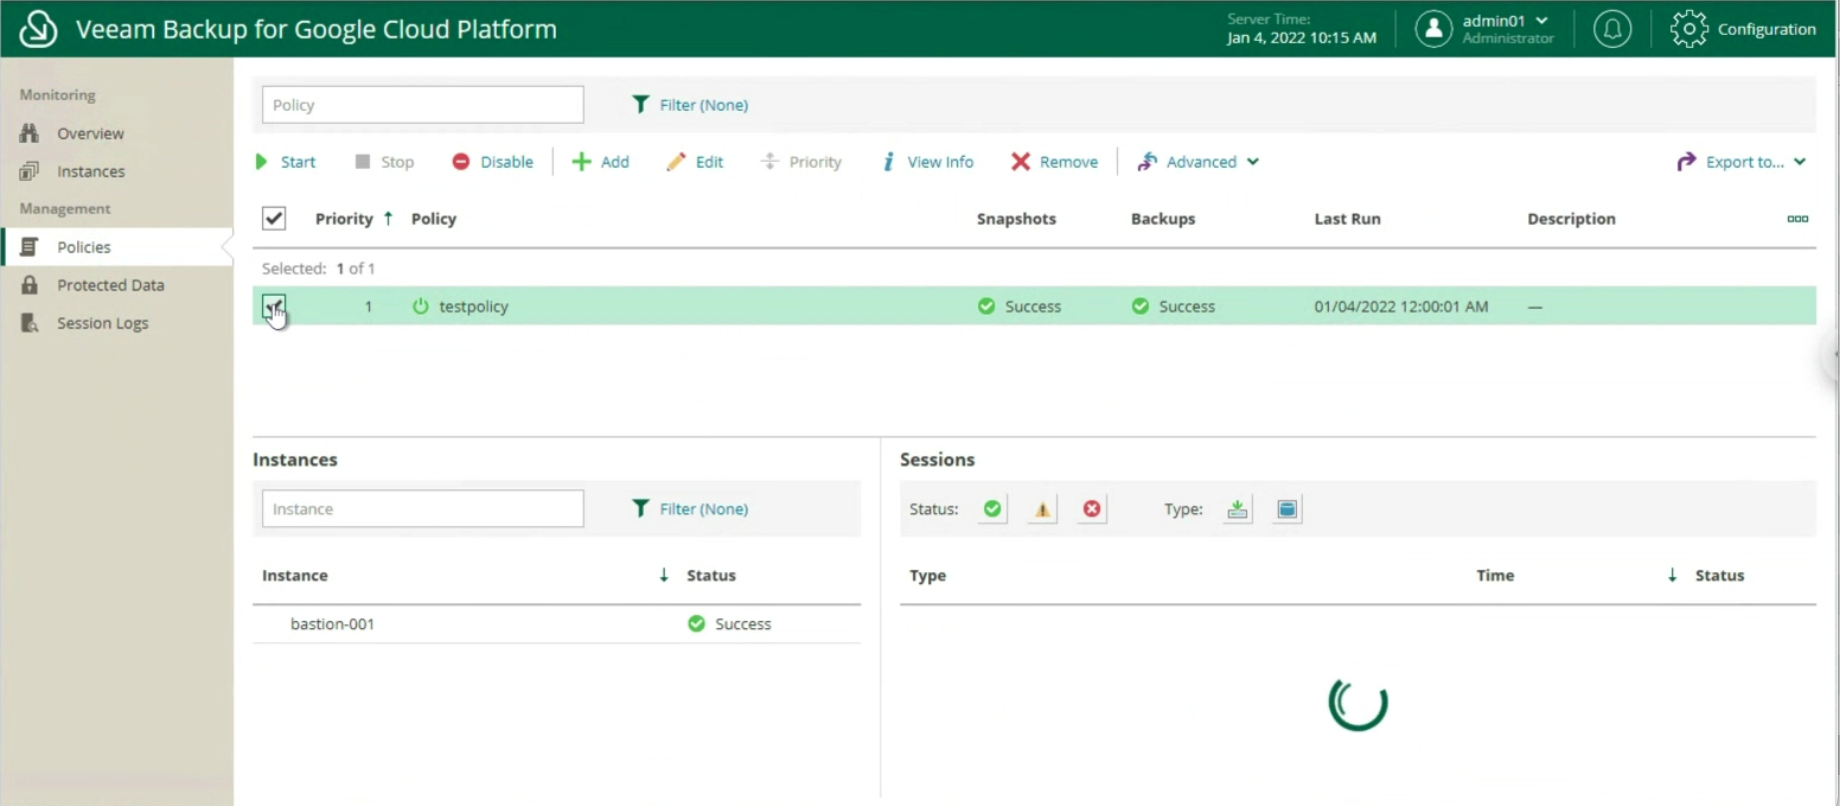 Image 11
 Image 12
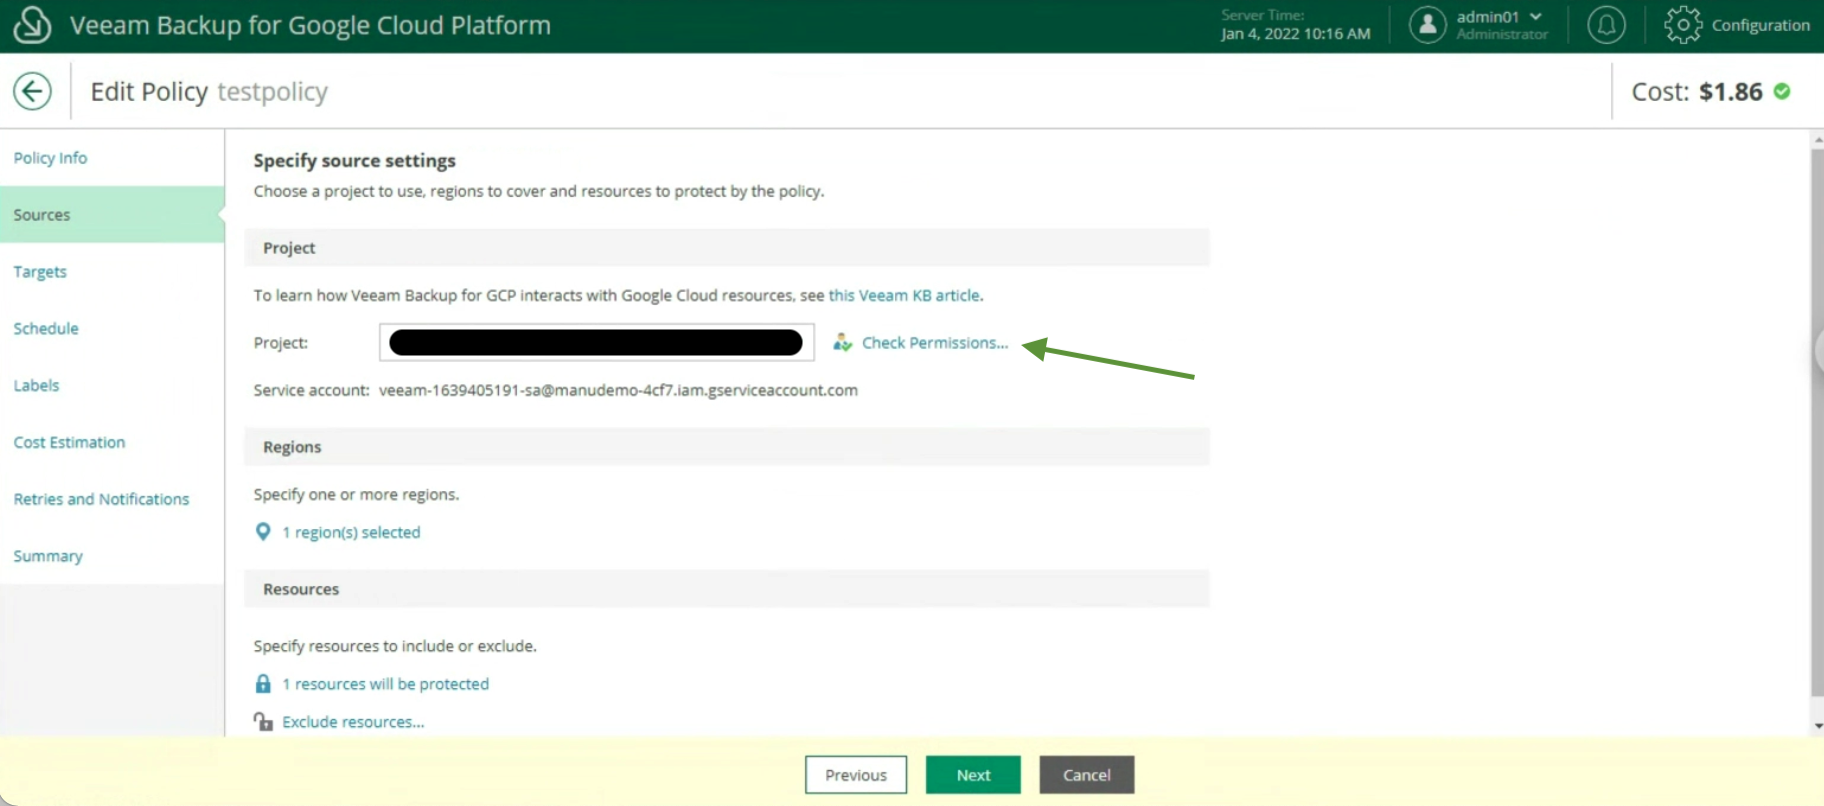 Image 13
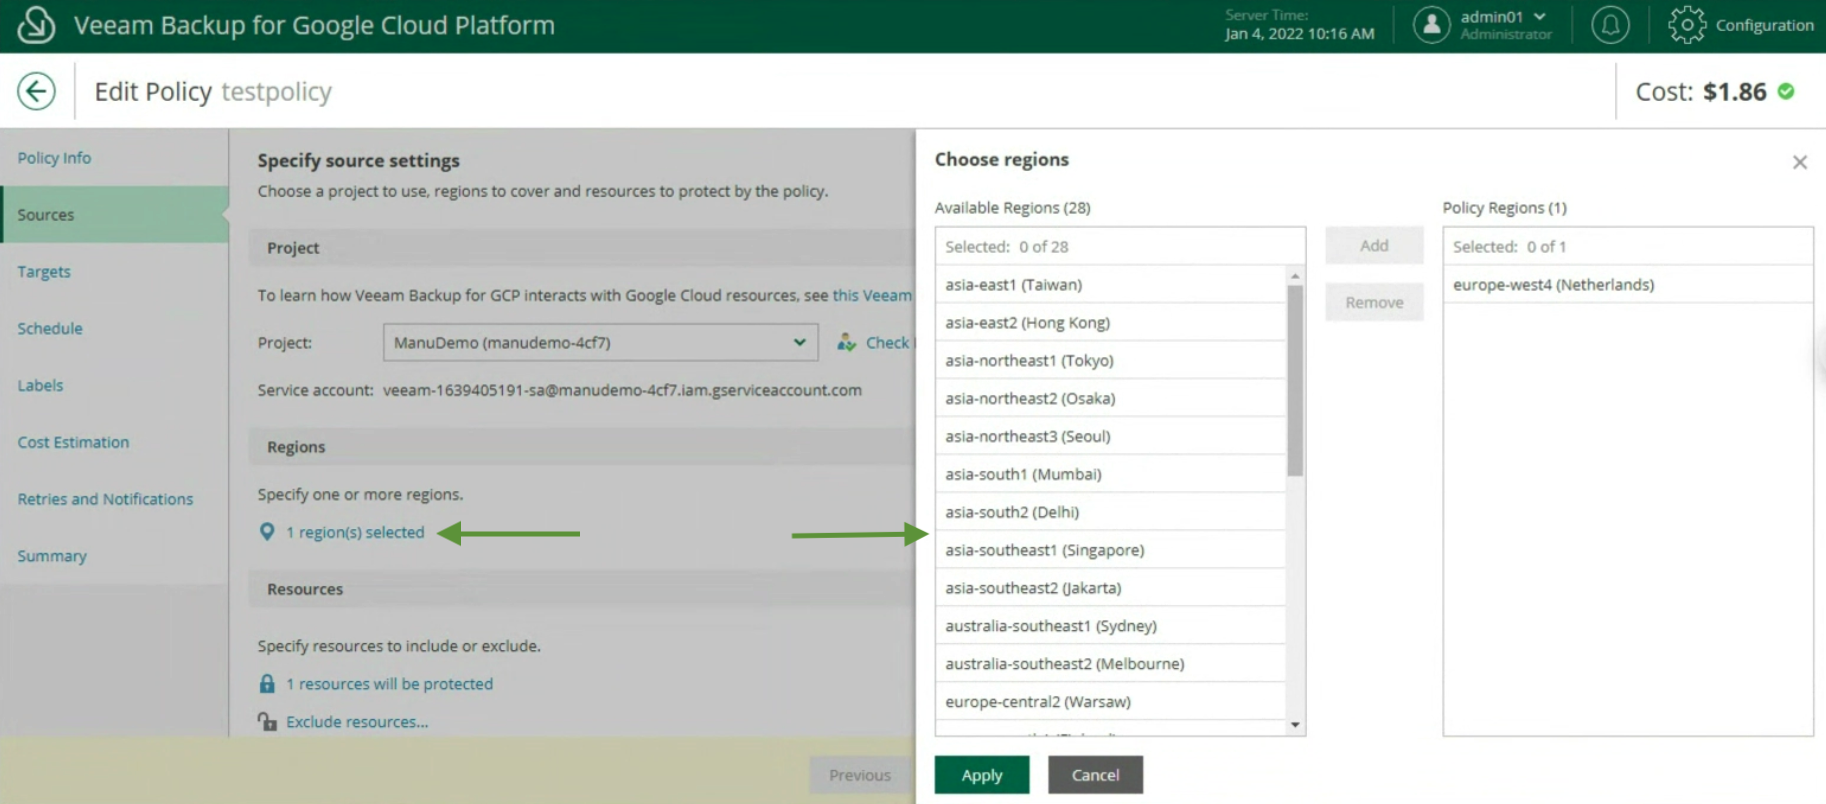 Image 14
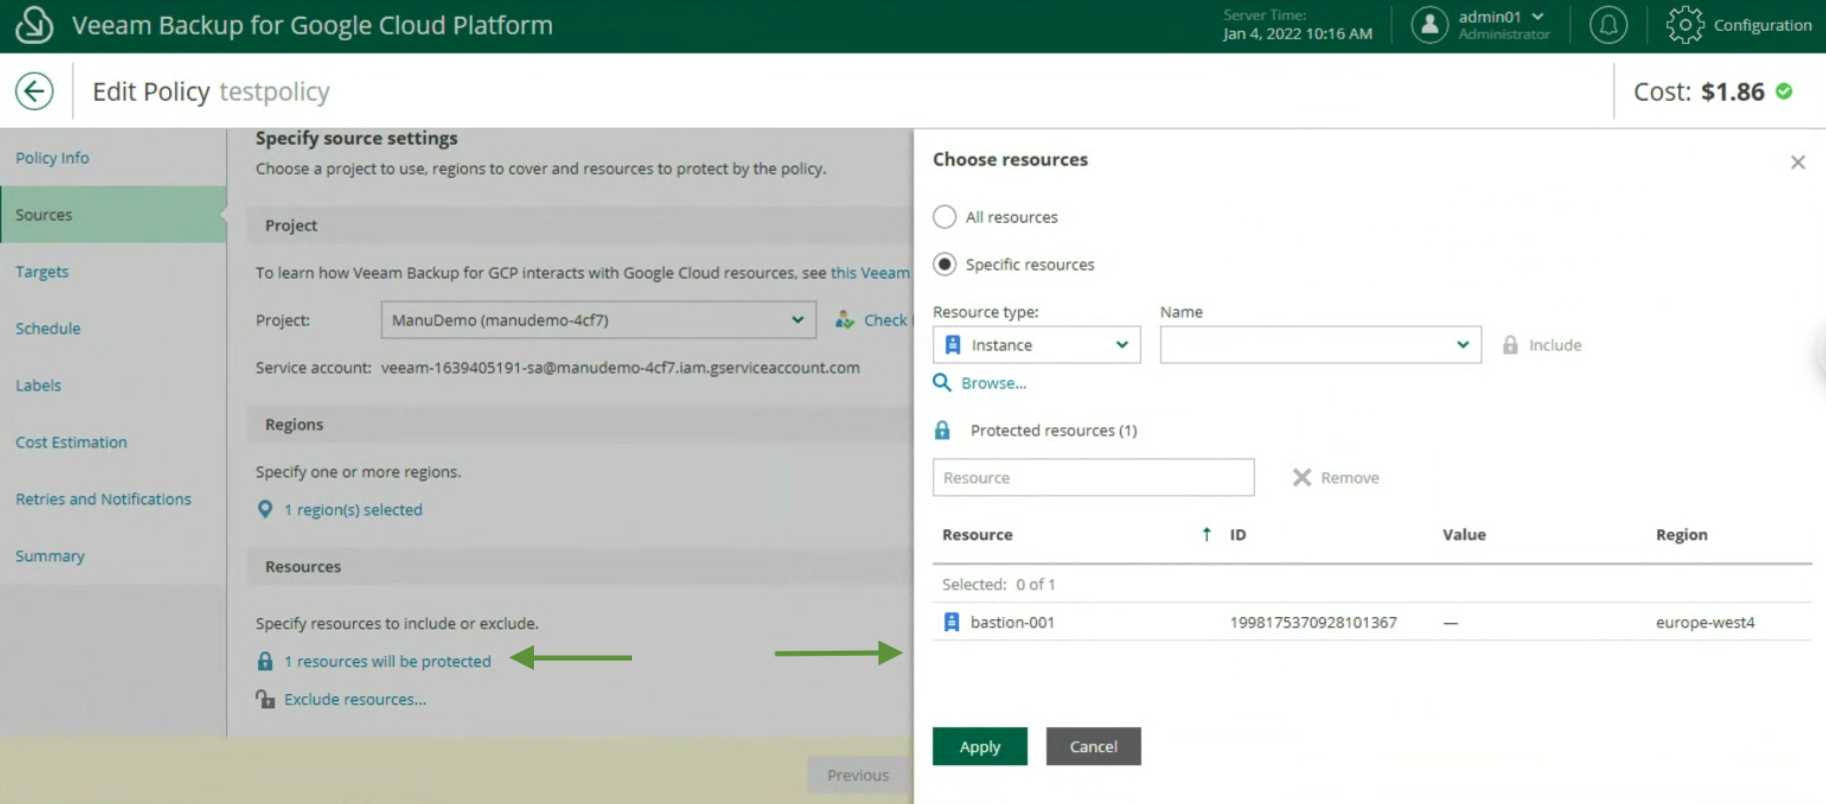 Image 15
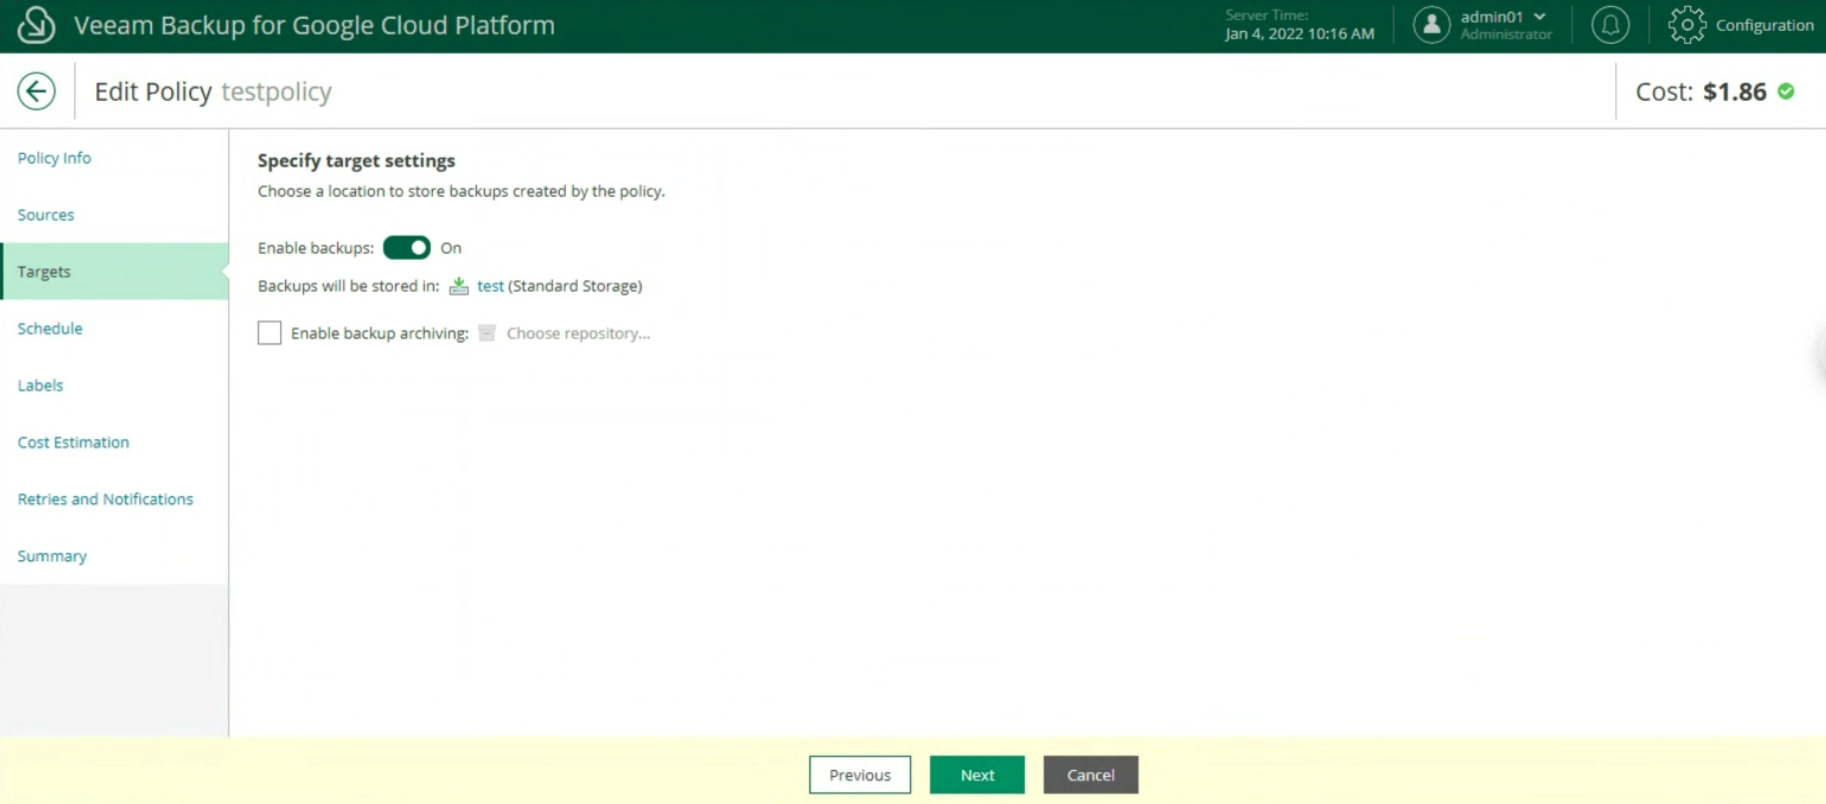 Image 16
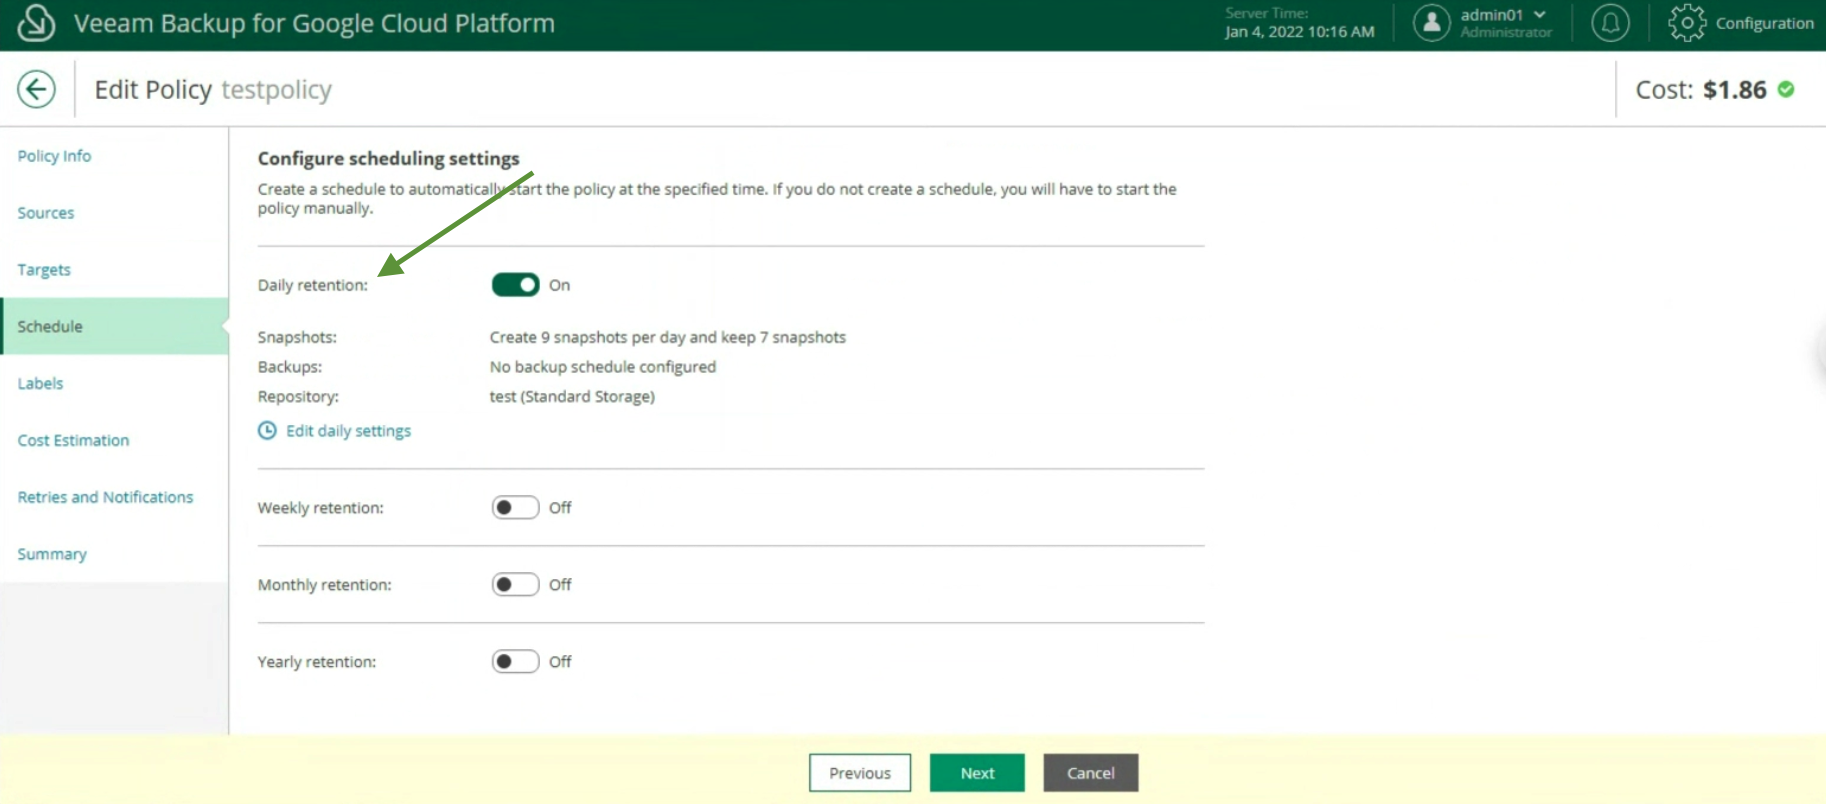 Picture 17
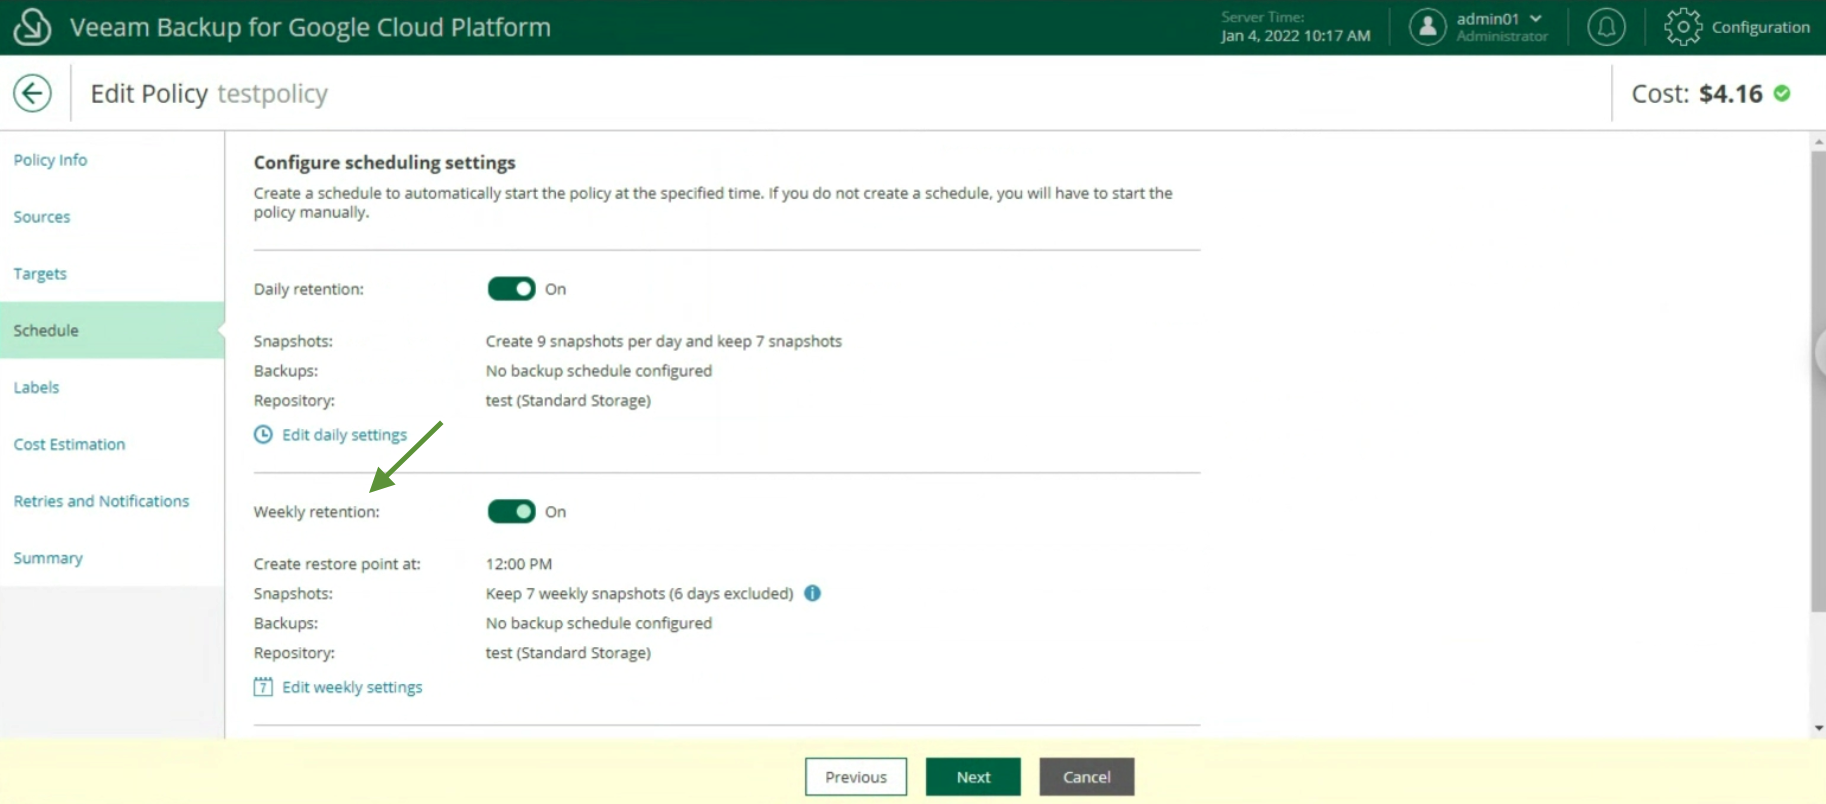 Image 18
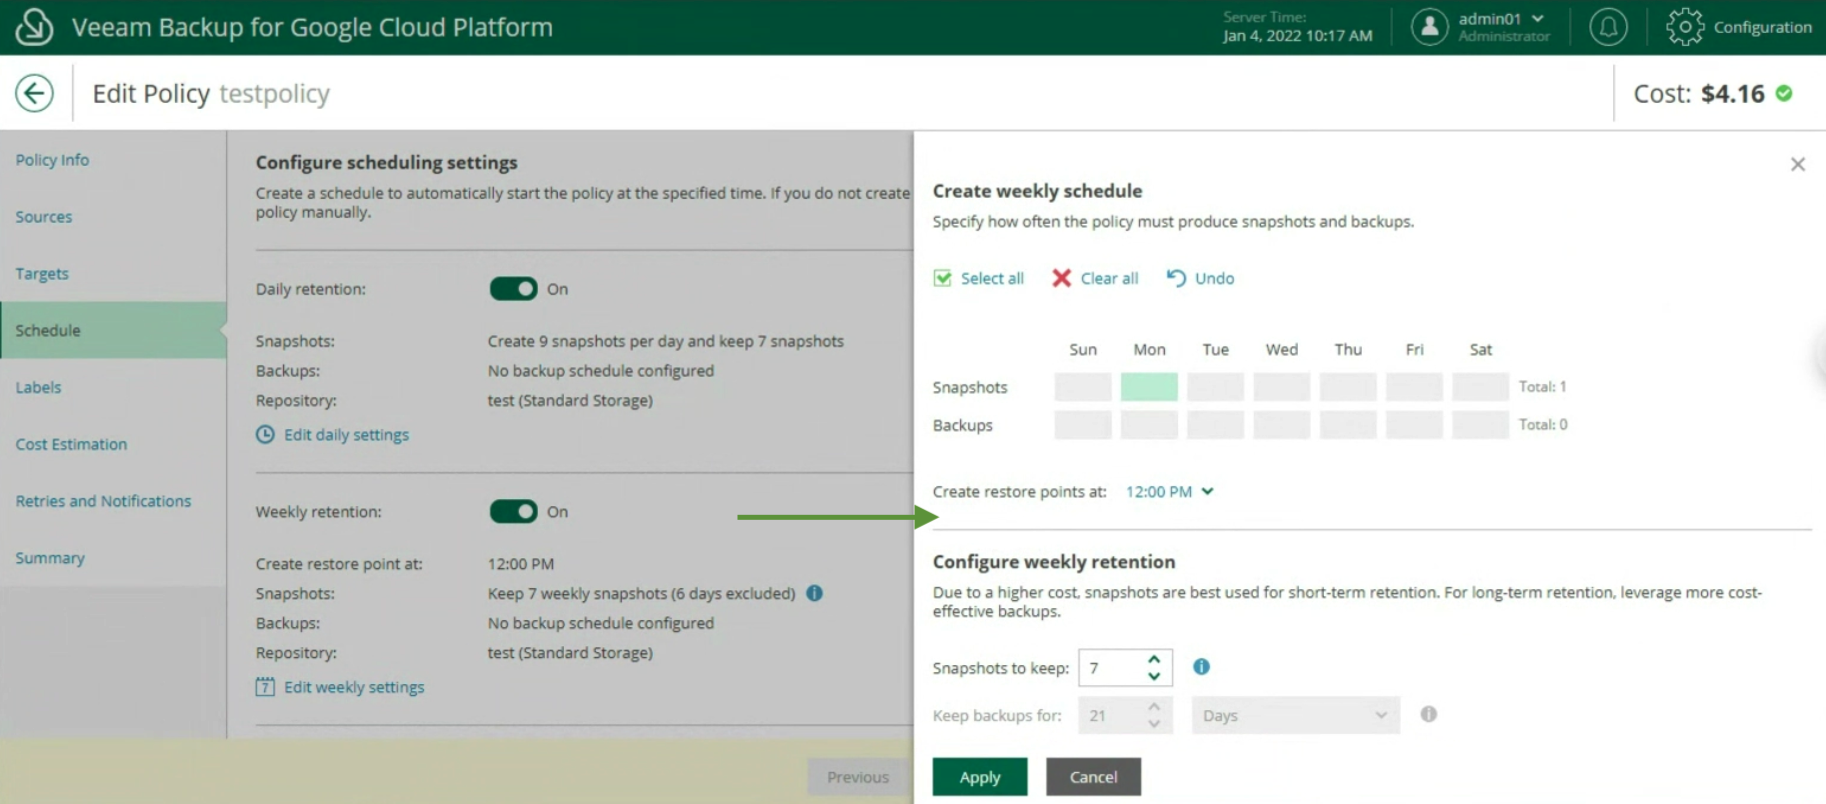 Image 19
The last two items indicate the estimated monthly costs to implement the backup policy (image 20) and the setting of retries and notifications (image 21)
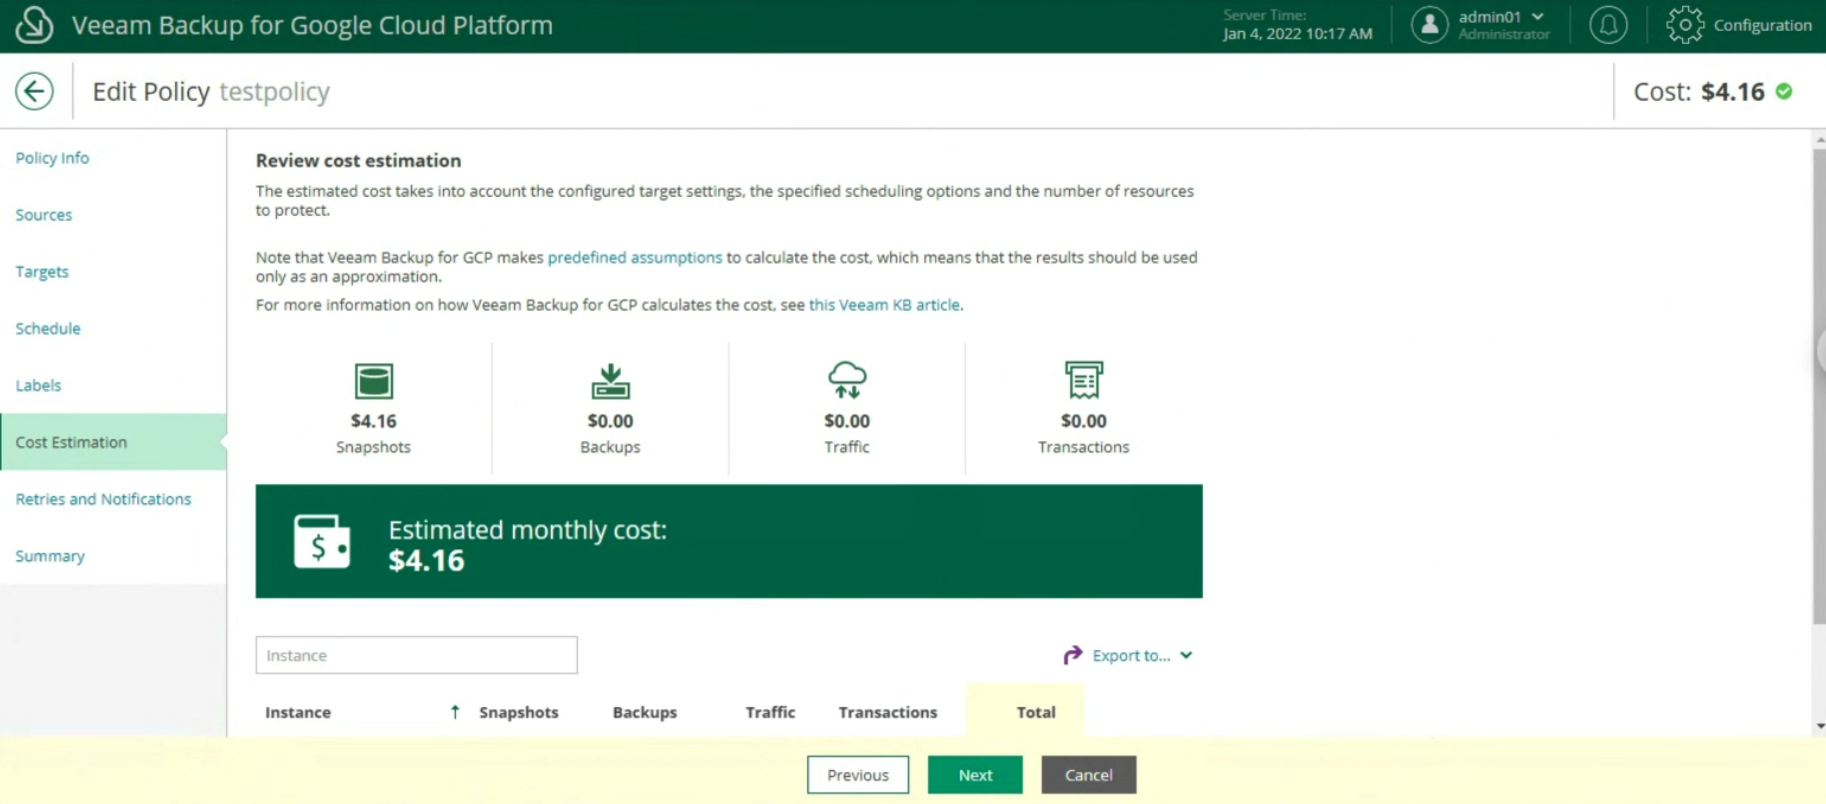 Image 20
 Image 21
Once the configuration is complete and the monitoring has verified that the policy has been completed successfully, it is possible to proceed with the recovery (image 22).
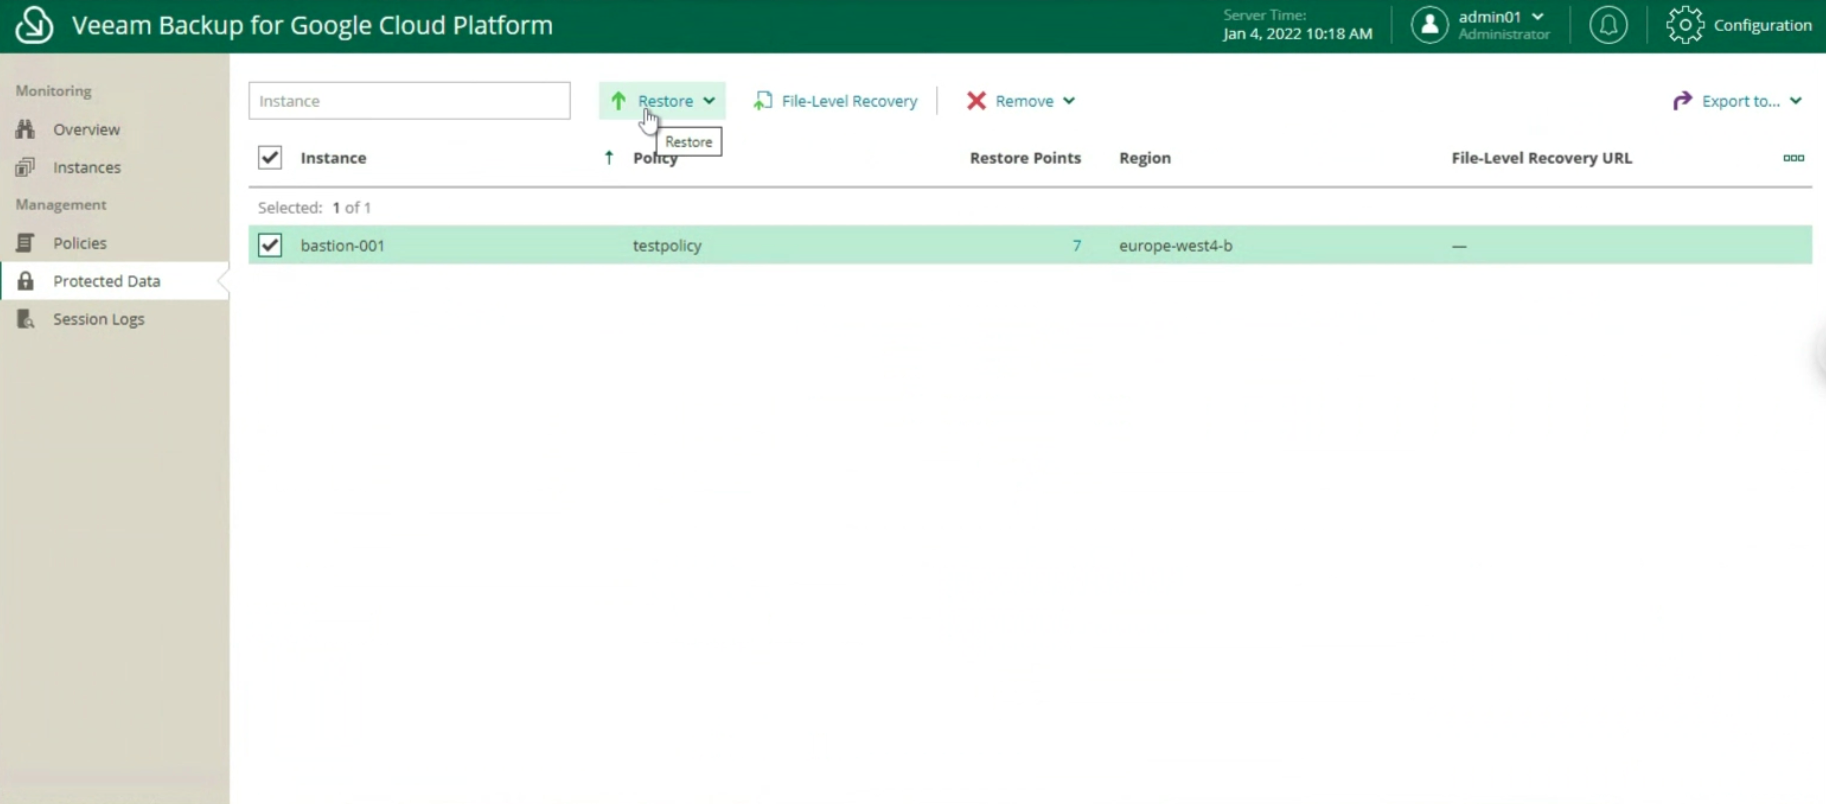 Image 22
The available options are:
- Entire Instance
- Files and Folders
The next images (23-24-25) show the key steps to restore the entire instance.
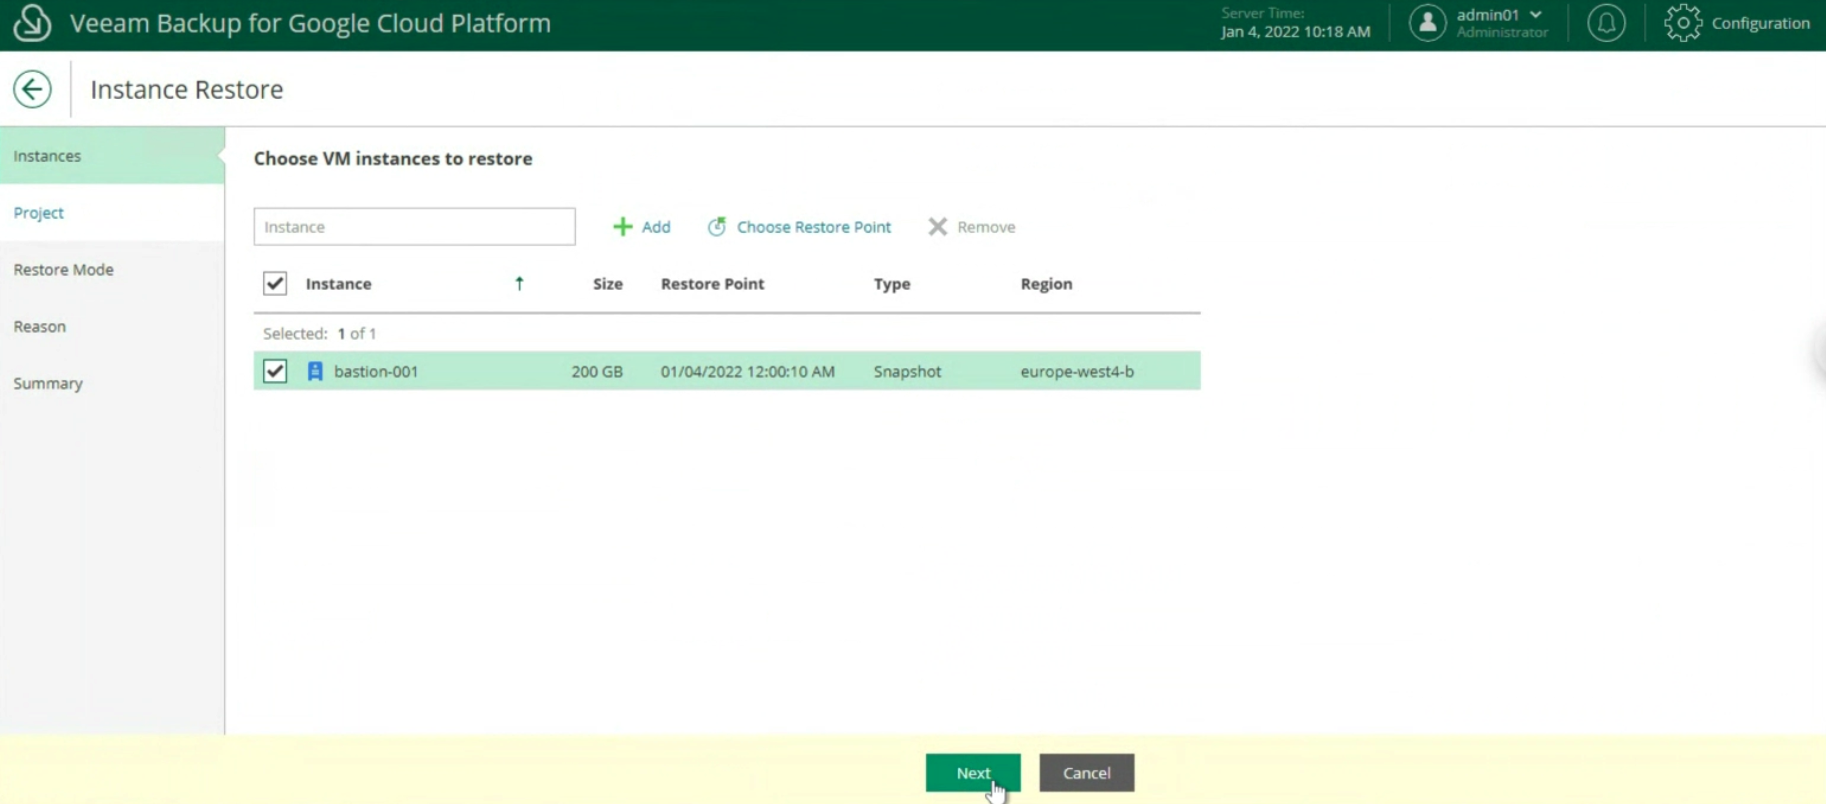 Image 23
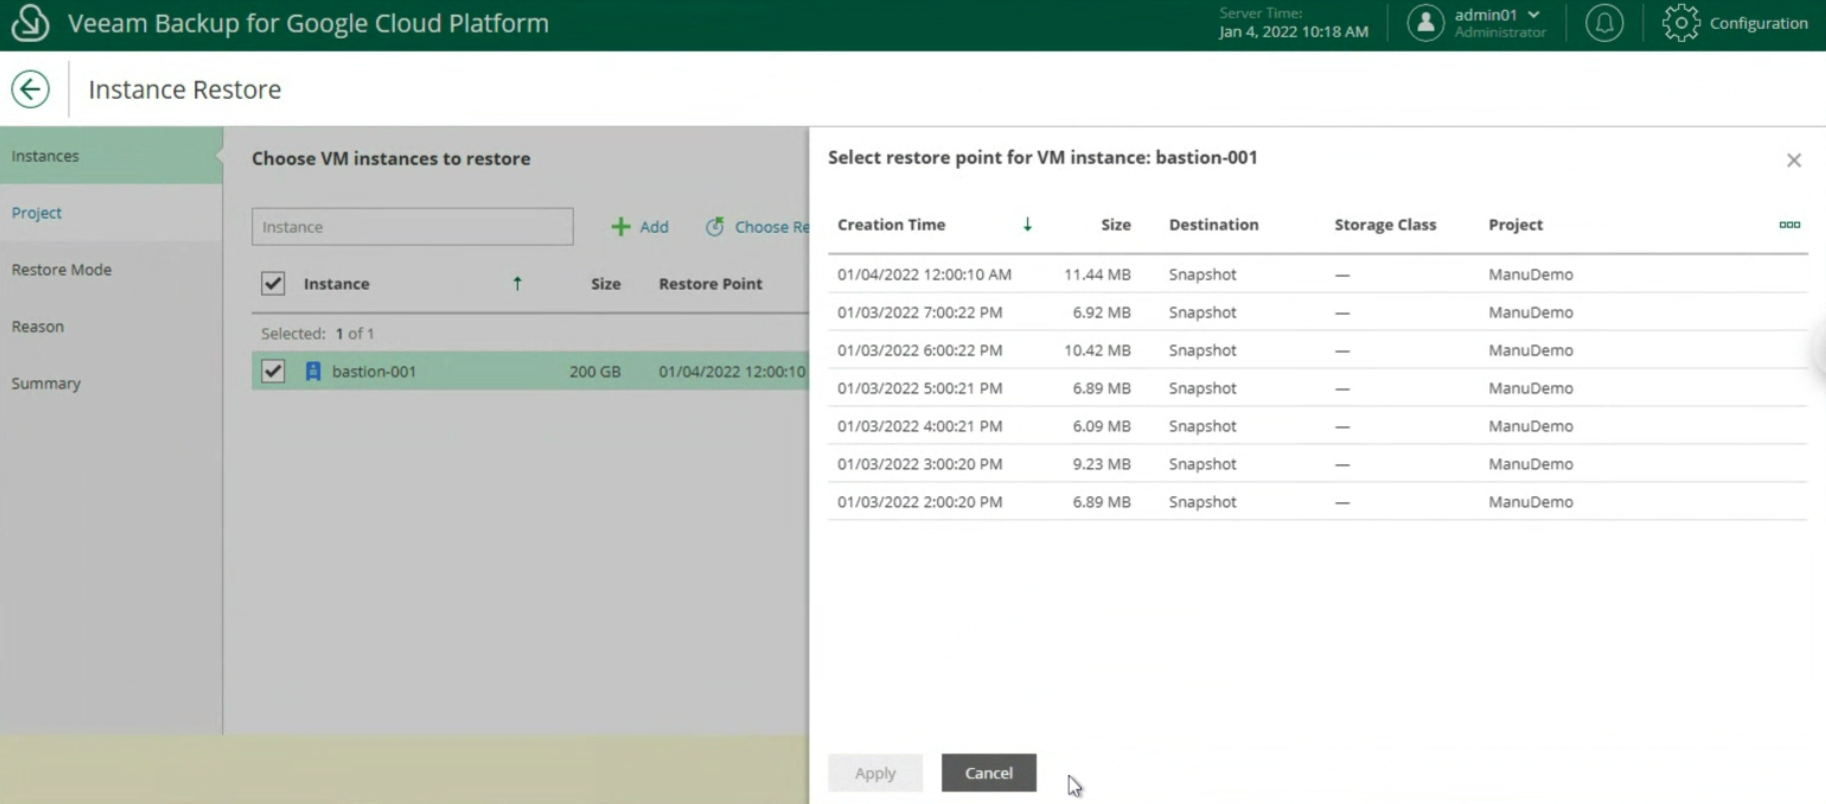 Image 24
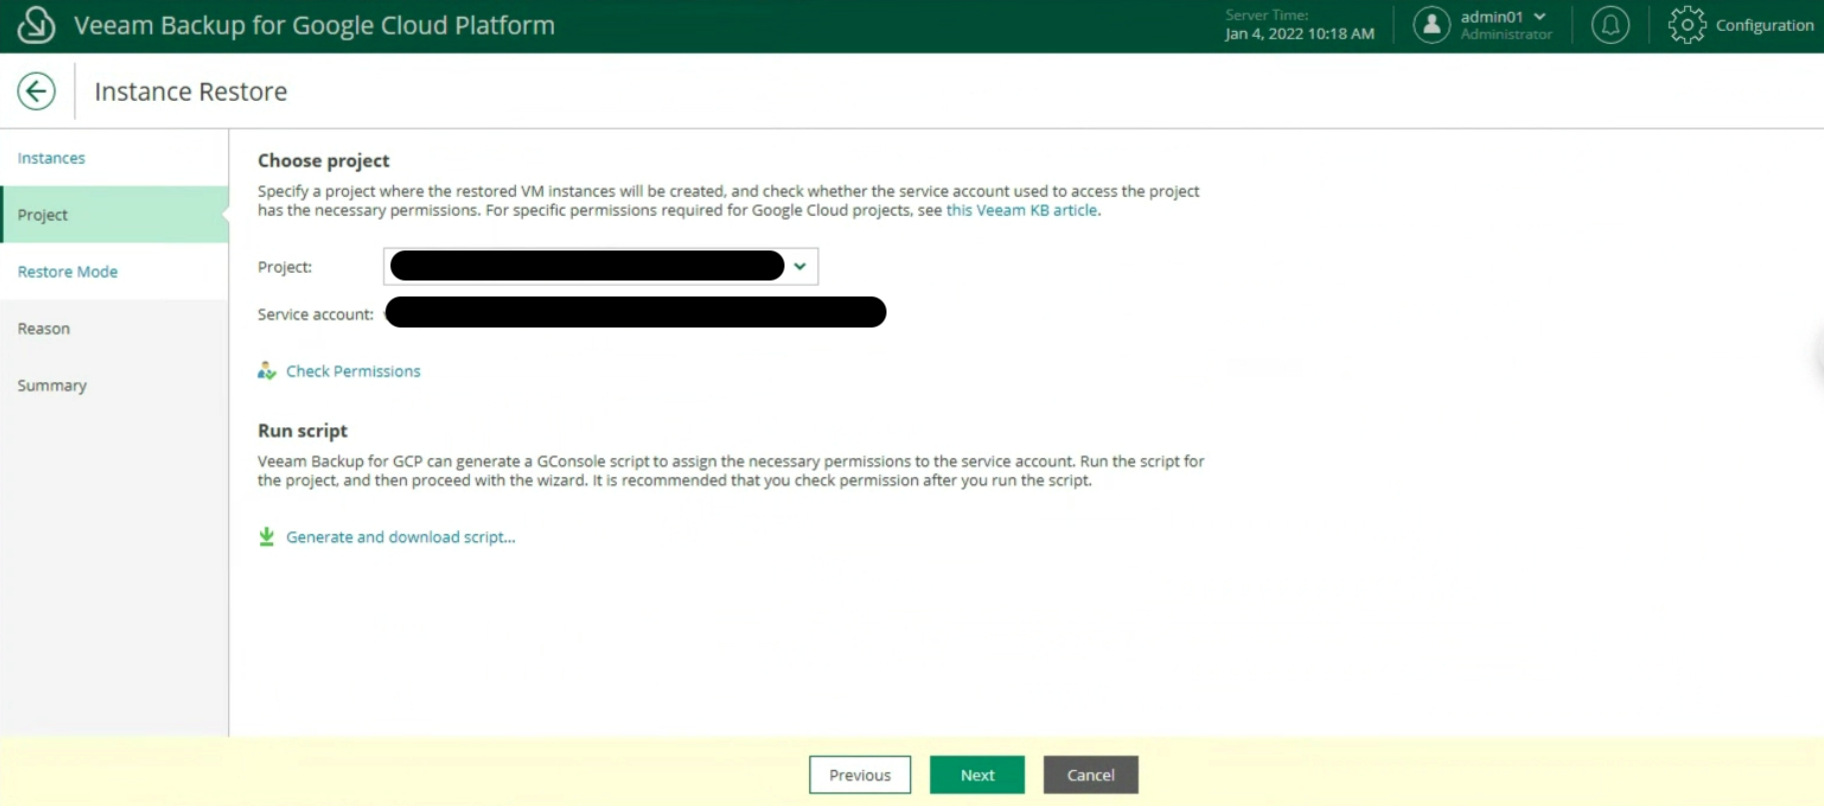 Image 25
In the next article we will see how to protect and restore a SQL DB present in a GCP instance
See you soon
 Figure 1
 Figure 2
 Figure 3
 Figure 4