
In questo articolo illustrerò la procedura per aggiornare l’Host ESXi quando l’ambiente VMware è composto da un solo server.
Nota 1: La prima attività è quella di aggiornare il vCenter (VCSA) controllando quali versioni ESXi sono supportate.
Nota 2: Il metodo tradizionale per aggiornare gli Host ESXi, sfrutta il processo automatizzato di update gestisto dalla console del vCenter.
Nota 3: Il sito di DR del mio laboratorio è costituito da un singolo Host VMware ESXi sul quale è presente il vCenter secondario (VCSA); in questo scenario, la metodologia indicata nella nota 1 non è utilizzabile, poiché durante la fase di aggiornamento, l’Host ESXi viene posto in maintenance mode. In questo stato tutte le VM presenti sono spente (compresa la VCSA).
La soluzione è quella di utilizzare la procedura presente nel sito VMware ESXi Patch Tracker che consta delle seguenti fasi:
1- Selezione della versione software che sarà installata alla fine del processe sull’host (vedi immagine 1)

Immagine 1
2- Determinare i comandi CLI da utilizzare durante la procedura di aggiornamento:
La procedura viene illustrata nel pop-up che appare quando si clicca sul pacchetto selezionato (vedi immagine 2)

Immagine 2
3- Abilitare l’Host ESXi alla connessione ssh (immagine 3)
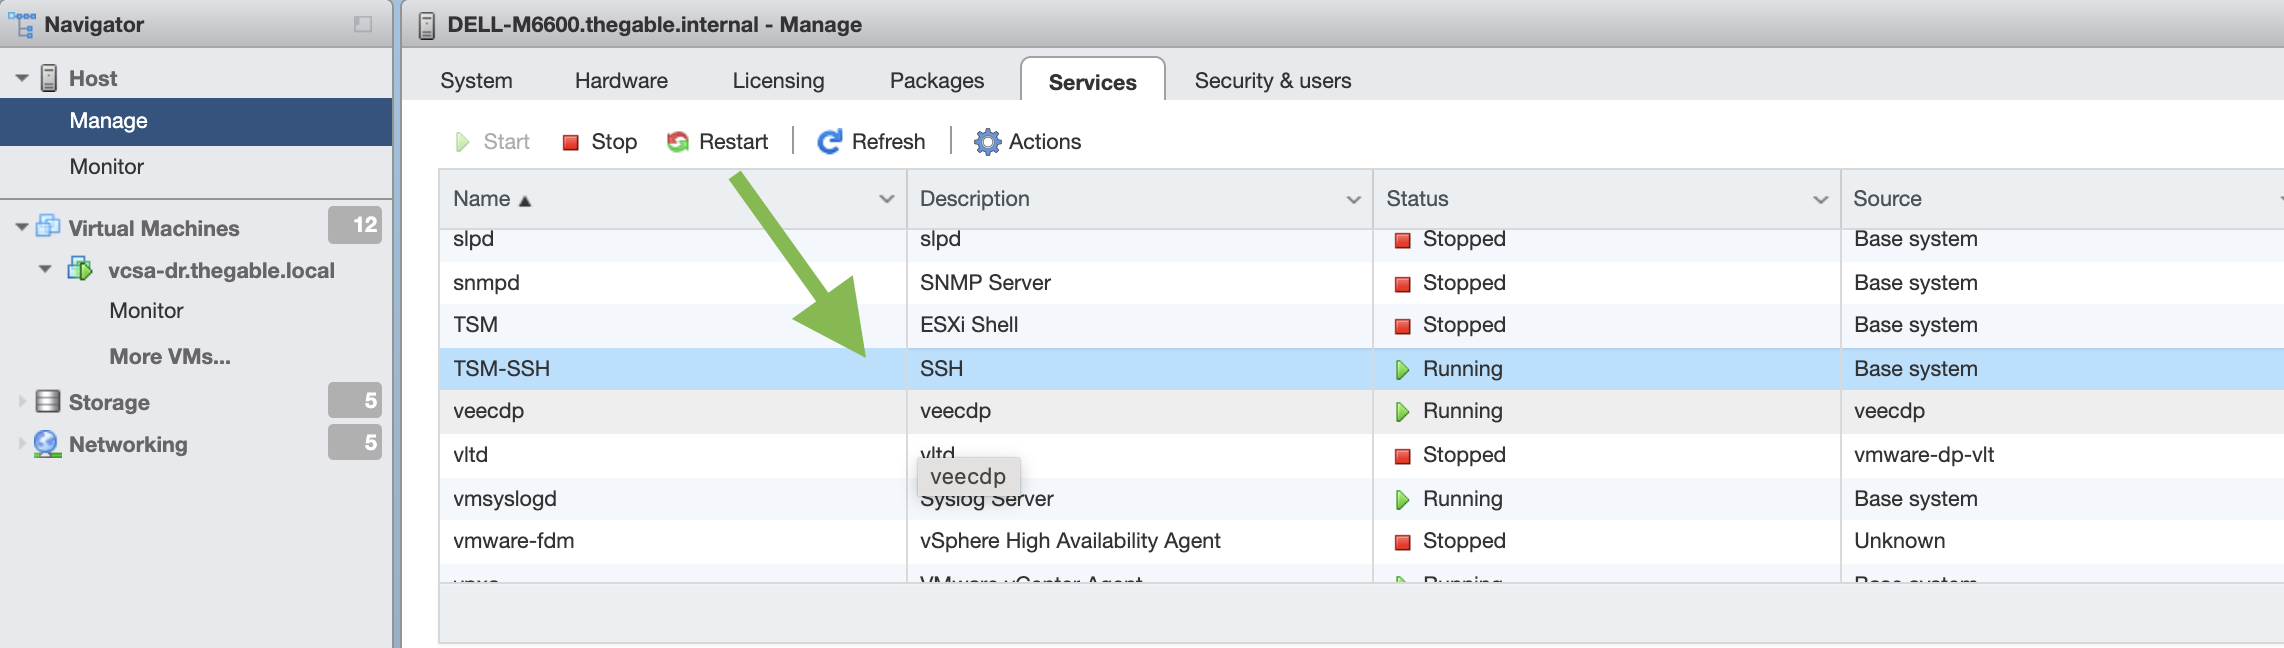
Immagine 3
4- Collegarsi via ssh all’host ESXi ed avviare i comandi precedentemente mostrati nel pop-up.
Nel mio caso:
- esxcli network firewall ruleset set -e true -r httpClient
- esxcli software profile update -p ESXi-7.0U3d-19482537-standard \ -d https://hostupdate.vmware.com/software/VUM/PRODUCTION/main/vmw-depot-index.xml
- esxcli network firewall ruleset set -e false -r httpClient
5- Porre l’Host ESXi in Maintenance mode e riavviarlo.
6- Al termine controllate che l’aggiornamento sia avvenuto correttamente (immagine 4 e 5)
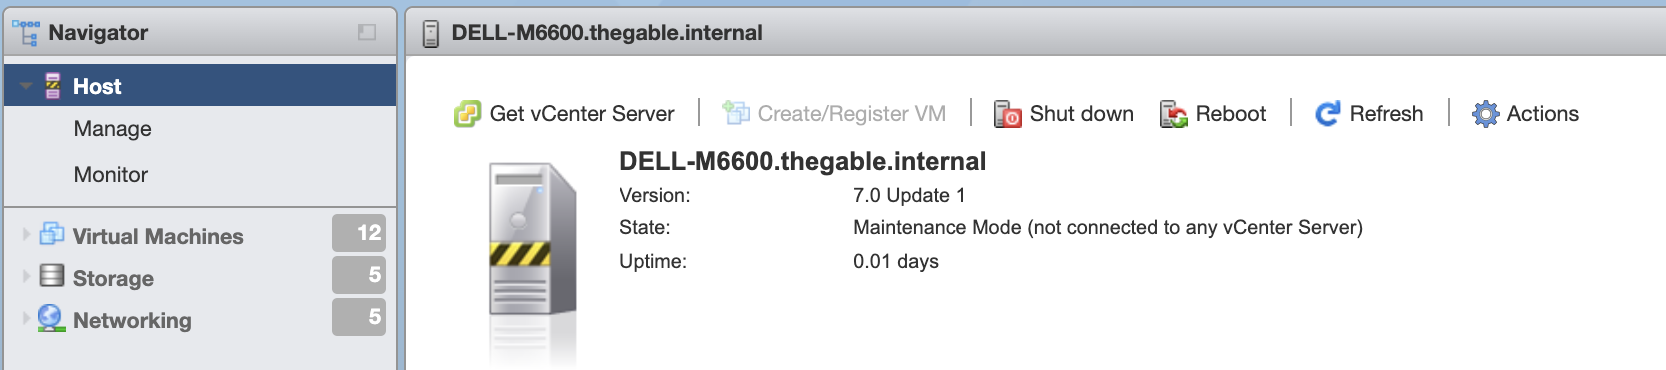
Immagine 4 – Pre Aggiornamento
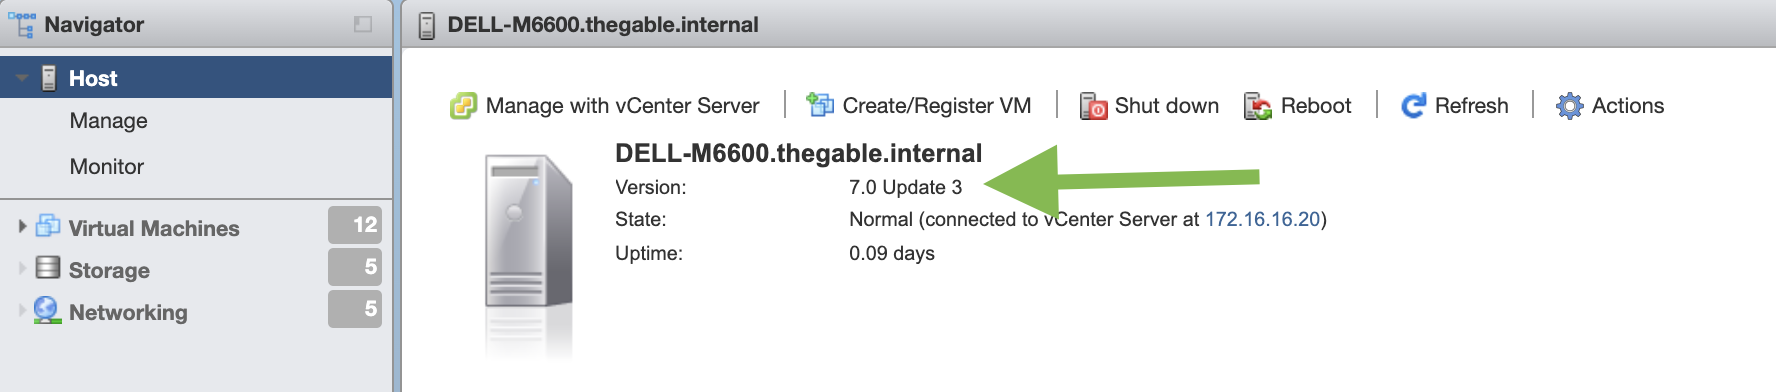
Immagine 5 – Post Aggiornamento
Nota 4: Nel caso in cui l’hardware non fosse in matrice di compatibilità, il consiglio è di utilizzare l’opzione <–no-hardware-warning>. Nel mio caso il secondo comando è stato cambiato in:
esxcli software profile update -p ESXi-7.0U3d-19482537-standard \ -d https://hostupdate.vmware.com/software/VUM/PRODUCTION/main/vmw-depot-index.xml –no-hardware-warning
A presto

 Picture 1
 Picture 2
 Picture 3
 Picture 4
 Picture 5
 Picture 6
 picture 7
 Picture 8
 picture 9
 picture 10
 Picture 11
 Picture 13
 Picture 14
 Picture 15
 Picture 16
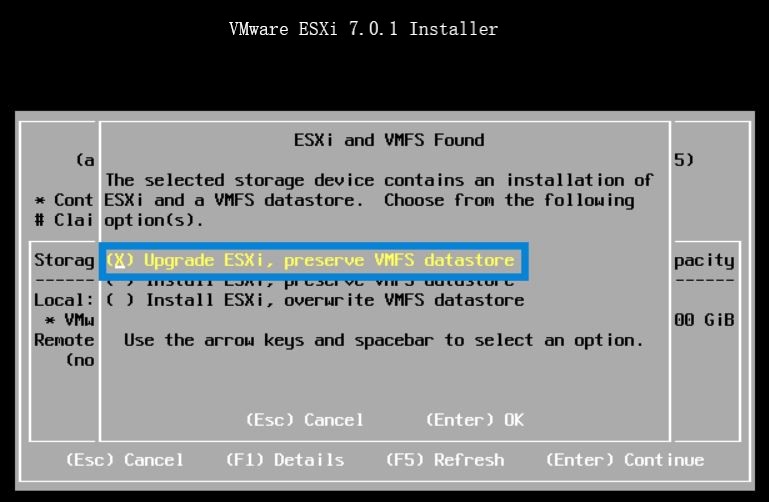 Picture 1
 Last weekend I upgraded all my Servers to the last VMware ESXi release (7.0.1 C) and this article is meant to describe all steps I performed.
 Picture 1
 Picture 2