Siamo arrivati all’ultimo articolo sul Veeam Disaster Recovery Orchestrator versione 5.
In questa ultima parte concentreremo gli sforzi fatti in precedenza e consultabili nel presente sito, per realizzare il piano di Orchestrazione del Disaster Recovery.
Dopo aver effettuato il login, la dashboard illustra lo stato dei piani realizzati (immagine 1).
Immagine 1
Notate che a differenza della versione VDrO precedente, è possibile filtrare i piani in base agli “scopes” (immagine 2).
Immagine 2
Una seconda e utilissima novità della versione 5 è la presenza della voce inventory (immagine 3), dove vengono riportati i VM Groups.
Tale opzione verifica immediatamente che nello “scope” scelto vi siano il gruppo di VM che realizzeranno il piano di DR.
Immagine 3
L’immagine 4 riporta i dettagli dei piani di Orchestrazione già creati.
Immagine 4
Vediamo ora come creare un piano:
Dal menù manage selezioniamo la voce New (immagine 5).
Immagine 5
E proseguendo con il wizard, inseriamo un nome (immagine 6), lo scope (immagine 7) e la tipologia di piano (immagine 8).
Immagine 6
Immagine 7
Immagine 8
Dopo aver aggiunto il gruppo di VM da porre sotto orchestrazione (immagine 9, 10 e 11)
Immagine 9
Immagine 10
Immagine 11
E’ possibile personalizzare le opzioni di Recovery, (ad esempio se processare le VM in modalità parallela o sequenziale) (immagine 12).
Immagine 12
Aggiungo ora gli step necessari alla realizzazione del piano (nell’esempio come prima attività del piano è stato aggiunto lo spegnimento della VM di produzione ) (vedi immagini 13, 14, 15 e 16).
Immagine 13
Immagine 14
Immagine 15
Immagine 16
Il wizard si conclude con:
L’opzione di porre sotto Backup le VM che sono state avviate durante il piano di DR (immagine 17)
I valori di RTPO che dovranno essere rispettati affinchè il piano possa essere eseguito (immagine 18)
La scelta della lingua del template da utilizzare (immagine 19)
L’ora alla quale i report saranno automaticamente generati (immagine 20)
Se creare immediatamente il report readiness (che verifica tutti i componenti del piano) (immagine 21)
immagine 17
immagine 18
immagine 19
immagine 20
immagine 21
Ora è possibile testare e successivamente avviare i piani di orchestrazione
Il presente articolo illustra come configurare il menù di amministrazione del Veeam Disaster Recovery Orchestrator (VDrO).
Prima di procedere alla fase di amministrazione, è indispensabile aver già etichettato le risorse che dovranno far parte dei piani di Disaster Recovery.
La classificazione è stata illustrata nel precedente articolo, disponibile cliccando sul seguente link: VDrO – VOne – Tagging.
Nota 1: Per accedere al menù di amministrazione, selezionate la voce denominata “Administration” (vedi immagine 1)
Immagine 1
La configurazione del menù di amministrazione si divide in tre principali aree:
Nella prima sono impostate:
Il nome del VDrO Server e il contact name (immagine 2).
le connessioni verso i Veeam Backup & Replication Server (VBR) (immagine 3)
le connessioni verso i vCenter (immagine 4)
la connessione opzionale verso gli storage (immagine 5) (fate riferimento al presente articolo per scoprire i dettagli)
Immagine 2
Immagine 3
Immagine 4
Immagine 5
La seconda area identifica attraverso il tagging le risorse da aggiungere ai piani di DR:
La recovery location (immagine 6)
Nella recovery location i datastore ove i filesystem delle VM resiederanno (immagine 7)
Il mapping delle reti (immagine 8)
Il remapping degli indirizzi IP (immagine 9)
Nota 2: Le operazioni sopra descritte sono possibili se e solo se tutte le risorse necessarie sono state etichettate.
Nota 3: Il remapping automatico degli indirizzi IP in caso di avvio di un piano di DR è disponibile solo per le VM Windows.
Immagine 6
Immagine 7
Immagine 8
Immagine 9
Nella terza area sono identificate:
La profilazione degli utenti. In parole semplici il VDrO permette di creare utenti in grado di amministrare solo degli specifici workload che sono chiamati “scopes” (immagine 10).
L’assegnazione dei DataLab agli “scopes”. Ricordo che i DataLab permettono di verificare che il piano di DR sia utilizzabile (immagine 11).
Immagine 10
Immagine 11
L’ultima configurazione permette di legare il gruppo di VM replicate o salvate tramite backup (dette VM Groups) agli scopes degli utenti.
Ad esempio, l’immagine 12 riporta che il VM Group “B&R Job – Replication VAO Win 10” è assegnato (included) ad entrambi gli scopes Admin e Linux.
Immagine 10
Nel prossimo ed ultimo articolo scopriremo come creare e verificare un piano di DR.
In this article, I’m going to show you how to set up an orchestration plan using as a source a CDP replica Job.
This article will not cover how to create and run a CDP replica job from VBR console. If you need a guide please refer to the official guide.
There are four main parts:
Create a Business Category
Setup the Environment
Create an Orchestration Plan
Launch the Orchestration Plan
The first and the second topics will be described in this article. The third and the fourth ones in the next articles.
A. To create a business category for CDP replica, just open the Veeam ONE interface from the VAO server (picture 1).
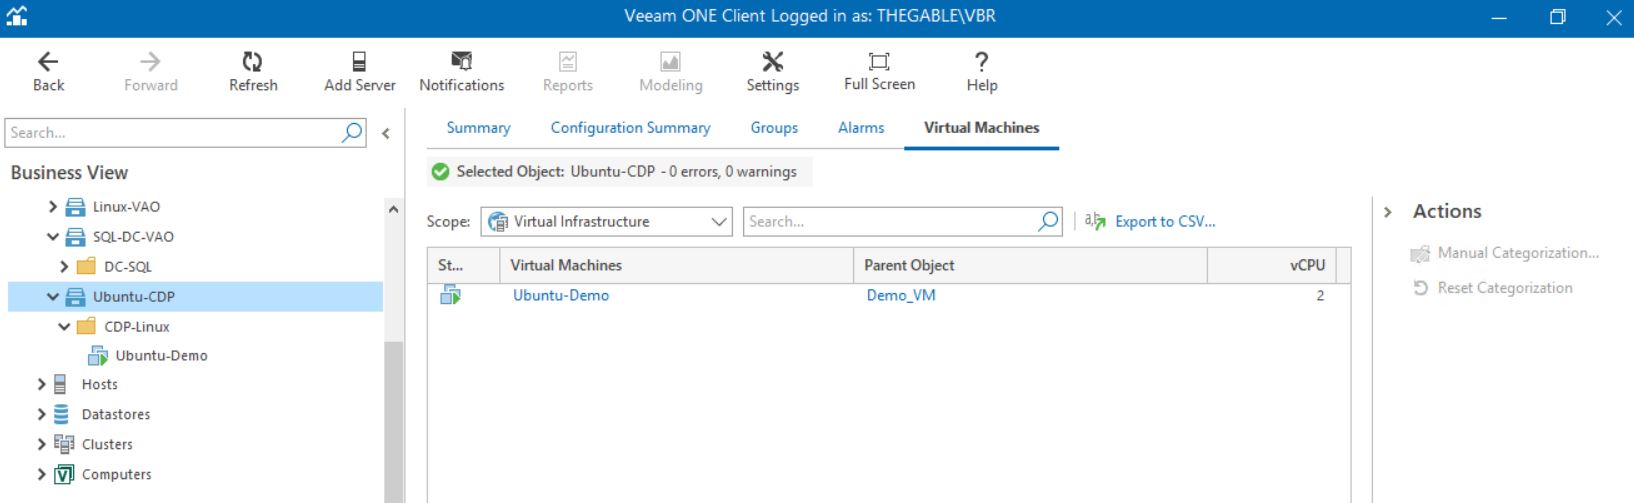
In this example, the business category is called Ubuntu-CDP , the resource group is called CDP-Linux (Picture 2).
Picture 1
Picture 2
B. After opening the VAO web interface it’s necessary to follow the next four steps.
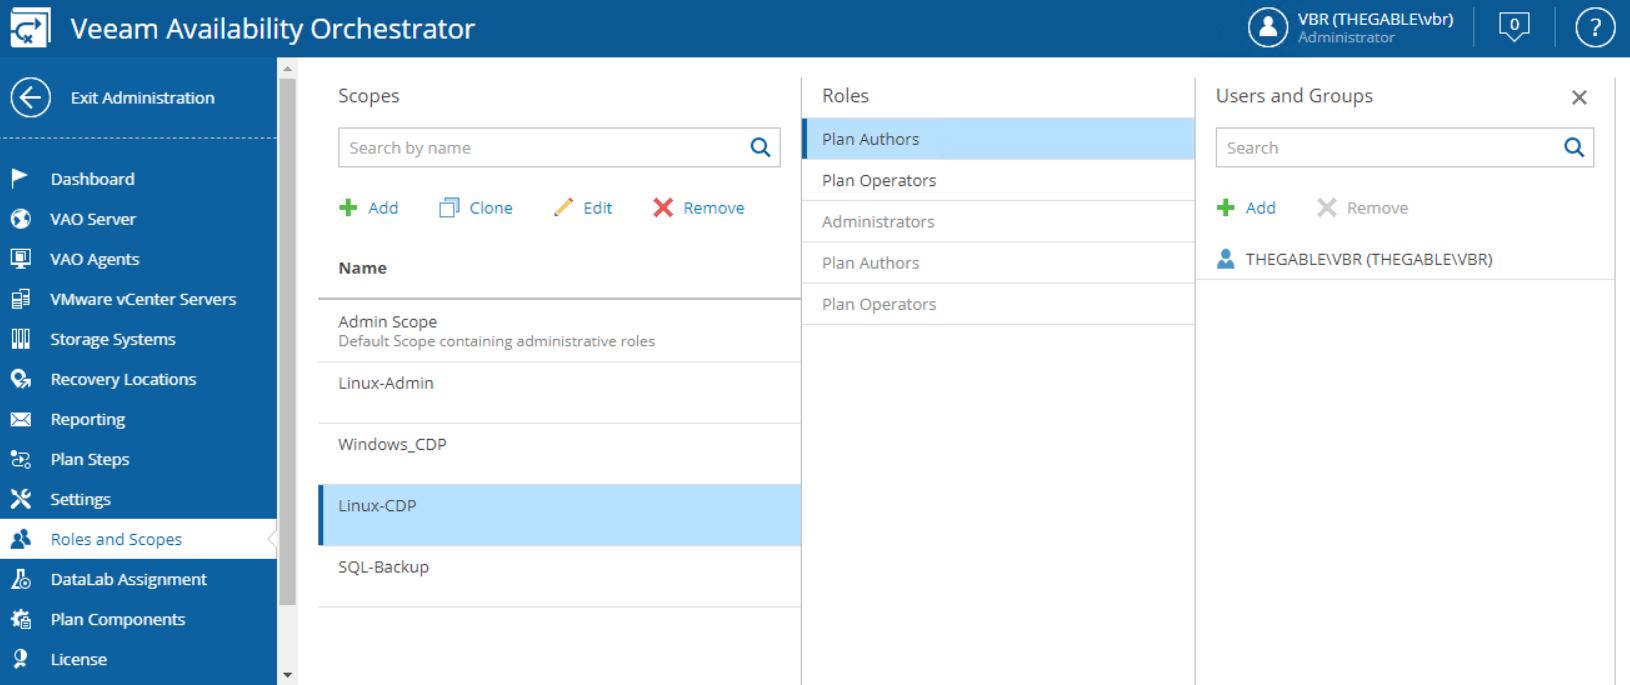
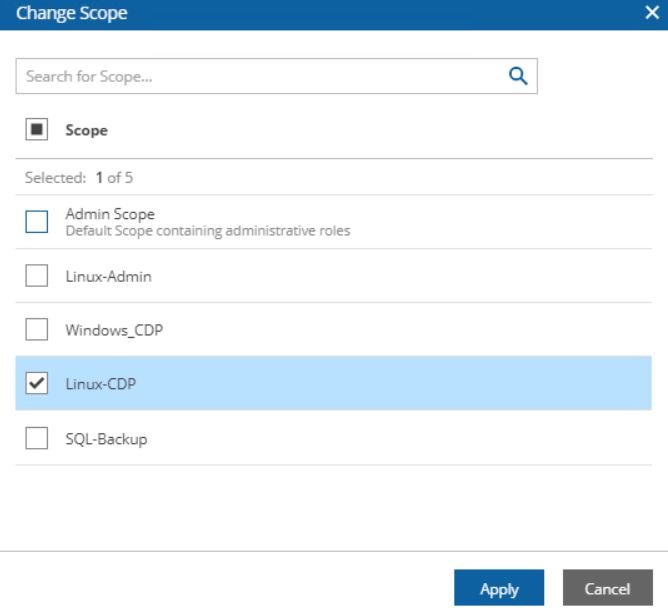
1. Add a Role and Scope (picture 3).
In my example, the scope is named Linux-CDP.
The plan Author/Operator is VBR.
Picture 3
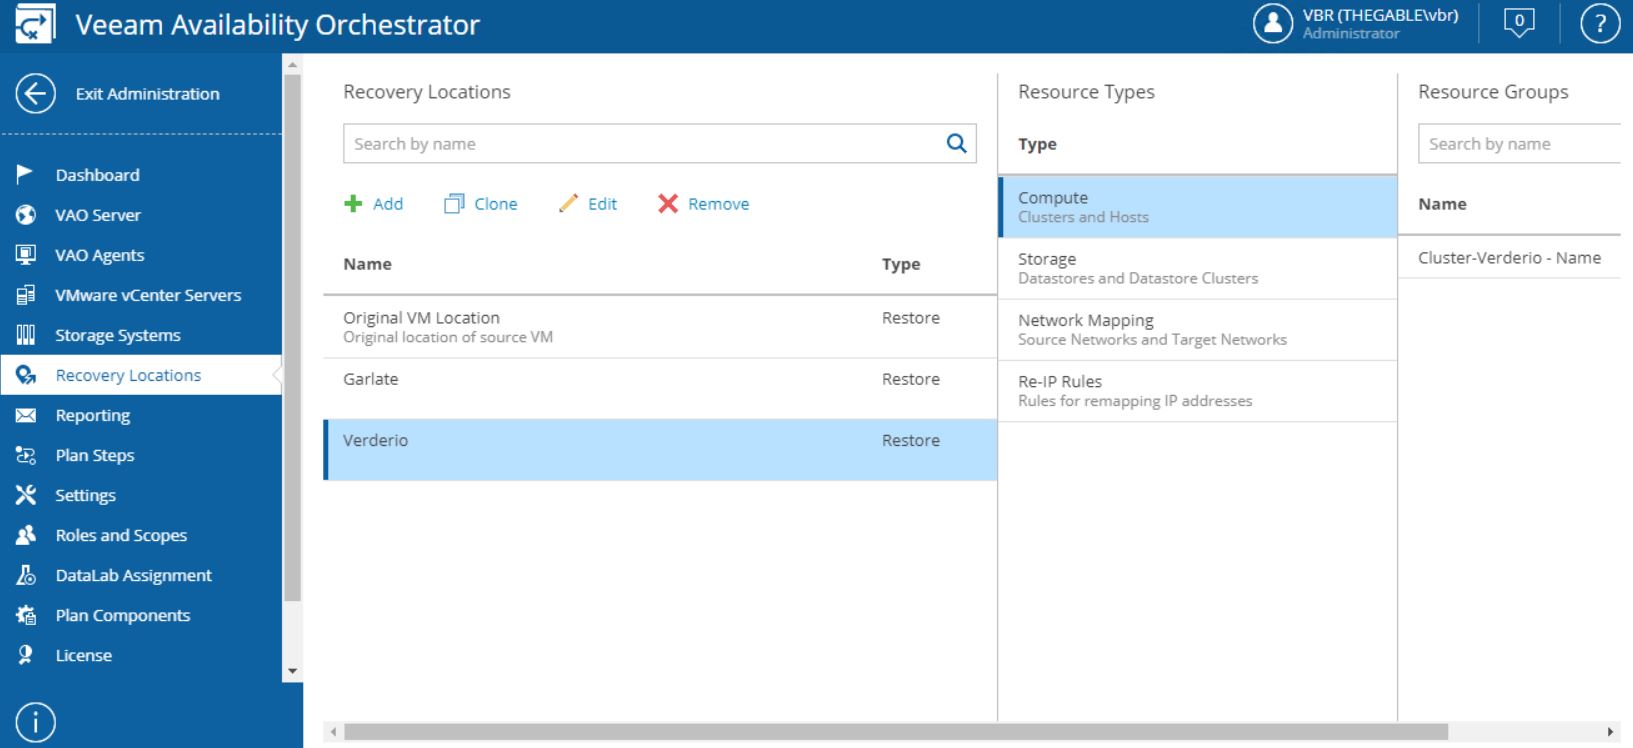
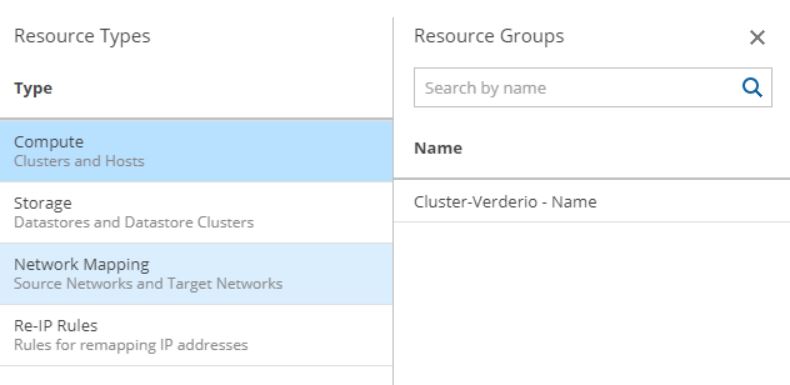
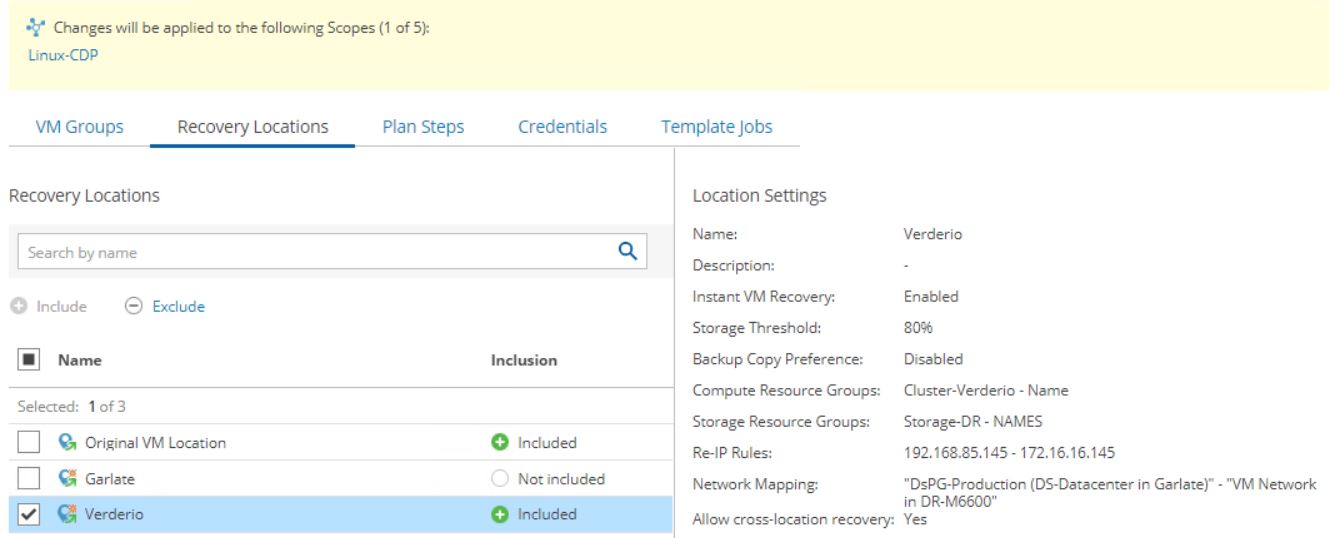
2. Add or modify the Recovery Location (picture 4).
In my example, the recovery location is Verderio and has the Cluster-Verderio as Compute resource (Picture 5).
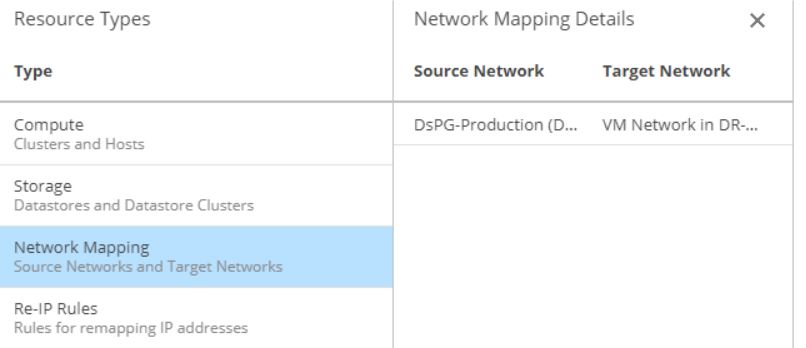
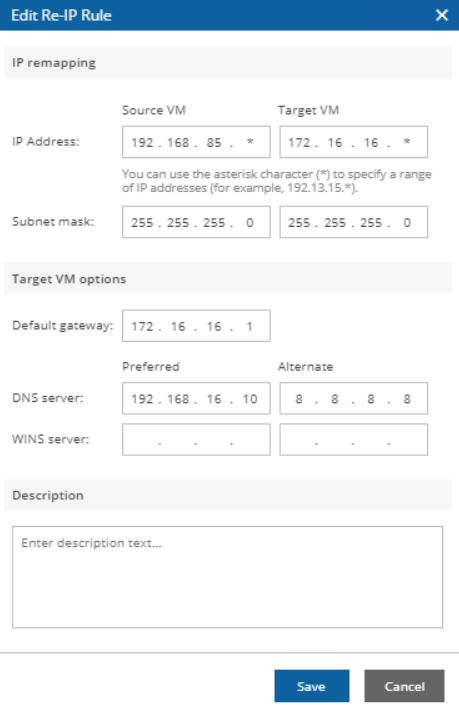
Pictures 6 and 7 show how to remap the Networking and how to set up the changing IP address rules.
Picture 4
Picture 5
Picture 6
Picture 7
Note1: The Re-IP feature is available just for Windows VMs (please have a look at the official documentation to get all detail (user guide). For Linux VMs it’s necessary creating a custom script.
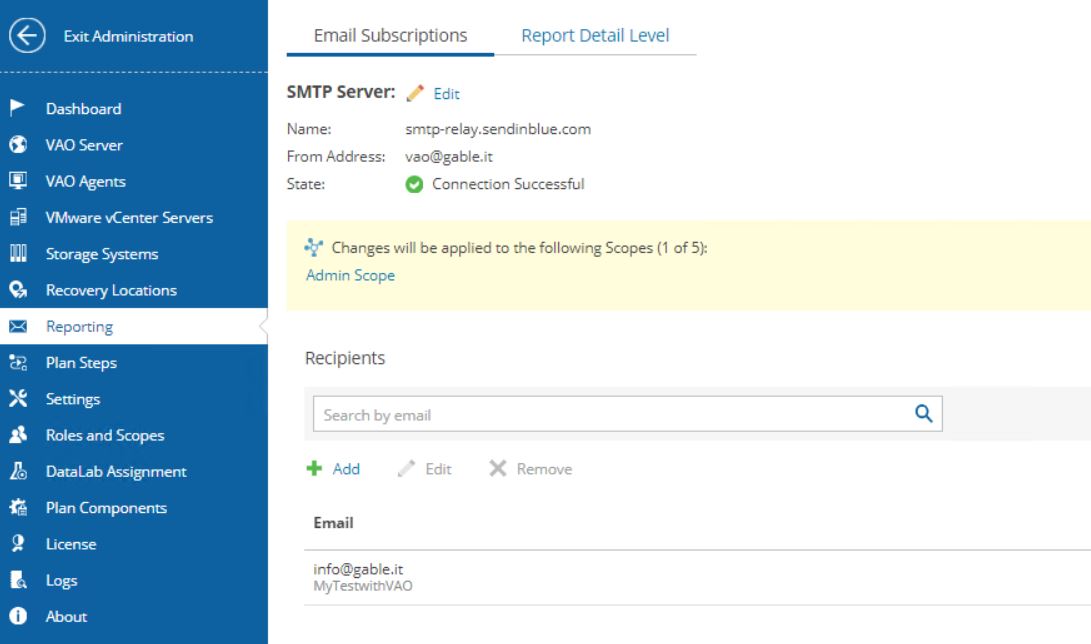
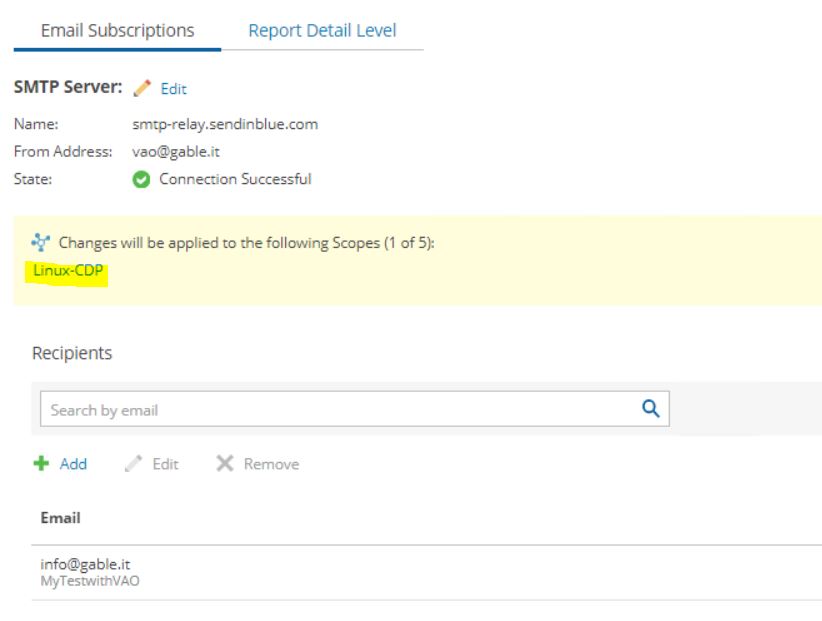
3. Reporting
Pictures 8, 9, and 10 show how to assign the Linux-CDP scope to your custom reports.
Picture 8
Picture 9
Picture 10
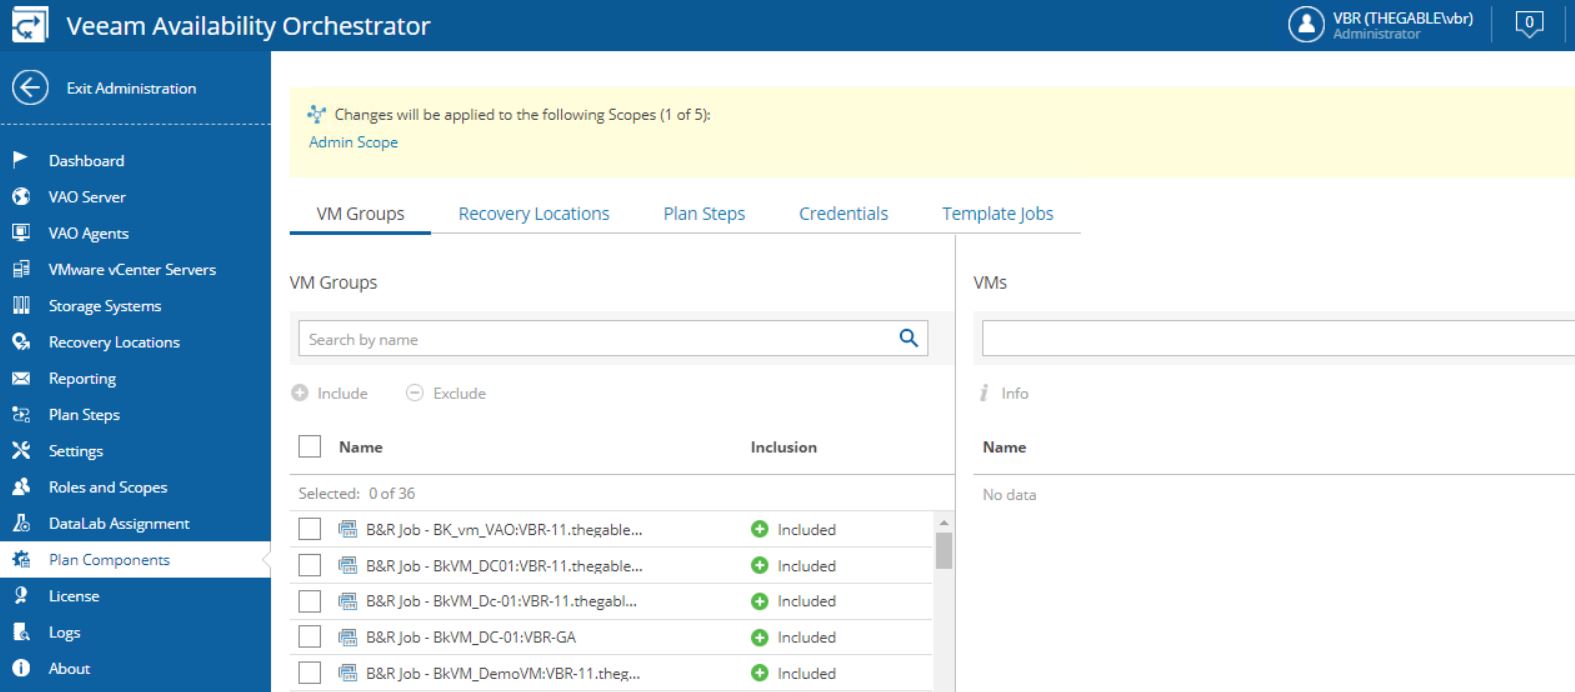
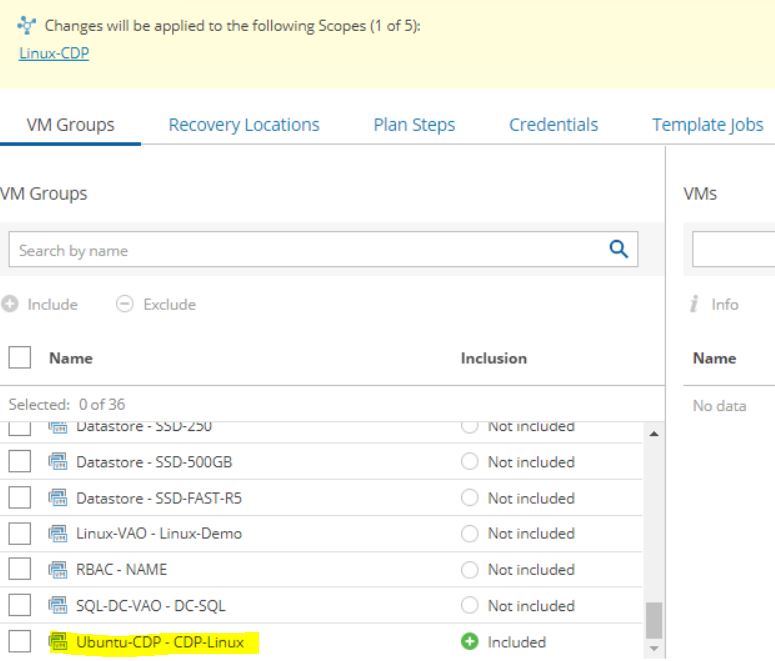
4. Assign the plan Components
Picture 11
Picture 12 shows how to add the VM group called Ubuntu-CDP to the scope Linux-CDP.
Picture 12
Picture 13 shows how to add a recovery location, i.e. Verderio.
Picture 13
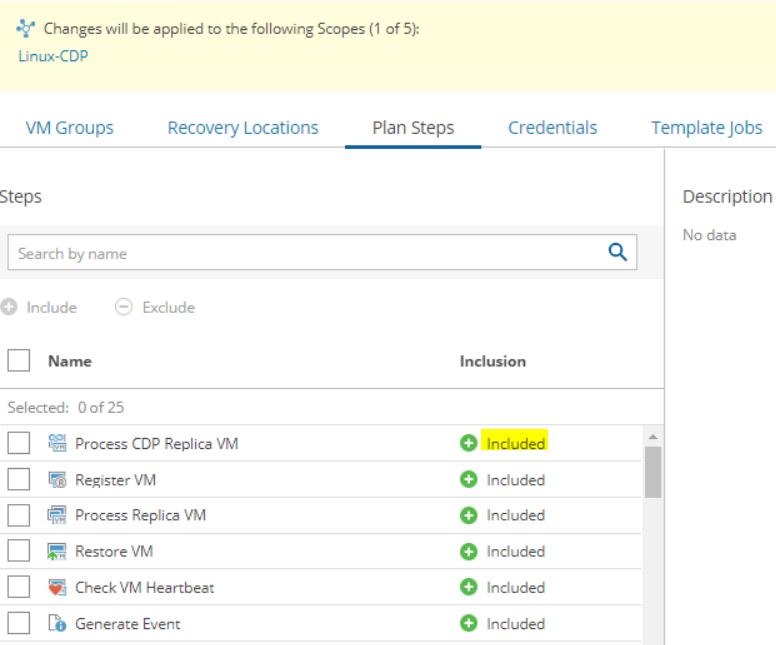
Picture 14 shows how to add the plan steps to the orchestration plan (In my example I included all the plan steps).
Picture 14
The next article shows how to create an Orchestration Plan and run it.
Suggestion: If you can’t wait and want to do it immediately, just read the previous articles 🙂
This topic needs an awfully long time to be rightly covered. For this reason, I wrote 5 articles.
The first two will explain the base concepts in front of technology. The others will cover how to set up VDrO for managing the Veeam Replica job, the Veeam Backup job, and the Netapp Storage Replica.
In these articles, I will not manage how to install VDO software; please refer to the deployment guide (VDrO Guides).
VDrO – Baseline-1:
One of the common requirements of big companies is to automatically manage Disaster Recovery.
Let’s see the decisional process of the IT Manager
These are the VDrO answers.
Let’s move to the VDrO console:
The first steps after logging in (picture 1) is to click on the administrator tab (Yellow on picture 2) and check the license file installed (picture 3)
Picture 1
Picture 2
Picture 3
Now I’m going to describe the structure of the software components.
VDrO Server: it shows where the VDrO Server has been installed (Picture 4)
Picture 4
The VDrO architecture is well-represented in picture 5 where three production sites replicate their data to a DR site.
Picture 5
Is it important to fill up the VDrO Server form? Yes, because VDrO creates automatically the DR- Plan documentation.
In my lab, I have just a production site and a DR site.
VDrO AGENTS: to control the activities of the Backup Server located in production sites, VDrO installs his own agent. The installation task is performed directly from the VDrO console (Picture 6).
Picture 6
vCENTER SERVERS: in my scenario, there are two vCenters; the first one in production and the second in DR site (Picture 7).
(Picture 7)
STORAGE SYSTEM: the most important VDrO news is the integration with storage replication technology. This version supports just Netapp. Picture 8 shows how to add the Storages to VDrO.
Picture 8
The last VDrO article will deal with how to set up and use this great technology.
RECOVERY LOCATION: it’s the place where the DR will be performed (Picture 9). It can be different locations in respect to where VDrO is installed.
Picture 9
In the next rows and pictures, I’ll show which info VDrO needs to work at its best.
In particular, I’m talking about the resources present in the recovery location. In this example the computer resources (Picture 10) and storage resources (picture 11).
Picture 10
Picture 11
The next 10 rows are very important to fix in mind.
How the VDrO can understand which resources are available? In other words, how can I assign resources to my Failover Plan?
The answer is VDrO uses massively tagging to all resources present at the VMware level.
Tagging means that resources can be added to VDRO
But …. is it possible to tag the resources?
Yes, It’s possible because inside VDrO there is the Veeam ONE Business-View component that can be freely used to tag resources.
To have more details about tagging please refer to theVDrO-guide.
One of the most common requests from the customers is to create automatic documentation about failover for both testing and procedures.
VDrO has already templates (in different languages that you can personalize at will) that are automatically filled up from software when you test or perform the Disaster Recovery.
In the next two pictures, it is shown how to set up an e-mail subscription (Picture 12) and configure the report Detail level (Picture 13).
Just remember to subscribe to the report to the right scope.
(Picture 12)
(Picture 13)
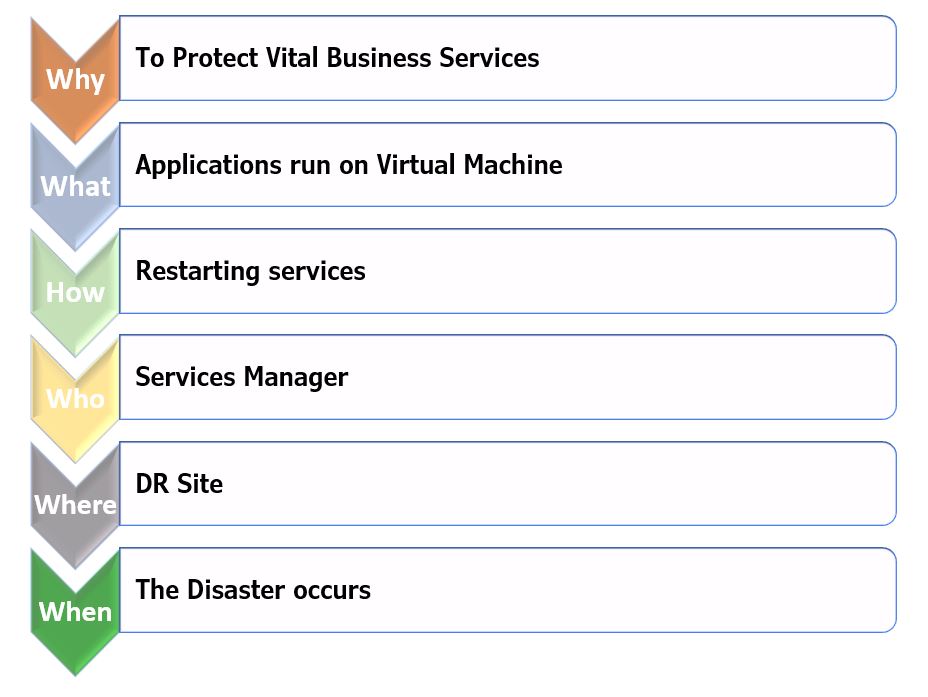
The next option is the reason why I fell in love with VDrO (Picture 14).
(Picture 14)
As you can see there is a big choice with DR plan steps. What does it mean?
Let’s see it with an easy example:
My DR plan requires switching on the Domain Controller (VM1) and afterward the SQL Application (VM2).
I want also to be sure that
a. the original VMs are switched off before starting the DR plan
b. when DR-plan is up and running, the SQL application has to answer port 1433.
What the VDrO can do for you?
With the pre-plan step, you can check the original VMs are switched off.
With a post-plan, you can check that the application answers correctly.
Another great point about plan steps is that you can choose if the actions have to be executed or skipped. In this way, it adds more flexibility to the solution.
(Picture 15)
Picture 16
It’s time to have a break. My next Article (VDrO – Baseline 2) will show scopes and plan components.

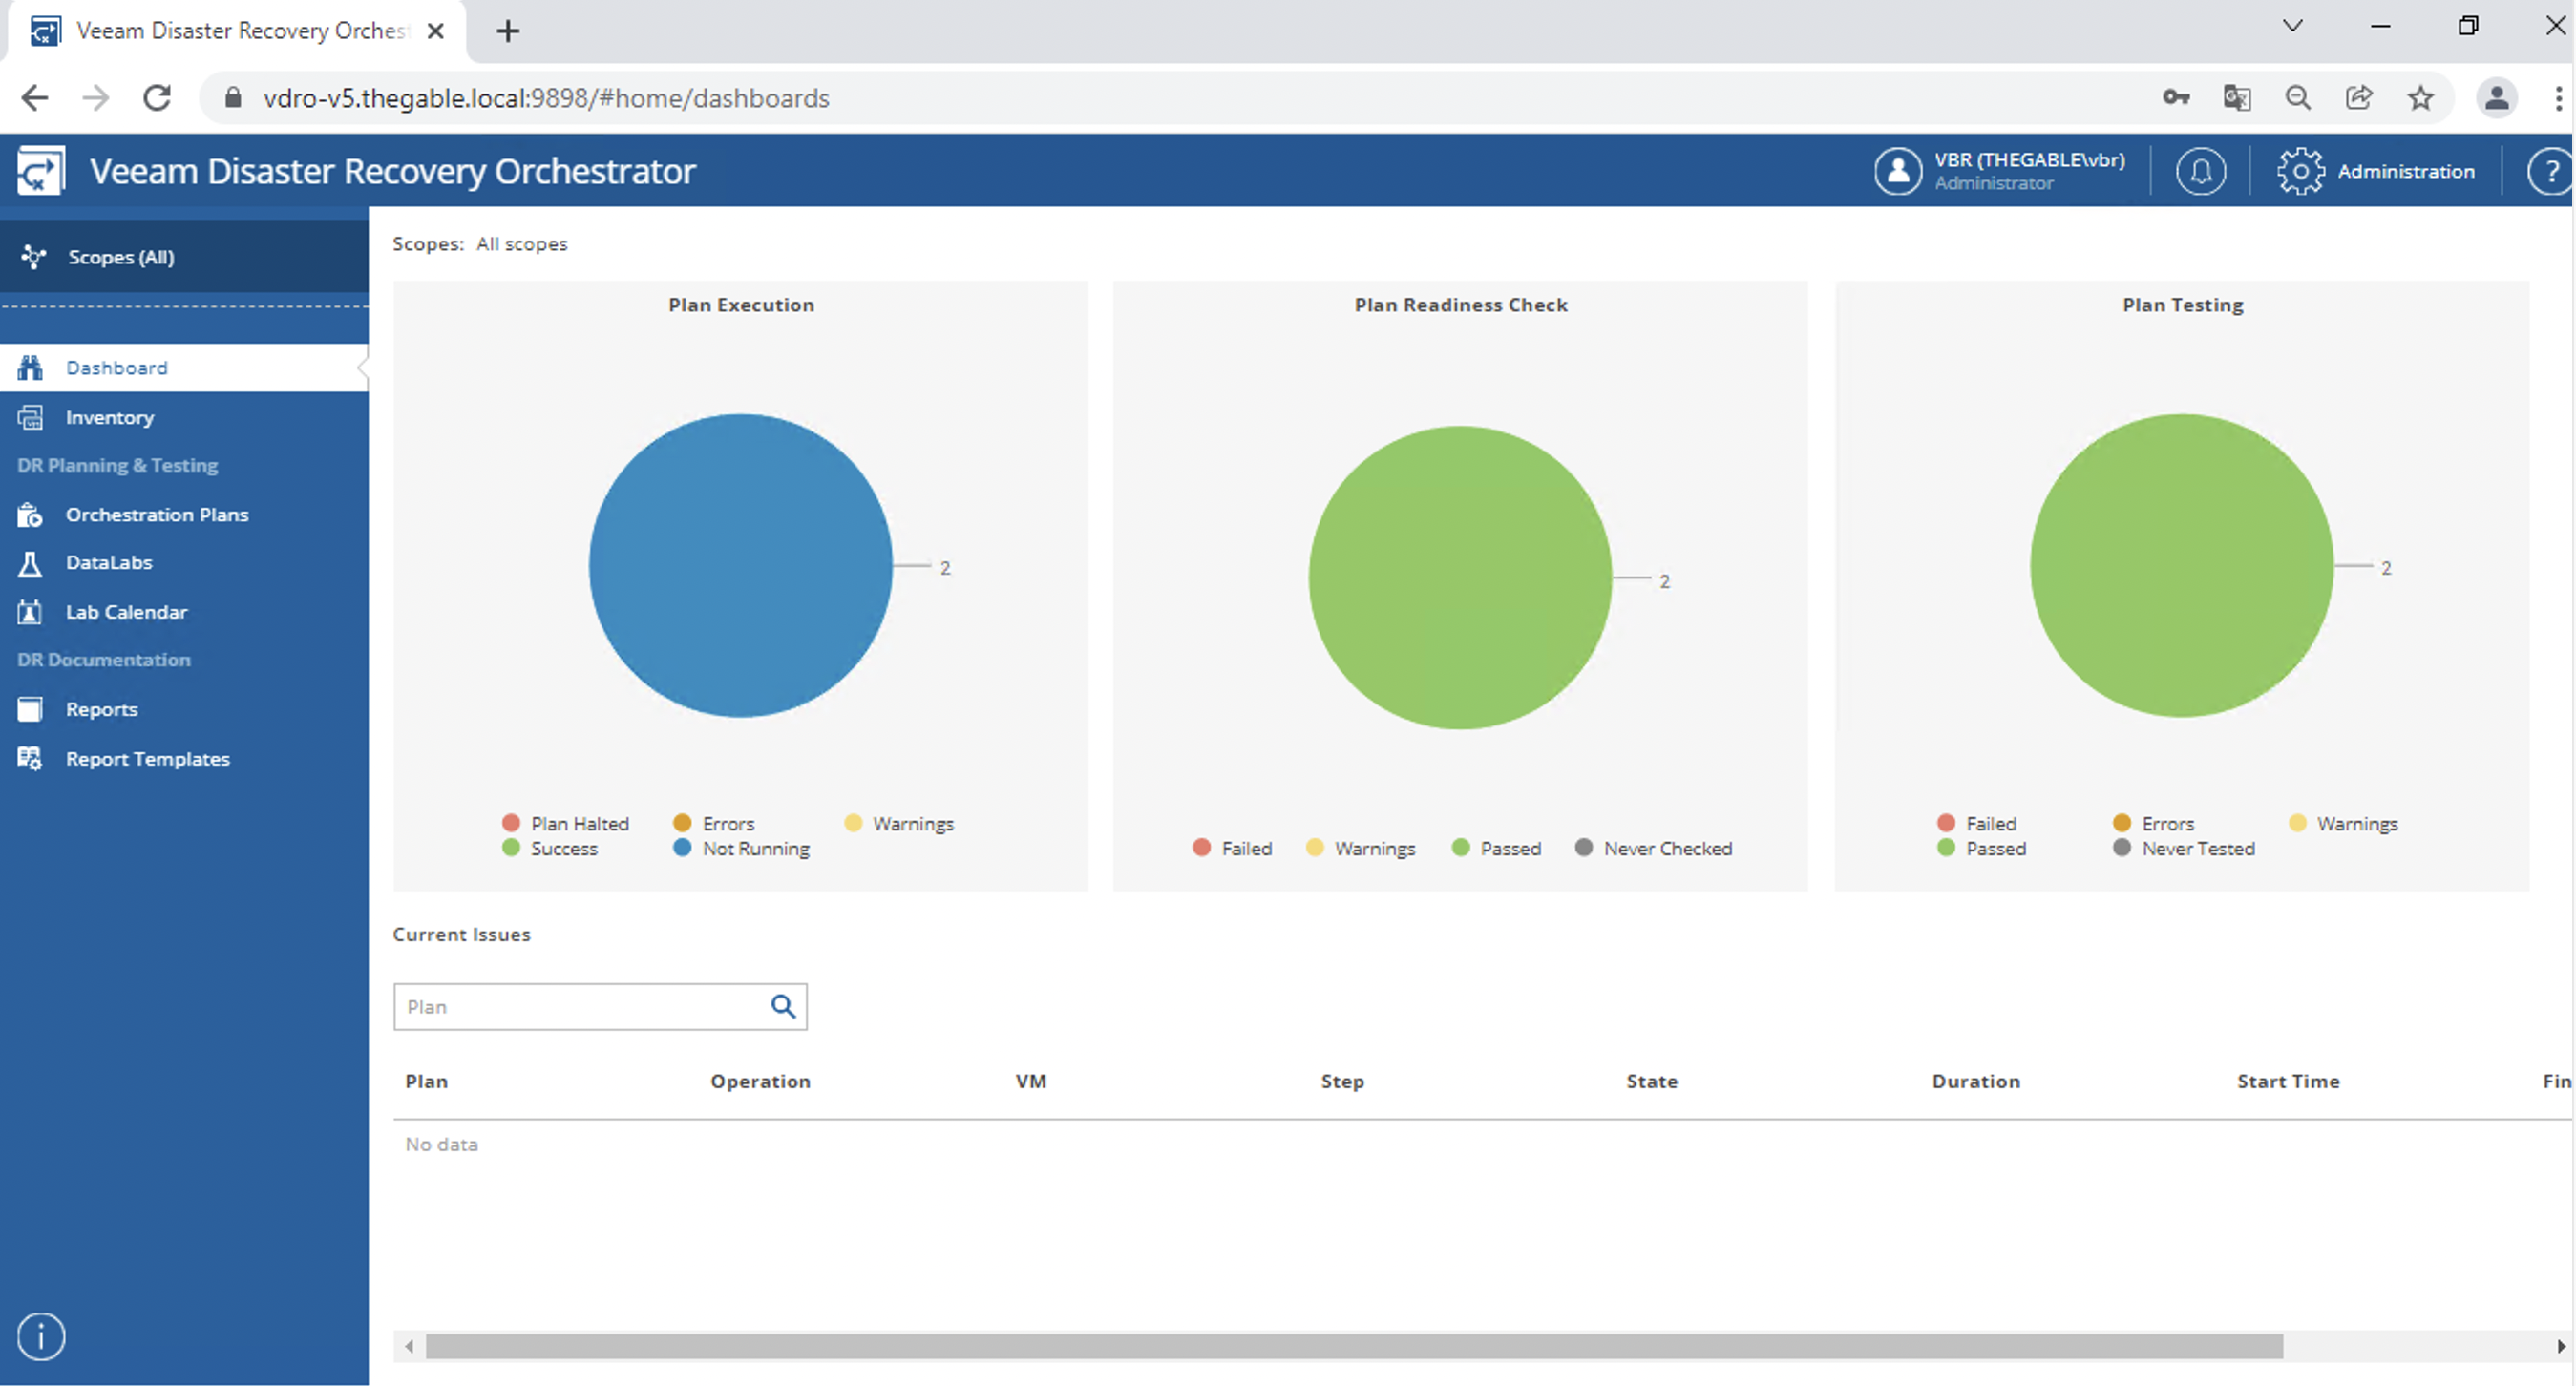 Immagine 1
 Immagine 2
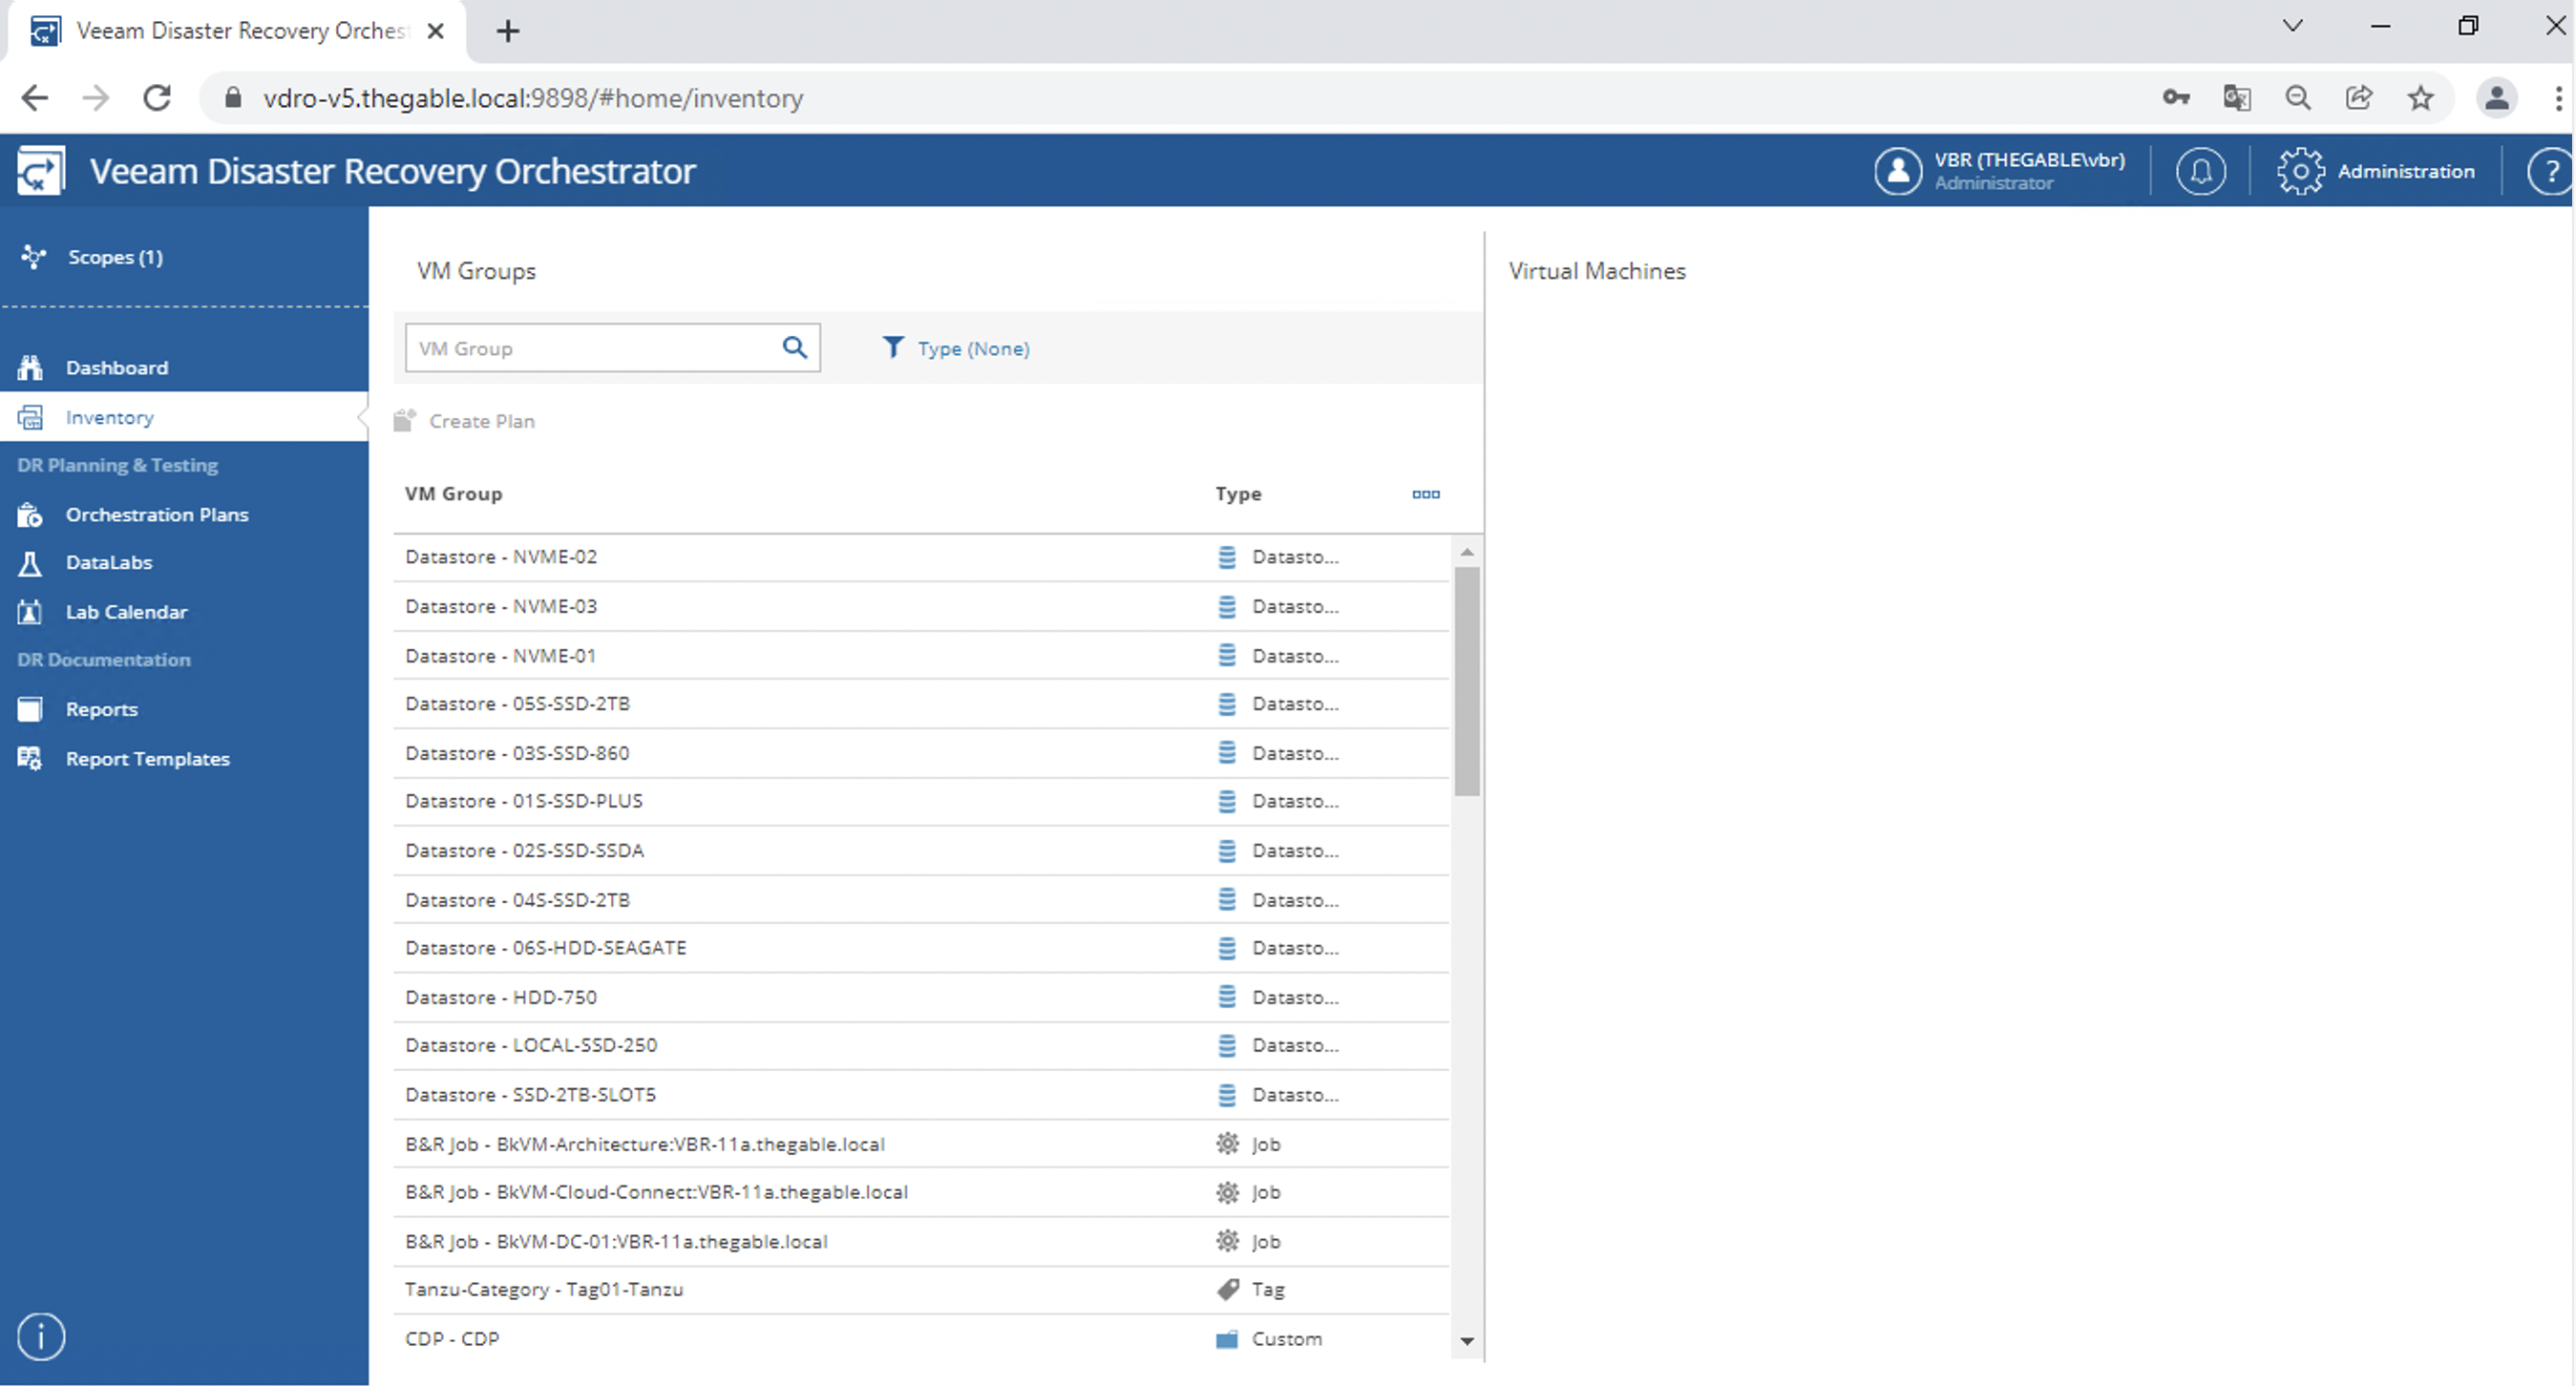 Immagine 3
 Immagine 4
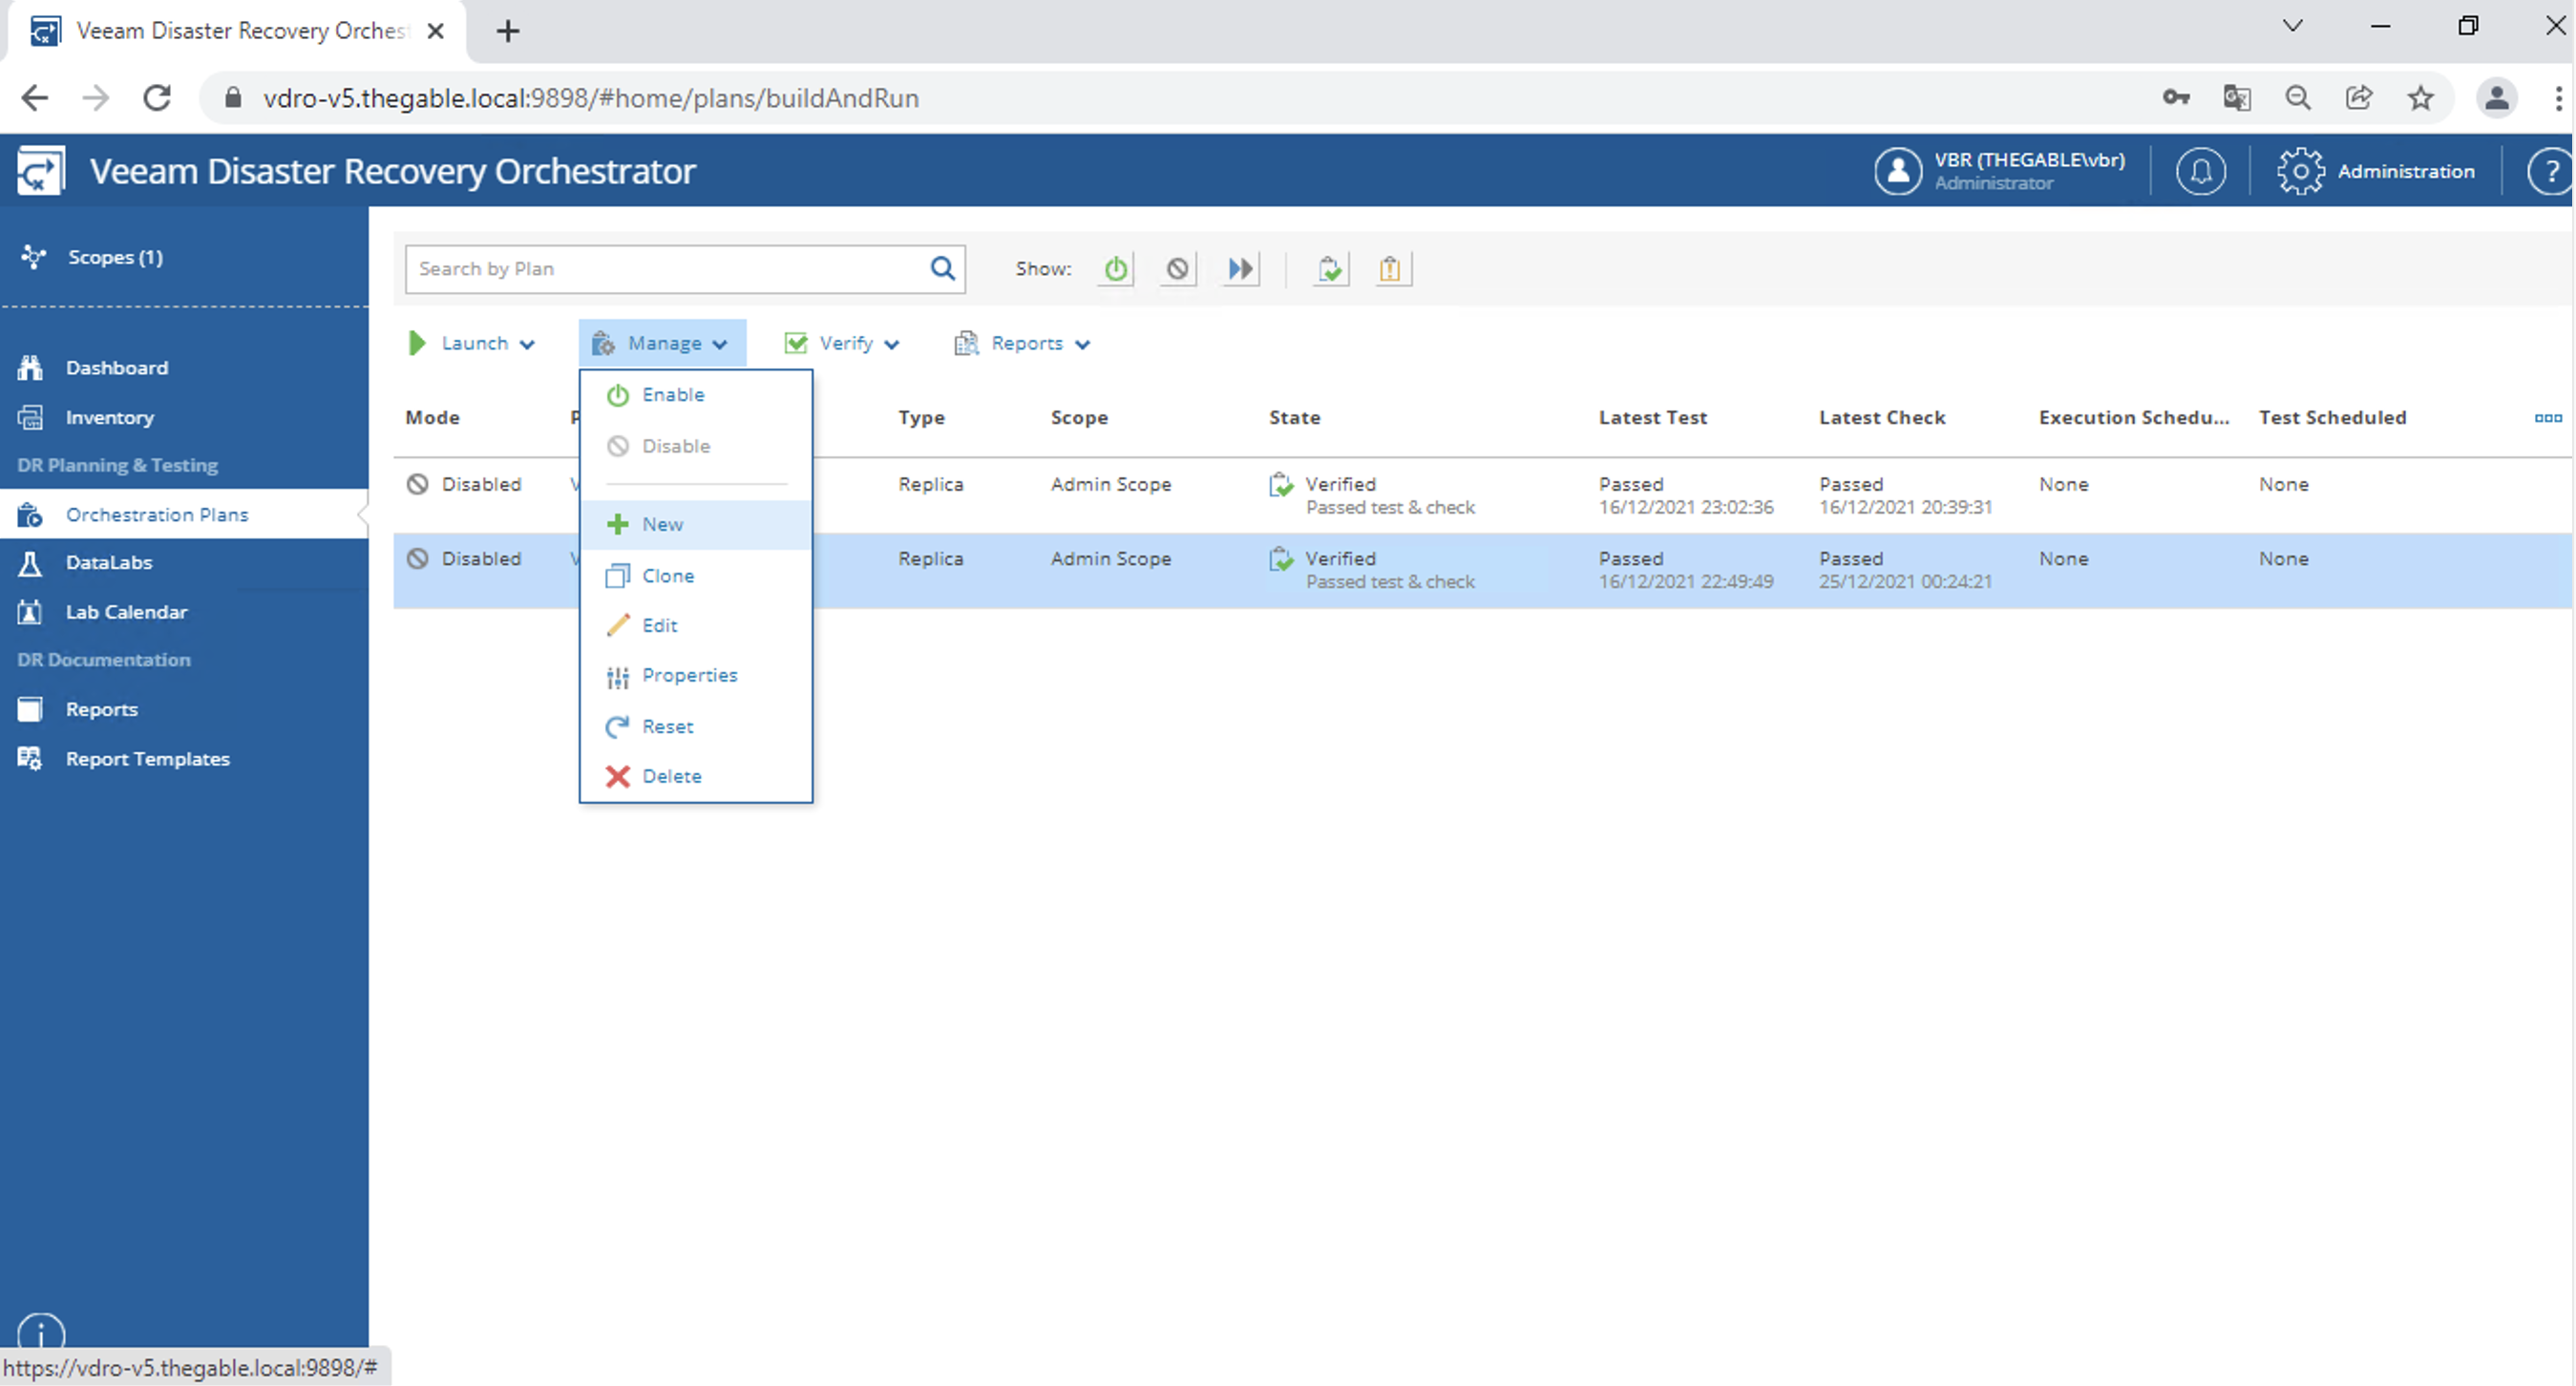 Immagine 5
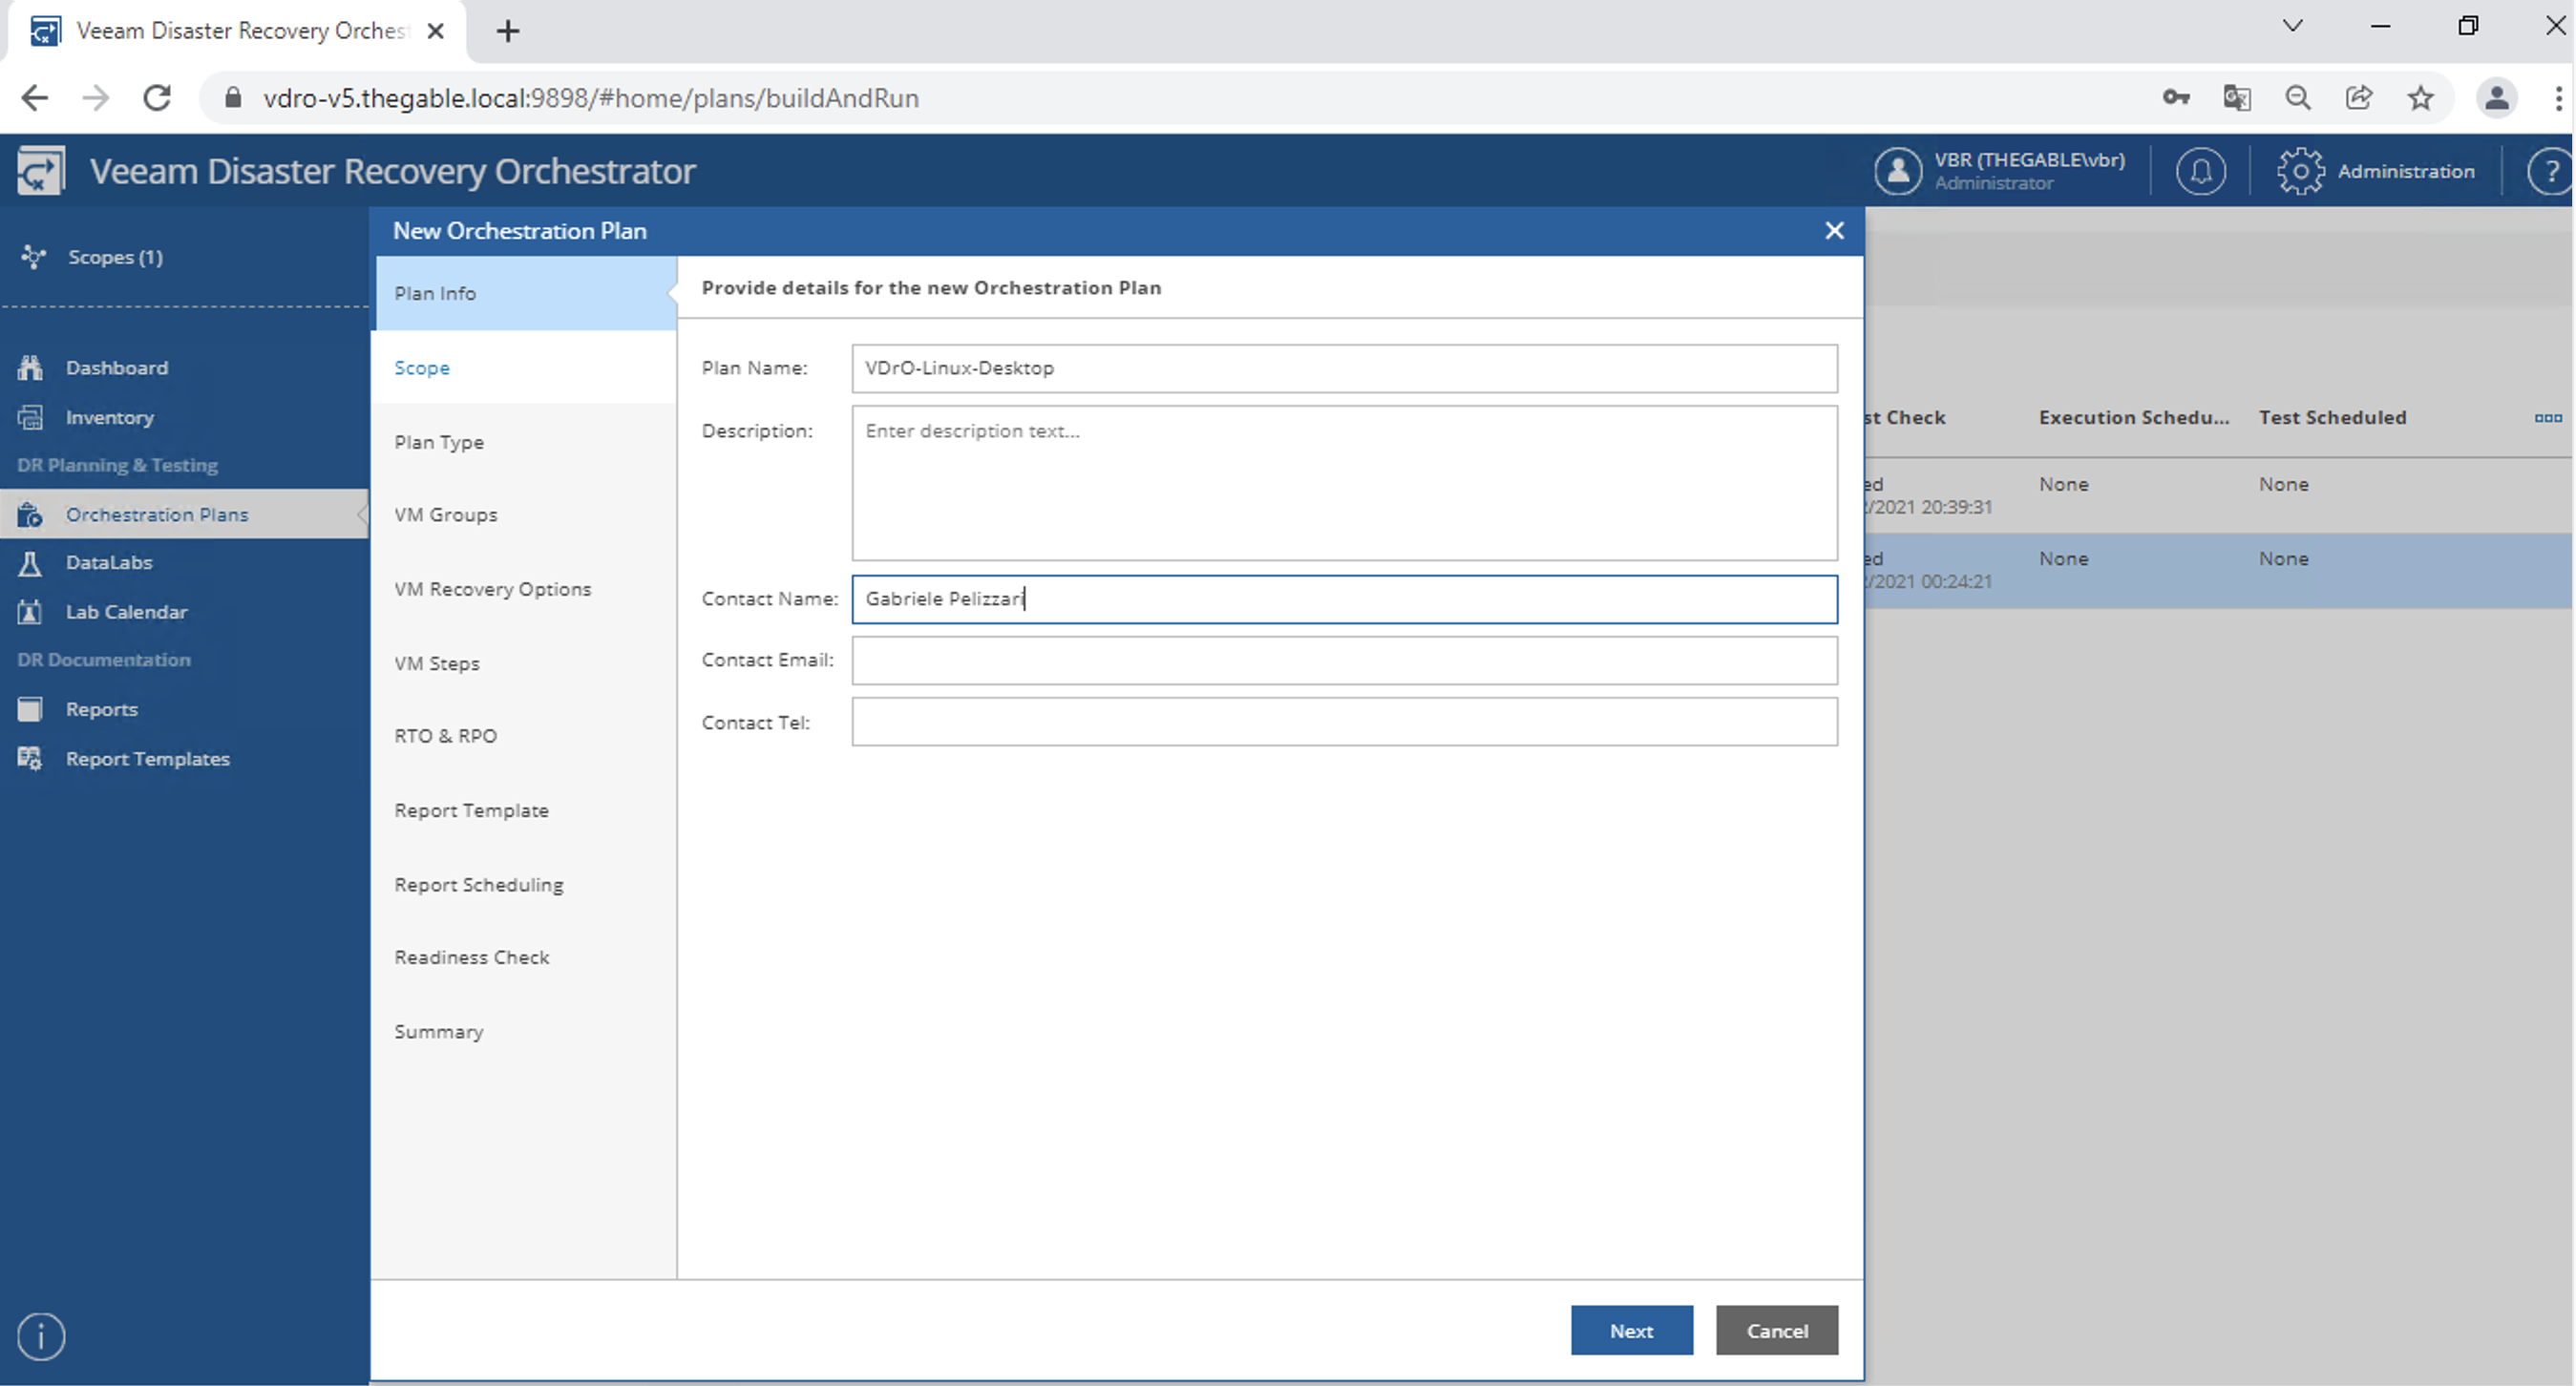 Immagine 6
 Immagine 7
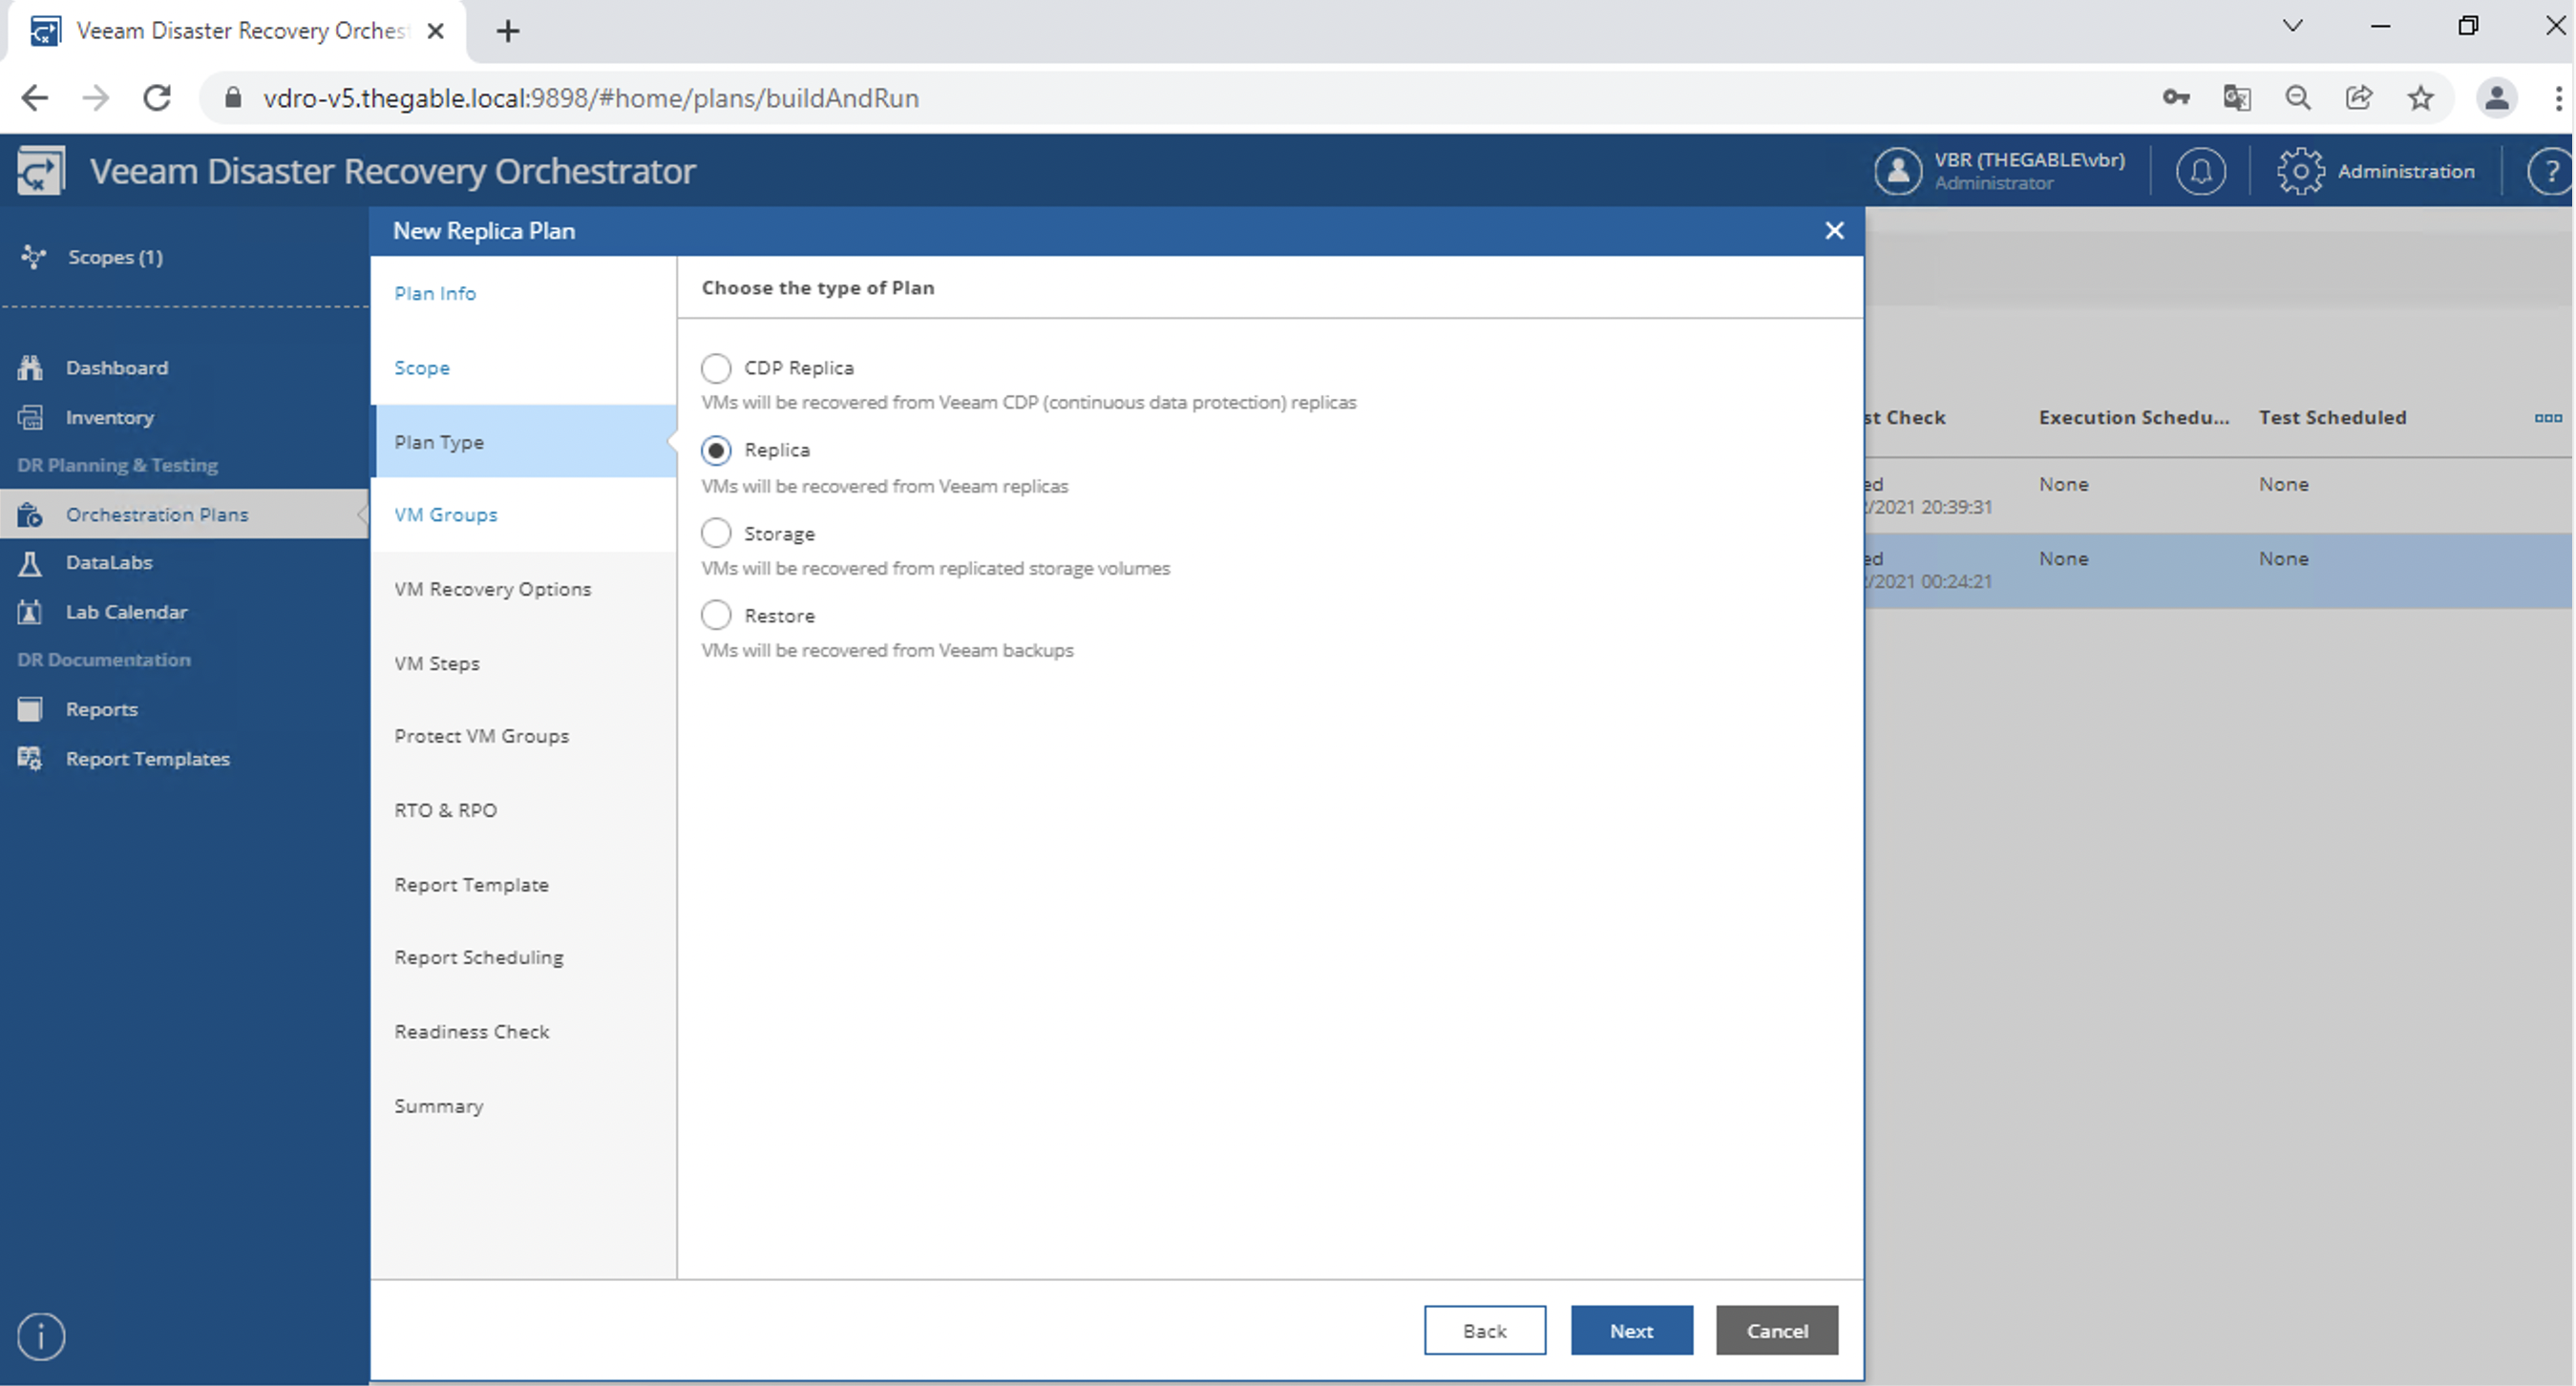 Immagine 8
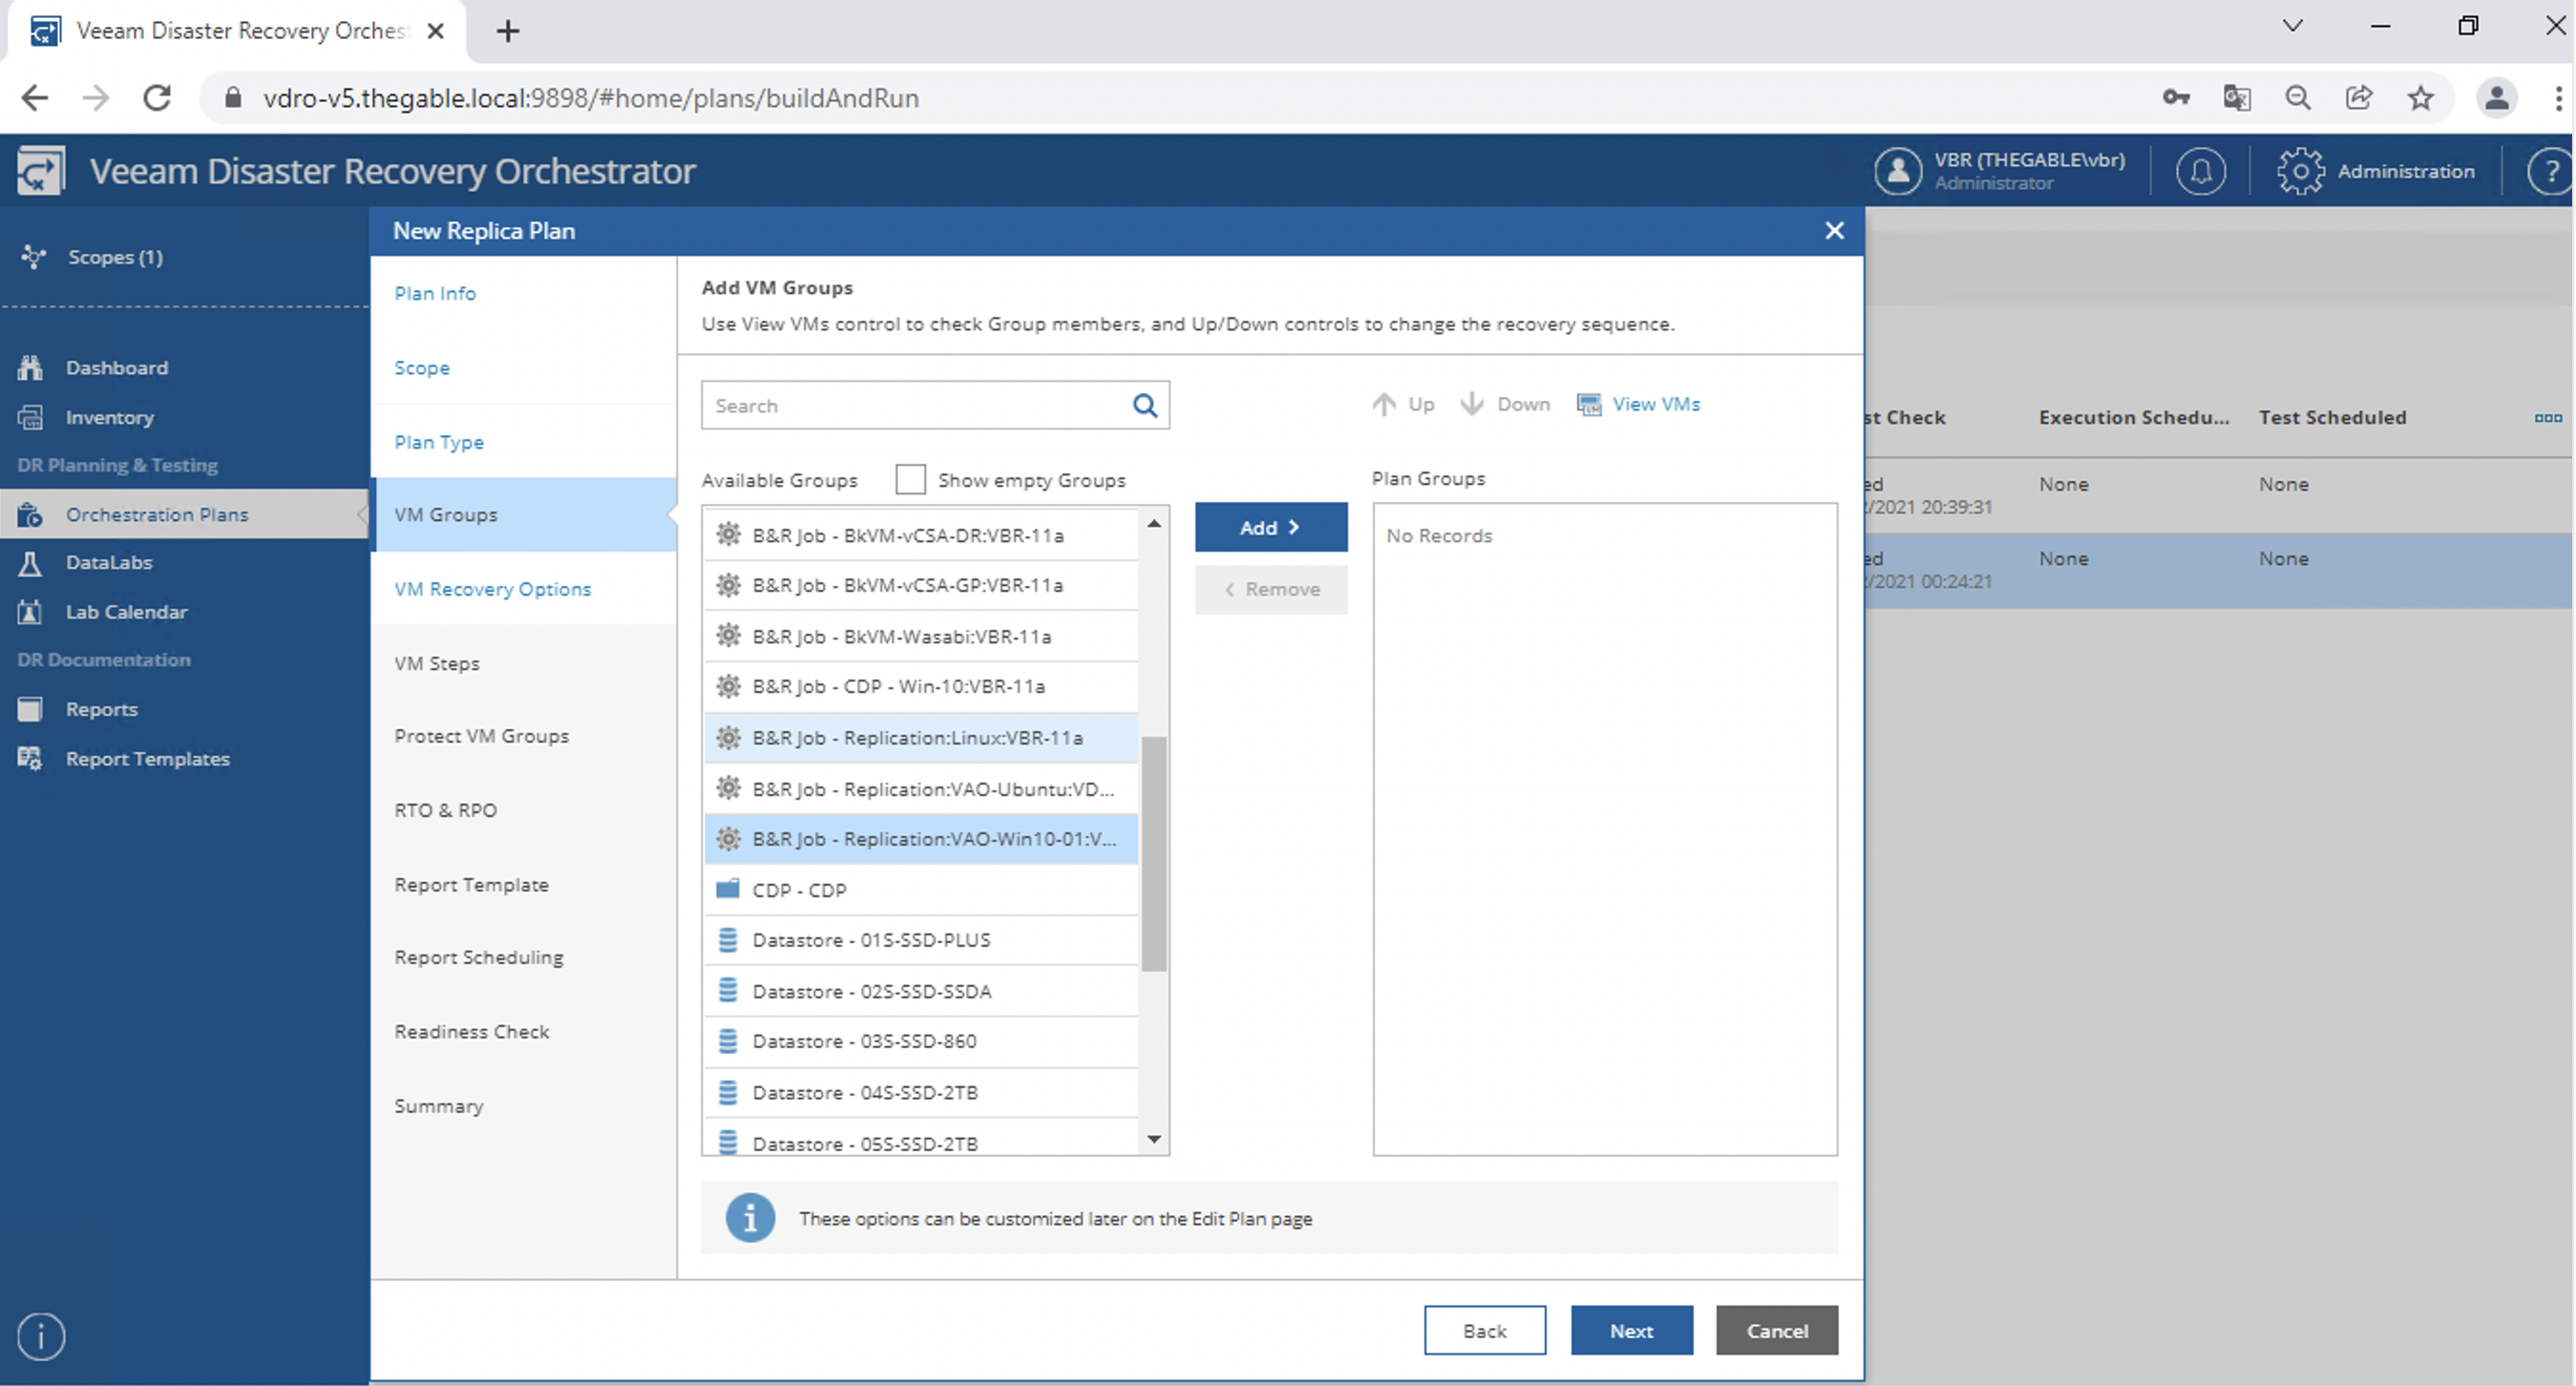
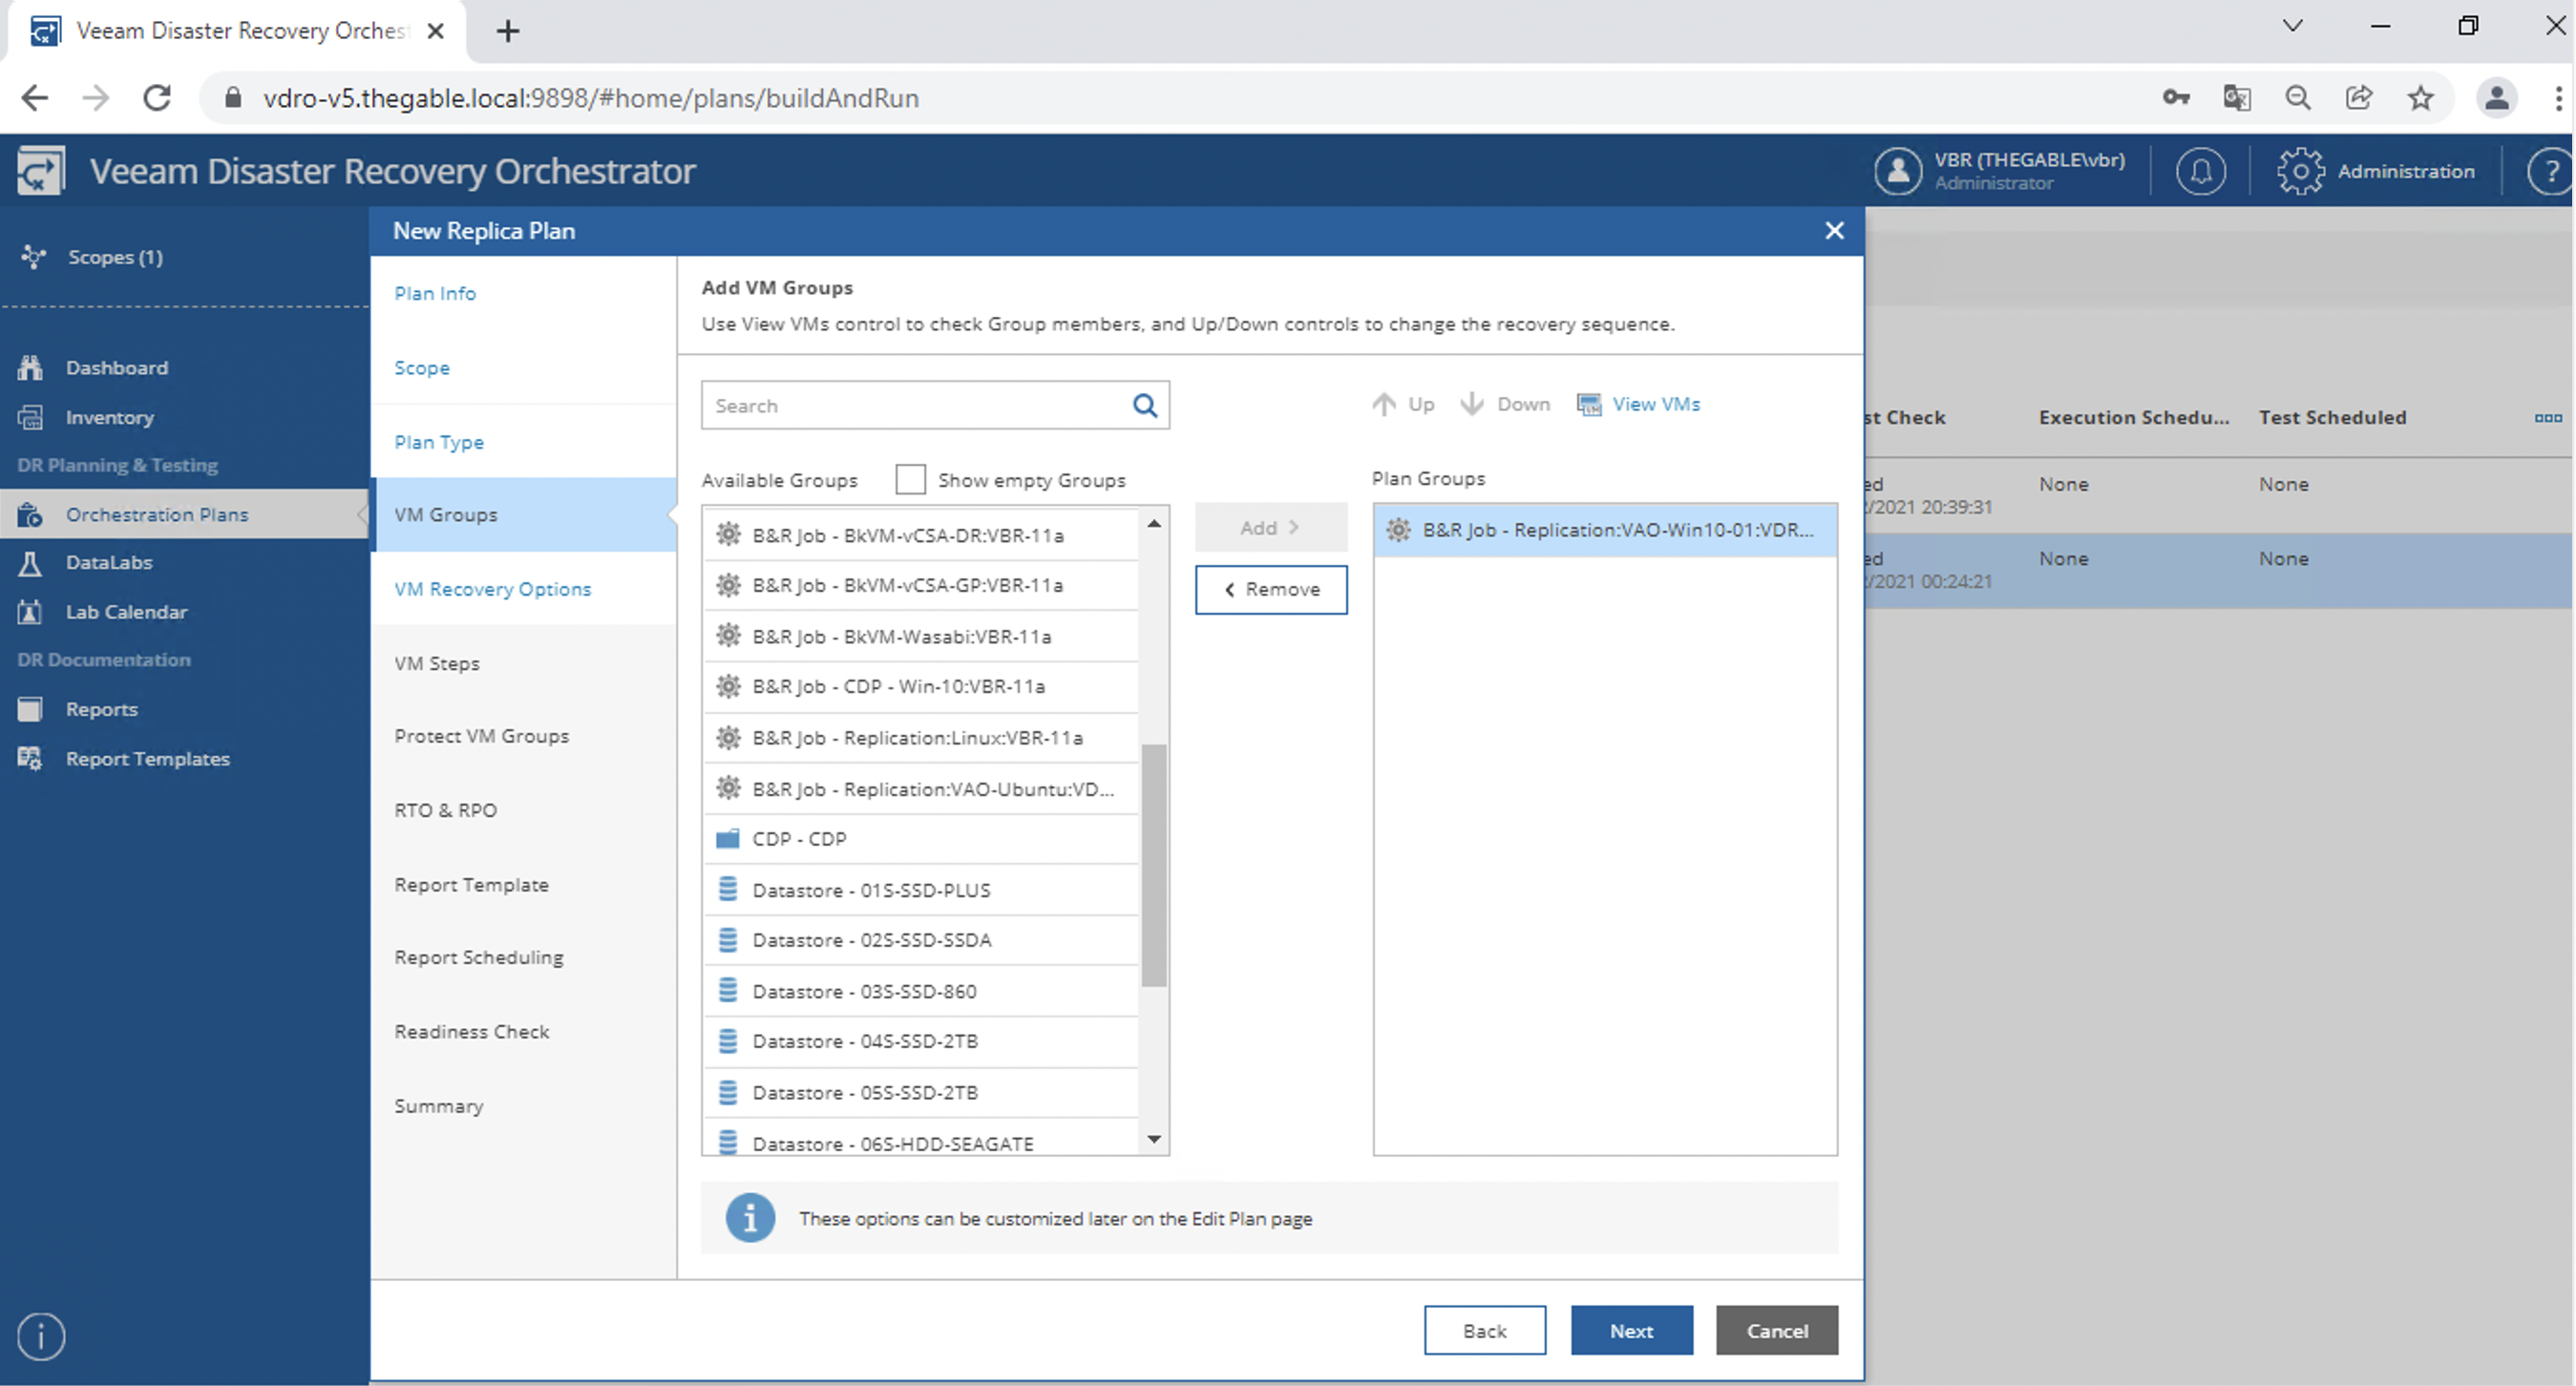 Immagine 10
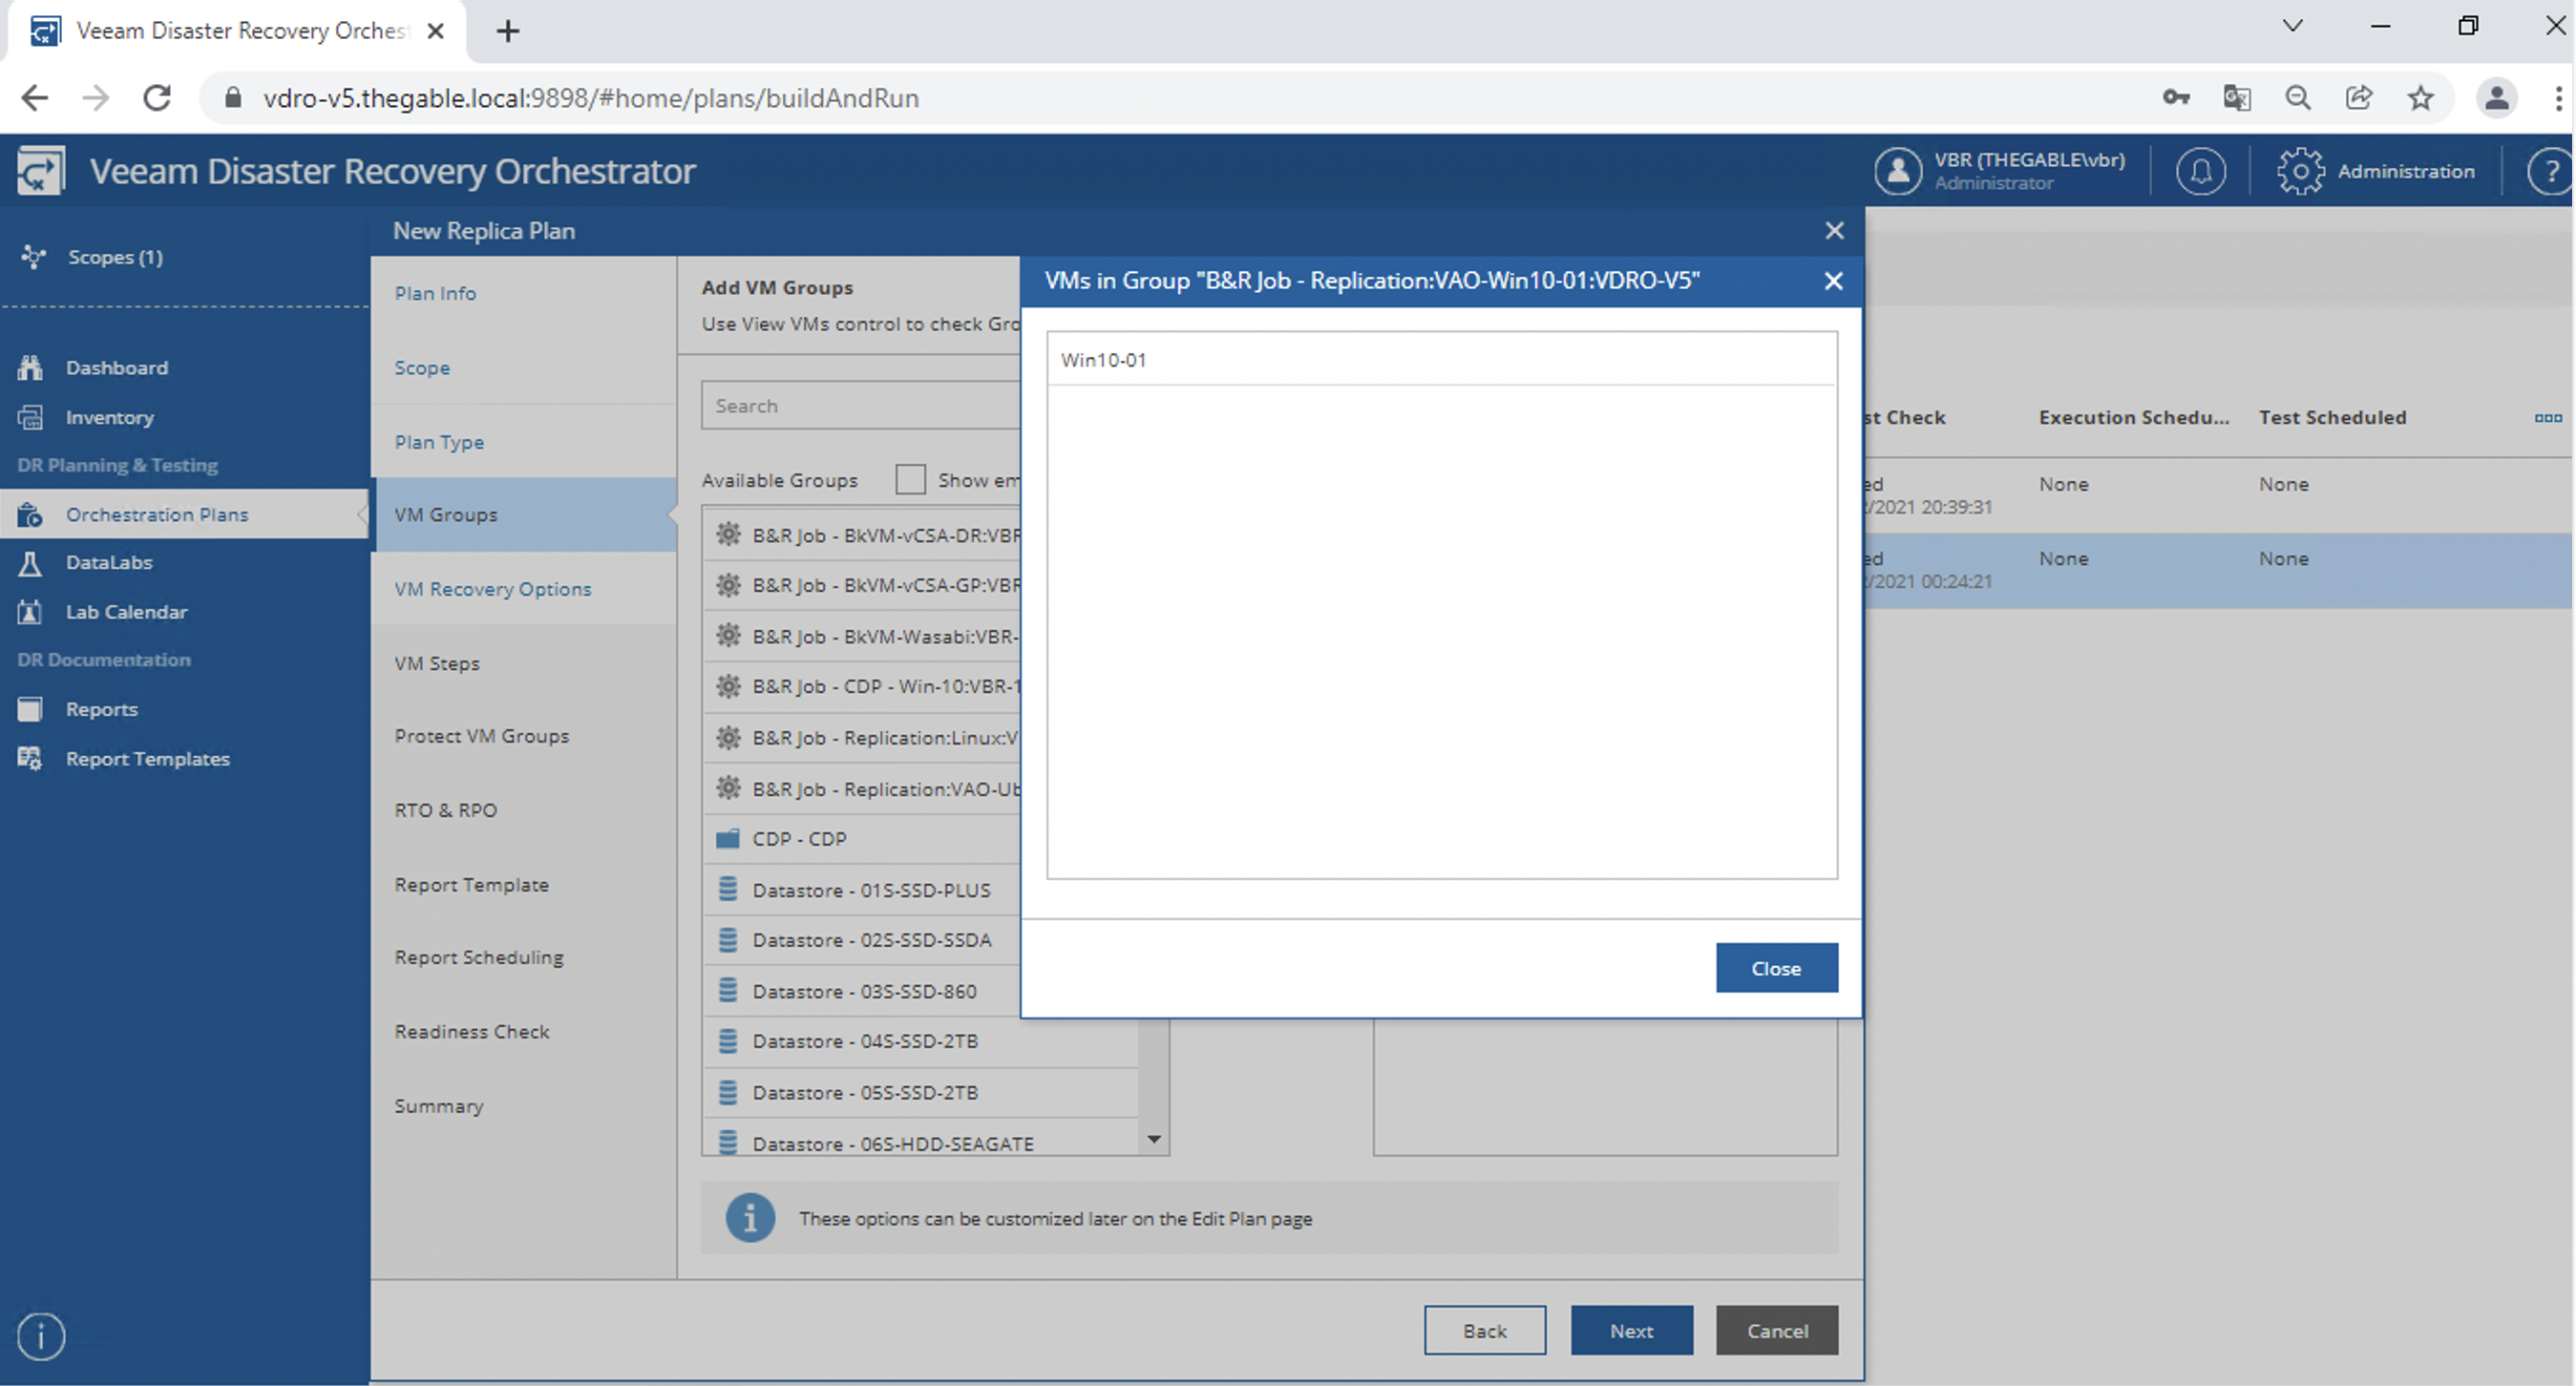 Immagine 11
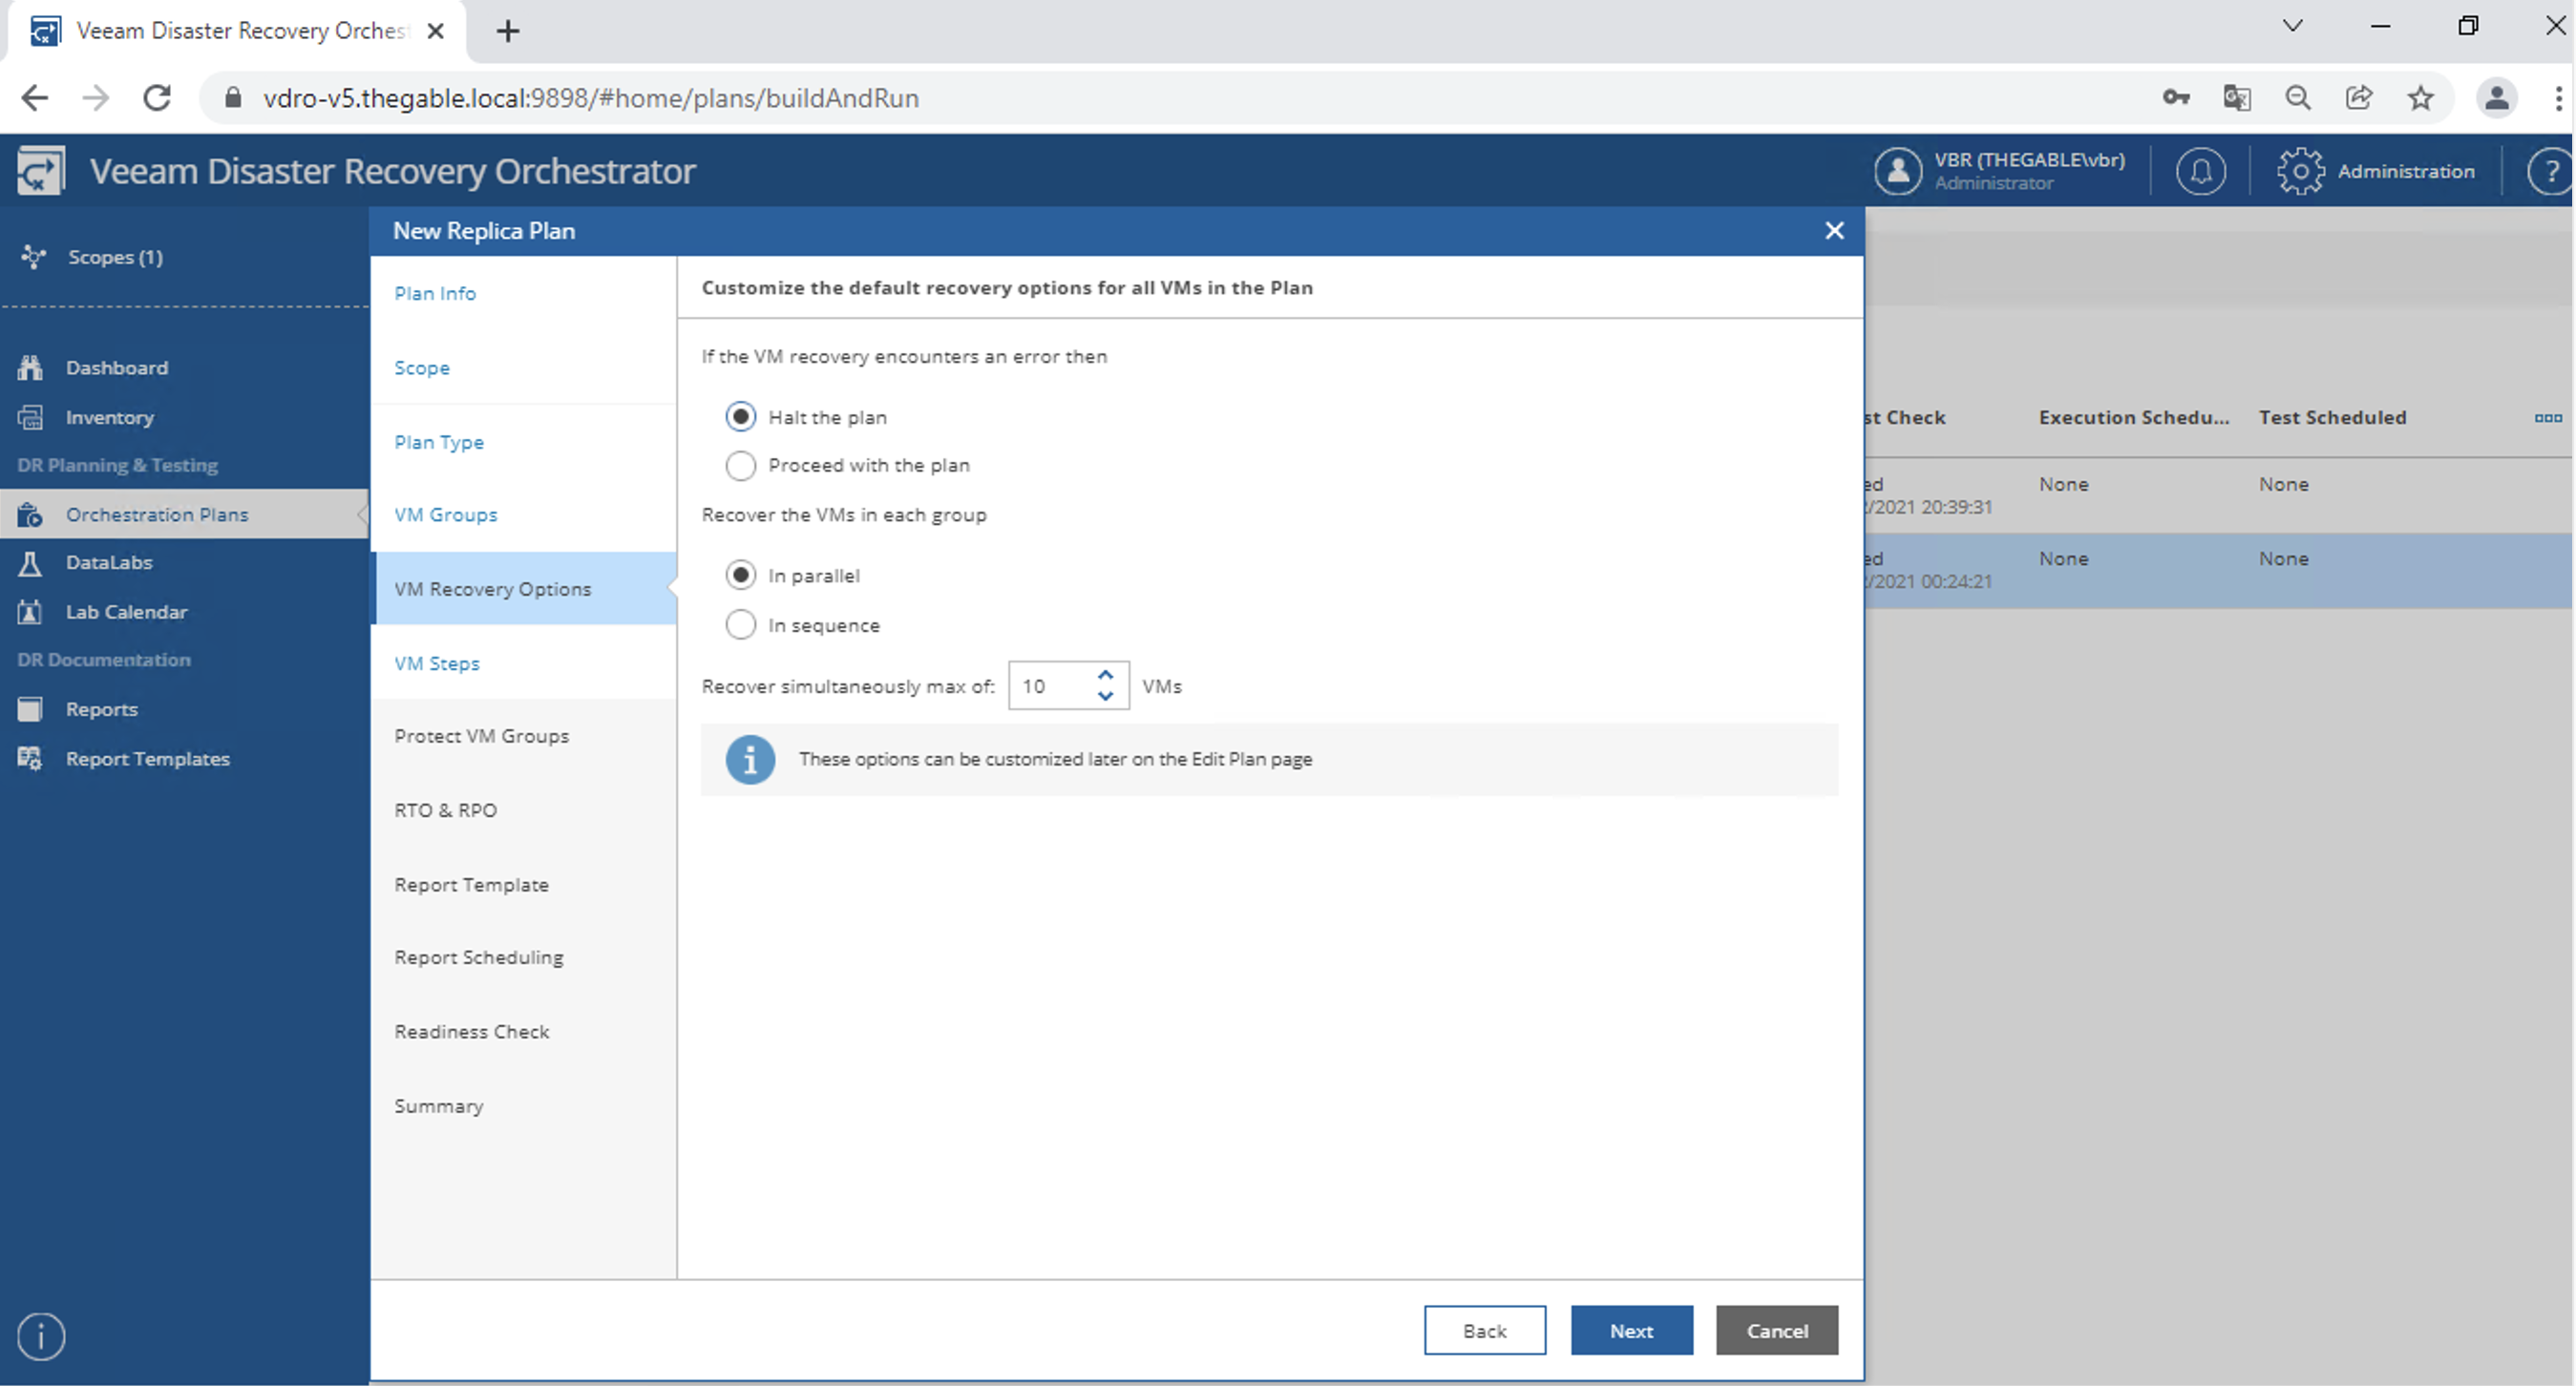 Immagine 12
 Immagine 13
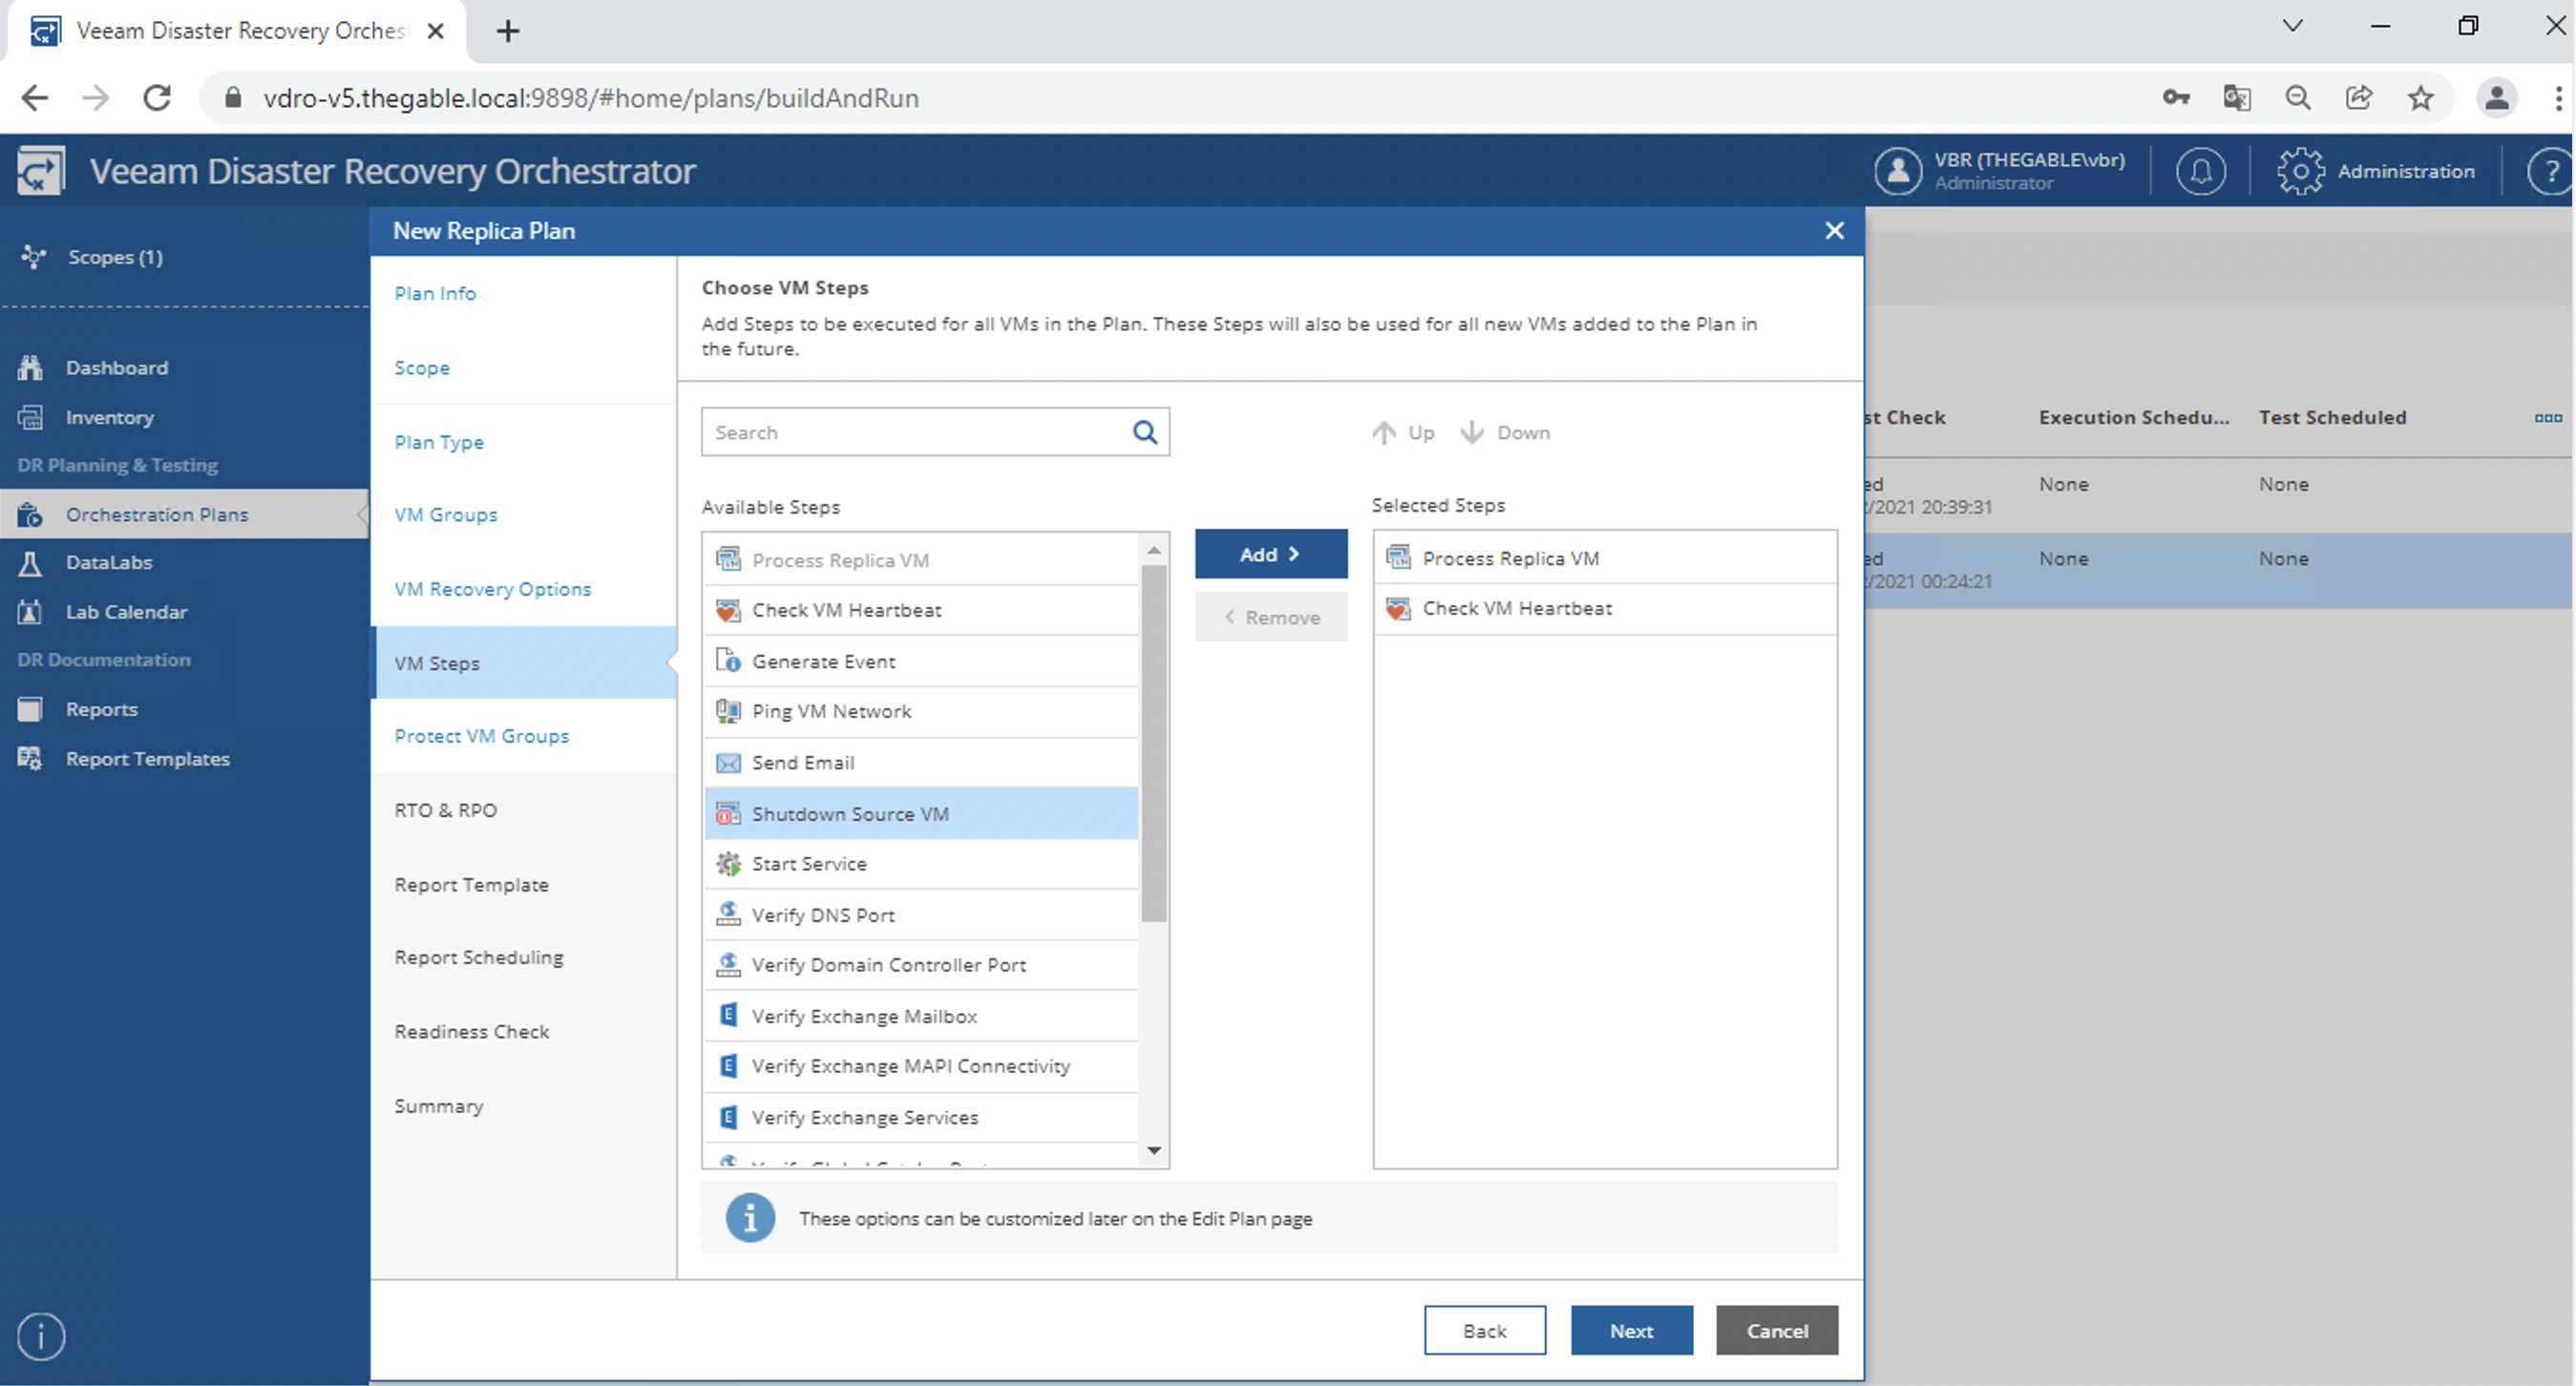 Immagine 14
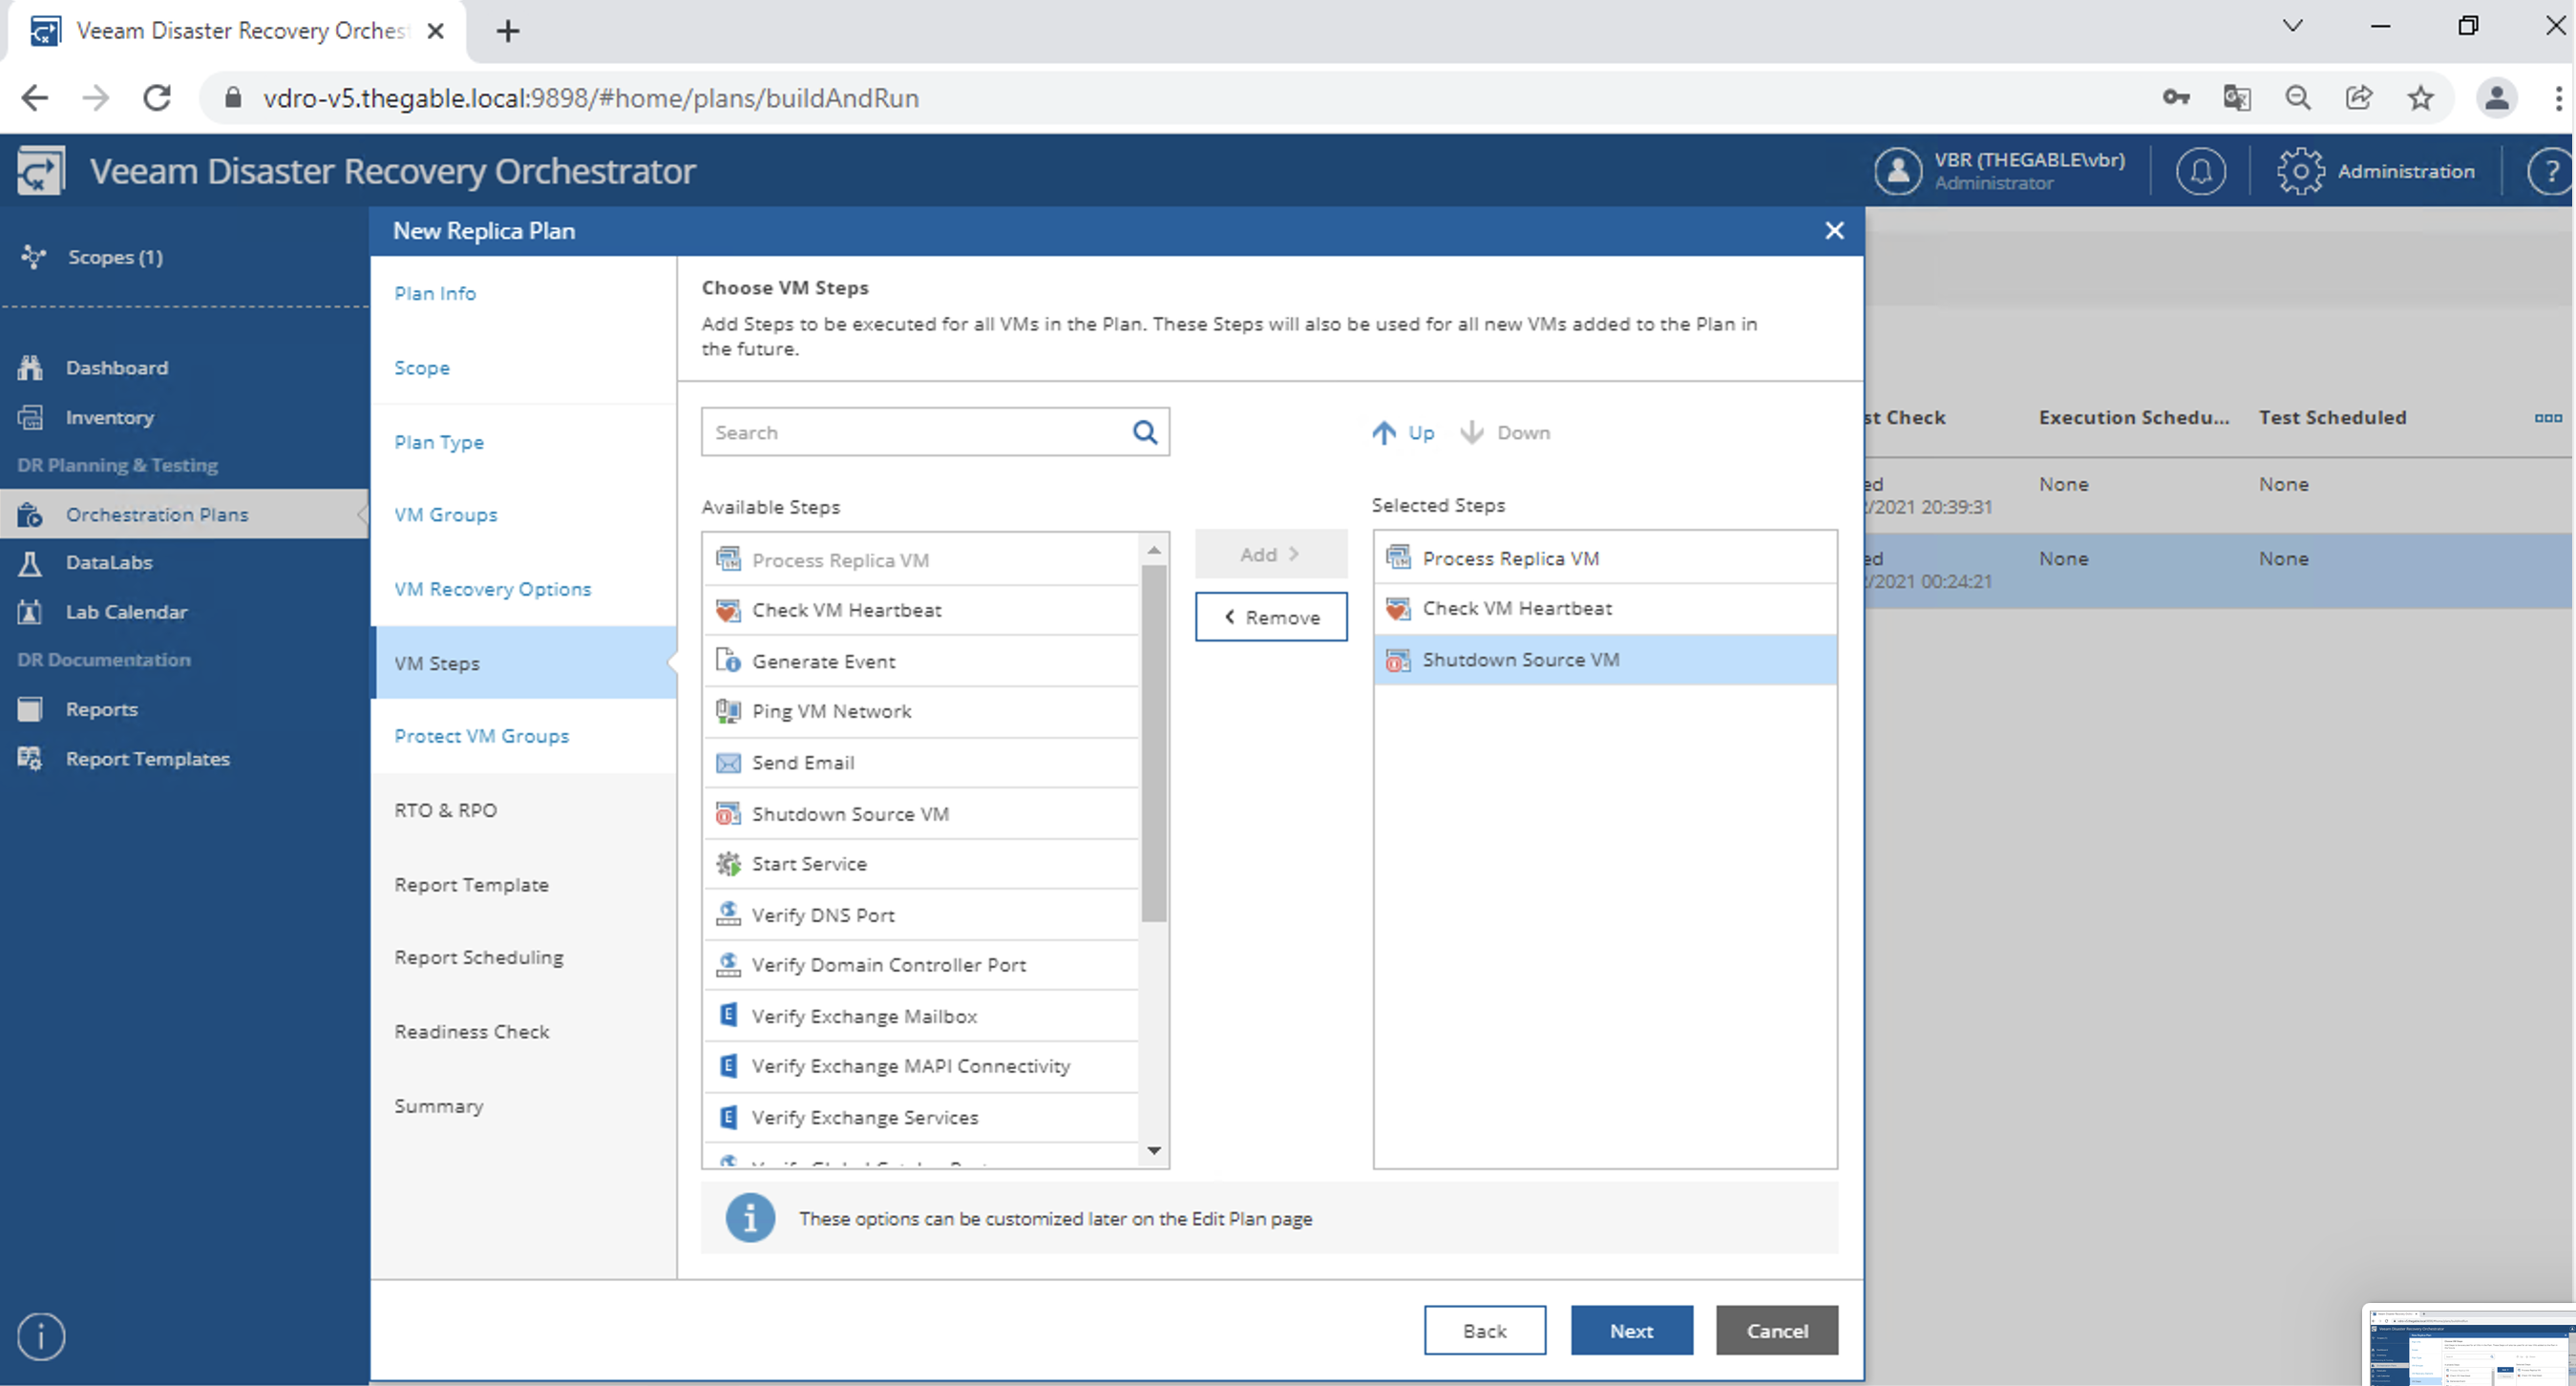 Immagine 15
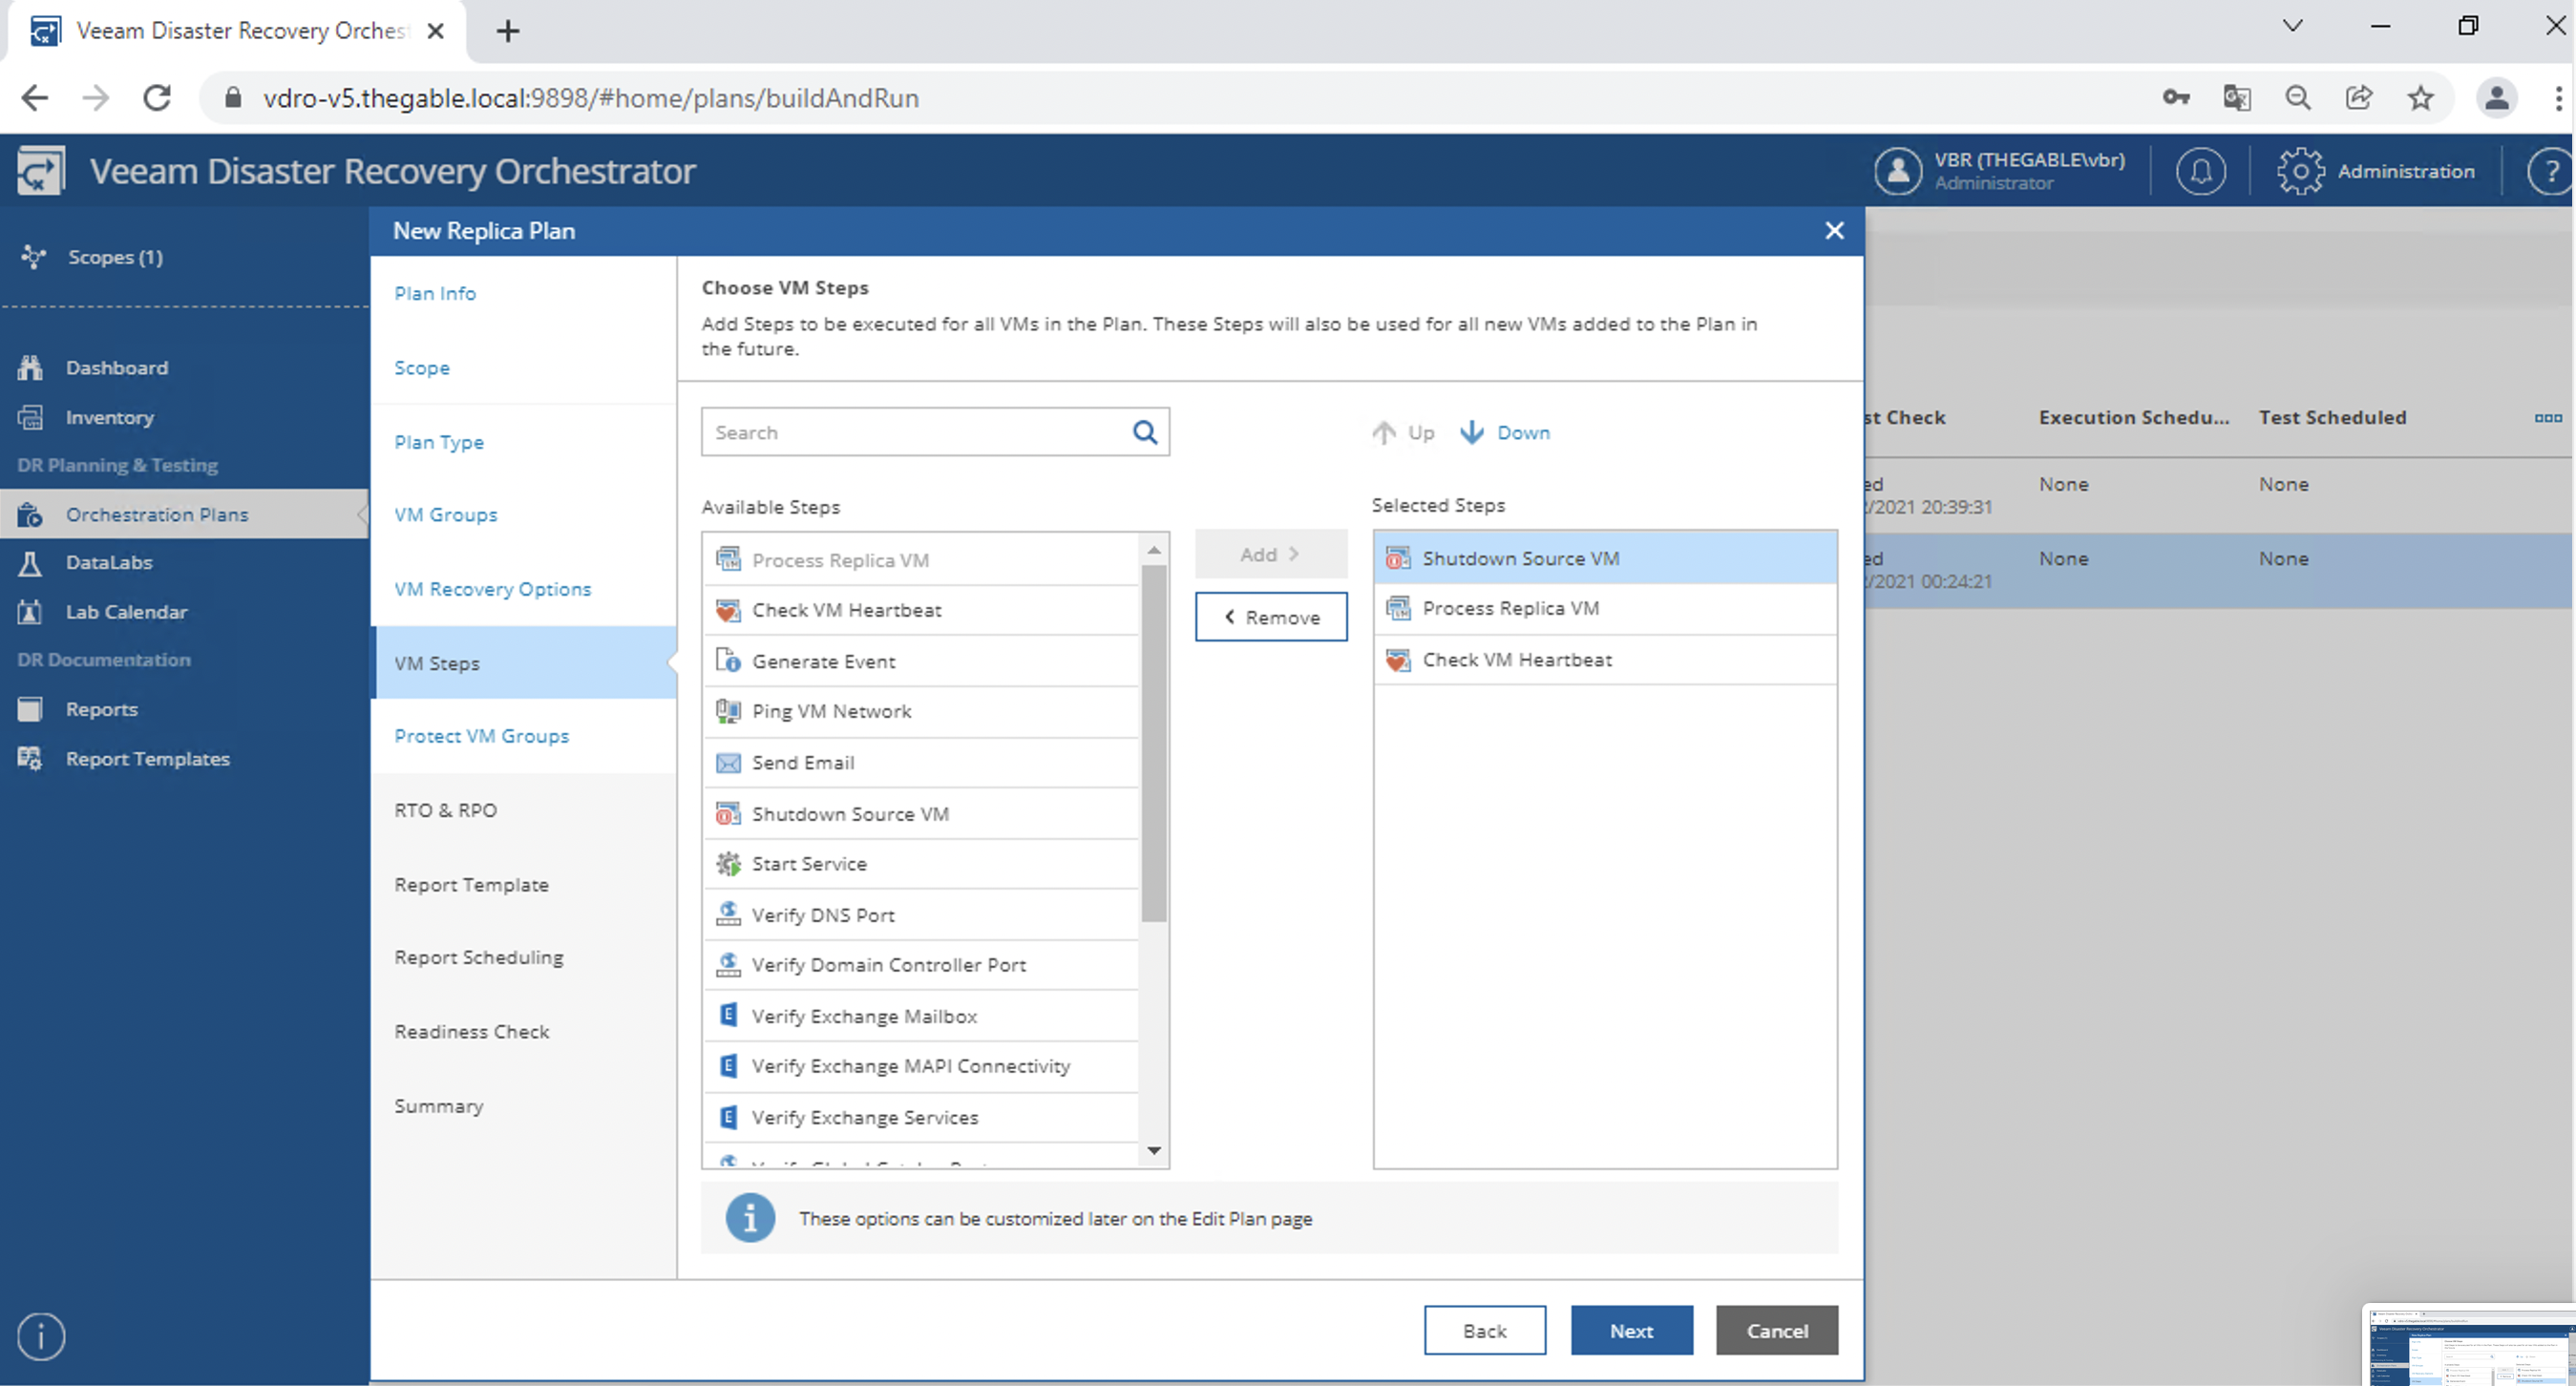 Immagine 16
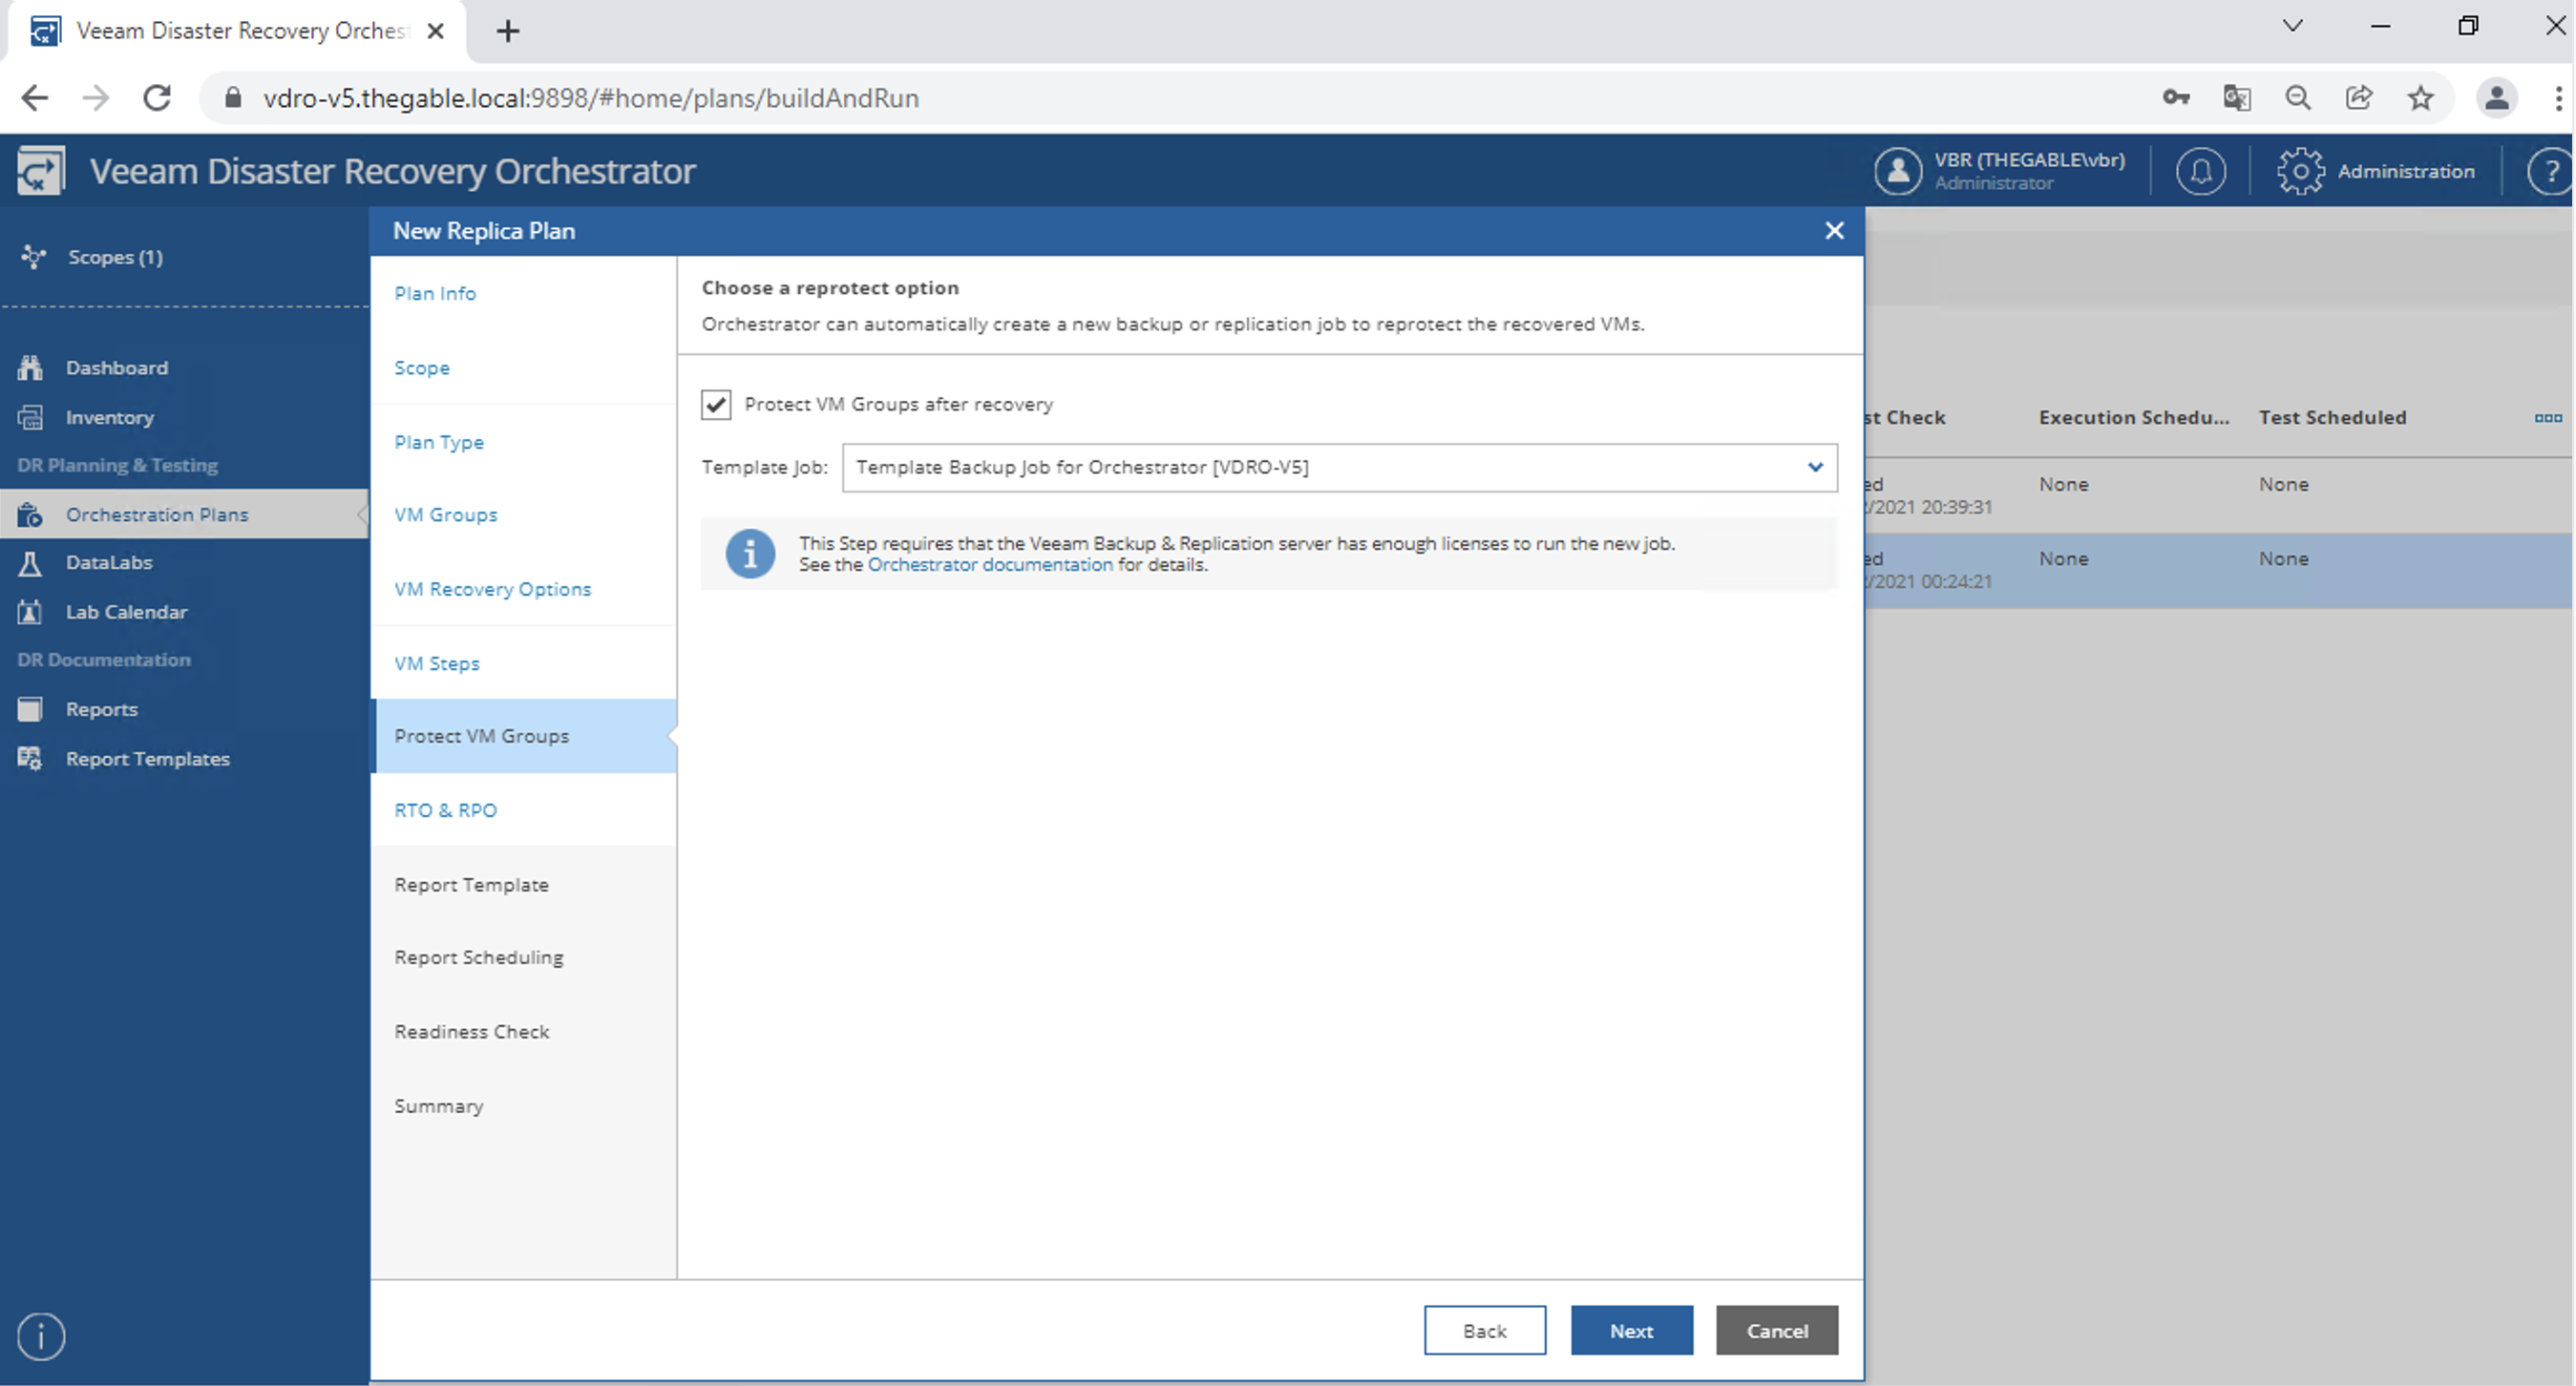 immagine 17
 immagine 18
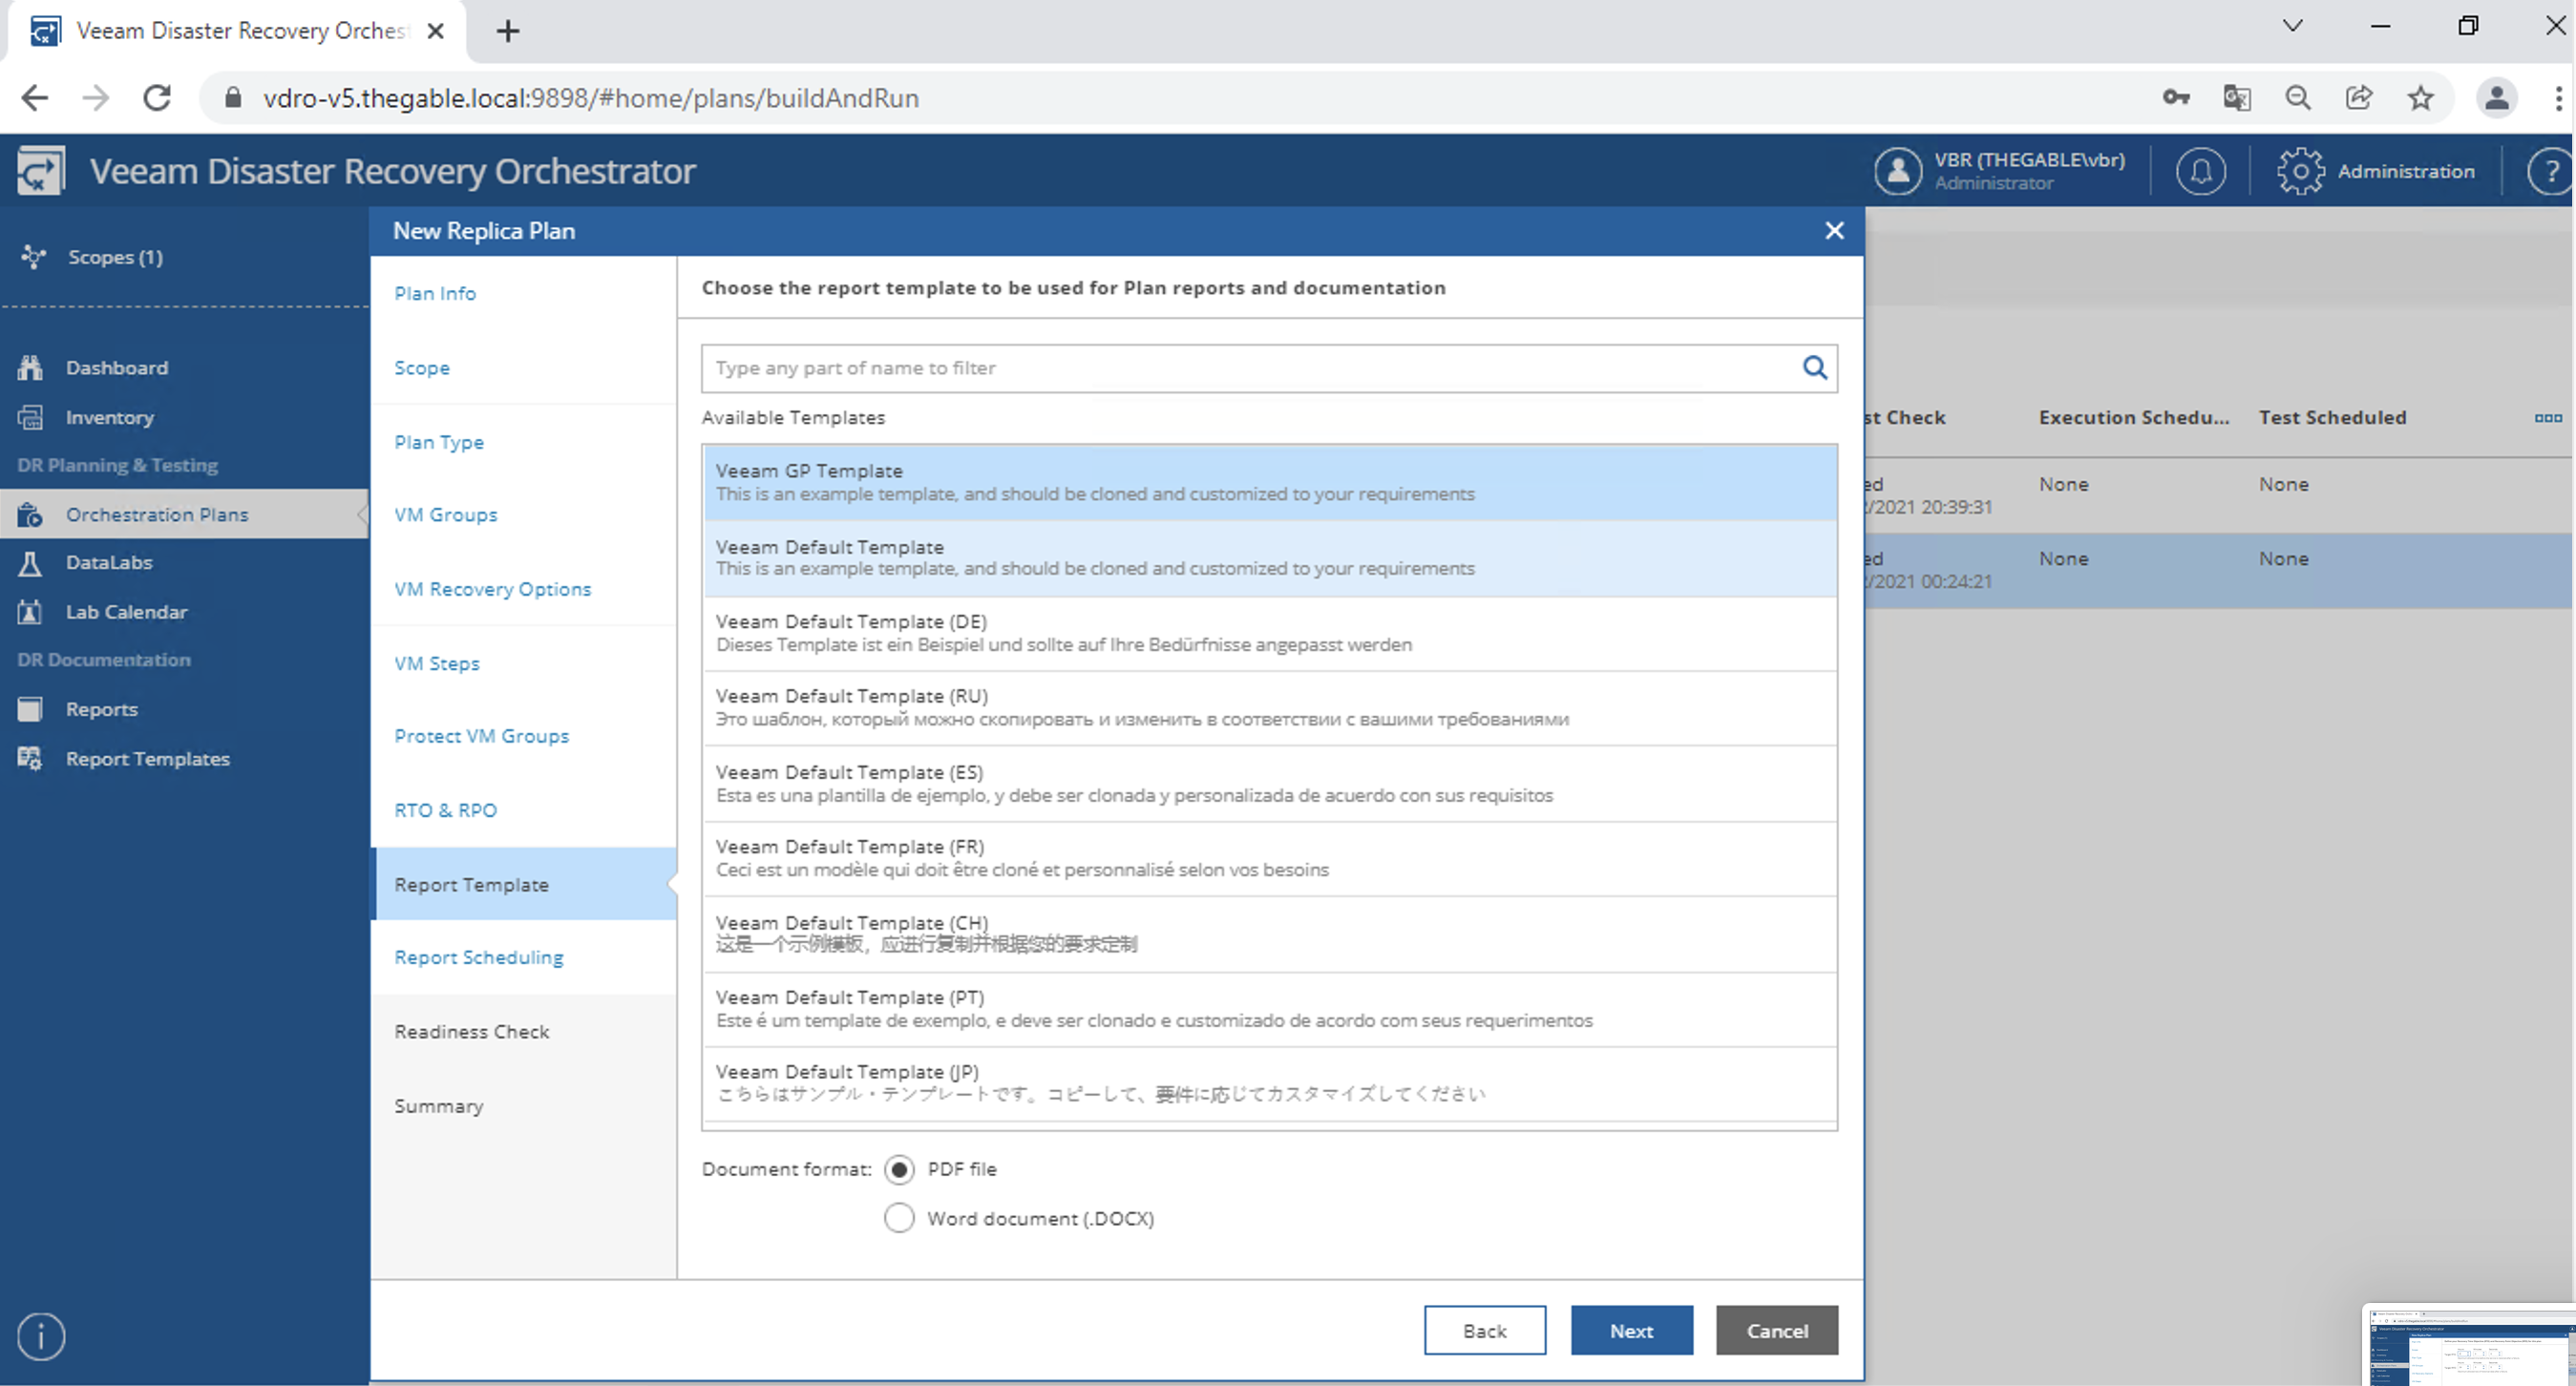 immagine 19
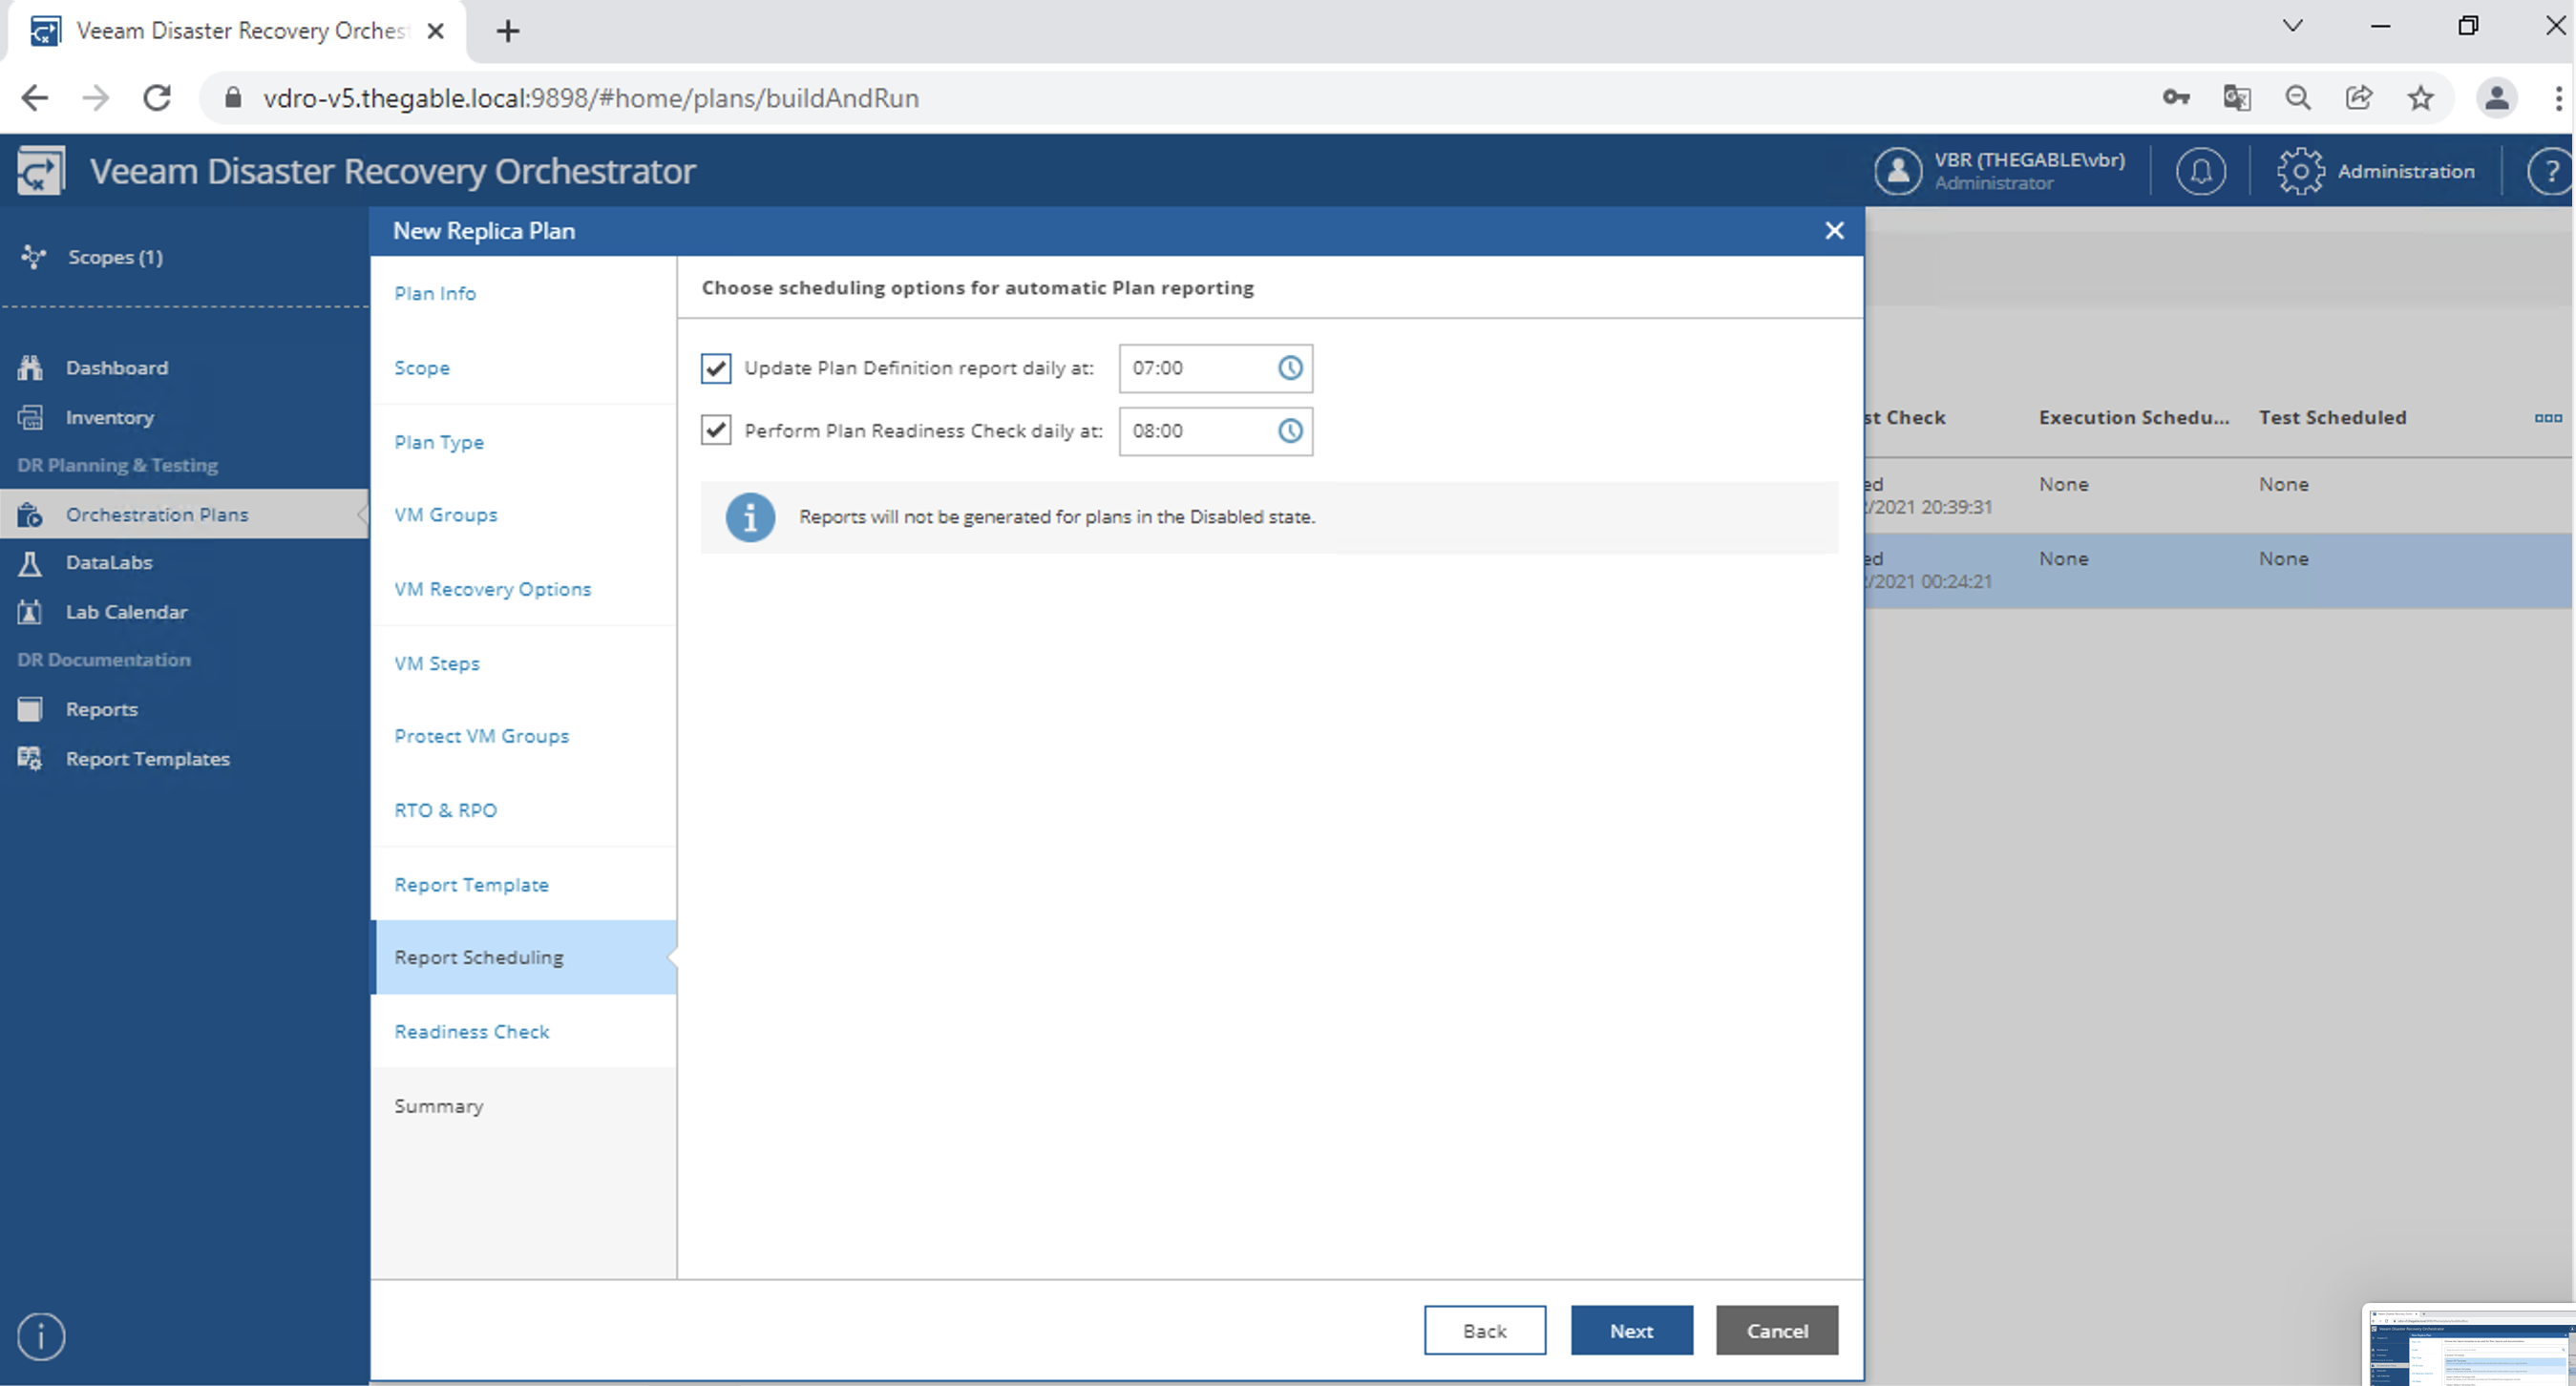 immagine 20
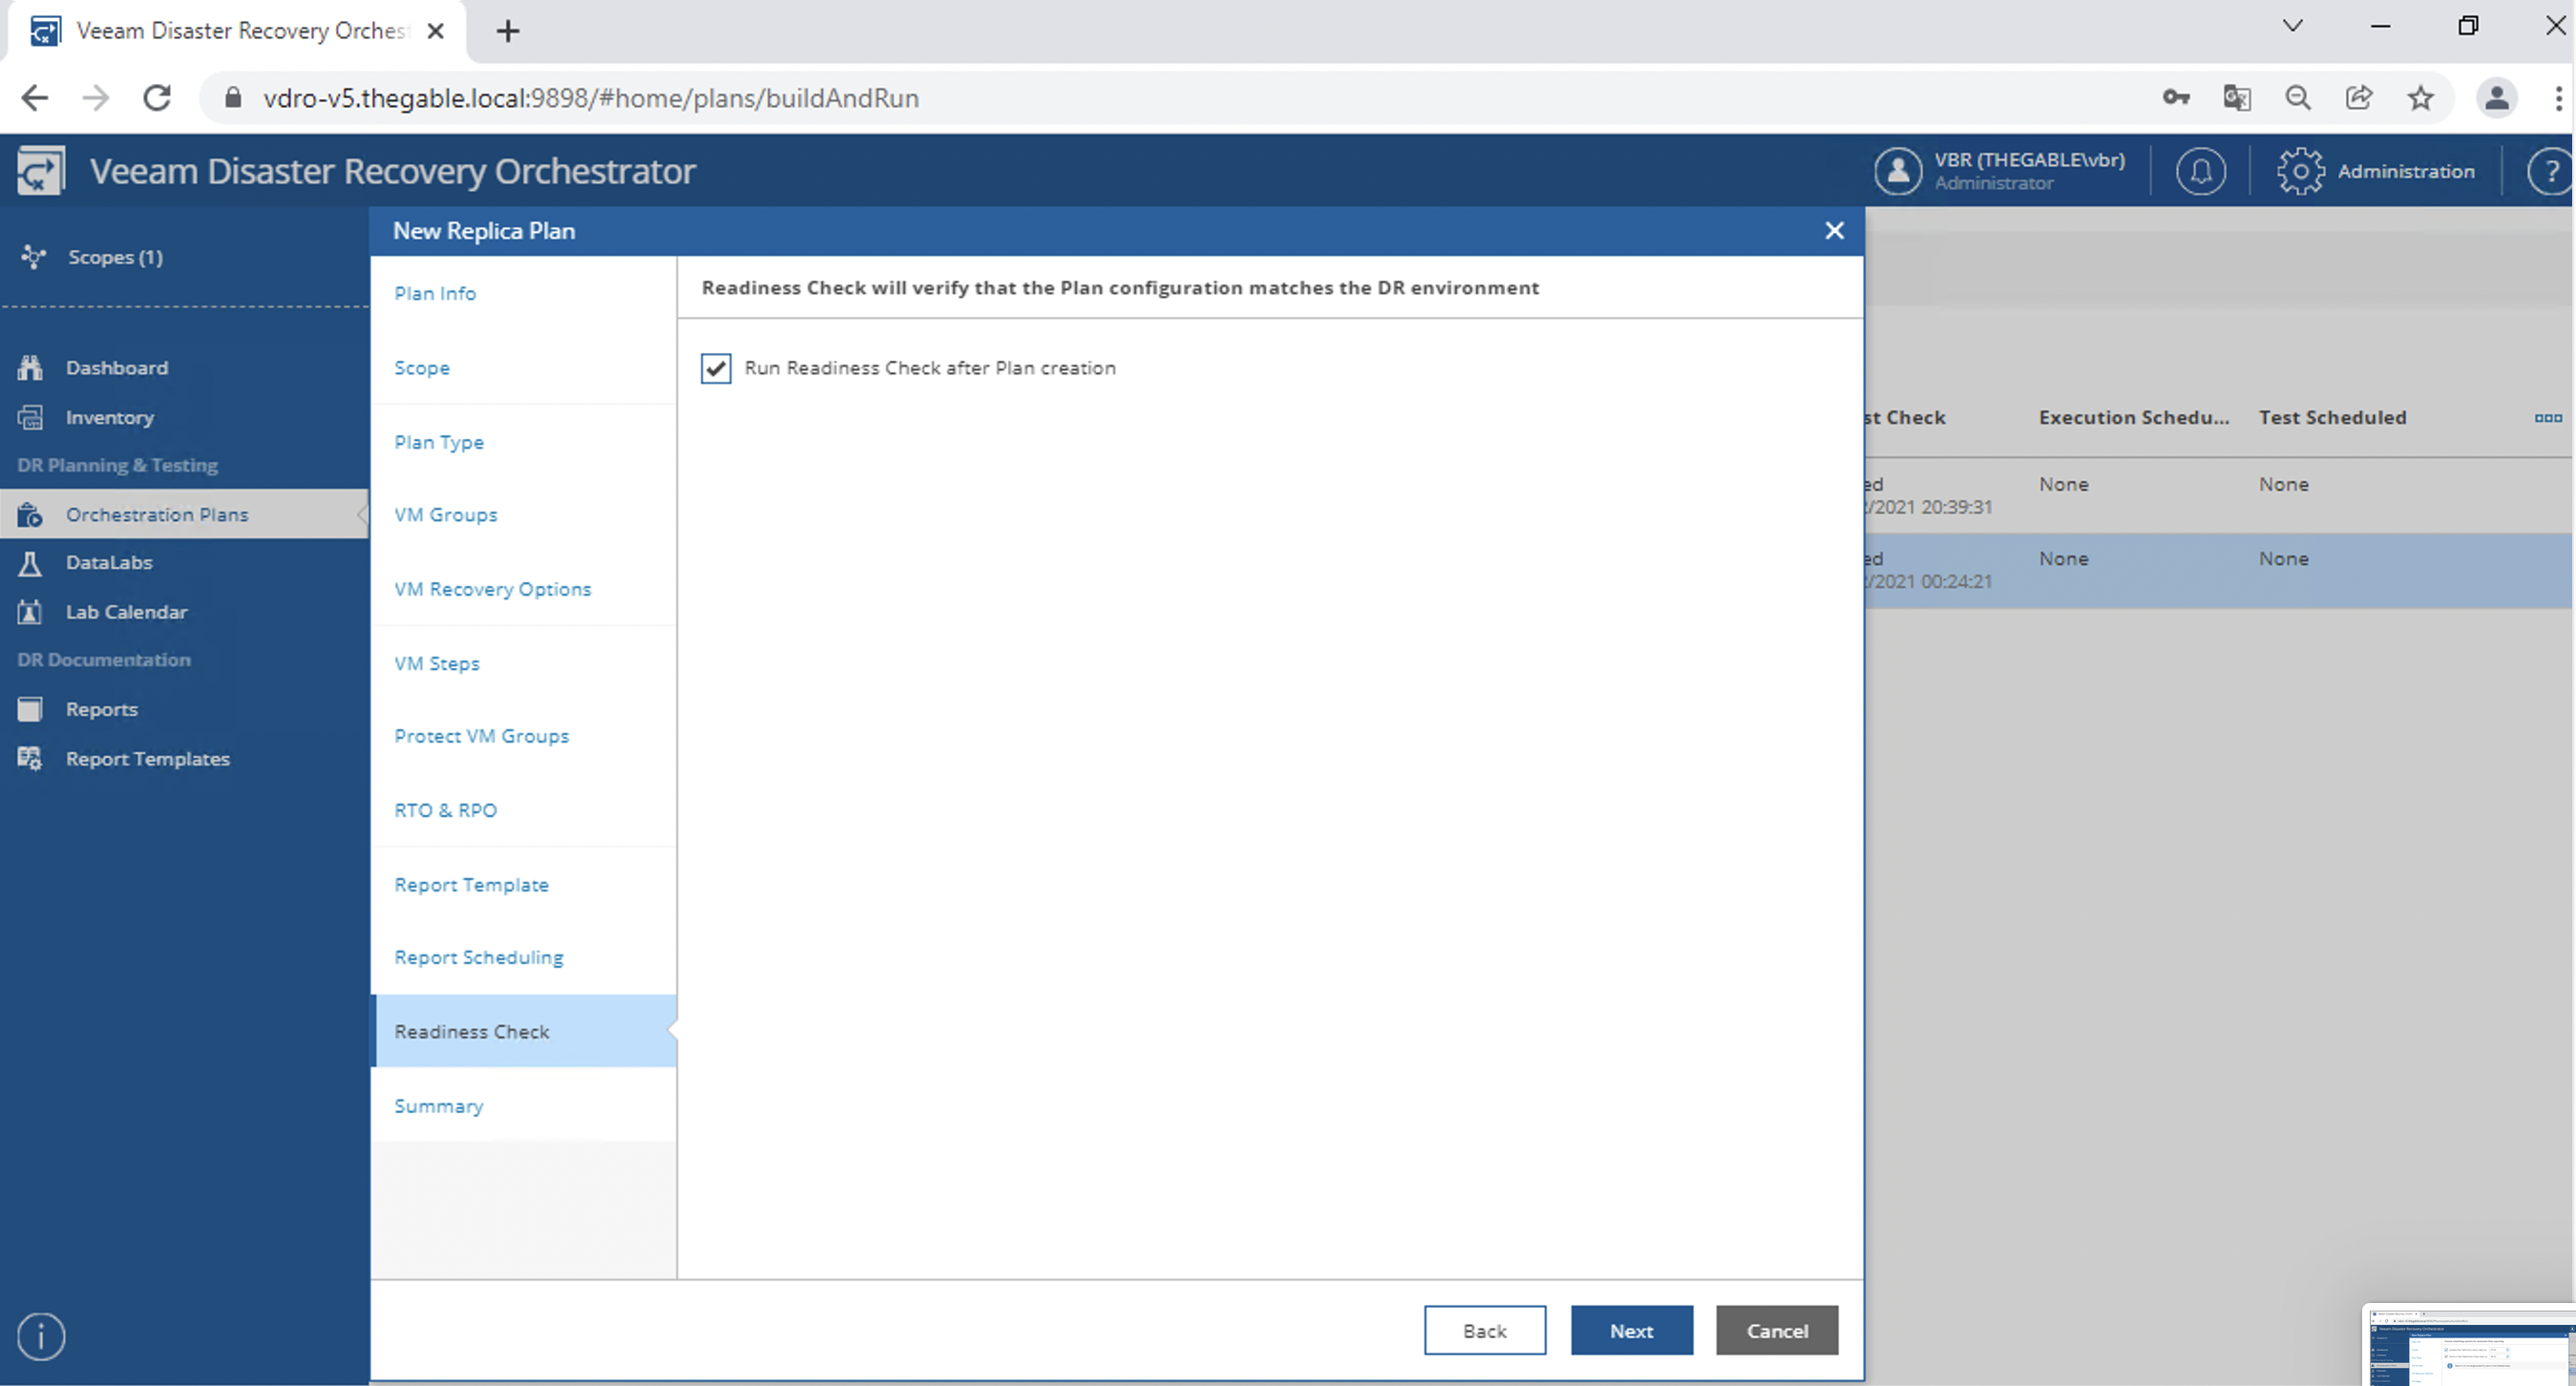 immagine 21
 Immagine 1
 Immagine 2
 Immagine 3
 Immagine 4
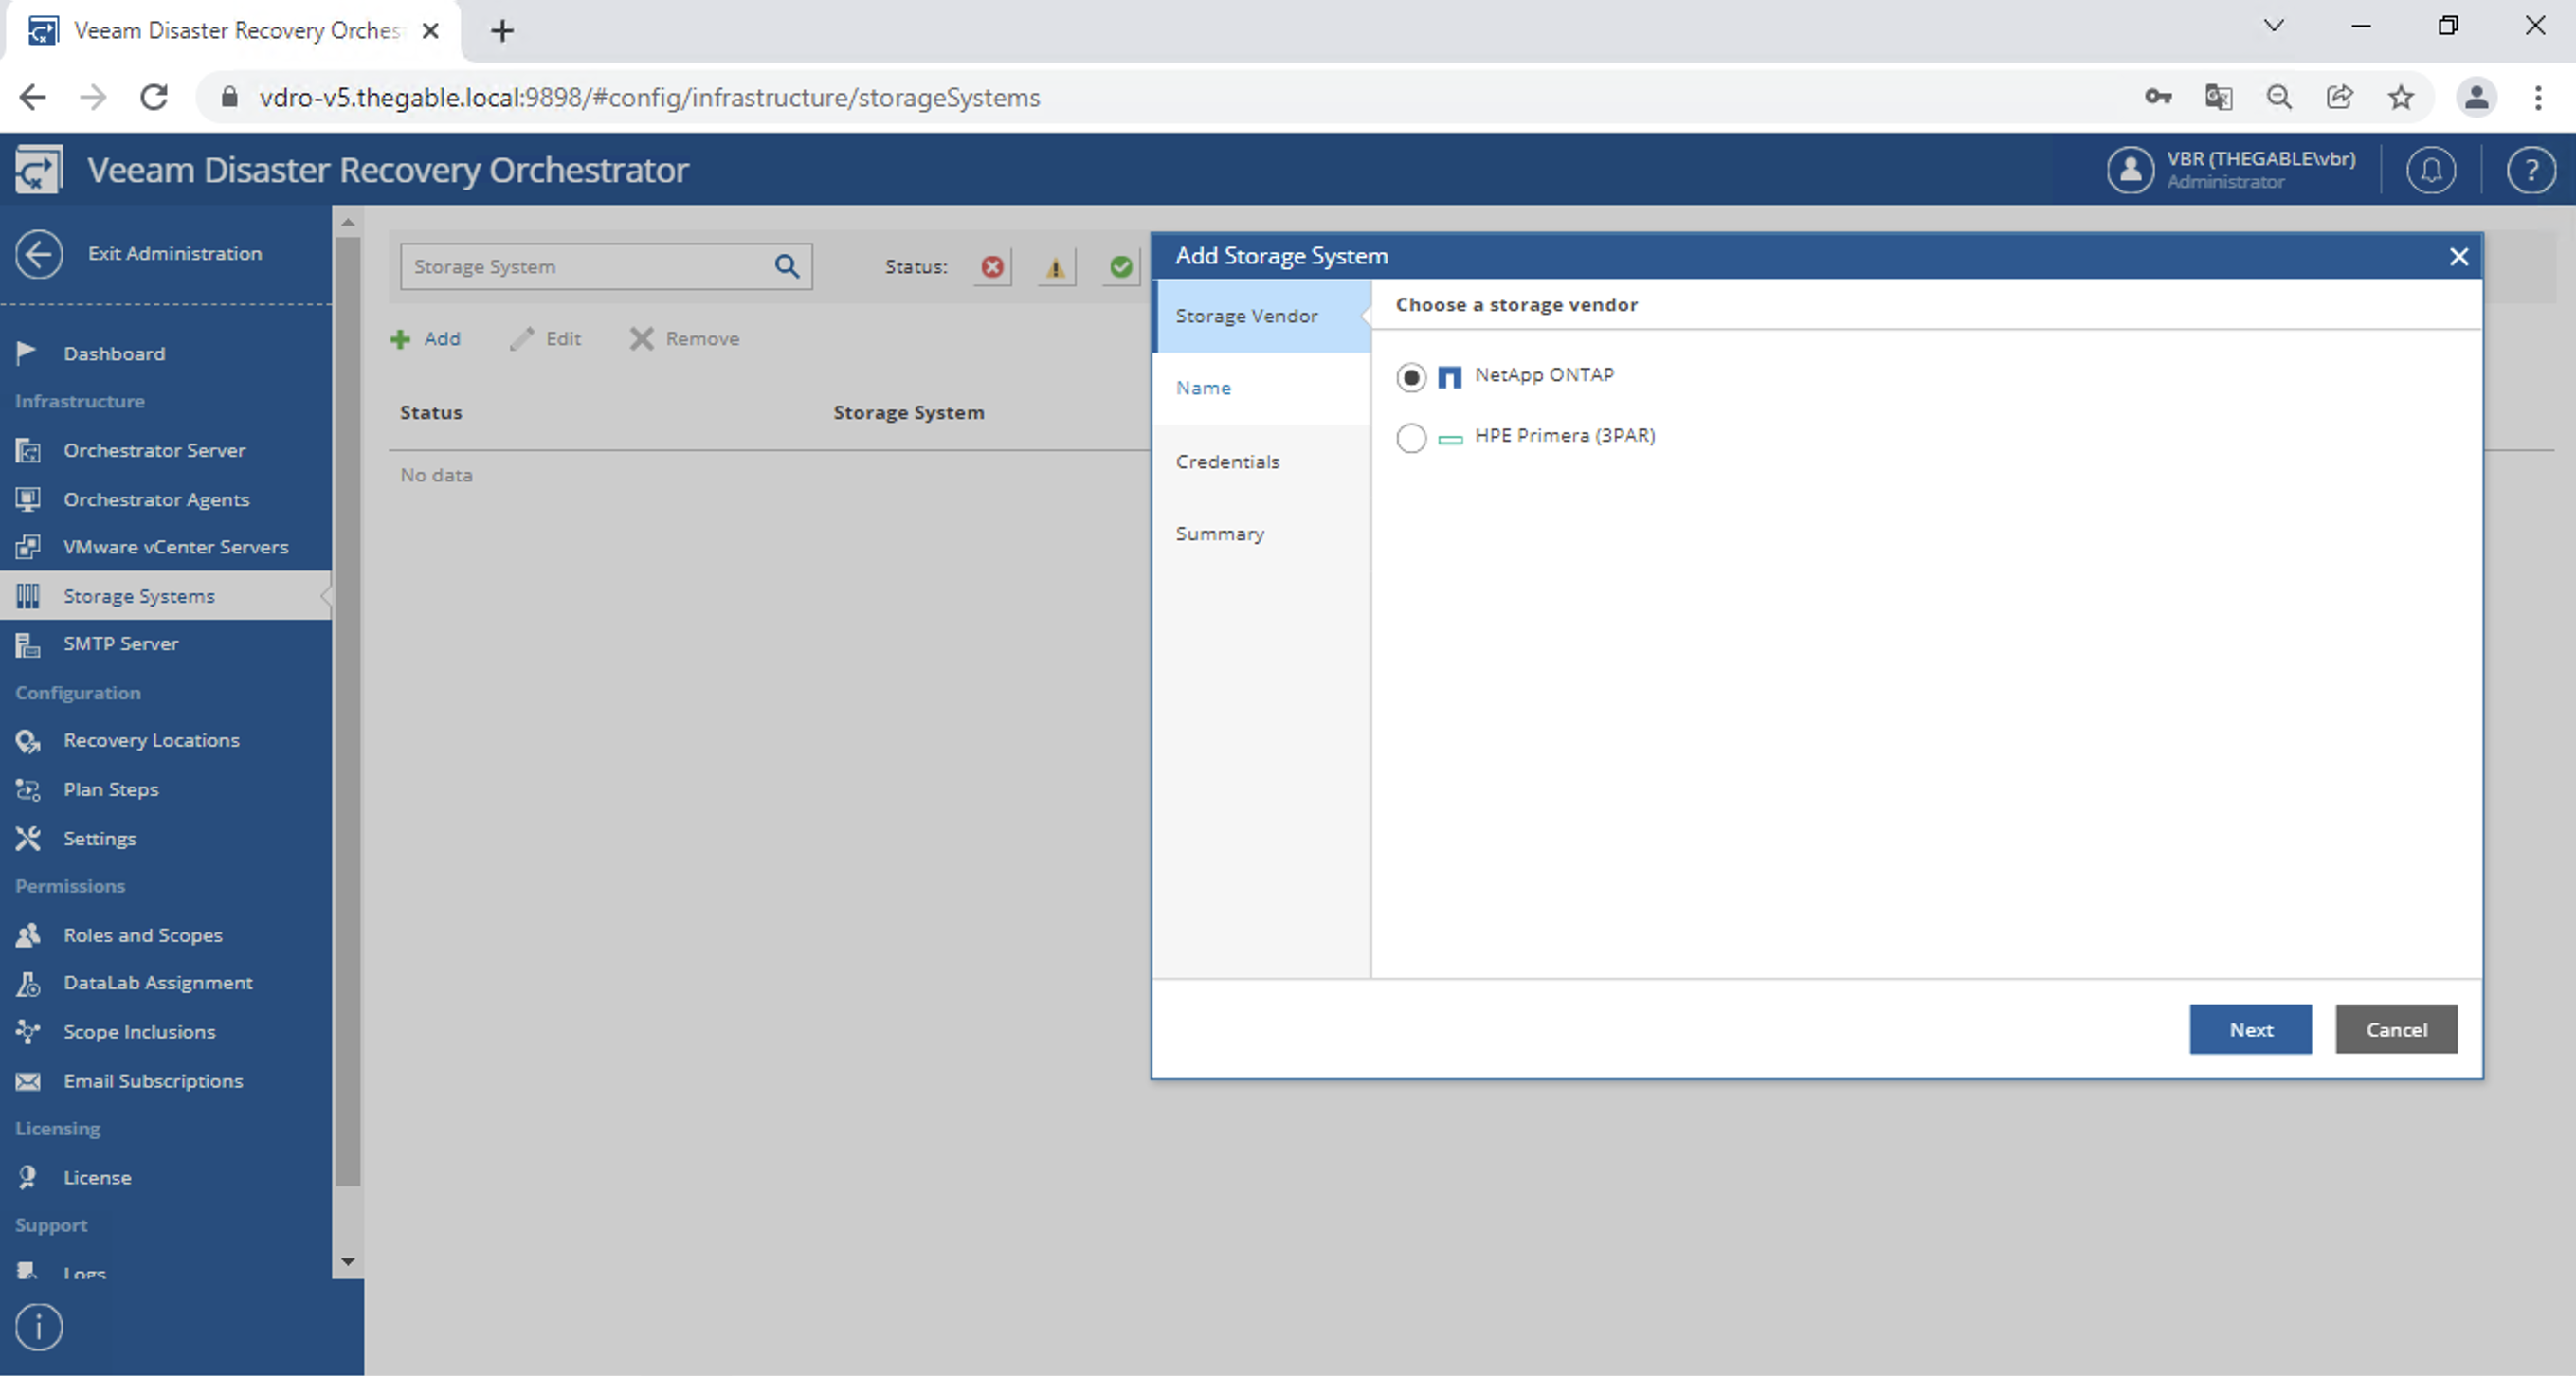 Immagine 5
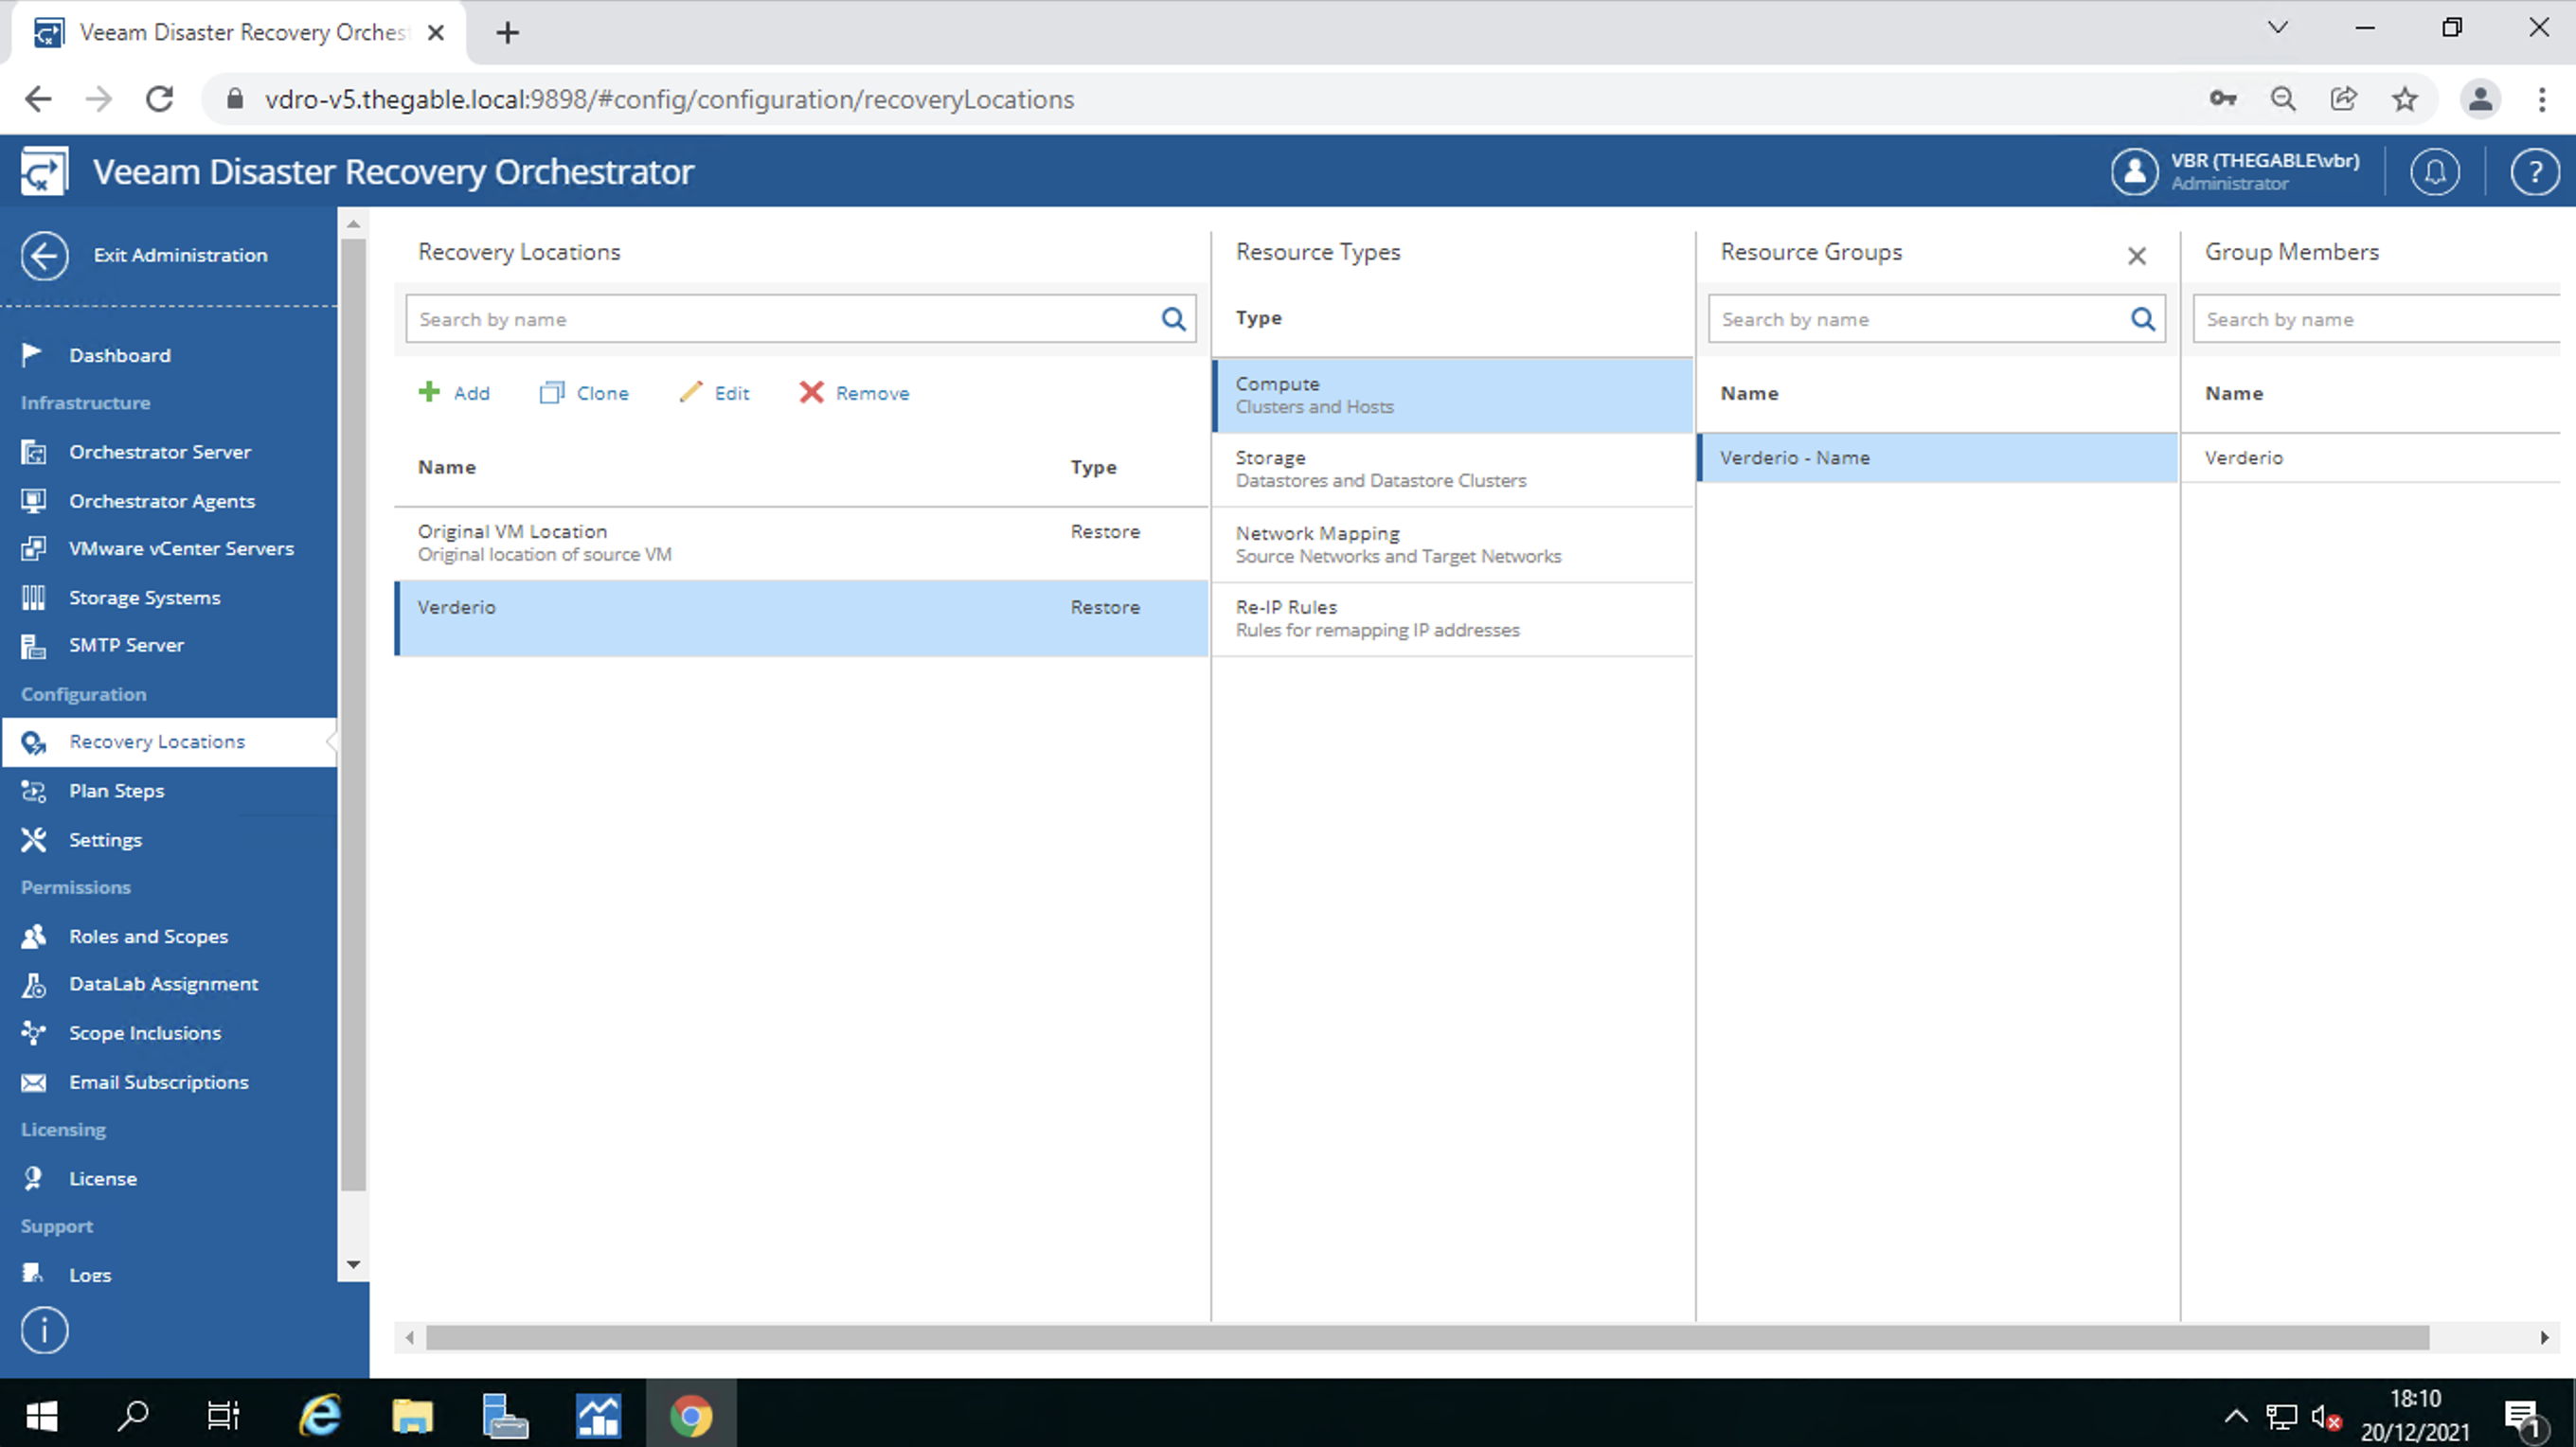 Immagine 6
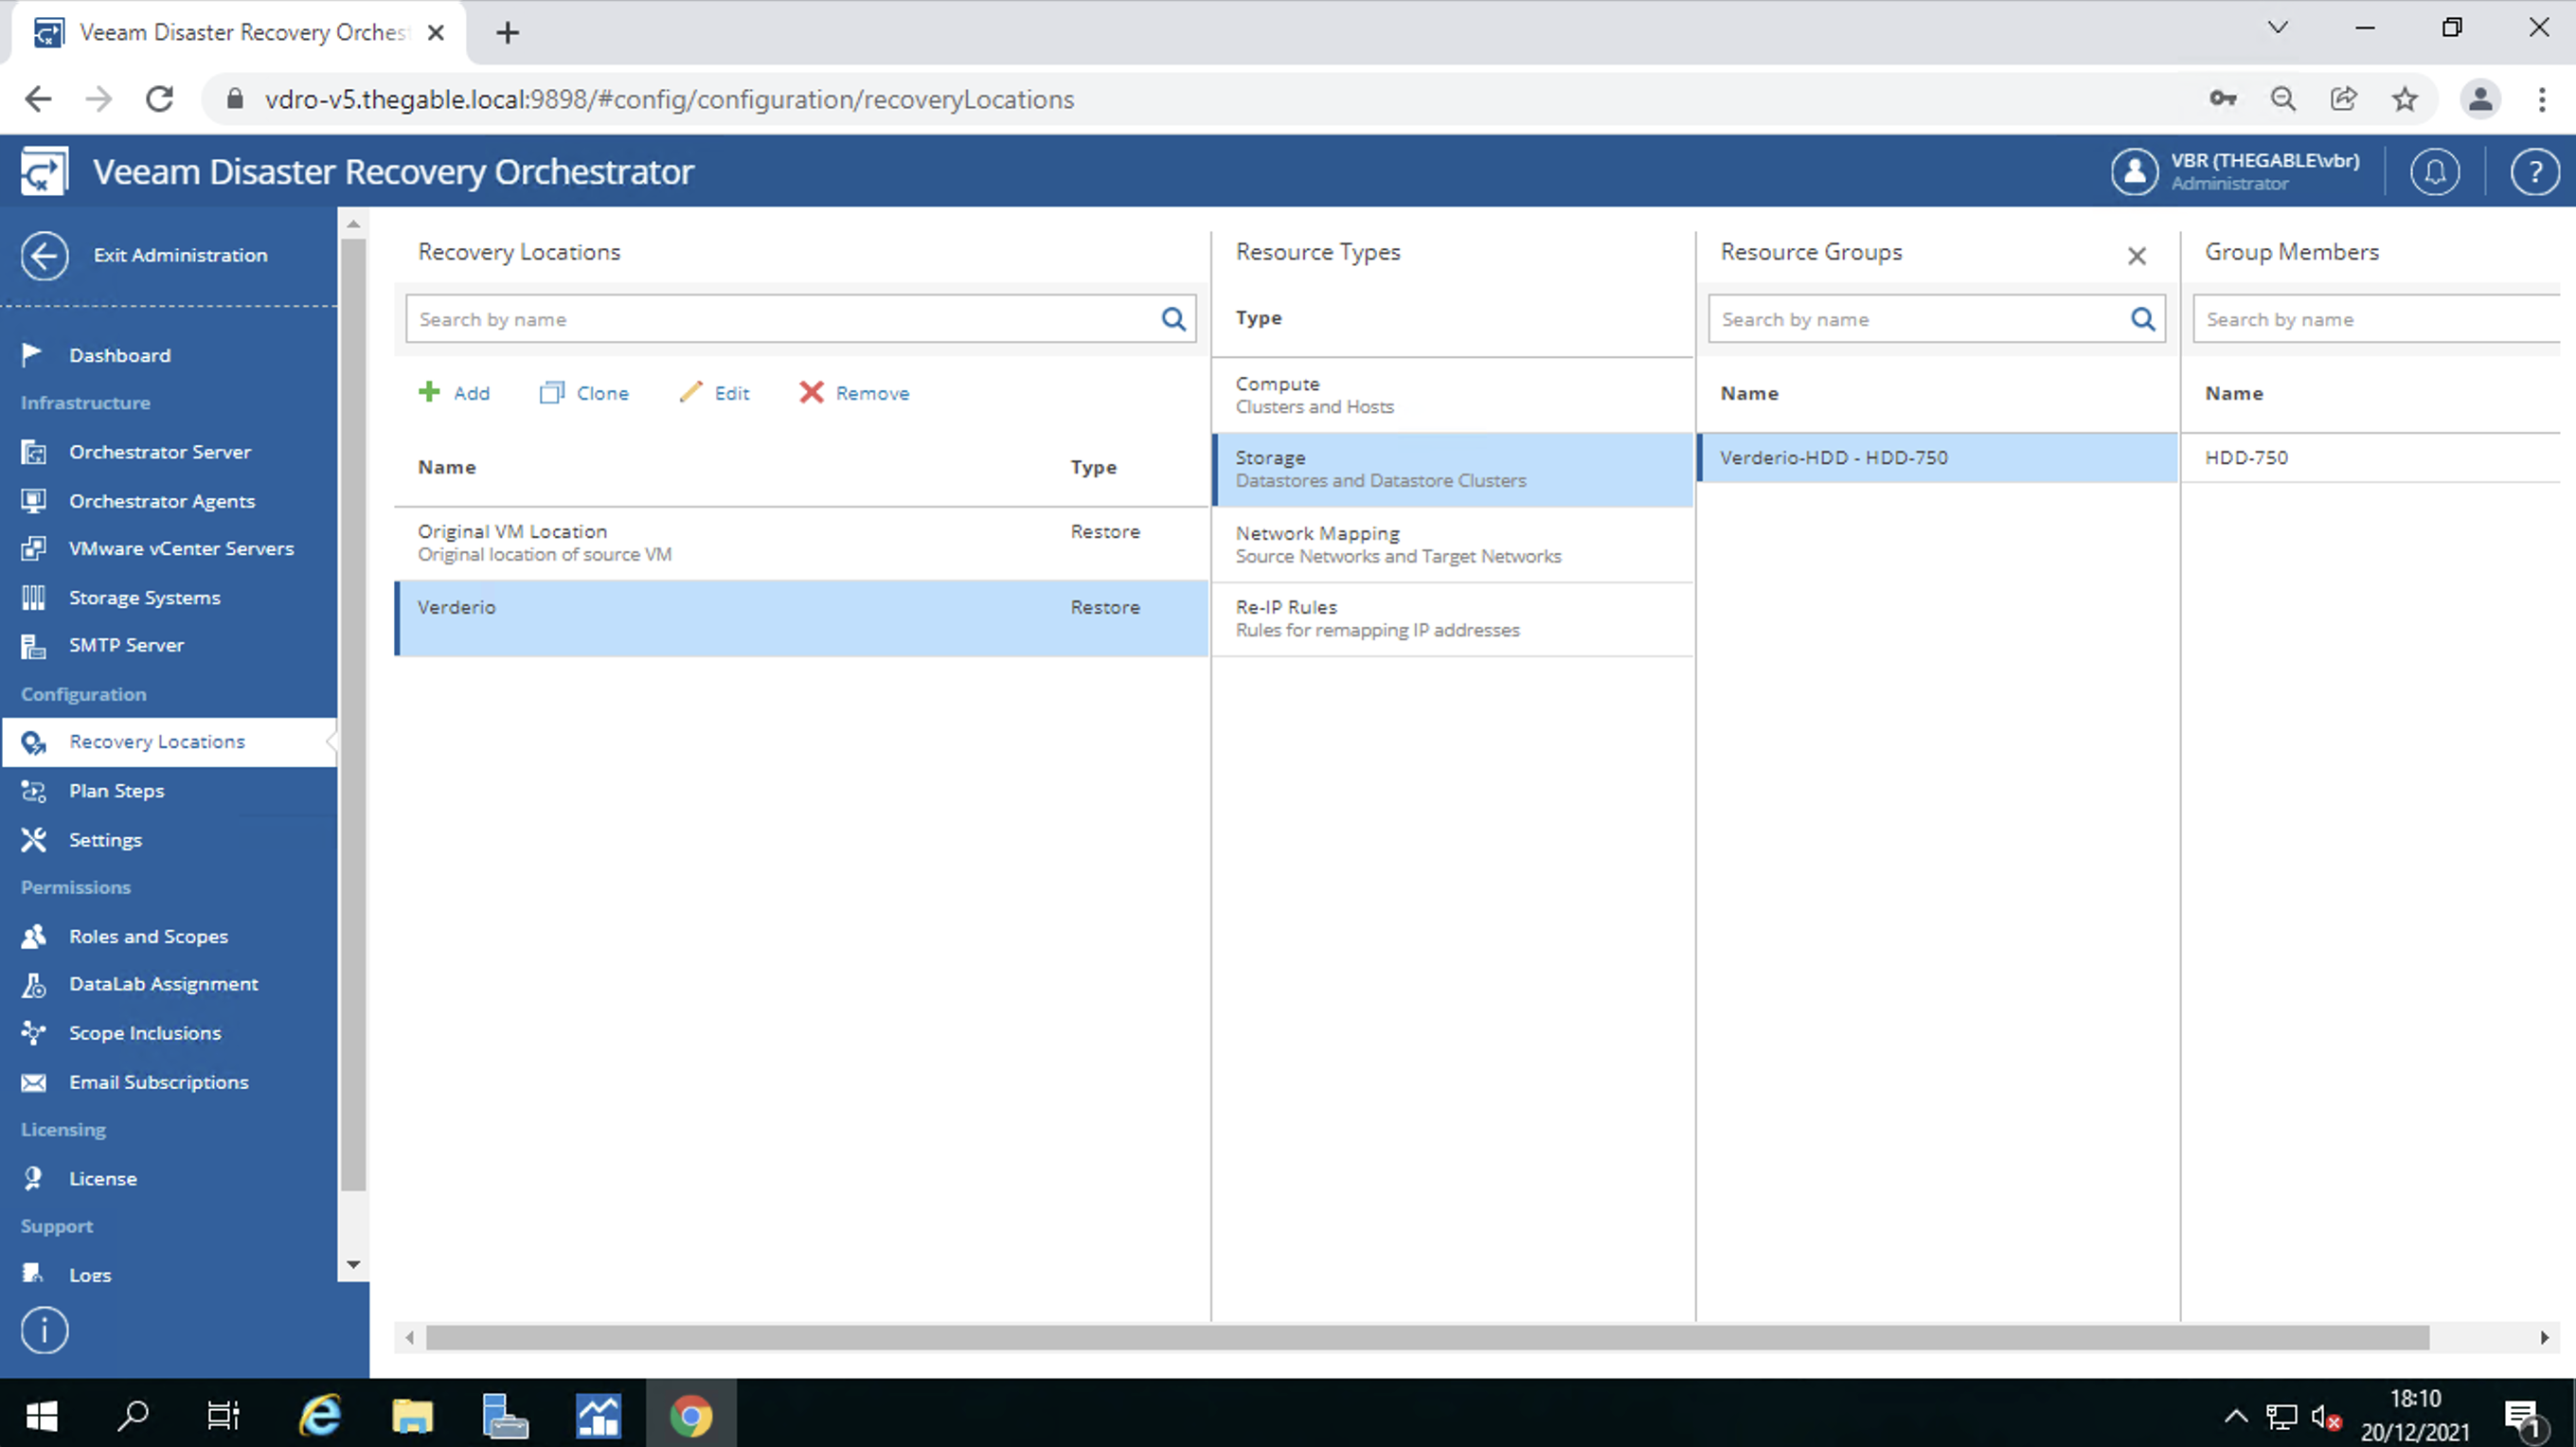 Immagine 7
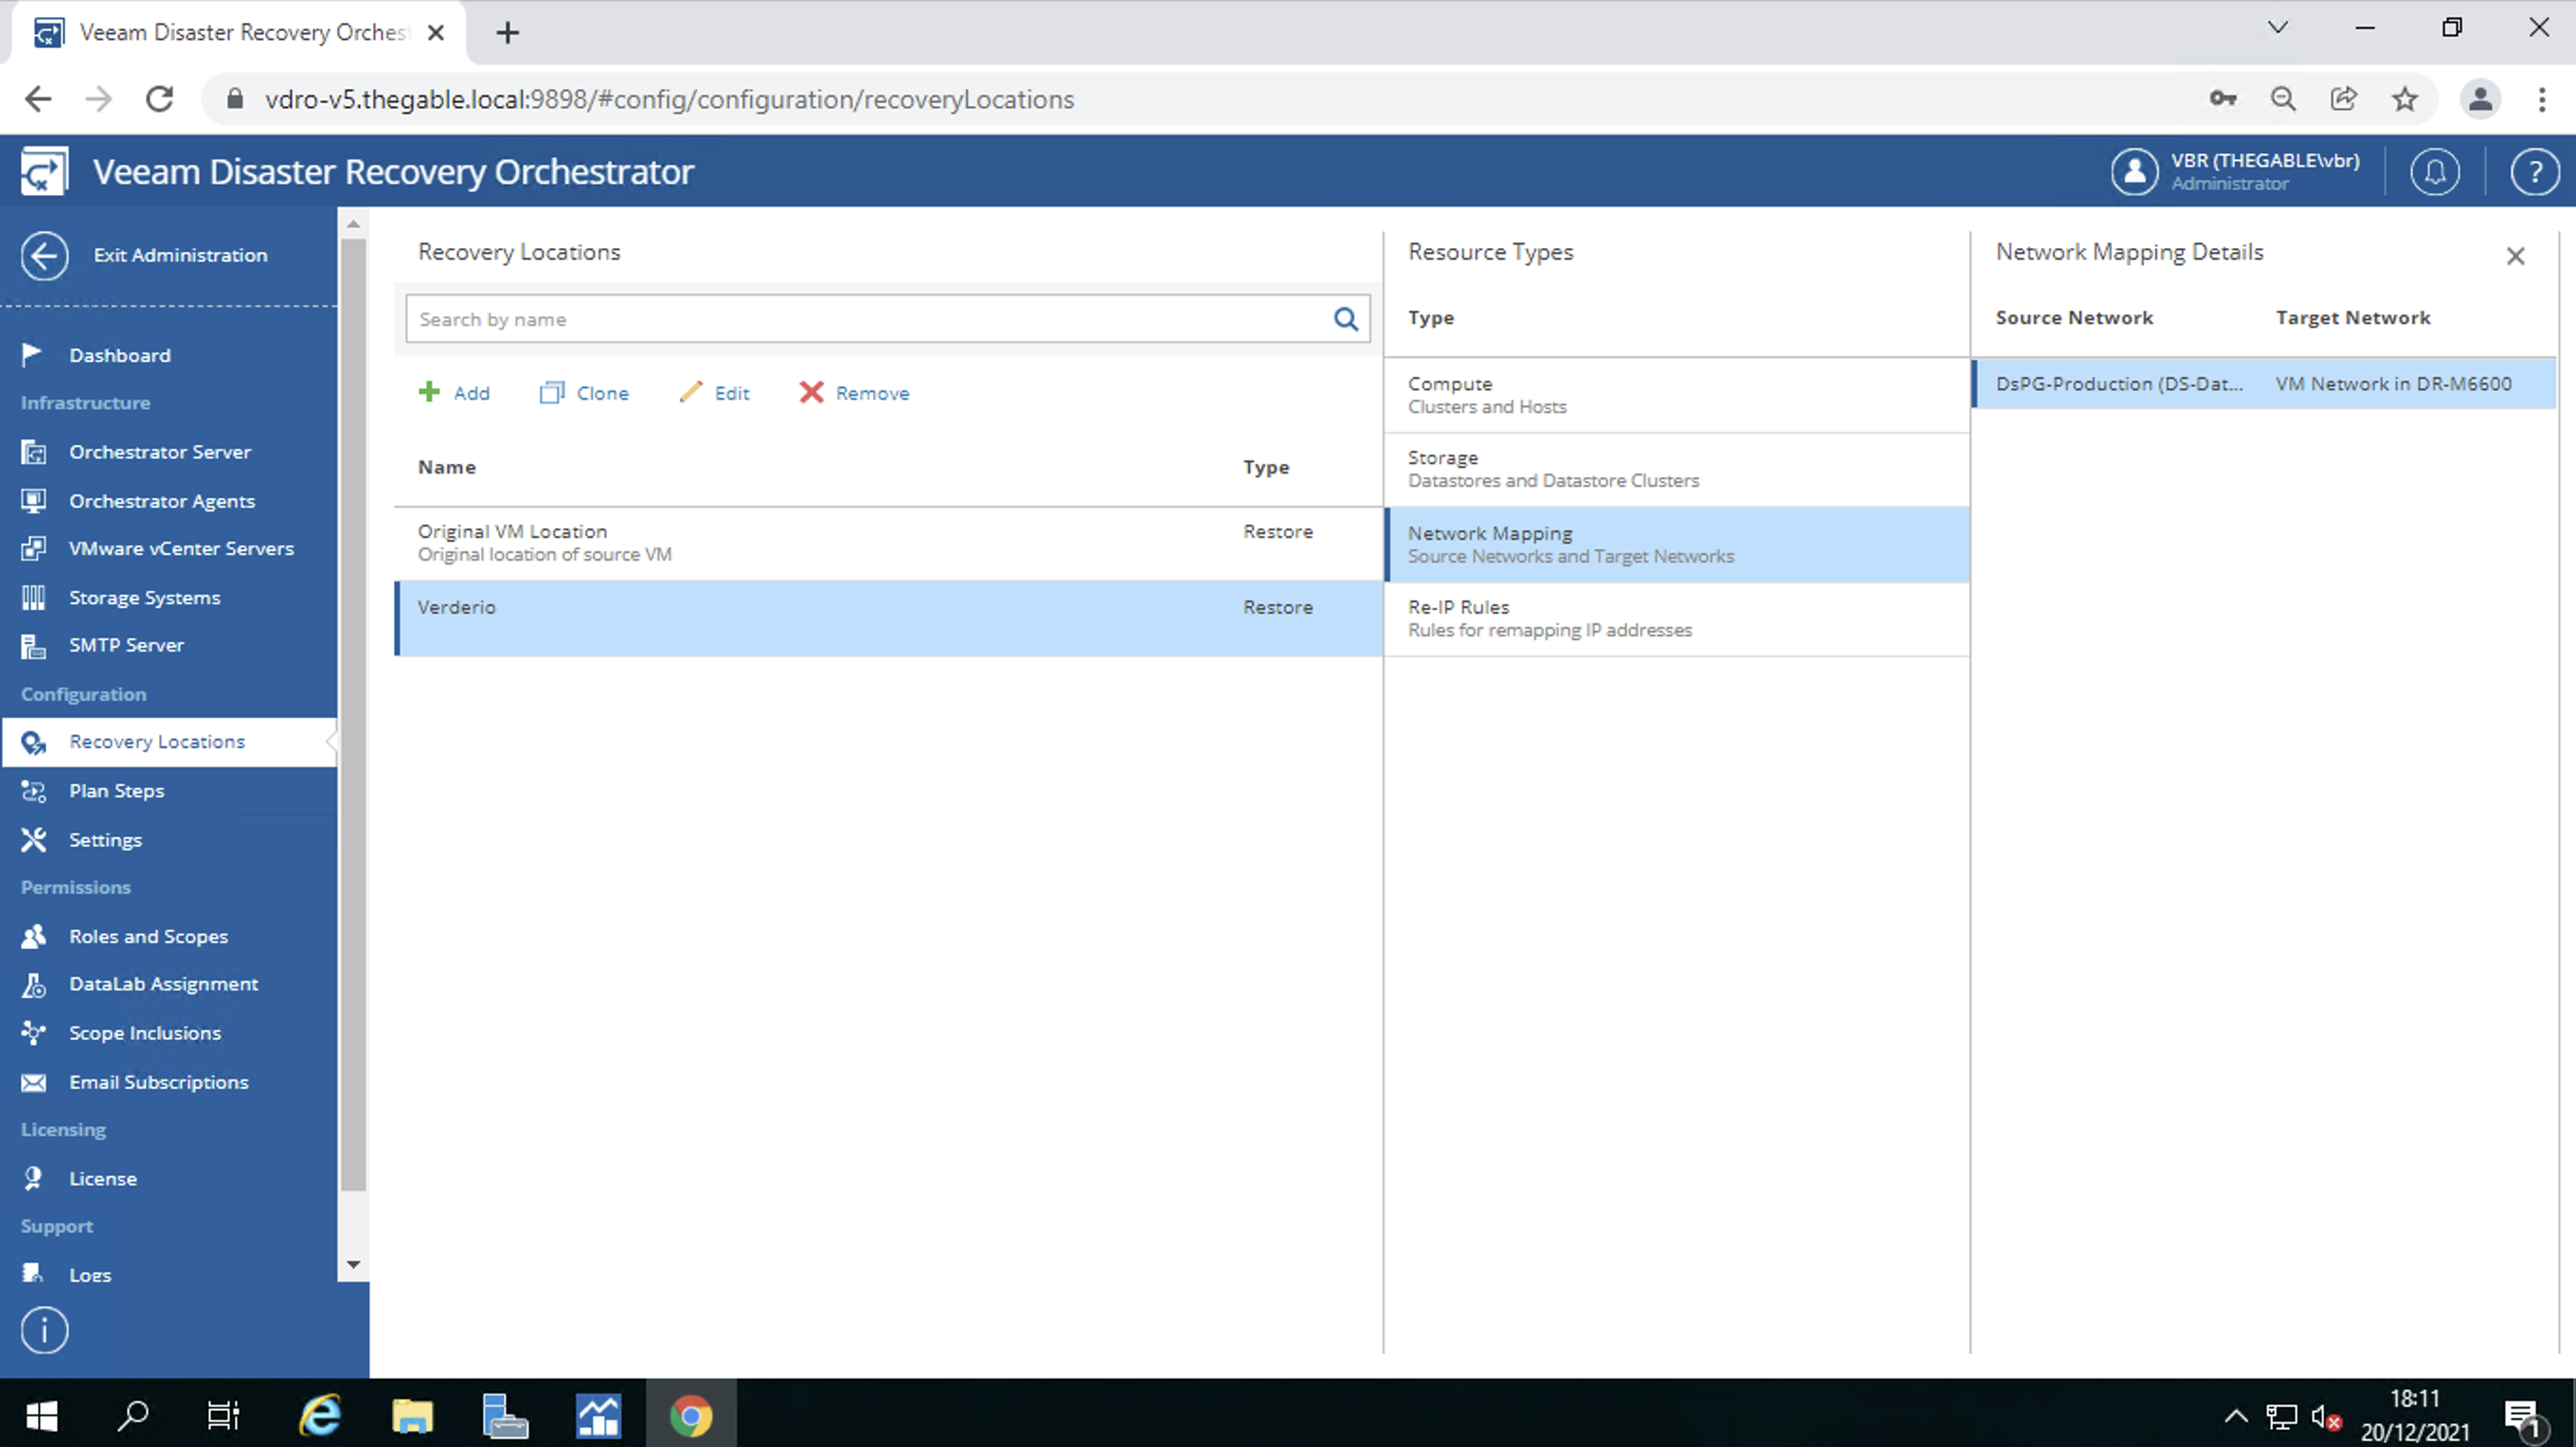 Immagine 8
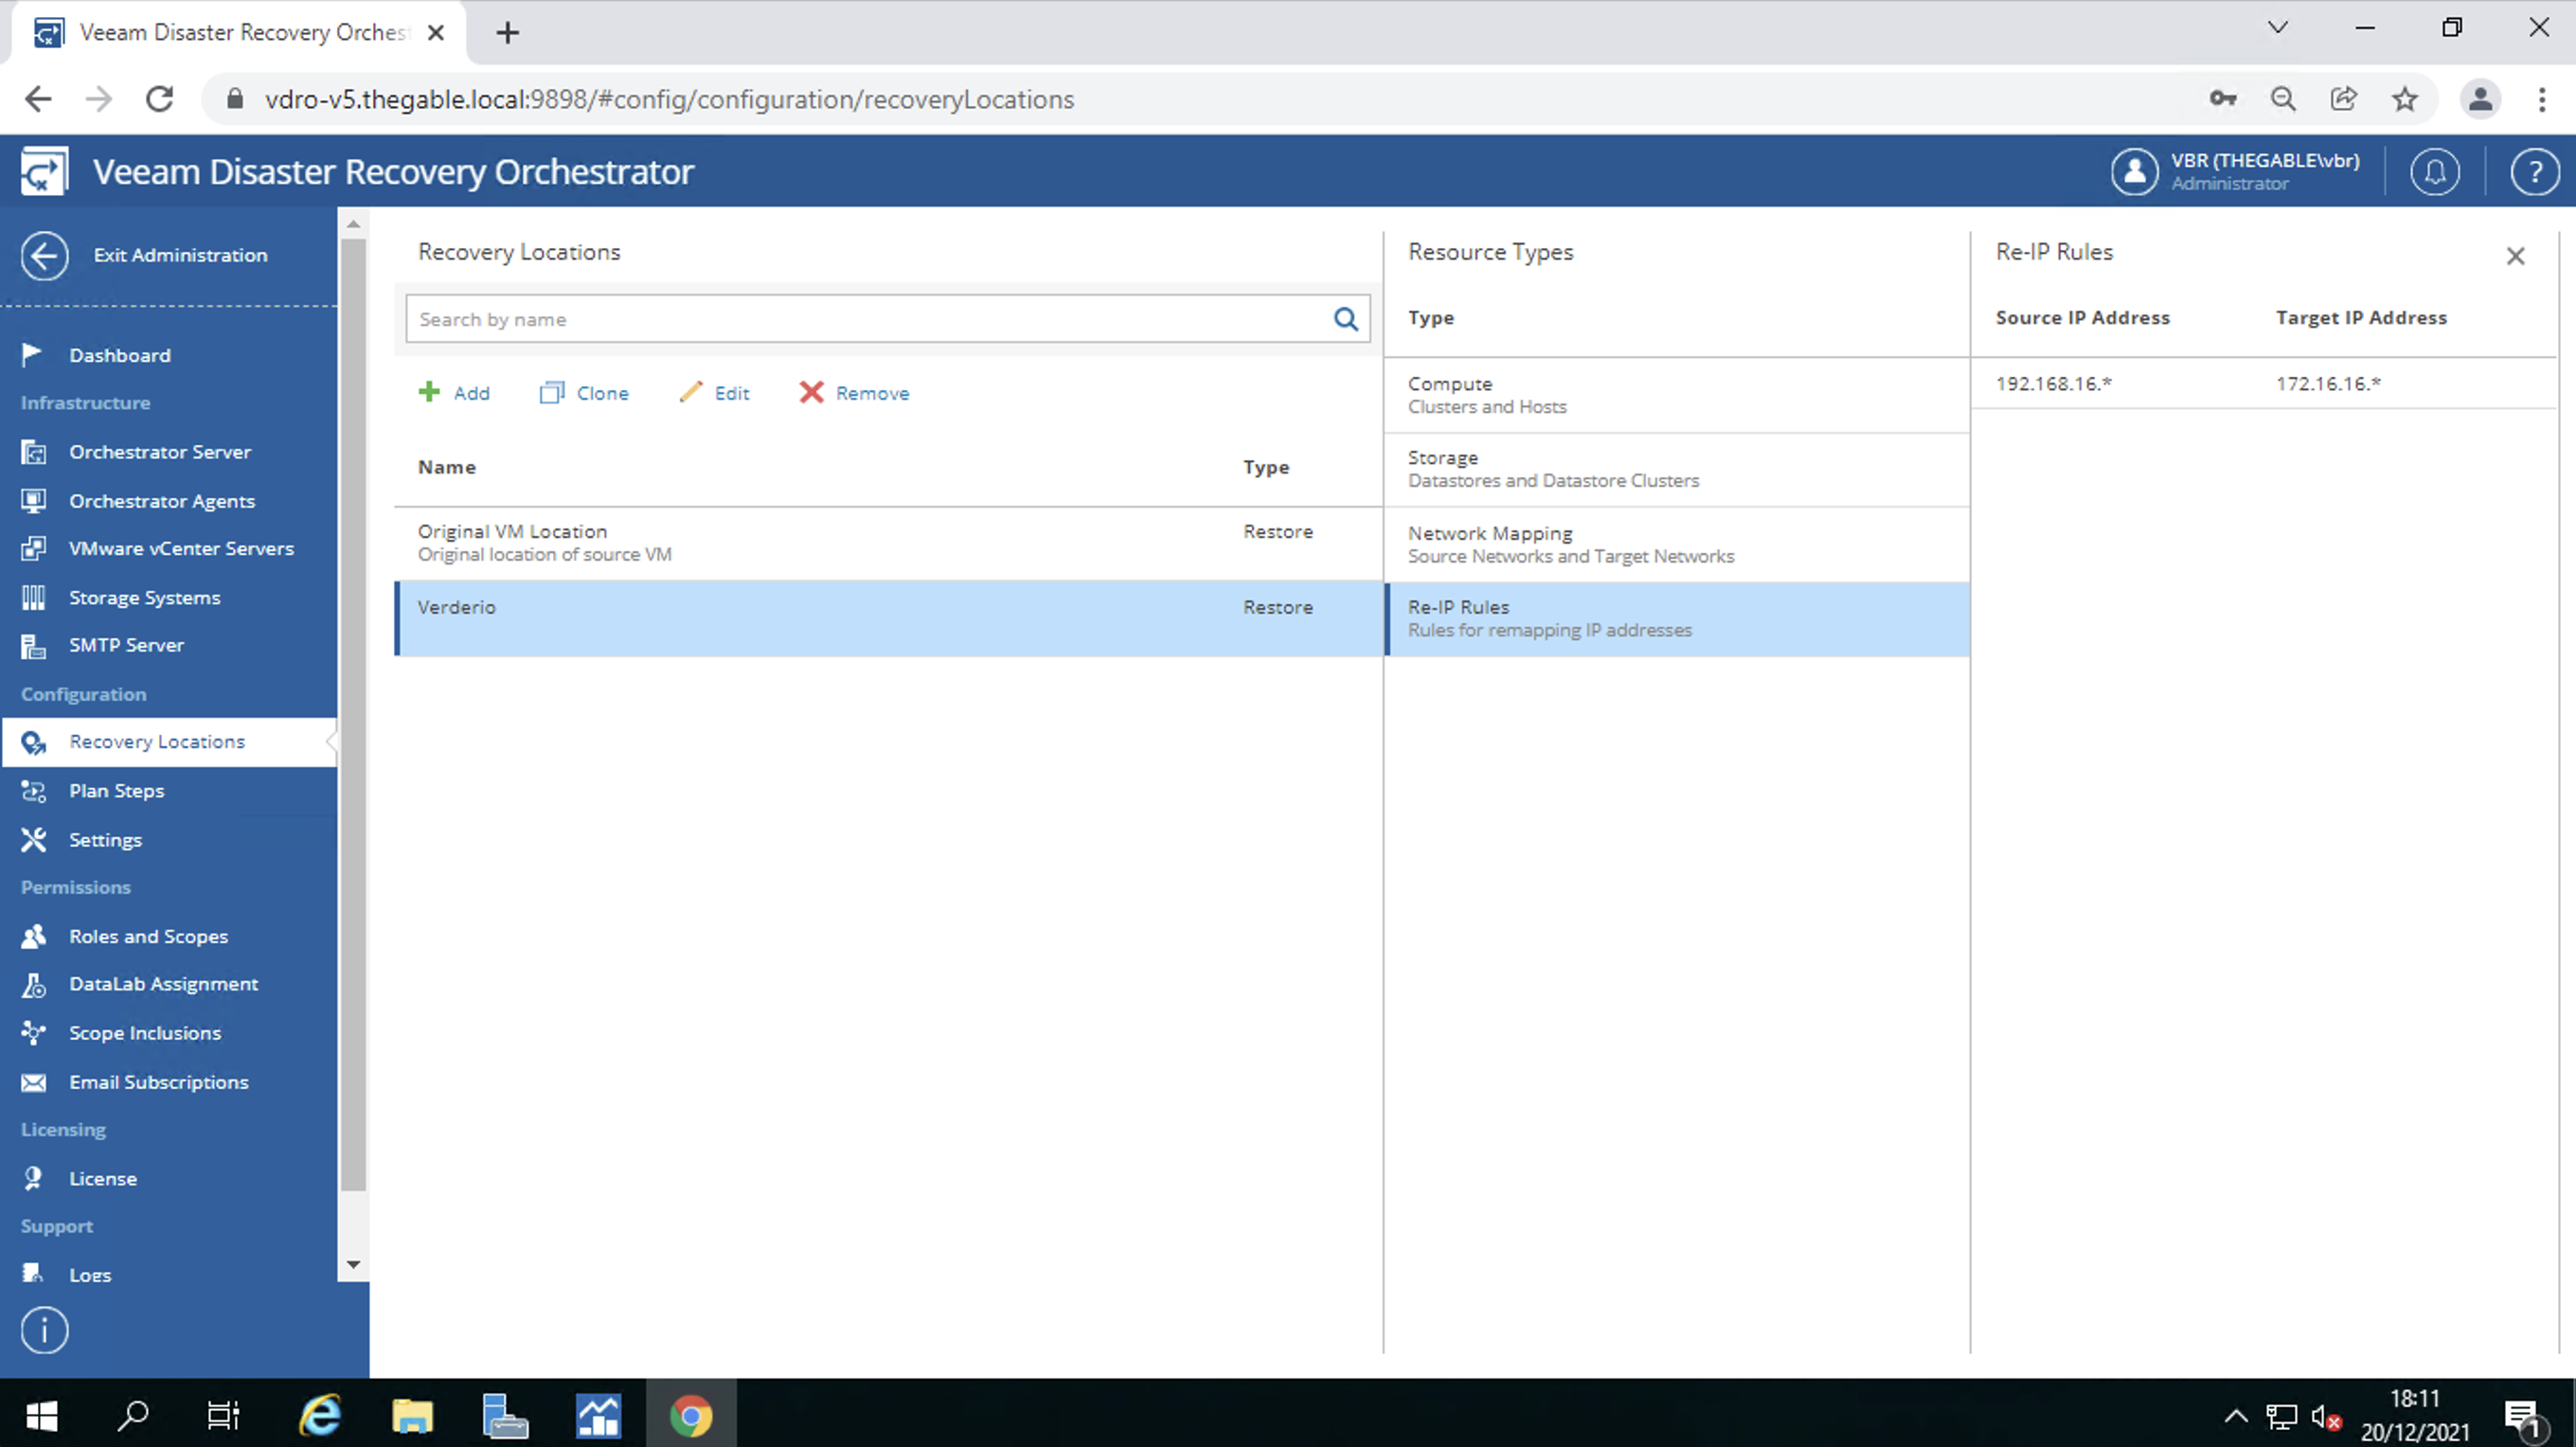 Immagine 9
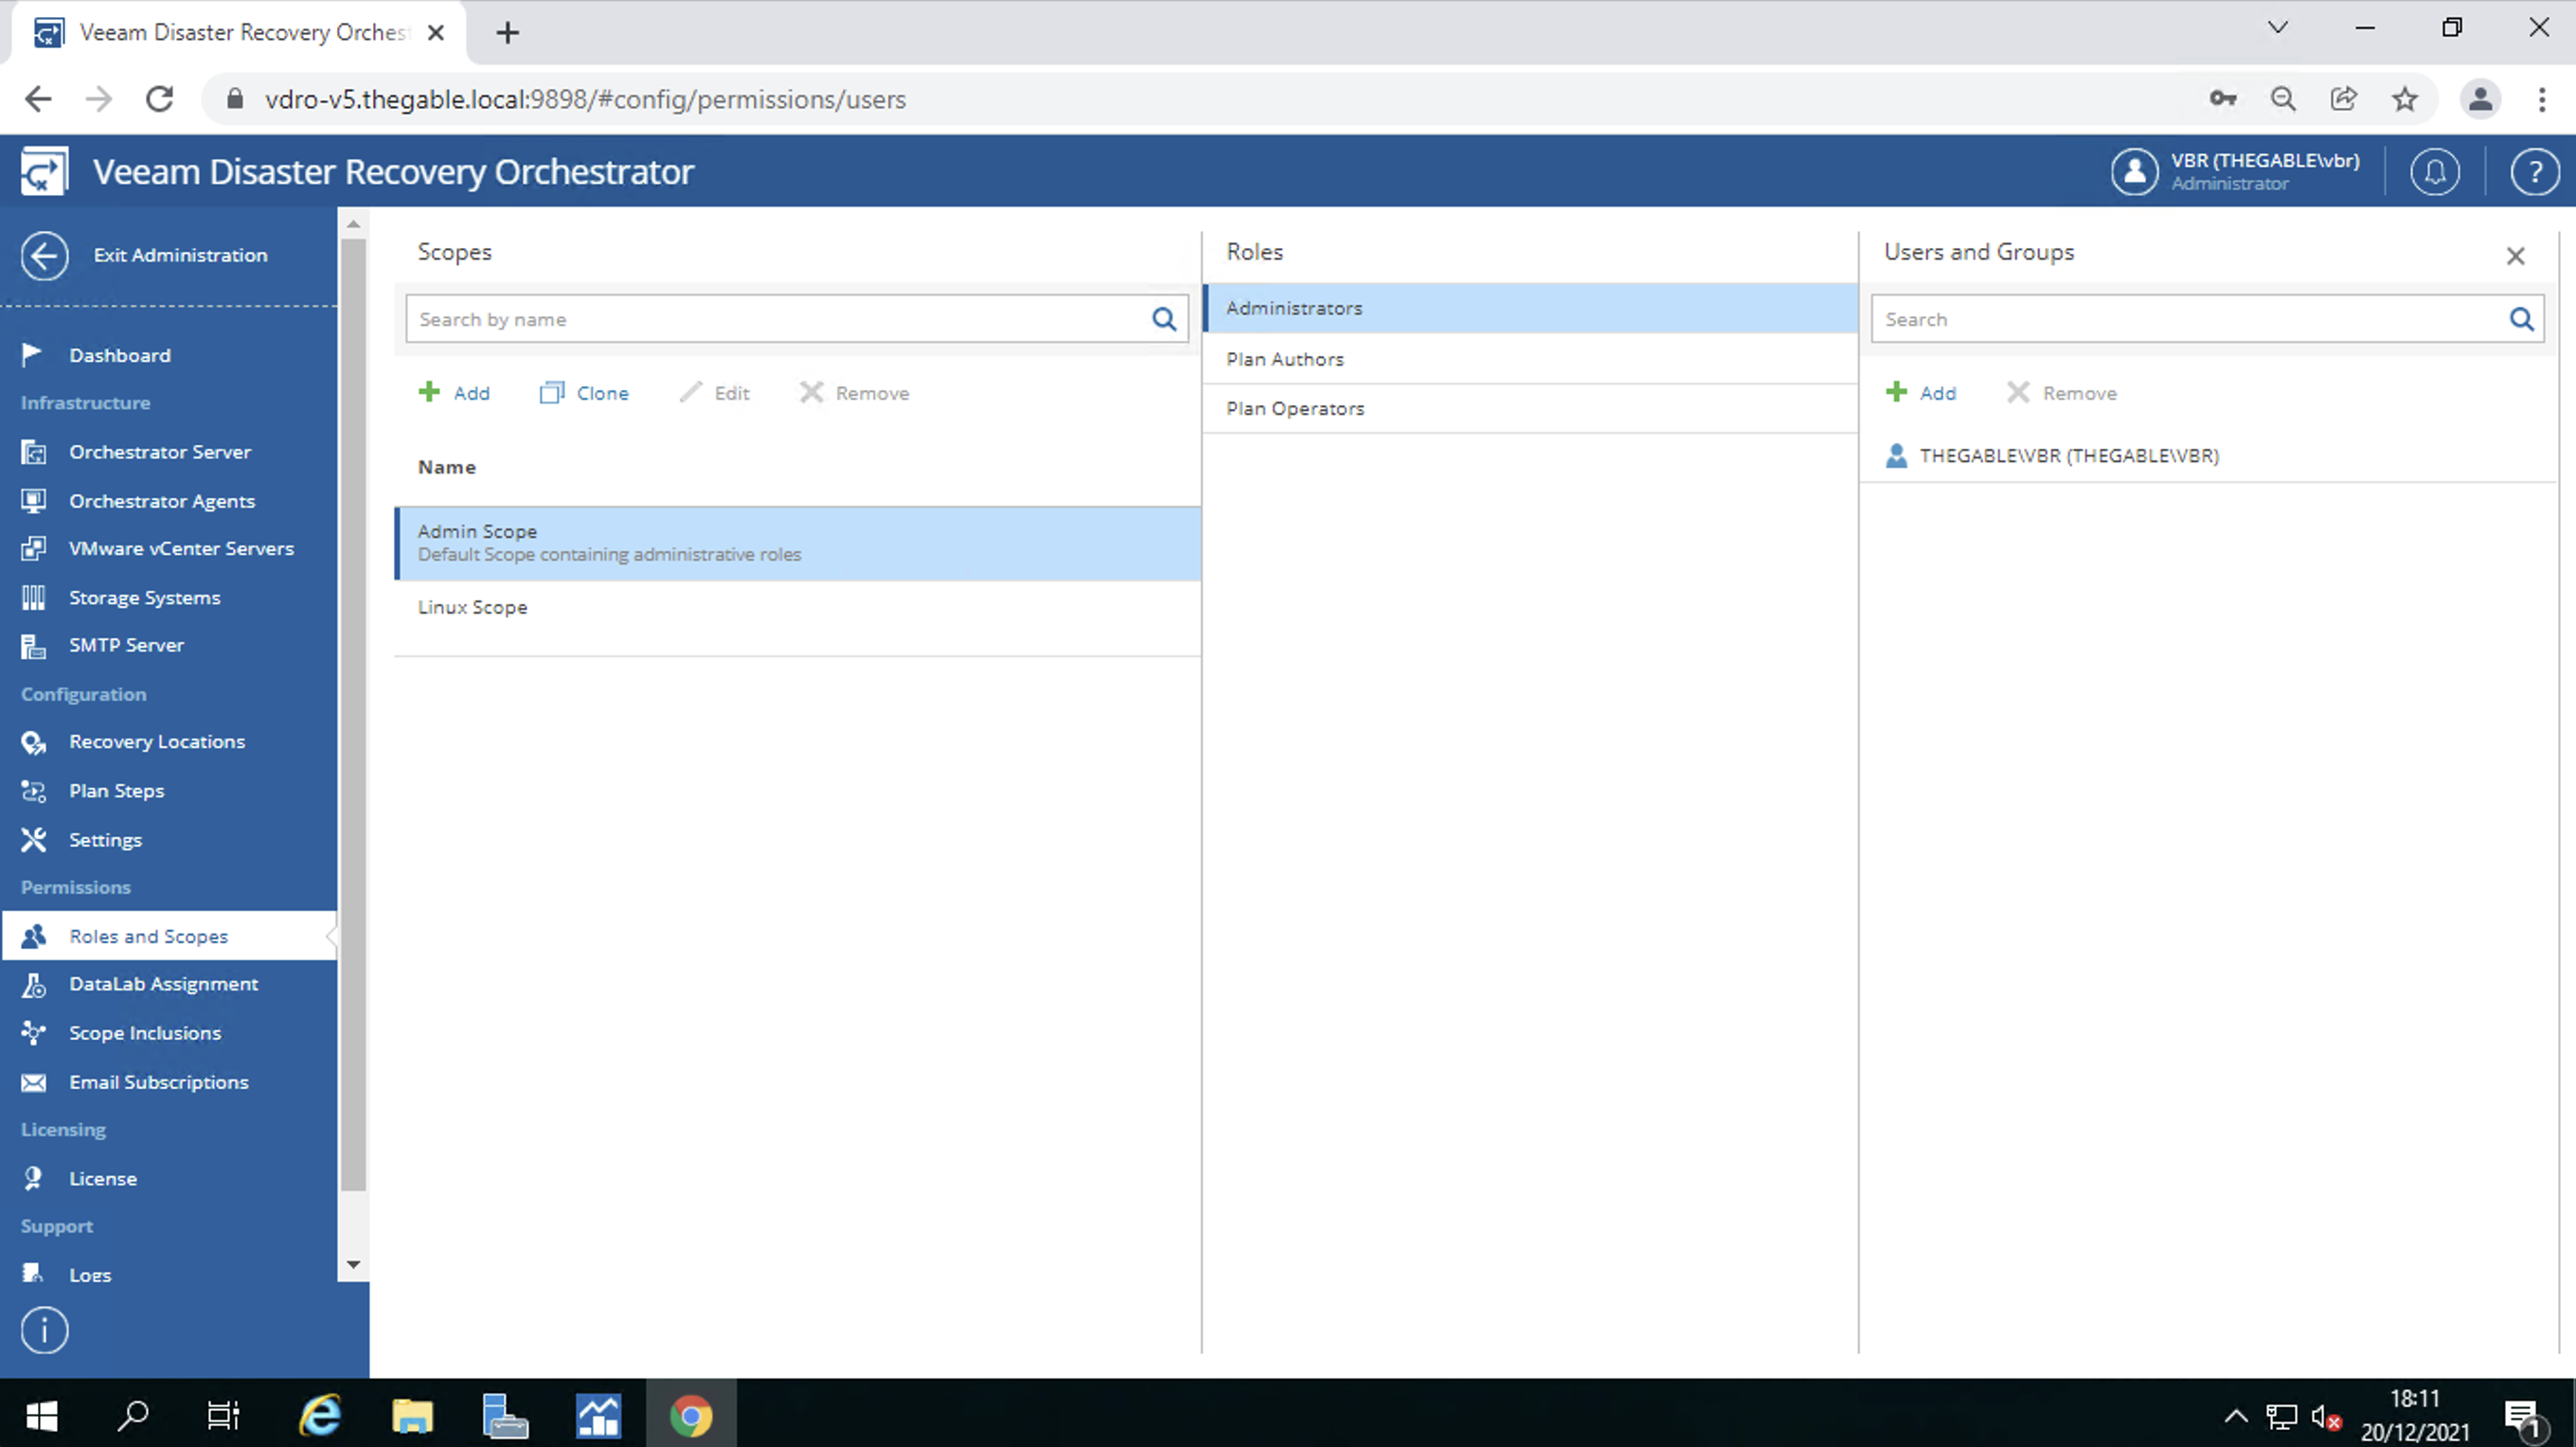 Immagine 10
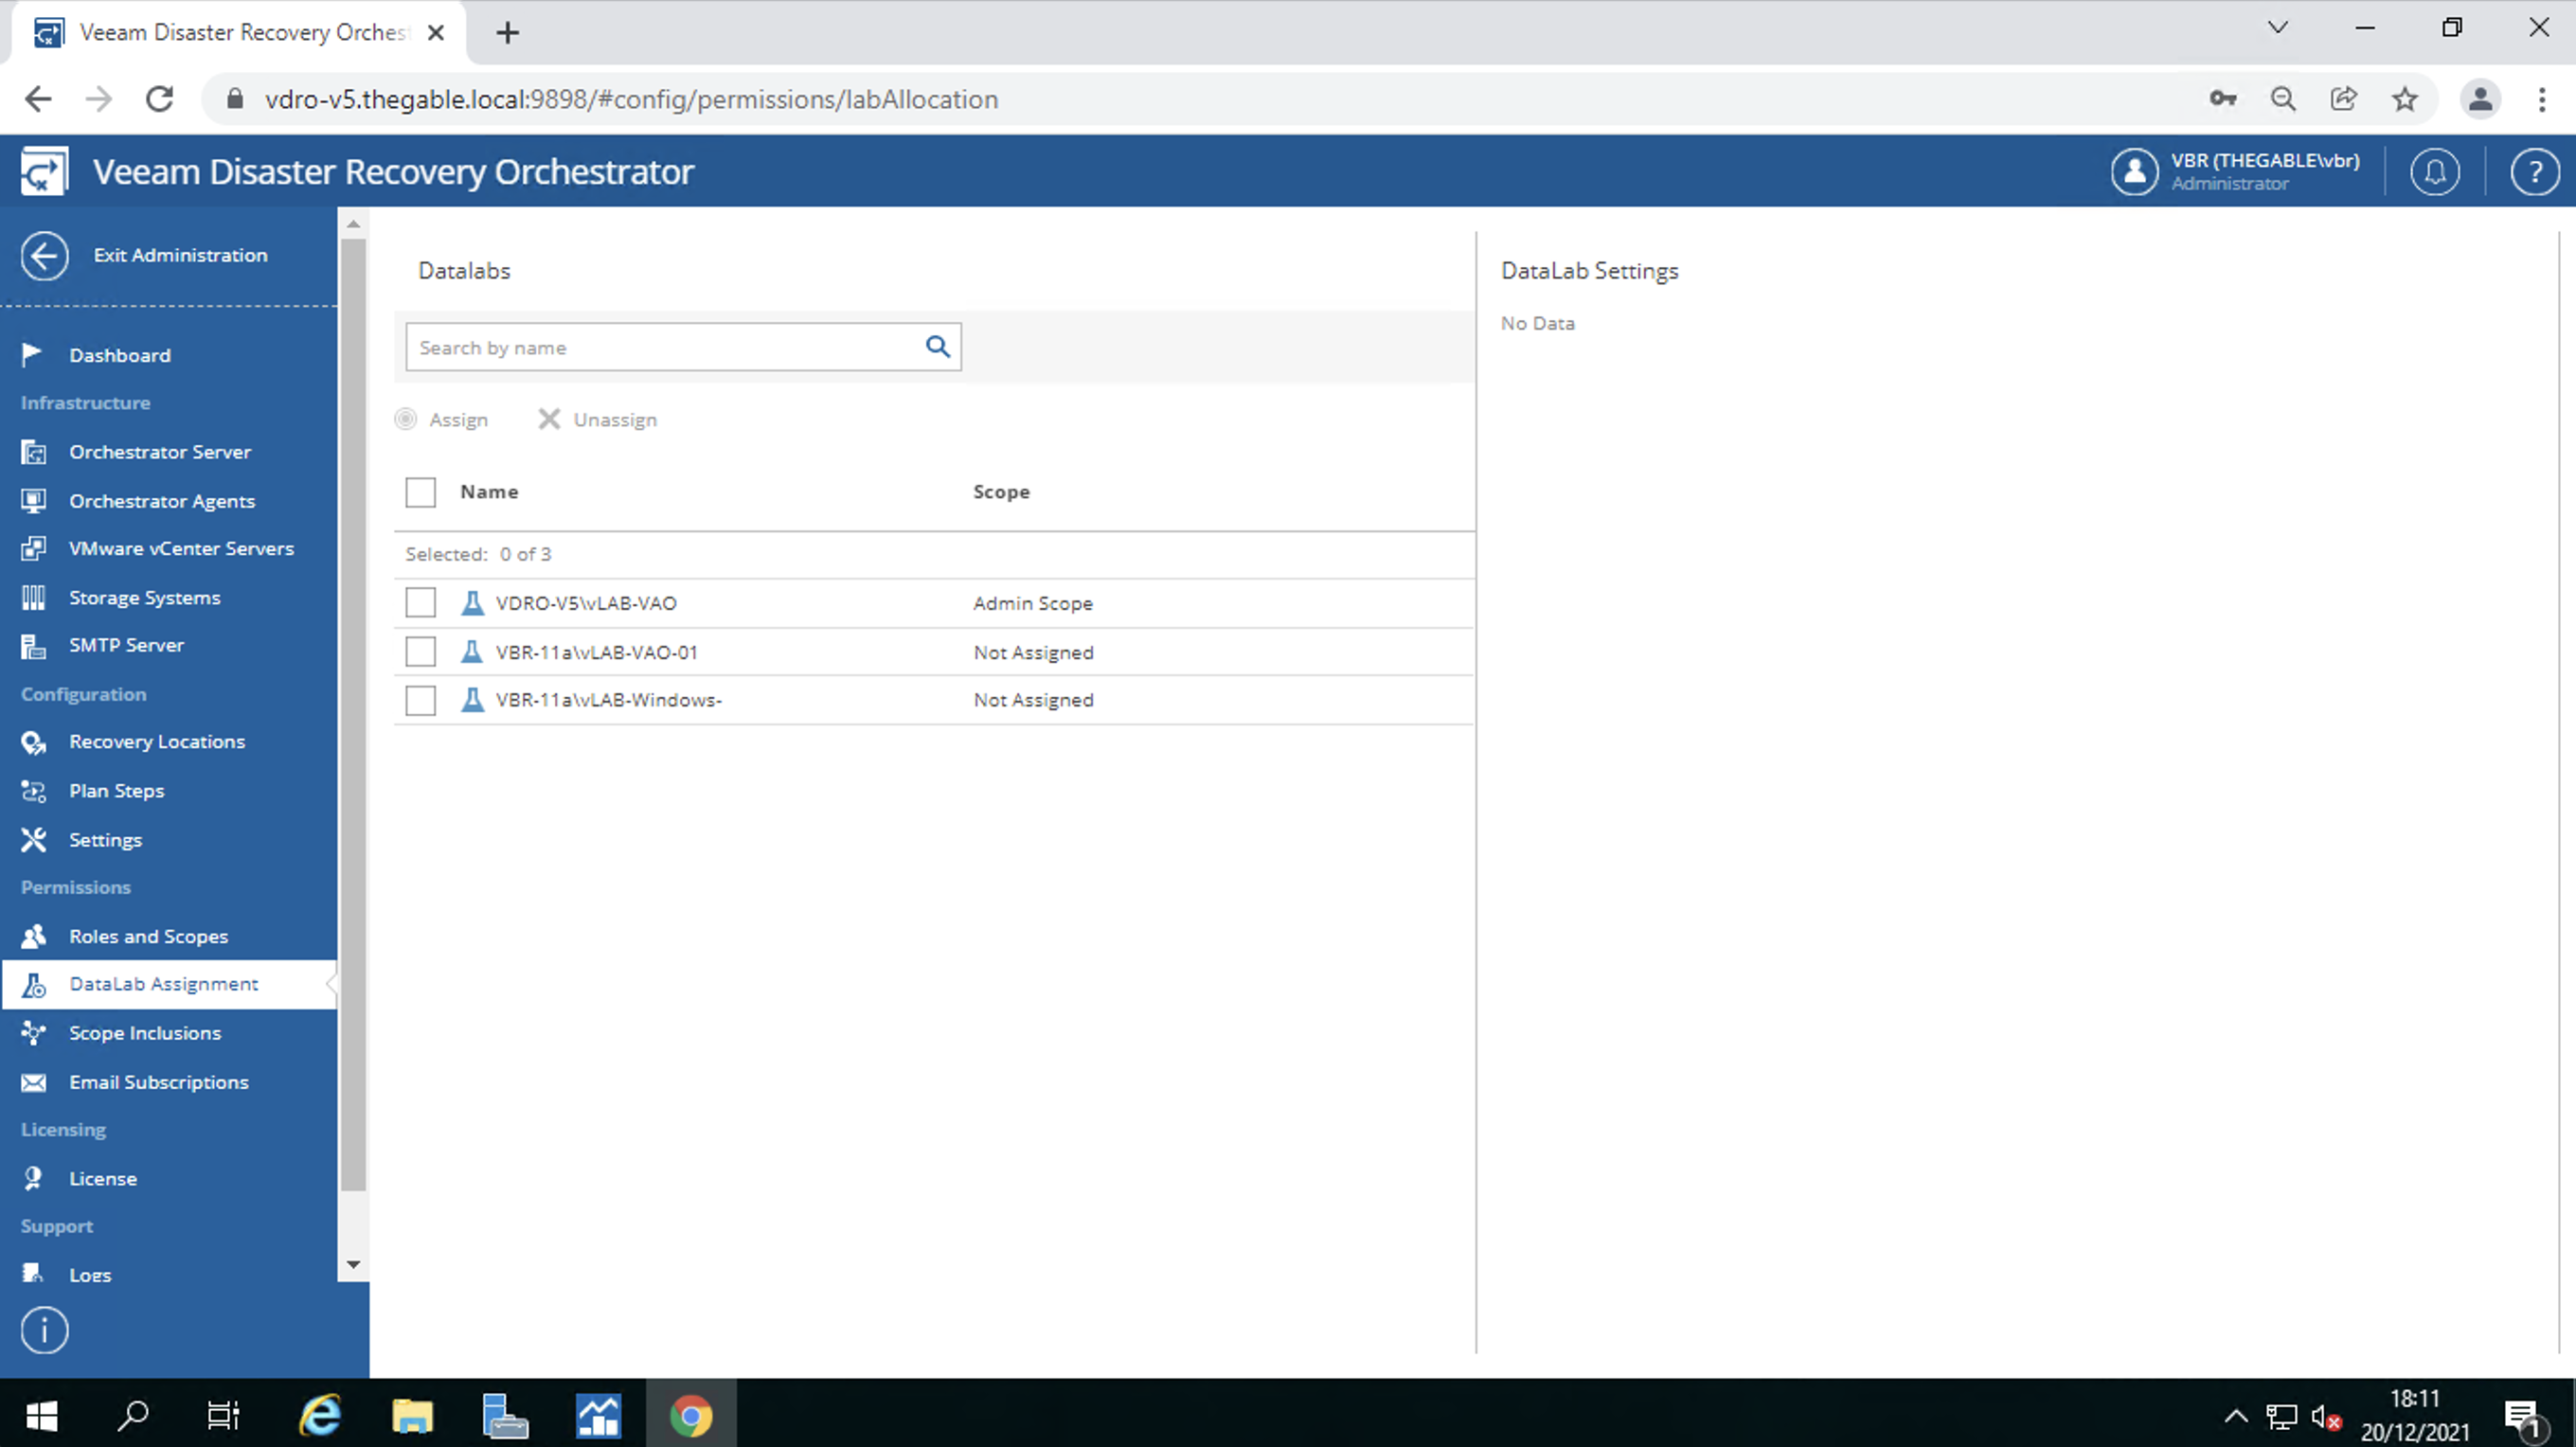 Immagine 11
 Immagine 10
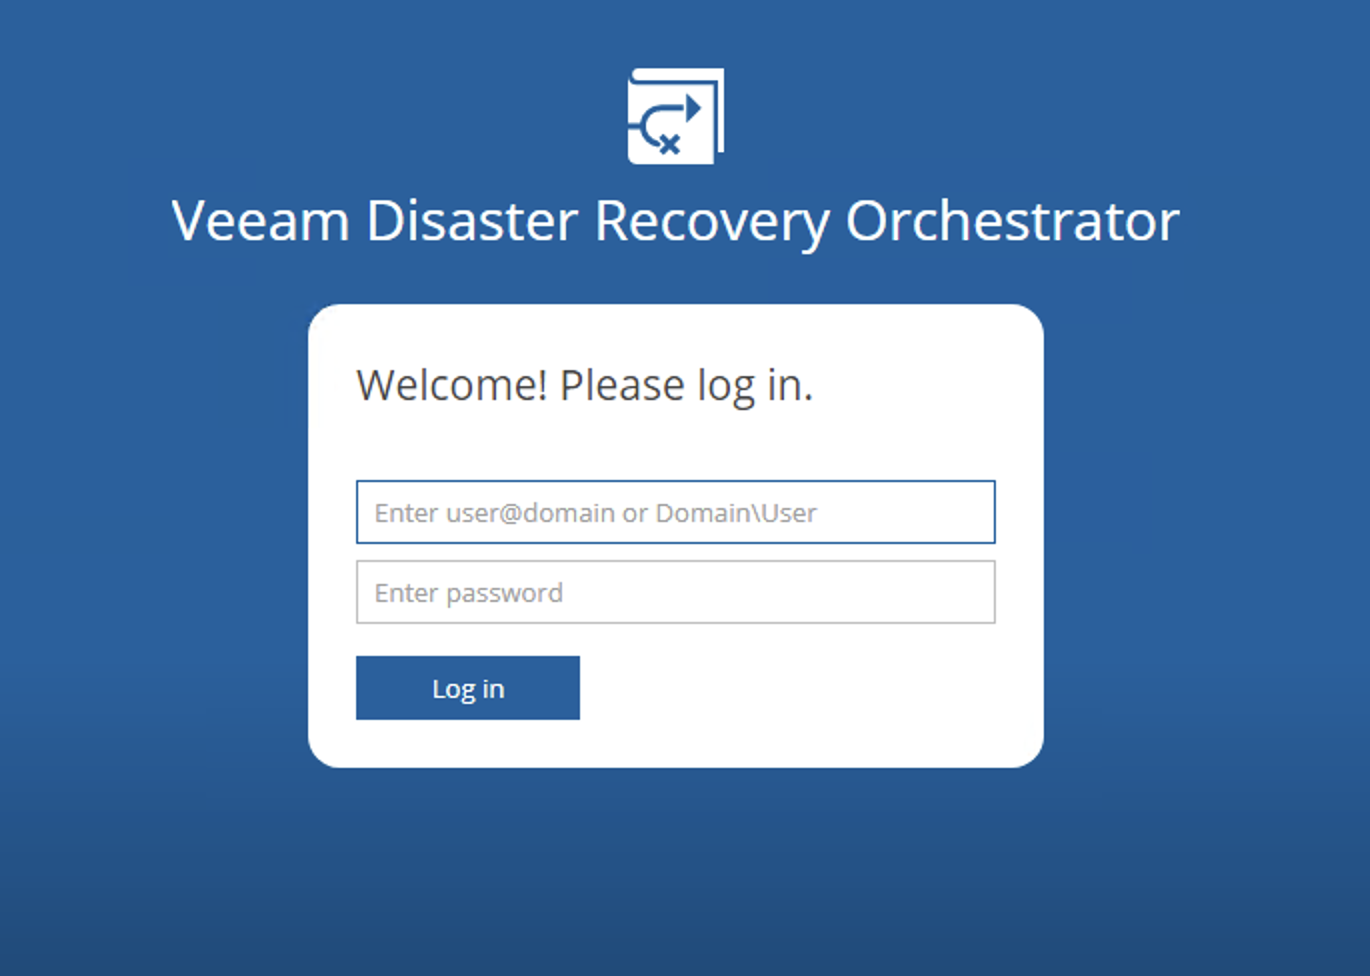 Immagine 1
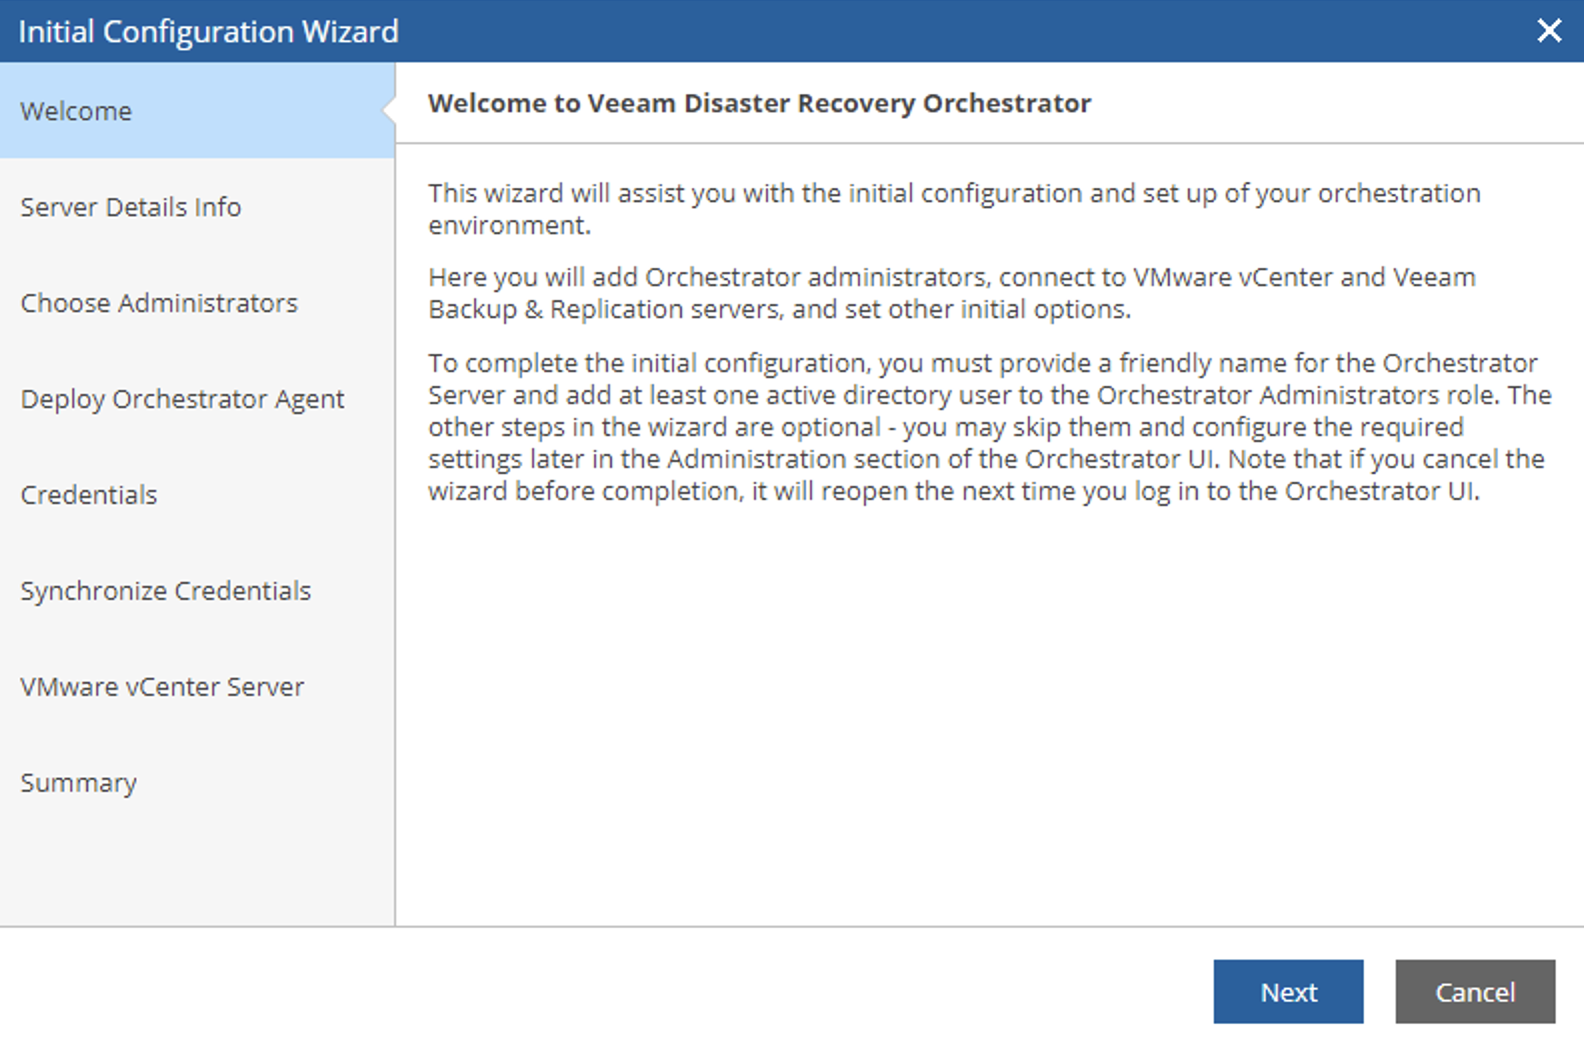 Immagine 2
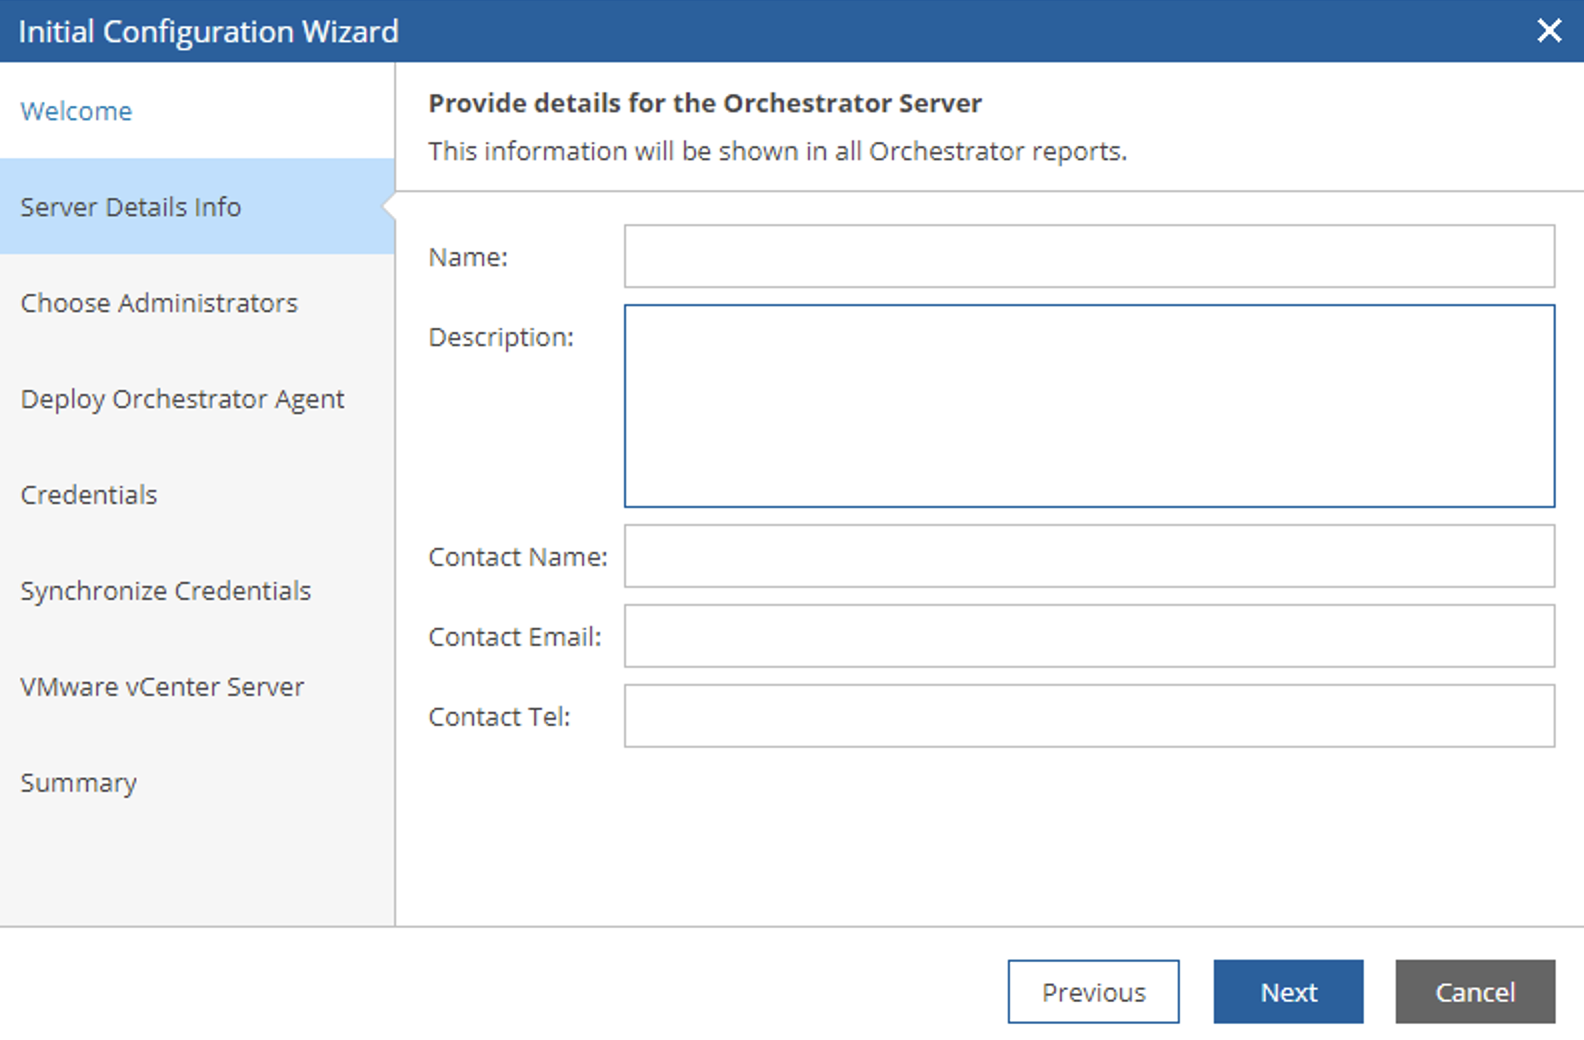 Immagine 3
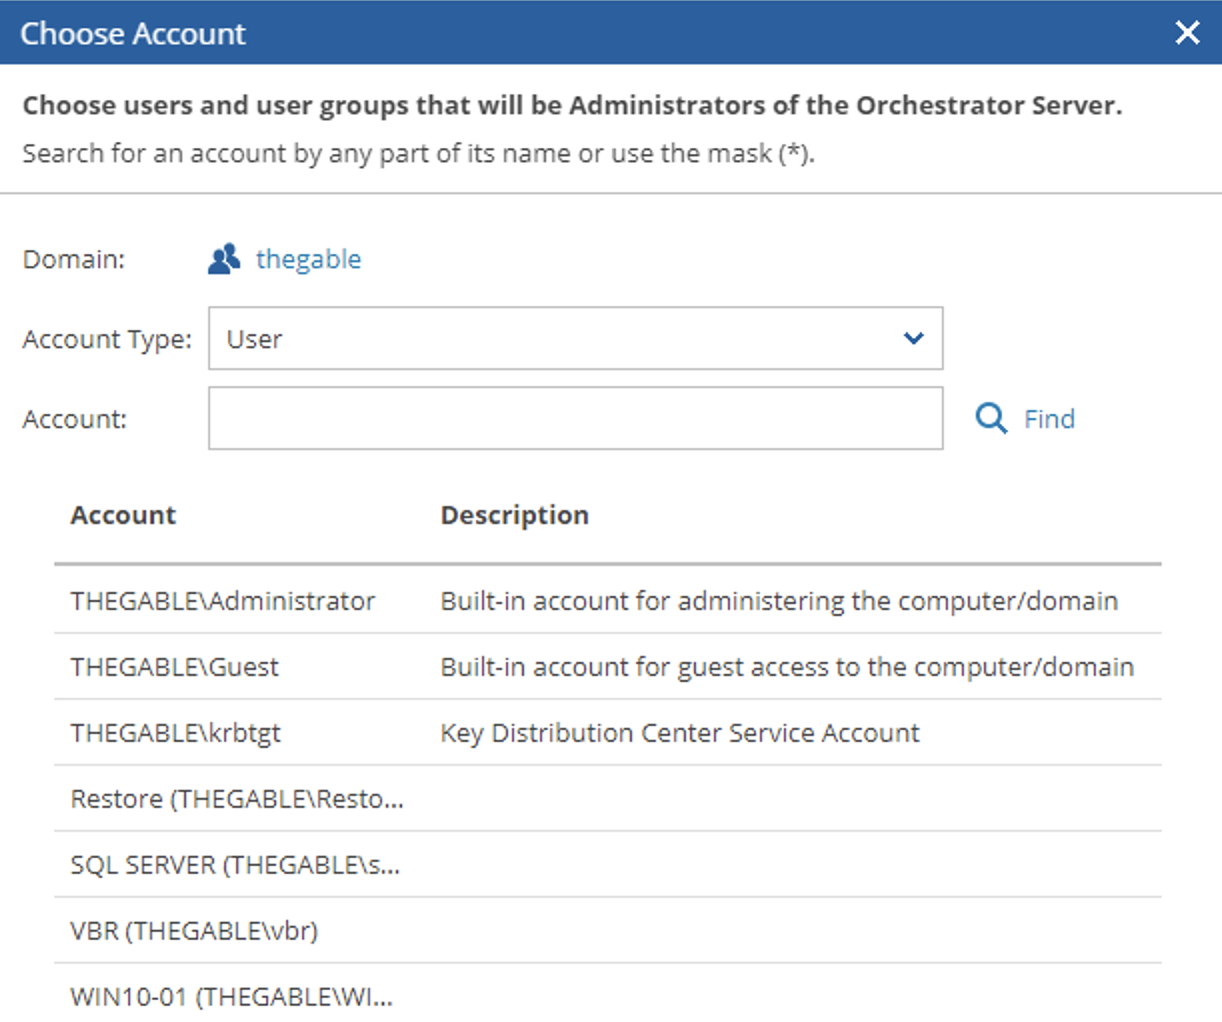 Immagine 4
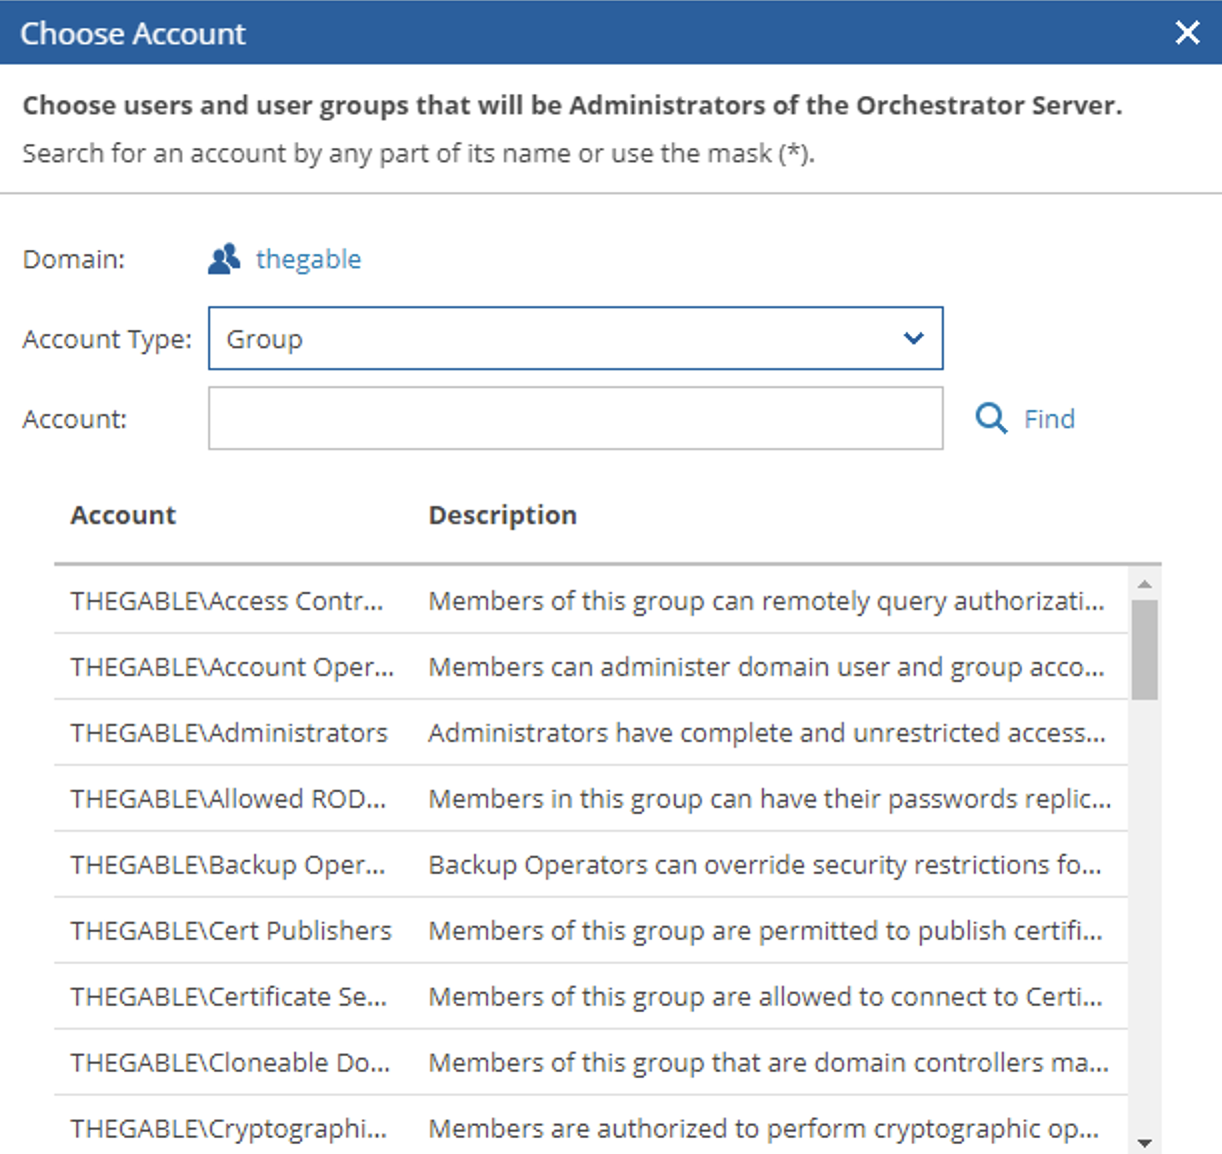 Immagine 5
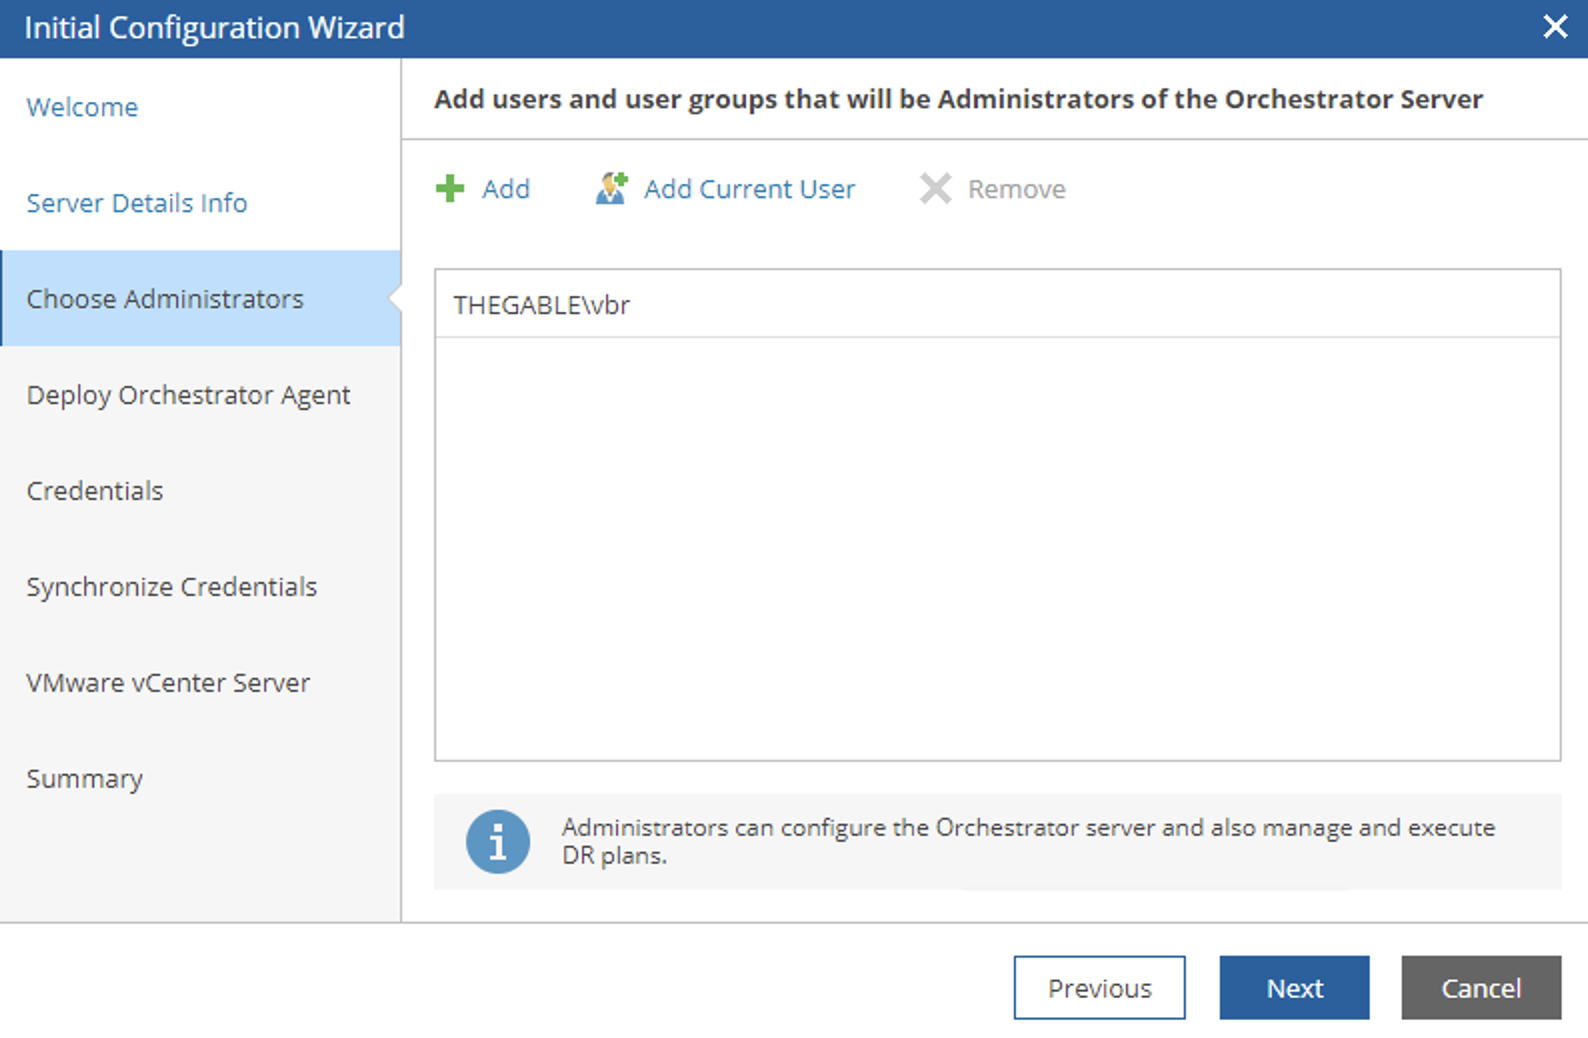 Immagine 6
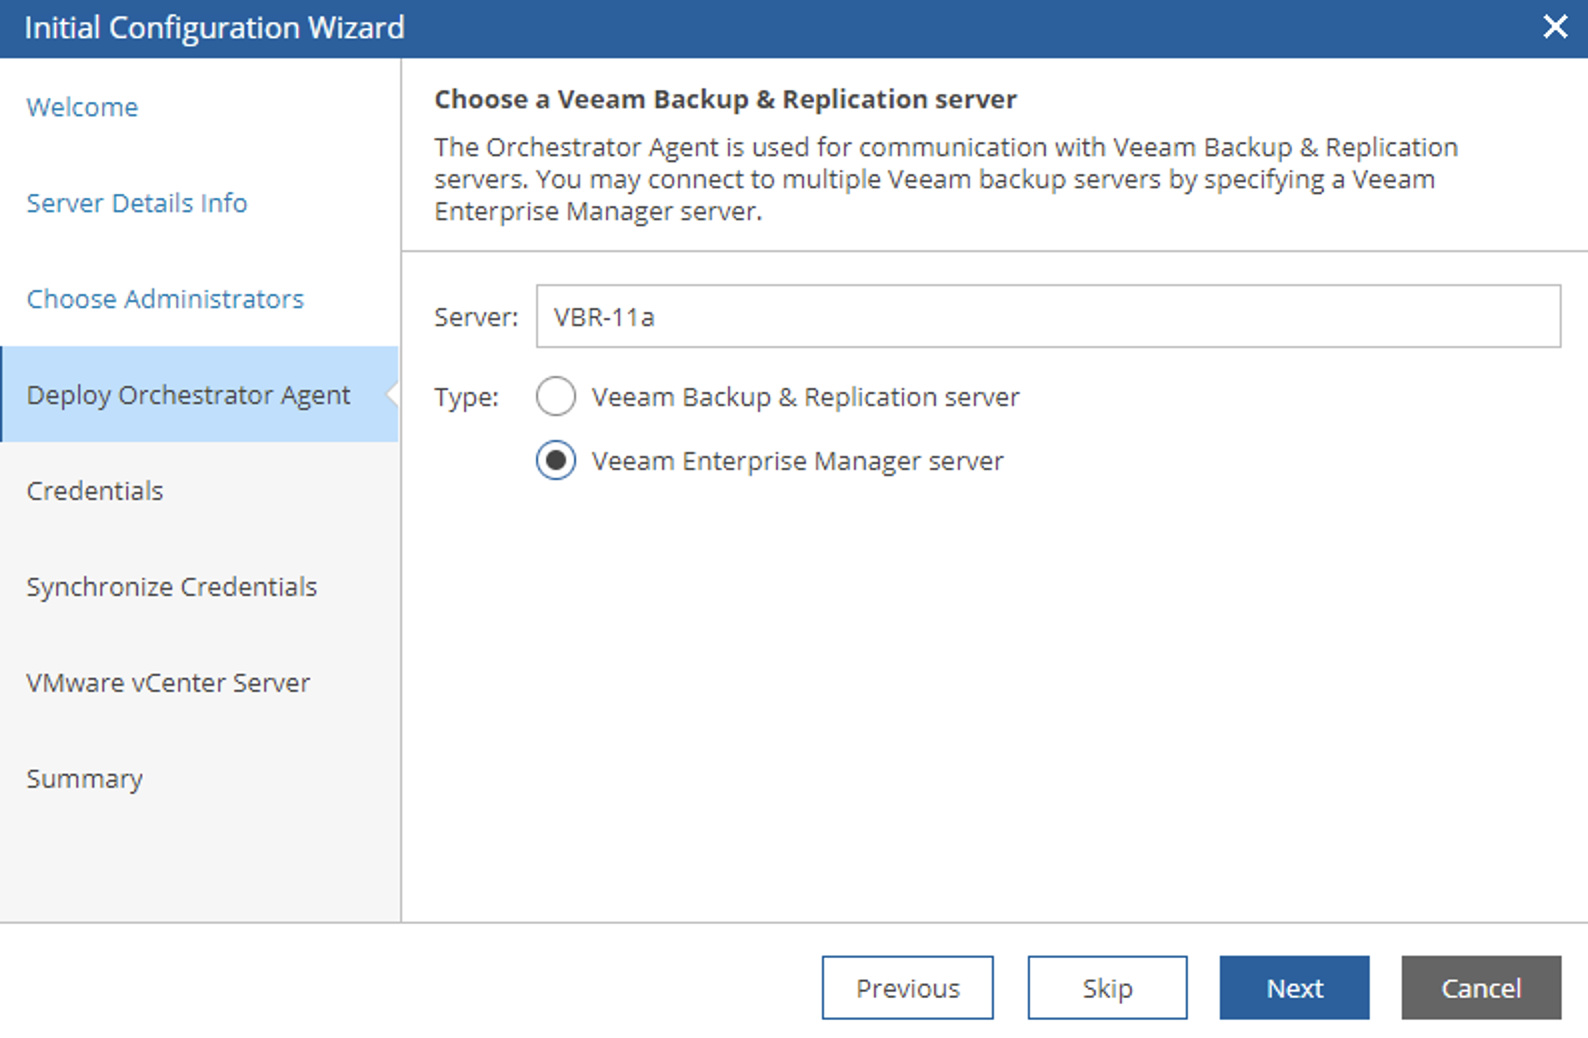 Immagine 7
 Immagine 8
 Immagine 9
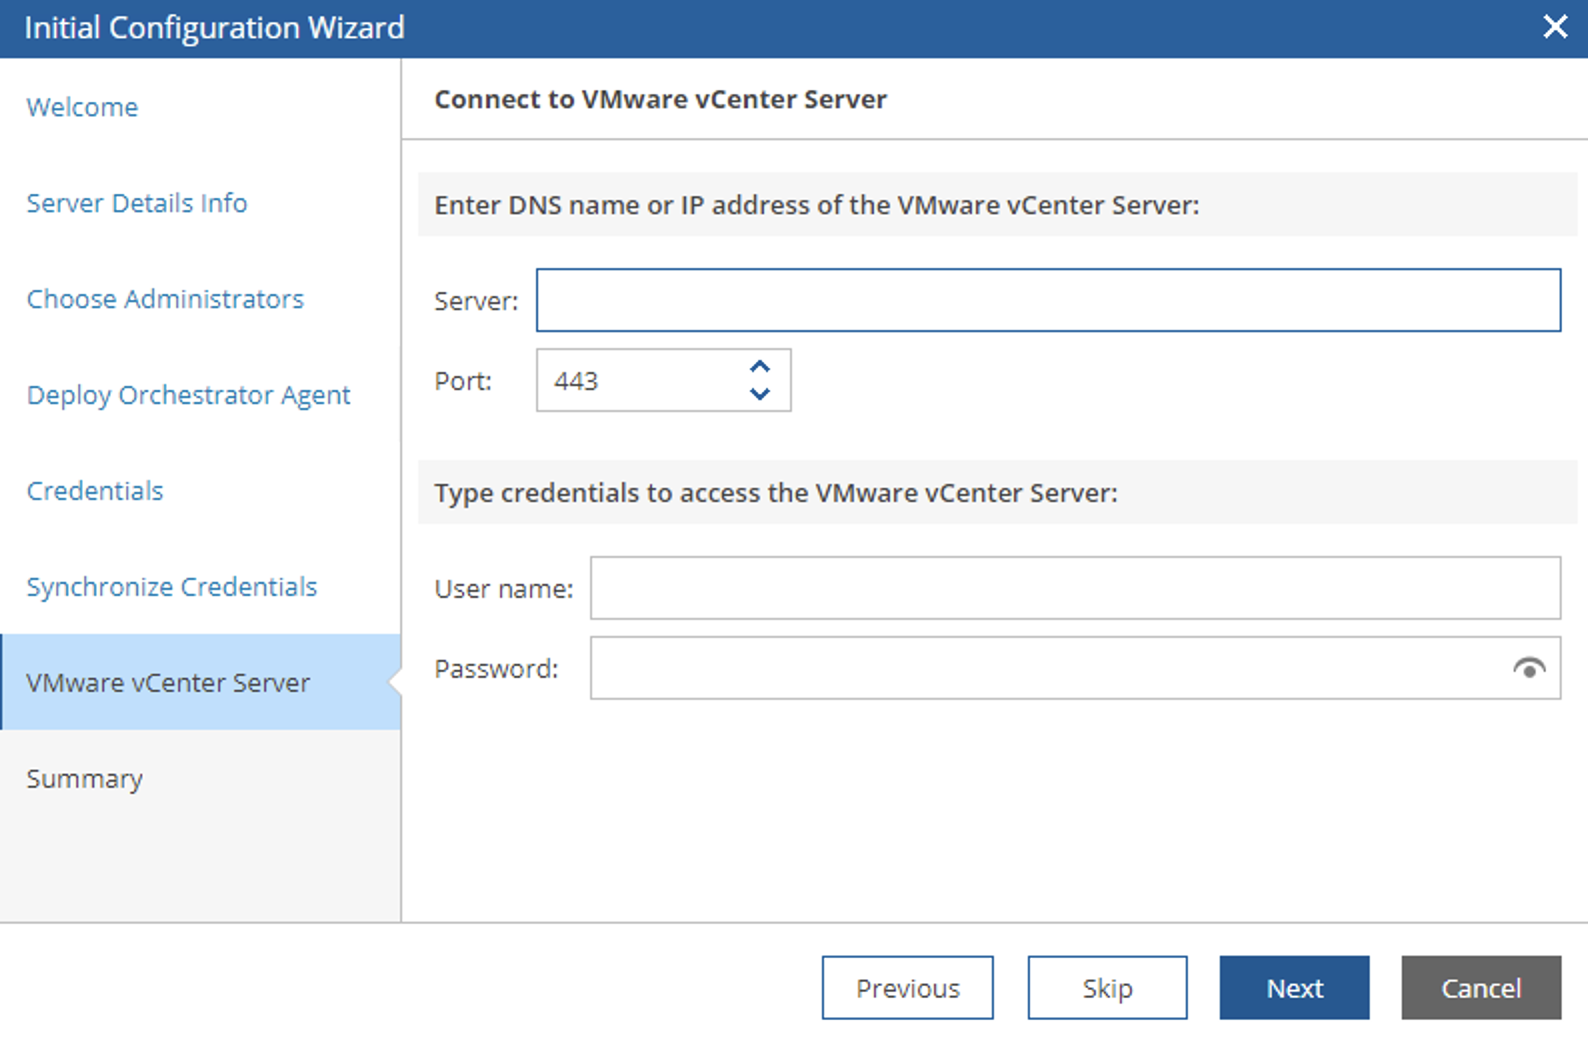 Immagine 10
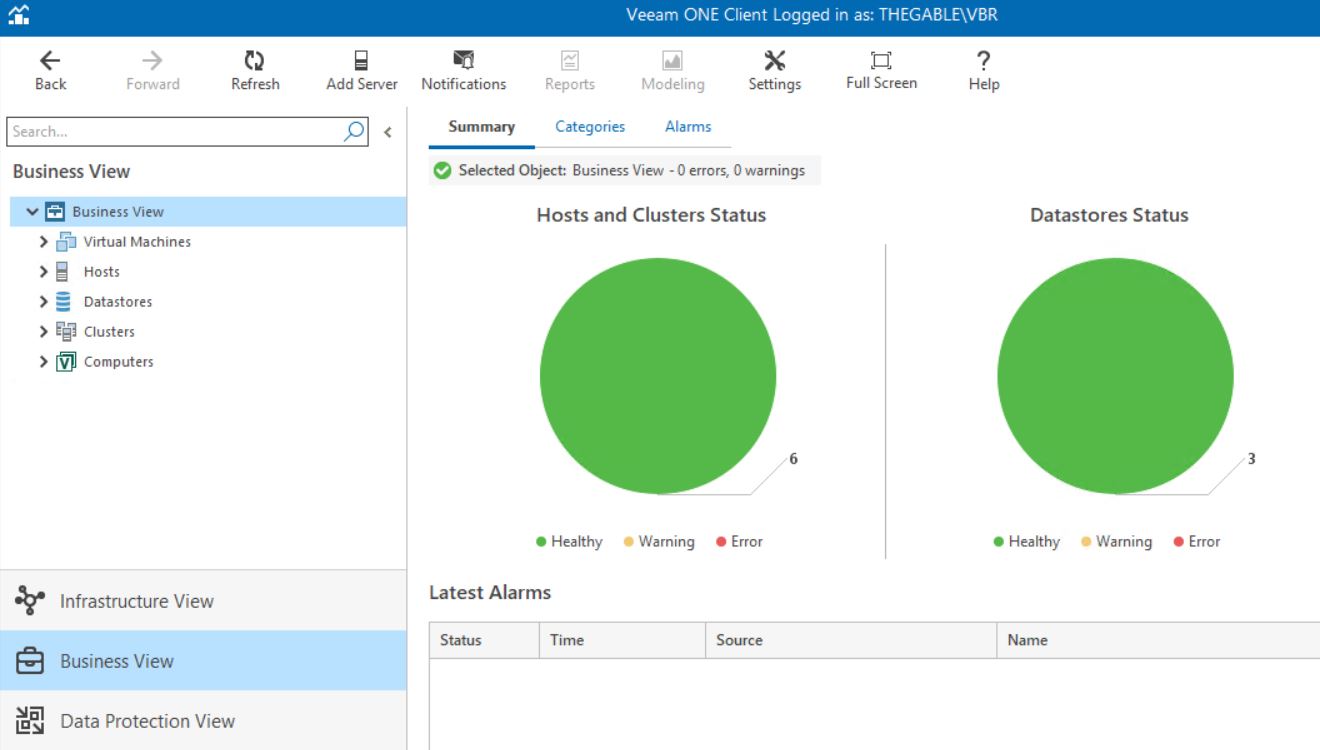

 Picture 1
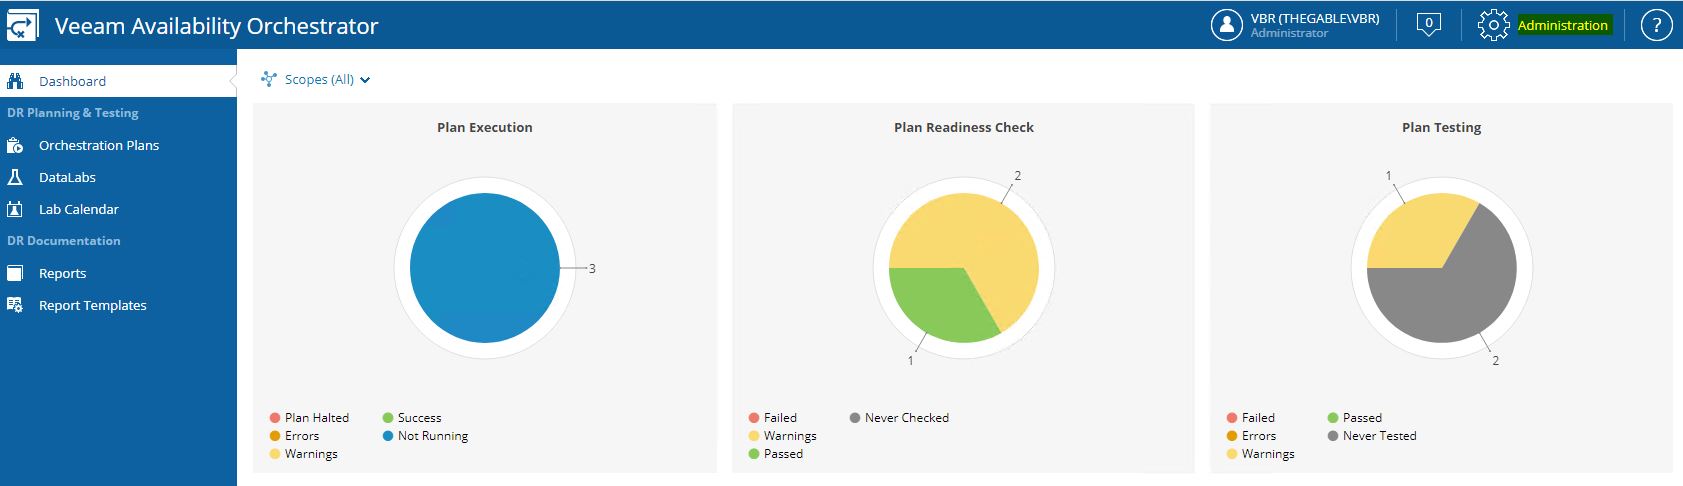 Picture 2
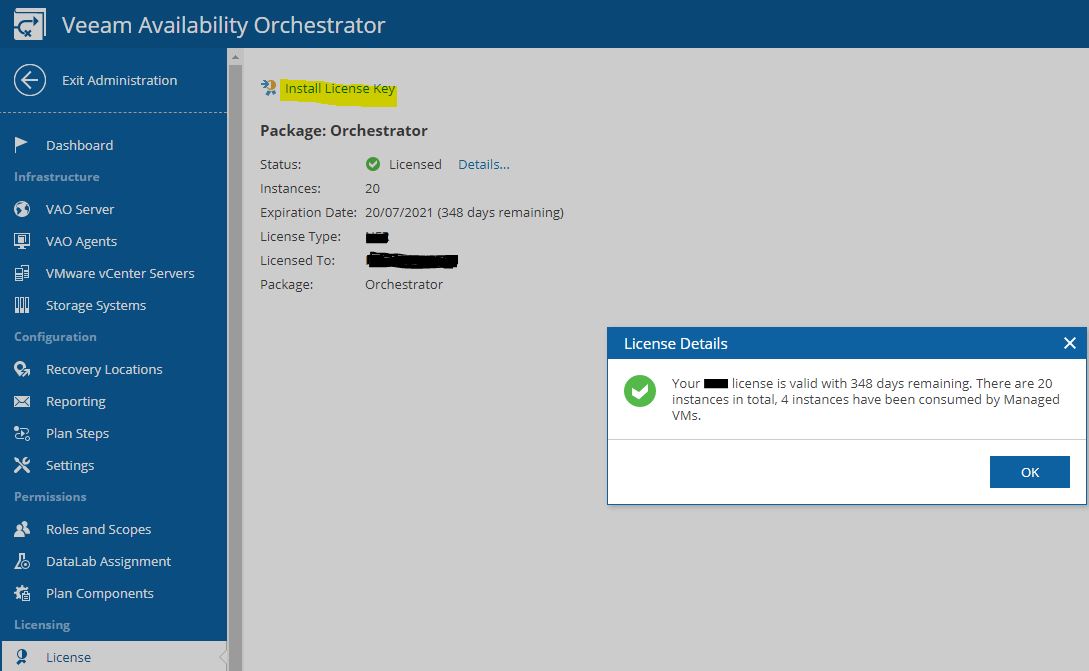 Picture 3
 Picture 4
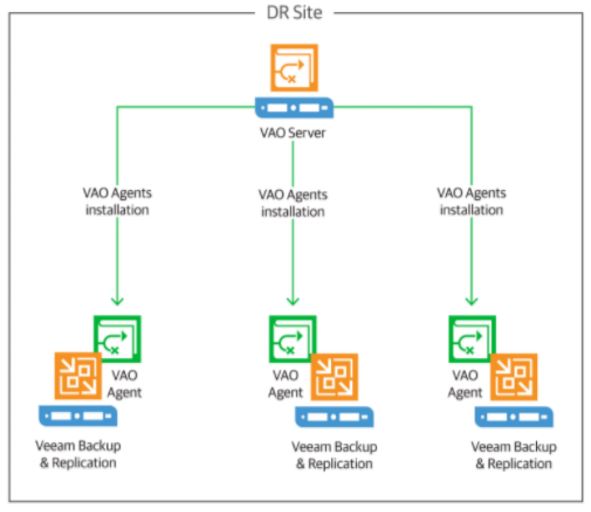 Picture 5
 Picture 6
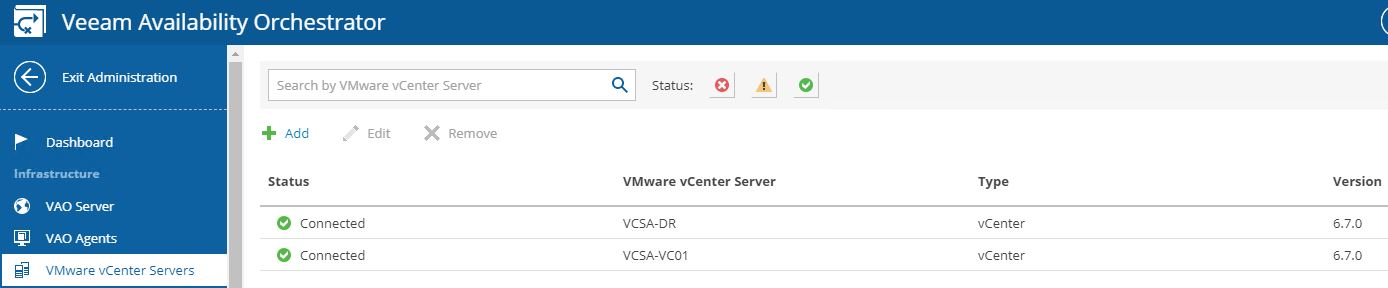 (Picture 7)
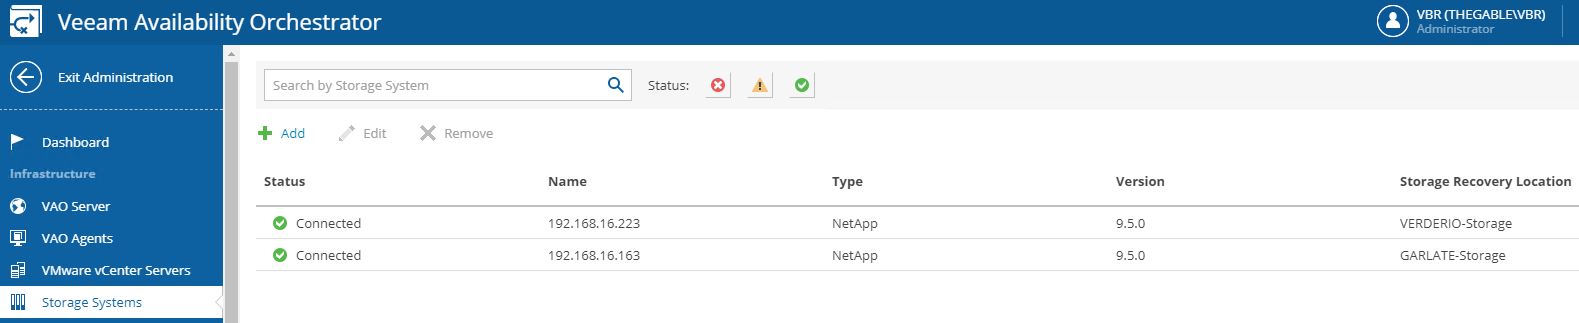 Picture 8
 Picture 9
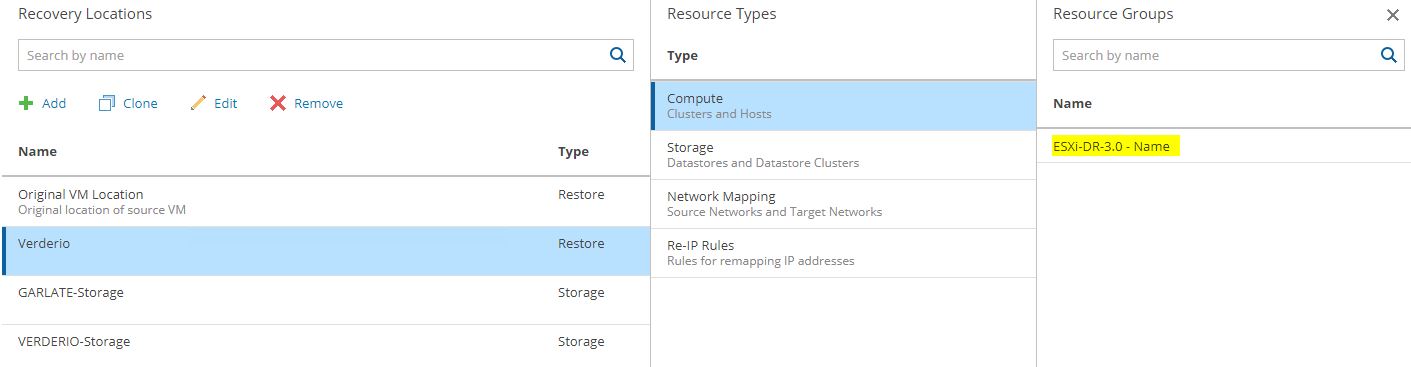 Picture 10
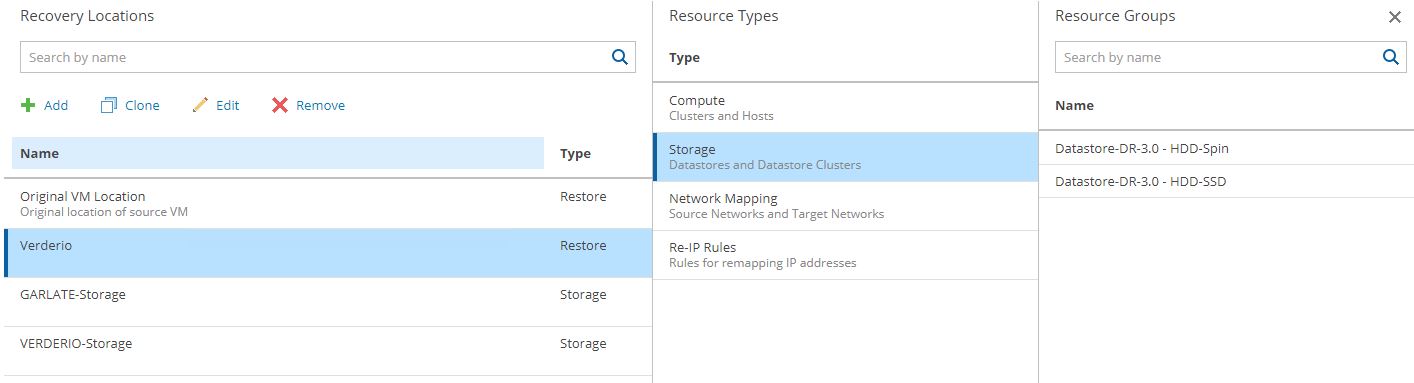 Picture 11
 (Picture 12)
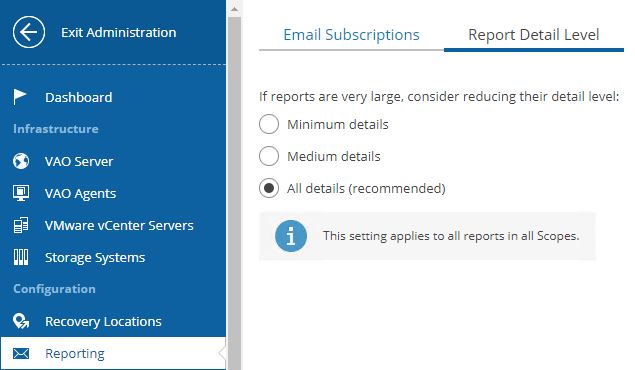 (Picture 13)
 (Picture 14)
 (Picture 15)
 Picture 16