My previous article explained the procedure to perform a failover from VBR console explaining why it is safe (Click here to read it)
In this second article, I’ll show you what can happen if you try a failover in a different way, answering the behavior that a partner had during a cleanup procedure.
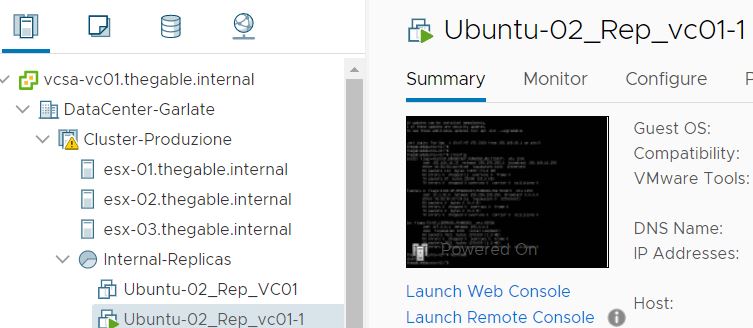
In my lab, I created a new Replica Job where the original VM is still Ubuntu-02 (Picture 1) and the replica VM has the suffix _Rep_vc01-1-1 (Picture 2).
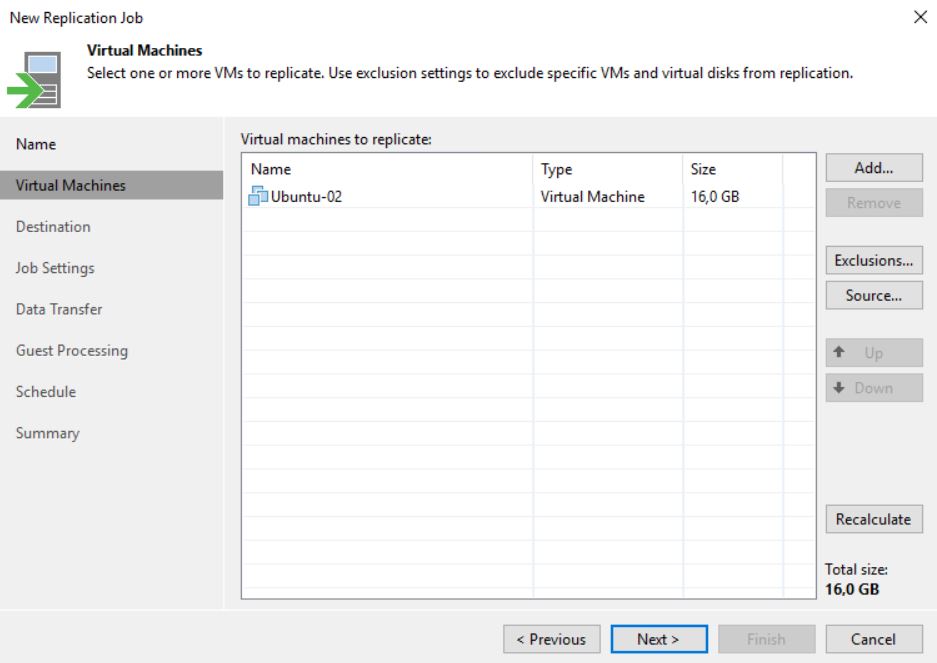 Picture 1
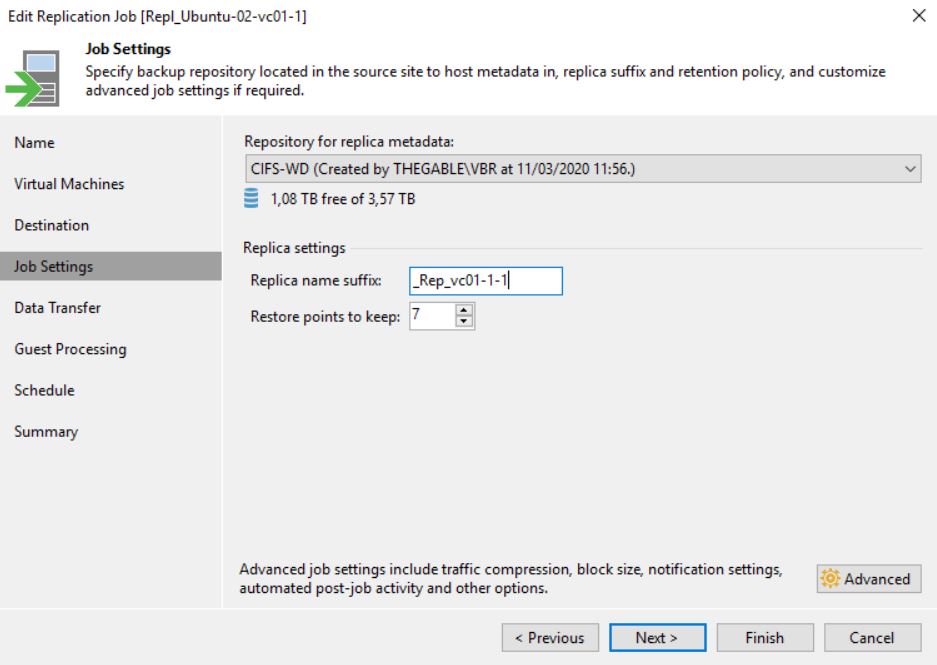 Picture 2
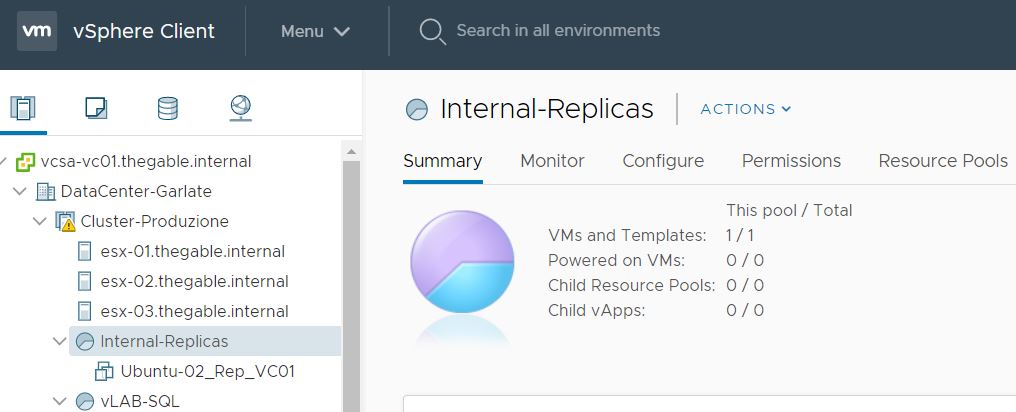
After the VM has been created (Picture 3) It is switched it on directly from the vCENTER console (Picture 4). To be sure it works as expected, it is possible to connect remotely.
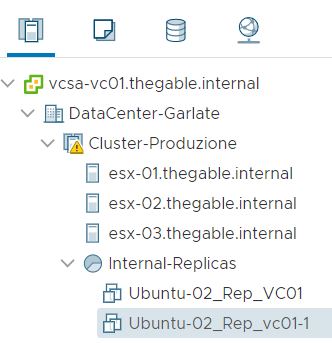 Picture 3
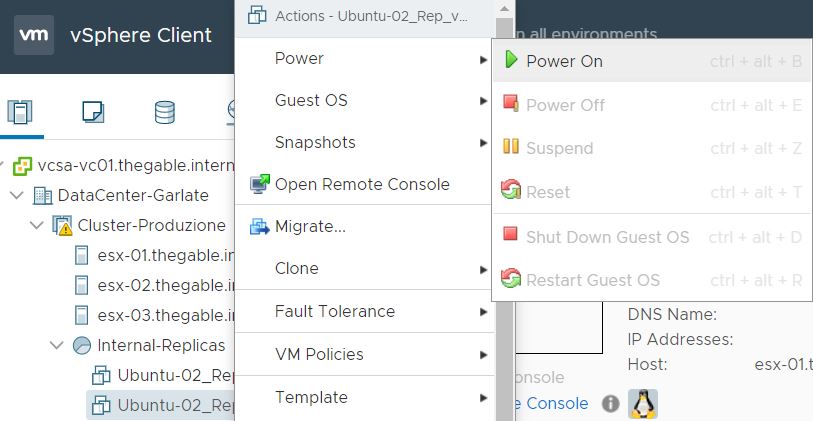 Picture 4
 Picture 5
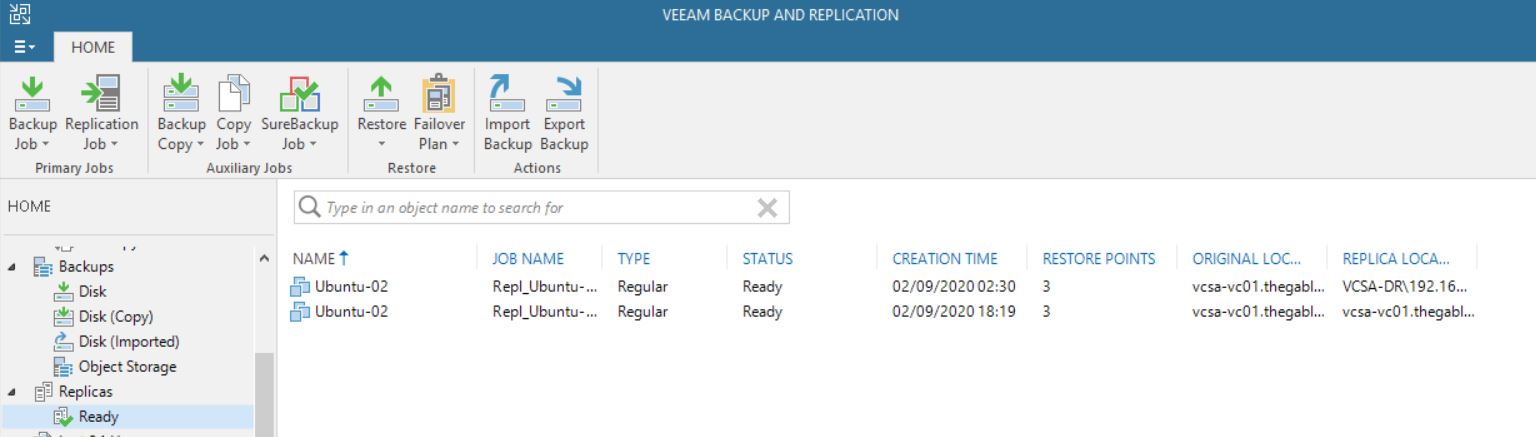
Going back to VBR console it’s possible to see that nothing has changed (Picture 6) just because the power-on action has been performed directly from the VMware console,
 Picture 6
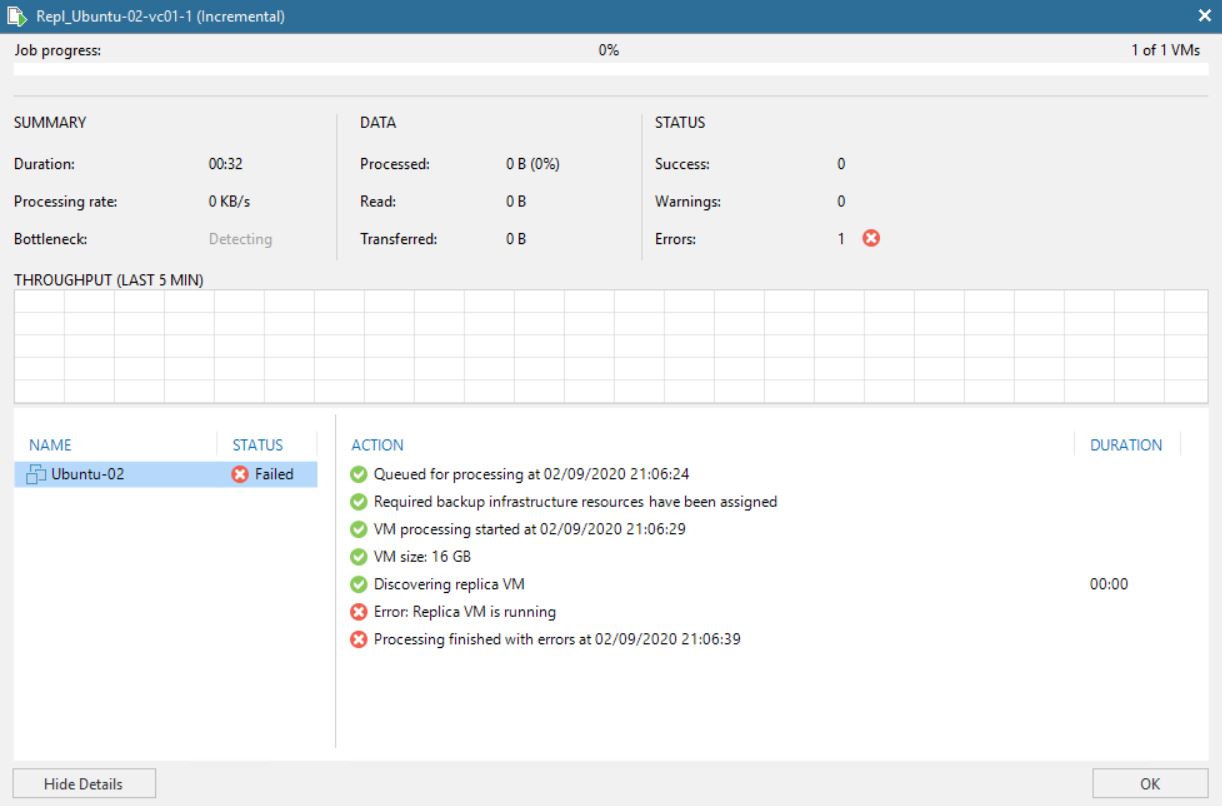
Attention point: If you try to perform a replica task it fails because the VM is running (picture 7)
 Picture 7
Now the main point of the two articles:
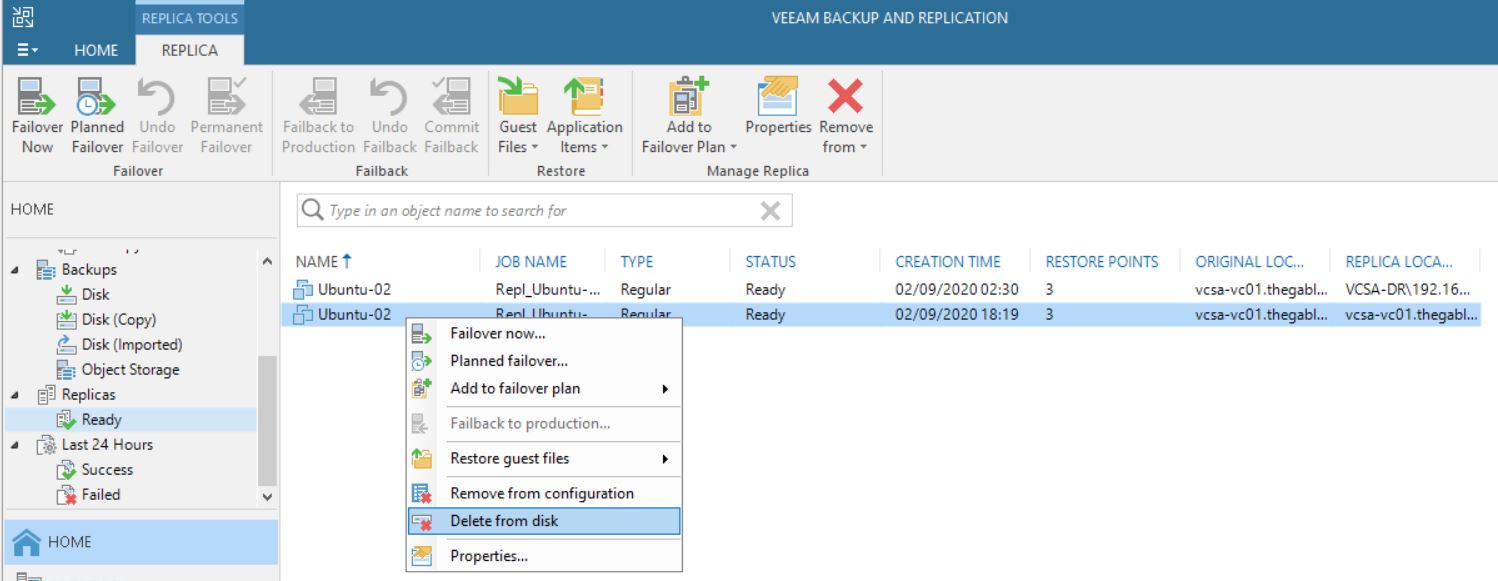
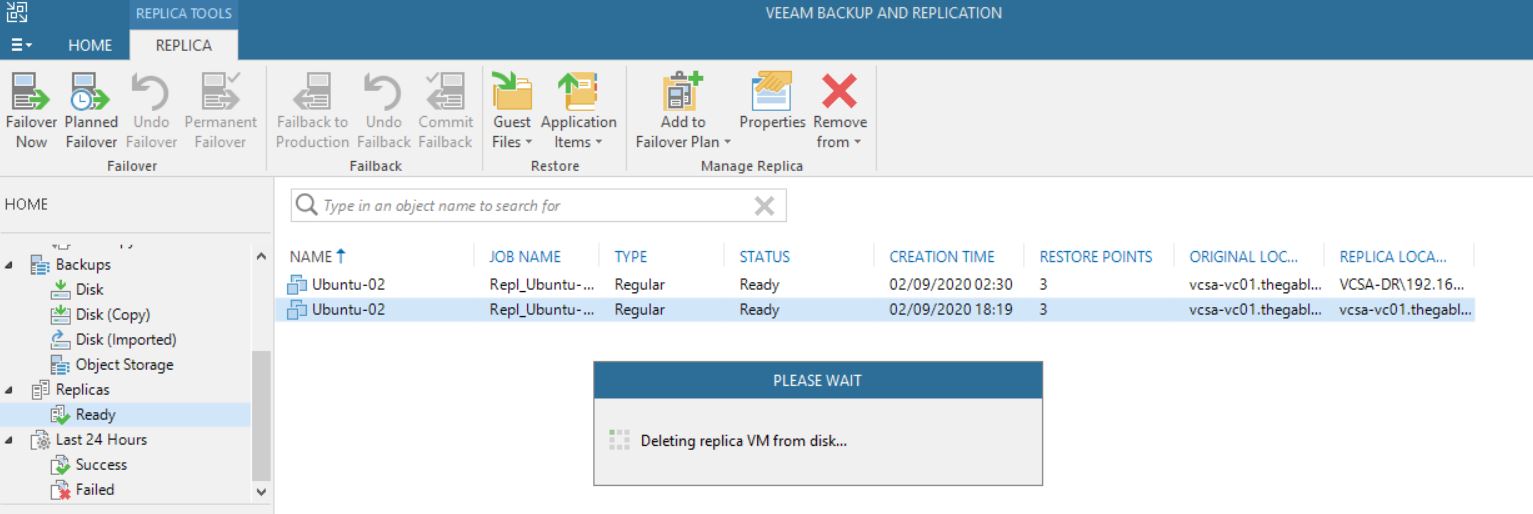
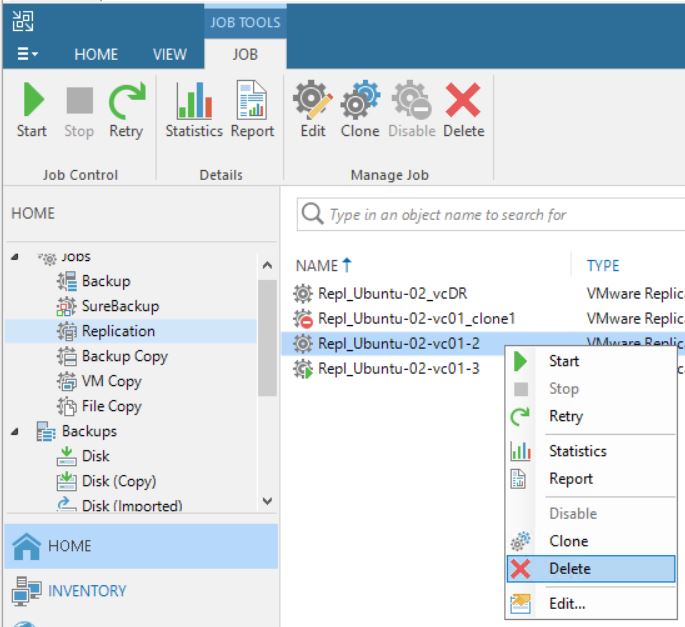
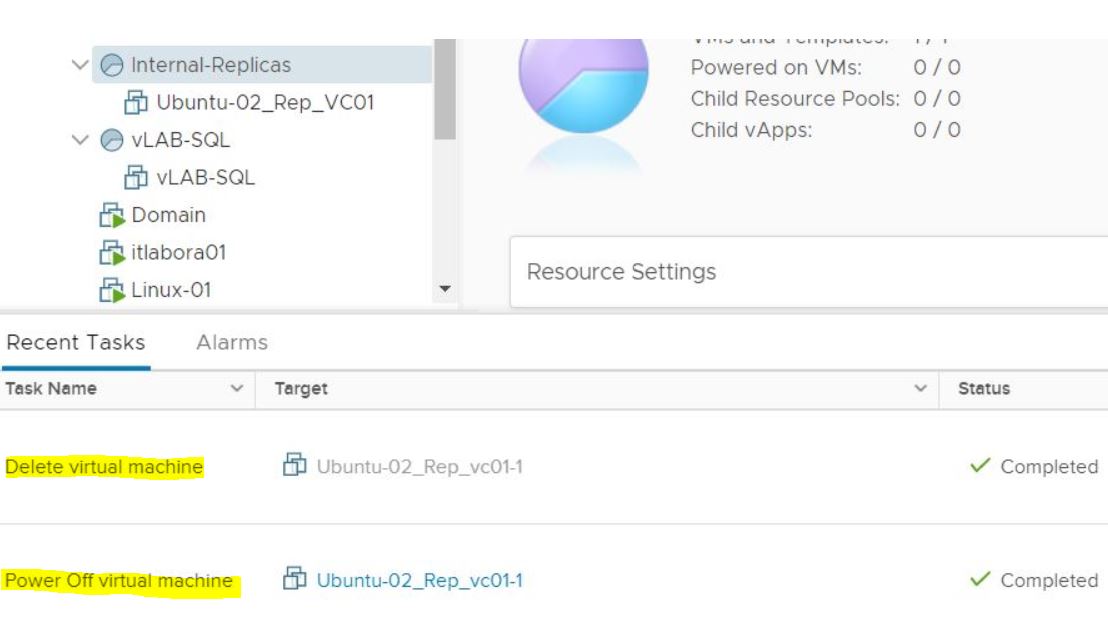
It’s a bad choice to delete VMs from VBR “Ready Replica VM” menu (picture 8/9) without knowing if the VMs have been started from vCENTER console. Why? Because also the production VM gets deleted as shown in picture 10.
 Picture 8
 Picture 9
 Picture 10
Let’s get a little wild with some supposing:
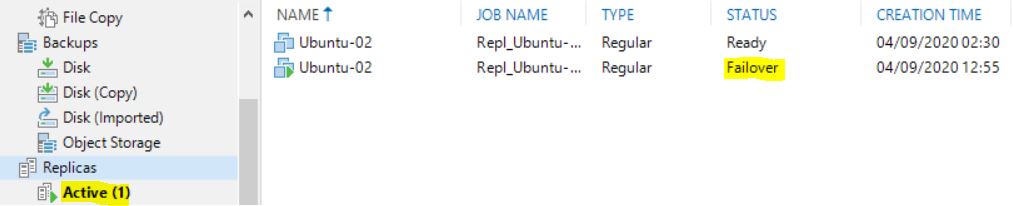
1. If you see the “active” status icon switched on ( from VBR console) it means the failover is started (picture 11)
 Picture 11
2. If a permanent failover was performed, the VM disappears from “Replica Ready” menu and replica job results to be empty (Picture 12)
 Picture 12
3. If the replica job works fine it means that no permanent failover has been performed
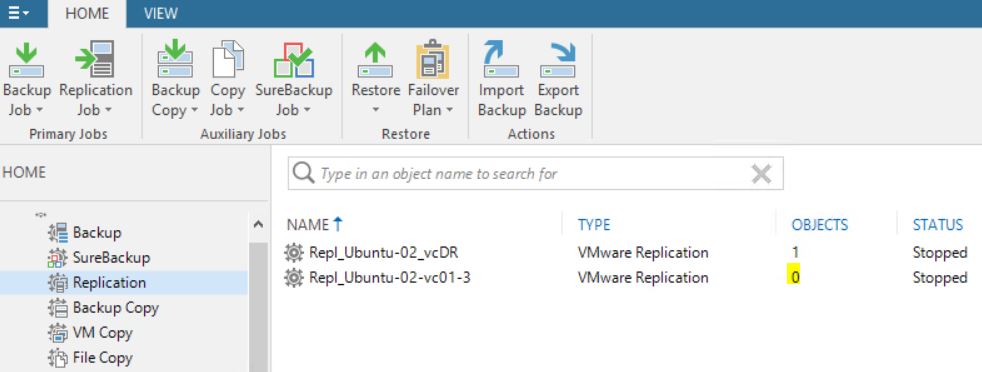
4. If the replica Job works fine but when clicking on the delete button (from “Replica ready menu” of VBR console) (picture 13) the production VM disappears, it means that a new replica job has been re-created after the manual failover has been launched (picture 14).
 Picture 13
 Picture 14
Knowing that deleting a VM replicated from VBR console needs a little attention, especially if you do not have the continuous and complete control of the VMware architecture, the question is: is it possible to think an easy checking-up before deleting VM?
The answer is Yes and Veeam One can easily help just creating them.
a. From vCENTER: setting up a report that checks if the VM to be deleted is running (power state status) (Table 1)
b. From VBR: if a Replication job is setted-up for that VM (Table 2)
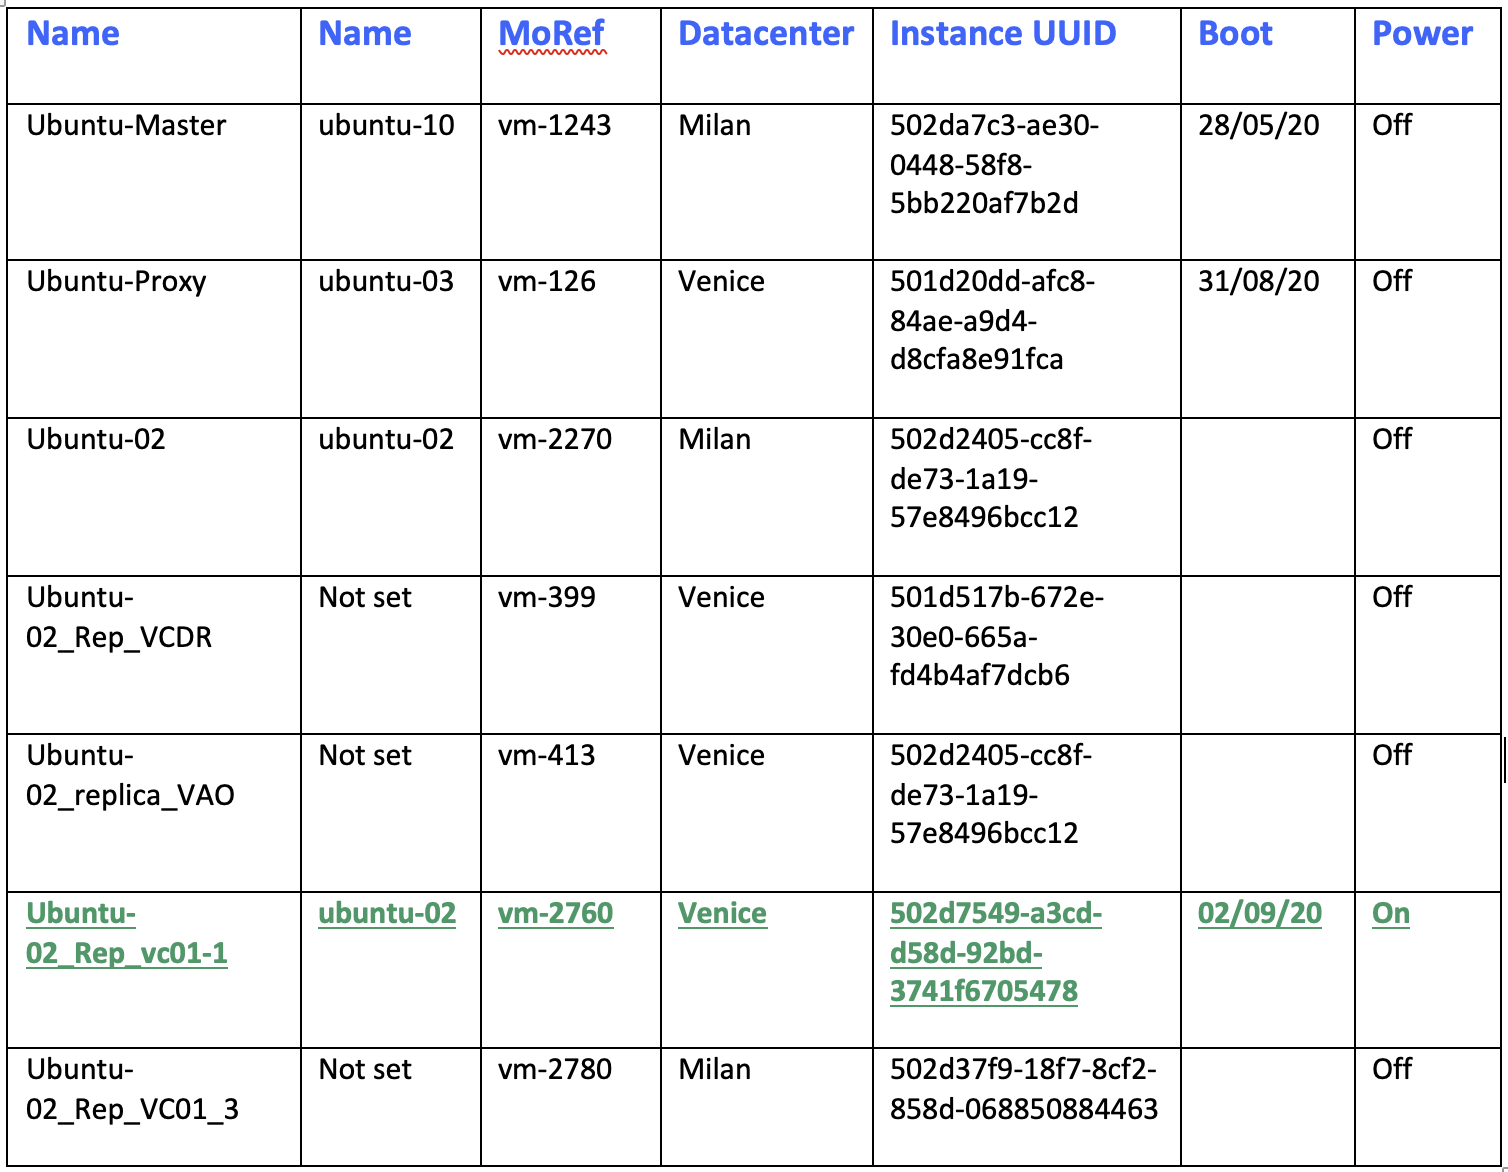 Table 1
 Table2
Is there another way to check it up?
Yes. using Powershell scripts.
The example you can find here below is just the first idea that can be polished with a little bit of your effort.
NB1: I’m not a PowerShell expert, I just love writing scripts easy to read by anyone.
NB2: Before trying it please ask your PowerShell expert a consultant!
NB3: It is meant to be launched from VBR.
NB4: If you think that it can be a feature request write to me!
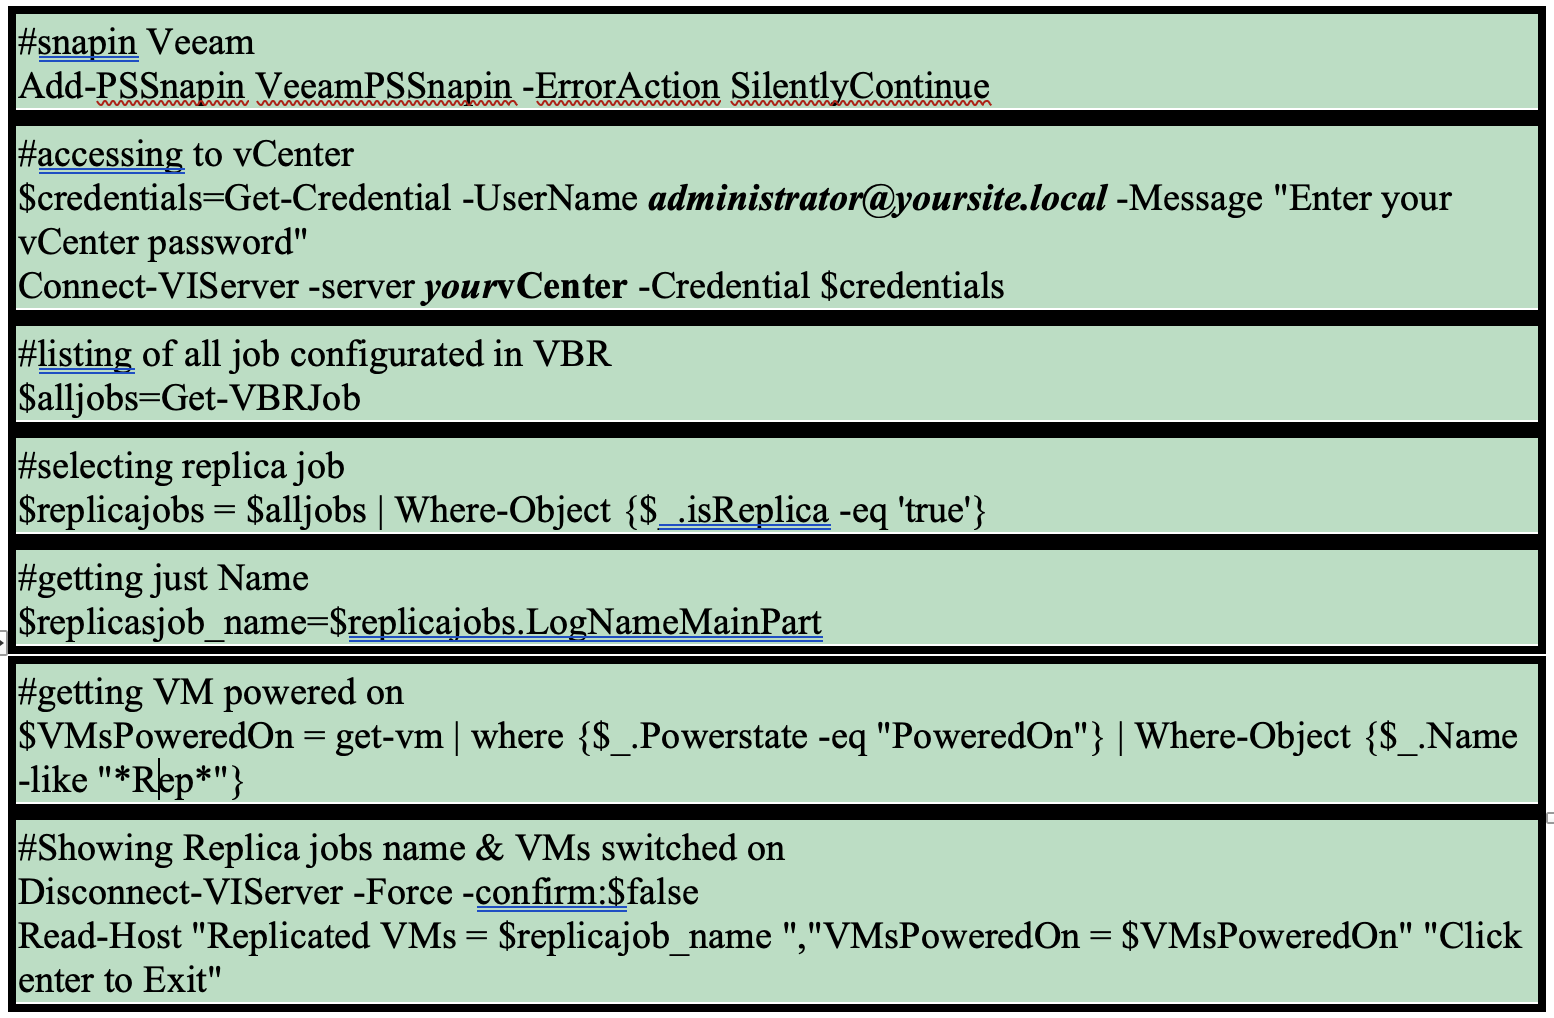 Table 3
That’s all for now guys!