Un articolo dedicato a come poter delegare i ripristini con Veeam Backup & Replication (VBR).
Il case study è legato alla protezione di file in cartelle condivise, ma può essere esteso a molti degli oggetti protetti con VBR. (vedi immagine 7)
—
- Nell’immagine 1 sono illustrate le tre cartelle di rete condivise (SHARE-A, SHARE-B, SHARE-C) che sono utilizzate come sorgente dei file da proteggere.
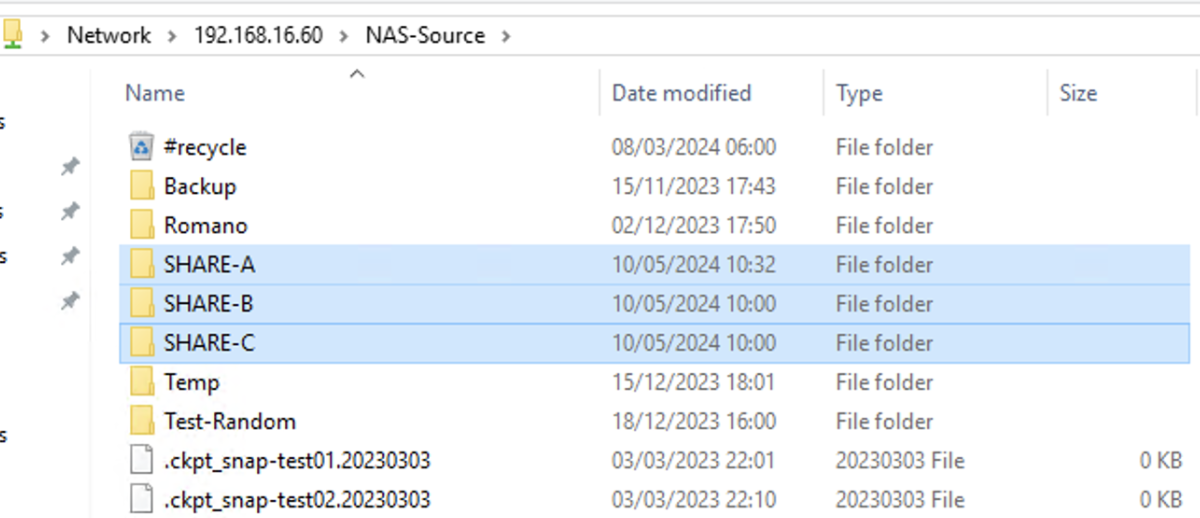 Immagine 1
Nello scenario si ipotizza che per ogni singola cartella condivisa, solo uno specifico utente possa procedere alle attività di ripristino.
- L’ immagine 2 evidenzia la creazione di tre utenti di Dominio, ShareA, ShareB, ShareC.
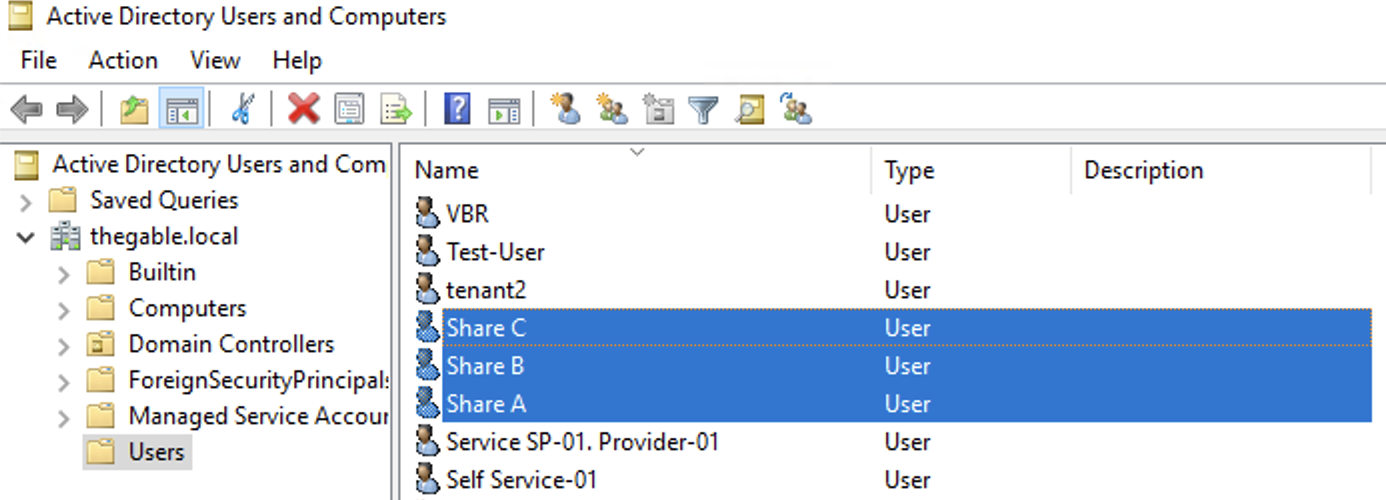 Immagine 2
I file afferenti ad una specifica cartella condivisa saranno ripristinabili dall’utente che ha nel nome l’identica lettera finale. Ad esempio, i file afferenti alla SHARE-A saranno ripristinabili dall’utente ShareA.
(NDR: Per semplicità espositiva la lettera X sostituirà una delle tre lettere dell’alfabeto A-B-C)
- Per ogni cartella condivisa è stato creato un job di Backup denominato “BkF-Share-X”
L’immagine 3 evidenzia che il job “BKF-Share-A” (freccia arancio) protegge l’intera SHARE-A (freccia Blue).
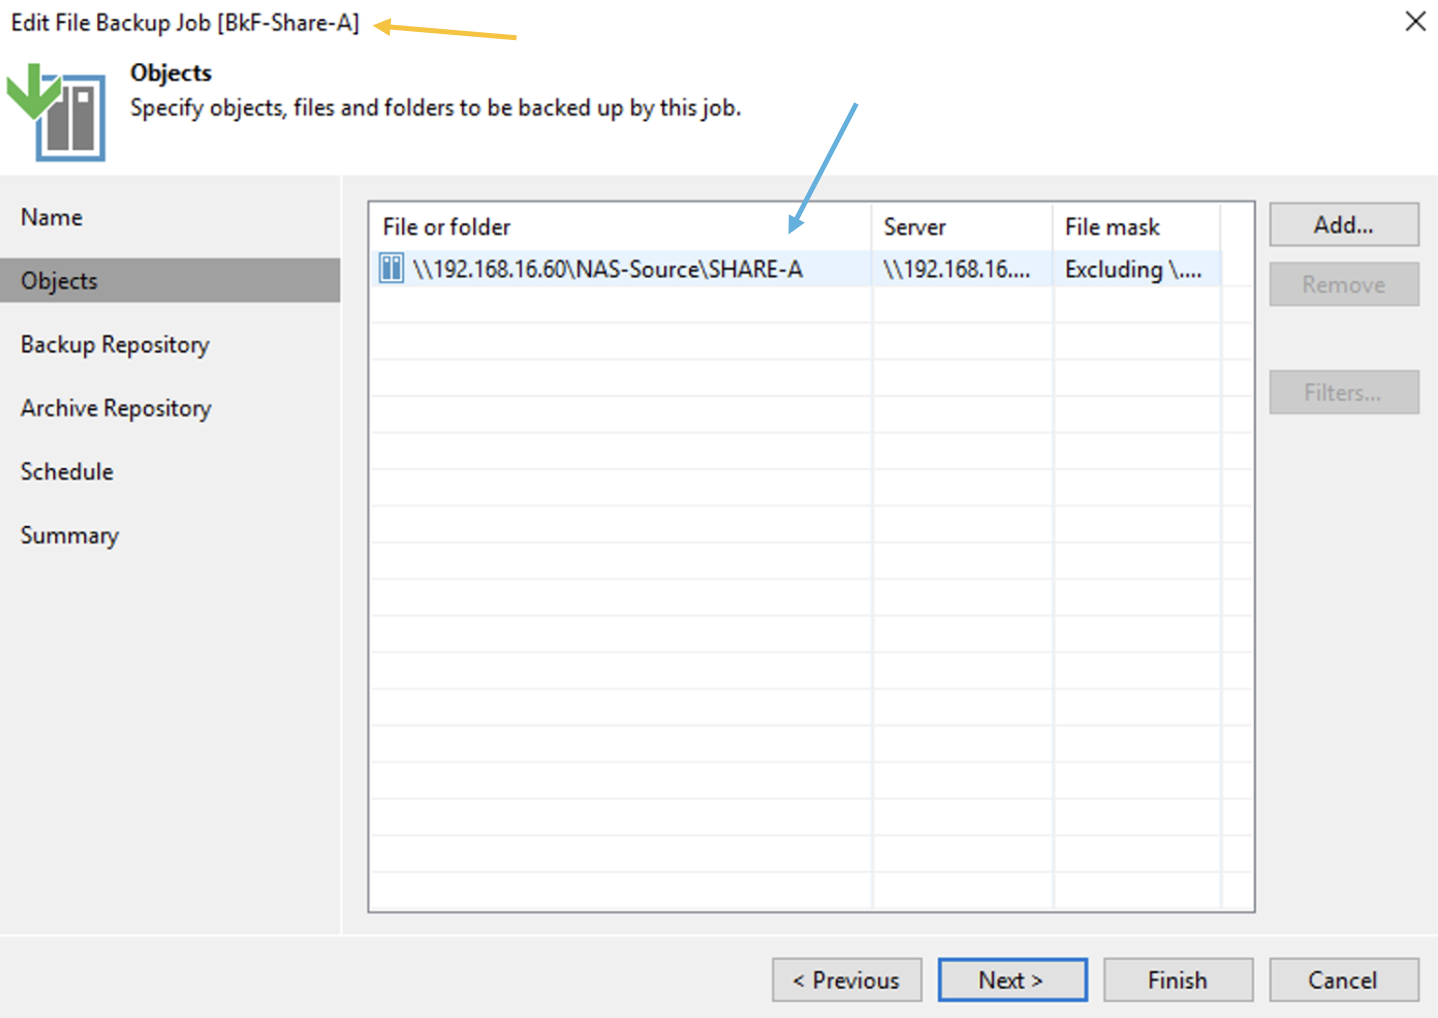 Immagine 3
- Nell’immagine 4 viene evidenziato il menù “configurazione” dall’ Enterprise Manager.
In questa fase di configurazione sono necessarie le credenziali amministrazione.
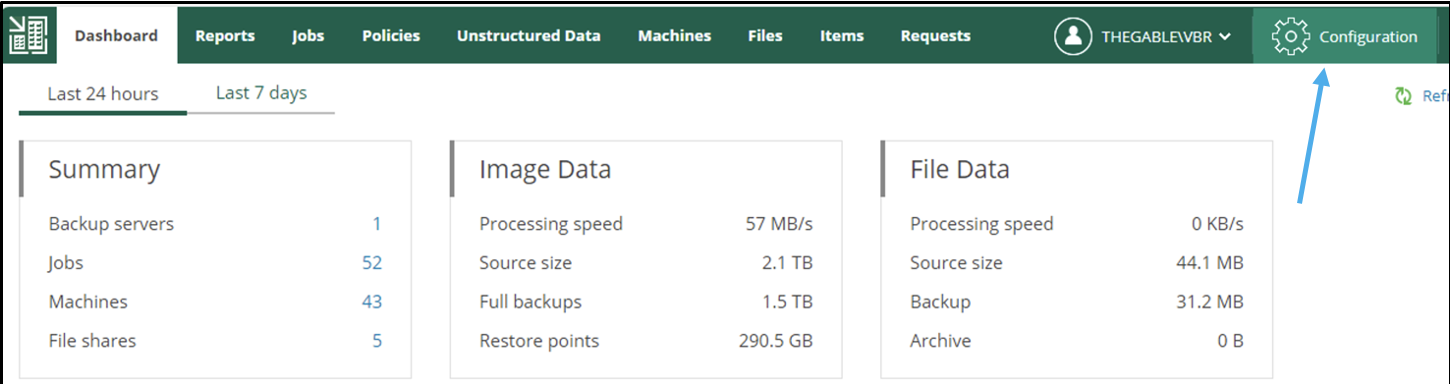 Immagine 4
- Dal sotto menù role (immagine 5 – freccia arancio) vengono aggiunti (freccia verde) i tre utenti precedentemente creati (ShareX) ai quali viene assegnato il ruolo di Restore Operator (freccia blue).
 Immagine 5
- L’immagine 6 mostra le opzioni di delega.
All’ utente ShareA (freccia verde) viene assegnata la possibilità di effettuare il ripristino di tutti gli oggetti protetti da VBR attraverso il pulsante “Choose” (freccia arancio); nelle opzioni di ripristino è possibile permettere il solo ripristino in-place (freccia blue).
Nelle immagini successive (7-8) viene indicato come effettuare la scelta degli oggetti da visualizzare durante le operazioni di delega del ripristino.
 Immagine 6
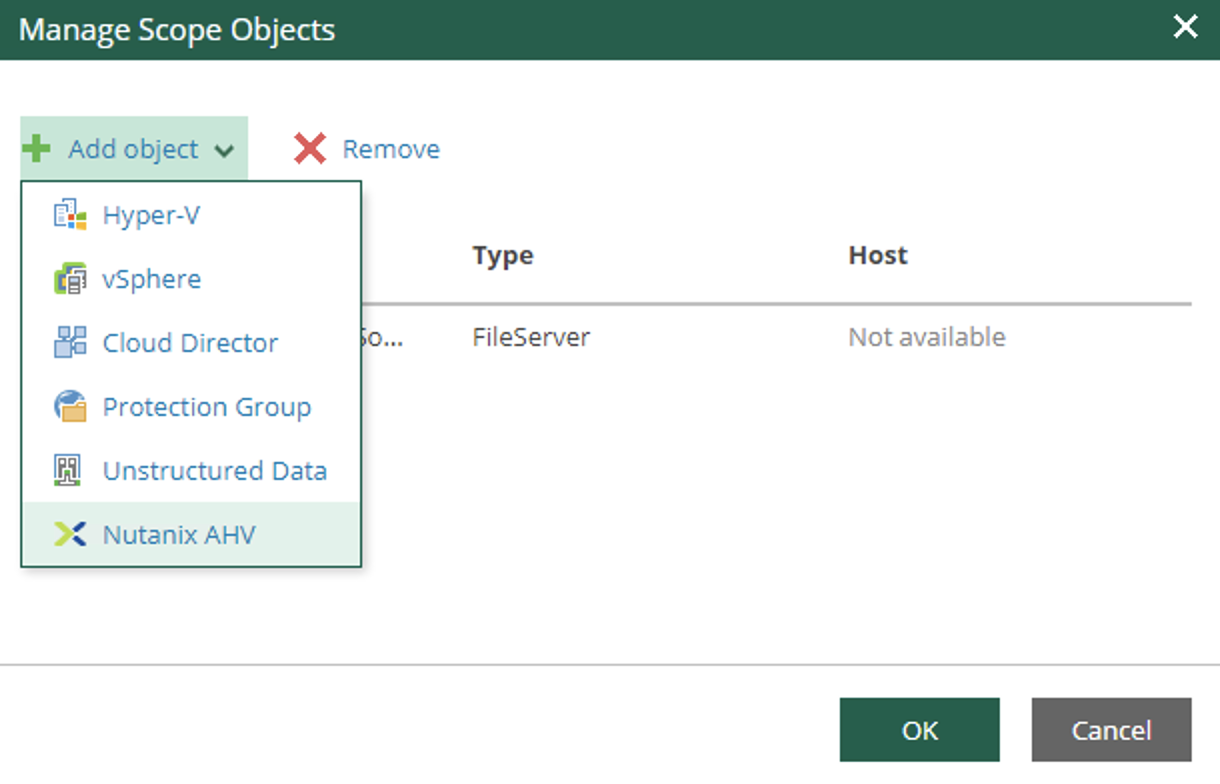 immagine 7
 Immagine 8
- L’immagine 9 illustra e conferma che effettuato il login dall’Enterprise Manager con le credenziali dell’utente ShareX (freccia Blue), siano visibili e ripristinabili solo i file della corrispettiva cartella condivisa (freccia arancio).
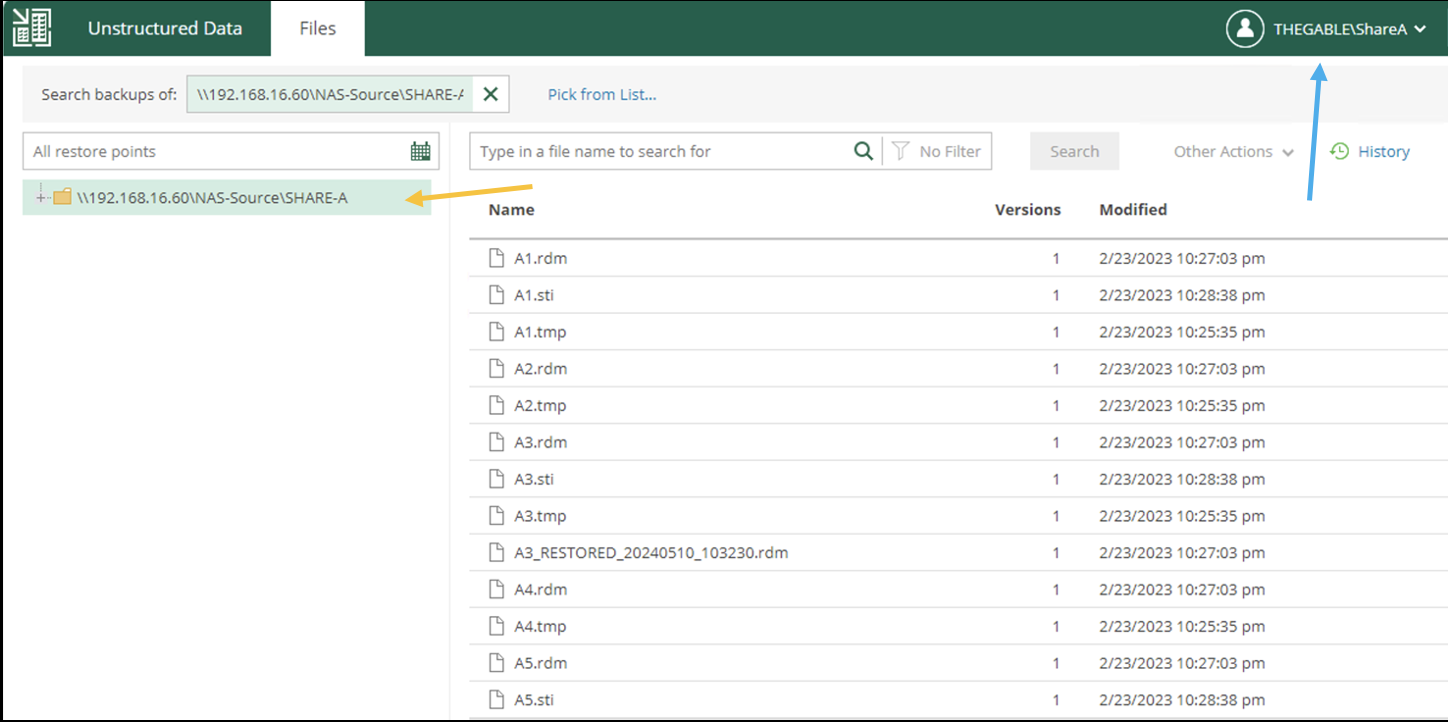 Immagine 9
Nota Finale:
- La gestione degli utenti è configurabile attraverso i gruppi AD.
- E’ possibile abilitare e disabilitare temporaneamente il ripristino di file ad un singolo utente o gruppi di utenti.
- Il licensing conteggia la quantità di dati protetti per ogni singolo job di Backup. (Il NAS Pack ha lo scopo di rispondere alle necessità di grandi quantità di dati).
- E’ possibile integrarsi con un portale web esistente via Rest-Ful-Api.
- La documentazione è disponibile sul portale Veeam o cliccando qui.