
Veeam One è uno splendido strumento di Analisi e Reportistica avanzata per ambienti virtuali e di backup.
In un’architettura Enterprise i ruoli di Veeam One, sono distribuiti su differenti Server.
Parliamo del DataBase (MS-SQL), del Reporting Server (SSRS) e ovviamente del Server Veeam ONE (VOS)
In questo articolo illustrerò come sia possibile ottimizzare la creazione dei report creando contestualmente una connessione cifrata tra Veeam ONE e il Reporting Server.
La procedura consta di tre macro fasi.
- Nella prima si crea il certificato che abilita la connessione cifrata HTTPS sul server SSRS.
- Nella seconda si configura SSRS in modo che possa accettare connessioni HTTPS.
- Nella terza si configura il server Veeam ONE ad utilizzare SSRS per la creazione dei report.
1- Creazione del certificato
Se nel vostro dominio non è installata alcuna autorità di certificazione (come nel mio), è necessario creare un Self-Signed certificate.
Vediamo come procedere:
Sul SSRS avviate come amministratori una console powershell e lanciate i seguenti comandi:
- New-SelfSignedCertificate -CertStoreLocation cert:\LocalMachine\my -dnsname NAMESERVER -NotAfter (Get-Date).AddMonths(60) (sostituite NAMESERVER con il nome del vostro Server).
- $pwd=ConvertTo-SecureString “yourpassword” -asplainText -force (sostituire yourpassword con una complicata e di vostra scelta).
- $file=”C:\MyFolder\SQLcertificate.pfx” (è la location dove verrà esportato il certificato).
- Export-PFXCertificate -cert cert:\LocalMachine\My\<Thumbprint creato dall’output del primo comando> -file $file -Password $pwd (Copia il certificato nel file creato nel punto 3).
- Import-PfxCertificate -FilePath $file cert:\LocalMachine\root -Password $pwd (importa all’interno del SSRS il certificato).
Ora è il momento di copiare il file SQLcertificate.pfx (punto 3) nel VOS e procedere alla sua installazione come indicato nelle prossime righe.
- Fare doppio click sul file e nella prima finestra scegliere “Macchina Locale”.
- Quando viene richiesta la password, fornite quella impostata nel passaggio 2.
- Nella schermata successiva selezionate “Posiziona tutti i certificati nel seguente archivio“, e dopo aver selezionato Sfoglia, selezionate dall’elenco “Autorità di certificazione radice attendibili“.
- Fate Ok e dopo aver selezionato Avanti, terminate l’installazione.
2- Configurazione SSRS
Utilizzando il configuration manager di SSRS è possibile impostare la connessione https come illustrato nelle immagini 1,2 e 3.
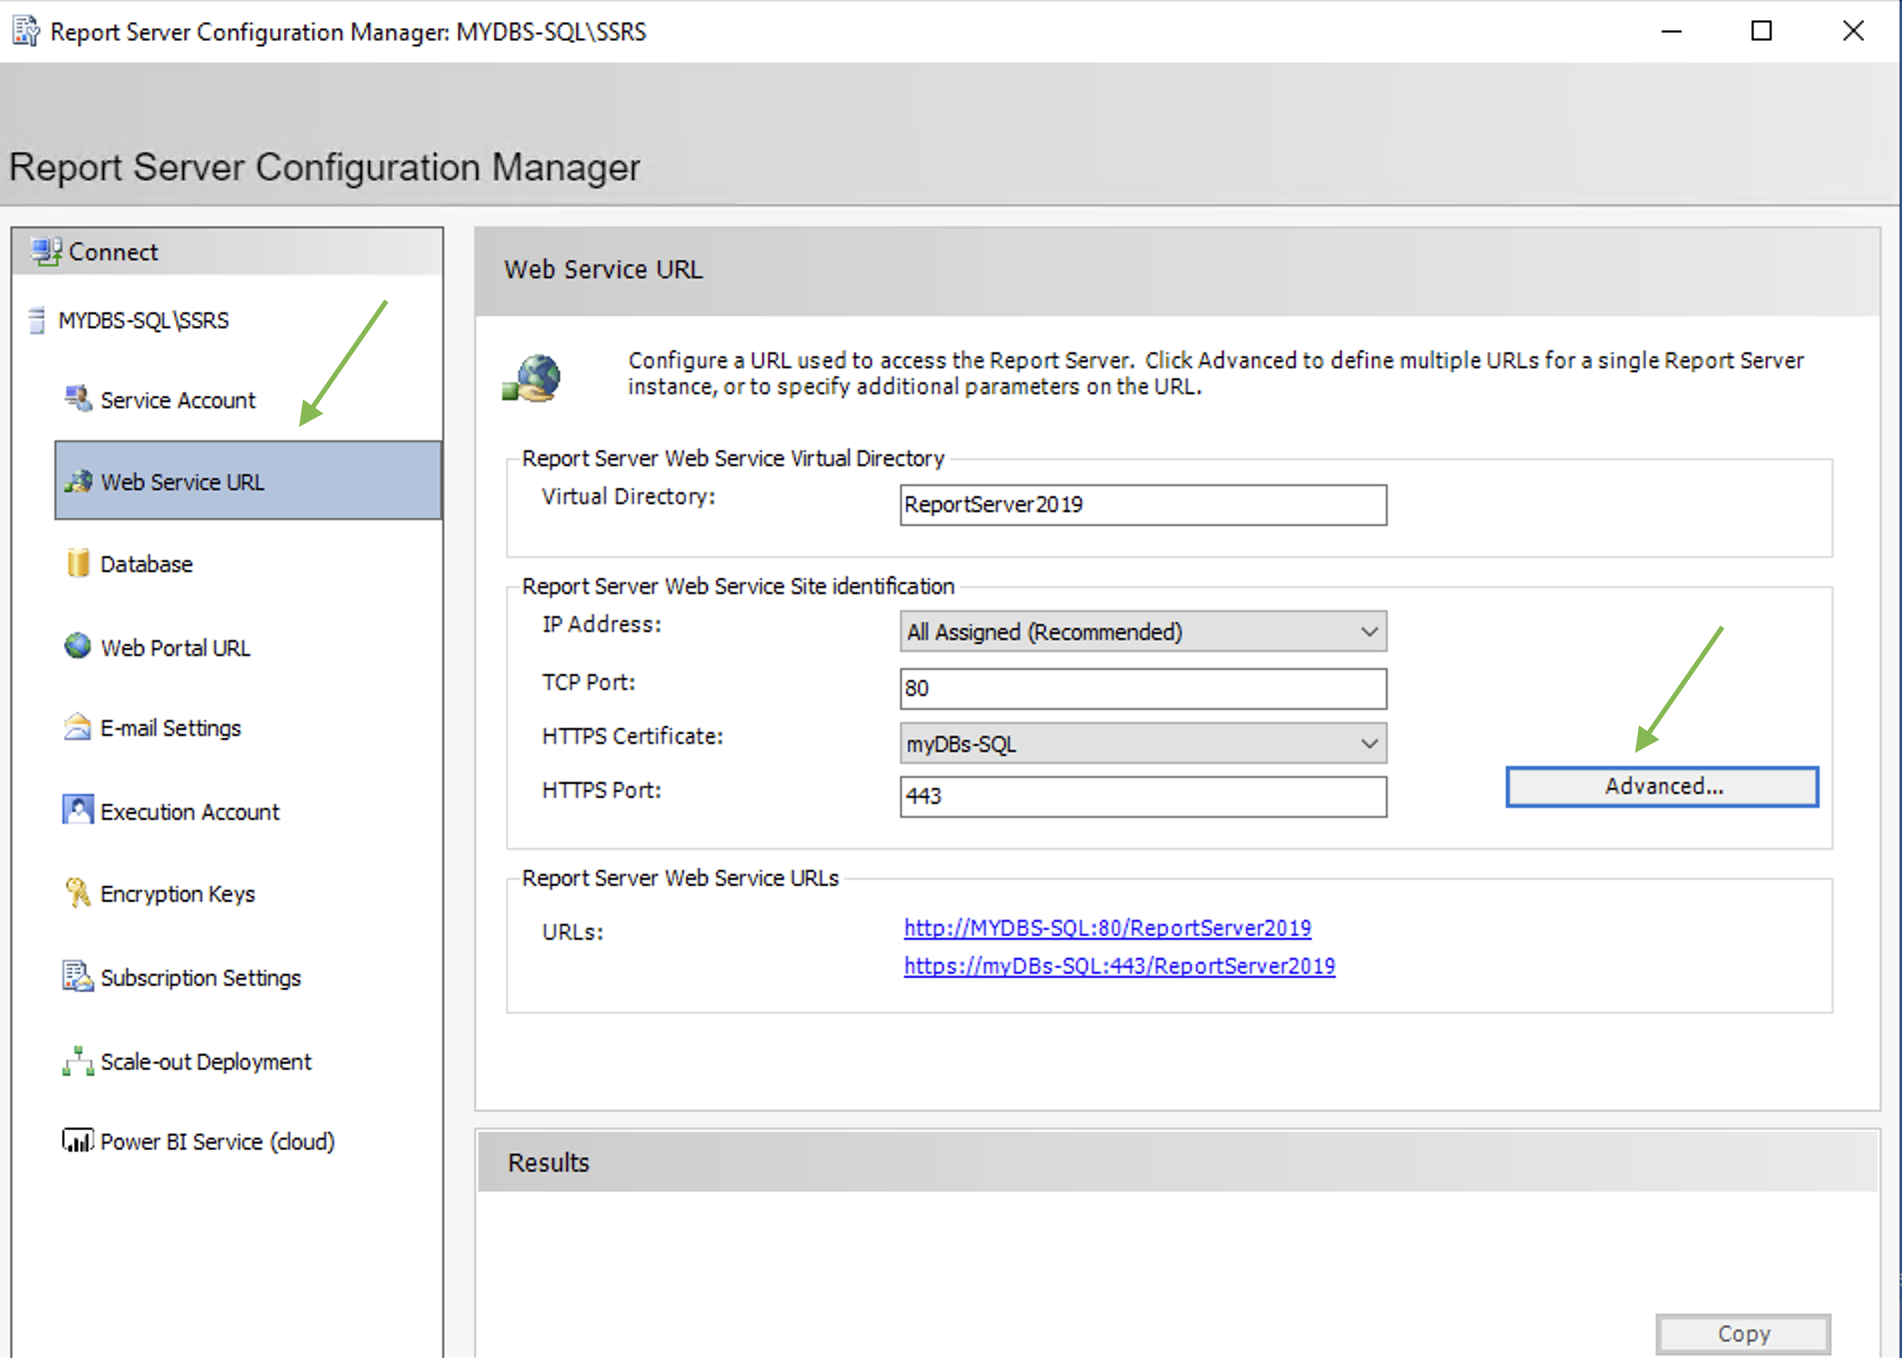 Immagine 1
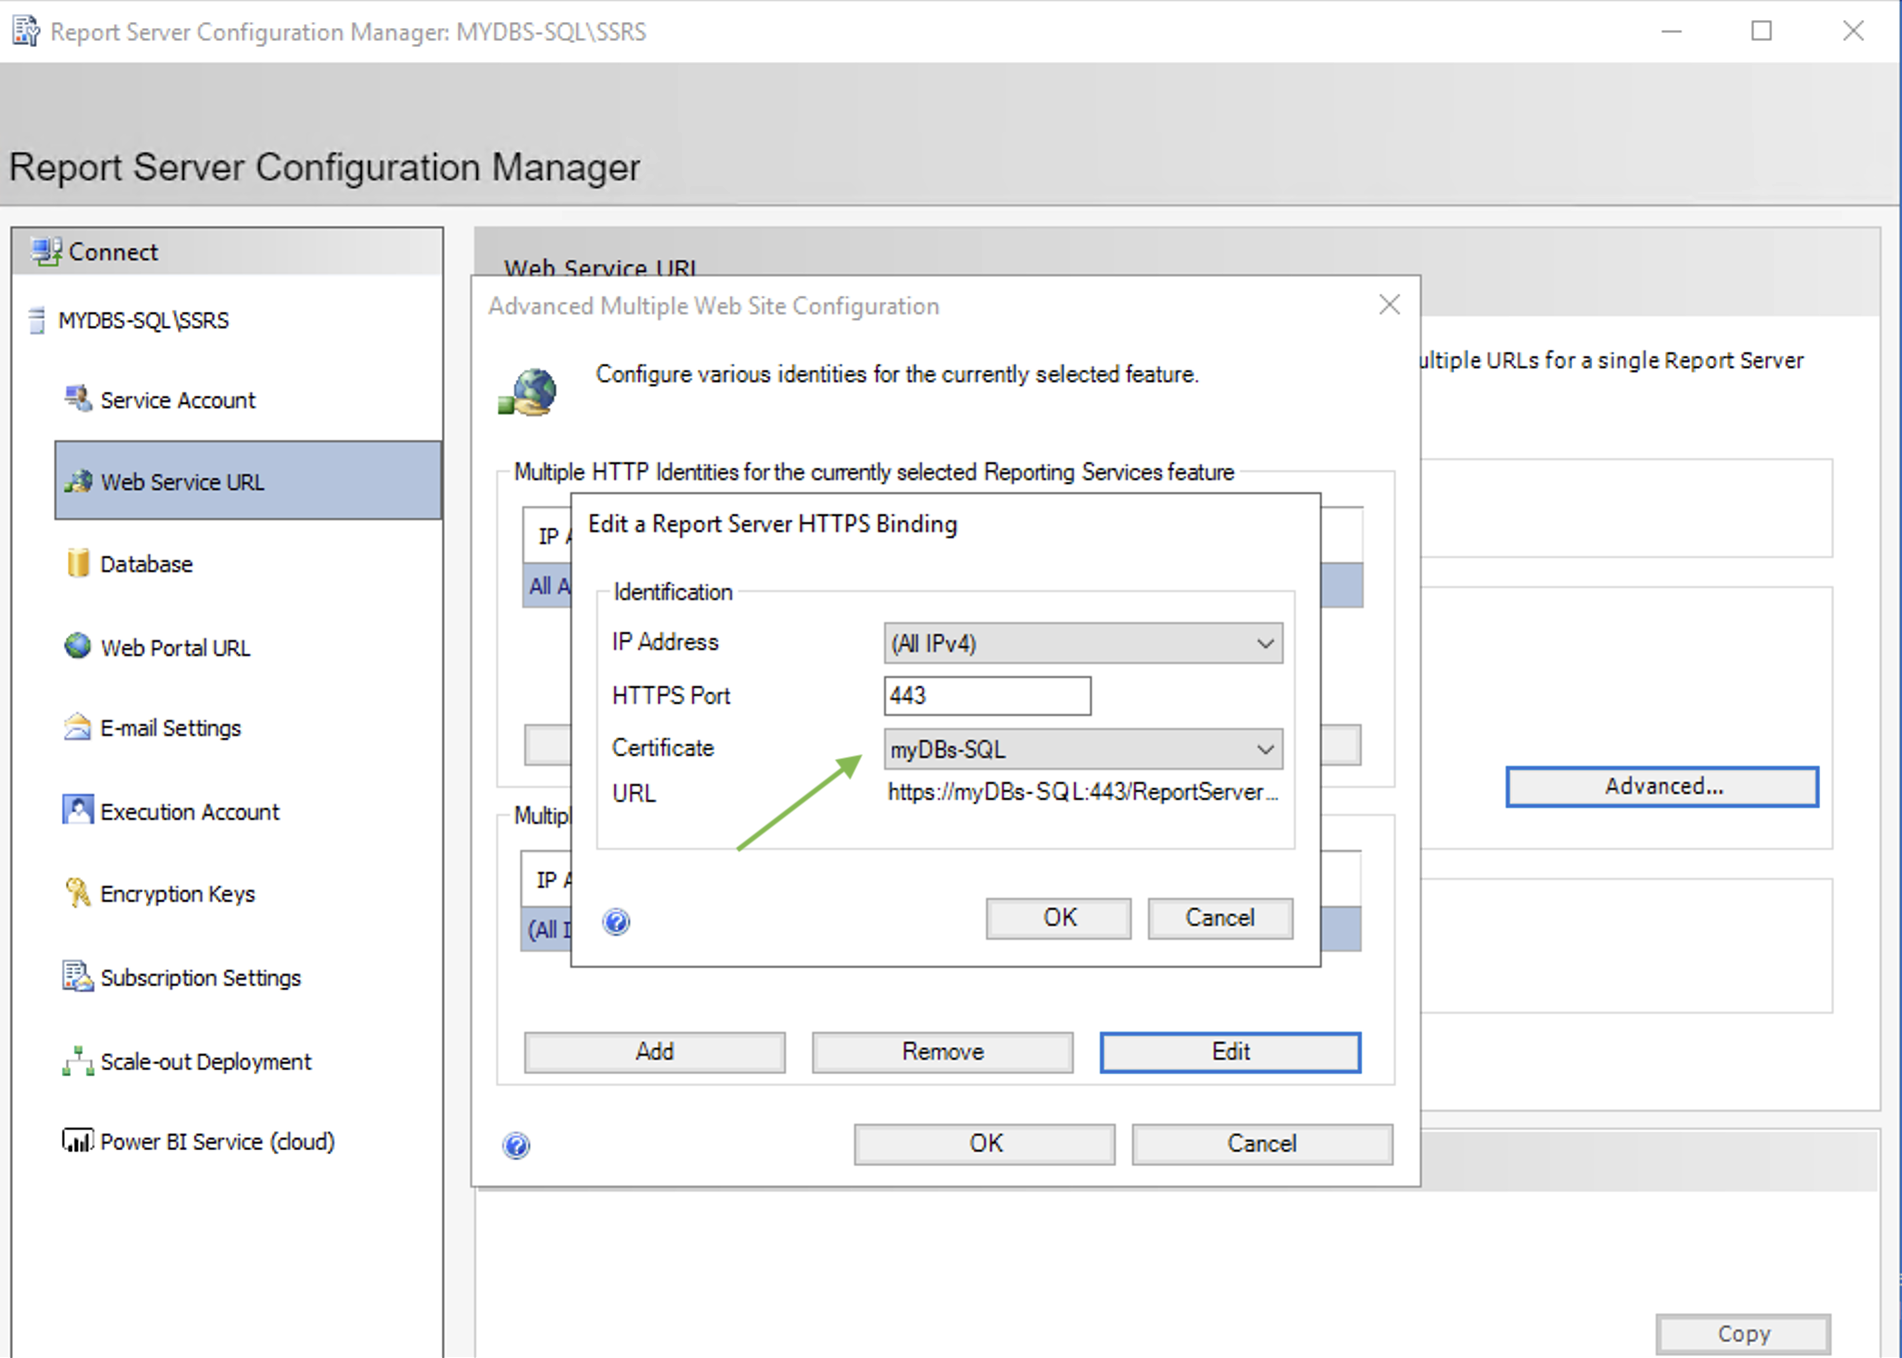 Immagine 2
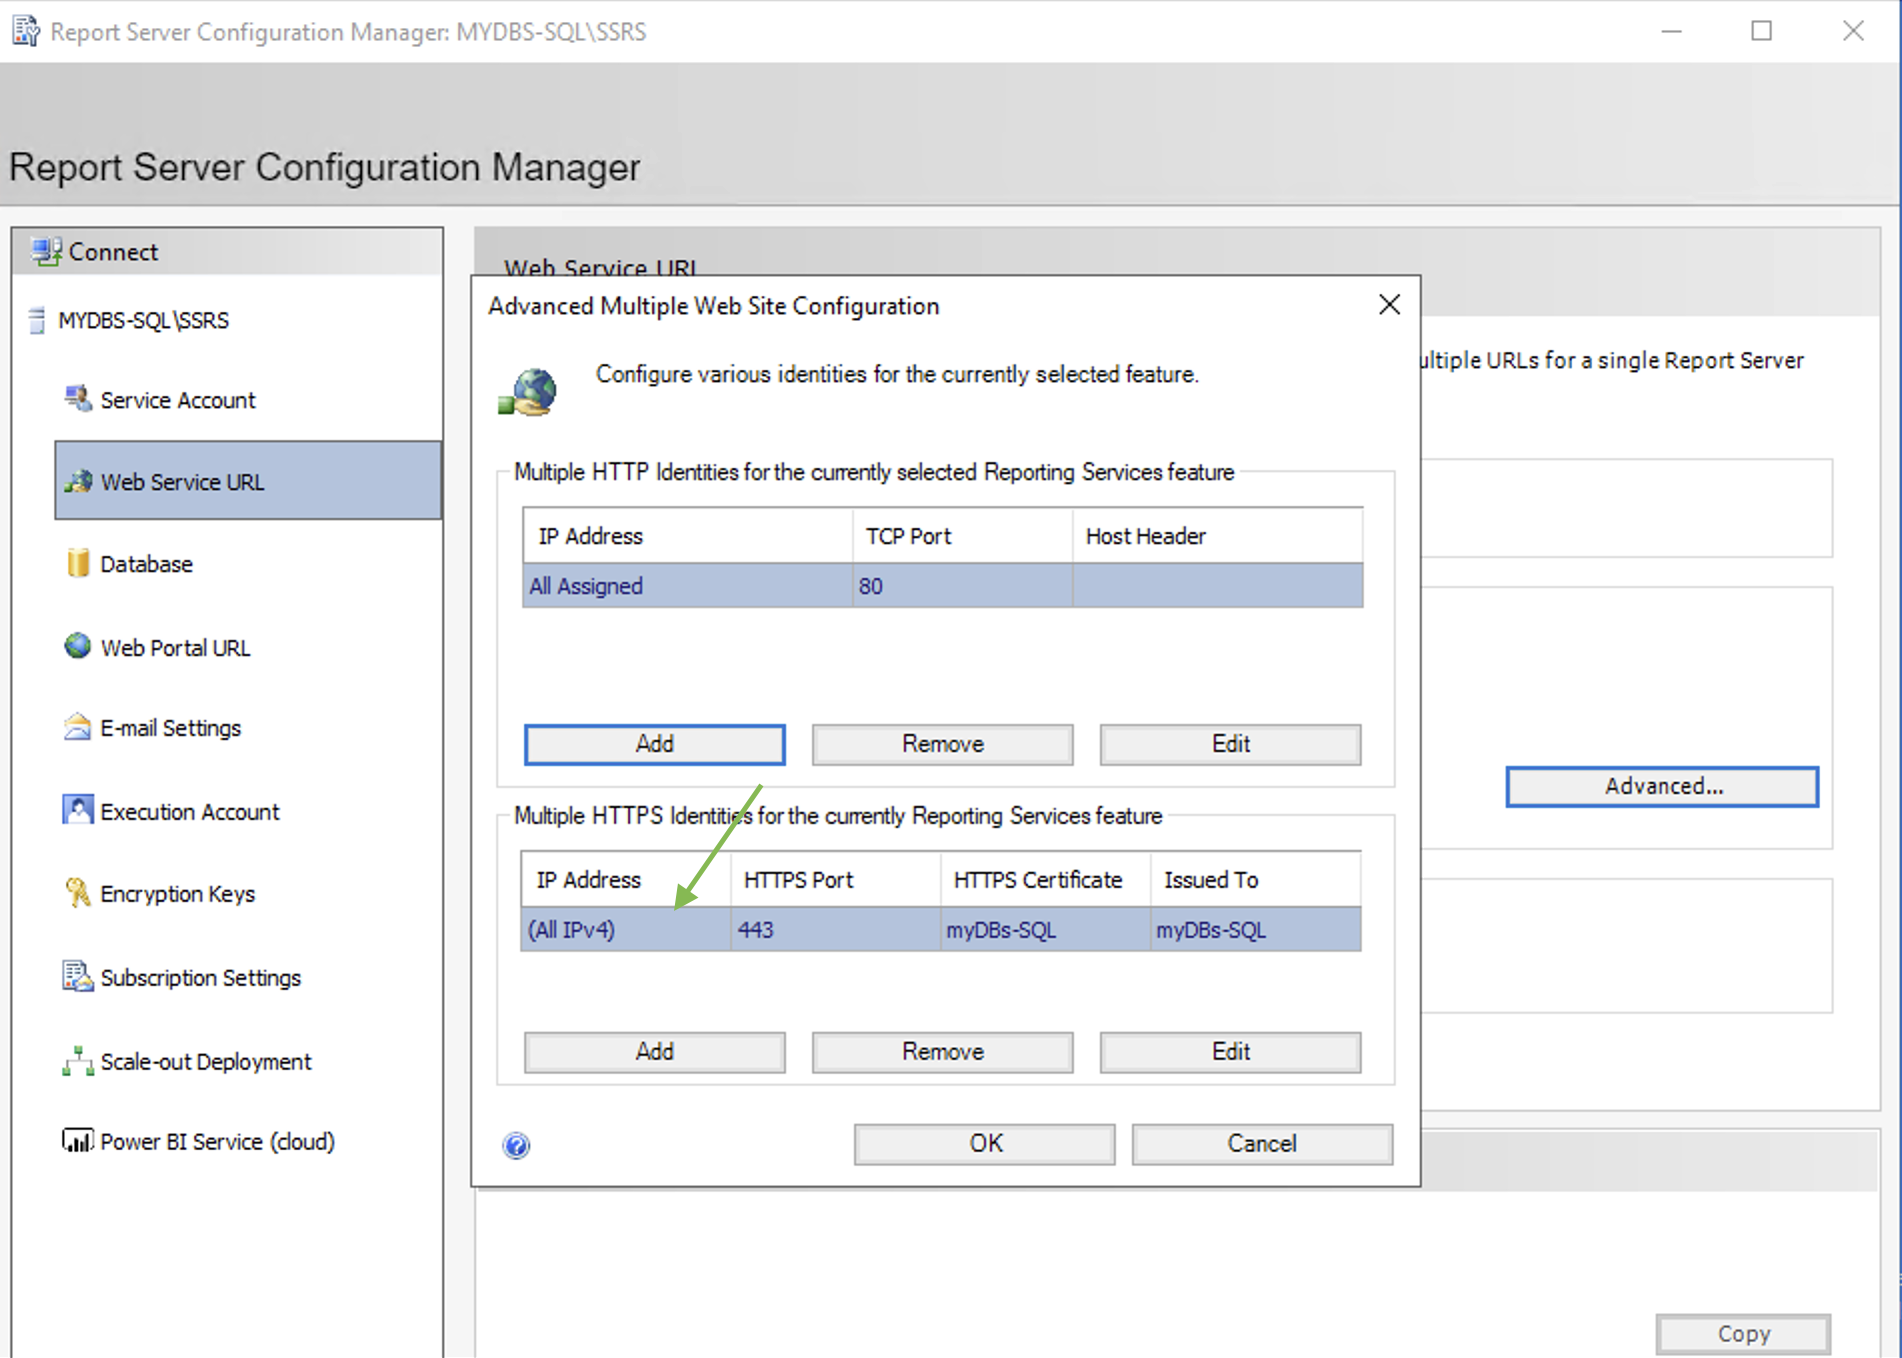 Immagine 3
3- Configurazione Veeam ONE
Le immagini 4 e 5 mostrano come configurare VOS in modo che debba utilizzare SSRS per generare i report.
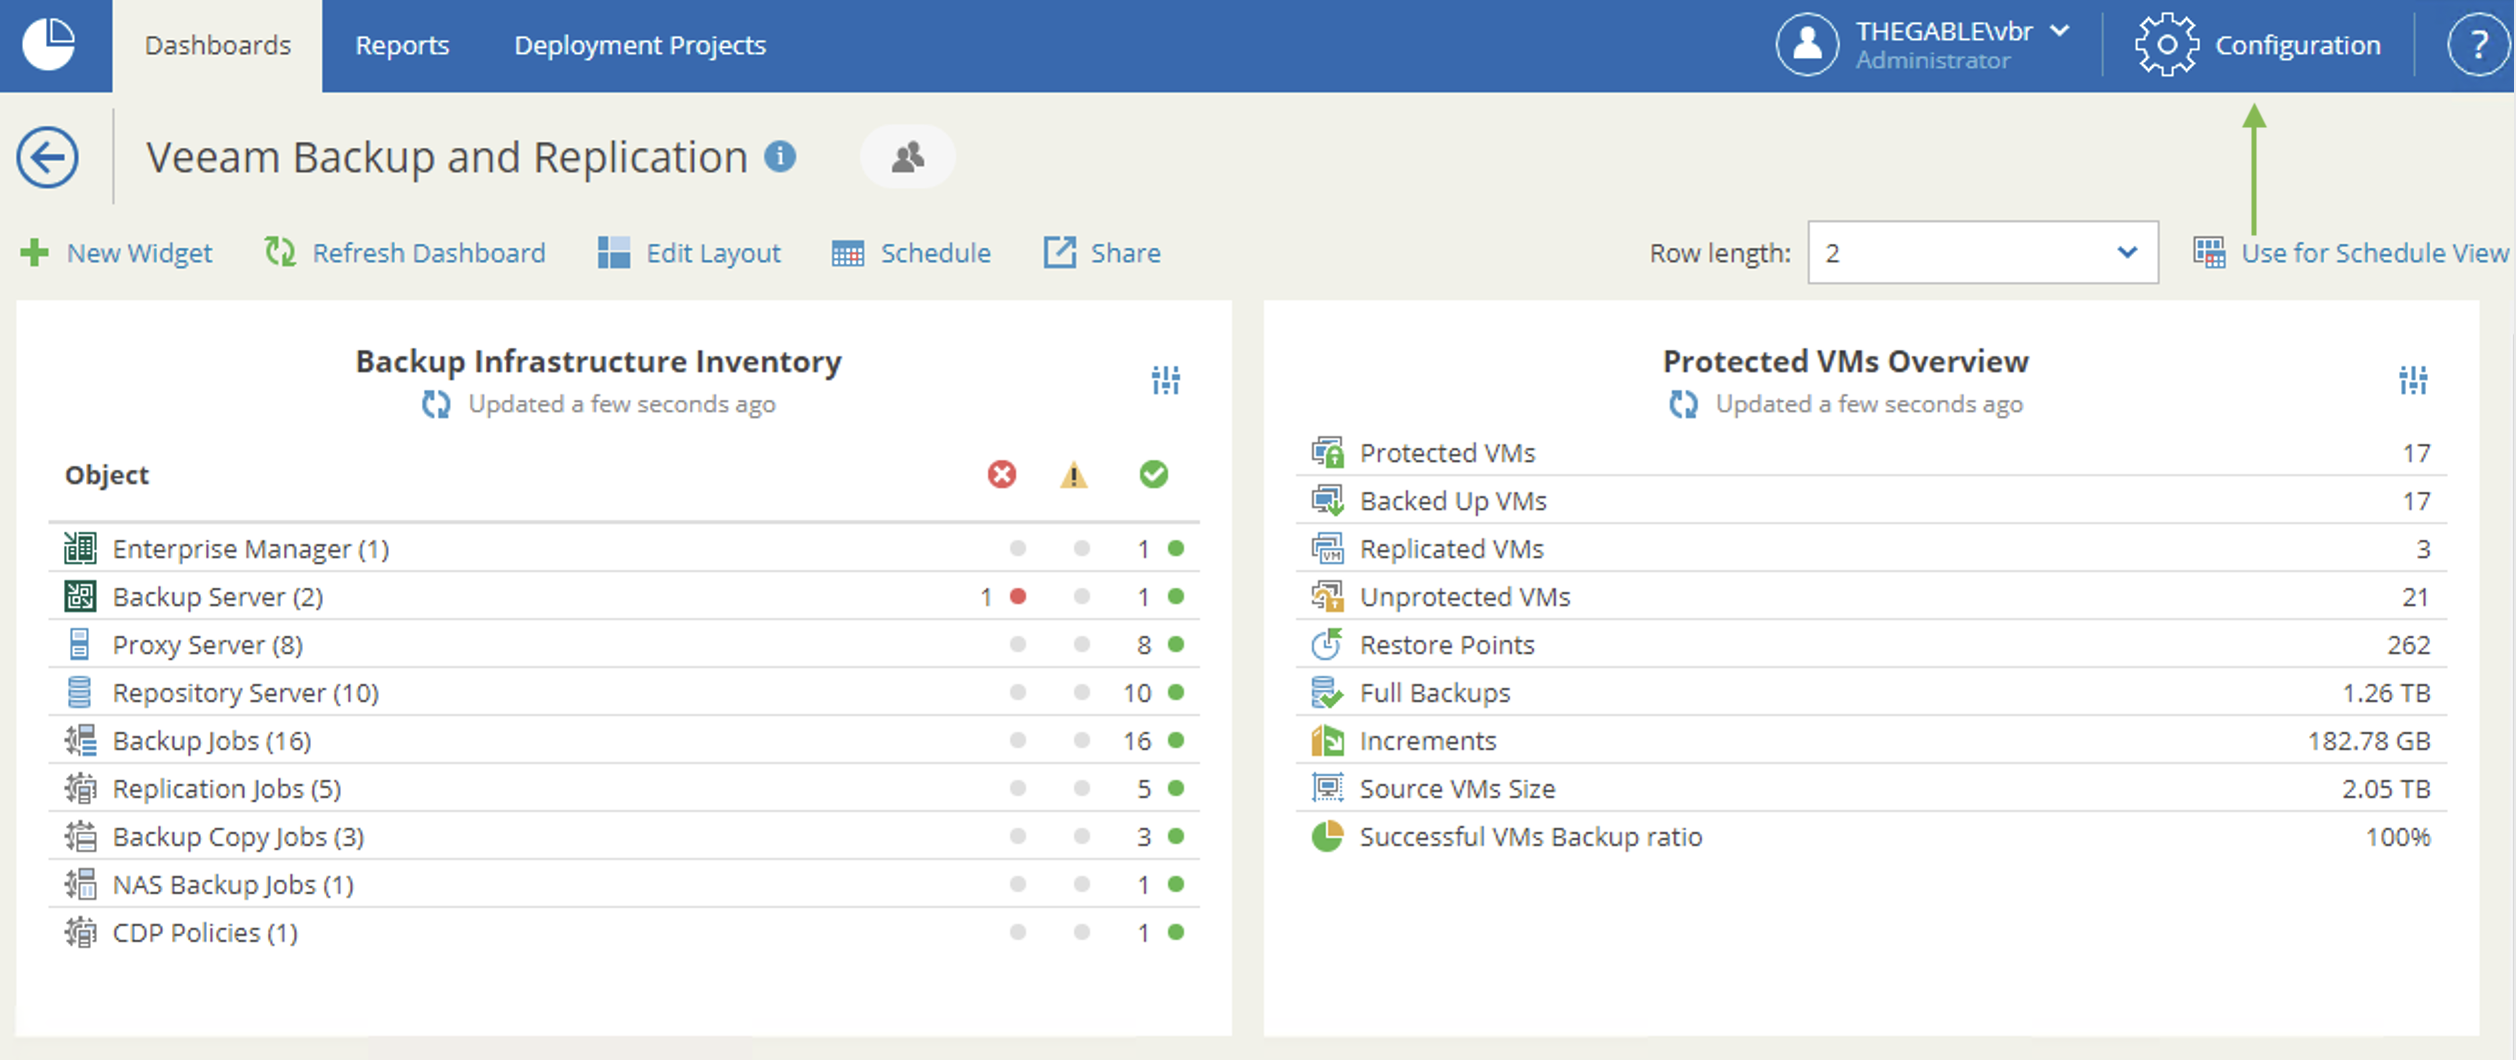 Immagine 4
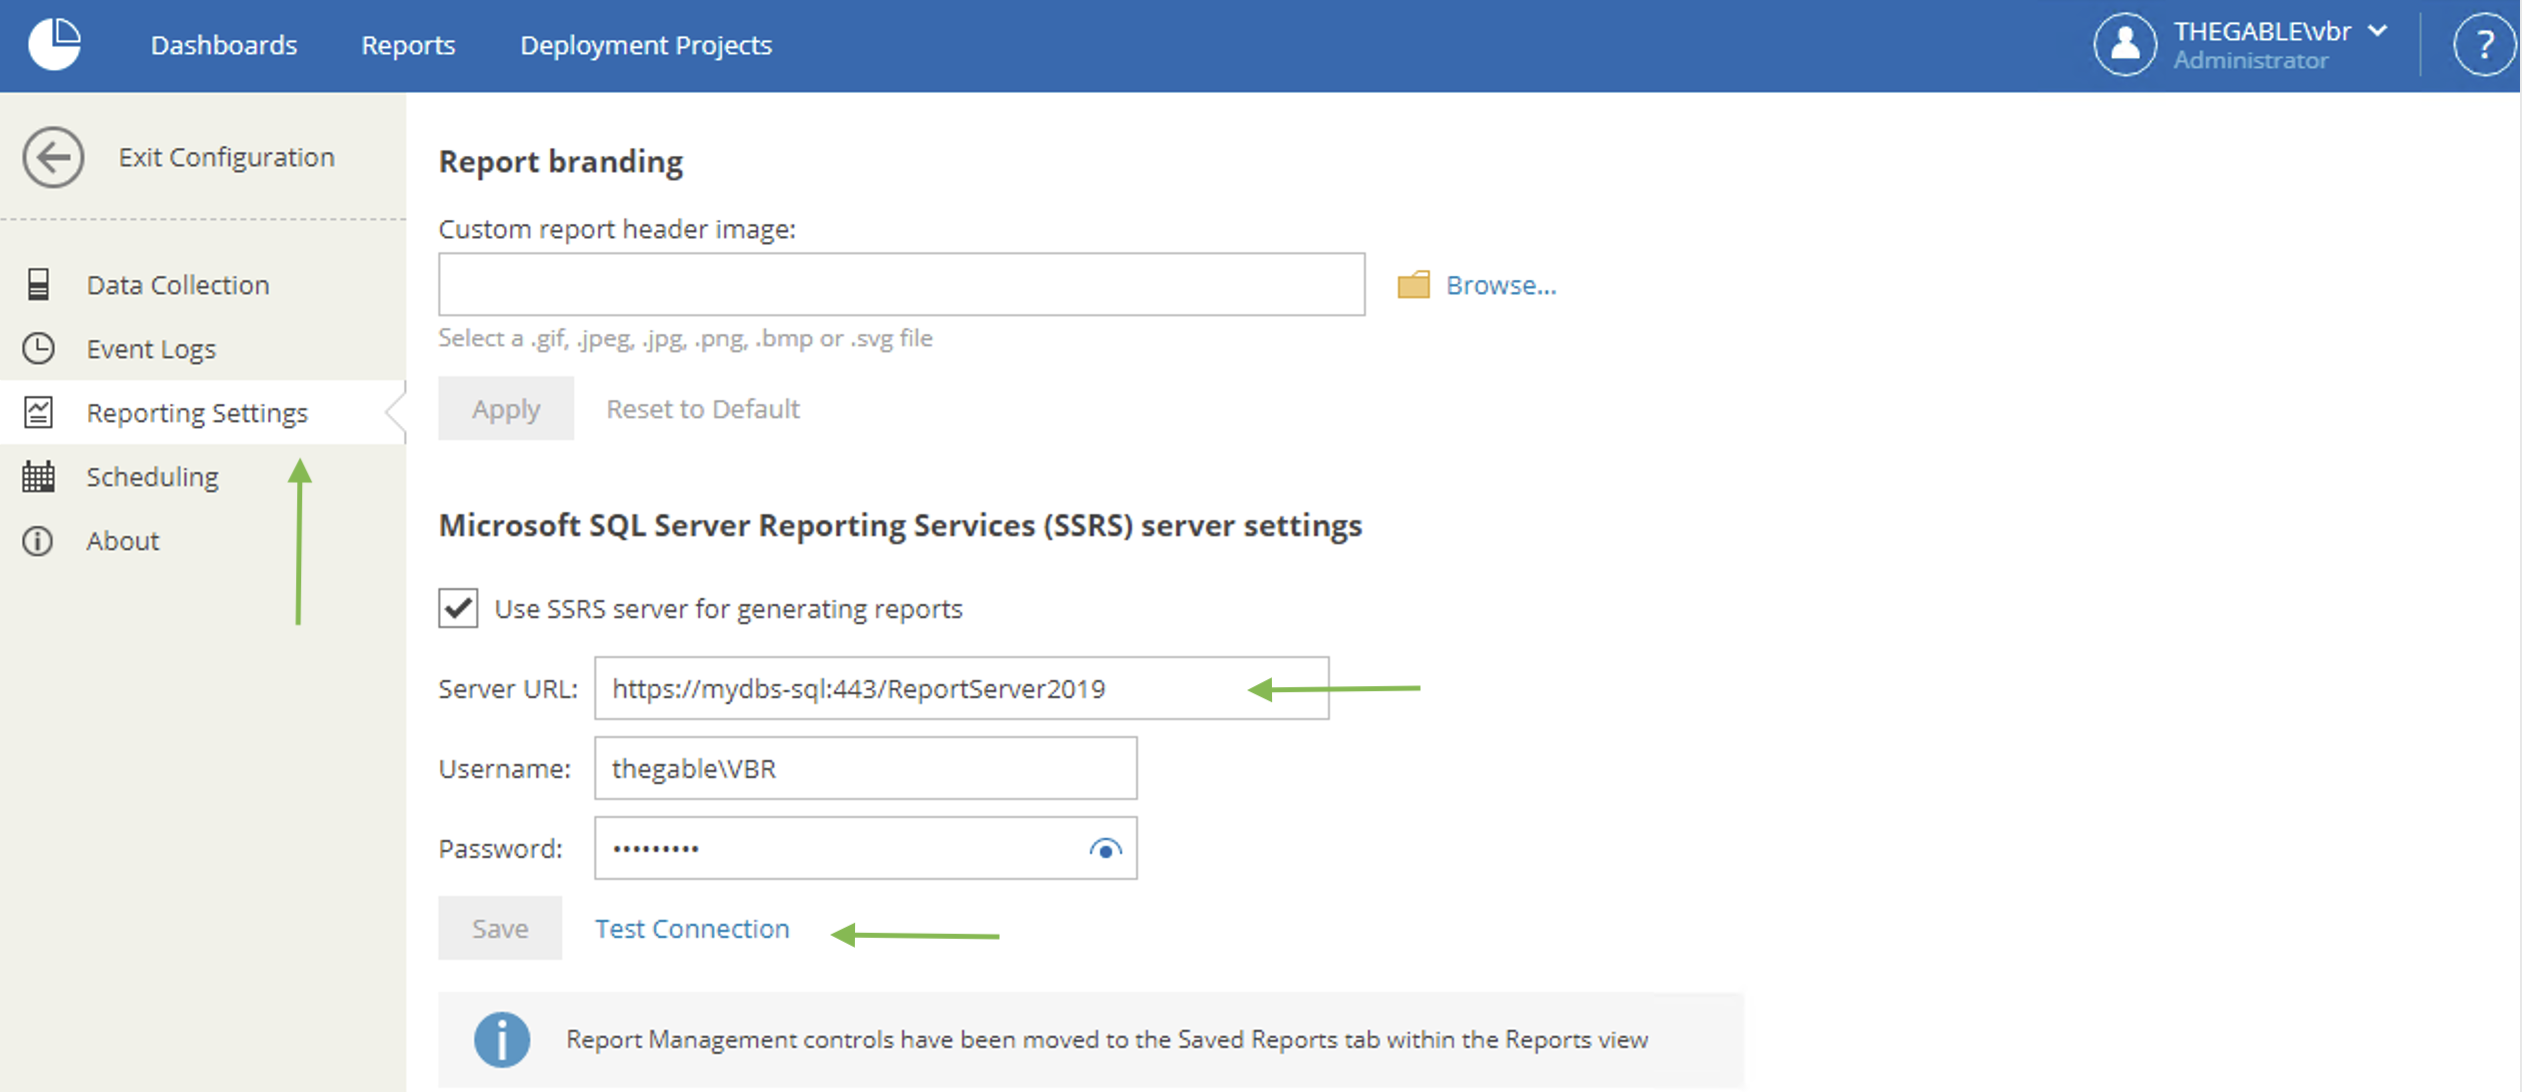 Immagine 5
Nota 1: Dall’immagine 5 possiamo osservare che è possibile testare la connessione tramite il pulsante Test Connection.
Nota 2: Il dettaglio su quali aprire sui firewall sono documentate nella guida. (helpcenter.veeam.com); ricordatevi di aggiungere la porta 443 🙂
A presto