
Nel precedente articolo abbiamo visto come operare sui job di backup per ottenere dei Full che possano essere utilizzati per creare una politica di retention GFS quando la destinazione dei job è un nastro.
In questo secondo articolo, scopriamo come sia possibile ottenere un risultato simile copiando i nastri.
Nota1: Per perseguire questa processo di protezione è necessario che nel DataCenter sia presente una seconda libreria a nastro.
Nota2: Il caso d’uso più comune per il Copy-Tape è quello di migrare i dati contenuti sui nastri di una vecchia tecnologia (LT06) verso una nuova (LTO9), visto che la nuova tecnologia non sarebbe in grado di leggere nativamente i dati contenuti sui vecchi nastri.
Le fasi che ci permetteranno di raggiungere il nostro scopo sono due:
- Fase 1: creazione di un pool di nastri afferente alla seconda libreria.
- Fase 2: job di copia del tape.
Fase 1
La creazione del Media Pool (immagine 1), dovrà essere personalizzato impostando:
-
- L’utilizzo di un nuovo nastro per ogni sessione di copia (immagine 2).
- Impostazione di una retention che per quel gruppo di nastri coincida con quella richiesta dalla politica GFS (immagine 3).
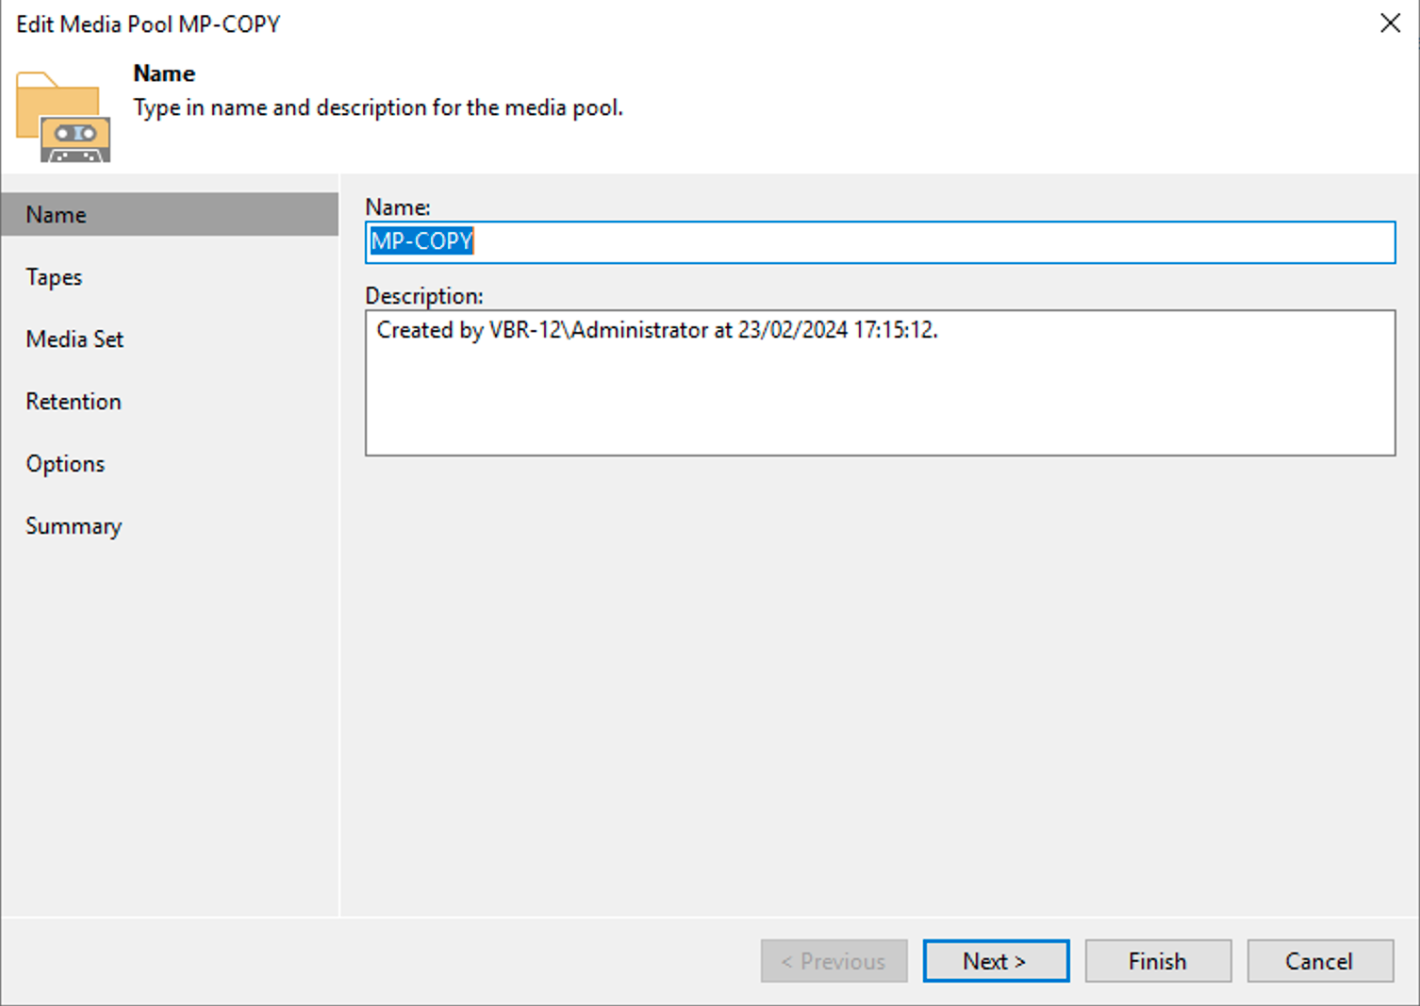 Immagine 1
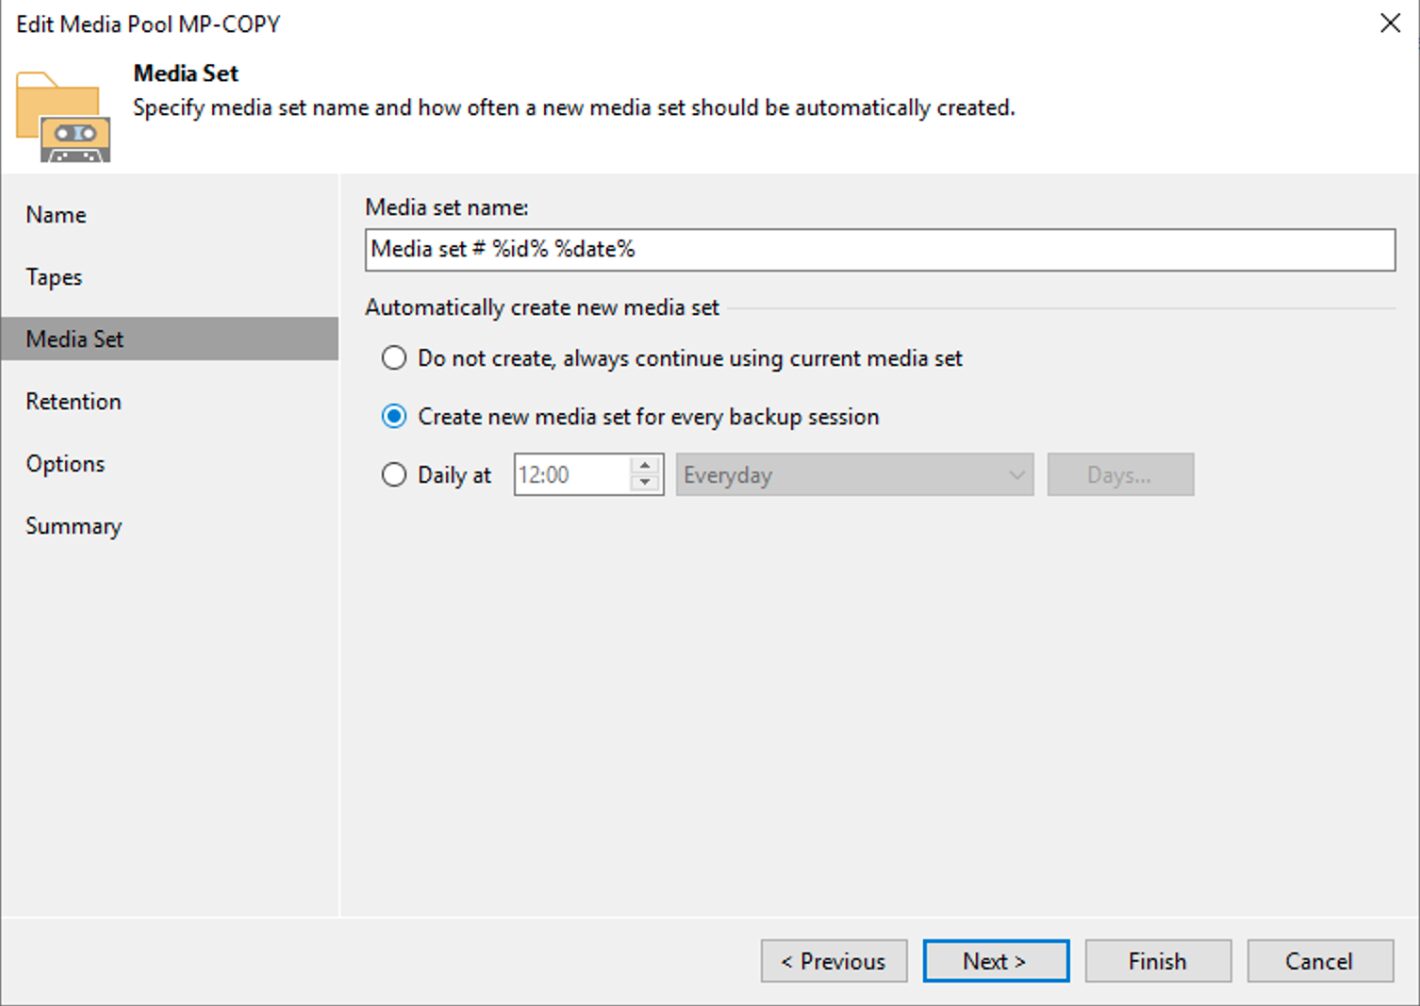 Immagine 2
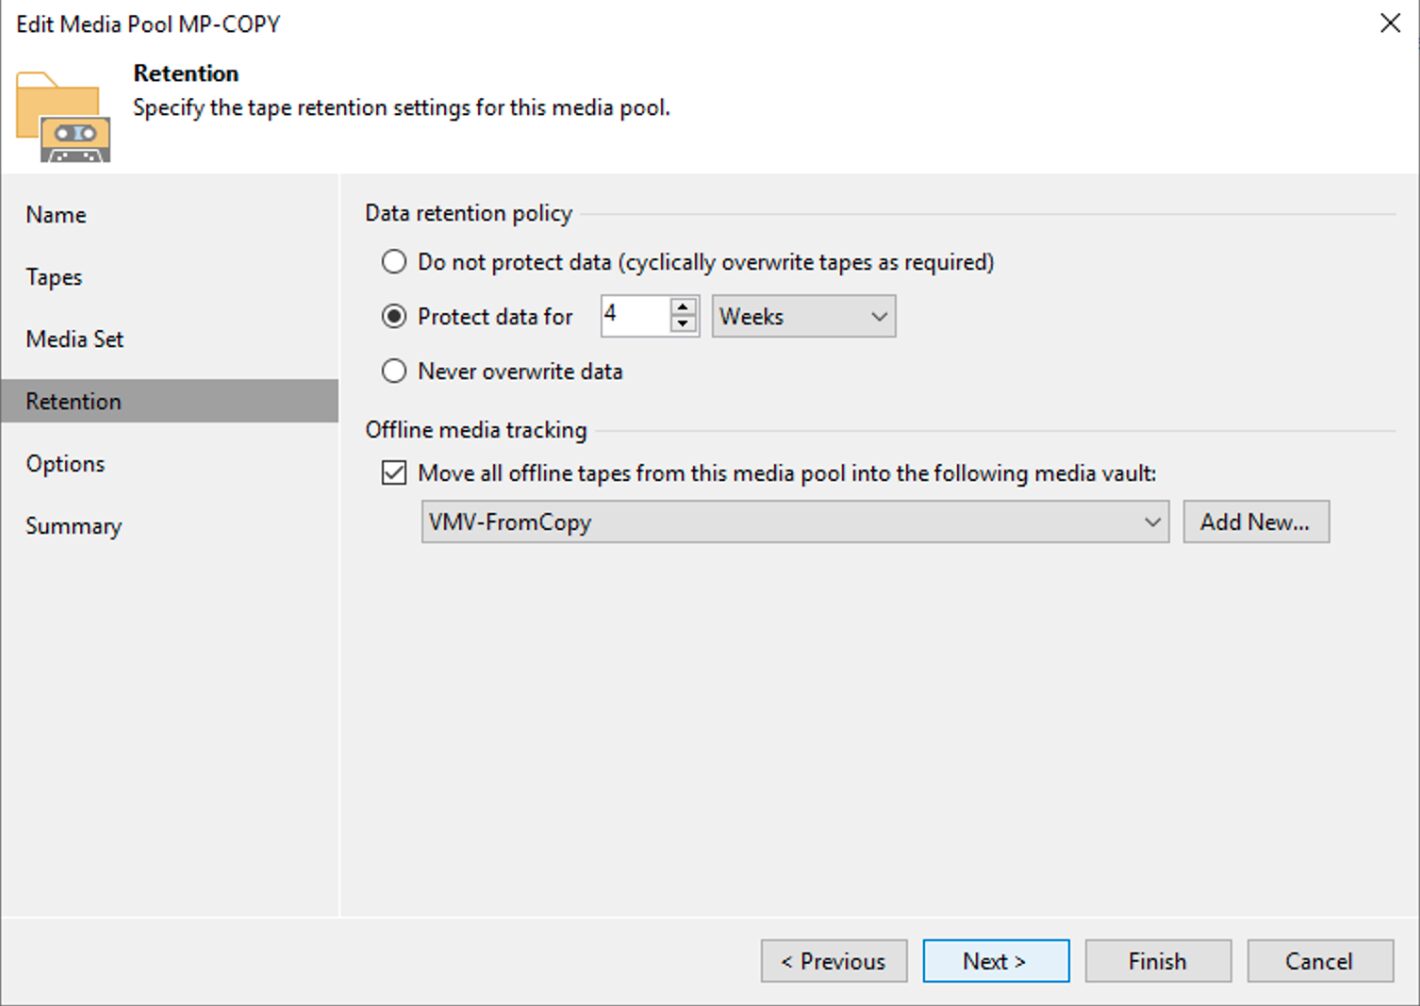 Immagine 3
Nota3: Nell’immagine 3 è stata impostata una retention di 4 settimane che risponde alla necessità di tenere il full settimanale per 1 mese.
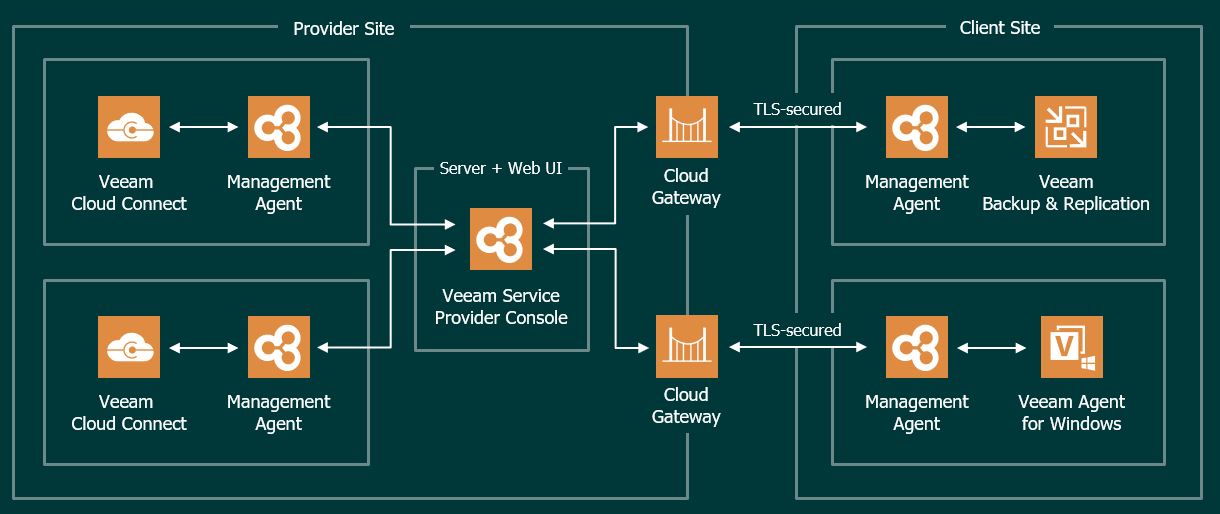
Nota4: L’immagine 4 evidenzia la possibilità di realizzare una politica di Vault per l’archiviazione dei nastri.
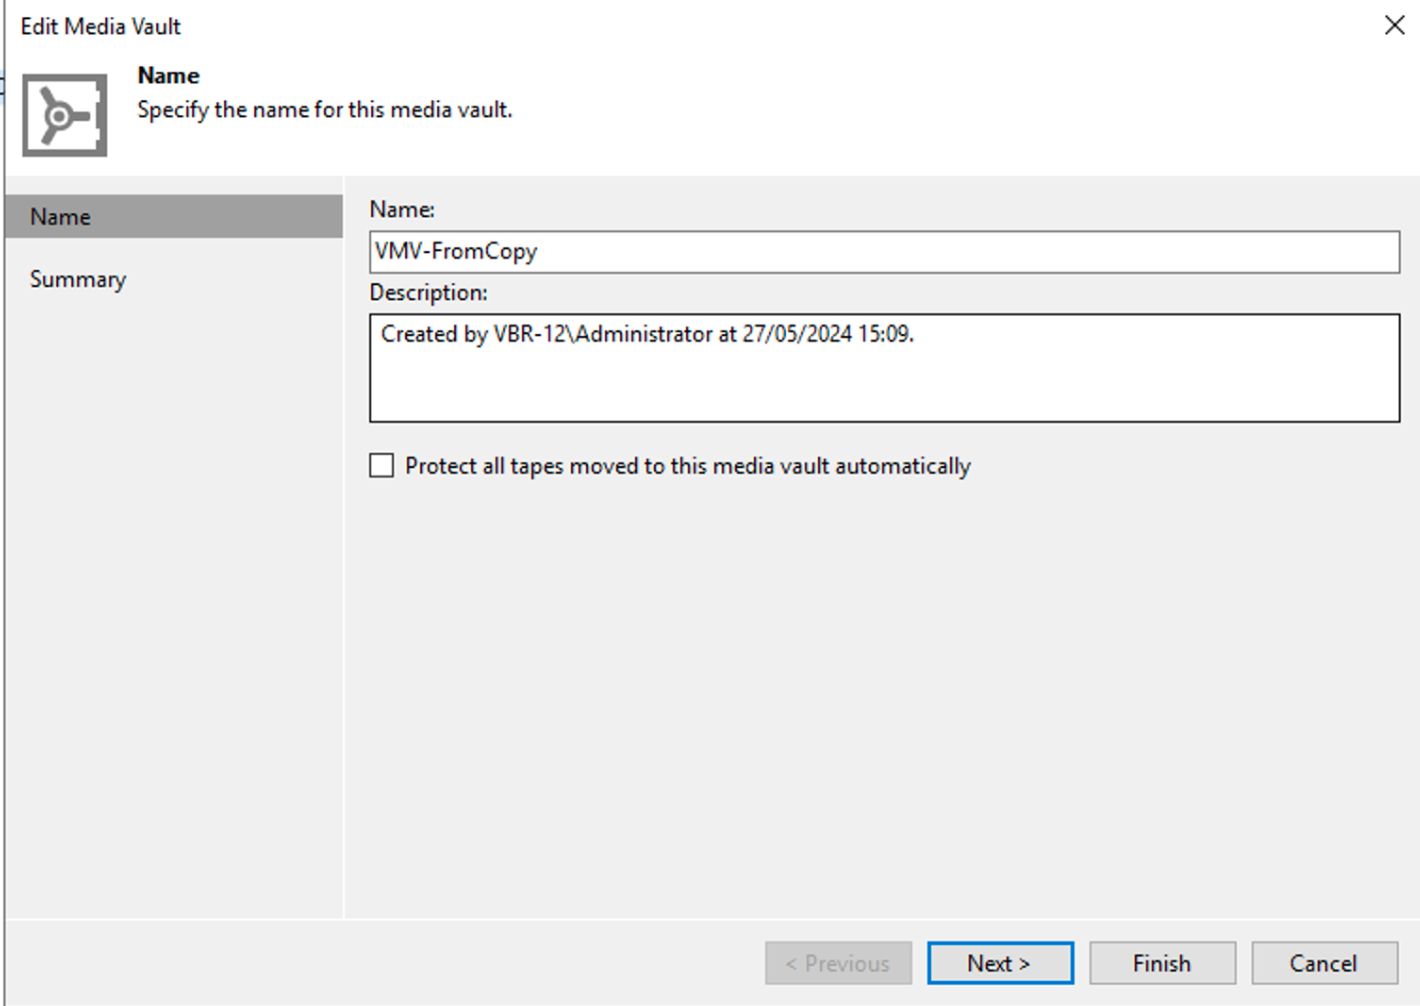 Immagine 4
FASE 2
Dall’interfaccia grafica di VBR selezionando con il tastro destro del mouse il nastro da copiare (immagine 5) è possibile avviare il comando di copia.
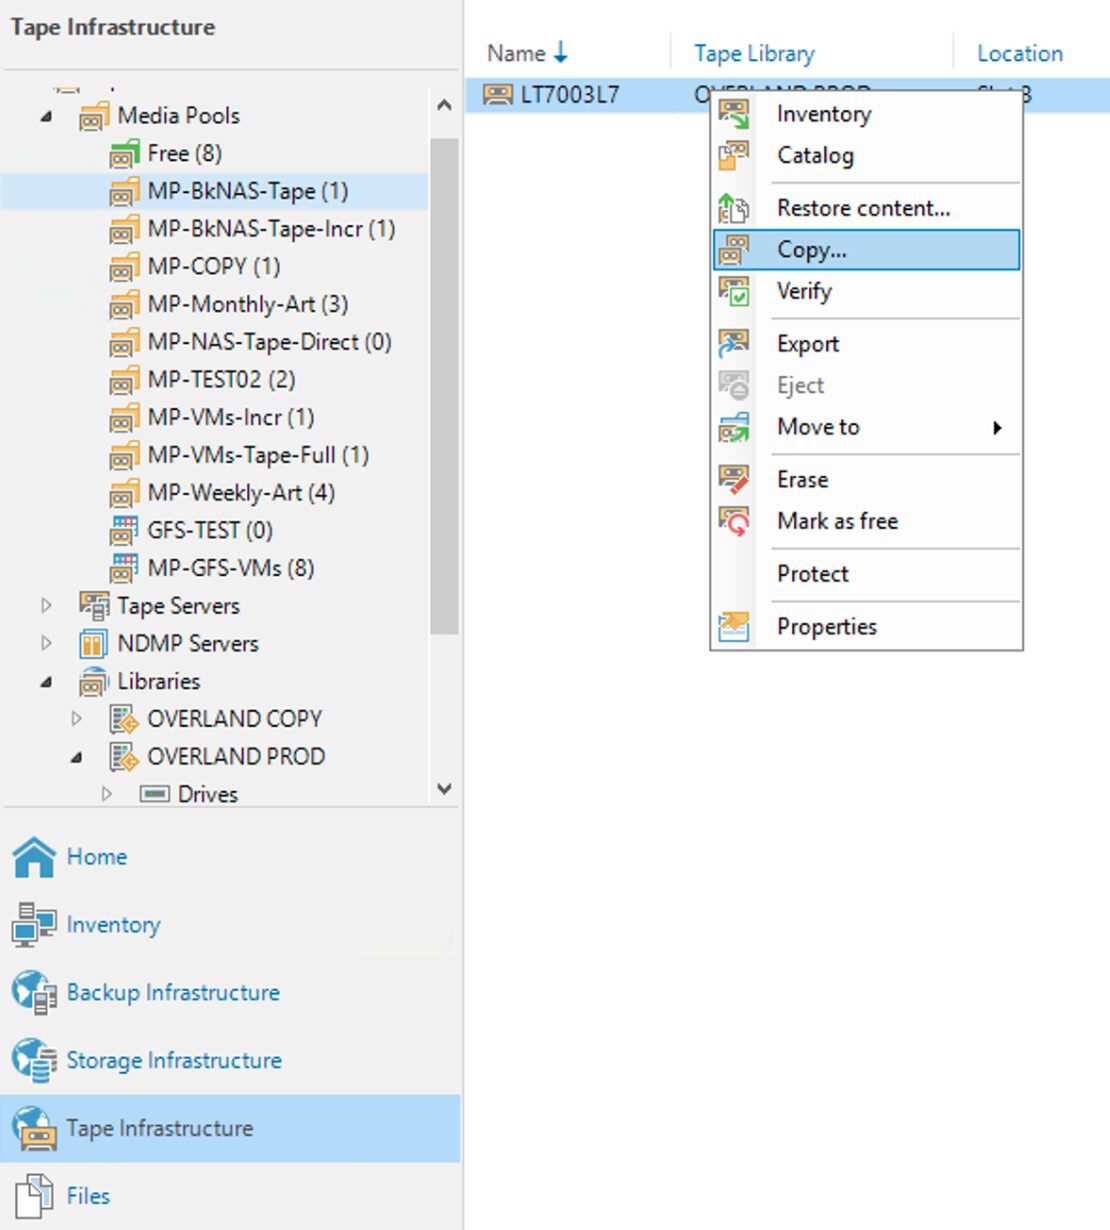 Immagine 5
I semplici passaggi successivi mostrati dalle immagini 6,7,8 e 9 mostrano come completare l’operazione di copia.
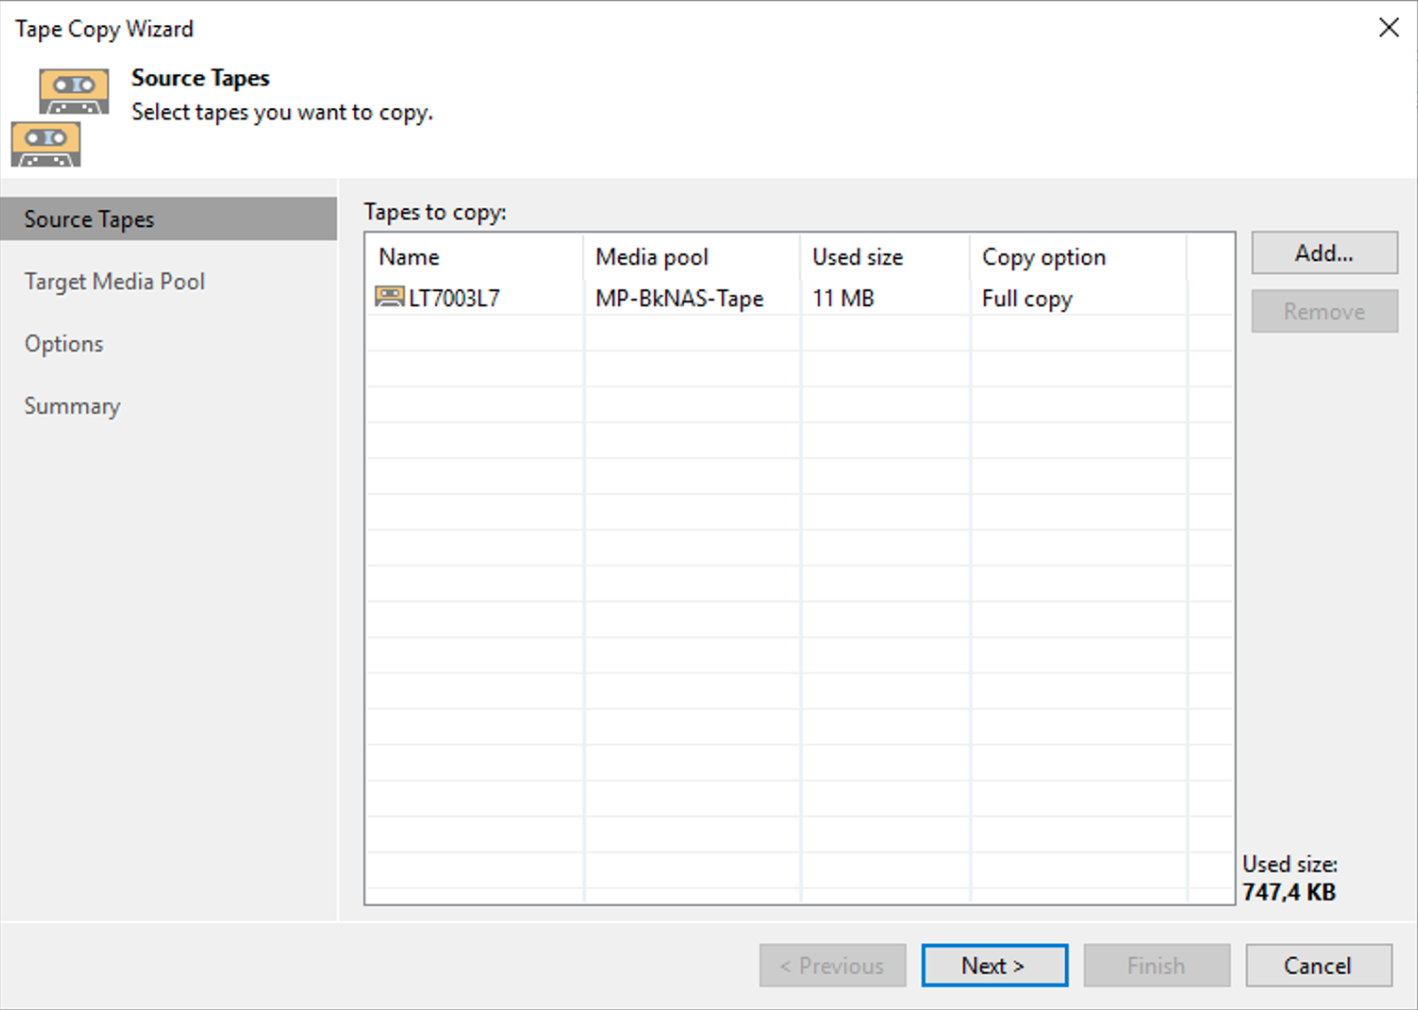 Immagine 6
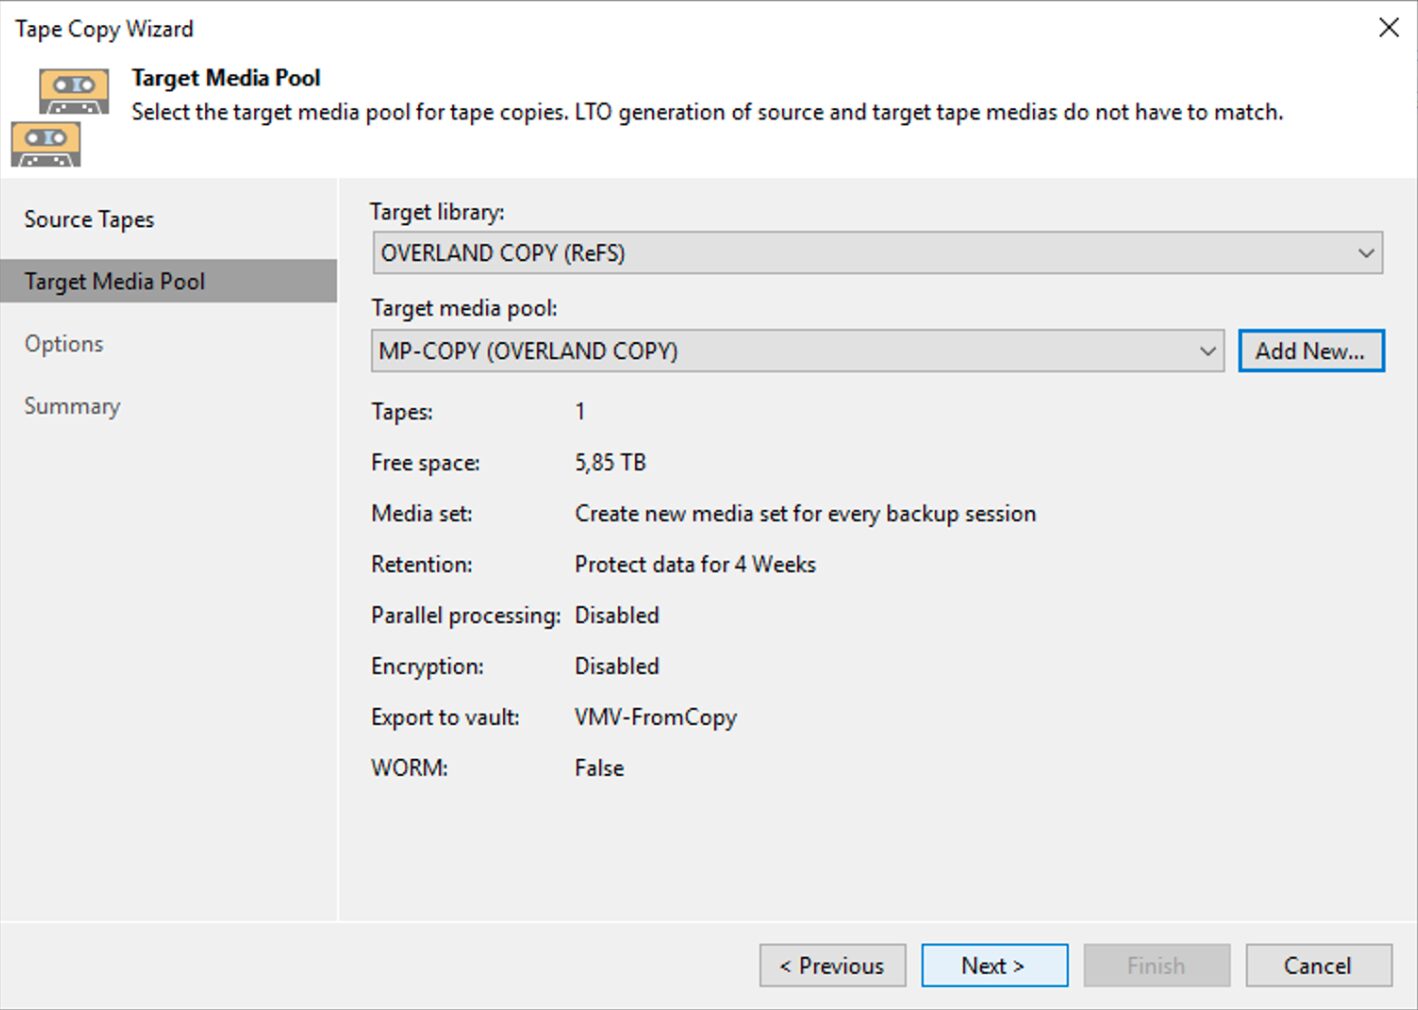 Immagine 7
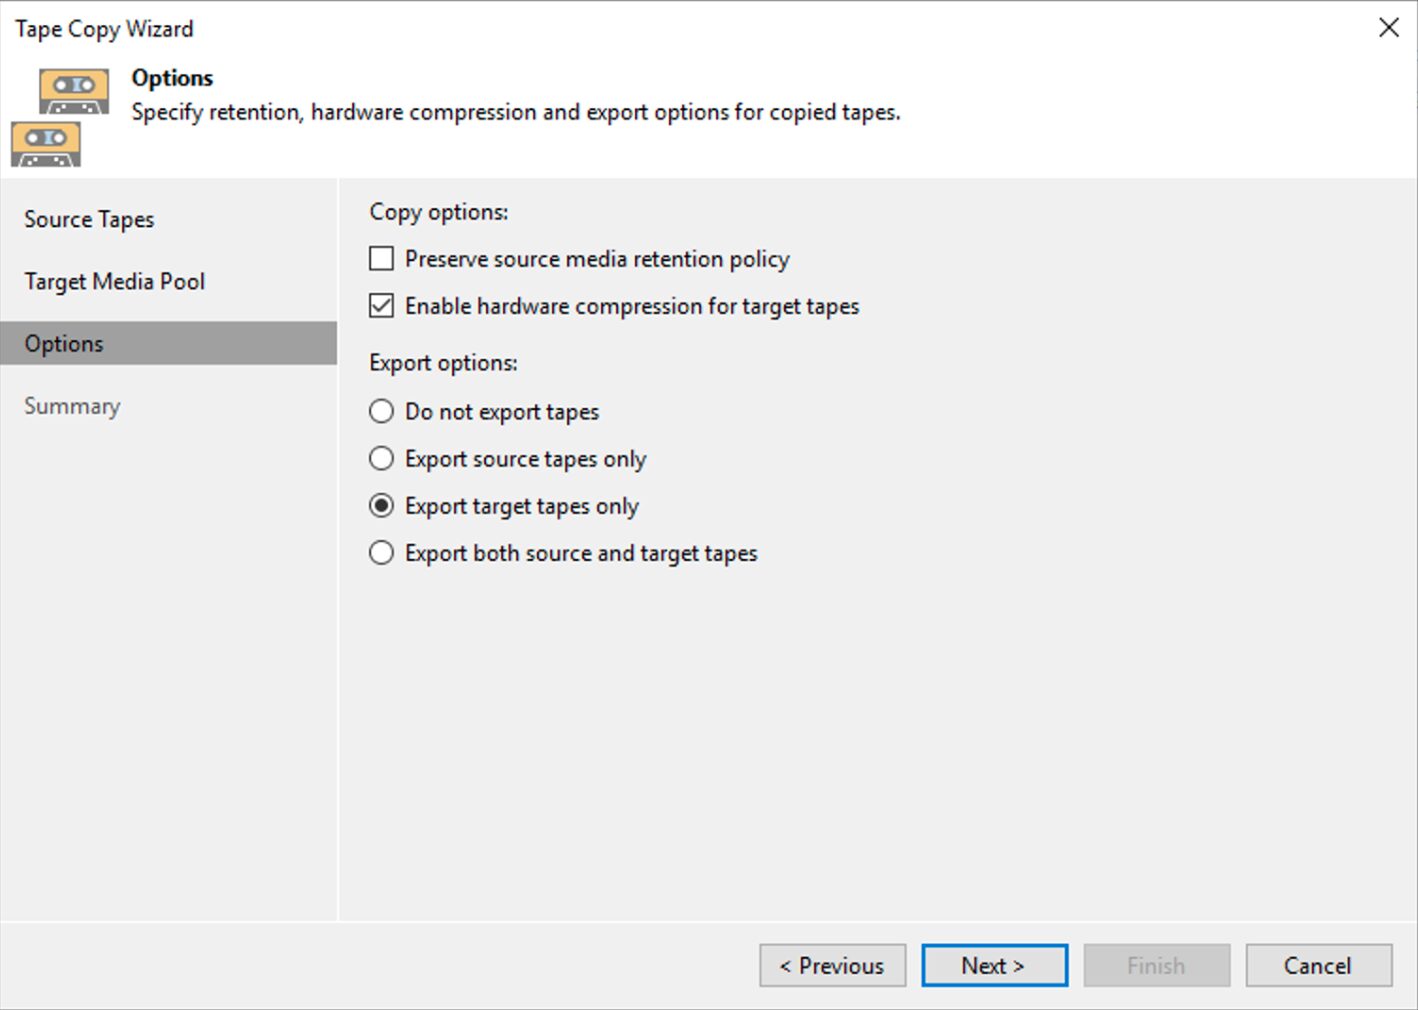 Immagine 8
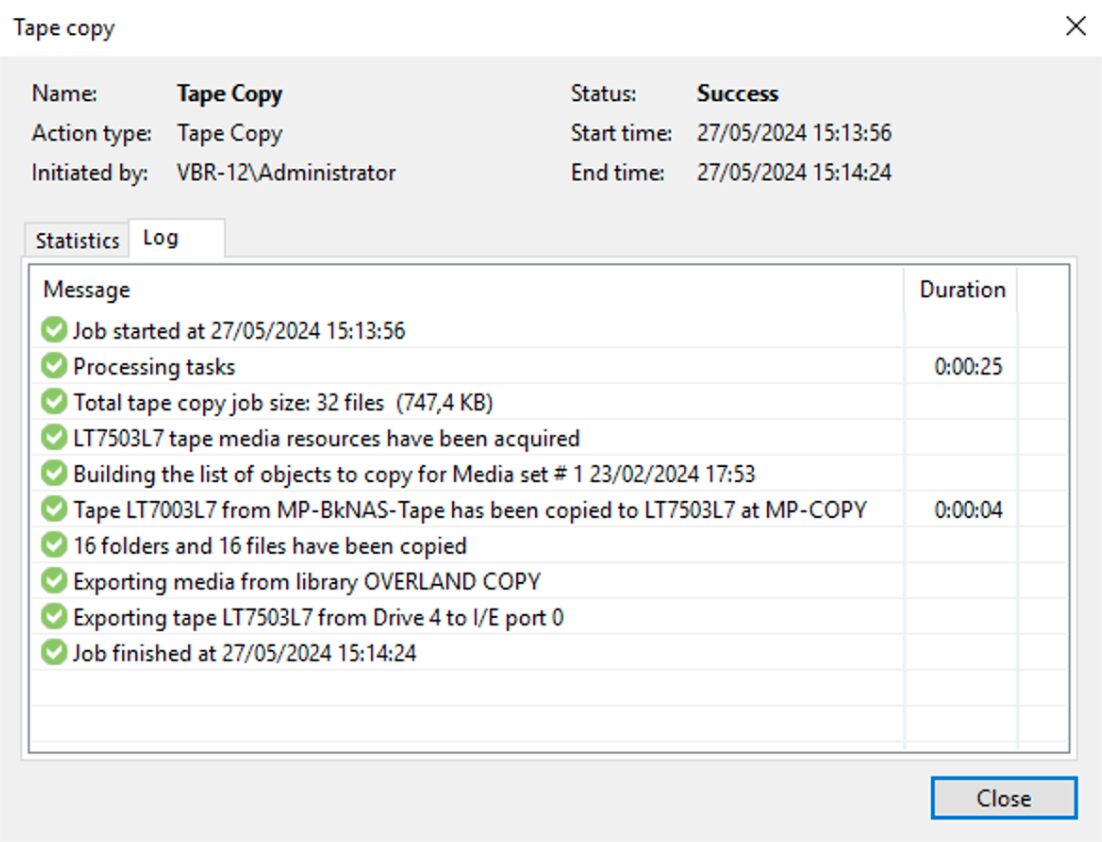 Immagine 9
Ultime note:
- La documentazione alla quale fare riferimento per conoscere quante risorse è indispensabile assegnare ai vari componenti è disponibile al seguente link.
- L’automazione della copia può avvenire tramite script in powershell.
- Il Copy to Tape non consuma license capacitive ma fate riferimentoal seguente link, voce Capacity Licensing per conoscerne tutti i dettagli.
 Picture 1
 Picture 1
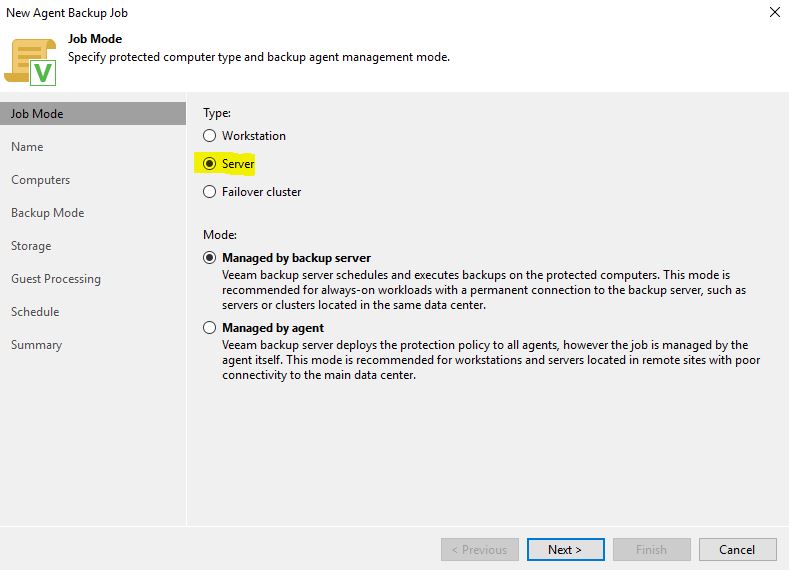 Picture 2
 Picture 5
 Picture 6
 Picture 7
 Picture 8
 Picture 9
 Picture 11
 Picture 12
 Picture 13
 Picture 15
 Picture 16
 Picture 17
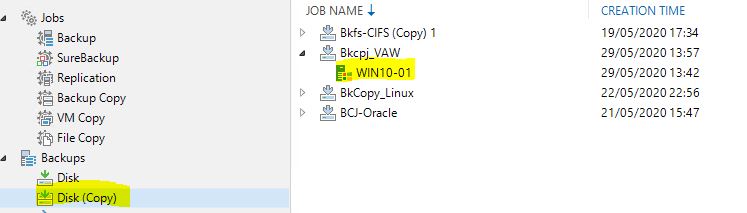 Picture 18
 Picture 19