
Molti clienti e partner chiedono se sia possibile implementare una politica di protezione di tipo GFS (Grandfather – Father – Son), quando i dati da proteggere afferiscono ad una NAS (Network Attacched Storage) e la destinazione è una libreria a nastri.
Tale automatismo con la versione attuale di Veeam Backup & Replication (VBR) 12.1 non è ancora disponibile, cosa invece è già possibile effettuare quando la sorgente del dato è un backup di VM e Server Fisici.
In questo primo articolo vi aiuterò a raggiungere l’obiettivo, sfruttando la grande flessibilità di VBR nella creazione dei job di backup.
Nota1: Nel prossimo vi illustrerò come realizzare copie GFS sfruttando una funzionalità poco conosciuta di VBR, il Tape Copy.
Flessibilità dei Job di Backup:
a. VBR gestisce i nastri utilizzando un architettura che si basa su:
- Media Pool (MP) sono i contenitori logici dei nastri e possono afferire ad uno o più job di Backup (nel nostro scenario creeremo un MP per Job).
- Media Set (MS) identifica i restore point presenti sul nastro (nel nostro scenario creeremo un MS per job di Backup per singolo nastro).
b. La soluzione proprosta è quella di creare job di backup settimanali, mensili e annuali in modalità full. Tali backup dovranno essere creati in uno specifica data e i backup dovranno risiedere su pool di nastri creati all’uopo.
Vediamo step by step come procedere:
c. Creazione dei Media Pool (MP) settimanale e mensile
 Immagine 1
Dall’immagine 2 è importante osservare che verrà utilizzato un nuovo nastro per ogni sessione di backup.
 Immagine 2
Nell’immagine 3 è mostrato come impostare la retention che in questo scenario è di 4 settimane.
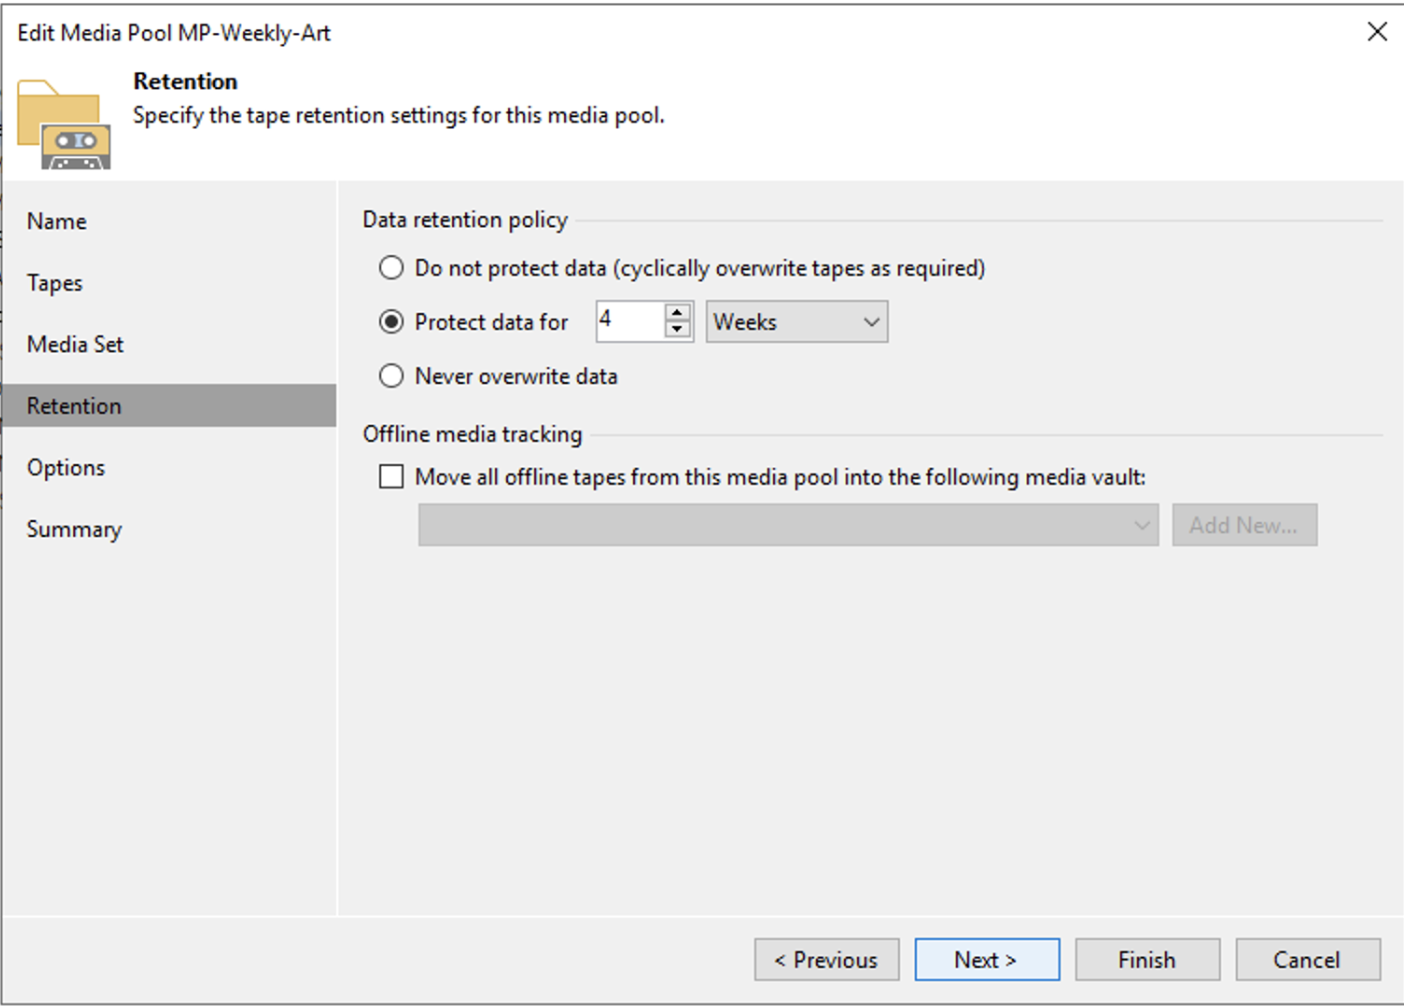 Immagine 3
Per il MP Mensile si utilizza la stessa procedura, modificando la retention in 12 mesi (vedi immagini 4,5,6).
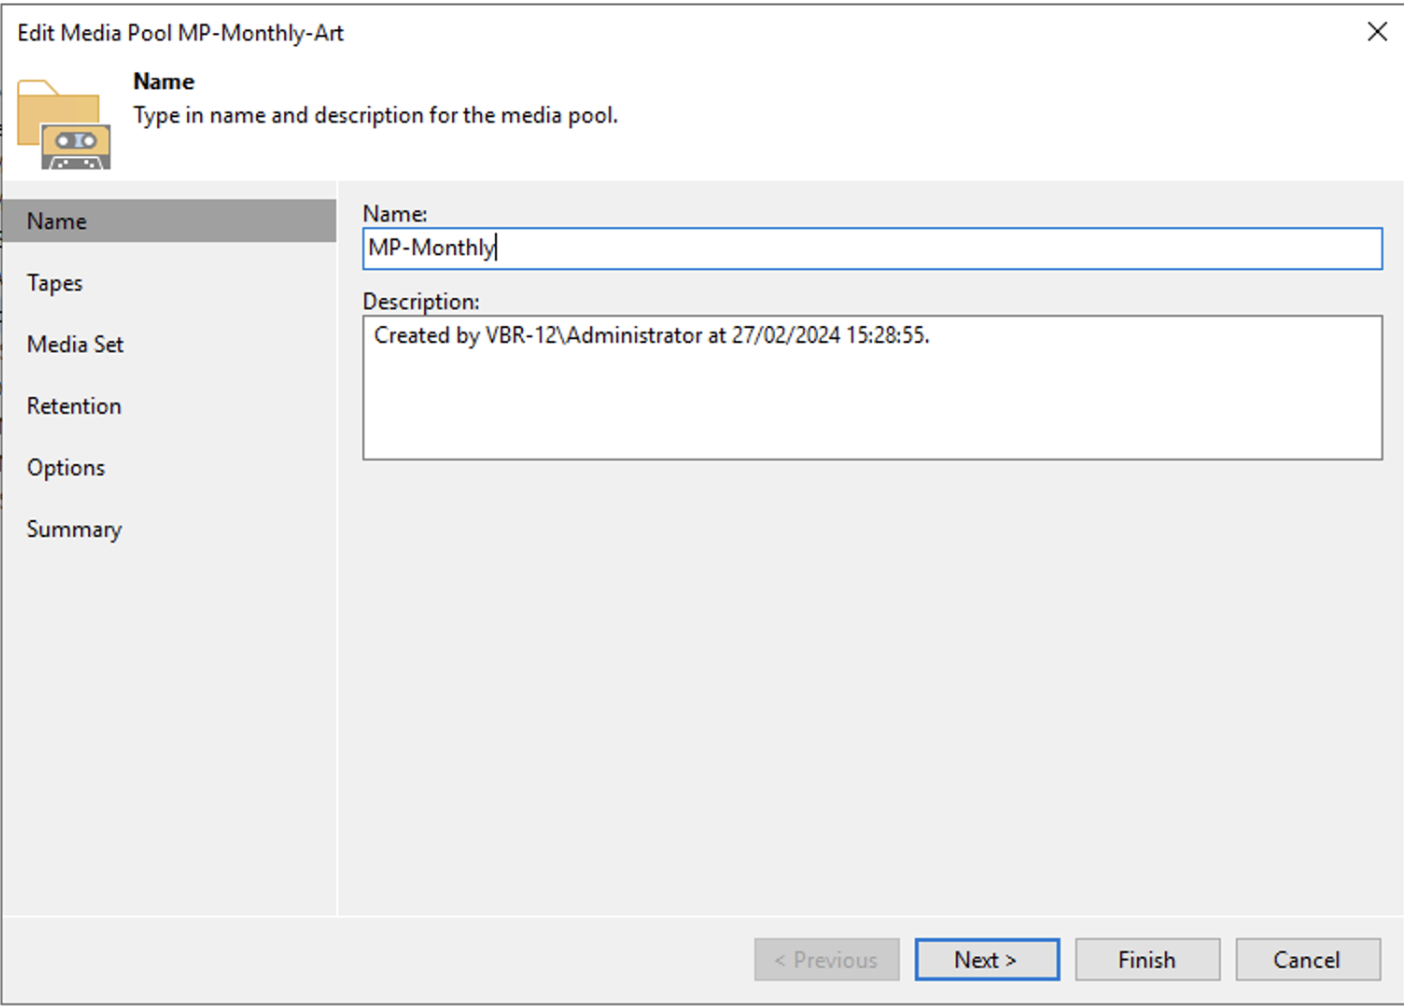 Immagine 4
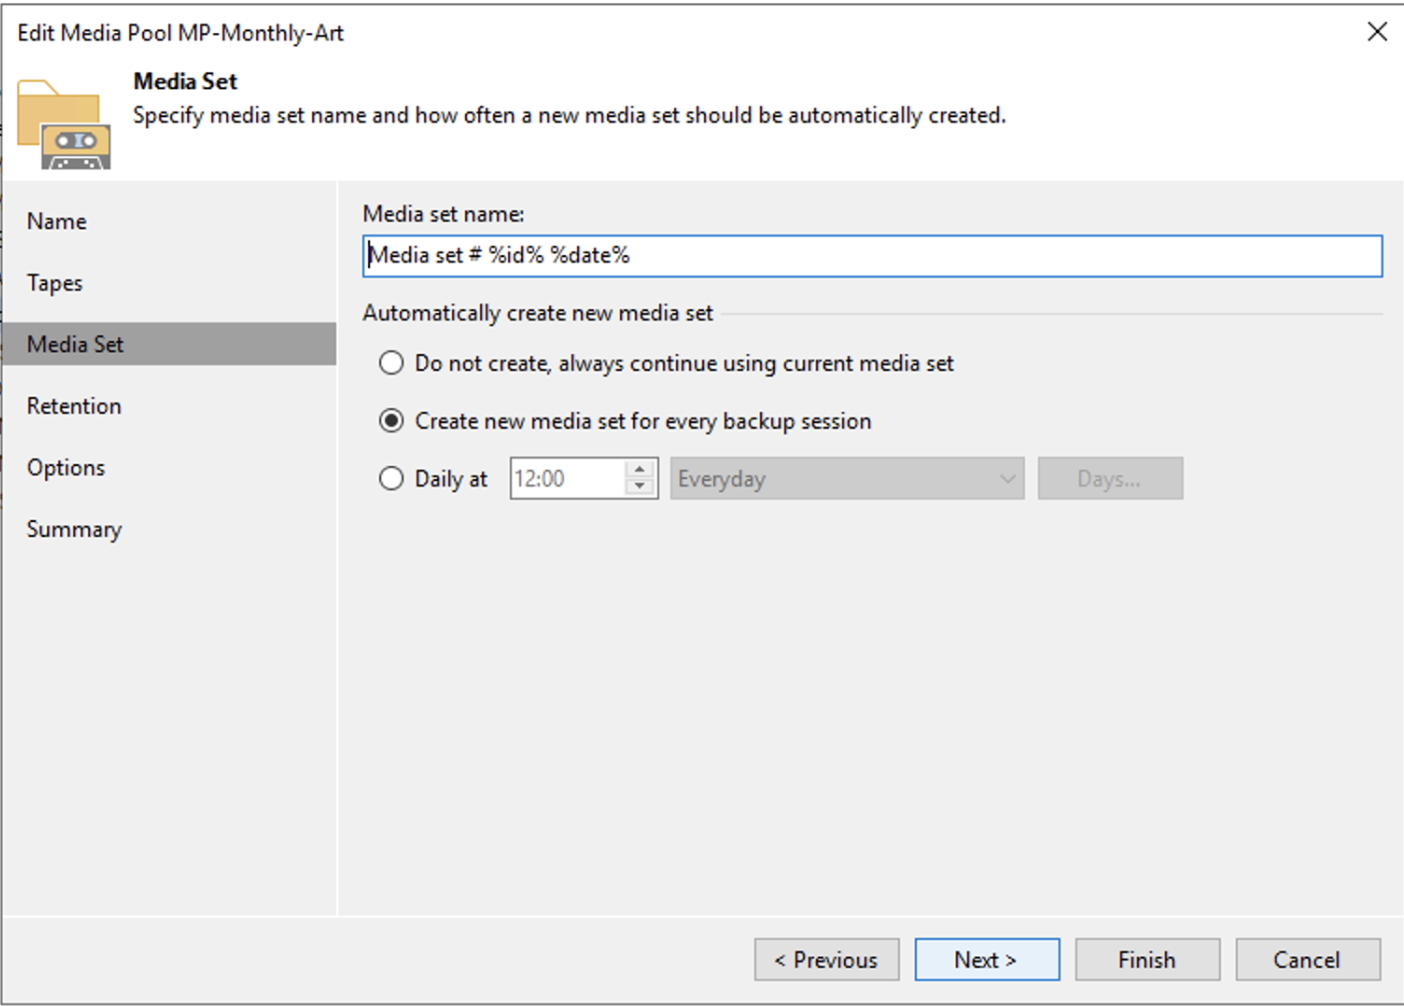 Immagine 5
Nell’immagine 6 si osserva che la retention per i Full Mensili è di 12 mesi.
 Immagine 6
d. Creazione dei job di Backup
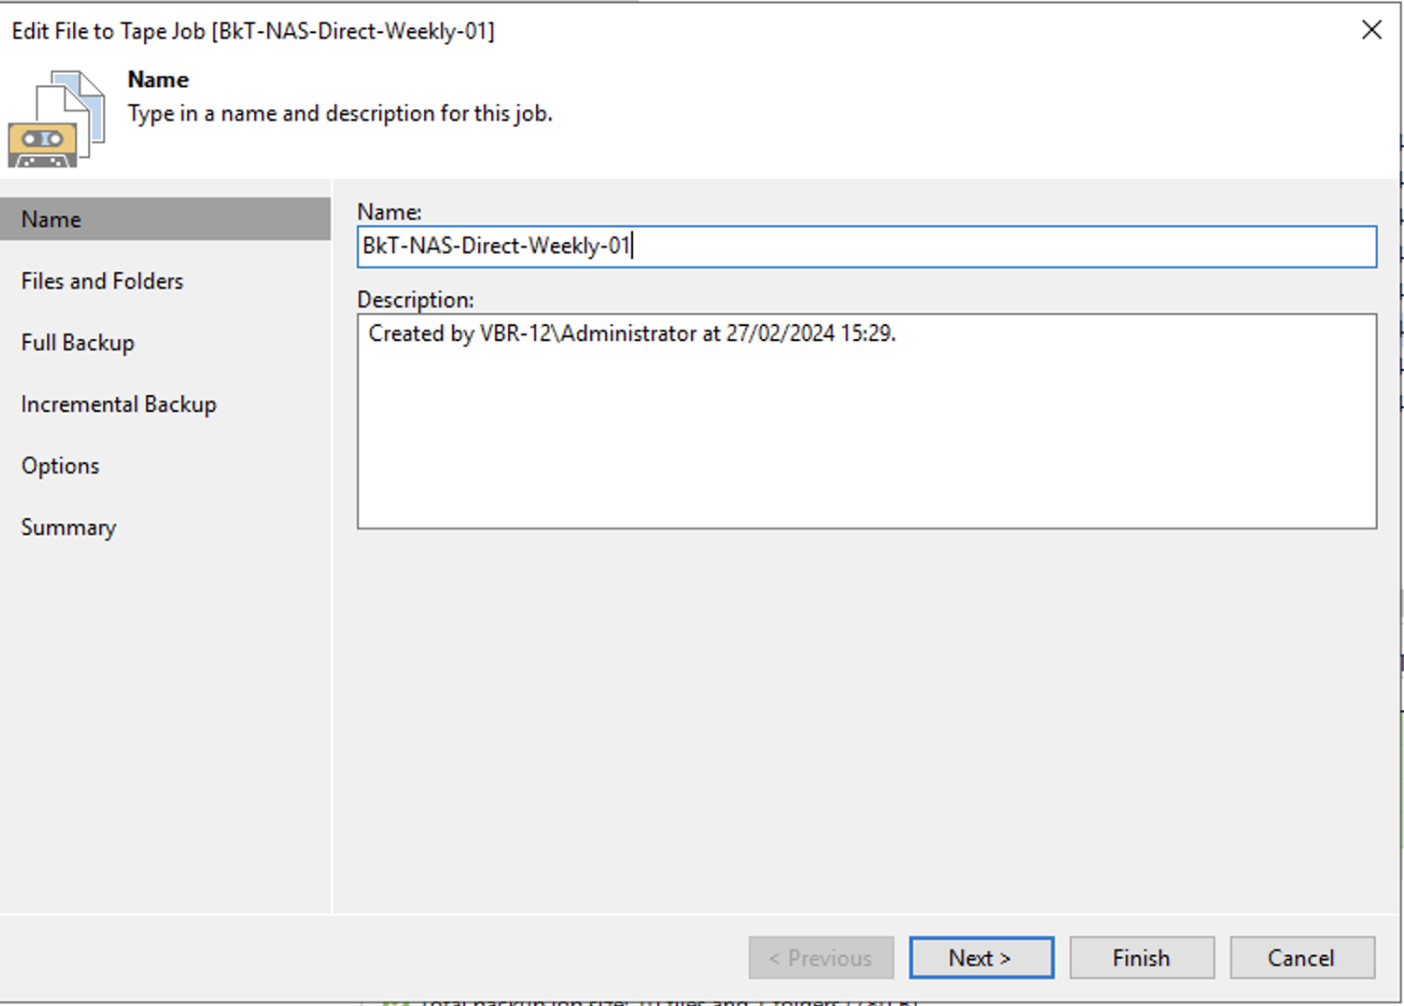 Immagine 7
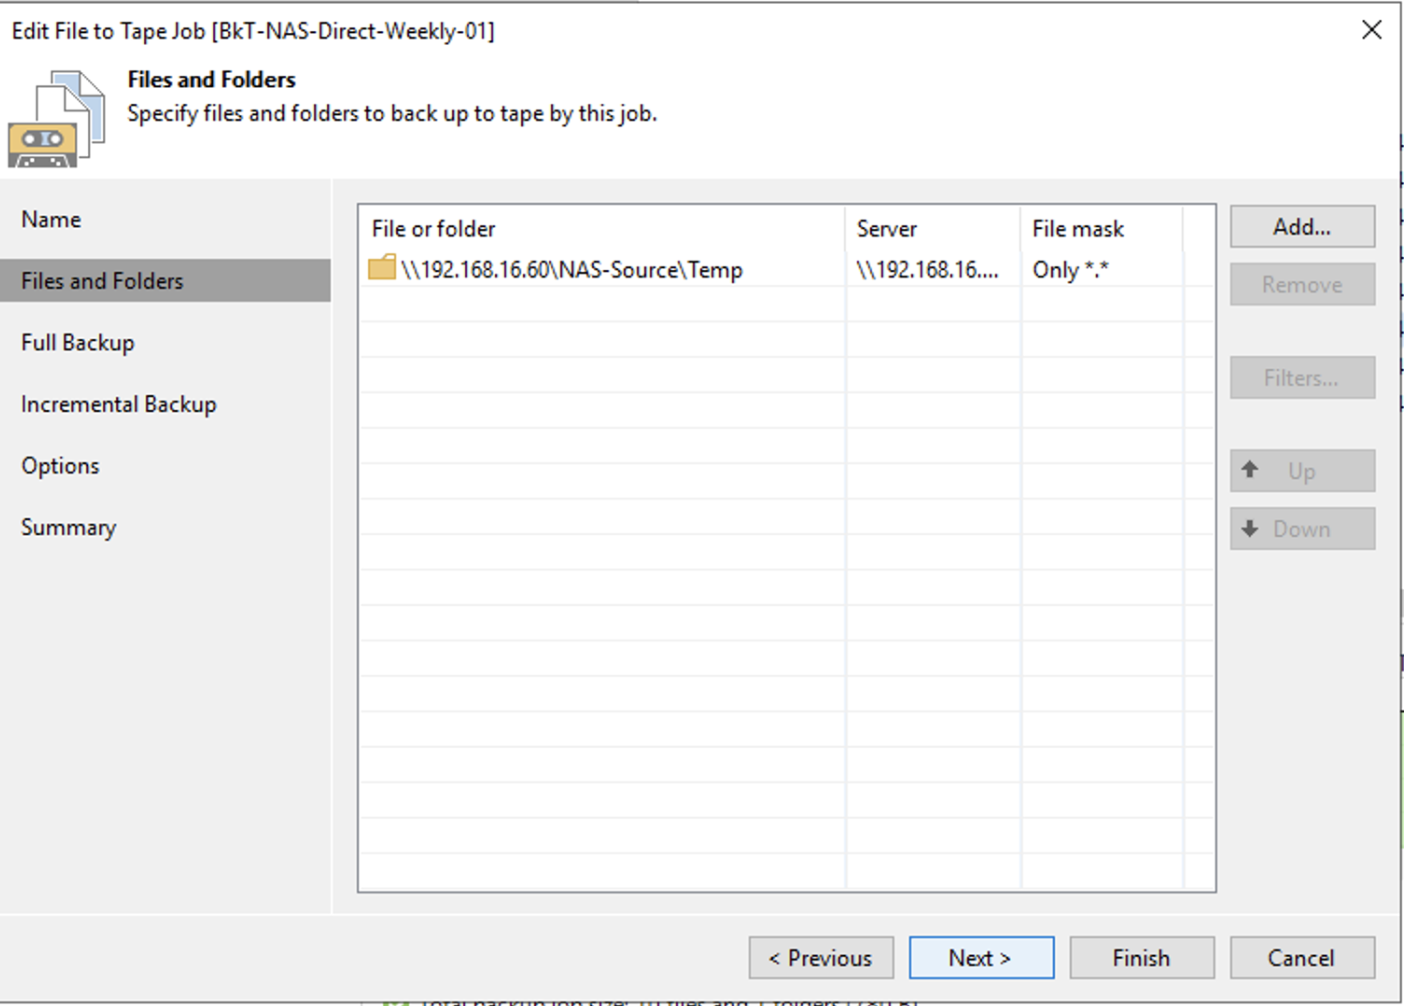 immagine 8
L’immagine 9 evidenzia lo scheduling del job di Backup.
L’ipotesi è di realizzare n job di backup full per ogni politica GFS.
Nel nostro scenario di esempio è riportato il job della prima settimana (freccia blue) con retention settimanale (freccia verde). Per la seconda, terza e successiva settimana si procederà in modo del tutto analogo, sostituendo alla voce “Run the full backup automatically” il valore first con second, third ecc.
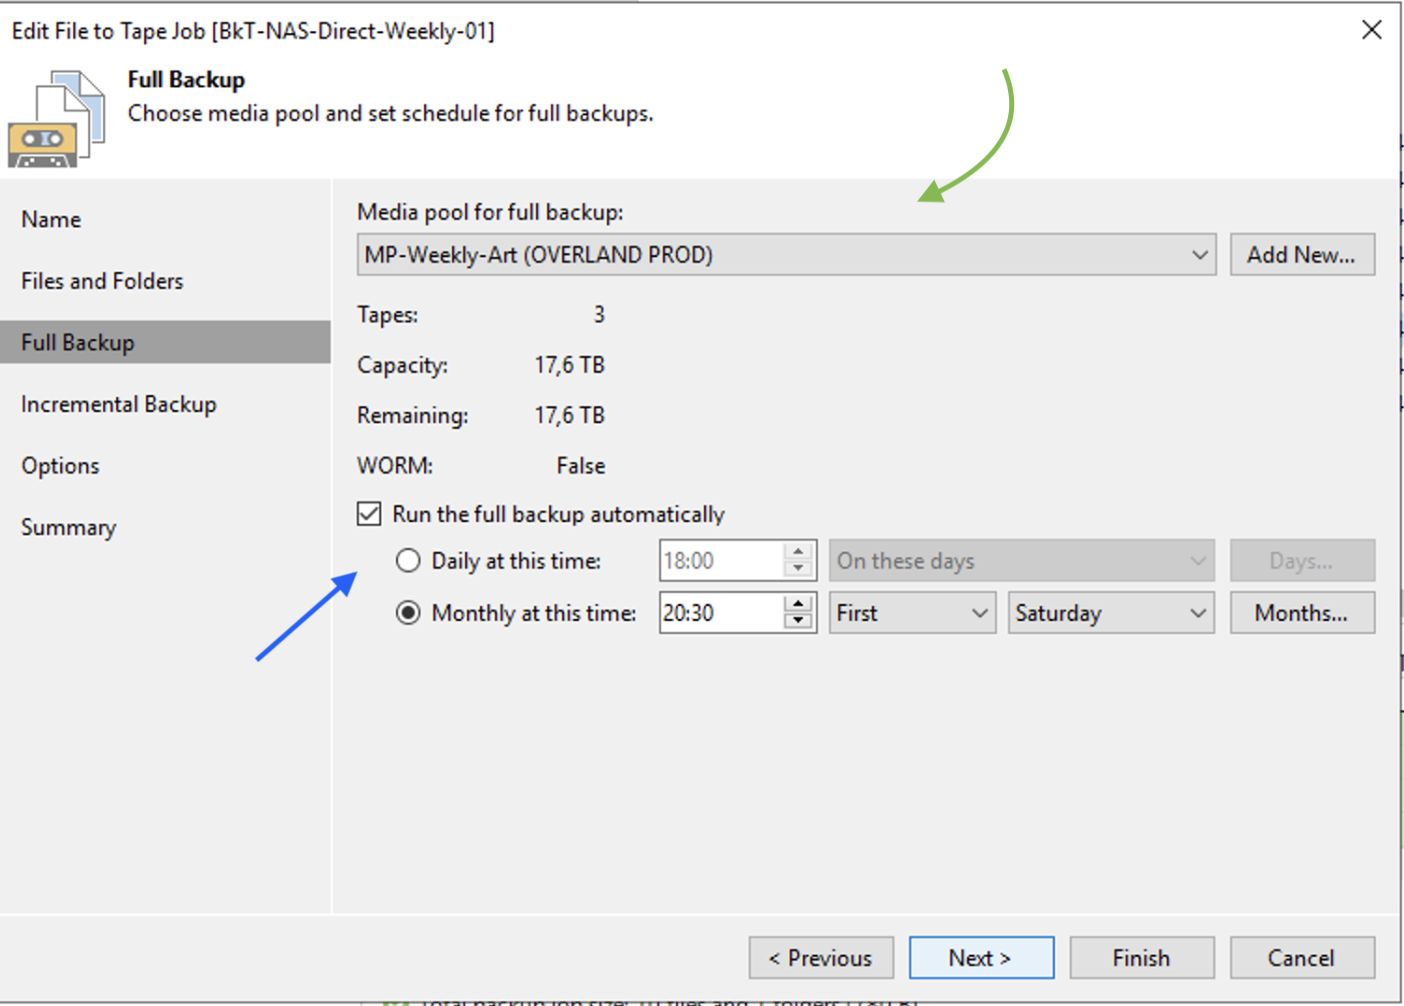 Immagine 9
L’immagine 10 evidenzia (freccia arancio) che non saranno avviati backup incrementali.
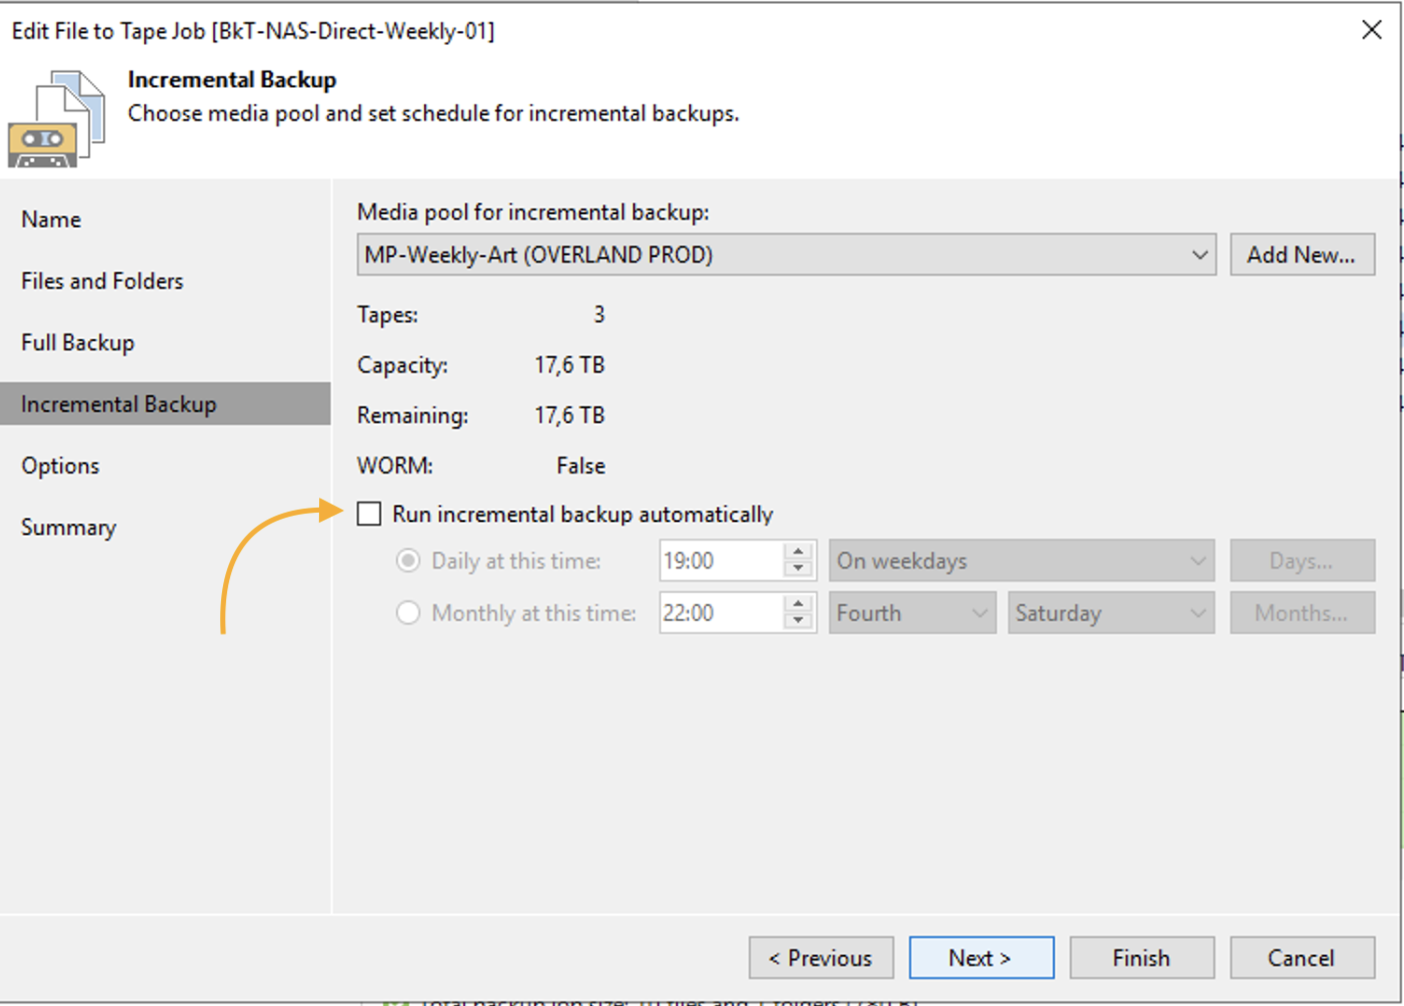 immagine 10
Gli stessi passaggi devono essere implementati per creare backup GFS di tipo mensile, nell’esempio ho impostato l’avvio del job di backup il 4 sabato del mese (immagine 12 – freccia blue).
 Immagine 11
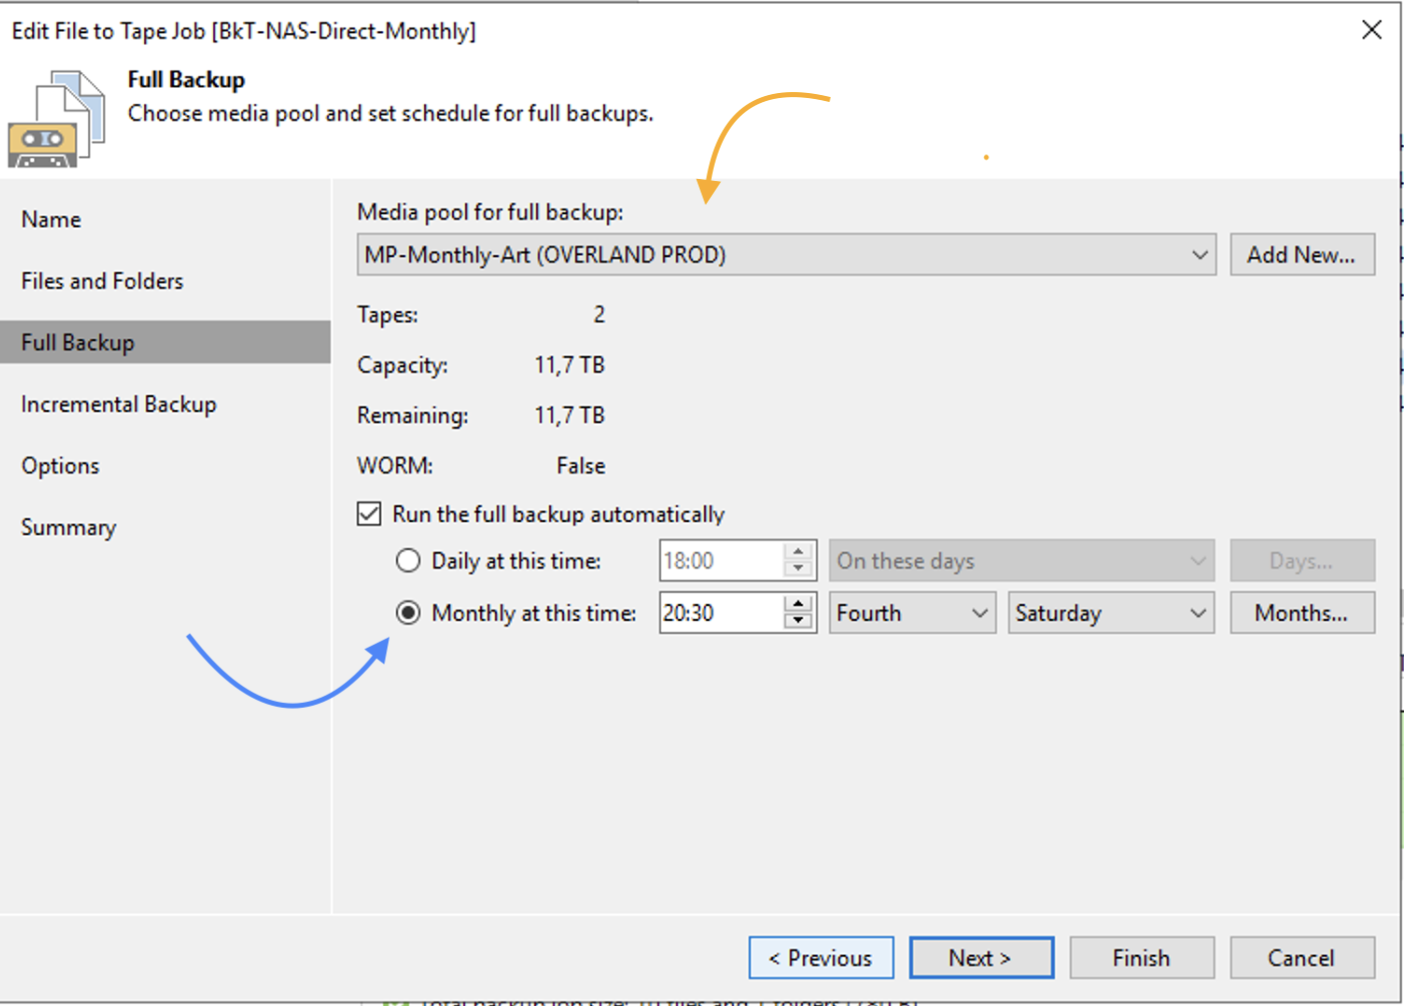 Immagine 12
 Immagine 13
Nota 2:
- Il licensing conteggia le licenze per singolo job di Backup (verisione 12.1).
- Effettuate dei test per essere certi che lo scenario corrisponda alle vostre necessità. Fatevi aiutare dal supporto Veeam.
Nel prossimo articolo vedremo come utilizzare la funzionalità di Tape Copy.


 Immagine 1
 Immagine 2
 Immagine 3
 Immagine 4
 Immagine 5
 Immagine 6
 Immagine 7
 Immagine 8
 Immagine 9
 Immagine 10
 Immagine 11
 Immagine 10

 Picture 1
 Picture 2
 Picture 3
 Picture 4
 Picture 6
 Picture 7
 Picture 8
 Picture 9
 Picture 10
 Picture 11
 Picture 12
 Picture 13
 Picture 14
 Picture 15
 Picture 16
 Picture 17
 Picture 18
 Picture 19
 Picture 20