Il presente articolo illustra come configurare il menù di amministrazione del Veeam Disaster Recovery Orchestrator (VDrO).
Prima di procedere alla fase di amministrazione, è indispensabile aver già etichettato le risorse che dovranno far parte dei piani di Disaster Recovery.
La classificazione è stata illustrata nel precedente articolo, disponibile cliccando sul seguente link: VDrO – VOne – Tagging.
Nota 1: Per accedere al menù di amministrazione, selezionate la voce denominata “Administration” (vedi immagine 1)
Immagine 1
La configurazione del menù di amministrazione si divide in tre principali aree:
Nella prima sono impostate:
Il nome del VDrO Server e il contact name (immagine 2).
le connessioni verso i Veeam Backup & Replication Server (VBR) (immagine 3)
le connessioni verso i vCenter (immagine 4)
la connessione opzionale verso gli storage (immagine 5) (fate riferimento al presente articolo per scoprire i dettagli)
Immagine 2
Immagine 3
Immagine 4
Immagine 5
La seconda area identifica attraverso il tagging le risorse da aggiungere ai piani di DR:
La recovery location (immagine 6)
Nella recovery location i datastore ove i filesystem delle VM resiederanno (immagine 7)
Il mapping delle reti (immagine 8)
Il remapping degli indirizzi IP (immagine 9)
Nota 2: Le operazioni sopra descritte sono possibili se e solo se tutte le risorse necessarie sono state etichettate.
Nota 3: Il remapping automatico degli indirizzi IP in caso di avvio di un piano di DR è disponibile solo per le VM Windows.
Immagine 6
Immagine 7
Immagine 8
Immagine 9
Nella terza area sono identificate:
La profilazione degli utenti. In parole semplici il VDrO permette di creare utenti in grado di amministrare solo degli specifici workload che sono chiamati “scopes” (immagine 10).
L’assegnazione dei DataLab agli “scopes”. Ricordo che i DataLab permettono di verificare che il piano di DR sia utilizzabile (immagine 11).
Immagine 10
Immagine 11
L’ultima configurazione permette di legare il gruppo di VM replicate o salvate tramite backup (dette VM Groups) agli scopes degli utenti.
Ad esempio, l’immagine 12 riporta che il VM Group “B&R Job – Replication VAO Win 10” è assegnato (included) ad entrambi gli scopes Admin e Linux.
Immagine 10
Nel prossimo ed ultimo articolo scopriremo come creare e verificare un piano di DR.
Nel mio laboratorio, il sito di Disaster Recovery è composto da un singolo host ESX 7.01.
Viene gestisto da un vCenter virtuale (denominato vCenter-DR), che afferisce esclusivamente alle risorse hardware messe a disposizione dallo stesso host ESX 7.01.
Lo scorso mese Veeam Software ha rilasciato l’aggiornamento di Veeam Backup & Replication 11A.
Tra le diverse migliorie introdotte, la mia attenzione si è concentrata sui nuovi driver (detti I/O filters) della componente CDP.
Se nel cluster principale, l’aggiornamento è stato semplice, immediato e indolore (vista la presenza di più host sotto un ulteriore vCenter), per il sito di Disaster Recovery si è generata una complicanza collegata all’architettura hardware presente.
L’aggiornamento falliva, poichè era impossibile porre l’host ESX 7.01 in mantenance mode senza di fatto spegnere anche il vCenter-DR che lo gestiva (vedi immagine 1).
Immagine 1
Come è stato possibile superare tale ostacolo senza modificare la configurazione del cluster? (Senza cioè aggiungere un ulteriore Host ESX 7.01)
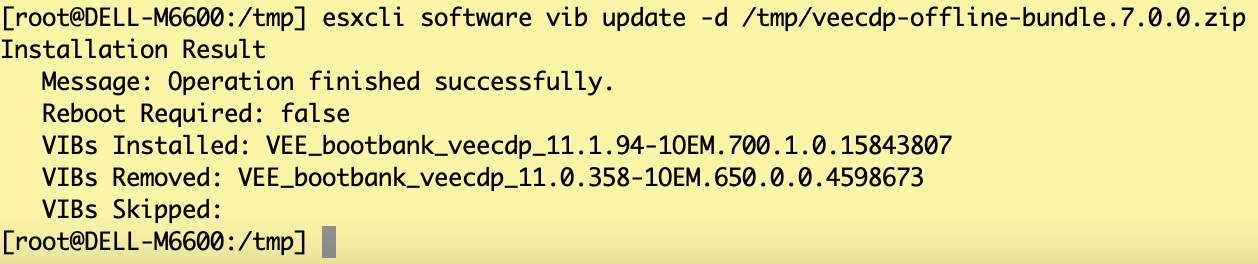
Copia del pacchetto Veeam CDP nell’host ESX 7.01 (veecdp-offline-bundle.7.0.0.zip)
Installazione del pacchetto attraverso il comando “esxcli software vib update -d /yourpath/veecdp-offline-bundle.7.0.0.zip” (vedi Immagine 2)
Immagine 2
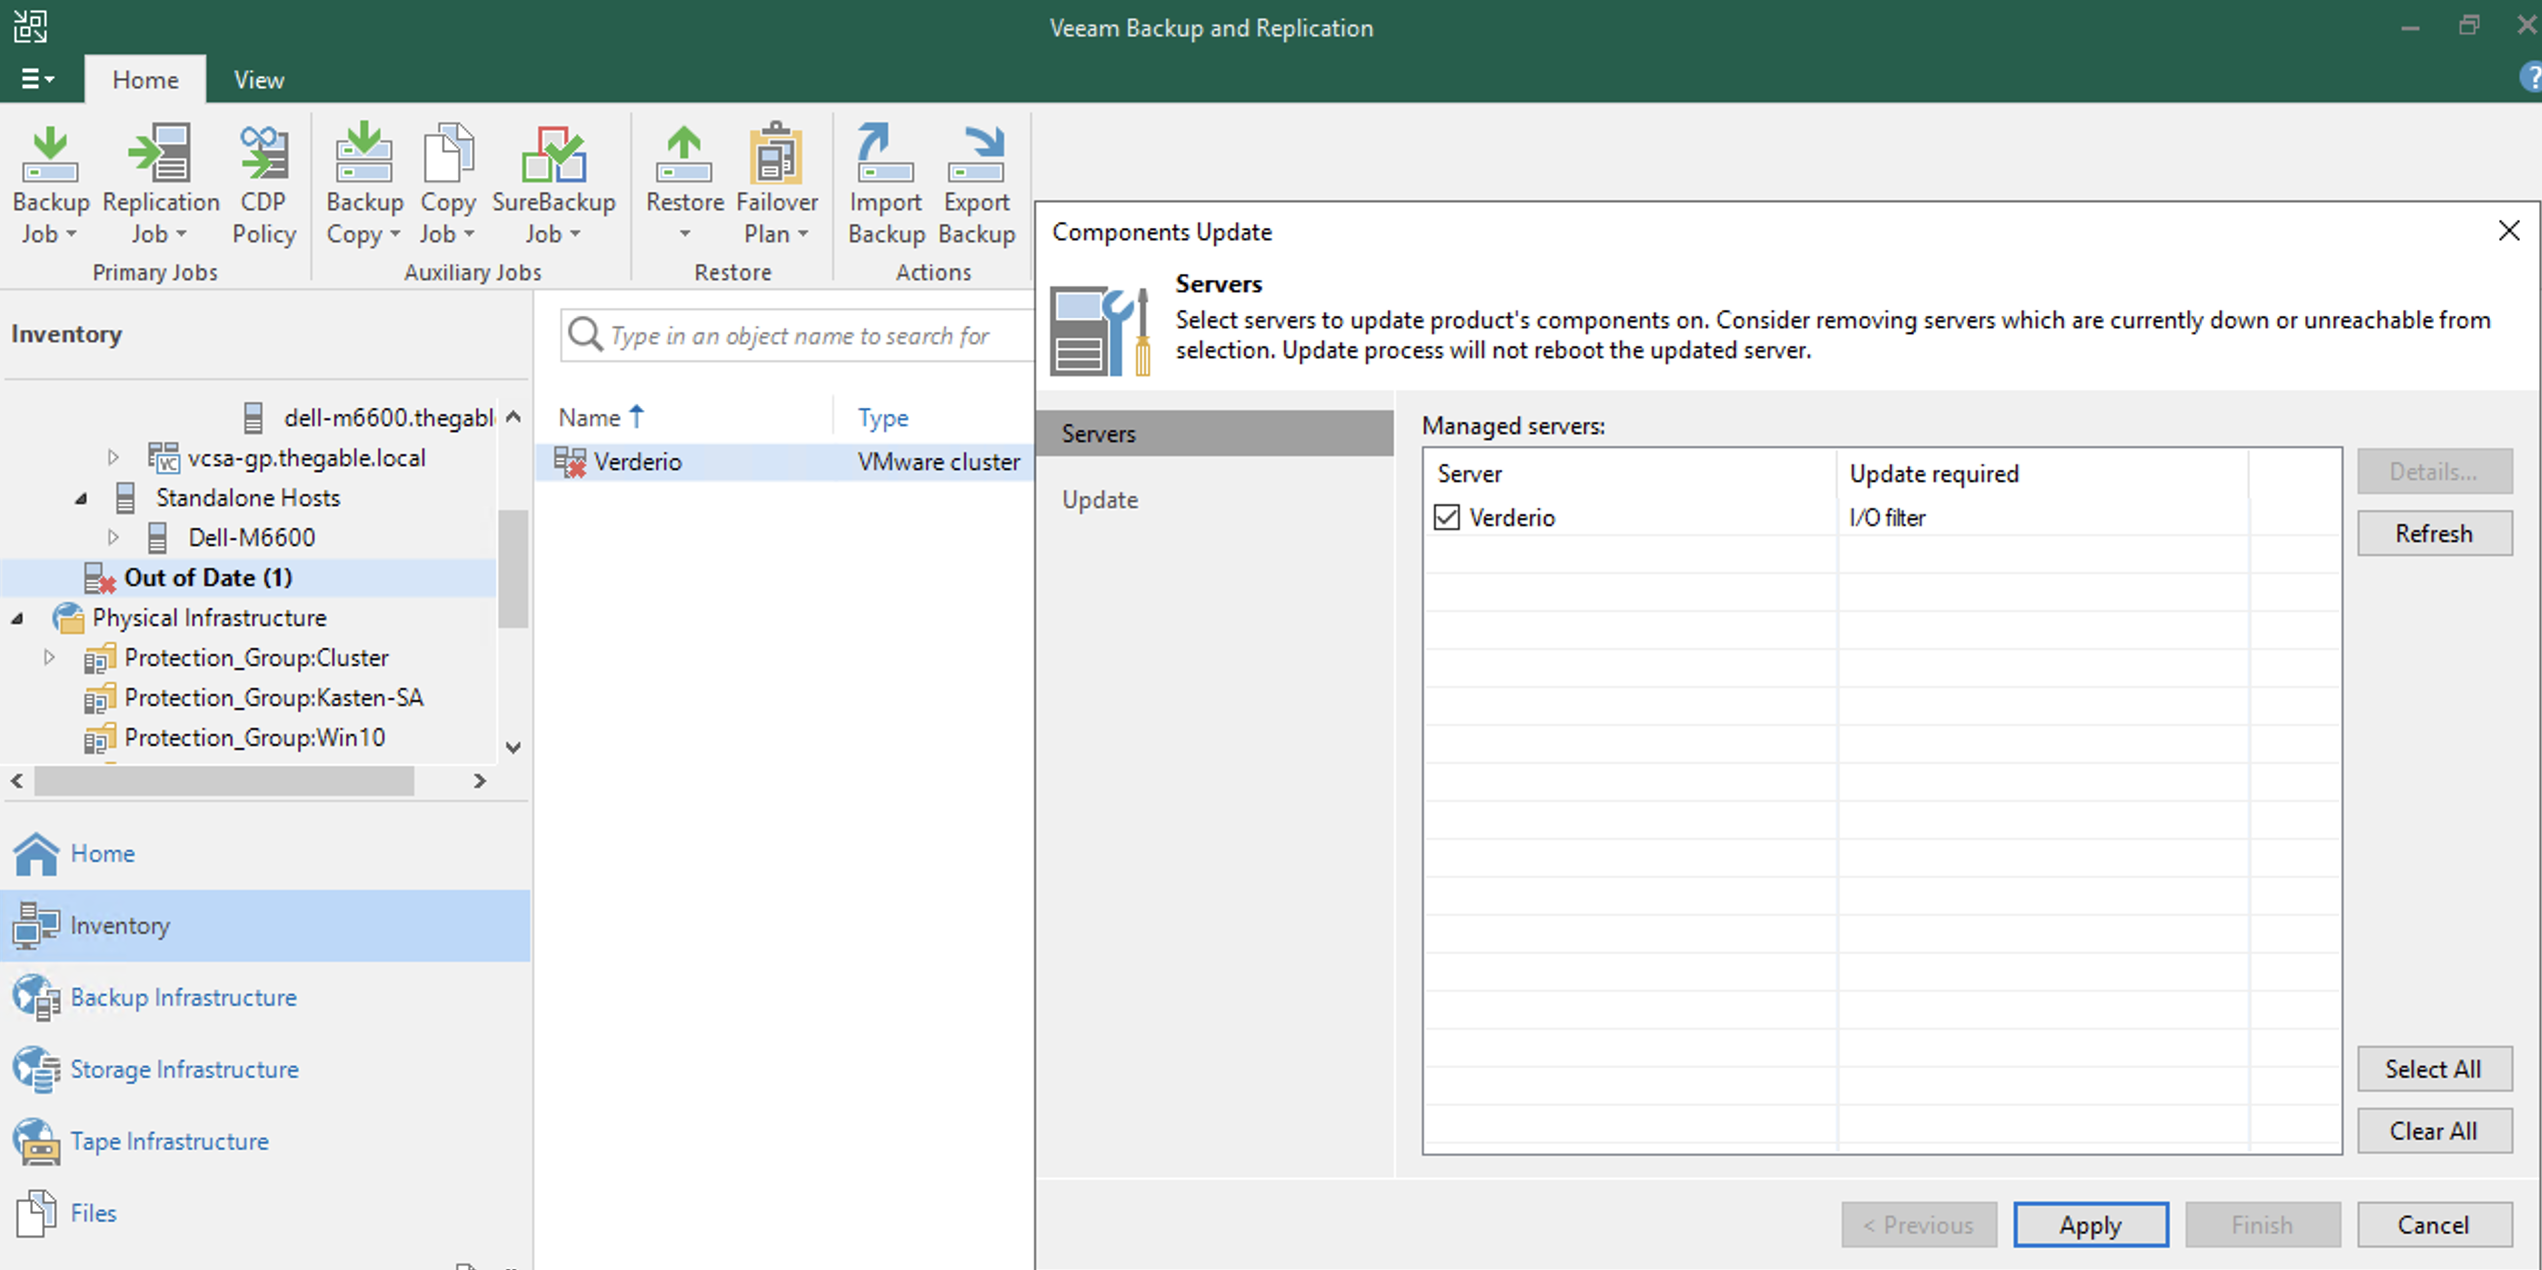
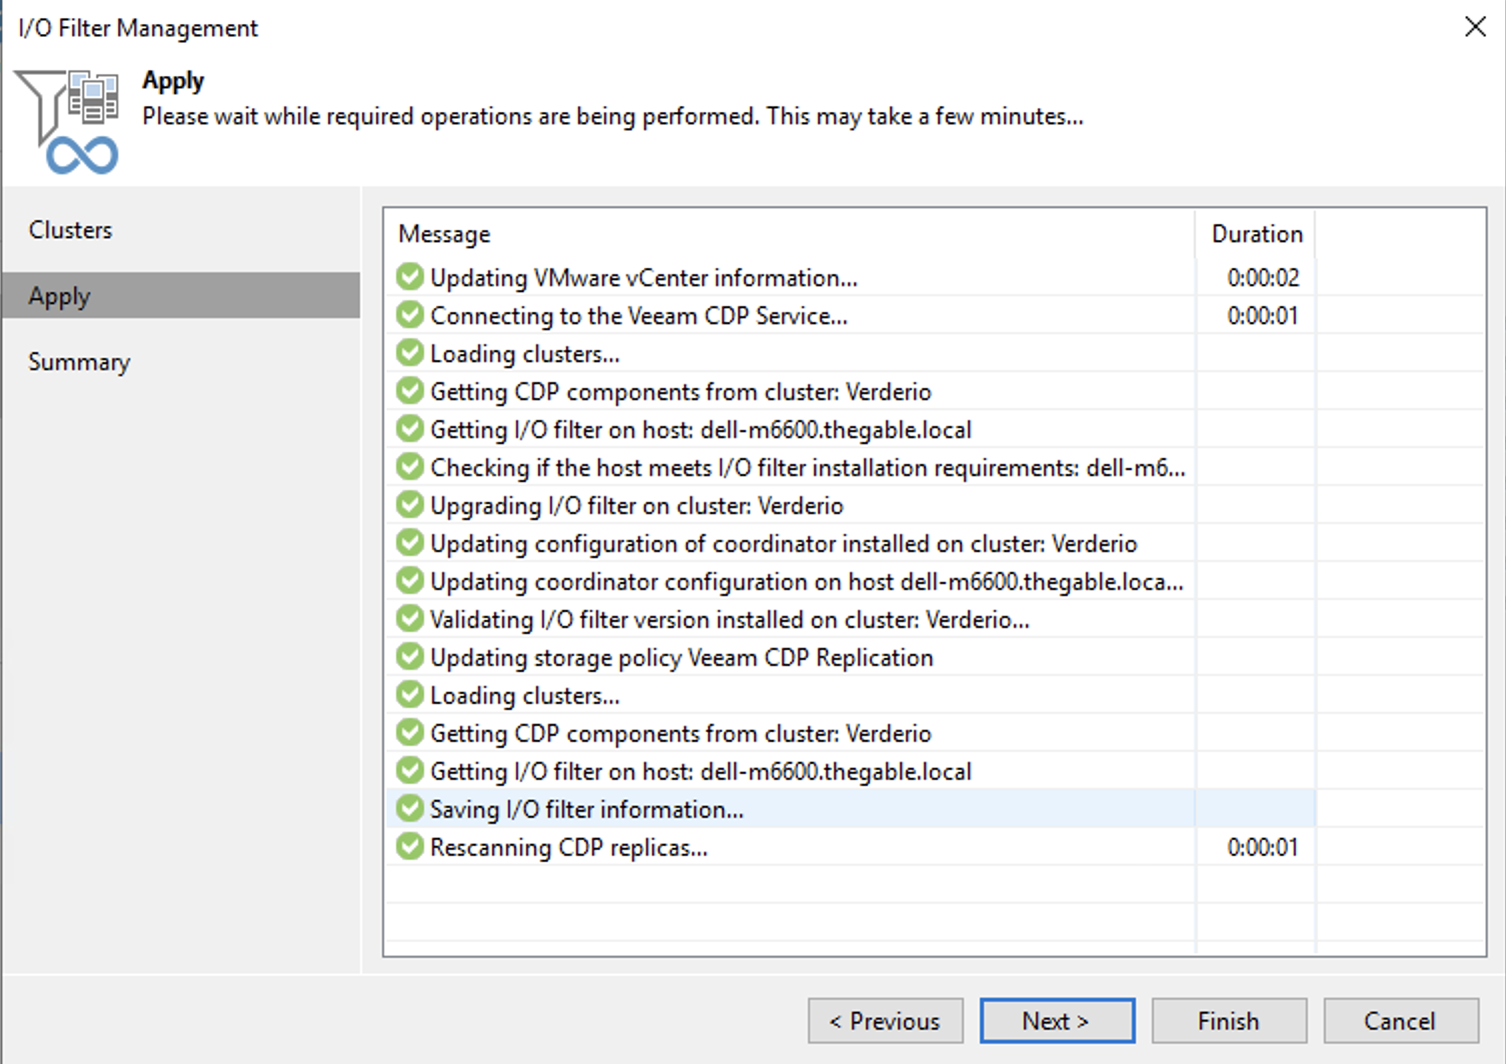
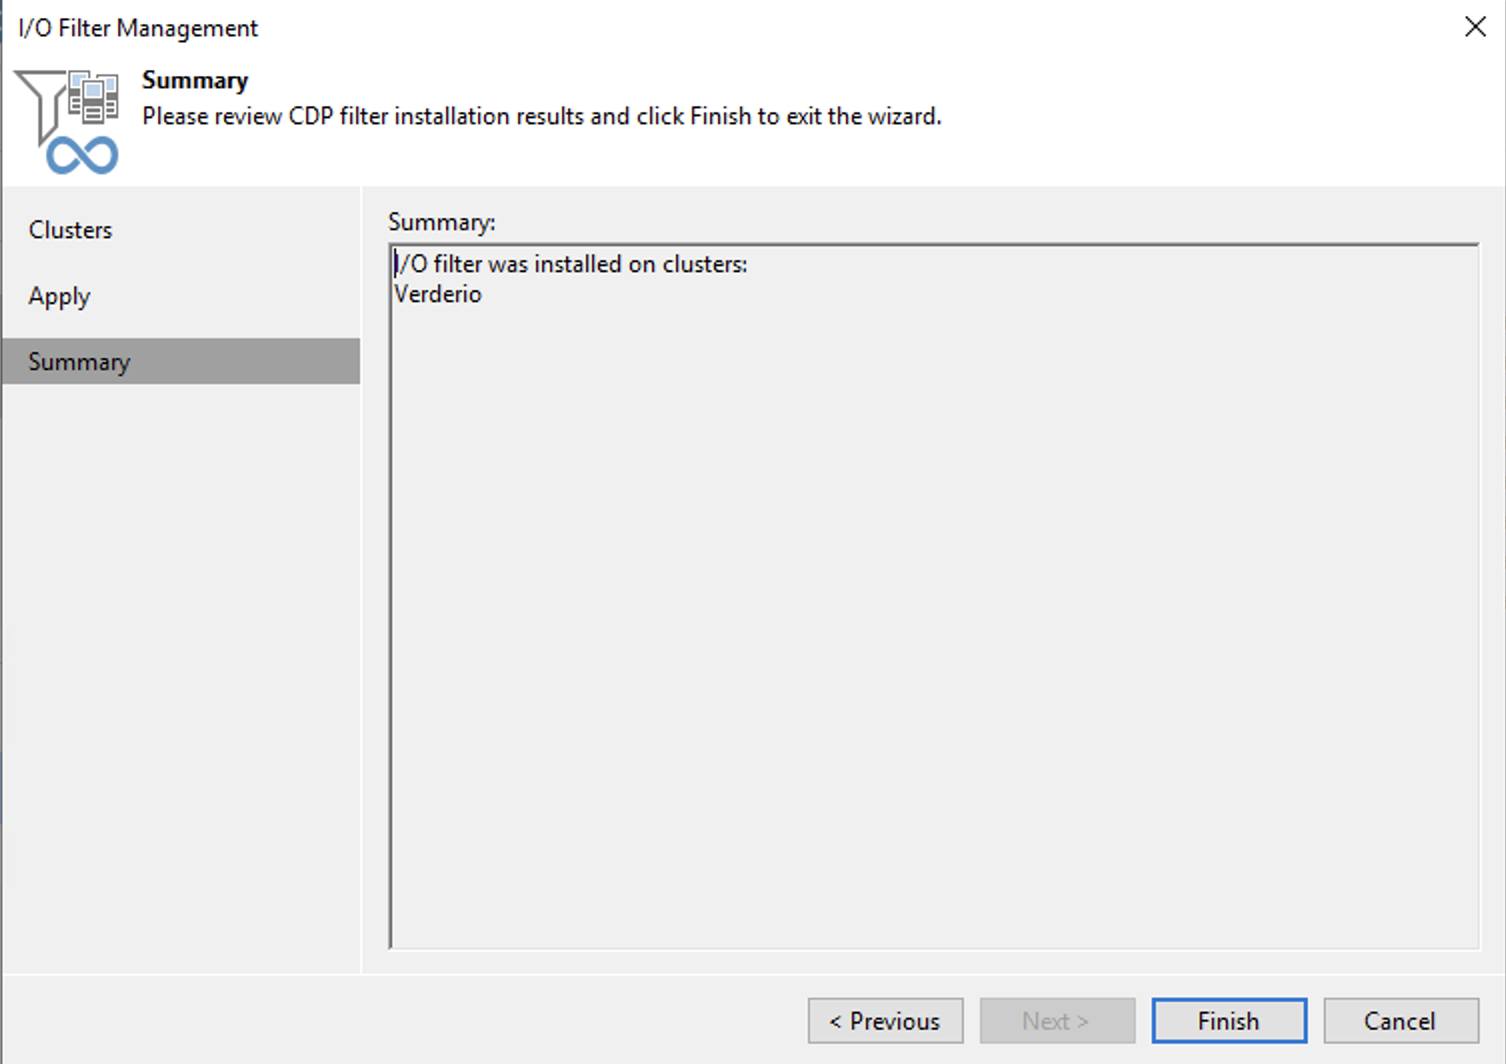
Terminata questa prima fase, è ora stato sufficiente ripetere la procedura standard di aggiornamento (vedi immagini 3,4 e 5).
Immagine 3
Immagine 4
Immagine 5
La verifica che garantisce che la procedura seguita è corretta è quella di realizzare un Job di Replica CDP, attendere che si concluda senza errori e che sia possibile avviare la procedura di failover.
Se negli ultimi 5 anni, la parola Cloud è stata quella più utilizzata (anche in modo inappropriato), negli ultimi cinque mesi la parola che sta rieccheggiando di più nel mondo IT è Digital Transformation.
Da Wikipedia:
“Digital Transformation (DT o DX) è l’adozione della tecnologia digitale per trasformare servizi e aziende, sostituendo processi non digitali o manuali con processi digitali o sostituendo la tecnologia digitale precedente con la tecnologia digitale più recente”.
Ancora: la Digital Transformation deve aiutare le aziende ad essere più competitive attraverso la rapida implementazione di nuovi servizi sempre in linea con le esigenze aziendali.
Nota 1: La trasformazione digitale è il paniere, le tecnologie da utilizzare sono le mele, i servizi sono i mezzi di trasporto, i negozi sono i clienti/clienti.
1. Tutte le architetture IT esistenti possono funzionare per la Trasformazione Digitale?
Preferisco rispondere ricostruendo la domanda con parole più appropriate:
2. La trasformazione digitale richiede che dati, applicazioni e servizi si spostino da e verso architetture diverse?
Sì, questo è un must ed è stato nominato Data Mobility.
3. La Data-Mobility significa che i servizi possono essere indipendenti dall’infrastruttura sottostante?
La miglior risposta credo che sia: nonostante al giorno d’oggi non esista un linguaggio standard che permetta a diverse architetture/infrastruttura di dialogare tra loro (on-premises & on cloud), le tecnologie di Data-mobility sono in grado di superare tale limitazione.
4. La Data Mobility è indipendente dai fornitori?
Quando uno standard viene rilasciato, tutti i fornitori vogliono implementarlo al più presto perché sono sicuri che queste funzionalità miglioreranno le loro entrate. Attualmente, questo standard non esiste ancora.
Nota 3: penso che il motivo sia che ci sono così tanti oggetti da contare, analizzare e sviluppare che lo sforzo economico per farlo non è al momento giustificato
5. Esiste già una tecnologia Ready “Data-Mobility”?
La risposta potrebbe essere piuttosto lunga ma, per farla breve, ho scritto il seguente articolo che si compone di due parti principali:
Livello applicazione (contenitore – Kubernetes)
Livello dati (backup, replica)
Application Layer – Container – Kubernetes
Nel mondo IT, i servizi sono eseguiti in ambienti virtuali (VMware, Hyper-V, KVM, ecc.).
Vi sono ancora alcuni servizi che girano su architetture legacy (Mainframe, AS400 ….), (vecchi non significa che non siano aggiornati ma solo che hanno una storia molto lunga)
Nei prossimi anni i servizi verranno implementati in un’apposita “area” denominata “container”.
Il contenitore viene eseguito nel sistema operativo e può essere ospitato in un’architettura Virtuale/Fisica/Cloud.
Perché i contenitori e le competenze su di essi sono così richiesti?
a. L’esigenza degli IT Manager è quella di spostare i dati tra le architetture al fine di migliorare la resilienza e ridurre i costi. b. La tecnologia Container semplifica la scrittura del codice dello sviluppatore perché ha un linguaggio standard e ampiamente utilizzato. c. I servizi eseguiti sul container sono veloci da sviluppare, aggiornare e modificare. d. Il contenitore è “de facto” un nuovo standard che ha un grande vantaggio. Superare l’ostacolo della mancanza di standard di comunicazione tra le architetture (private, ibride e cloud pubblico).
Un approfondimento sul punto d.
Ogni azienda ha il proprio core business e tutte hanno bisogno della tecnologia informatica.
Qualsiasi dimensione dell’azienda?
Sì, basti pensare all’ uso del cellulare, per prenotare un tavolo al ristorante o acquistare un biglietto per un film. Sono anche abbastanza sicuro che ci aiuterà a superare la minaccia Covid.
Questo è il motivo per cui continuo a pensare che l’IT non sia un “costo” ma un modo per ottenere più successo e denaro migliorando l’efficienza di qualsiasi azienda.
Anche Kubernetes ha delle funzionalità specifiche per consentire la mobilità dei dati?
Si, un esempio è Kasten K10 perchè ha tante e avanzate funzionalità di migrazione dei workload (l’argomento sarà ben trattato nei prossimi articoli).
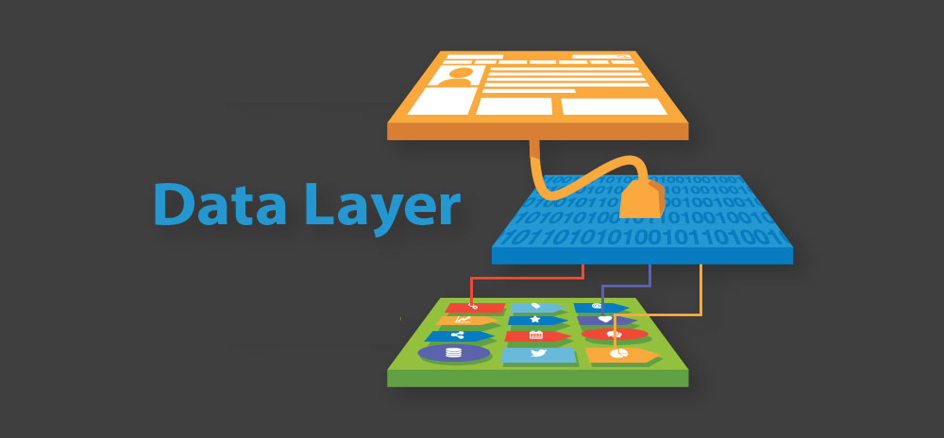
Data-Layer
E i servizi che non possono essere ancora containerizzati?
C’è un modo semplice per spostare i dati tra diverse architetture?
Sì, è possibile utilizzando copie dei dati di VM e Server Fisici.
In questo scenario aziendale, è importante che il software possa creare backup/repliche ovunque si trovino i carichi di lavoro.
È abbastanza? No, il software deve essere in grado di ripristinare i dati all’interno delle architetture.
Ad esempio, un cliente può dover ripristinare alcuni carichi di lavoro on-premise della sua architettura VMware in un cloud pubblico o ripristinare un backup di una VM situata in un cloud pubblico in un ambiente Hyper-V on-premise.
In altre parole, lavorare con Backup/Replica e ripristino in un ambiente multi-cloud.
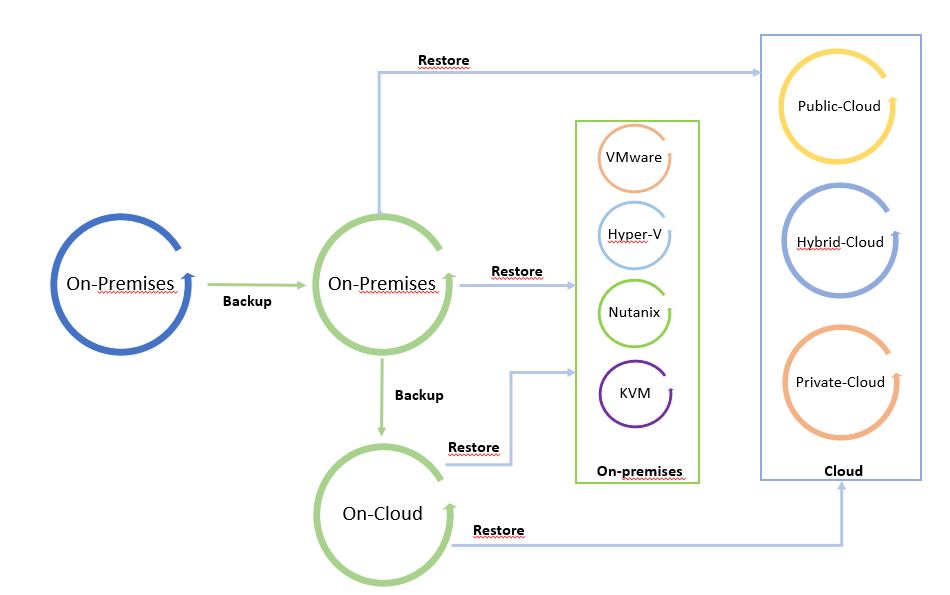
Le immagini successive mostrano il processo dei dati.
L’ho chiamato “Il ciclo dei dati” perché facendo leva su una copia di backup è possibile spostare liberamente i dati da e verso qualsiasi Infrastruttura (Cloud pubblico, ibrido, privato).
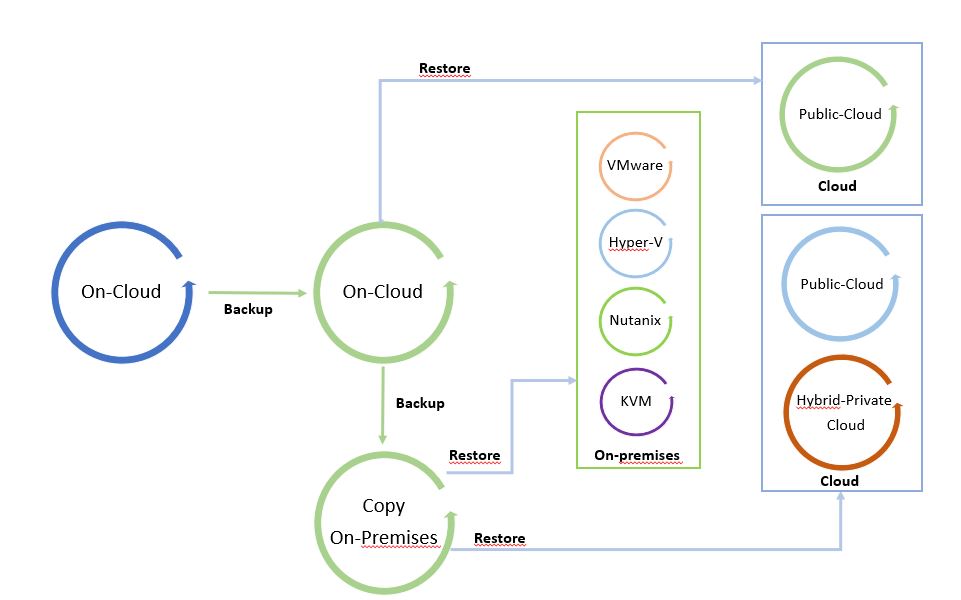
Le immagini 1 e 2 sono solo esempi del concetto di mobilità. Possono essere modificati aggiungendo tutte le piattaforme supportate dal software di cloud mobility.
Il punto di partenza dell’immagine 1 è un backup in locale che può essere ripristinato in locale e nel cloud. L’immagine 2 mostra il backup di un carico di lavoro sito in un cloud pubblico ripristinato su cloud o in locale.
È una via circolare in cui i dati possono essere spostati tra le piattaforme.
Nota 4: Un buon suggerimento è quello di utilizzare l’architettura di mobilità dei dati per configurare un sito di ripristino di emergenza a freddo (freddo perché i dati utilizzati per ripristinare il sito sono backup).
Immagine 1
Immagine 2
C’è un ultimo punto per completare questo articolo ed è la funzione Replica.
Nota 5: Per Replica intendo la possibilità di creare un mirror del carico di lavoro di produzione. Rispetto al backup, in questo scenario il carico di lavoro può essere avviato senza alcuna operazione di ripristino perché è già scritto nella “lingua” dell’host-hypervisor.
Lo scopo principale della tecnologia di replica è creare un sito di ripristino di emergenza a caldo (DR).
Maggiori dettagli su come orchestrare il DR sono disponibili su questo sito alla voce Veeam Disaster Recovery Orchestrator (conosciuto anche con il nome di Veeam Availability Orchestrator)
La replica può essere sviluppata con tre diverse tecnologie:
Replica Lun/Archiviazione
Split I/O
Snapshot
Tratterò questi scenari e i casi aziendali di Kasten K10 in articoli futuri.
1- The first magic point for starting is Wikipediawhere I got a good definition:
In computing, hardening is usually the process of securing a system by reducing its surface of vulnerability, which is larger when a system performs more functions; in principle, a single-function system is more secure than a multipurpose one. Reducing available ways of attack typically includes changing default passwords, the removal of unnecessary software, unnecessary usernames or logins, and the disabling or removal of unnecessary services.
2- The second point is to understand the concept of Perimeter security:
It is natural barriers or artificially built fortifications that have the goal of keeping intruders out of the area . The strategies can be listed as:
It is the division of an organization network into smaller and, consequently, a more manageable grouping of interfaces called zones. These zones consist of IP ranges, subnets, or security groups designed typically to boost performance and security.
In the event of a cyberattack, effective network segmentation will confine the attack to a specific network zone and contain its impact by blocking lateral movement across the network via logical isolation through access controls.
Designating zones allows organizations to consistently track the location of sensitive data and assess the relevance of an access request based on the nature of that data. Designating where sensitive data reside permits network and security operations to assign resources for more aggressive patch management and proactive system hardening.
The next good rules involve your backup architecture and in specific the Backup Repositories:
Windows:
a. Use the built-in local administrator account
b. Set permissions on the repository directory
c. Modify the Firewall
d. Disable remote RDP services
Linux:
e. Create a Dedicated Repository Account
f. Set Permissions on the Repository Directory
g. Configure the Linux Repository in VeeamModify the Firewall
h. Use Veeam Encryption
Do you want to know more about security? If so the Veeam Best Practices are for sure the answer.
The next article will cover monitoring and automatic actions using Veeam-ONE.
5- Prevent injection of shady boot code
Code injection, also called Remote Code Execution (RCE), occurs when an attacker exploits an input validation flaw in software to introduce and execute malicious code.
To prevent the attack please follow the following rules:
a. Run with UEFI Native Mode b. Use UEFI with Secure Boot Standard Mode c. Combine Secure Boot with TPM d. Equip critical servers with a TPM 2.0
A lot of new challenges came to people who work in IT-Departments these last months.
The number of ransomware attacks has been growing day by day and their attack strategies are becoming more and more evil and dangerous.
The common questions the Managers ask the IT guys are:
a) Are the company protected against these risks?
A good answer is that a successful approach is when the percentage of certainty is more than the percentage of risk.
b) Which are the best practices to be safer?
The key is defining the right process of protection.
The scope of these articles is showing the correct behavior to keep your architecture as safer as possible or, in case of attack, gain as much time as possible to fend off the assault.
The articles will cover the storage point of view and do not deal with perimetral defenses, antimalware, antiviruses, networking strategies, and so on.
Which are the main strategies to adopt?
Having more copies of your data
Hardening the infrastructure
Monitoring behaviors
Are you ready? Let’s start with the first topic !!!
Having more copies of your data:
Backup software is the right tool to score the goals of this first part.
It has to be able to:
a) Create application consistency backup.
b) Copy backup data to different locations.
Almost all backup software can do that but some additional features can address better the biggest challenges:
Flexible: Backup software should write backup data to different types of repositories and be able to restore it without any required dependency. To be clearer, the backup data have to be self-consistent. The advantage is being able to fit different architecture scenarios (Let’s call it “Data mobility”).
Data-Offline: back up data should be put into a “quarantine” area where they cannot be either re-written or read. The classic deployment is a Tape Devices architecture or any scripts that automatically detach the repository devices.
Immutability: The backup data cannot be changed until the immutability period is over. This has a double advantage in comparison to data-offline strategy: It changes the repository status as written & online just for the new backup file. It is offline (as Tape technologies) for re-writing to already present backup data. The speed restore option has to remain unchanged.
Immutability can be reached in two ways:
By WORM (Write Once, Read Many) devices, where the backup files can be used just to restore once they have been added to repositories. For example, technology can be the optical disk, a technology I have been working on in the past.
At Veeam Software this common customer and partner request has been addressed using the immutability propriety of the Object Storage. The good news is that VBR v. 11 implements this great feature directly in Linux Repositories.
Is this enough? I’m still thinking that the backup solution should at least be able to:
Check the backup file and the backup content. The only way to check if a backup file is really reusable is restoring it in a separate area where communication with the production environment is forbidden. At Veeam it is called Sure-Backup.
Check with your anti-virus/anti-malware that the backup files have not been already attacked somewhere and sometime. At Veeam the technology used is the Data integration API.
Before restoring files or VMs in production, check with your anti-virus/anti-malware if your data has been already attacked. At Veeam it is called Secure Restore
Perform Replica Jobs. It helps to create a Disaster Recovery Site useful in performing a quick restart of the service. At Veeam this feature is included from the beginning and the Sure-Backup can be applied with replica too (it is called Sure-Replica). V.11 has a very powerful feature: CDP.
Restore backup data to the public cloud when the primary and replication site is totally out of order. I call it Cold Disaster Recovery and it needs at least one restore point available.
The next article topic is how to hardening your backup architecture
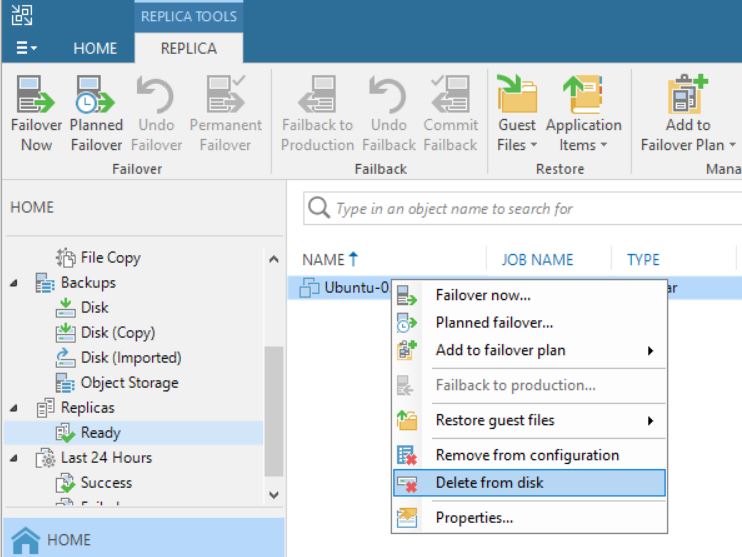
Last month, a partner had to face up a strange VBR behavior.
From the VBR console he deleted a VM’s replica (Picture 1), and suddenly the production VM has been also erased (don’t worry, before doing any activity he tested the backups using sure backup technology).
Picture 1
The reason why it happened become clear to me once I read the logs.
To do it shortly, some weeks before someone started a Failover directly from vCENTER console without doing any communication to the internal IT team.
This article wants to explain how to avoid this common mistake.
The first step is understanding some basic concepts:
a) VMware identify any single VM with a number named MorefID and a UUID.
b) Any single operating system has an identifier named Instance UUID (Universal Unique IDentifier); in my lab, I set-up more than one replica job for a single VM
Table 1. row 2. shows the name of production VM (Ubuntu-02), its morefID (vm2270), where it is running (Milan), the UUID (…bcc12) and its VM UUID … f58b.
Table 1. row 3-4 shows the name of VMs replicas, morefID, instance UUID and its UUID.
All tables shown in these articles have been created using Veeam One
Name
PCName
morefID
DataCenter
Instance UUID
UUID
Ubuntu-02
ubuntu-02
vm-2270
Milan
502d2405-cc8f-de73-1a19-57e8496bcc12
564d013a-7835-9d1b-841e-32855790f58b
Ubuntu-02_Rep_VC01
ubuntu-02
vm-2694
Milan
502d2d90-d08f-08aa-efcf-d9feaa1d13f8
564d013a-7835-9d1b-841e-32855790f58b
Ubuntu-02_Rep_VCDR
ubuntu-02
vm-399
Venice
501d517b-672e-30e0-665a-fd4b4af7dcb6
564d013a-7835-9d1b-841e-32855790f58b
Table-1
Picture 2 shows the VM source (highlighted in yellow) from vCENTER console.
Picture 2
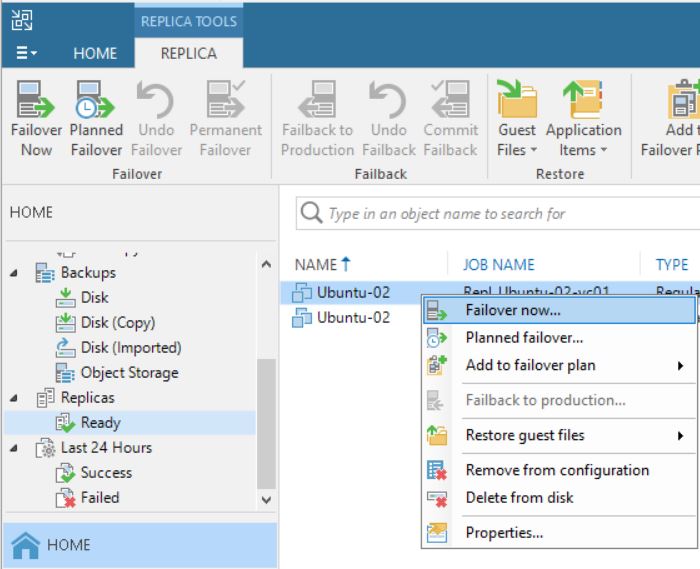
After checking up that the VM source is switched off, it’s possible to start a Failover (Picture 3).
Picture 3
The next five pictures show the step-by-step wizard to complete the procedure correctly. As you can see from picture 4 the VM that has been replicated with two different jobs (Picture 5) is always Ubuntu-02.
Picture 4
Picture 5
Pictures 6-8 show the result of the failover.
Picture 6
Picture 7
Picture 8
What happens when you complete the task with the Permanent failover? (Picture 9/10/11)
Picture 9
Picture 10
Picture 11
First of all, comparing picture 3 with 12 it is possible to see that one of the Replica Ready VM, and precisely the VM in permanent failover, has been deleted.
Picture 12
Picture 13 shows that now the replica job contains 0 objects. The right behavior is confirmed by pictures 14,15,16 and 17 where it is shown that the replica is not available anymore.
Picture 13
Picture 14
Picture 15
Picture 16
Picture 17
The cloning job option didn’t change the correct behavior (Pictures 18 and 19)
Picture 18
Picture 19
Let’s sum up. Following the right procedure, the Failover works as aspected
Now …. why the VM has been deleted? The next article will explain it in detail.

 Immagine 1
 Immagine 2
 Immagine 3
 Immagine 4
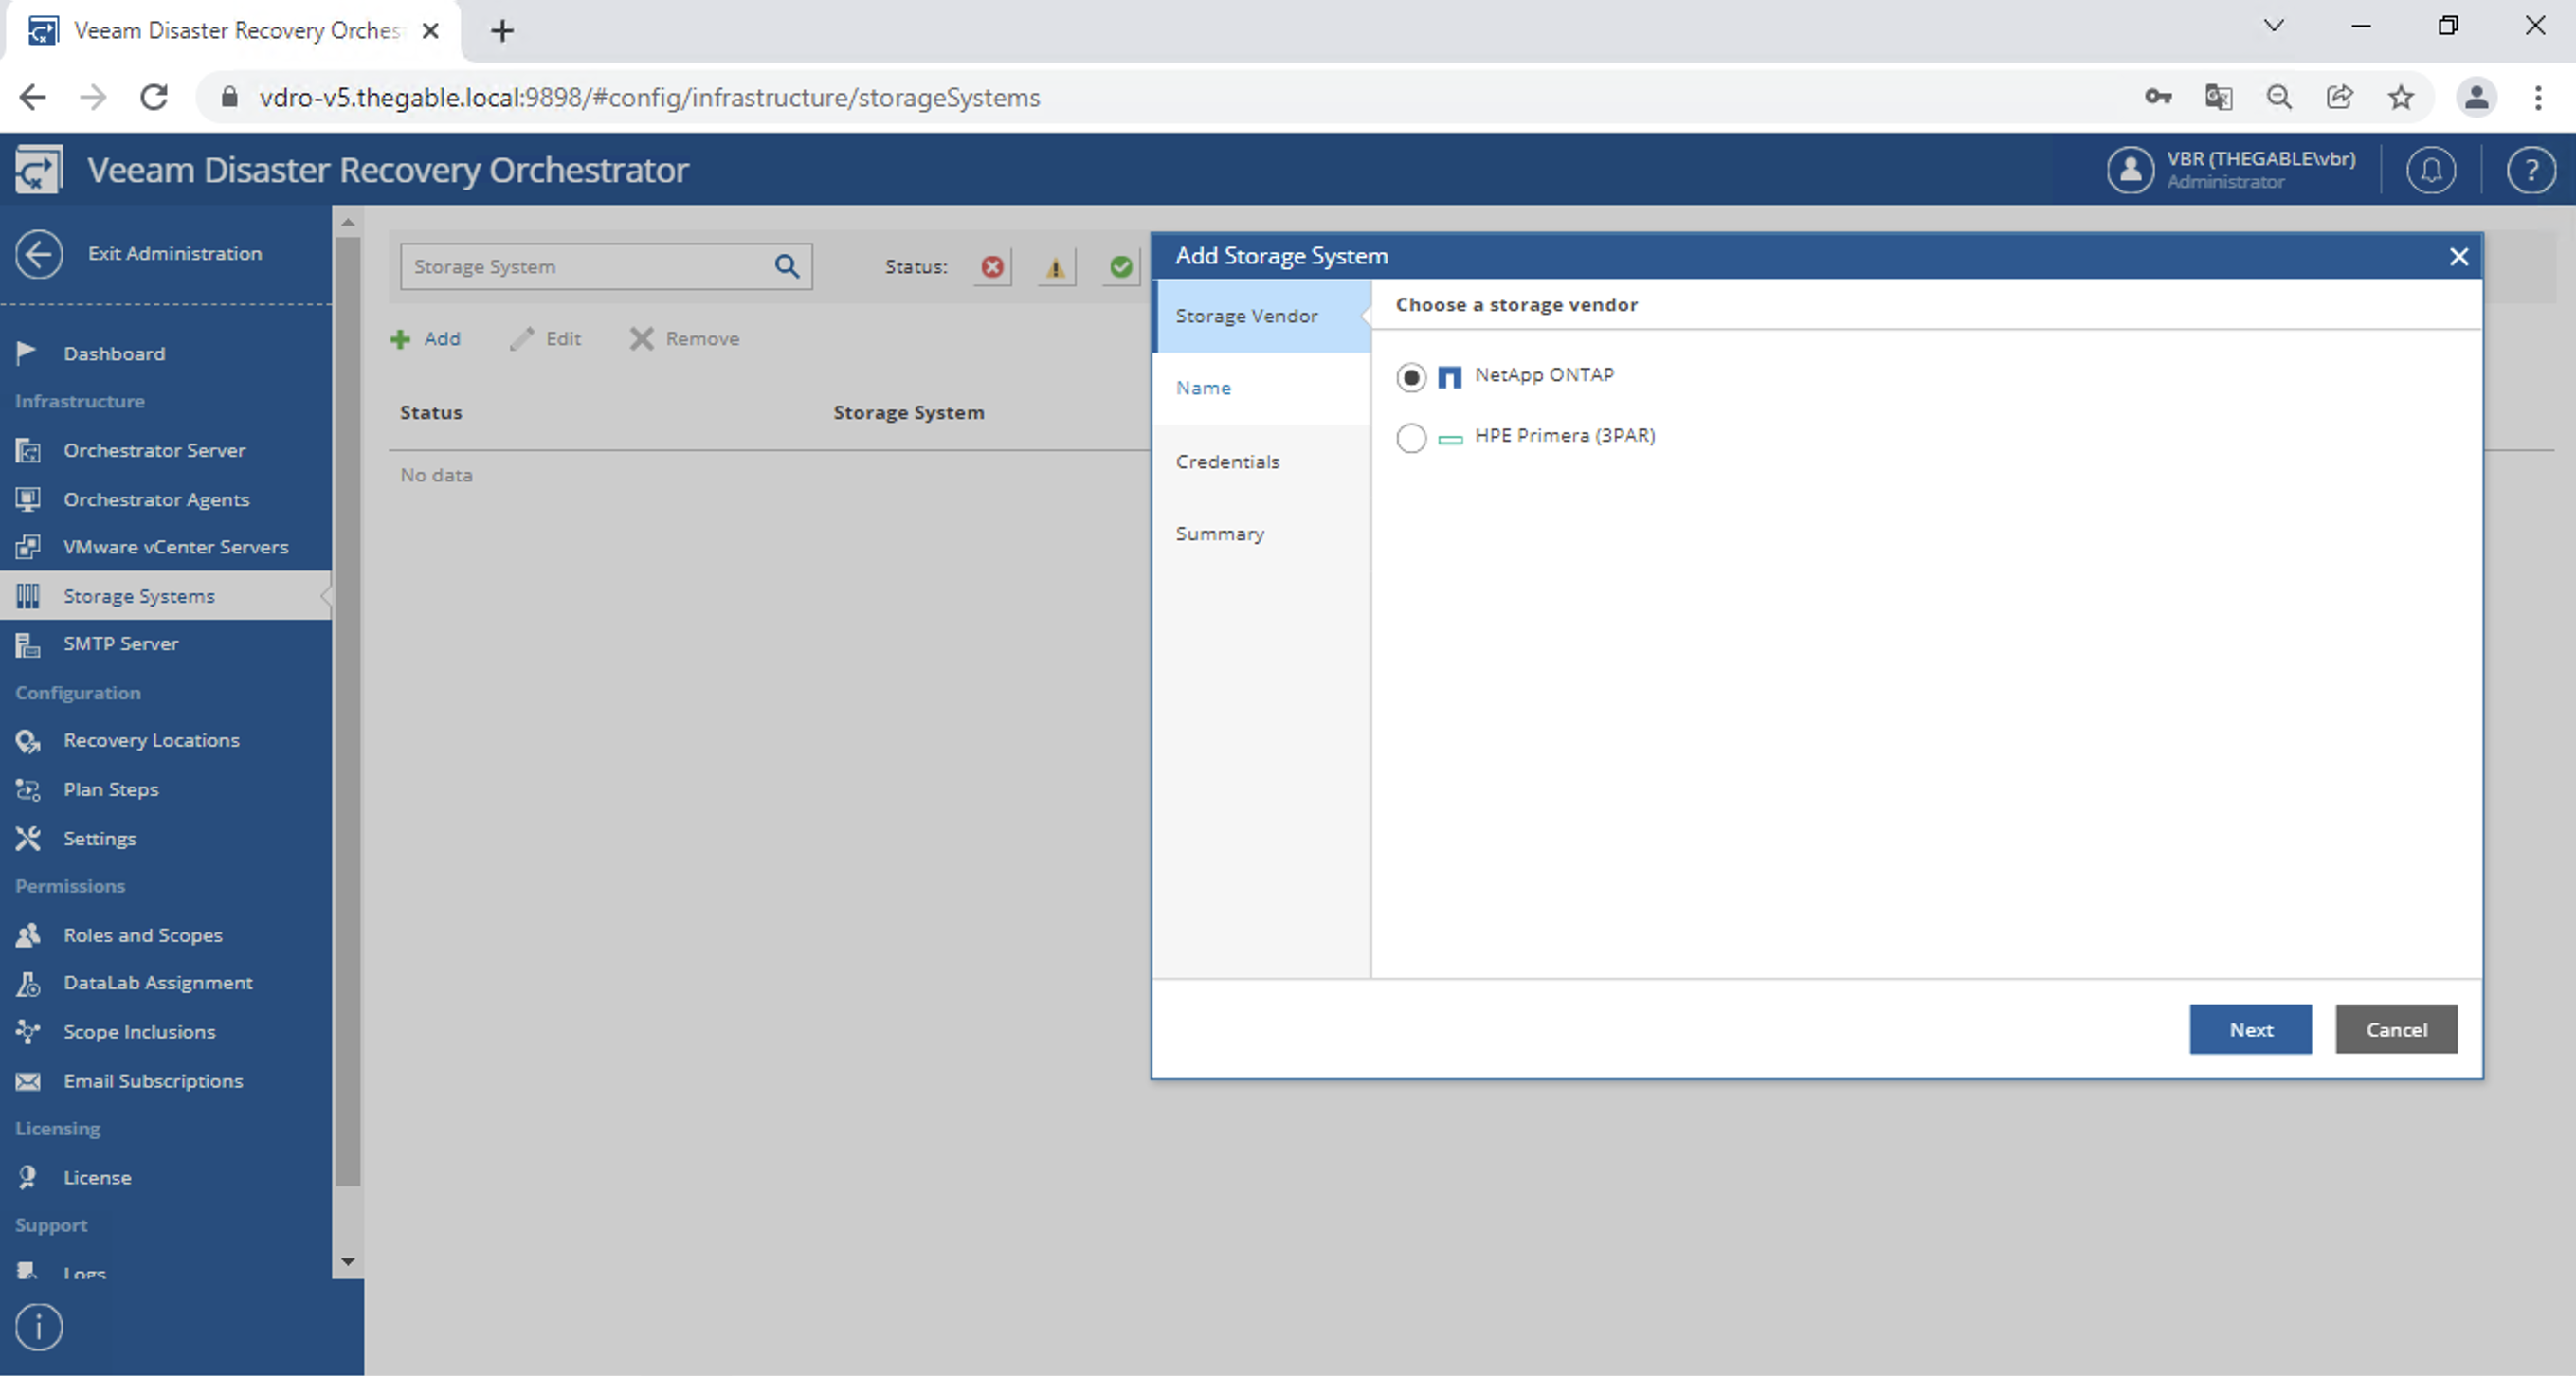 Immagine 5
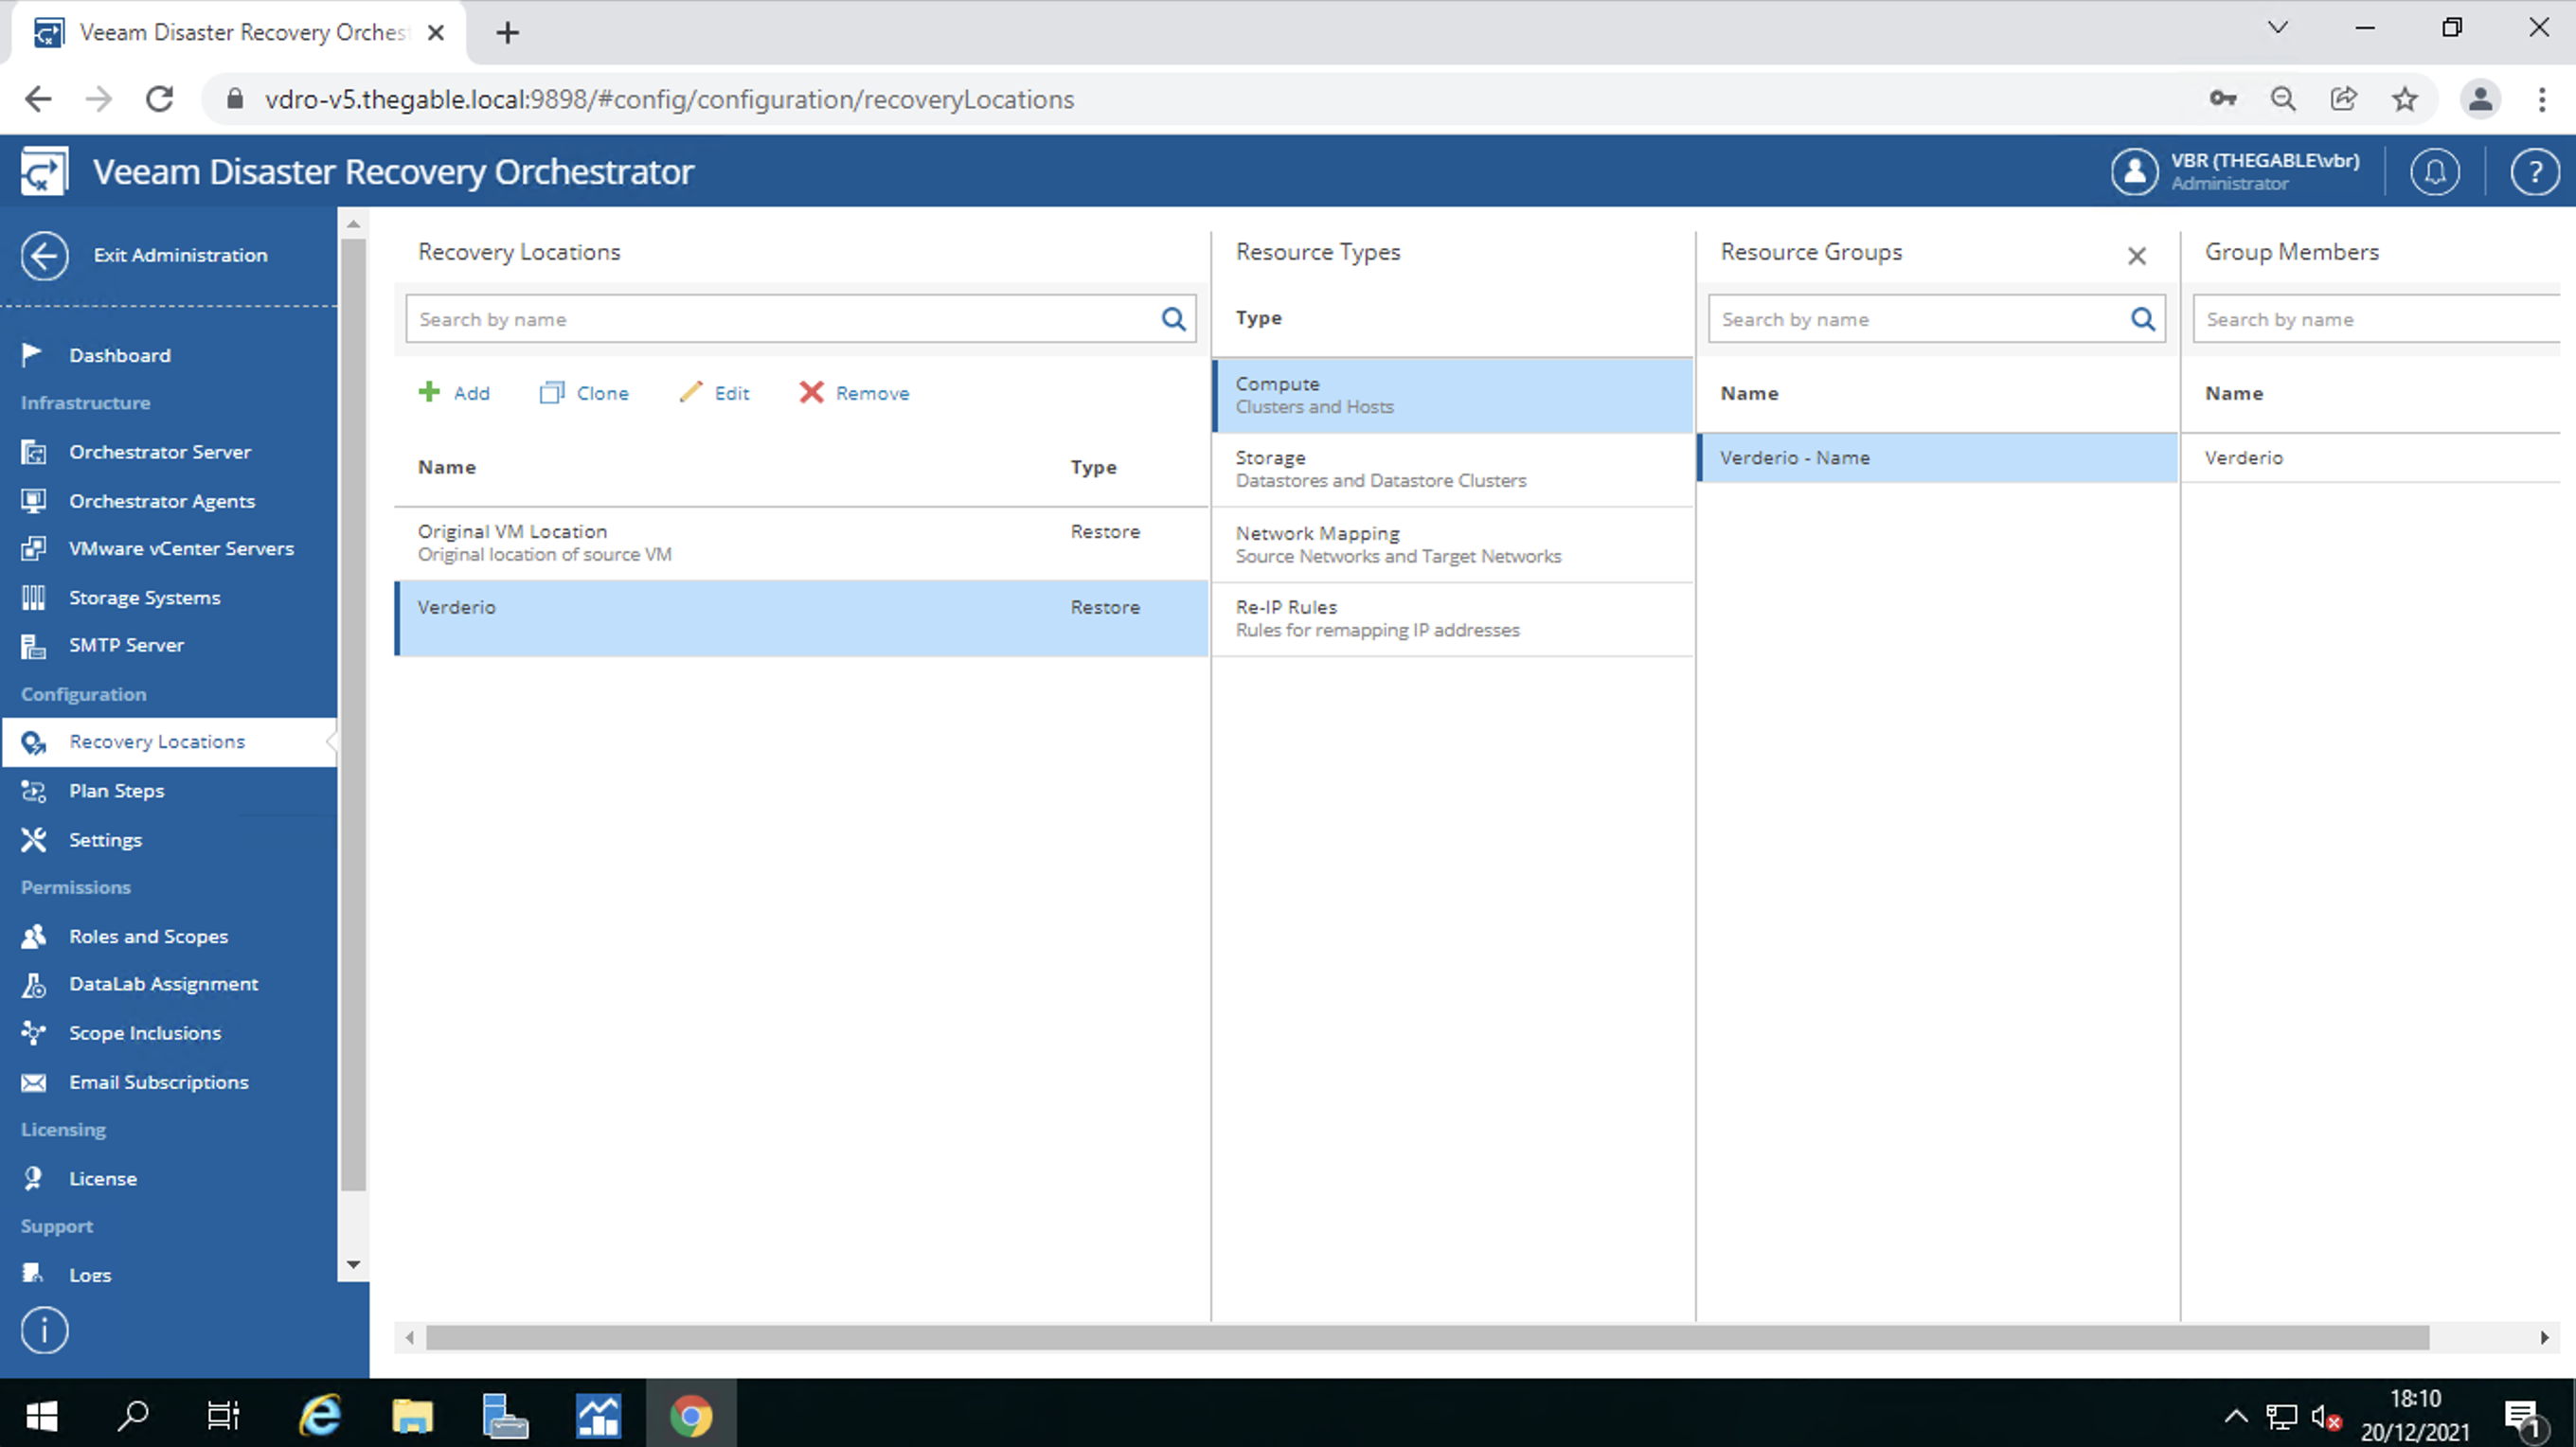 Immagine 6
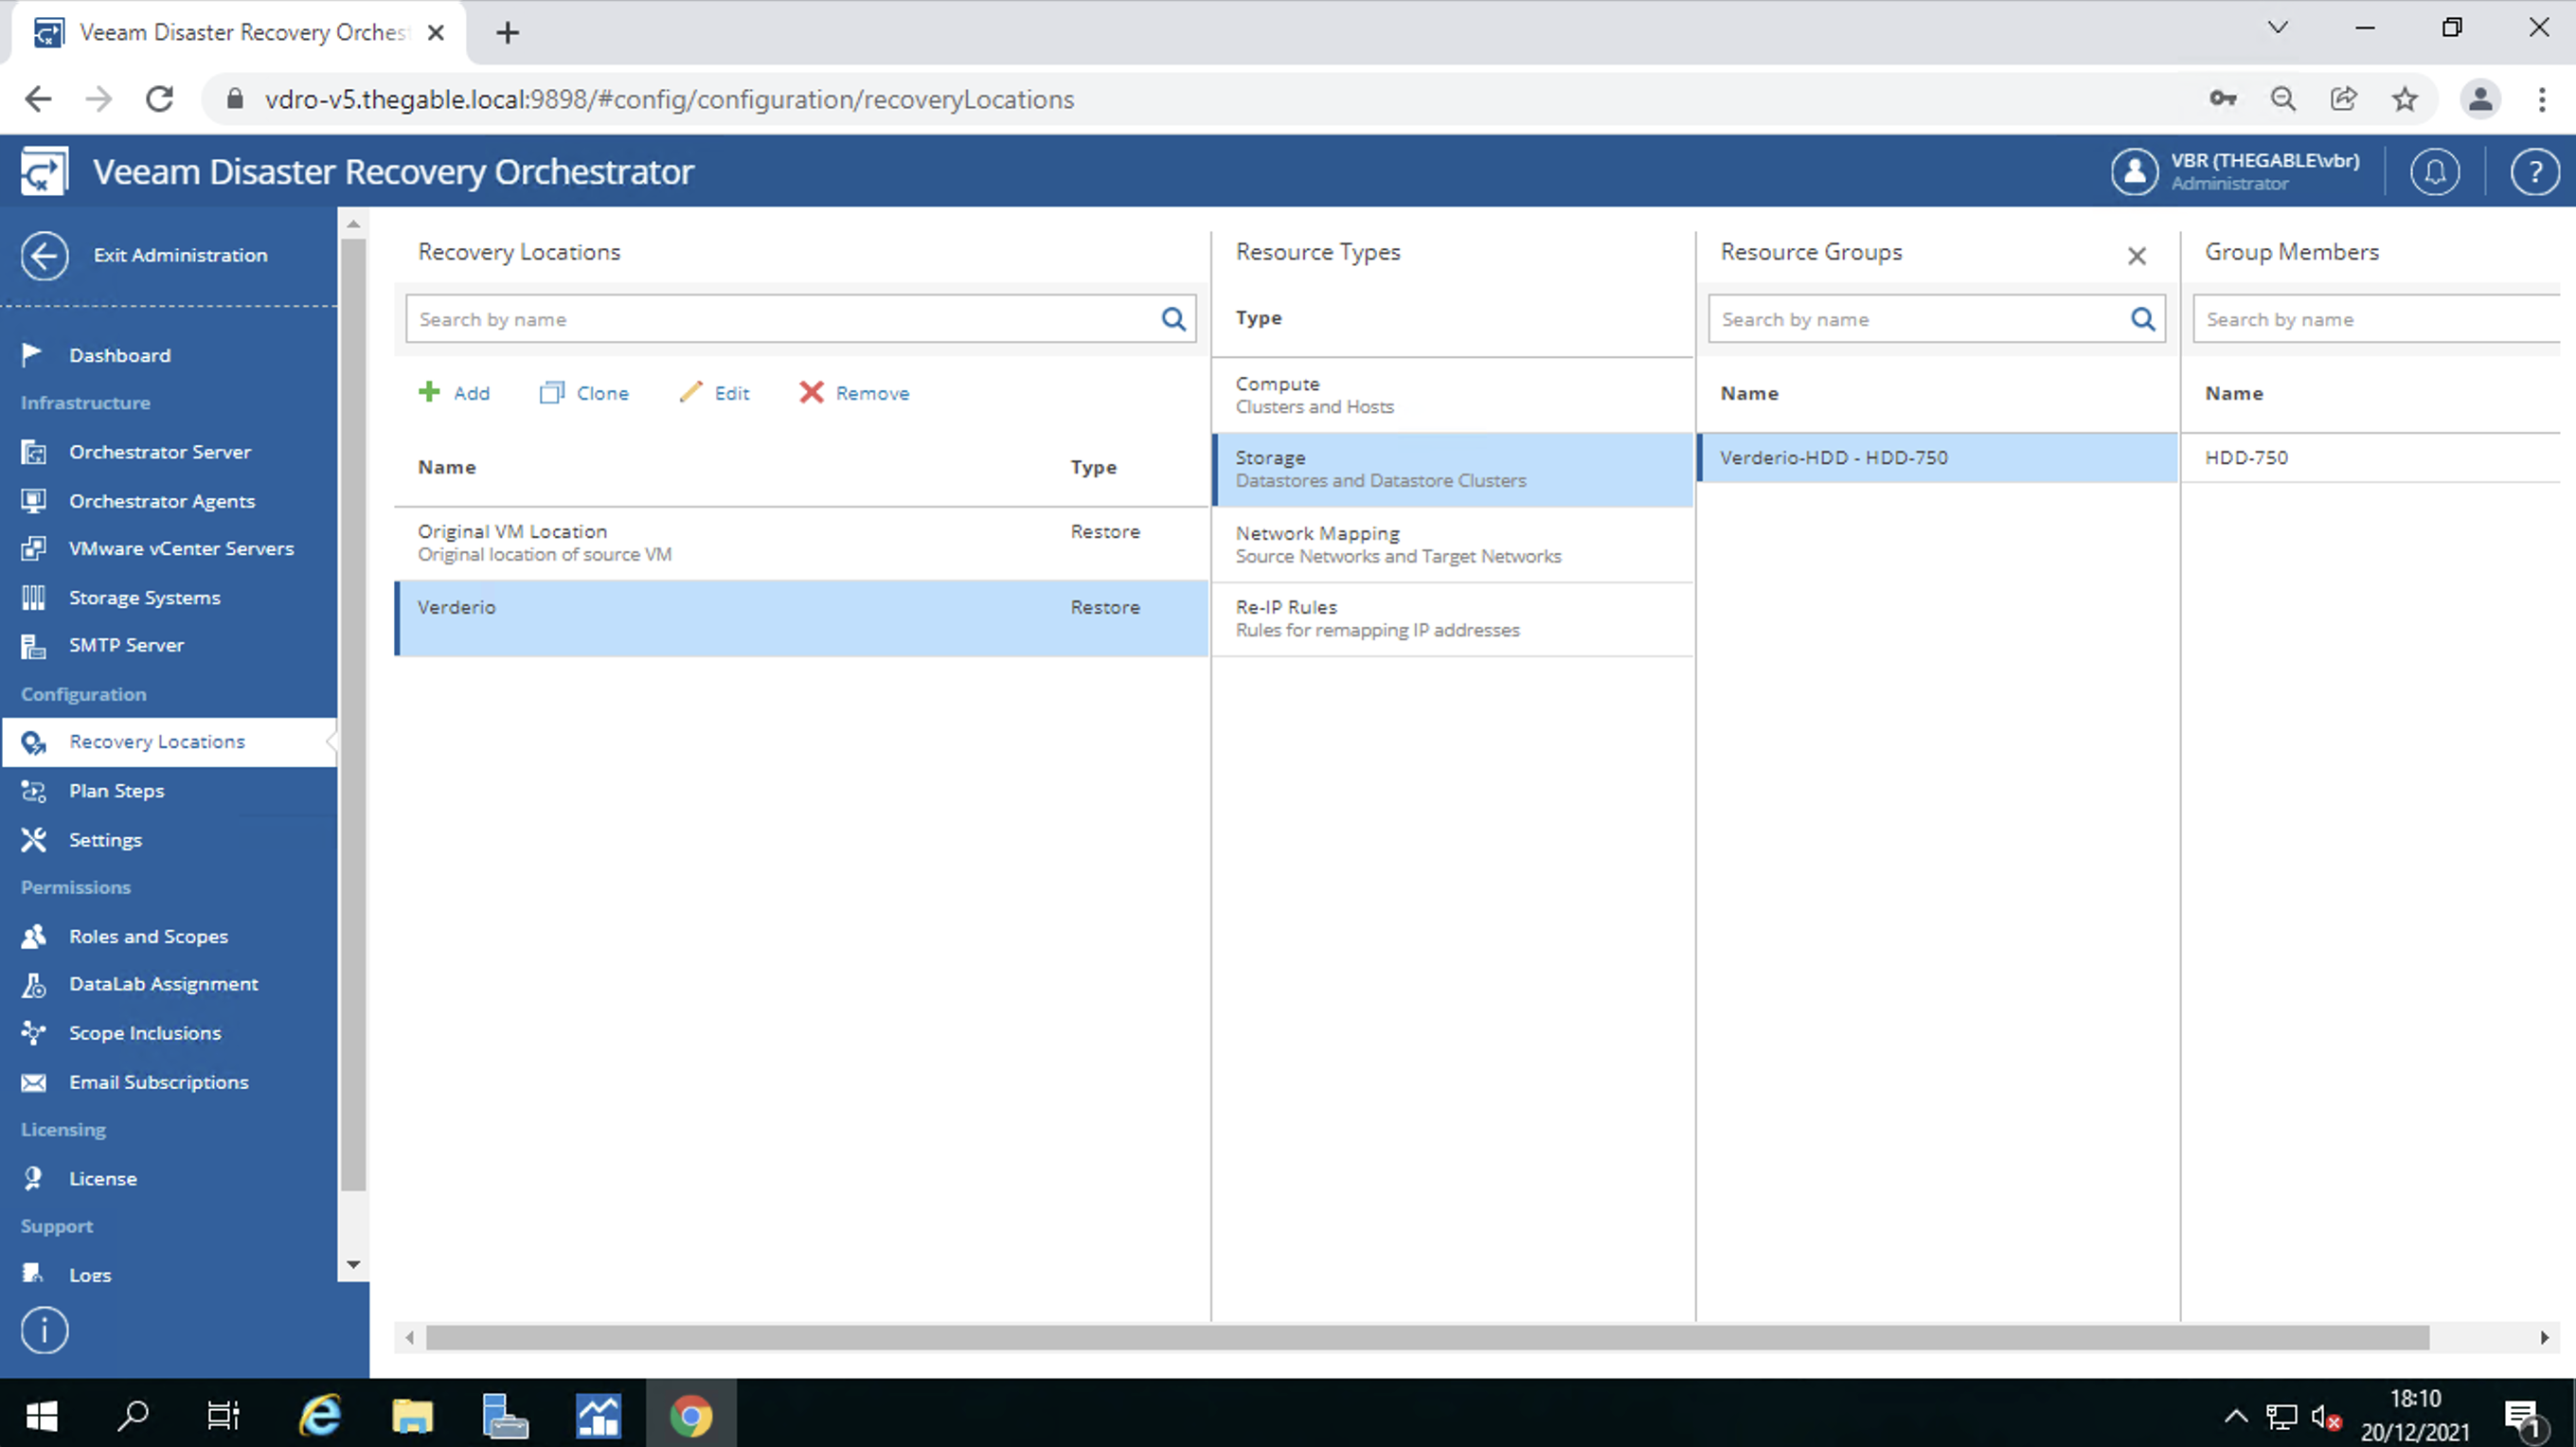 Immagine 7
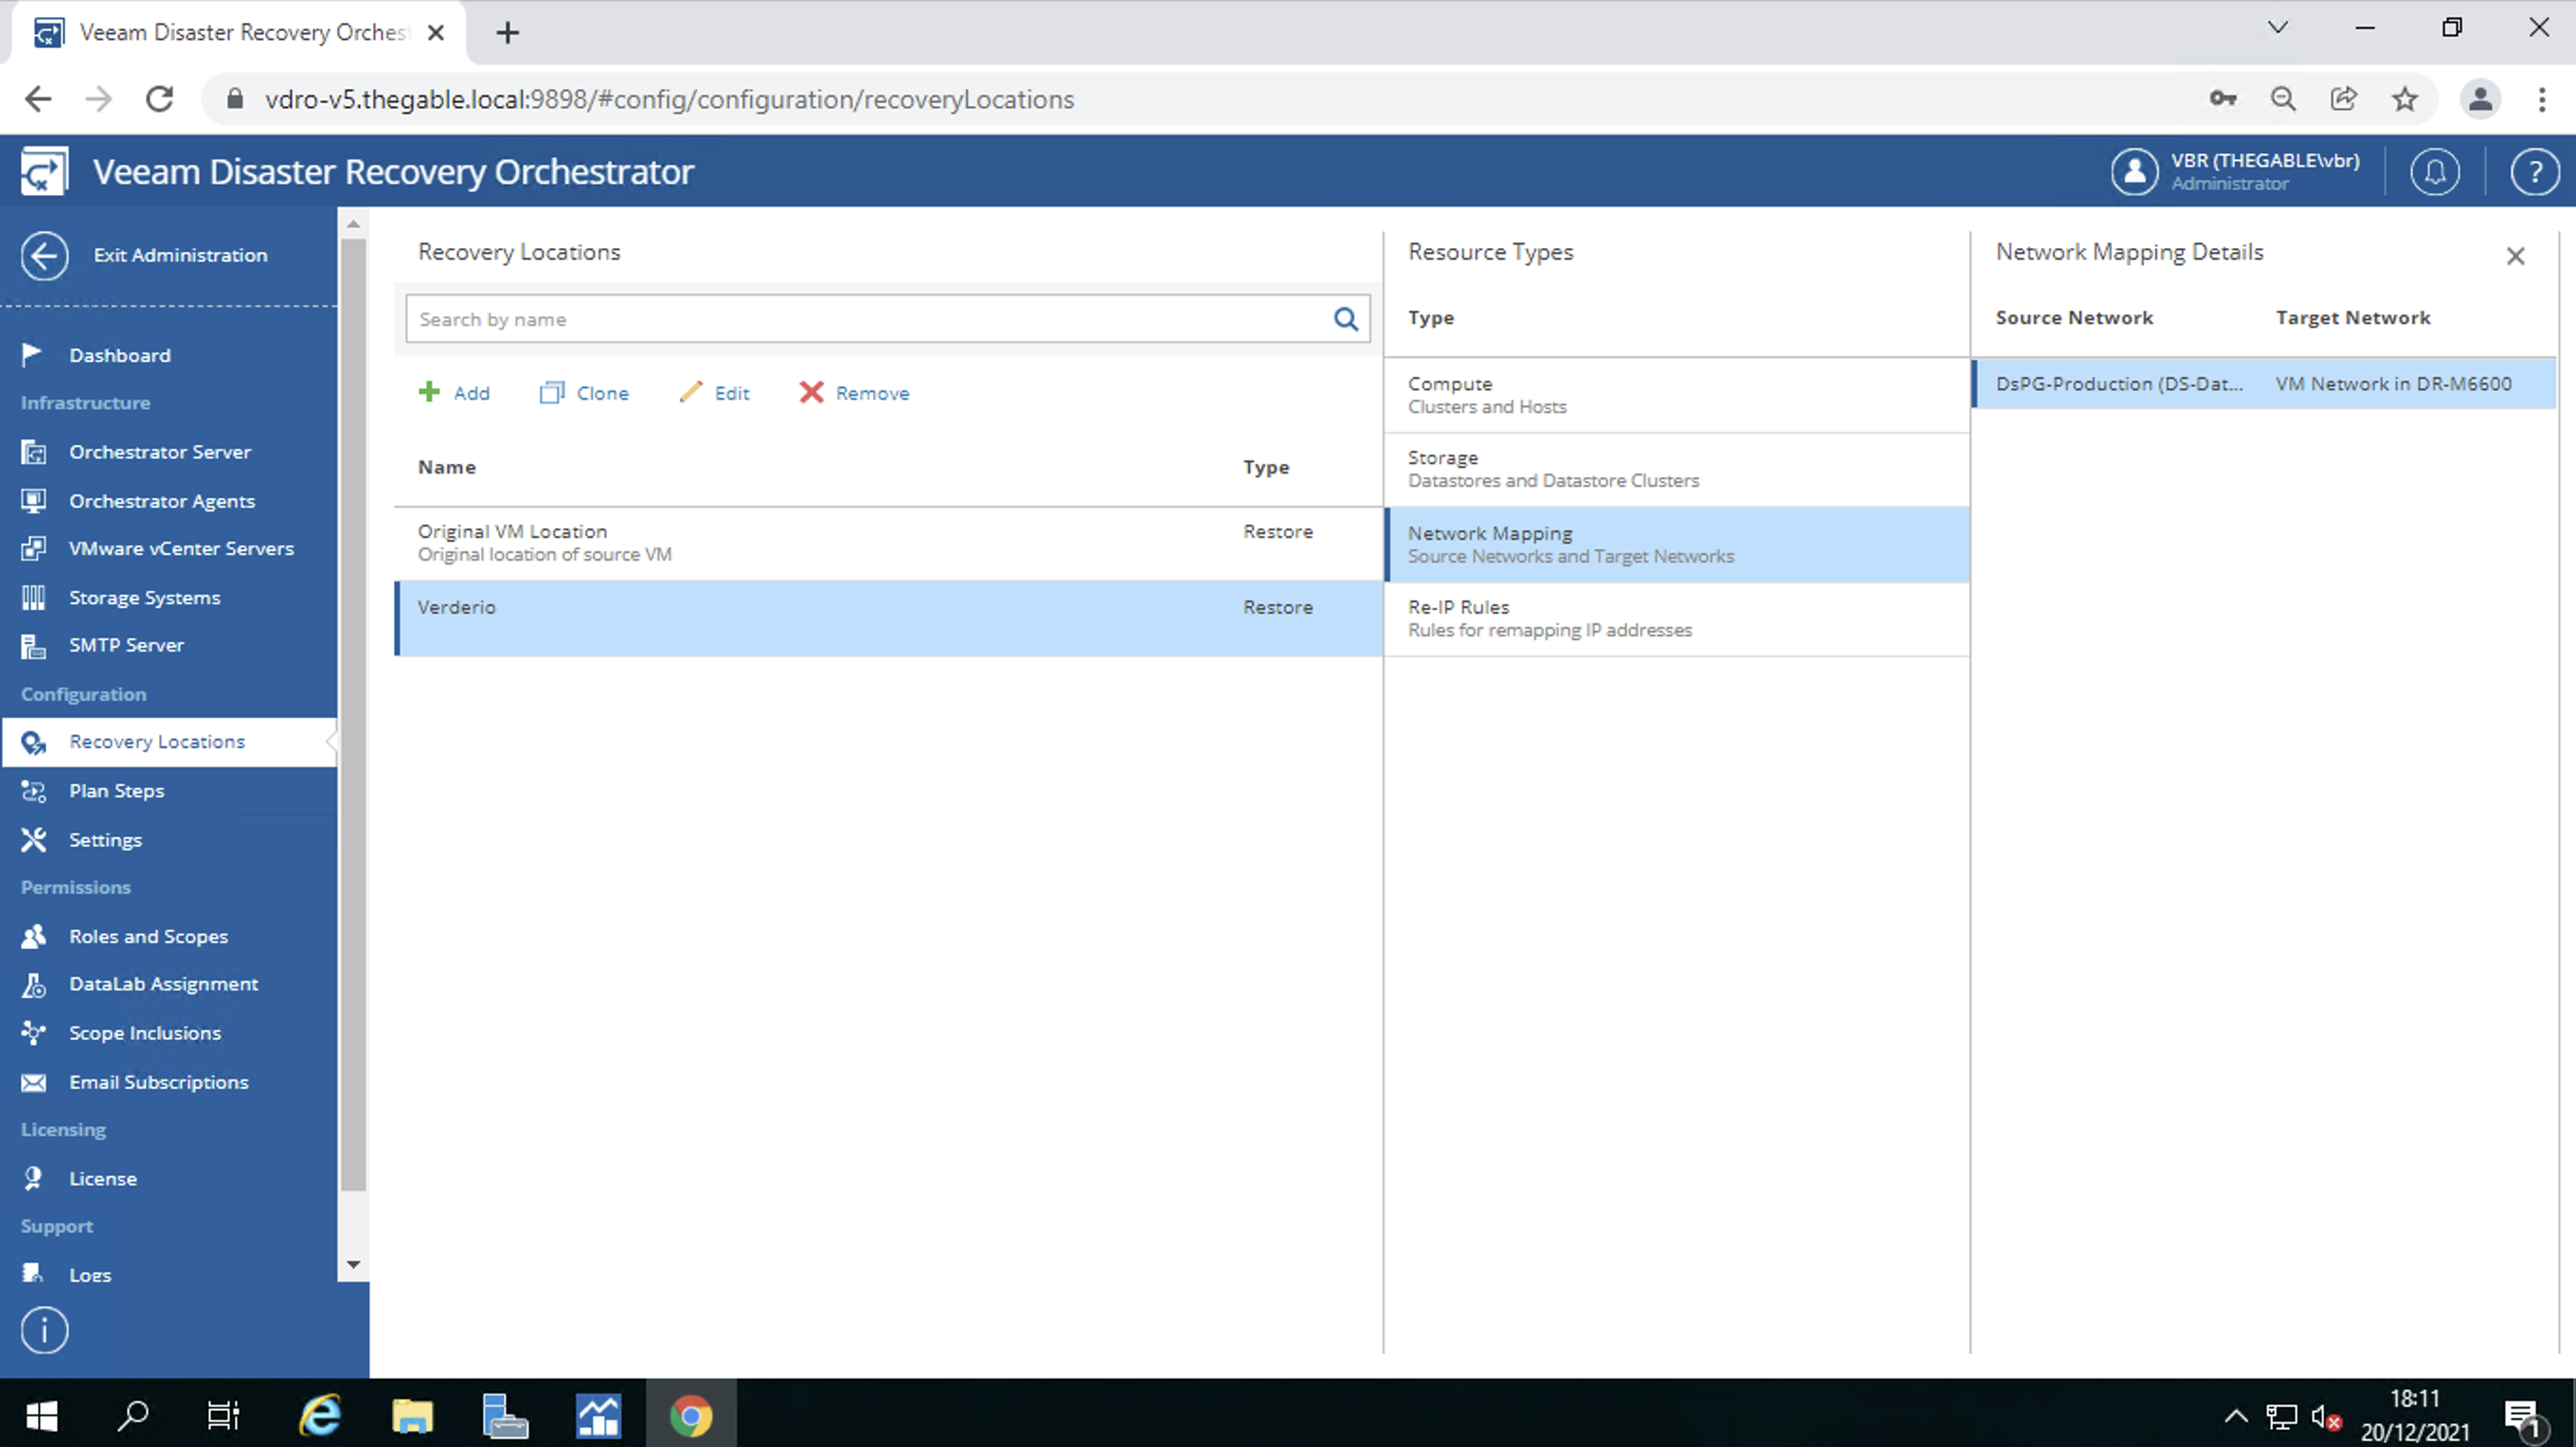 Immagine 8
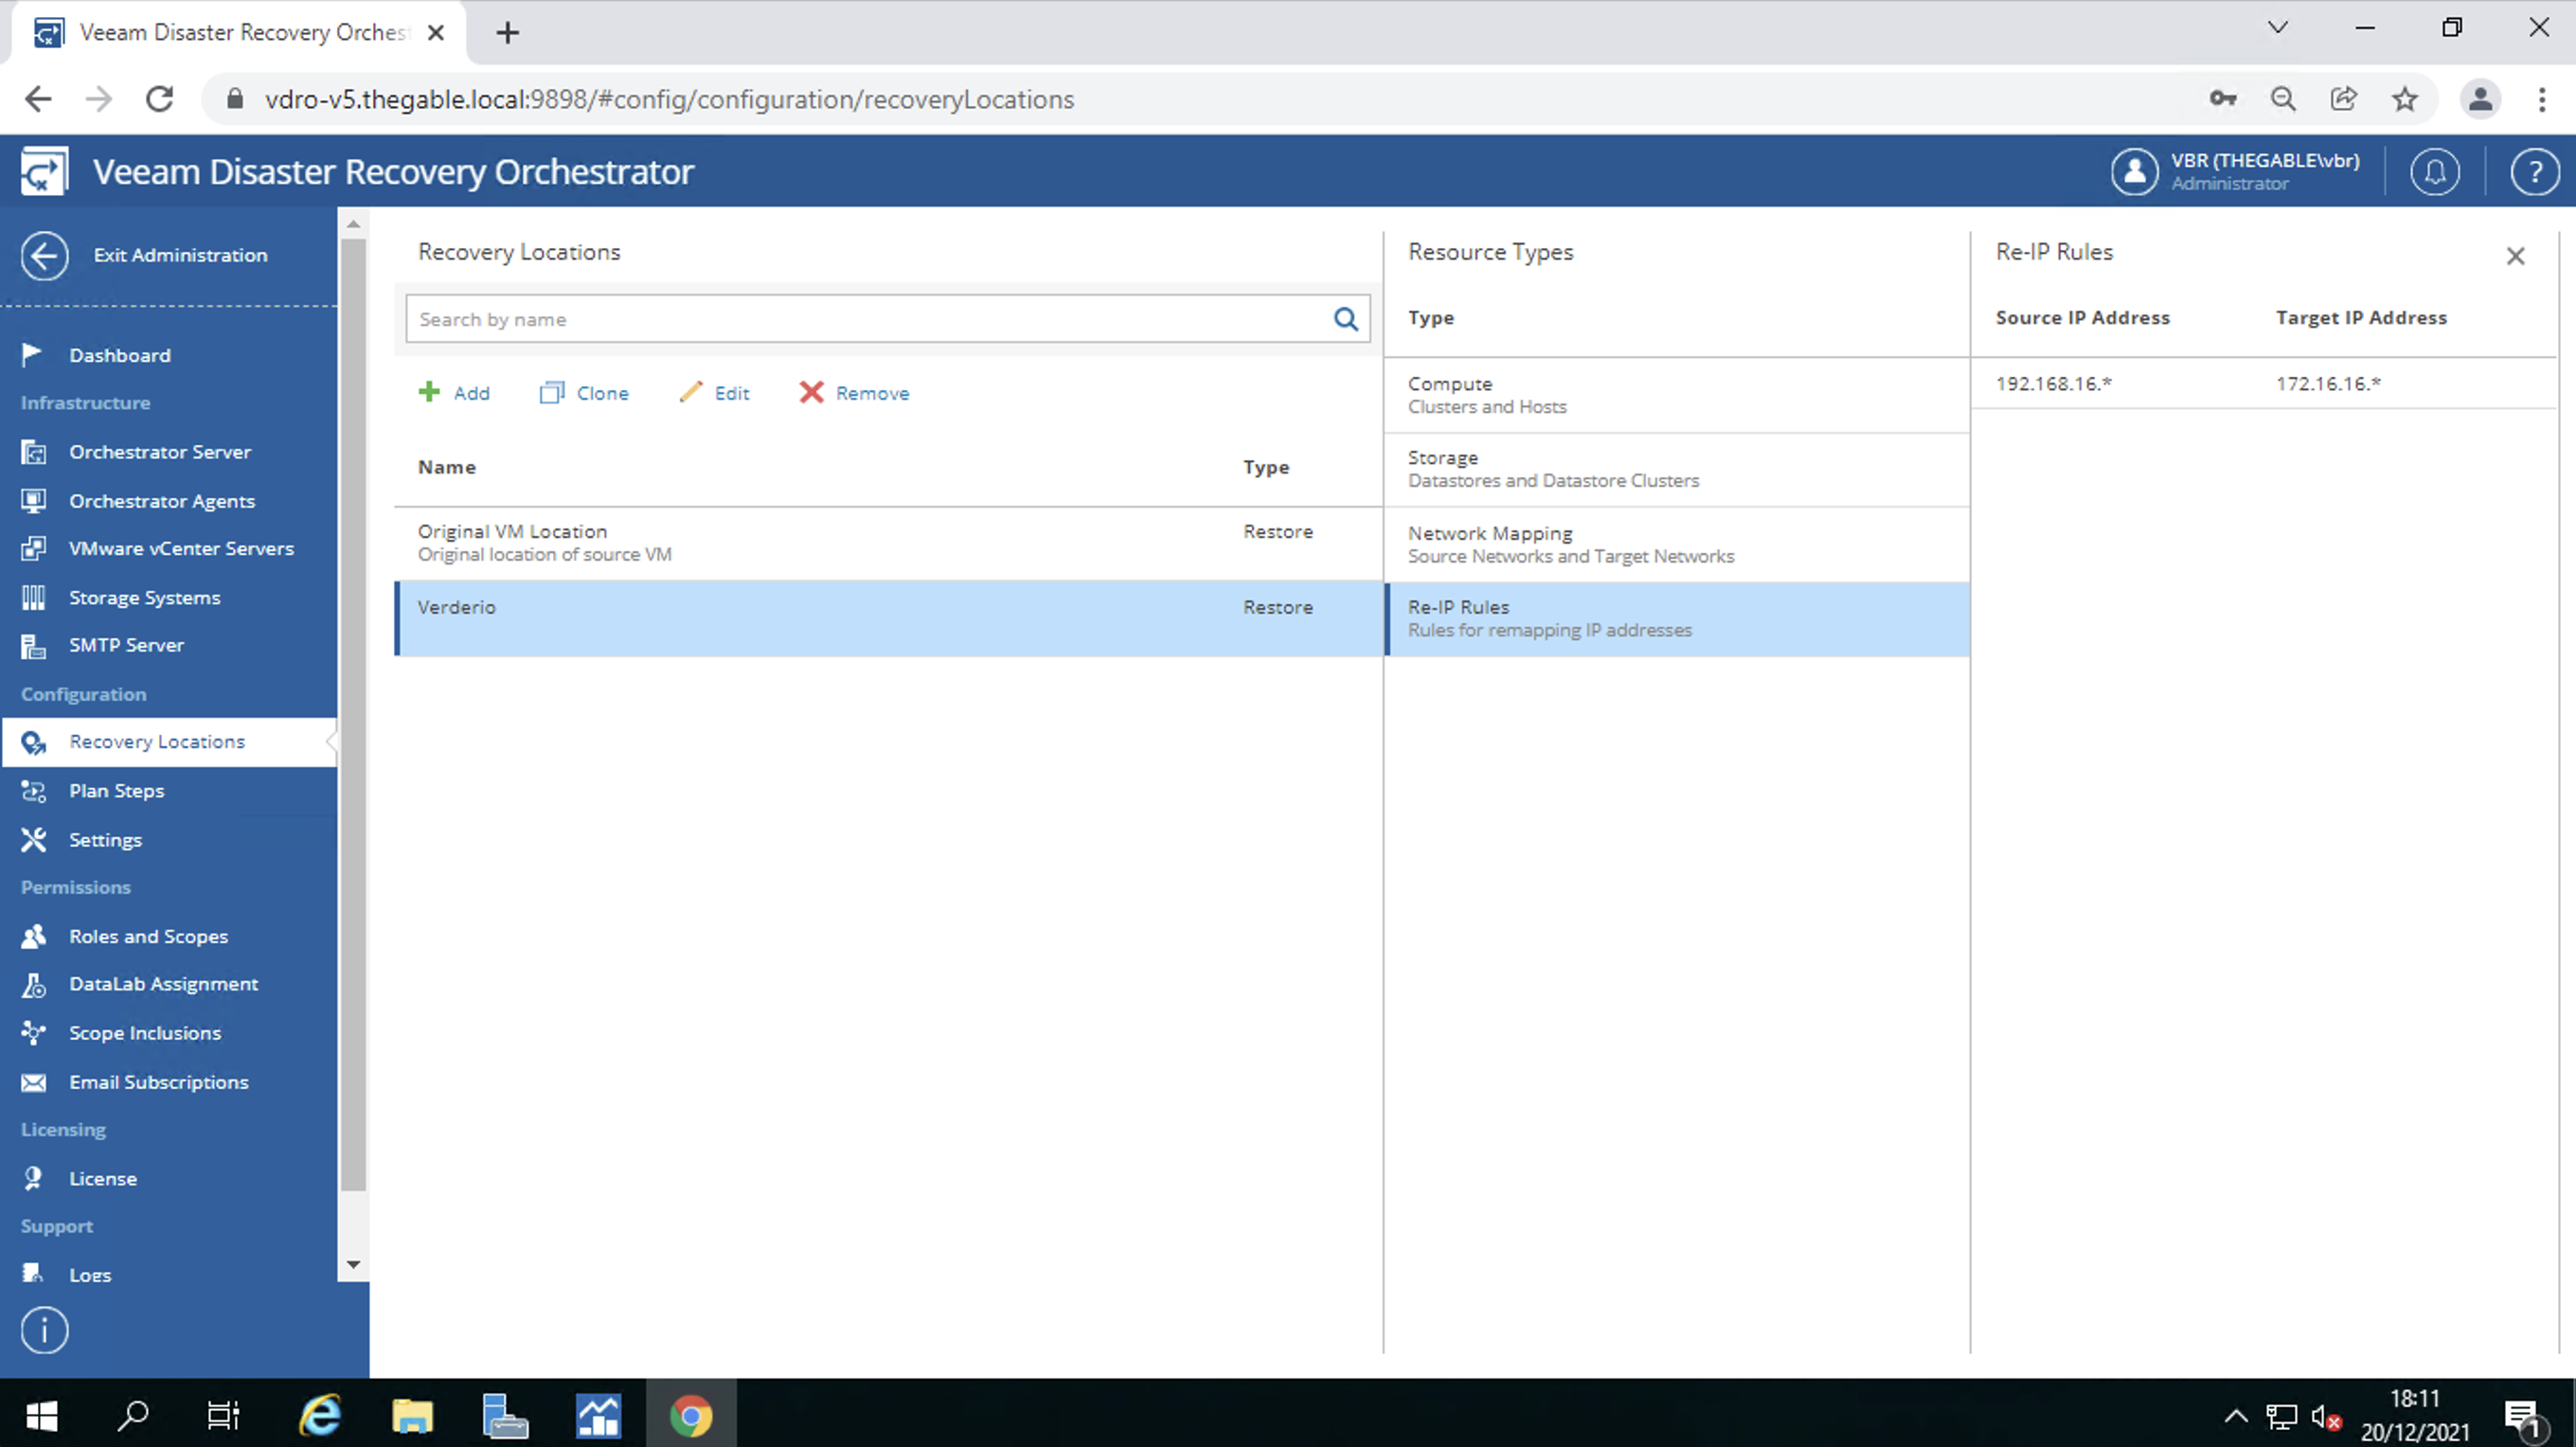 Immagine 9
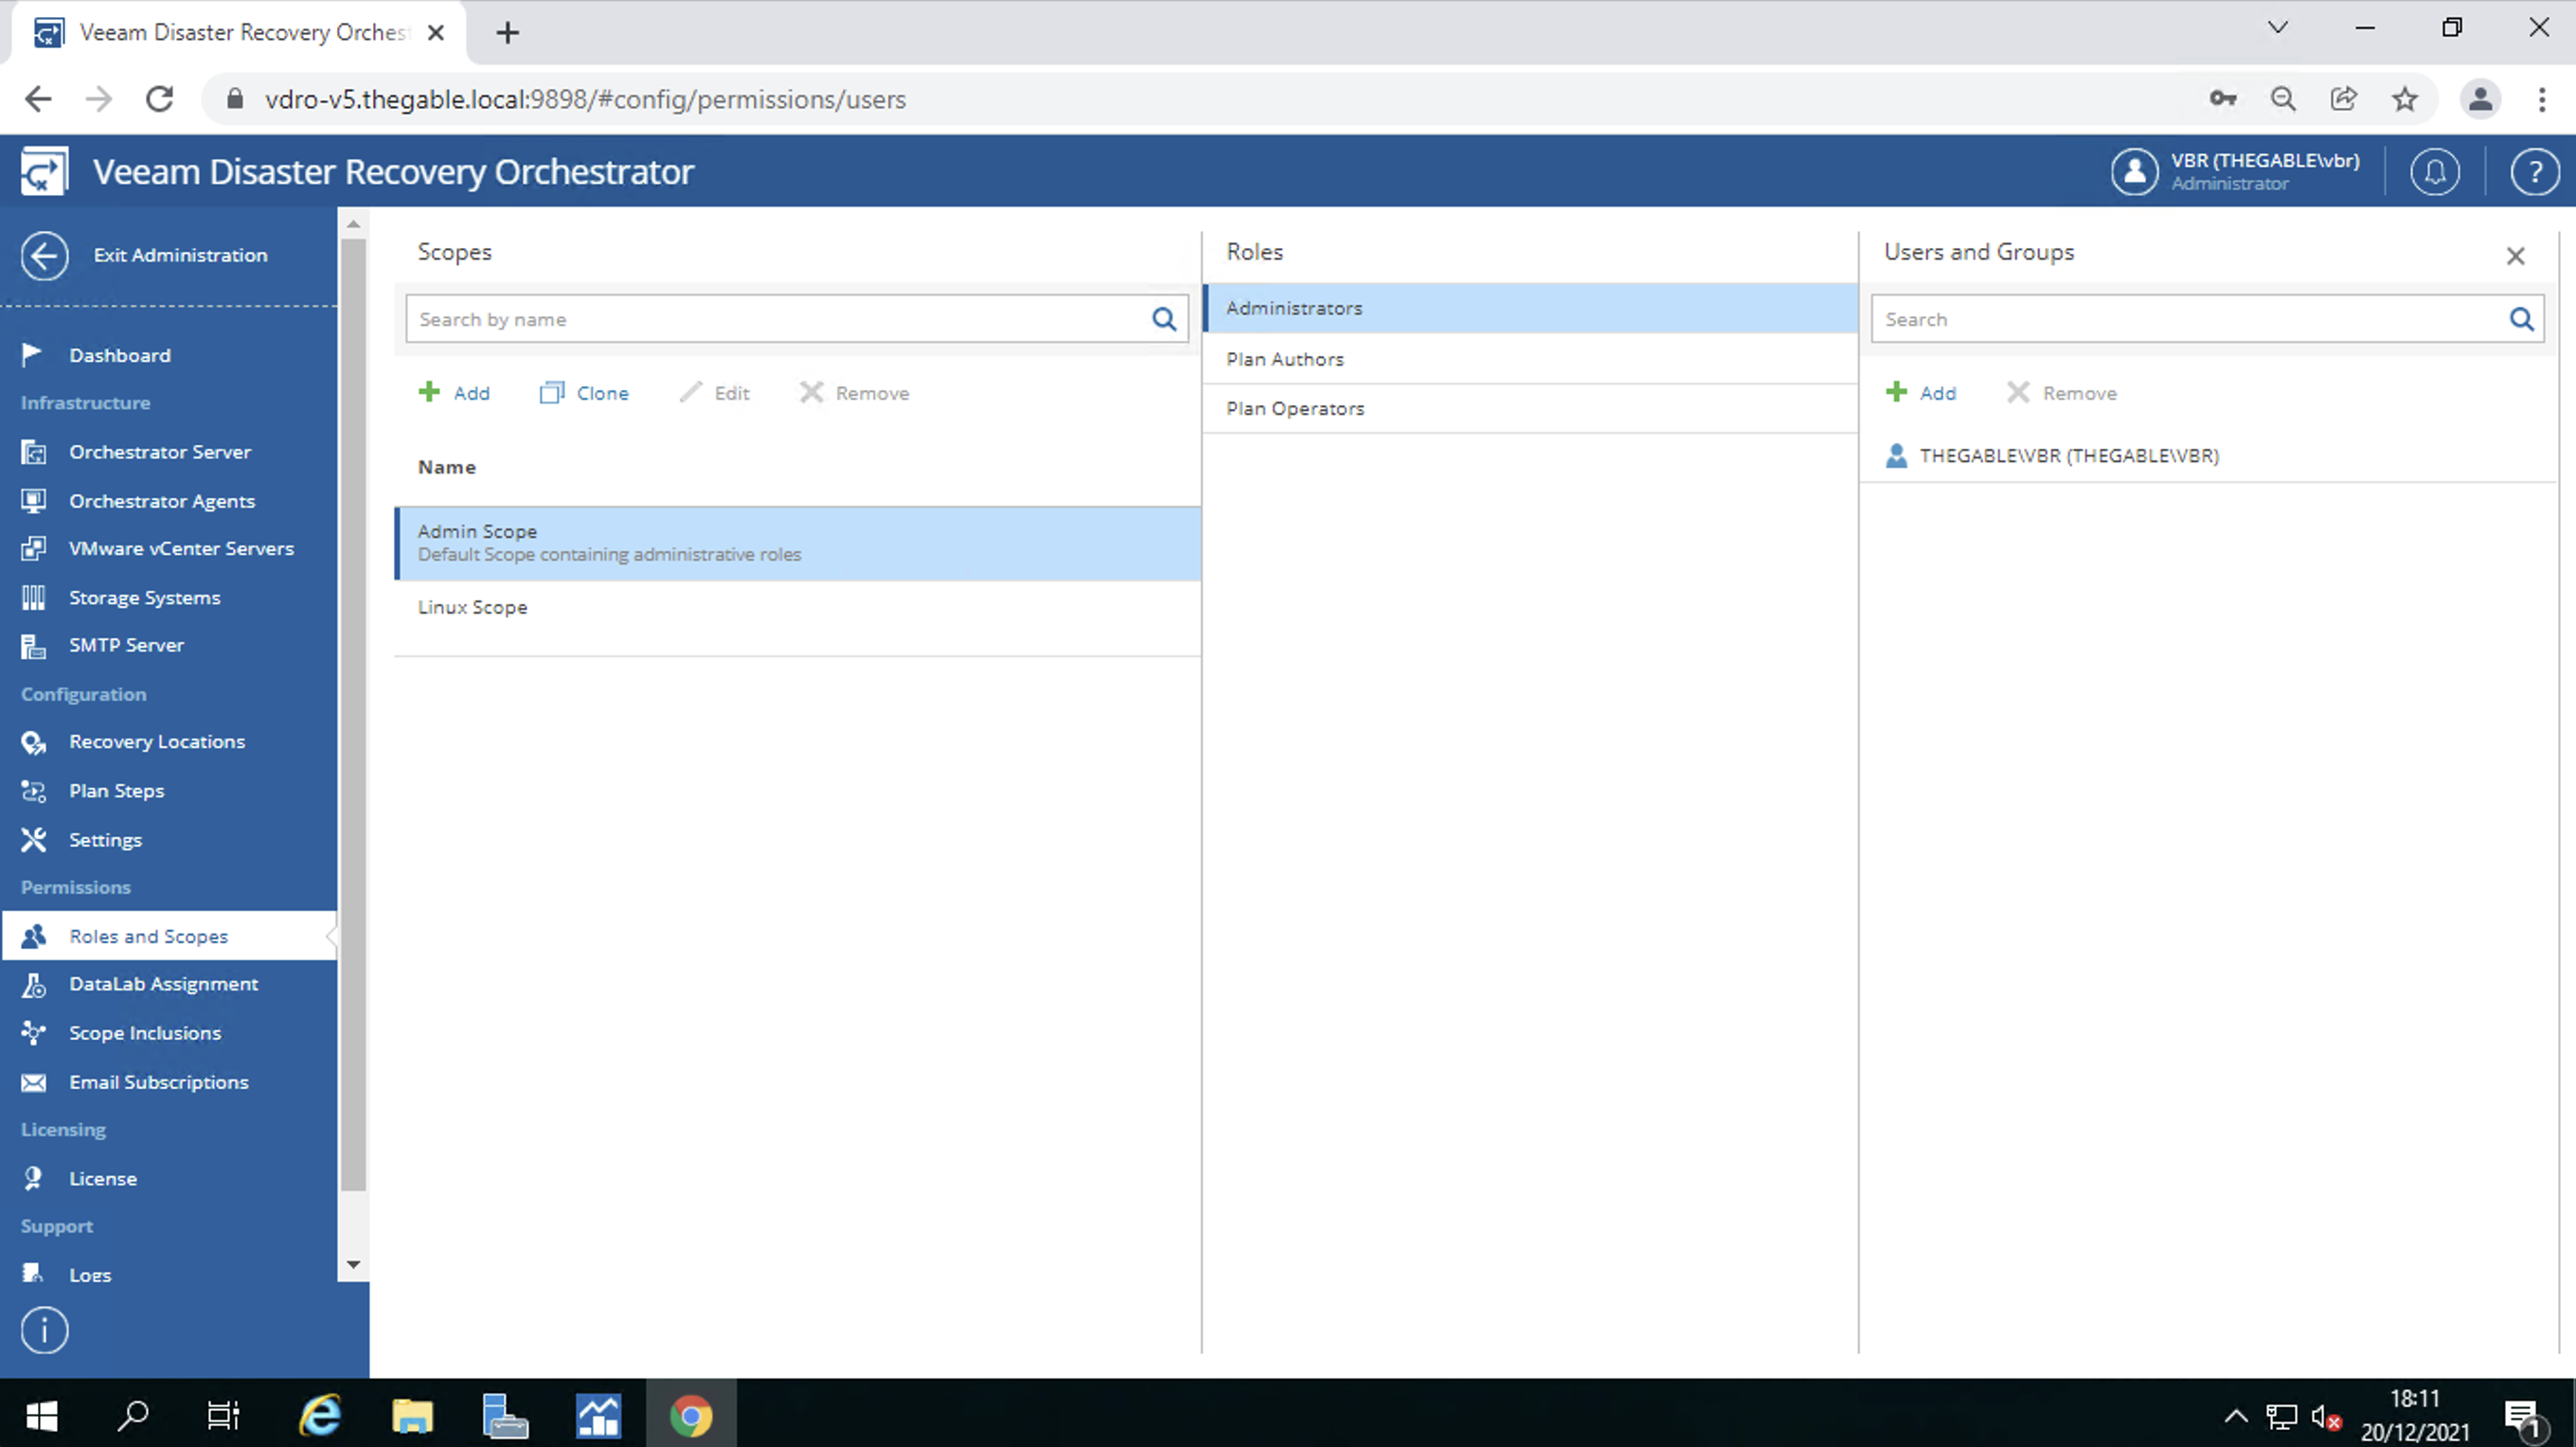 Immagine 10
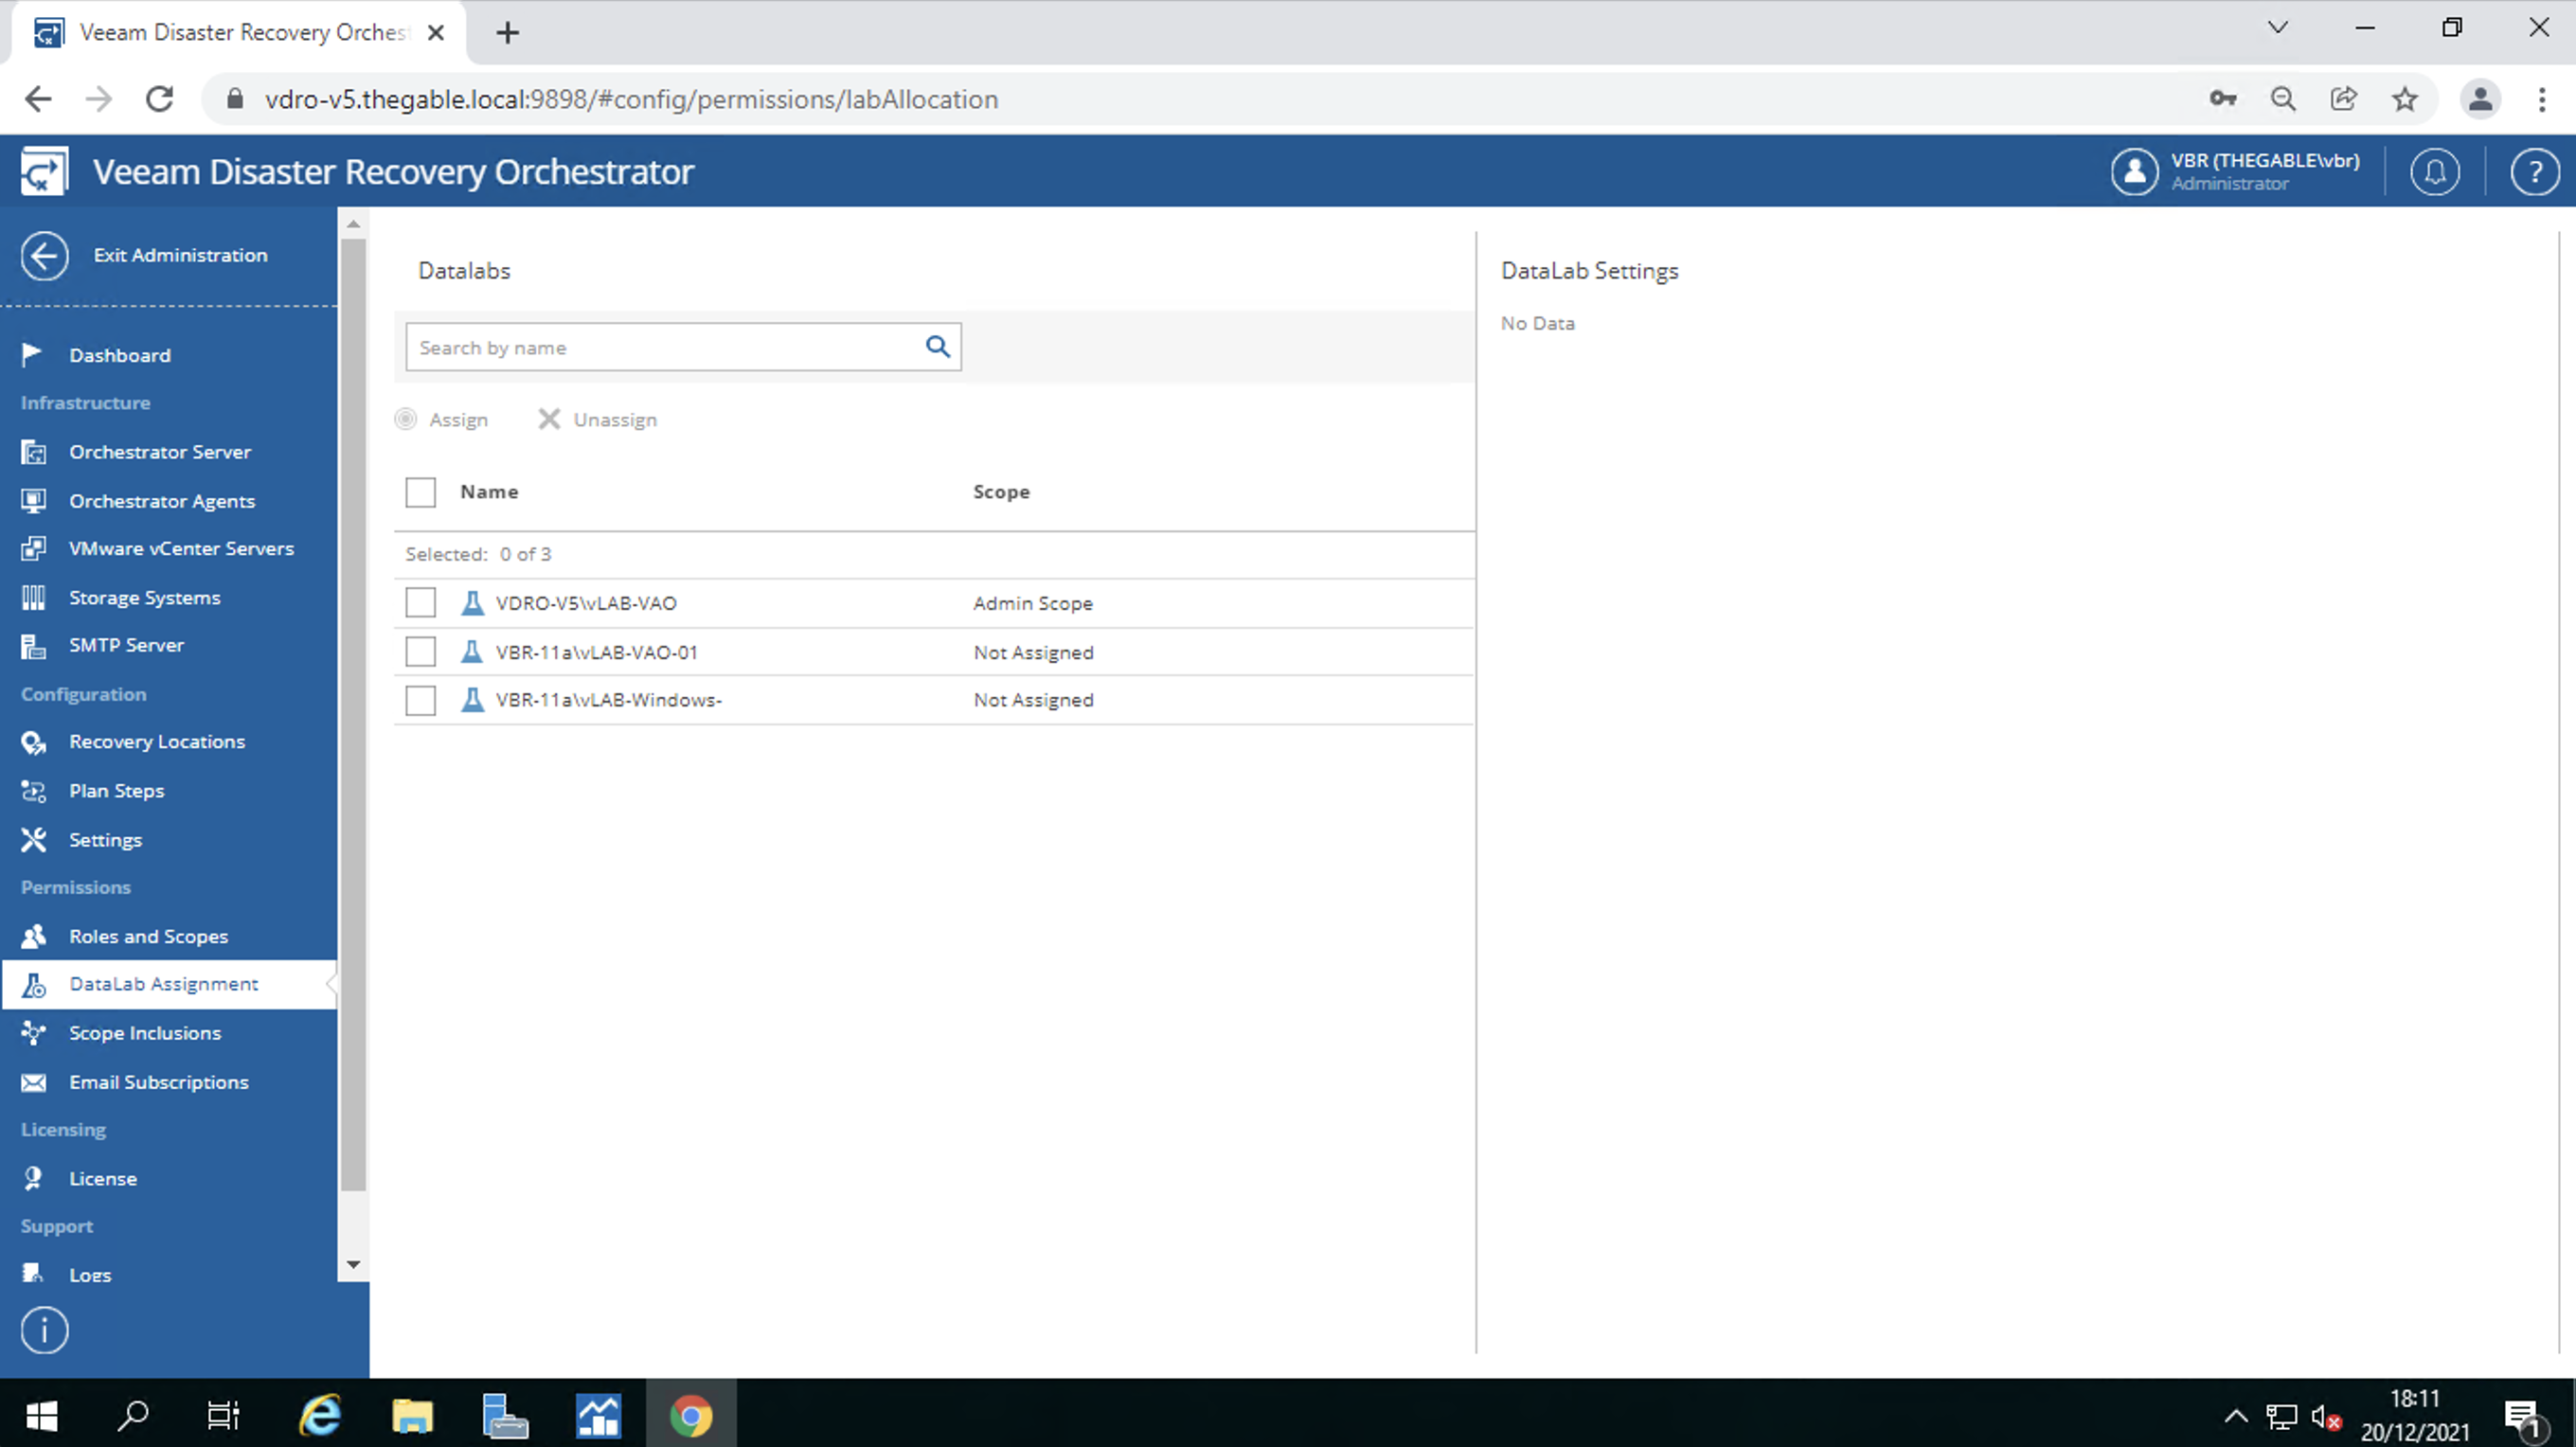 Immagine 11
 Immagine 10
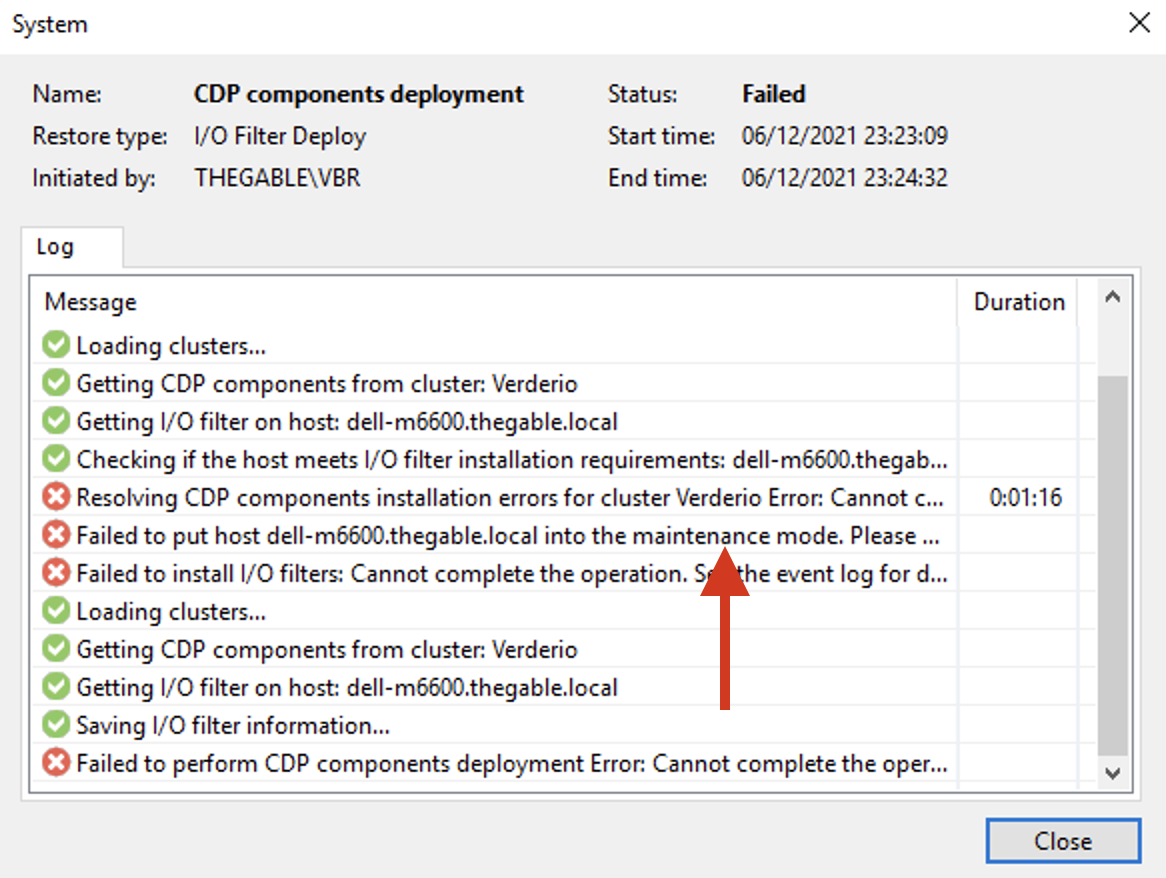


 Picture 1
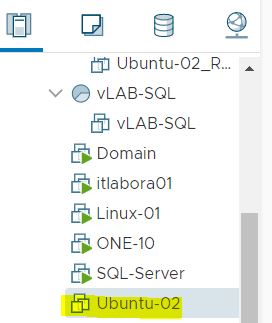
 Picture 3
 Picture 4
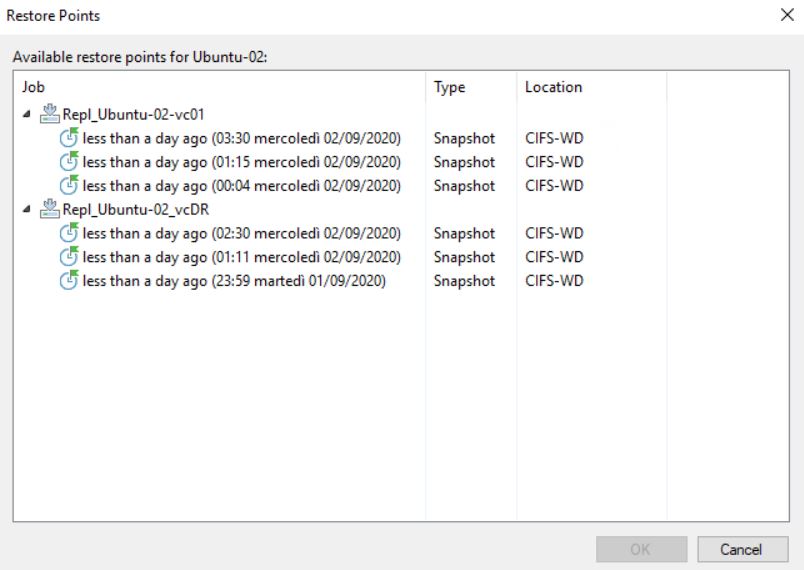 Picture 5
 Picture 6
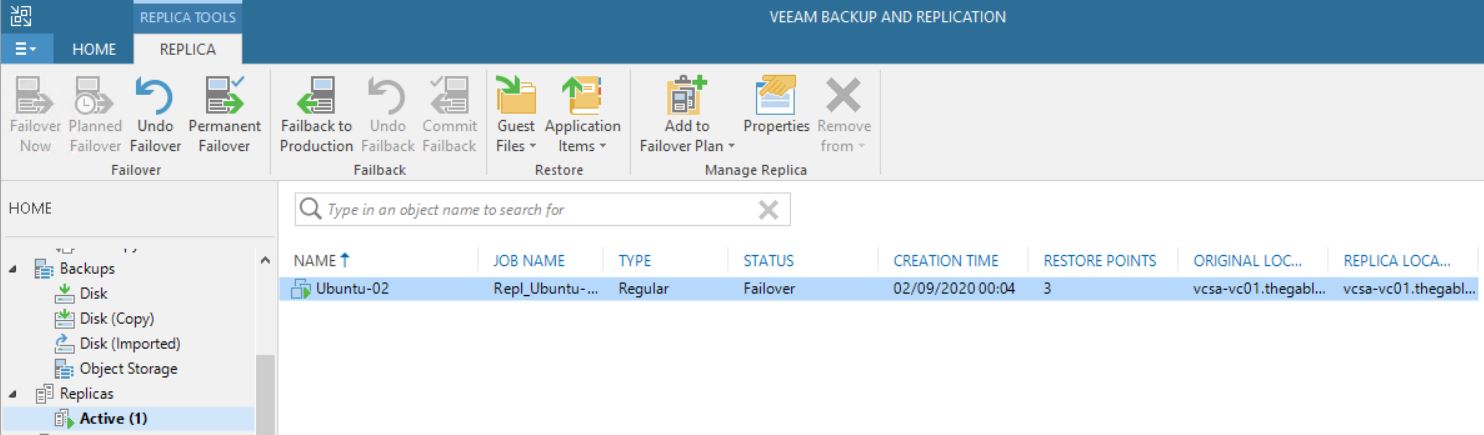 Picture 7
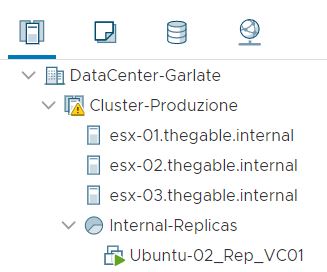 Picture 8
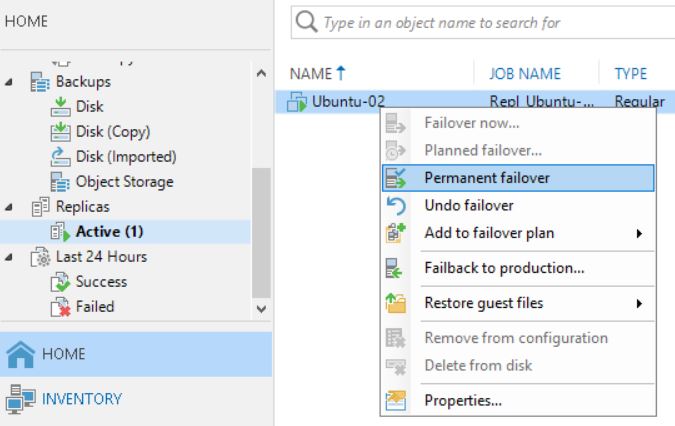 Picture 9
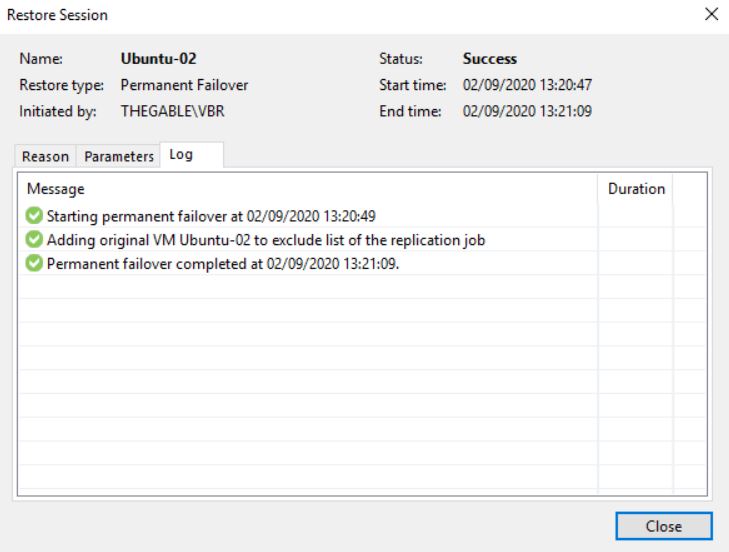 Picture 10
 Picture 11
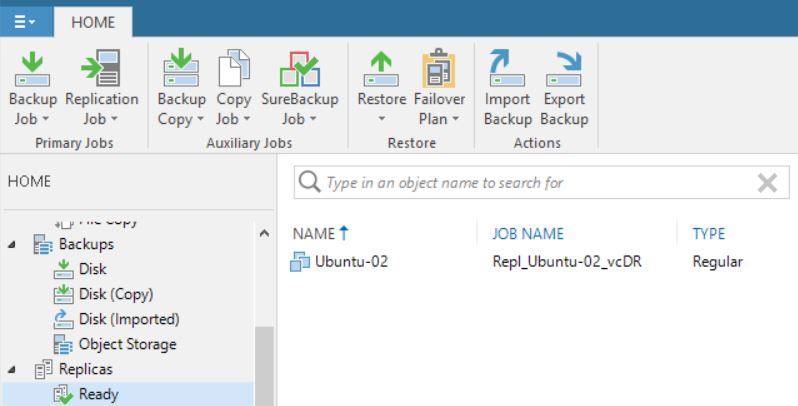 Picture 12
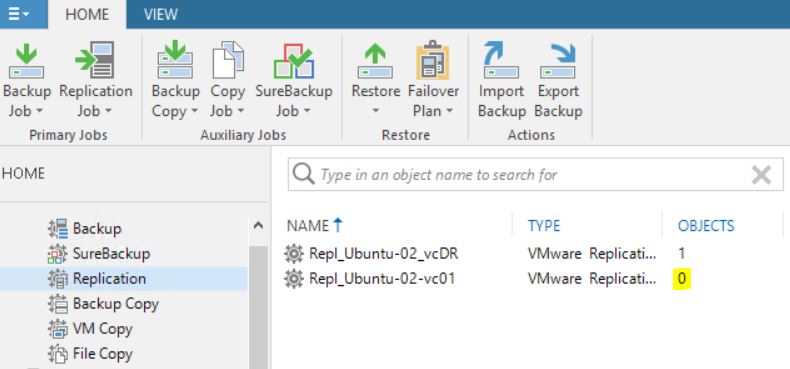 Picture 13
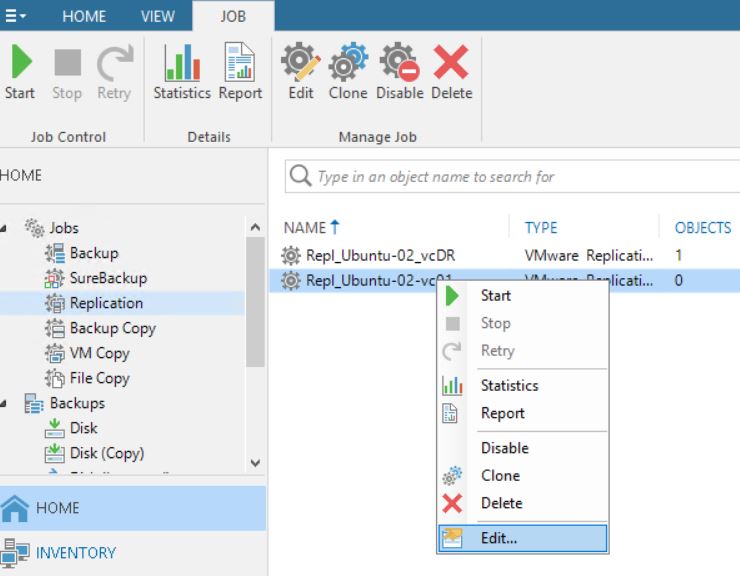 Picture 14
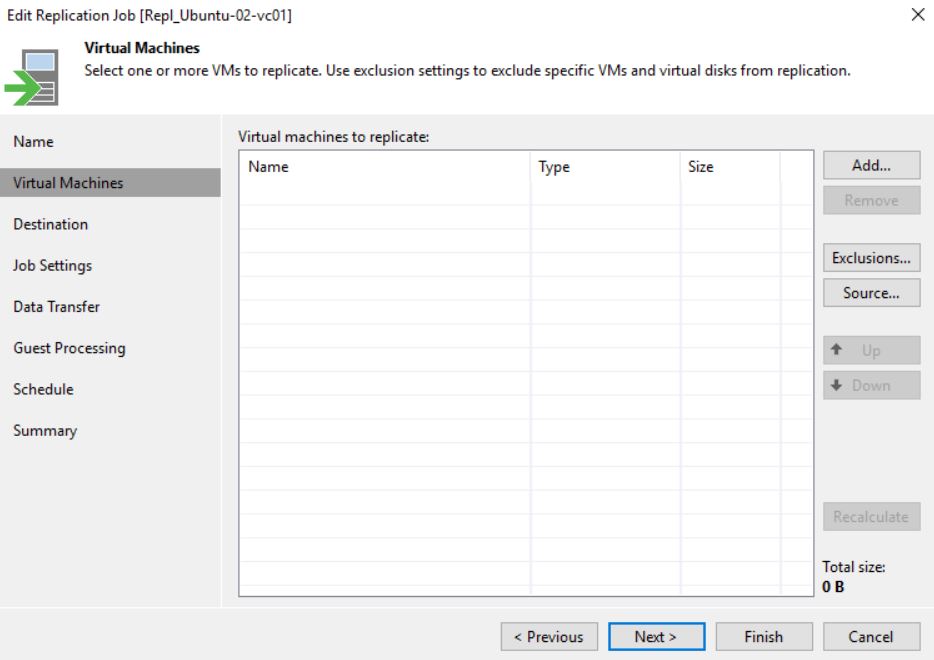 Picture 15
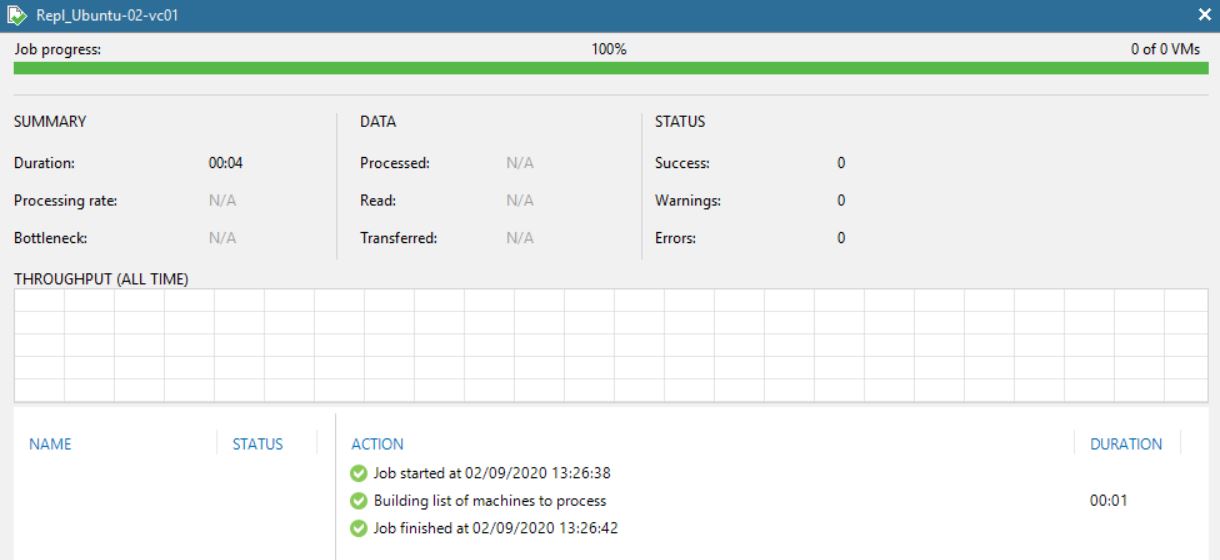 Picture 16
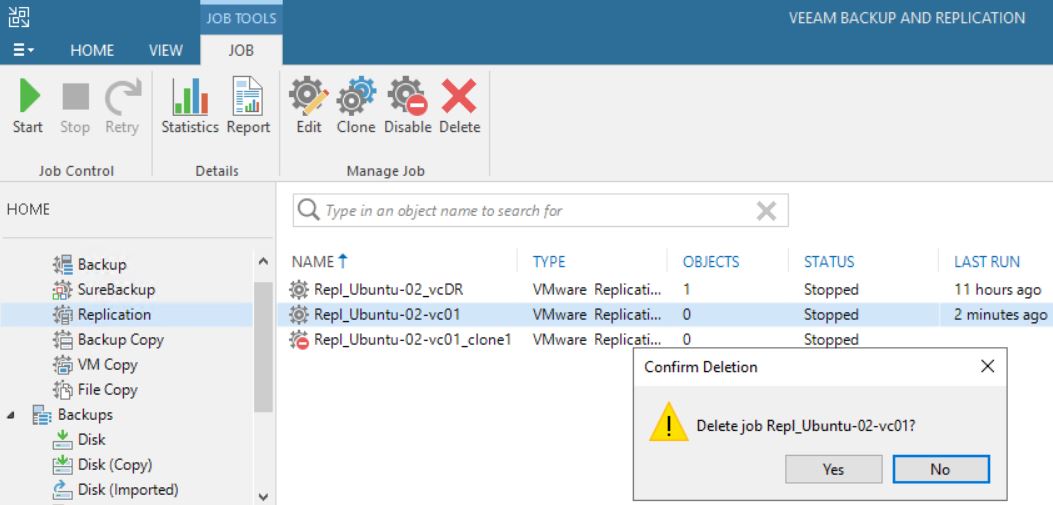 Picture 17
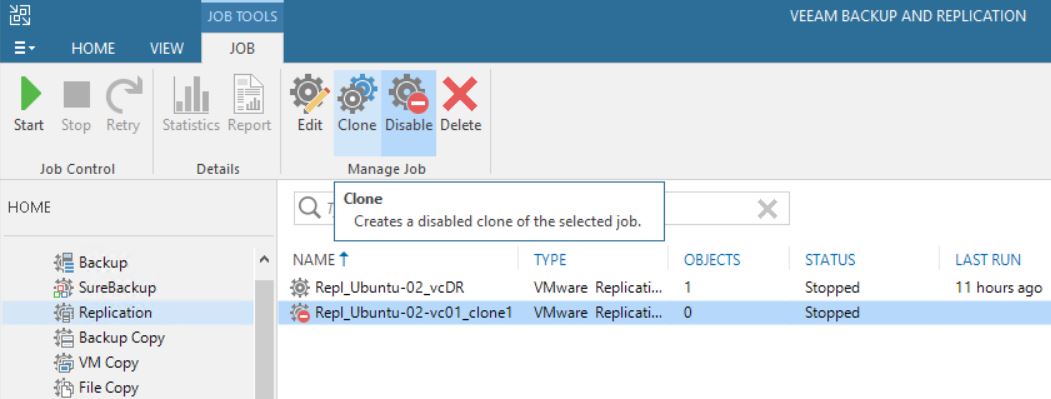 Picture 18
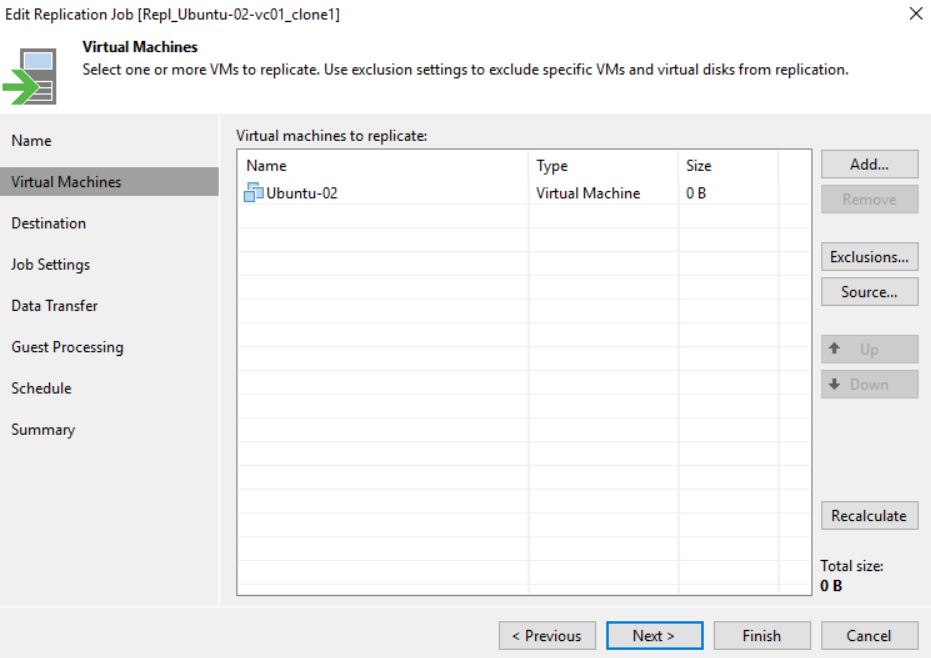 Picture 19