
In this article, I will explain the procedure to upgrade the ESXi Host when the VMware environment consists of only one server.
Note 1: The first task is to update the vCenter ( VCSA ) by checking which ESXi versions are supported.
Note 2: The traditional method of updating ESXi Hosts uses the automated update process managed by the vCenter console.
Note 3: The DR site of my laboratory consists of a single VMware ESXi Host on which the secondary vCenter ( VCSA ) is present; in this scenario, the methodology indicated in note 1 cannot be used, since, during the update phase, the ESXi Host is placed in maintenance mode. In this state, all the VMs present are off (including the VCSA ).
The solution is to use the procedure on the VMware ESXi Patch Tracker site which consists of the following steps:
1- Selection of the software version that will be installed on the host at the end of the process (see image 1)

Picture 1
2- Determine the CLI commands to use during the update procedure:
The procedure is illustrated in the pop-up that appears when you click on the selected package (see image 2)

picture 2
3- Enable the ESXi Host for ssh connection (image 3)
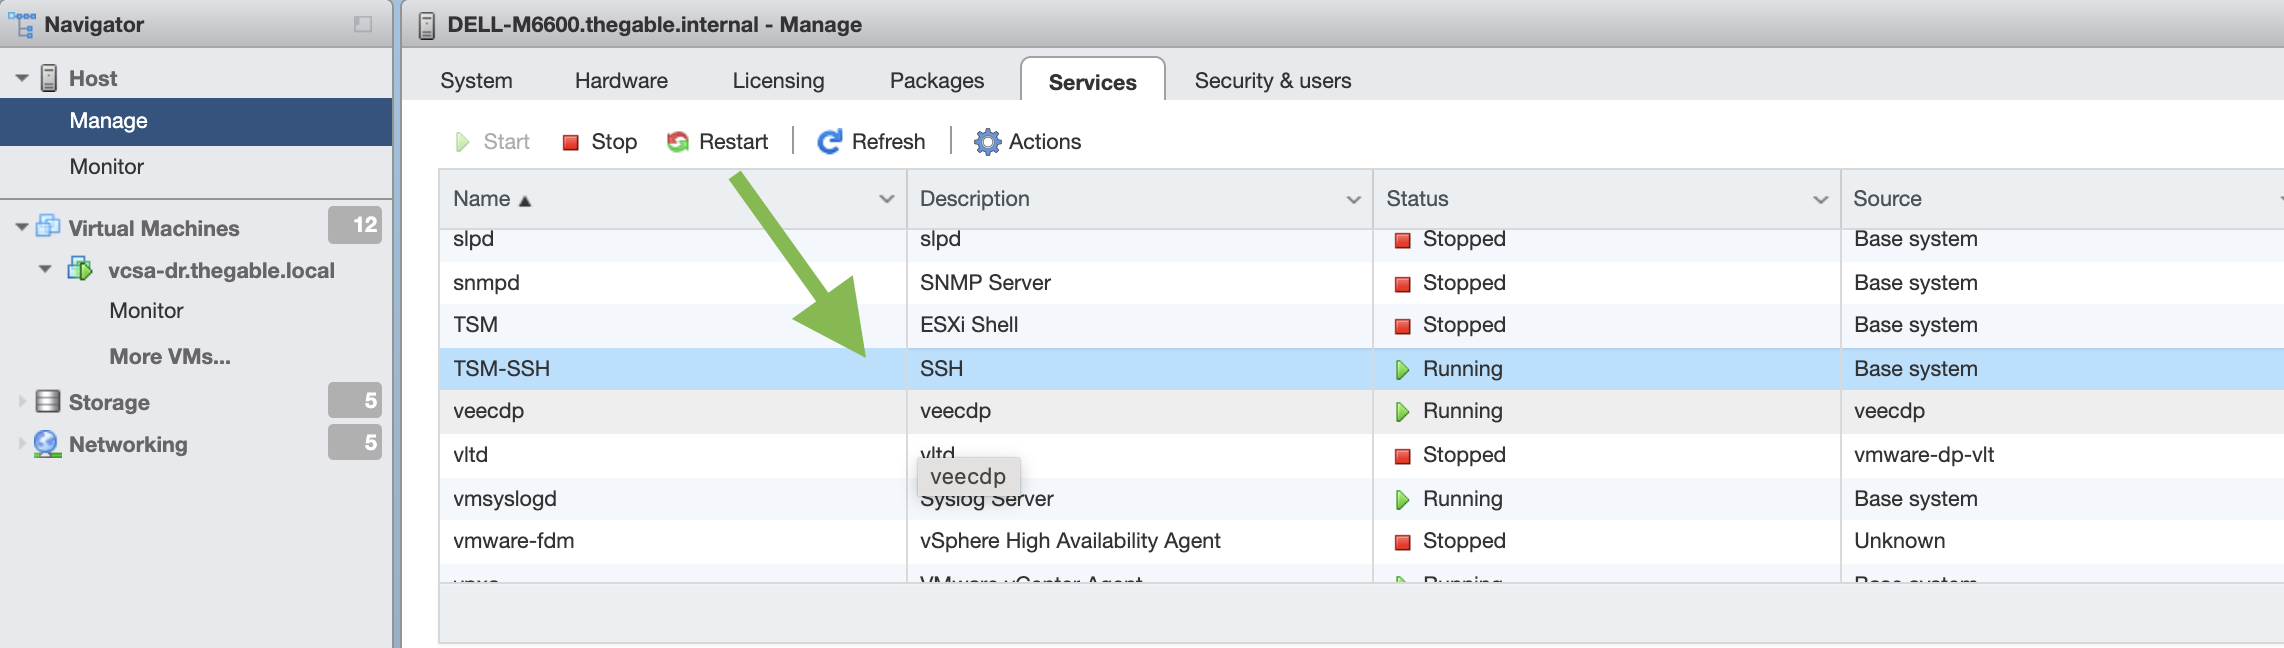
Picture 3
4- Connect via ssh to the ESXi host and run the commands previously shown in the pop-up.
In my case:
- esxcli network firewall ruleset set -e true -r httpClient
- esxcli software profile update -p ESXi-7.0U3d-19482537-standard \ -d https://hostupdate.vmware.com/software/VUM/PRODUCTION/main/vmw-depot-index.xml
- esxcli network firewall ruleset set -e false -r httpClient
5- Put the ESXi Host in Maintenance mode and restart it.
6- At the end, check that the update was successful (image 4 and 5)
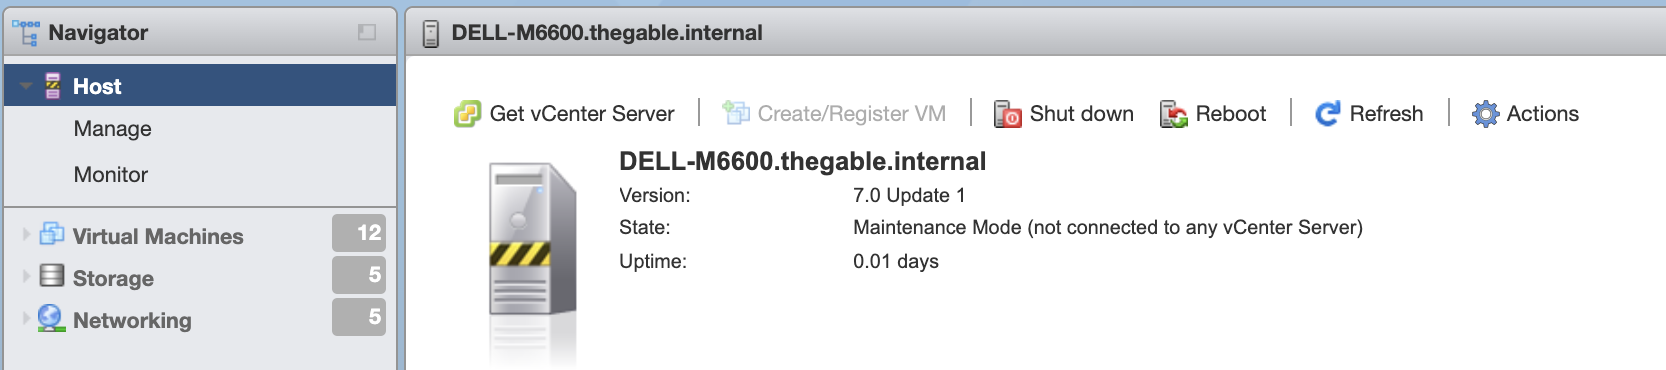
Picture 4 – Pre Update
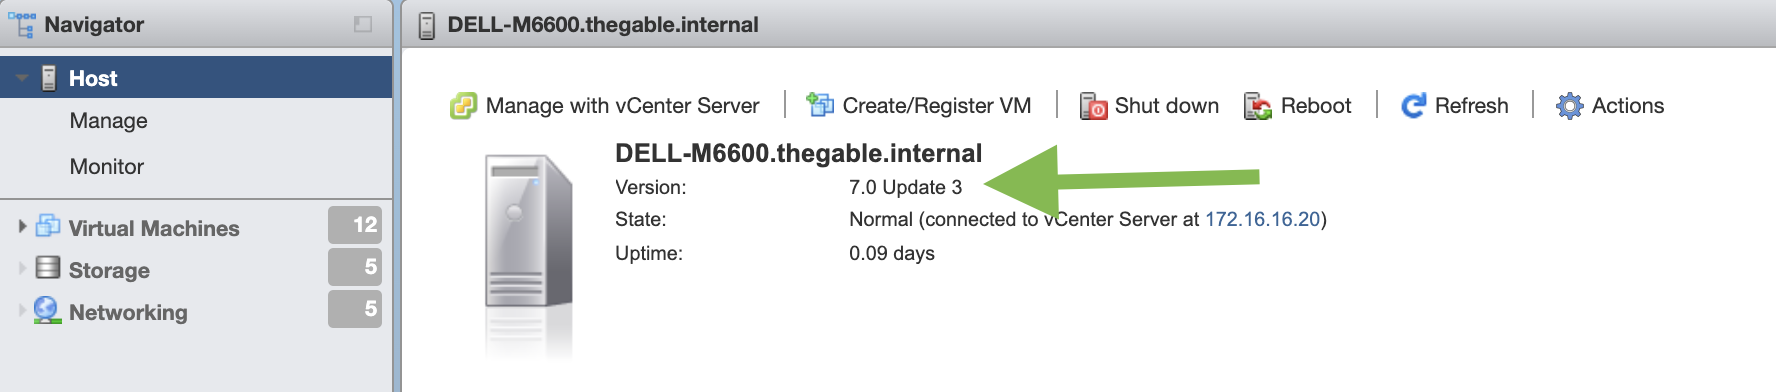
Picture 5 – Post Update
Note 4 : In case the hardware is not in the compatibility matrix, the advice is to use the option< –no-hardware-warning> . In my case the second command was changed to:
esxcli software profile update -p ESXi-7.0U3d-19482537-standard \ -d https://hostupdate.vmware.com/software/VUM/PRODUCTION/main/vmw-depot-index.xml –no-hardware-warning
See you soon
 Immagine 1
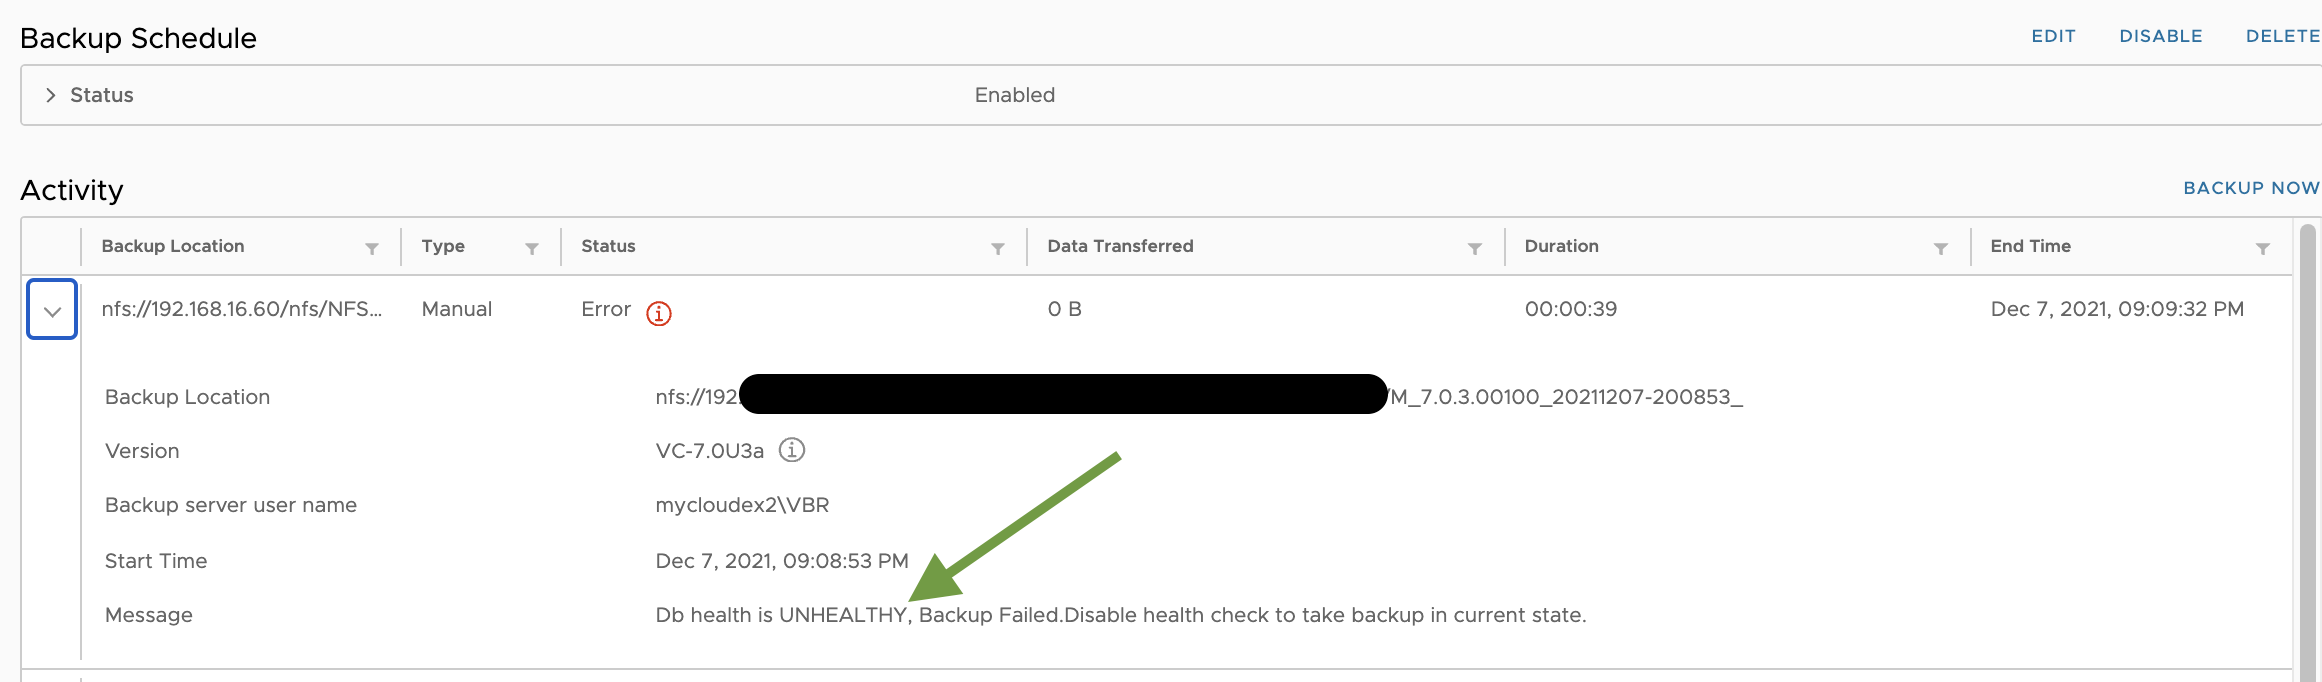 Immagine 2
 Immagine 3
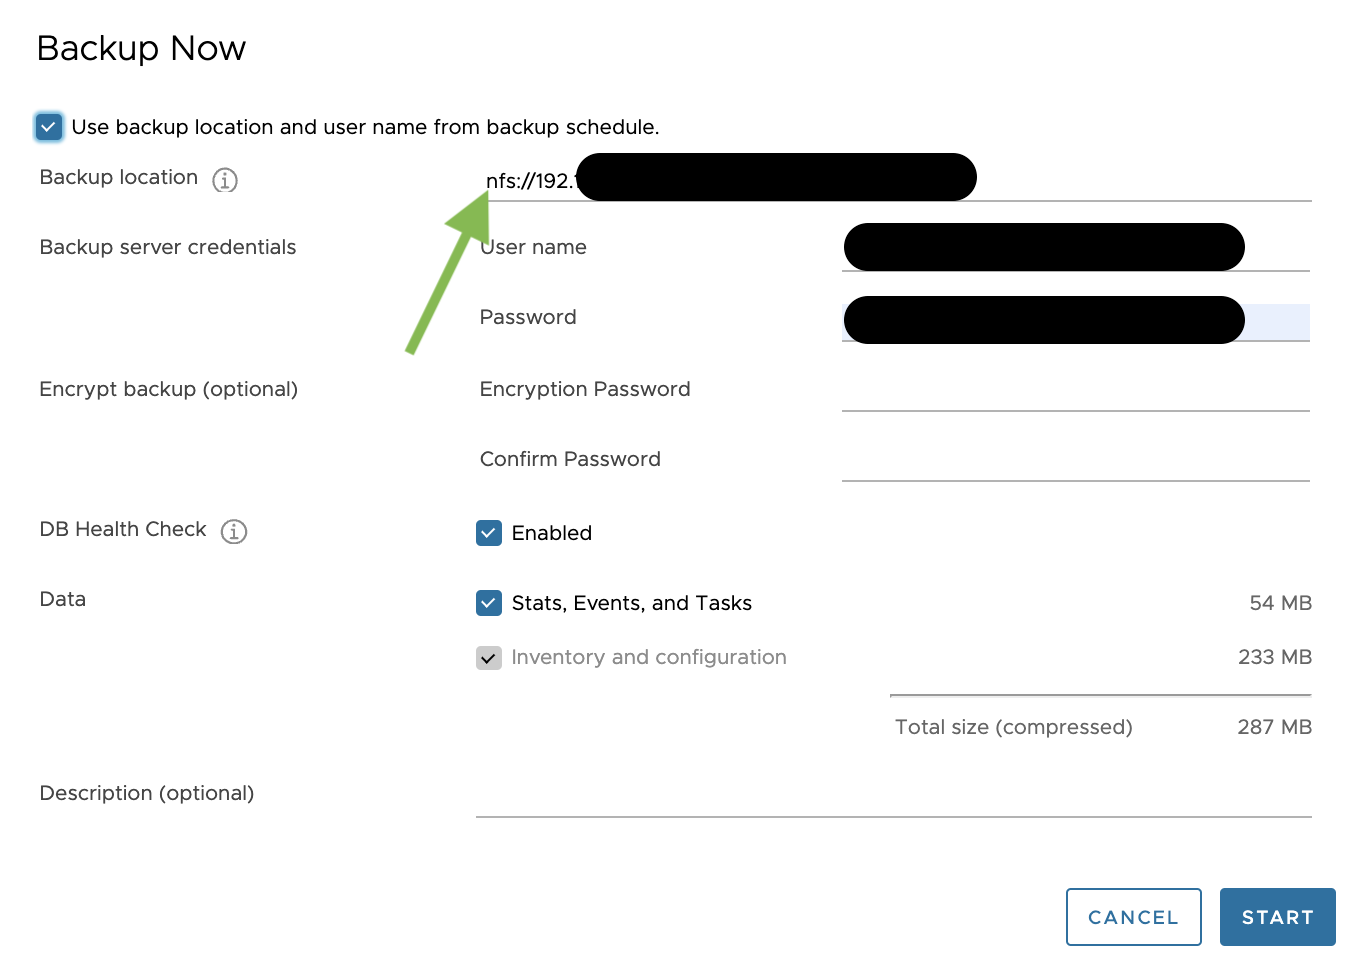 Immagine 4
 Immagine 5